Retrieve the on-behalf token (optional)
You can store the on-behalf-of and on-behalf-of-refresh tokens from Azure AD inside HelloID user attributes. In this way, the tokens can be passed through to any SSO application that users log into from HelloID. The application can then use these tokens to directly access the Azure Graph API on behalf of the users, without requiring re-authentication.
For more information, see Microsoft identity platform and OAuth 2.0 On-Behalf-Of flow.
As prerequisites, you must have already done the following:
Set up Azure AD as an OIDC IdP in HelloID: Azure AD (OIDC) IdP
Added the target application(s) to which you want to pass the on-behalf-of tokens, to both HelloID (as SSO application(s)) and Azure AD (as registered apps)
It is recommended to use multiple browser tabs while following these instructions. You will be copying and pasting several values between Azure AD and HelloID.
In HelloID, go to Security > Authentication > Identity providers.
Select the Edit link for the Azure AD OIDC IdP.
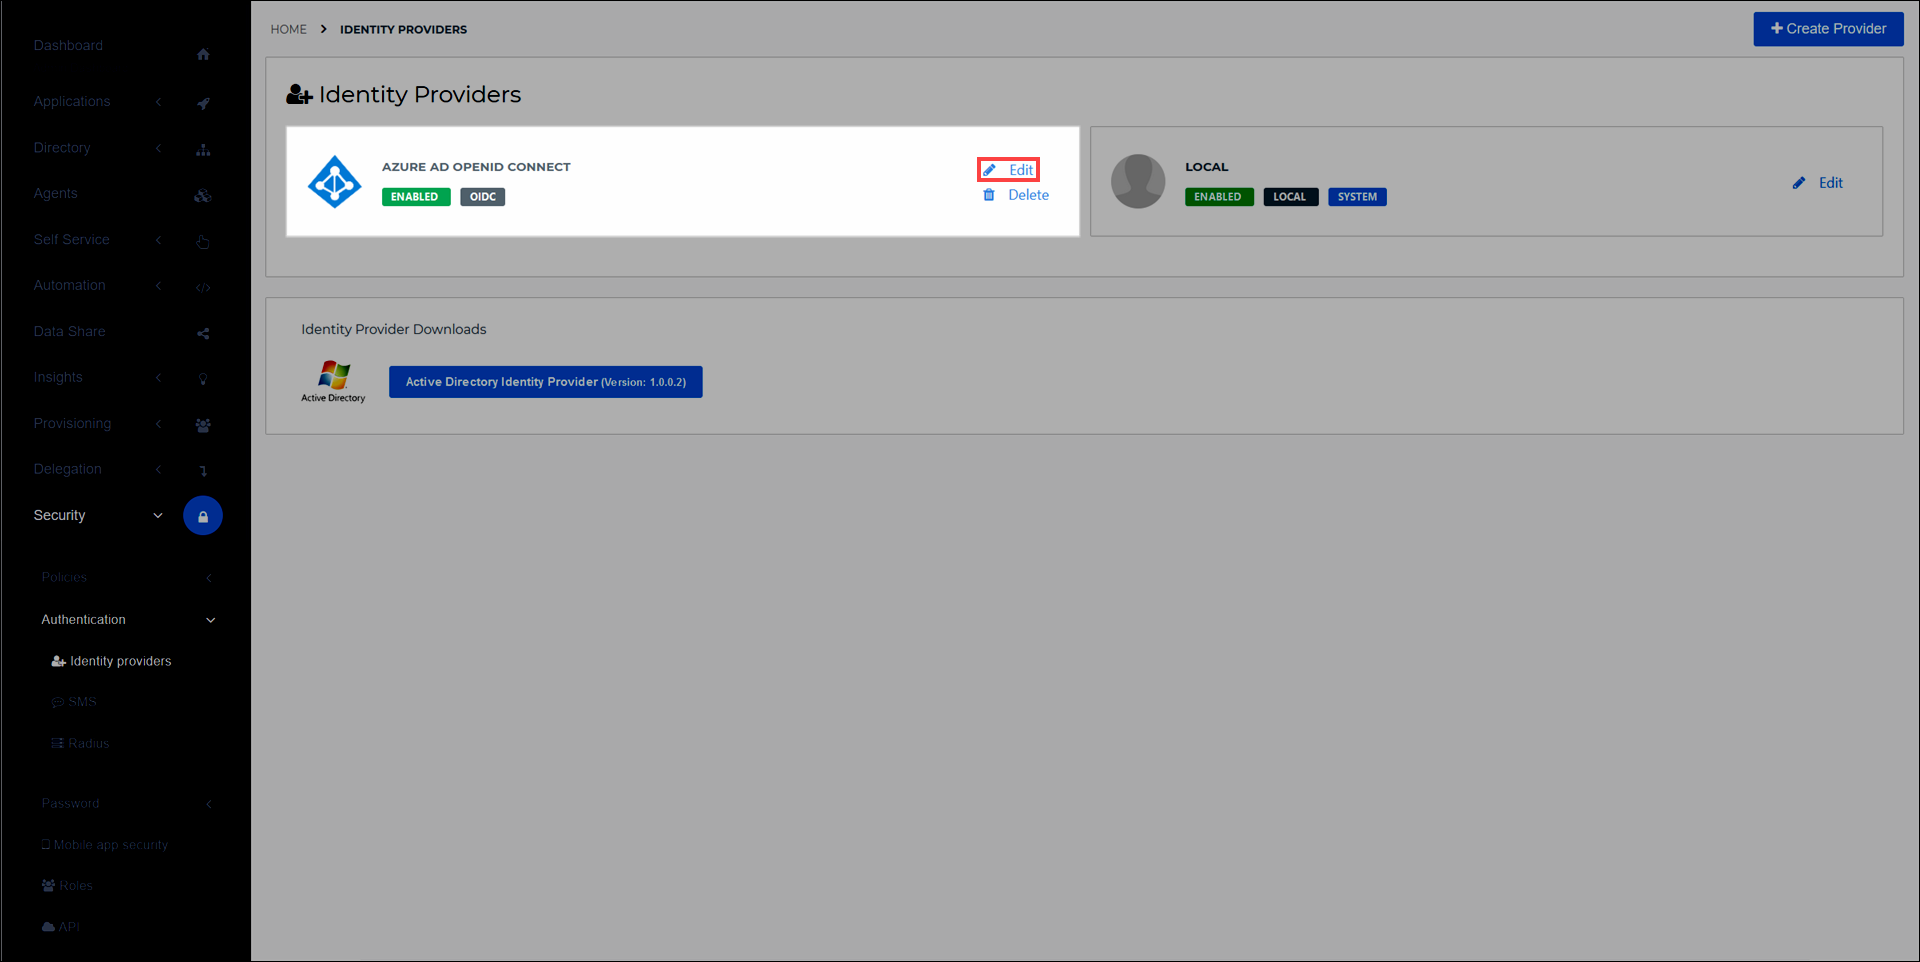
Select the Configuration tab.
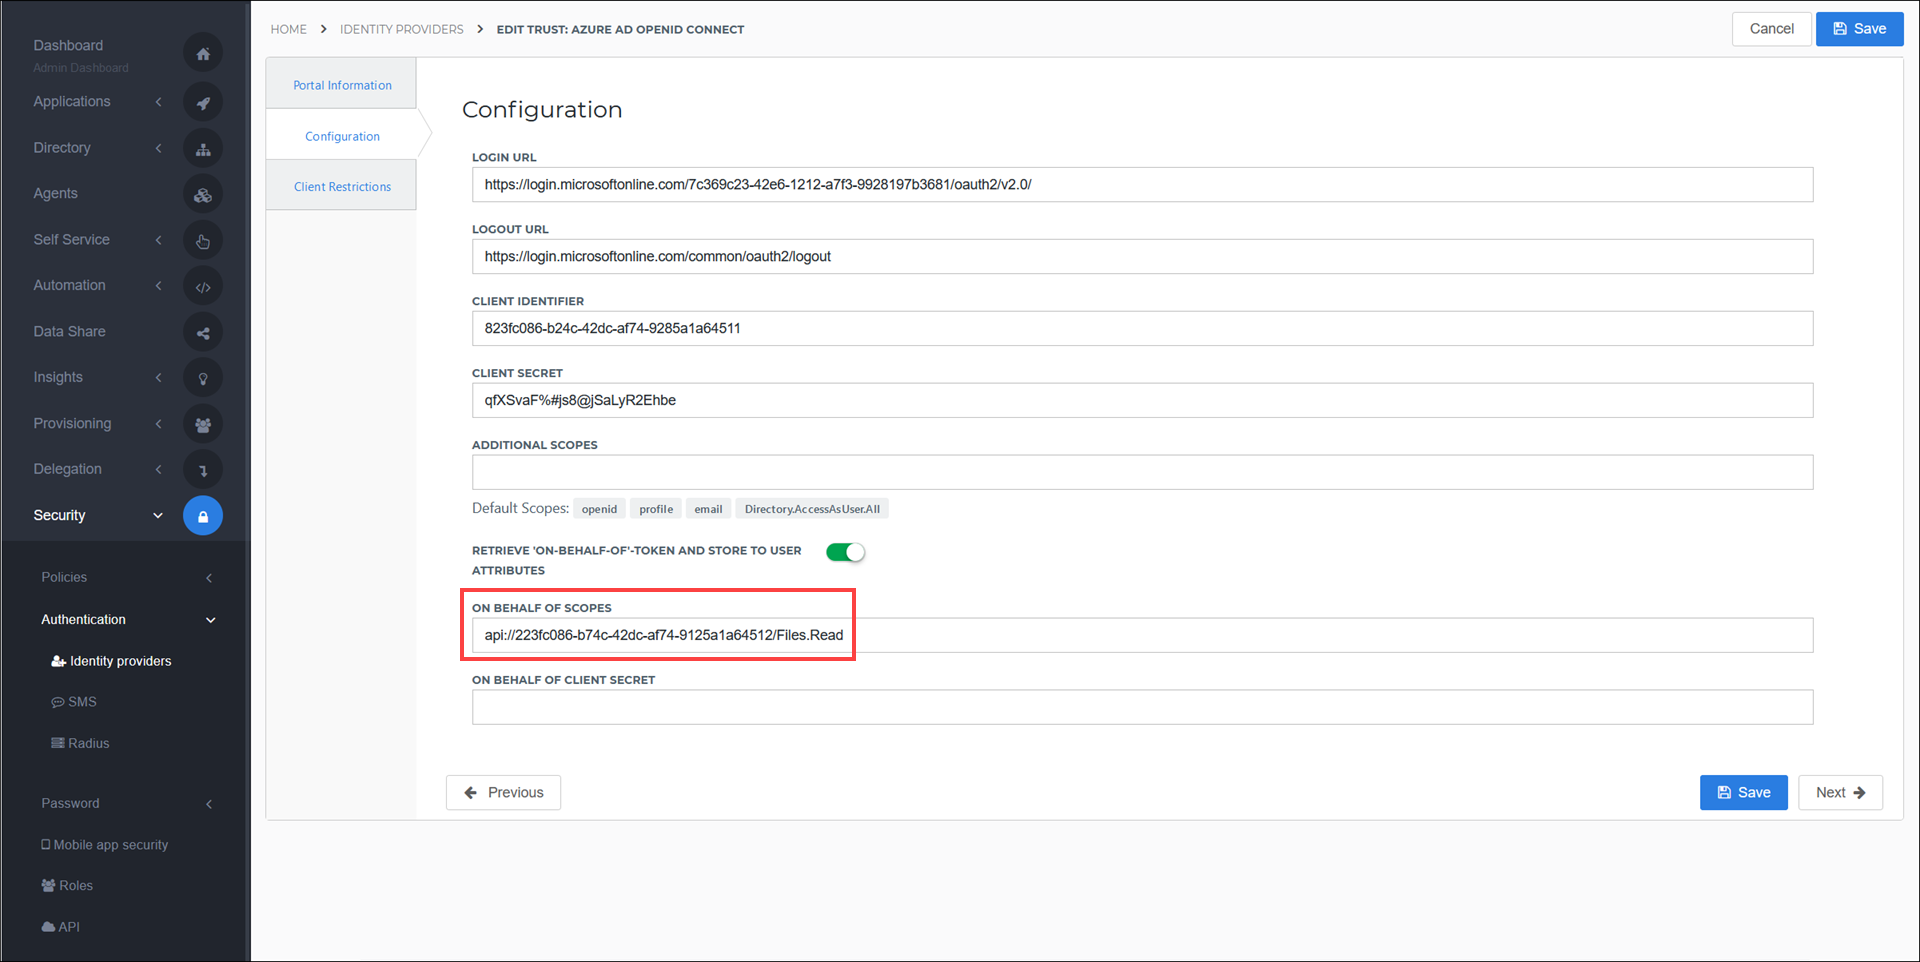
Turn on the Retrieve 'On-behalf-of' token and store to user attributes toggle. This automatically adds and maps
onbehalfoftokenandonbehalfofrefreshtokenattributes to all users who log in via the Azure AD IdP, without requiring you to manually add these attributes to the Azure OIDC IdP's mapping set. Leave this browser tab open, without selecting the Save button yet.In a new browser tab, go to Azure Active Directory > App registrations in your Azure portal.
Select the
HelloIDapp that you registered earlier (see Azure AD (OIDC) IdP)Copy its Application (client) ID to a separate notepad app. You will need it shortly.
In Azure AD, go back to App registrations.
Select the target app which users will SSO into from HelloID (the app to which the on-behalf-of tokens will be passed).
Select the Expose an API link.
Select the Add a scope link.
Accept the default Application ID URI. Select the Save & continue button.
Enter your desired scopes.
Select the Add scope button to confirm.
Copy the
api://value which appears under the Scopes column in the Azure AD Expose an API screen. (For example:api://37c086f5-bdc7-4f88-955c-49cb7c3d711d/Files.Read)In HelloID, paste it into the On Behalf of Scopes field of the Configuration tab.
Select the Save button.
In Azure AD, return to the Expose an API page for the target application.
Select the Add a client application button.
Paste the
HelloIDapp's Application (client) ID value you copied in step 7 into the Client ID field.Under Authorized scopes, select the check box for the scope you created in step 13.
Select the Add application button to confirm.
Select the Certificates & secrets link.
Select the New client secret link.
Enter a Description and an expiration period.
Select the Add button to confirm.
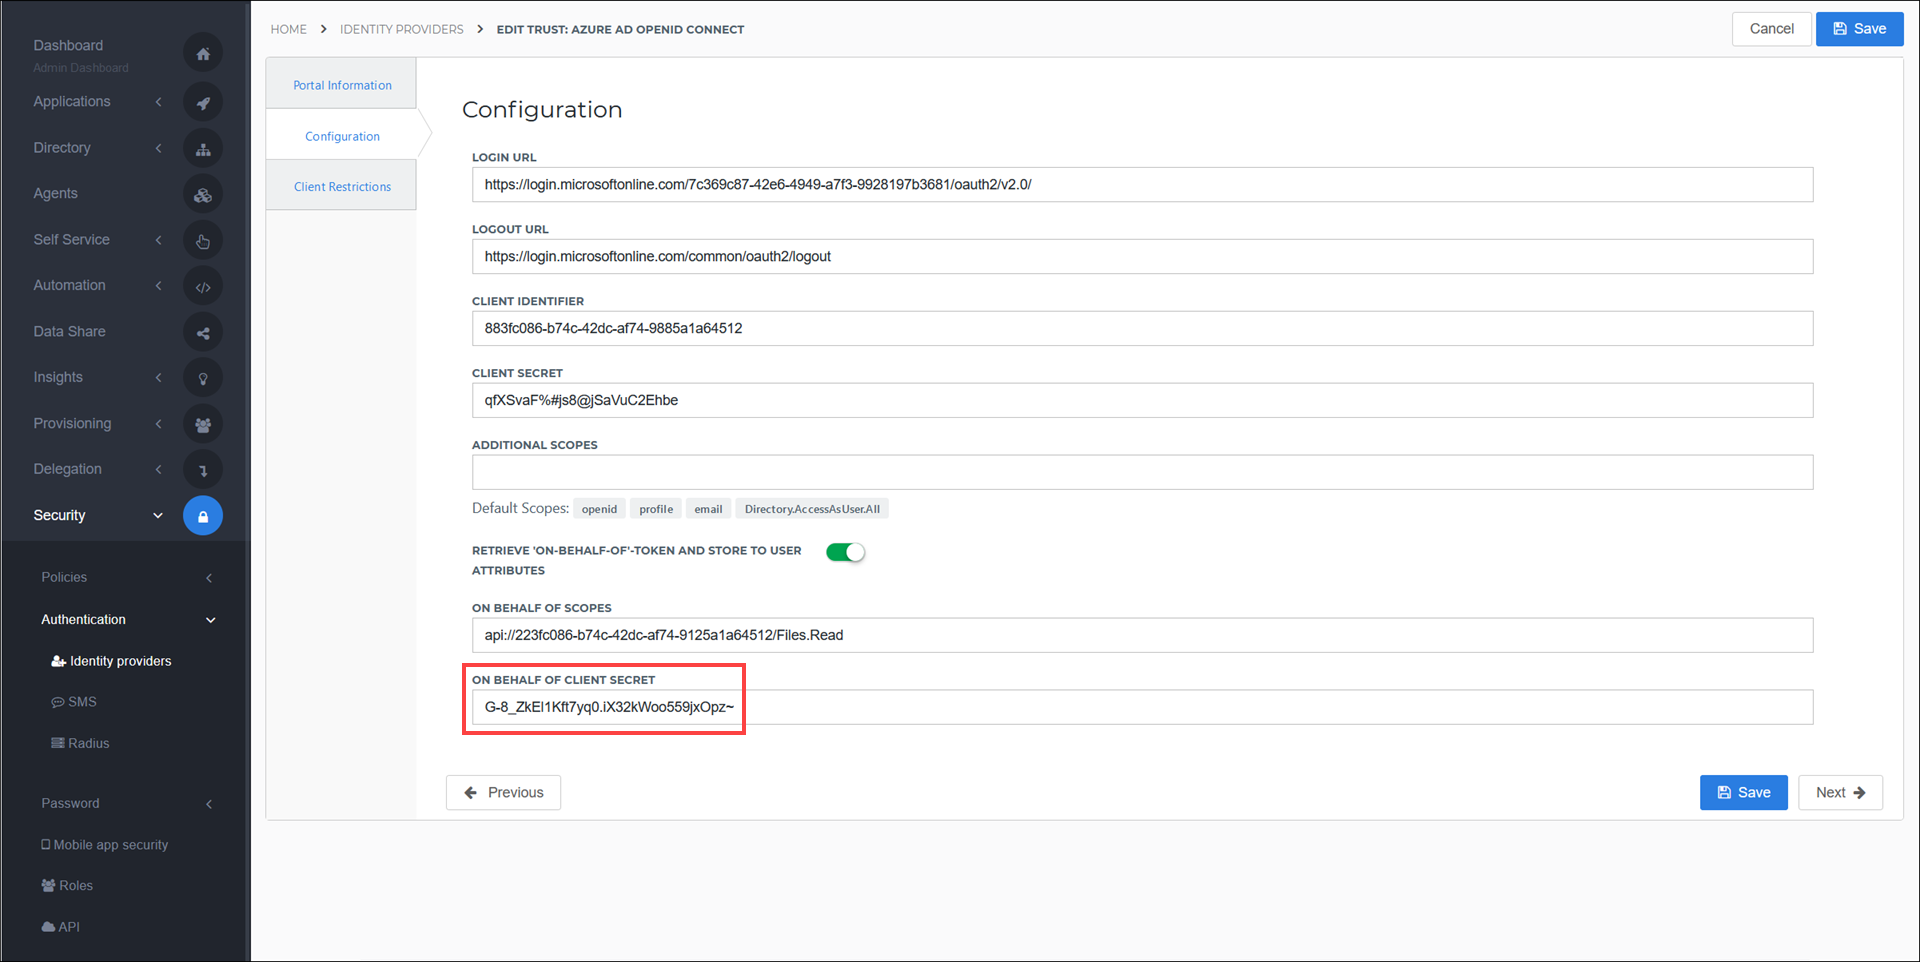
Copy the client secret that appears under the Value column.
In HelloID, paste it into the On Behalf of Client Secret field of the Configuration tab.
Select the Save button to confirm.
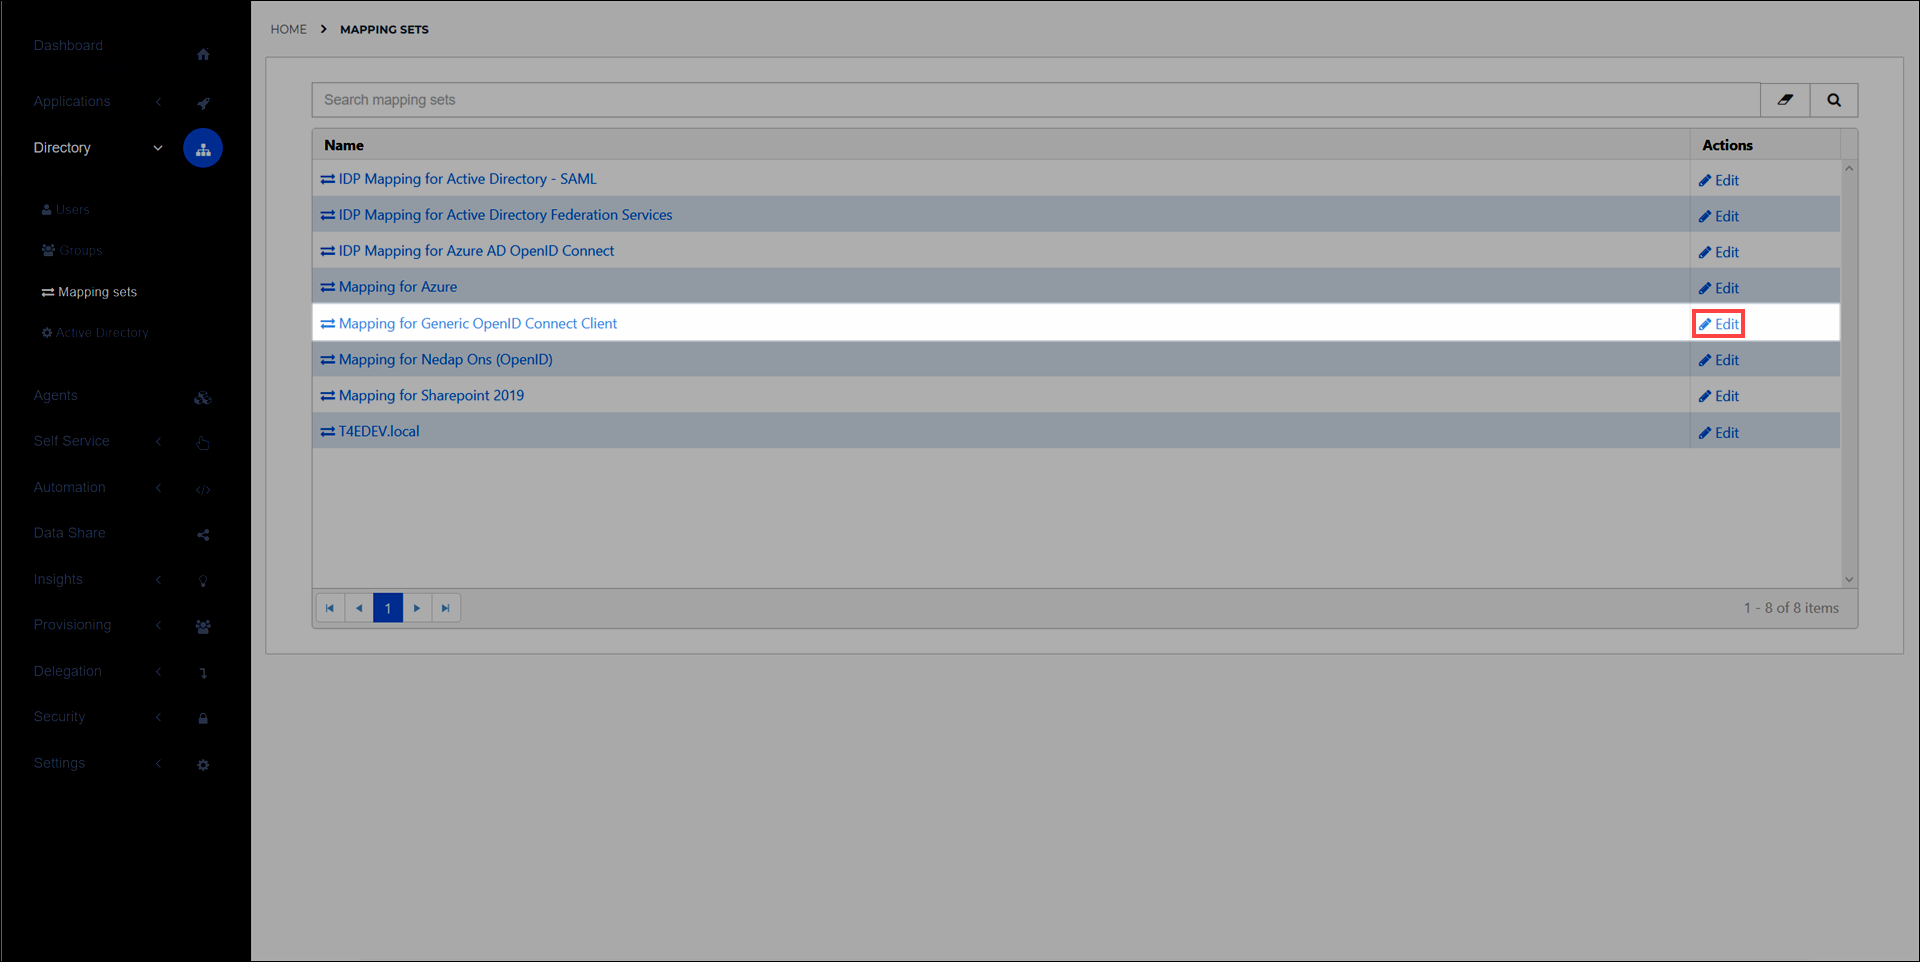
Go to Directory > Mapping sets and select the Edit link for the target application which will require these tokens. For example:
Select the Change attributes link to add
On behalf ofandOn behalf of Refreshattributes withonBehalfOfandonBehalfOfRefreshfor the External Field values, respectively. Learn more about mapping sets here.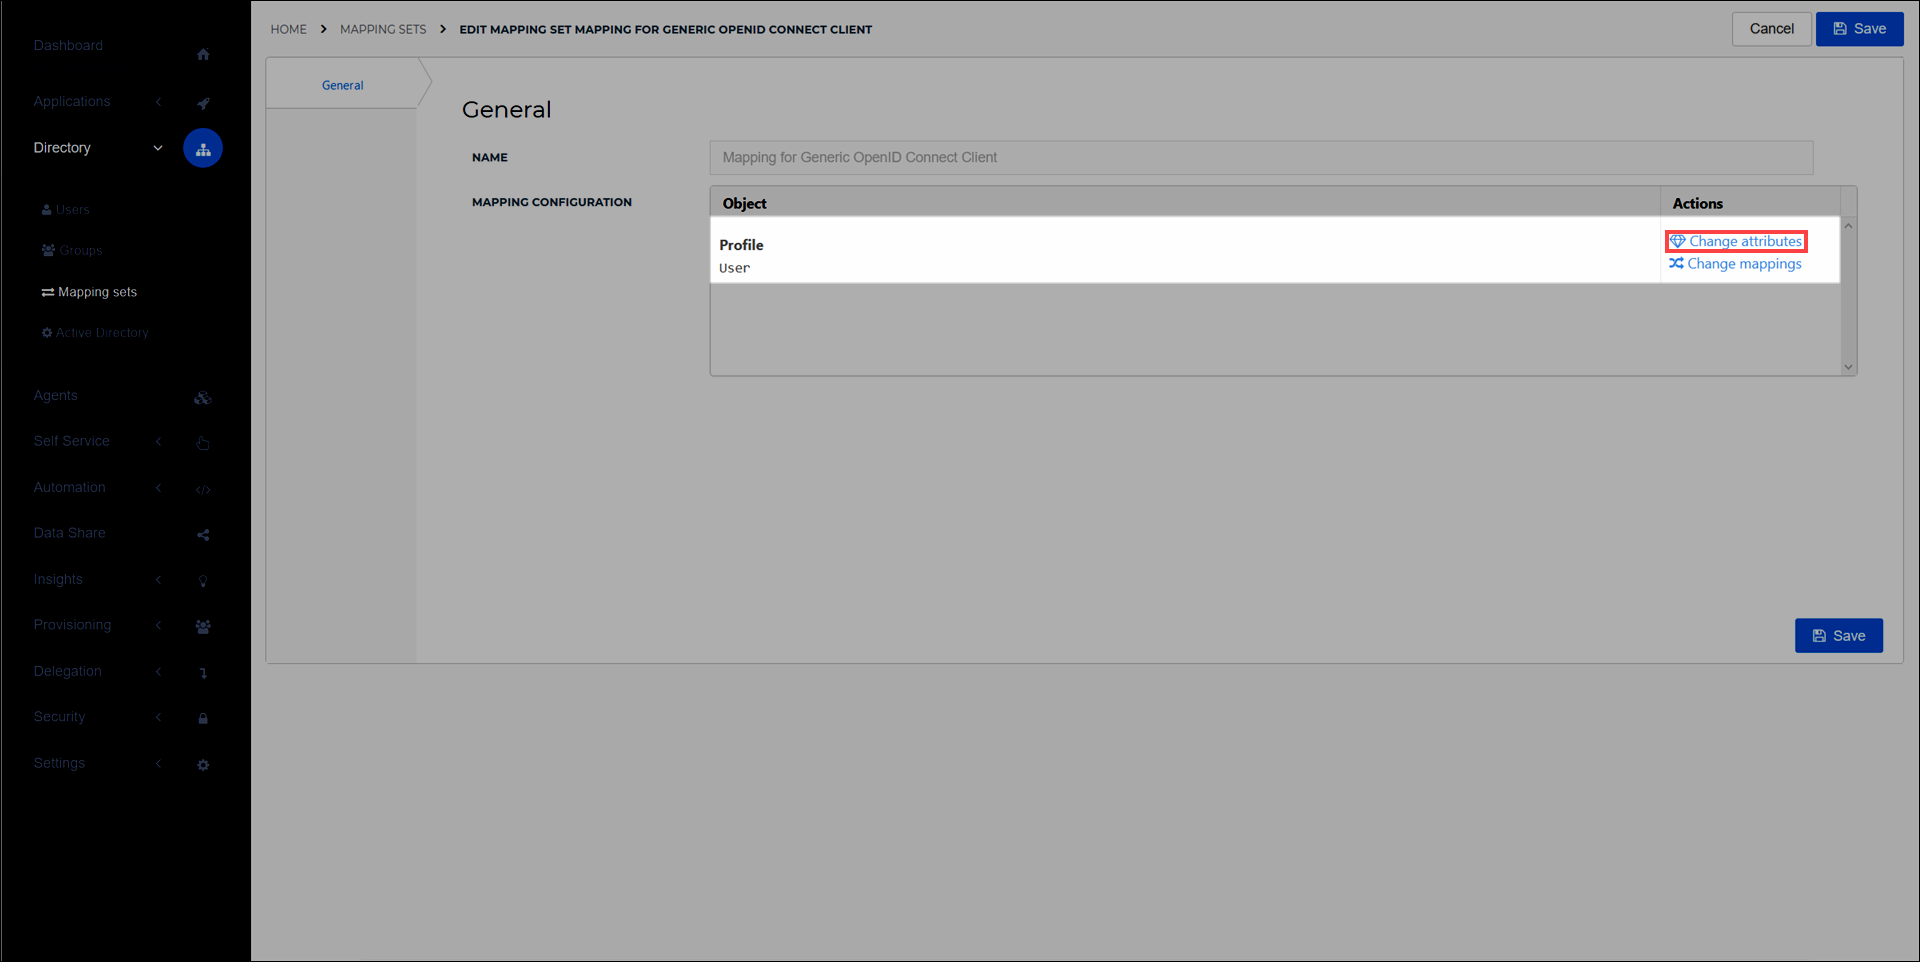
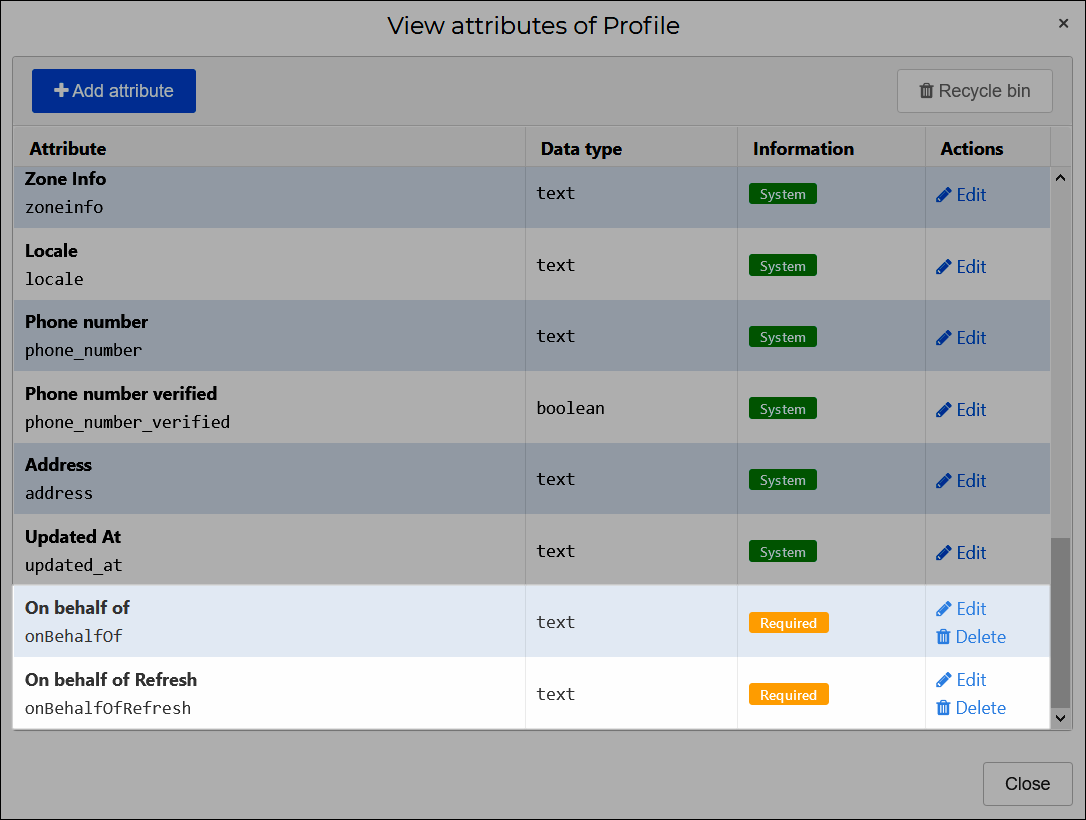
Select the Close button when done.
Select the Change mappings link to map the newly-created user attributes as follows:
User Attribute
HelloID Claim Set Variable
{{user.attributes.onbehalfoftoken}}On behalf of{{user.attributes.onbehalfofrefreshtoken}}On behalf of Refresh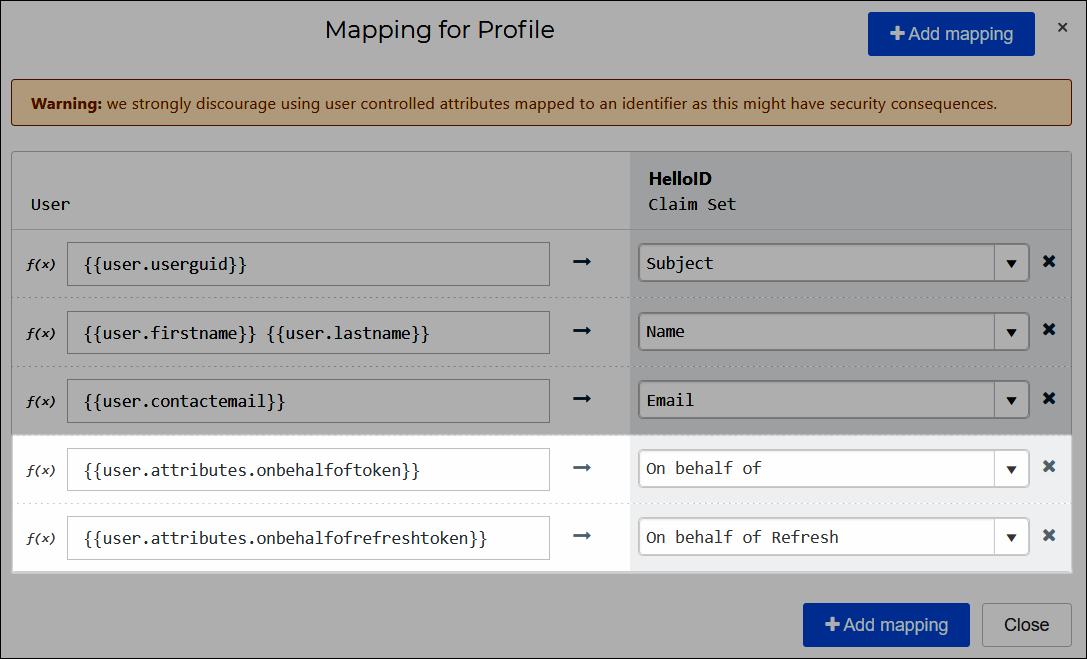
Select the Close button when done.
Select the Save button to confirm.
The on-behalf-of and on-behalf-of-refresh tokens will now be passed through to the configured application when an end user selects it in the Applications tab of the HelloID end user dashboard. The application will have access to the Azure Graph API without any additional authentication by the user.