Ortec WS cloud websites SAML application setup
Introduction
Depending on your implementation, you can have multiple SSO configurations to Ortec.
This article shows you how to set up SSO to the Ortec WS Cloud Websites. If you use Ortec Hosting you will need a separate configuration for the Ortec Hosting Portal.
Requirements
HelloID environment
Ortec servicedesk credentials
Create or Import a Certificate
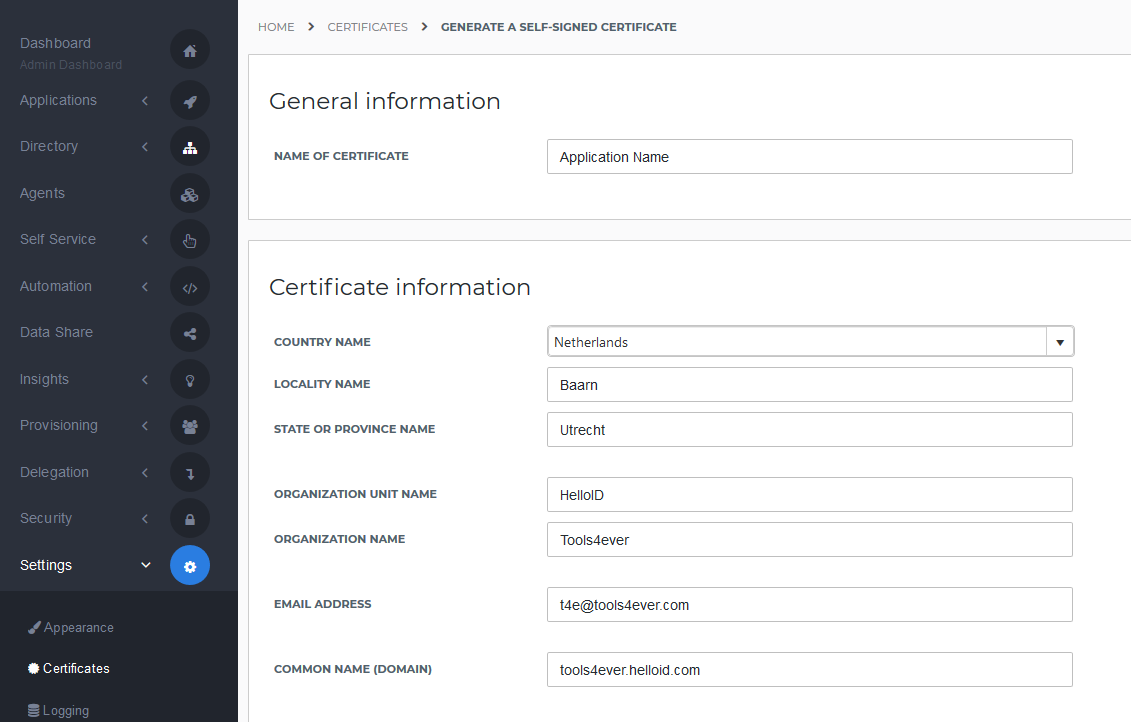
If there is no certificate yet, a certificate must be imported or created. This can be done in the HelloID Administrator Portal under Settings > Certificates. For this tutorial, we will use a self-signed certificate. Learn more about certificates here.
 |
Application setup
Add the Ortec WS Cloud Websites application
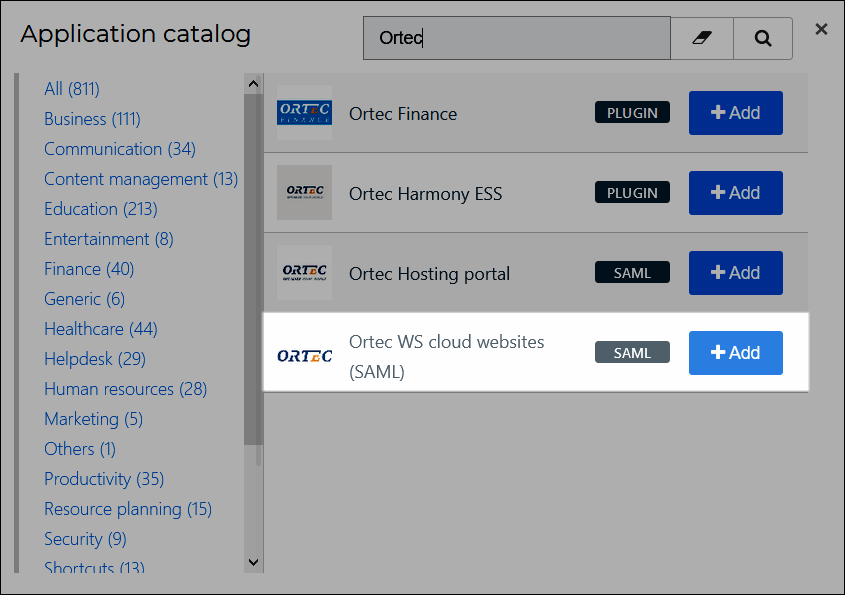
Create a new application in HelloID by navigating to Applications > Applications. Open the Application Catalog and search for "Ortec WS cloud websites". Find the SAML template, and click Add. Learn more about managing applications here.
 |
General tab
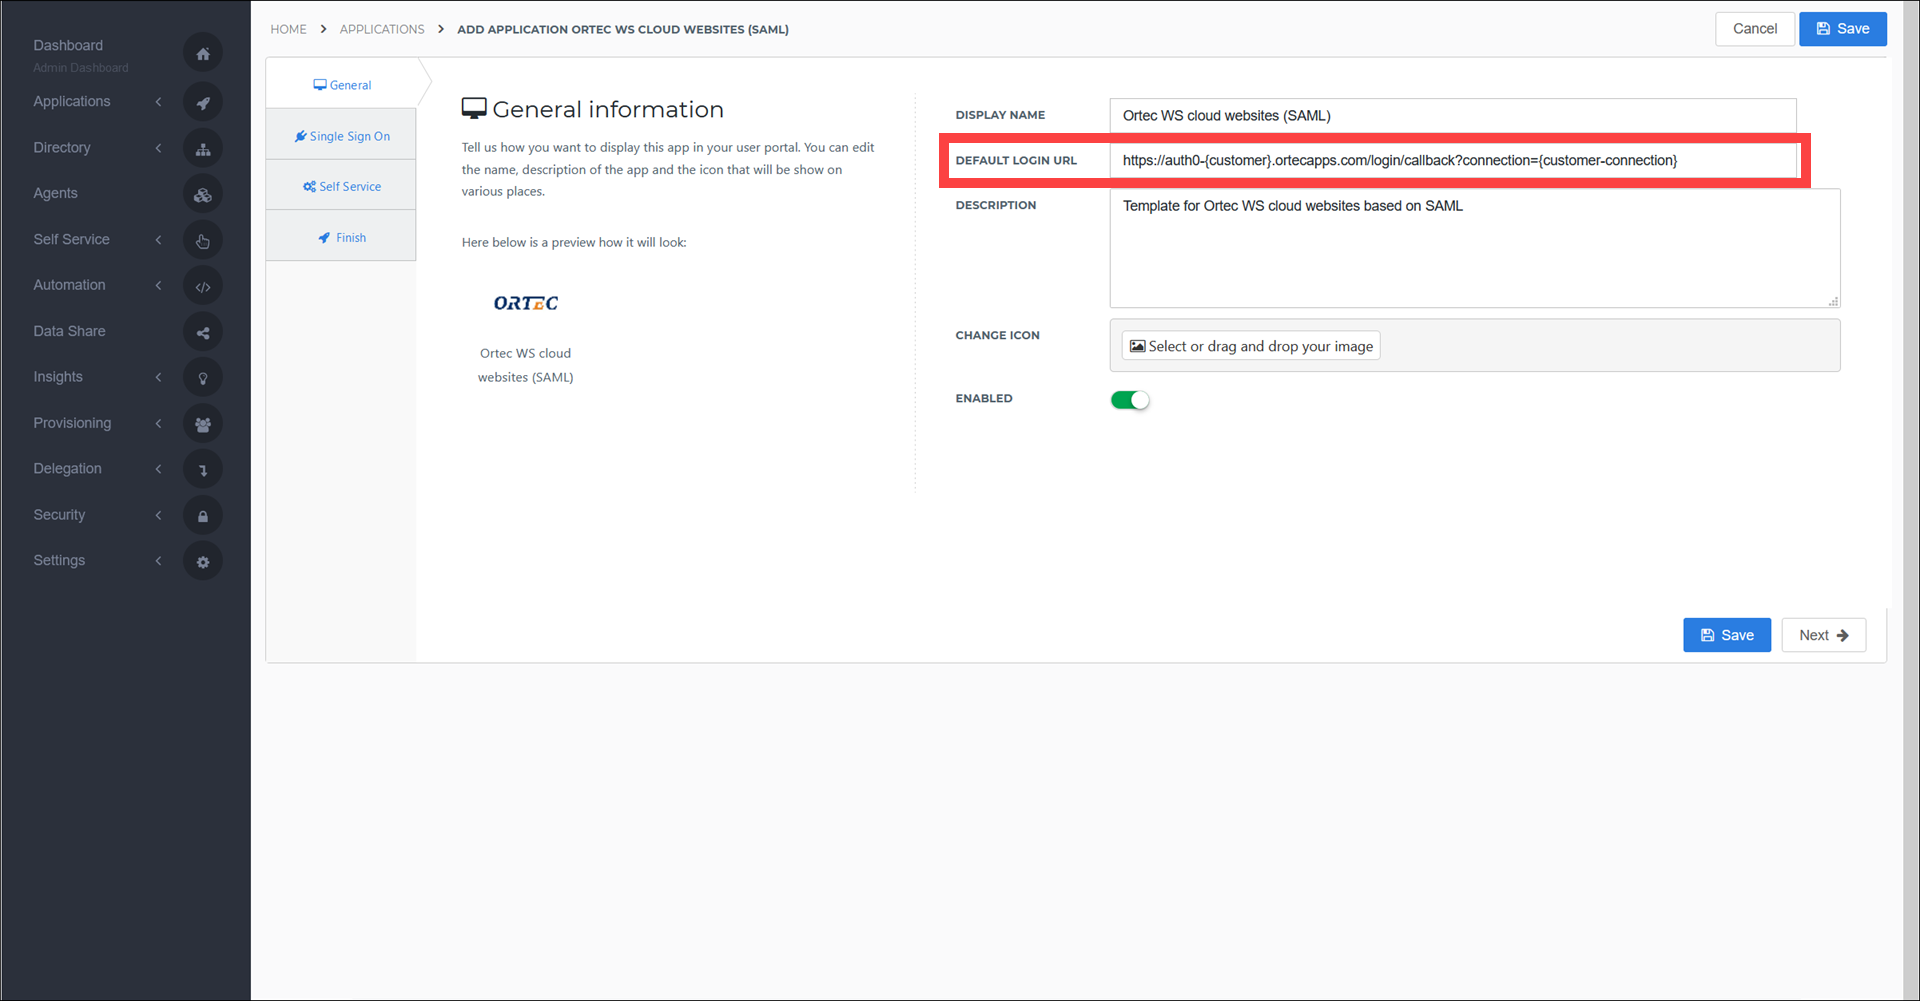
On the General tab, fill the Default Login URL with your Ortec SSO URL. Optionally, you may also add a description. Click Next.

Single Sign-on tab
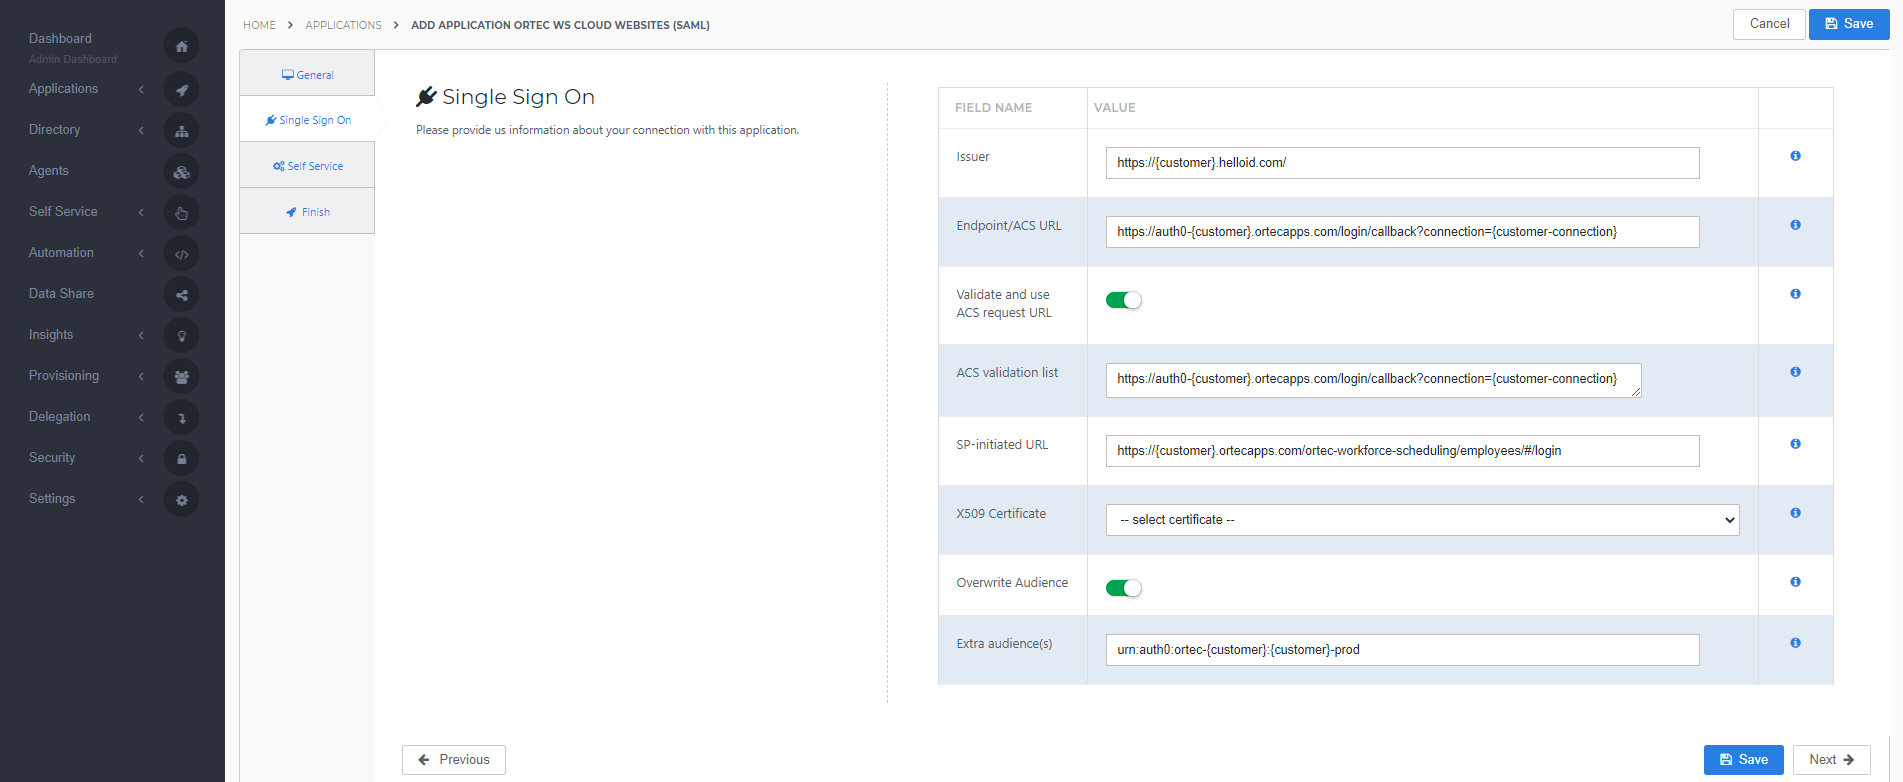
On the Single Sign-On tab, perform the following steps:
Change the Issuer to your HelloID portal URL.
Change the Endpoint URL to your
onortec.comconnection URL. Note that your customer subdomain is repeated twice in the URL.Turn on or off the Validate and use ACS request URL toggle, depending on the Ortec environment settings.
By default this is enabled, disabling this option imposes a security risk.
Change the ACS validation list to your Endpoint URL. There might be more than one URL in this list.
Change the SP-initiated URL to your
onortec.comURL. This is the URL that the HelloID application tile will launch.Keep the Overwrite Audience toggled turned on.
Change the Extra audience to your
onortecURN customer URI.In the X509 Certificate dropdown, select the certificate that you created or imported previously.
Click Next.

Self service tab
On the Self Service tab, choose whether to automatically create a Self Service product, which makes the application requestable. This is optional. Click Next.
On the Finish tab, click Save to add the application to HelloID.

Application metadata
After saving the Ortec Hosting Portal application, click its Edit link on the applications overview. This will bring you to its properties page.
Right-click the Download metadata button and copy its URL for later use in Ortec.
Mapping set
After saving the application, click its Edit link on the applications overview. This will bring you to its properties page. You can now edit the Mapping Set on the configuration tab.
In most implementations the userPrincipalName is used as the identifier. Change this if needed, according to your configuration.
Request SAML
Create a ticket on the Ortec servicedesk (via
customer.ortec.com) with the titleRequest for SAML SSO on ORTEC WS Cloud Websites.Add the following information to the ticket:
The Metadata URL you copied
SSL (Logout) URL (in the format
https://{customer}.helloid.com/authentication/signoff)Connection name
A logical identifier for the connection that will be configured in both HelloID and Ortec (something like
{customer}-prod)Note: must start and end with an alphanumeric character and can only contain alphanumeric characters and
-. Spaces aren't allowed.
Ortec will process the request and update the ticket with the following information. These need to be communicated towards HelloID:
Allowed callback URL
Audience URI (SP Entity ID)
Metadata URL