WordPress SAML application setup
Introduction
This manual shows you how to set up SSO to WordPress using the SAML protocol. The configuration takes place in HelloID and WordPress, specifically at the SAML SP Single Sign On - SSO login plugin by miniOrange setup.
Requirements:
HelloID environment
WordPress environment
Create or Import a Certificate
If there is no certificate yet, a certificate must be imported or created. This can be done in the HelloID Administrator Portal under Settings > Certificates. For this tutorial, we will use a self-signed certificate. Learn more about certificates here.
Application Setup
Add the WordPress Application
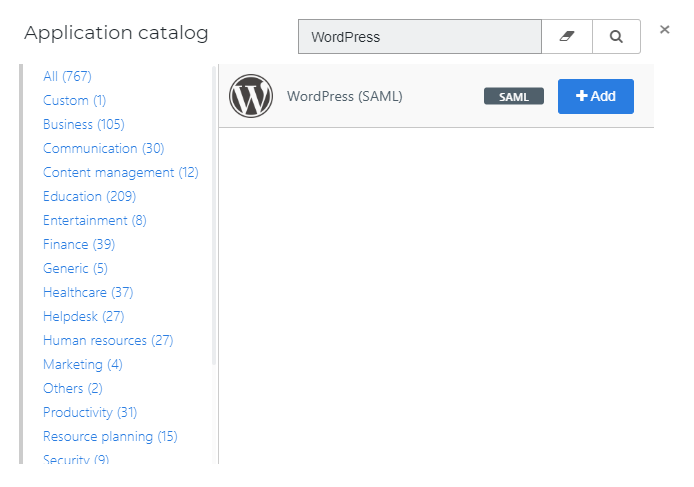
Create a new application in HelloID by navigating to Applications > Applications. Open the Application Catalog and search for "WordPress". Find the SAML template, and click Add. Learn more about managing applications here.
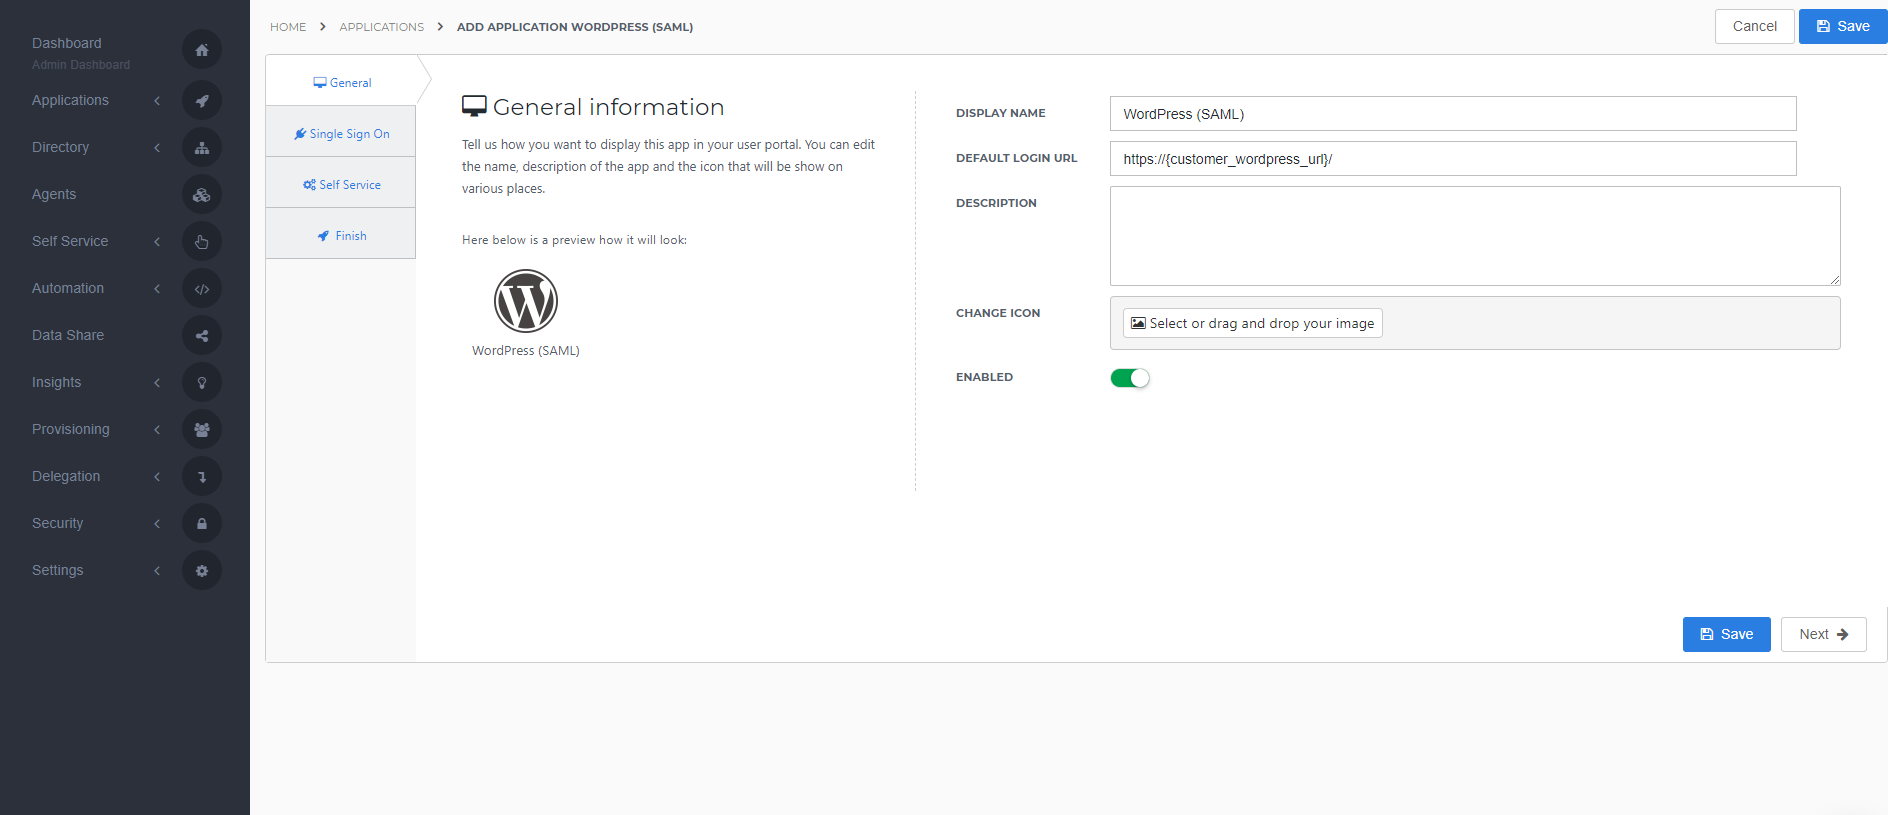
General tab
On the General tab, fill the default login URL with the WordPress environment SSO URL (replace {customer_wordpress_url} with your WordPress environment URL). Optionally, you may also add a description. Click Next.
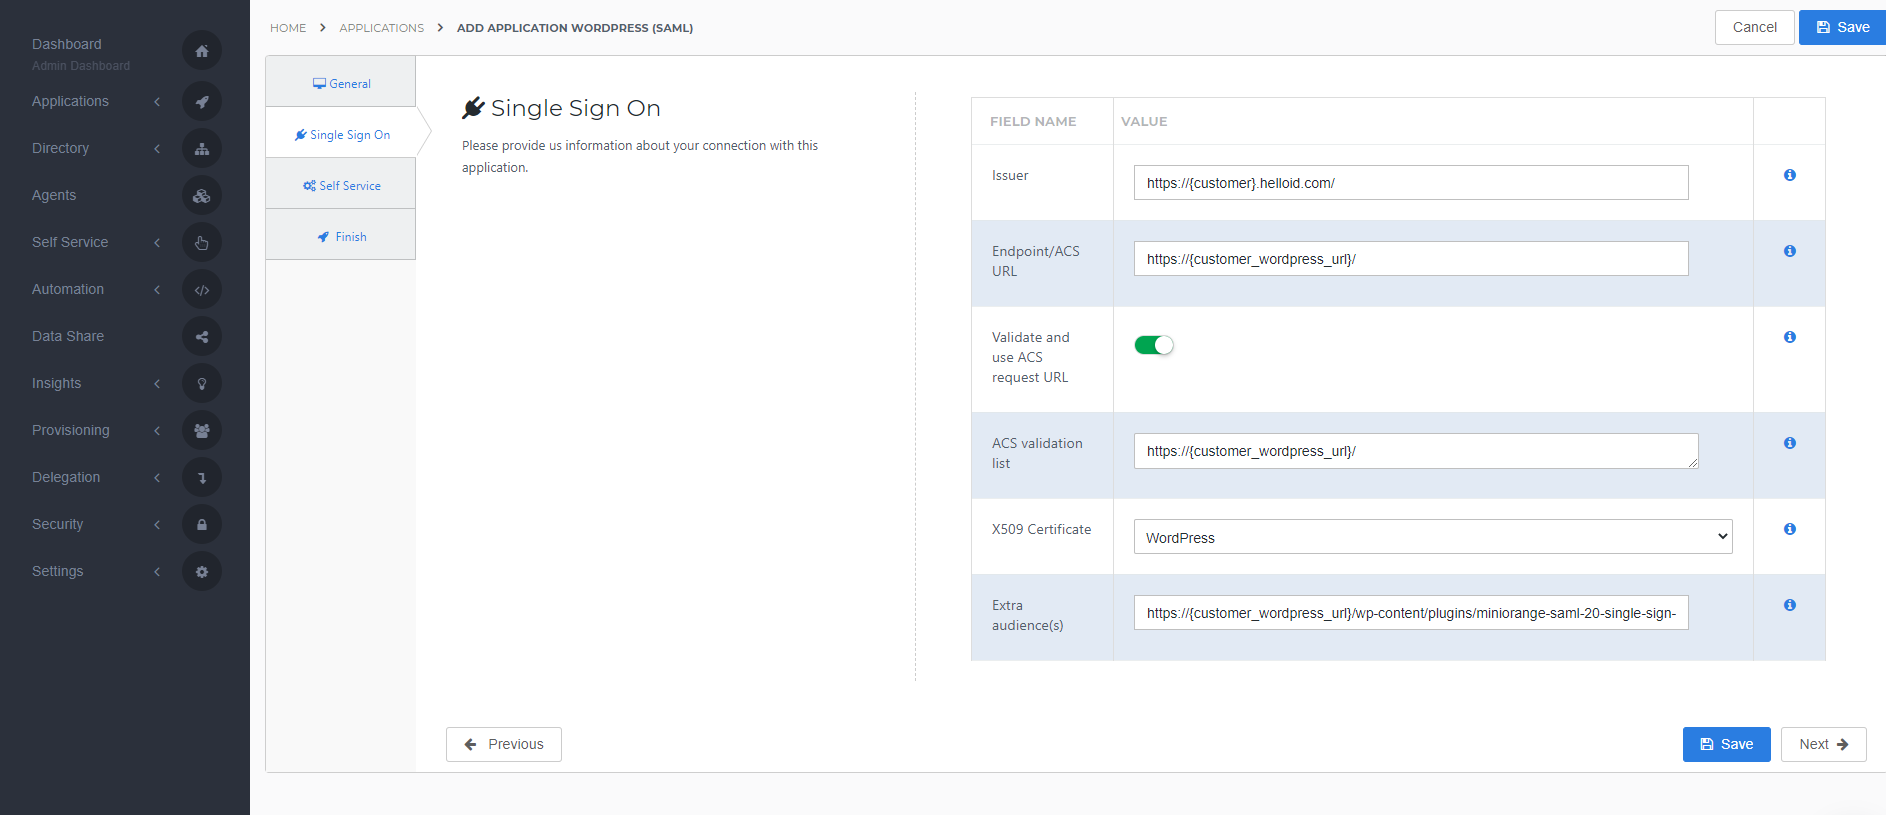
Single Sign-on tab
On the Single Sign-On tab, perform the following steps:
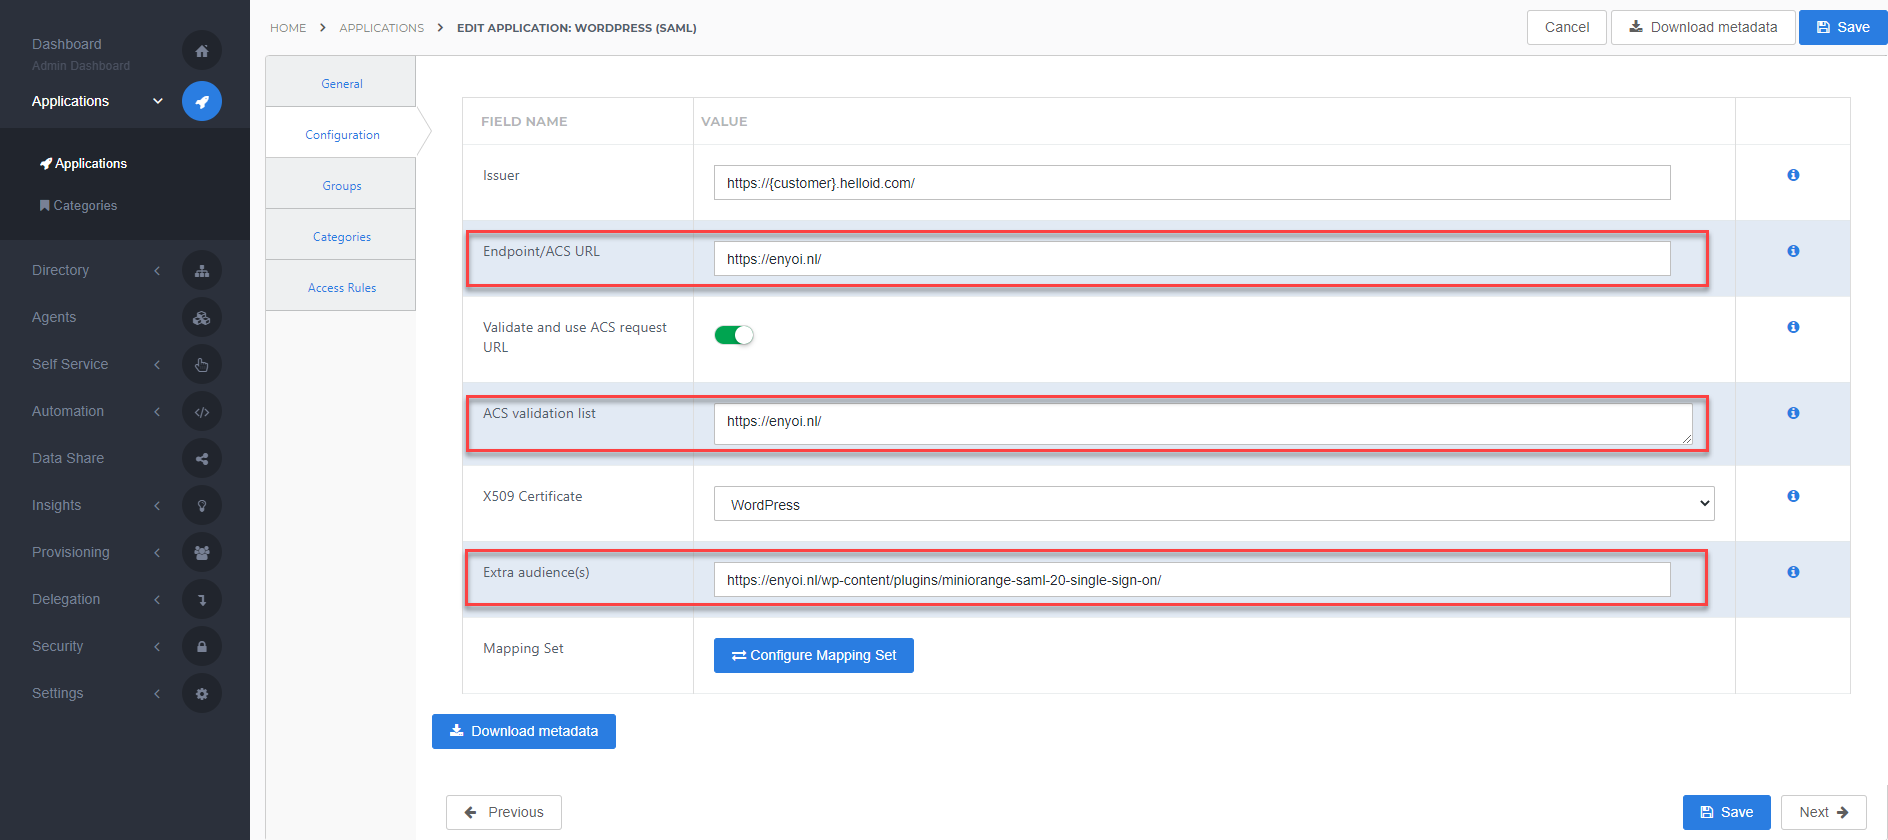
For the Issuer field, provide your HelloID domain in the format "https://{customer}.helloid.com/".
Note: The trailing slash (/) is required!
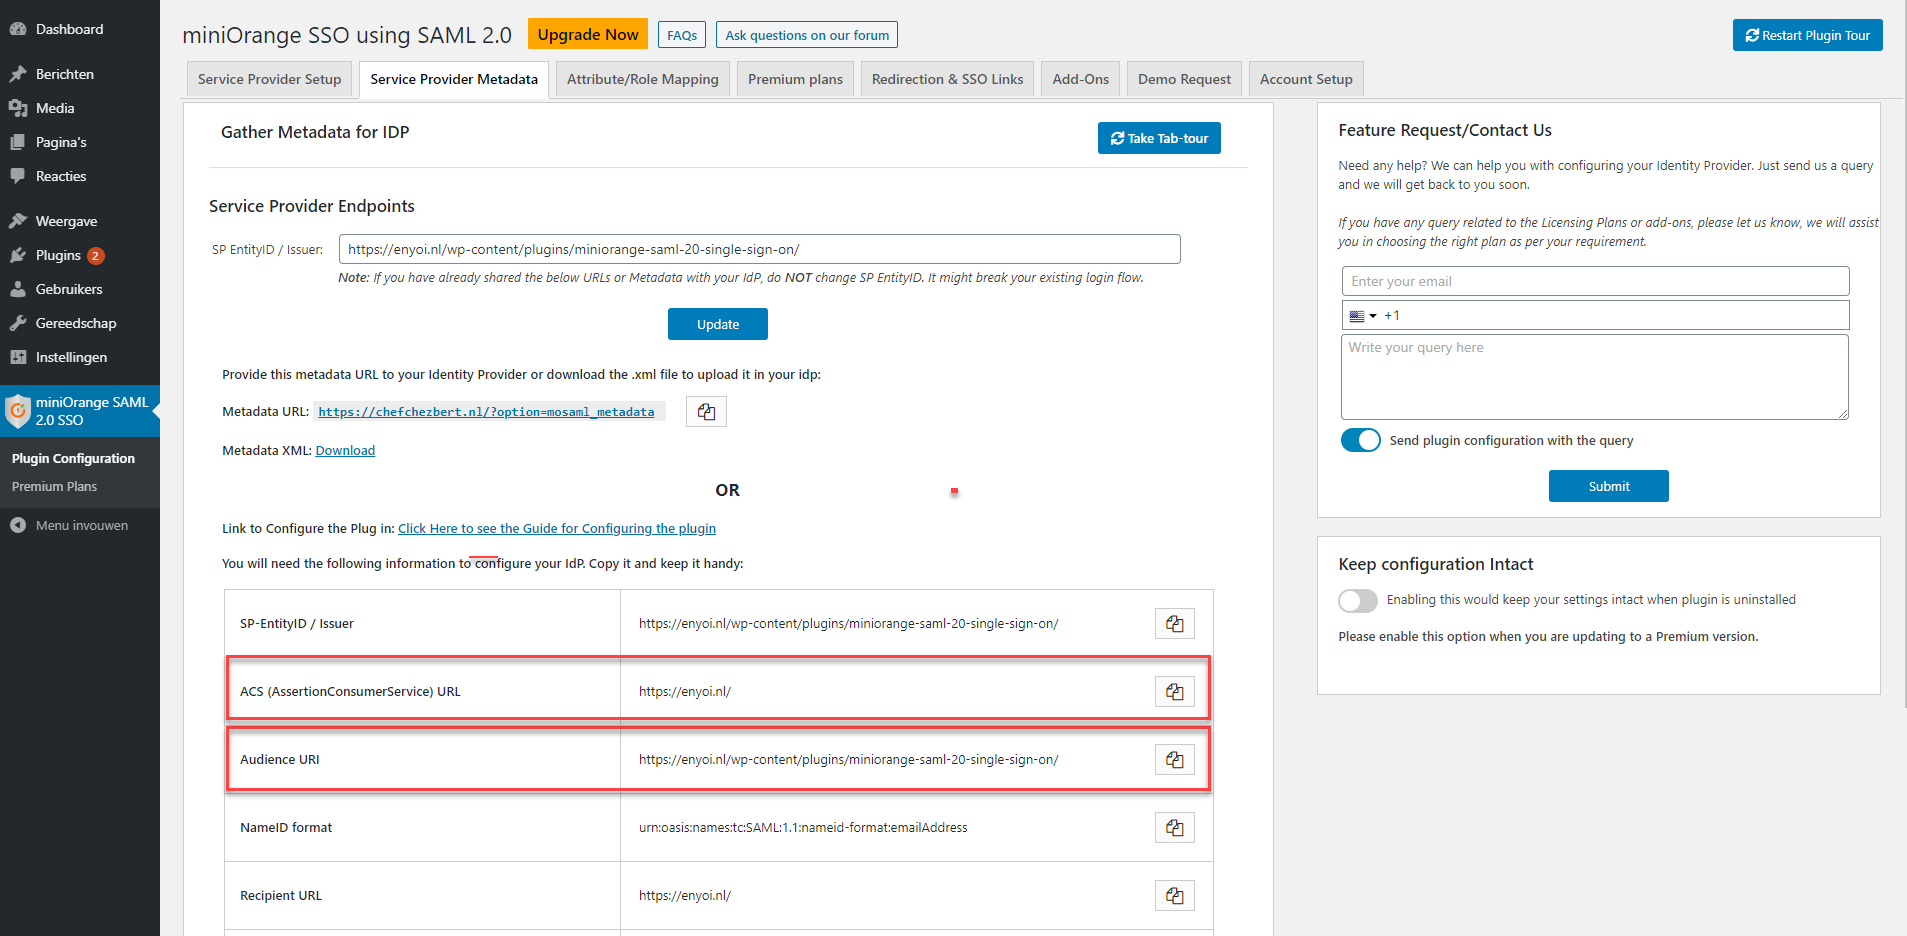
Endpoint/ACS URL should be set with the ACS (AssertionConsumerService) URL provided by the MiniOrange SAML 2.0 SSO plugin in your WordPress environment, provided at 4.2 - Service Provider Metadata
Validate and use ACS request URL is always selected for security reasons.
ACS validation list should contain the URL you entered at the Endpoint/ACS URLNote: This URL is case sensitive
In the X509 Certificate dropdown, select the certificate that you created or imported previously.
As Extra audience enter the Audience URI provided by the MiniOrange SAML 2.0 SSO plugin in your WordPress environment, provided at 4.2 - Service Provider Metadata Note: This URL is case sensitive
Click Next.
Self service tab
On the Self Service tab, choose whether to automatically create a Self Service product, which makes the application requestable. This is optional. Click Next.
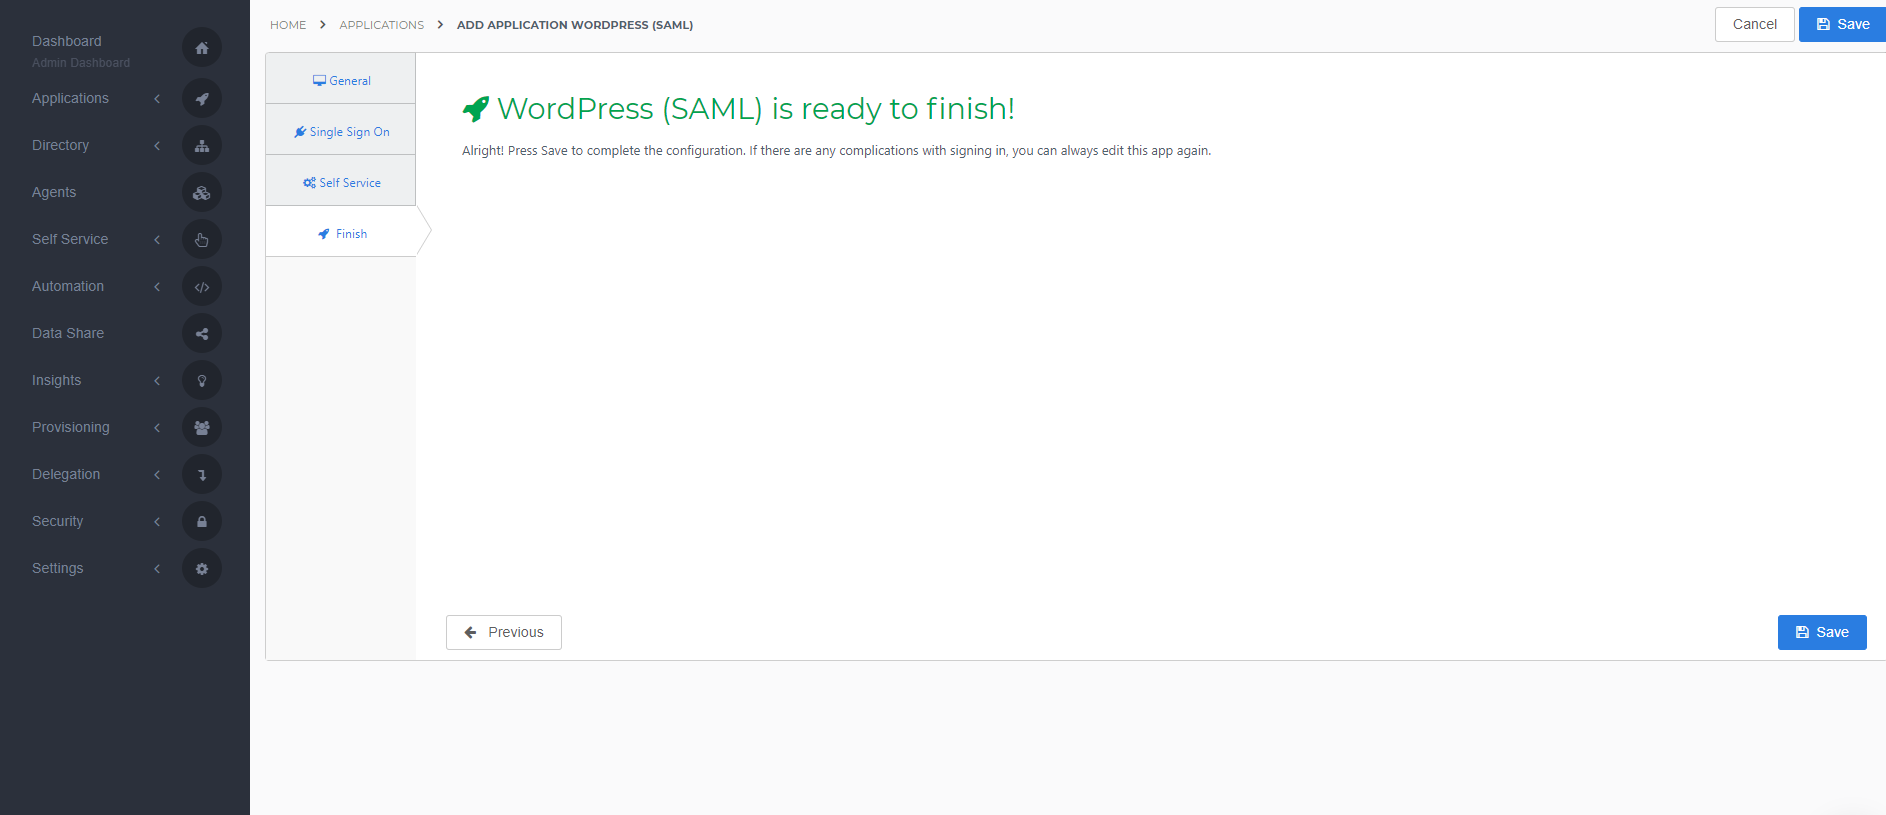
Finish tab
On the Finish tab, click Save to add the application to HelloID.
Application metadata
After saving the WordPress application, click its Edit link on the applications overview. This will bring you to its properties page.
You now have the option to obtain the application metadata.
The MiniOrange SAML 2.0 SSO plugin for WordPress uses the metadata URL to import the settings, right-click Download metadata and copy the link address (something along the lines of https://enyoi.helloid.com/metadata/download?ApplicationGUID=e6e741f5-a469-4849-93f7-fe2e259a339f) at the right top of the screen.
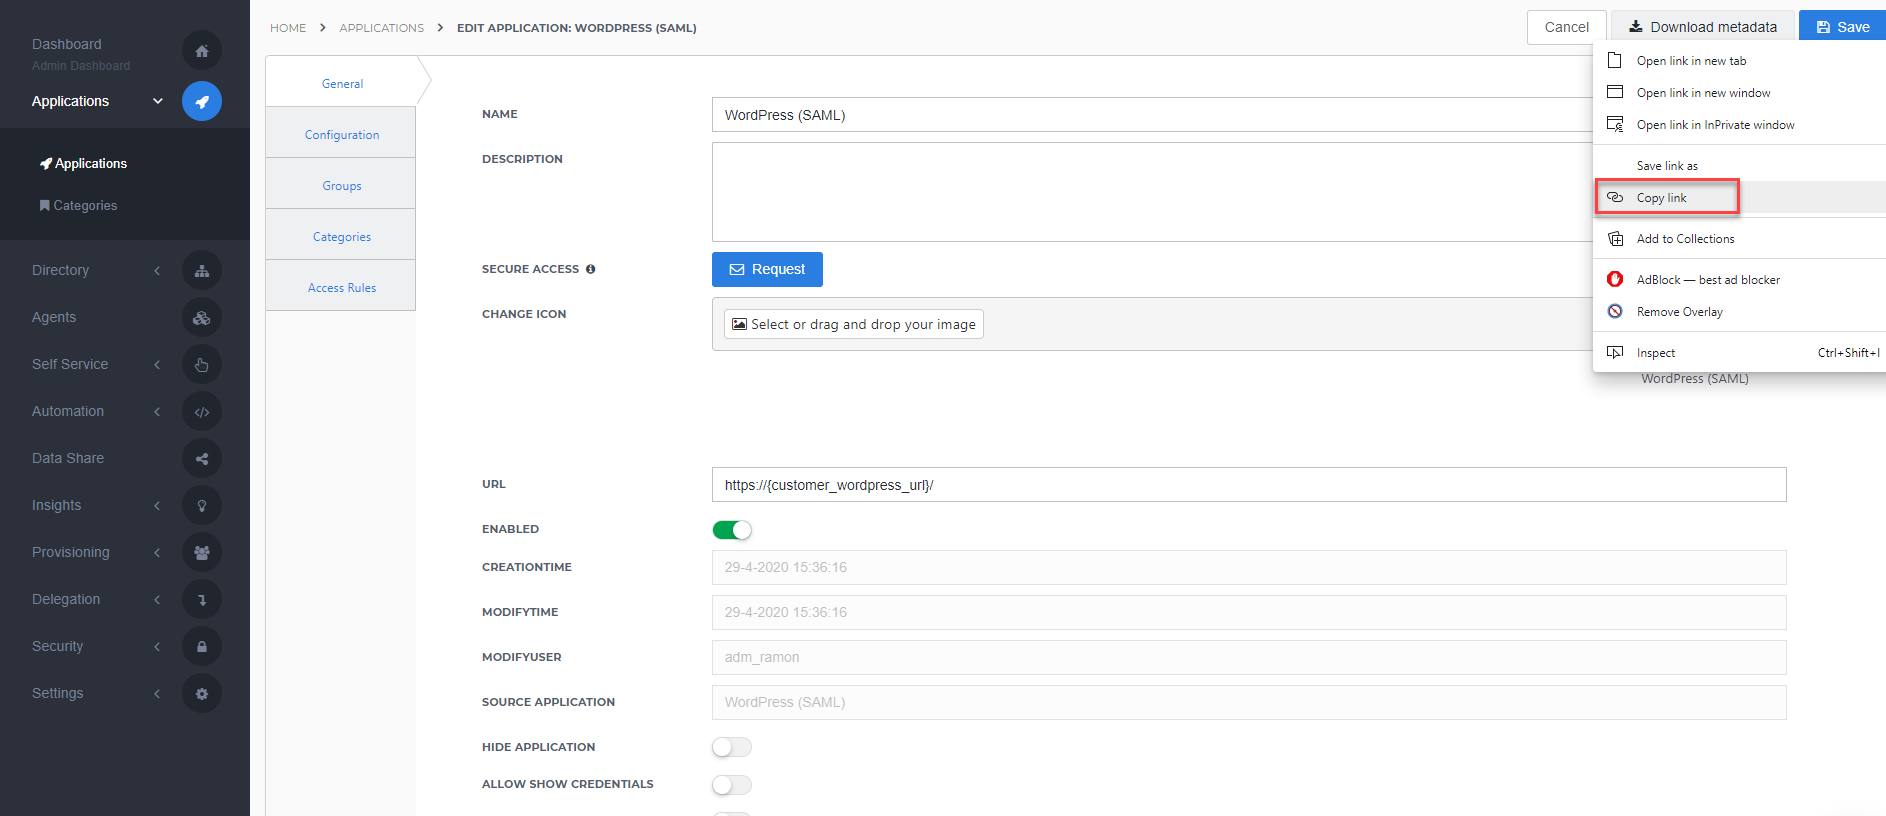
Take note of the metadata URL as we will need it for the WordPress configuration.
The configuration of the HelloID application is finished.
WordPressConfiguration
Service Provider Setup
In order to make the connection, you need to configure HelloID as an Identity Provider in the MiniOrange SAML 2.0 SSO plugin for WordPress.
To configure the SSO on the WordPress side, you will need the following information:
Metadata URLfound at step 3.2 - Application metadata
Perform the following steps:
On the WordPress admin portal, open the miniOrange SAML 2.0 SSO plugin.
On Service Provider Setup click Upload IDP Metadata.
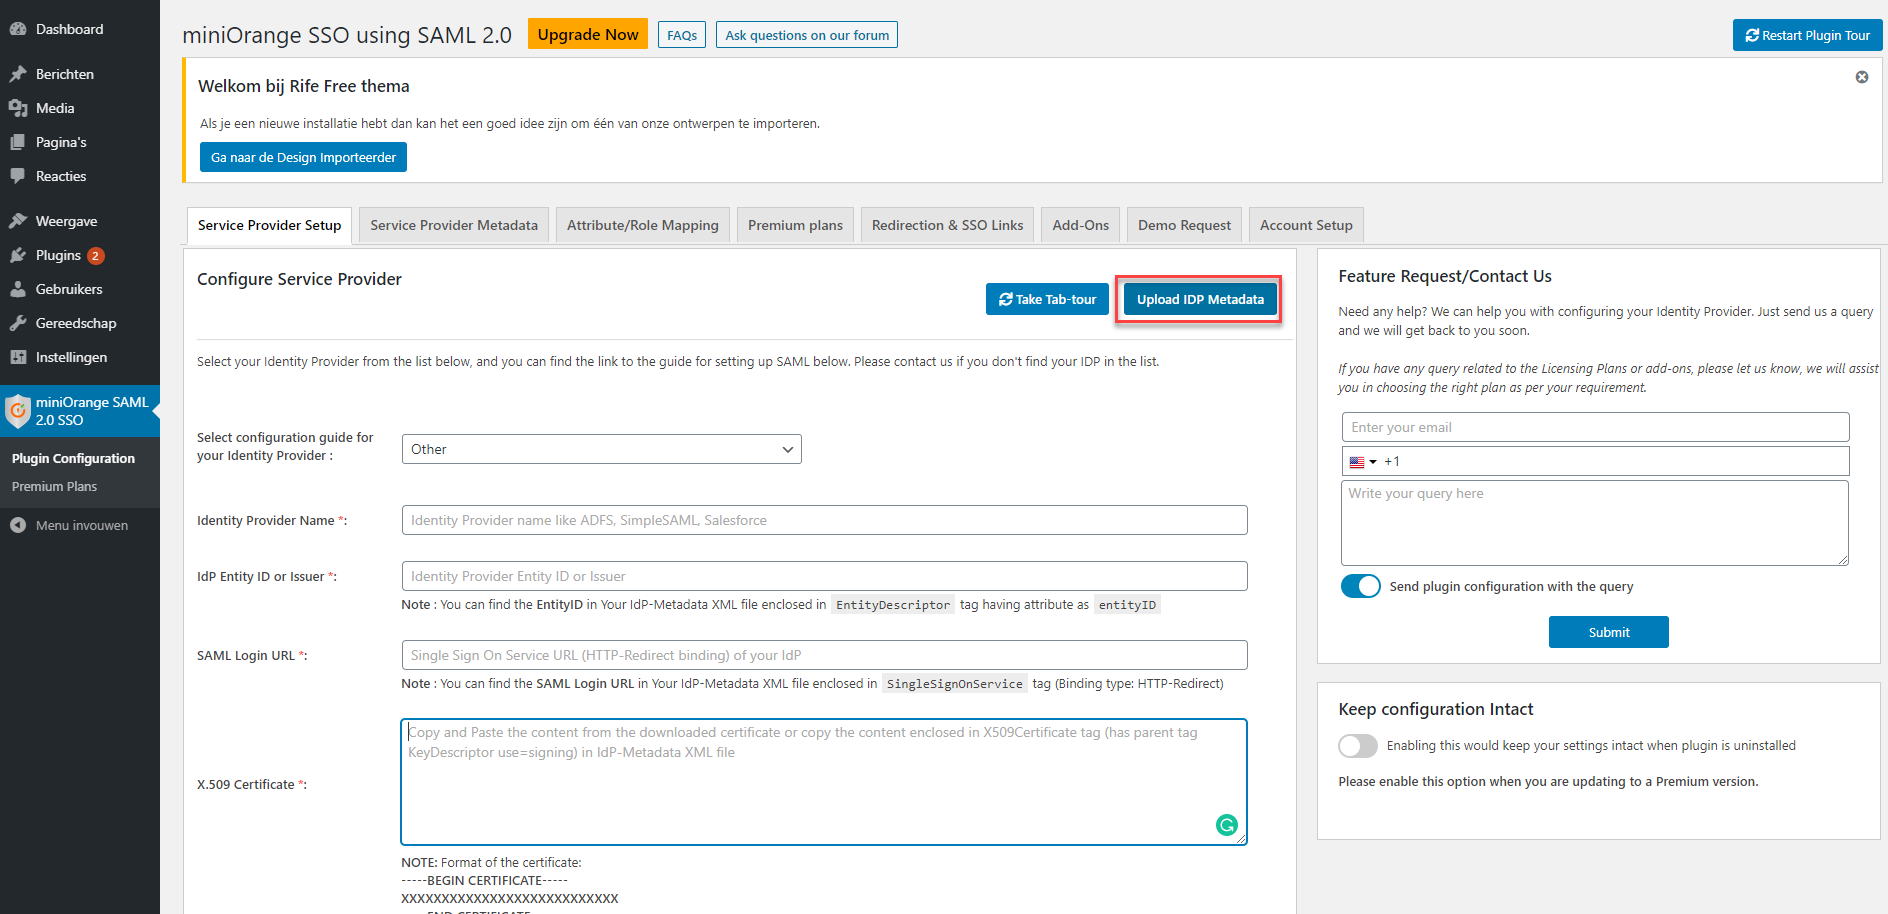
The Upload IDP Metadata page will open.
Enter an Identity Provider Name like "HelloID"
At Enter metadata URL, fill in the HelloID metadata URL found at step 3.2 - Application metadata
Click Fetch Metadata
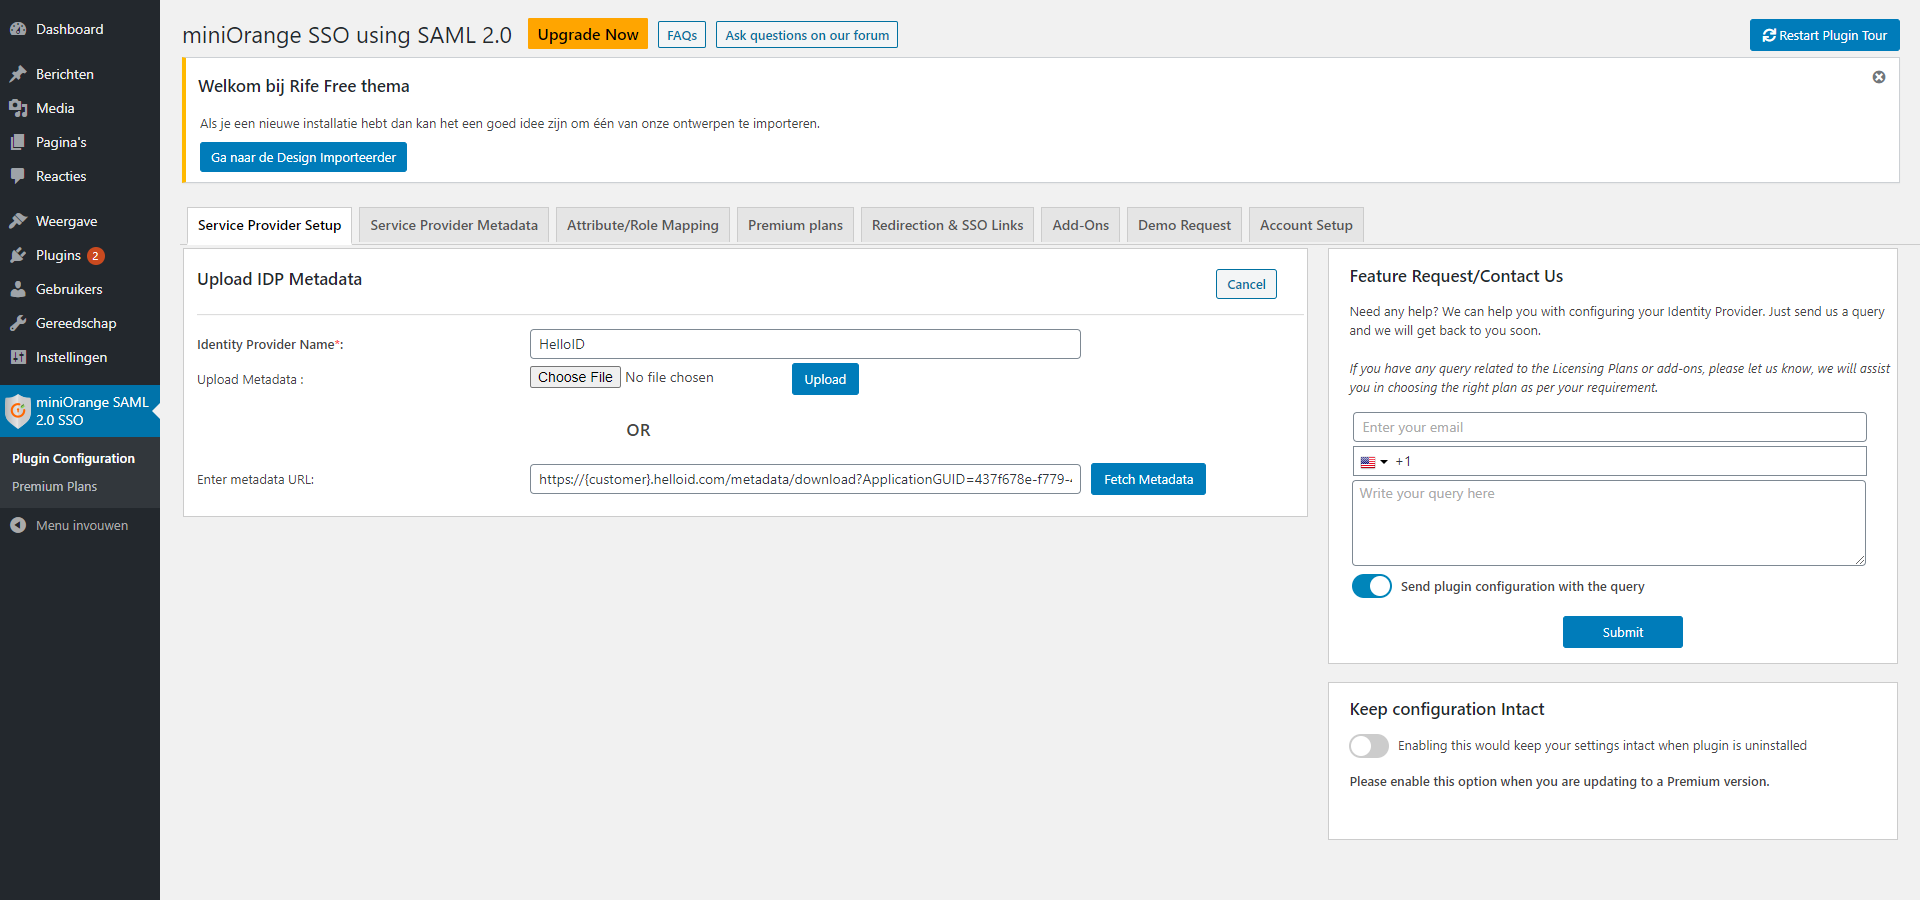
The metadata will be imported and you'll arrive at a preconfigured Service Provider Setup page on which you won't have to fill in or change anything anymore.
Service Provider Metadata
Now that HelloID is configured as an Identity Provider in the MiniOrange SAML 2.0 SSO plugin for WordPress we can finalize the configuration on the HelloID side.
To complete the HelloID application configuration following information:
ACS (AssertionConsumerService) URL
Audience URI
Go back to the HelloID admin portal and click the Edit link of your previously configured WordPress application on the applications overview. At the Configuration tab, complete the following configuration:
At the HelloID Endpoint/ACS URL and the ACS validation list(since these values should match) enter the ACS (AssertionConsumerService) URL.
Extra audience with the Audience URI.
Test the Configuration
The configuration is now finished and may be tested.
Launch a browser and navigate to your HelloID Portal.
After logging into HellloID you should now see a new application for WordPress, as shown below.
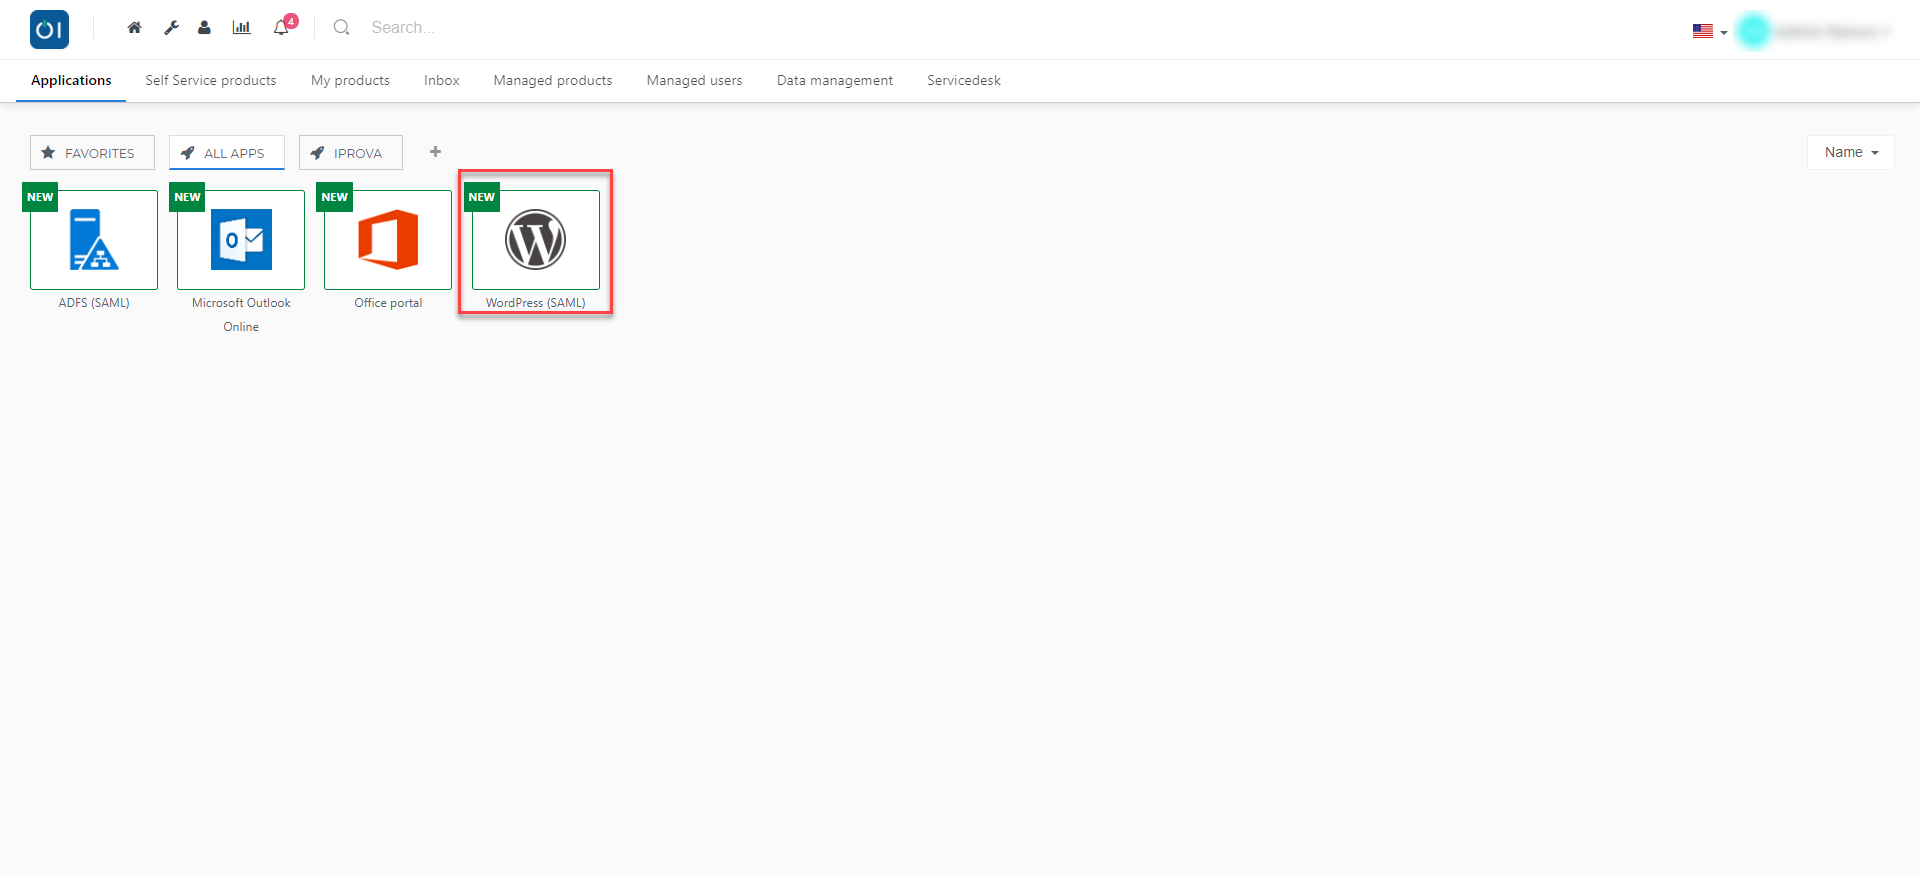
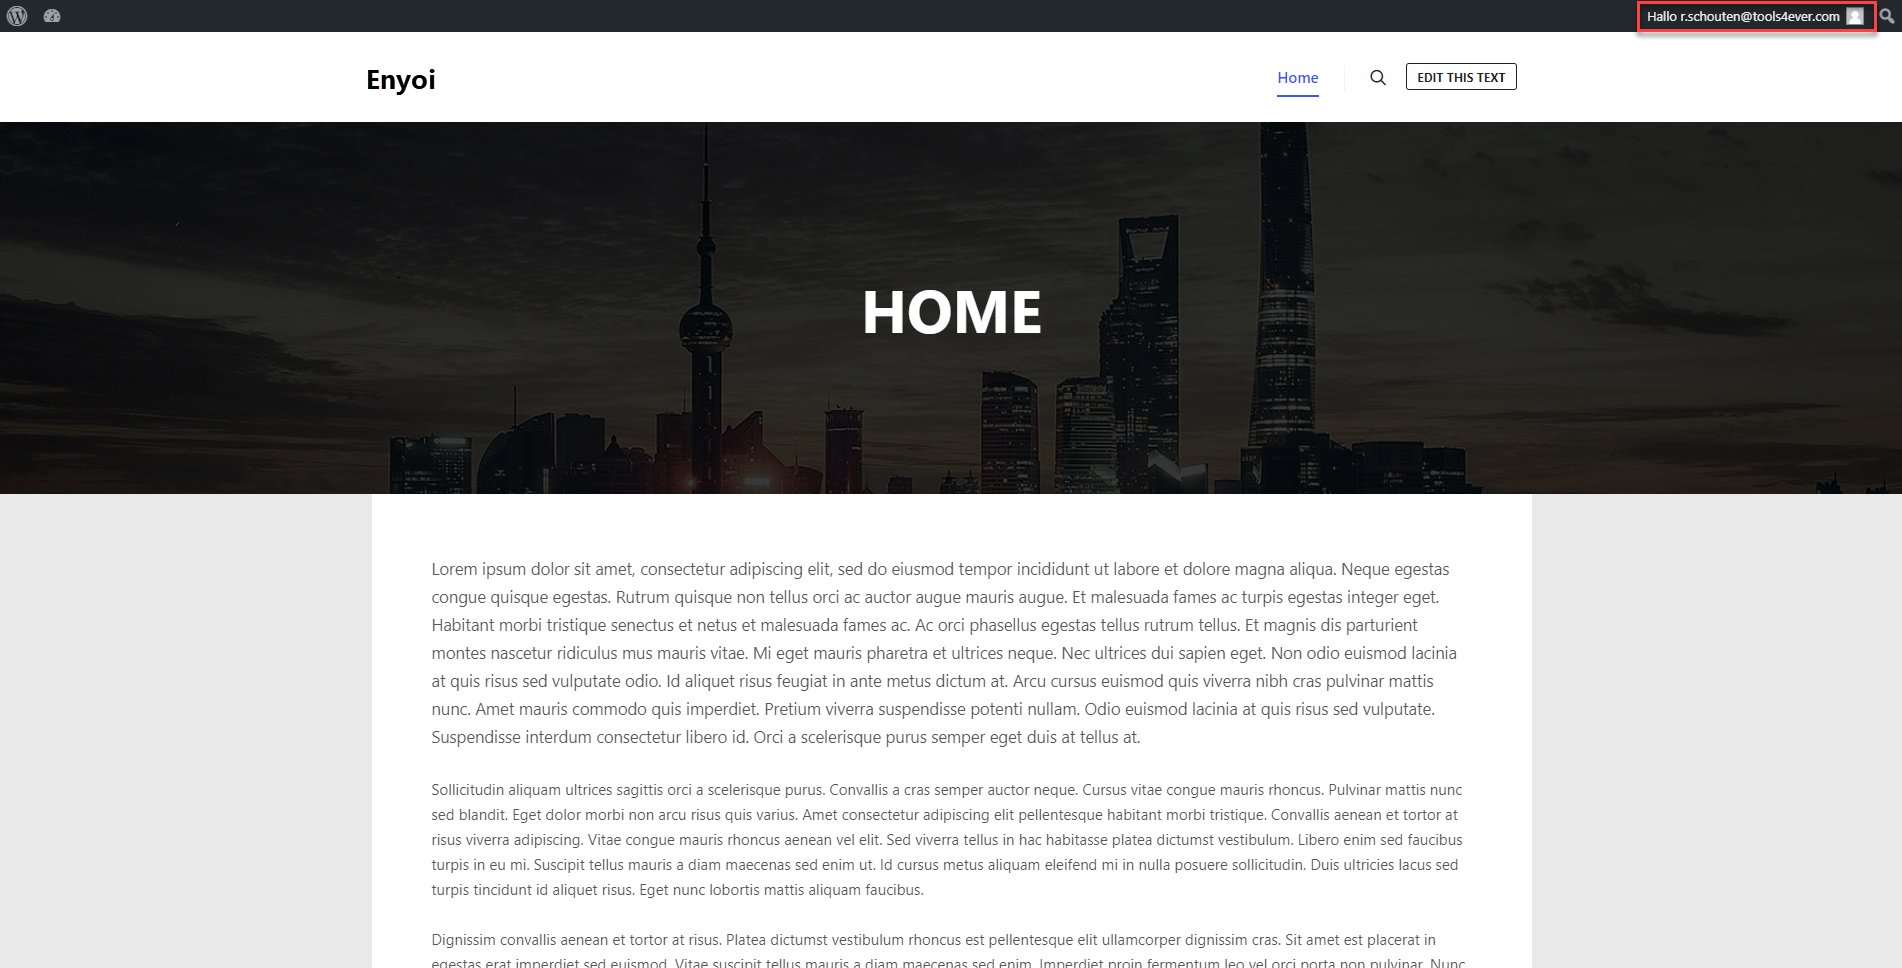
Click on the WordPress (SAML) application and you will be redirected to the WordPress page, authenticated via SAML.
Finishing Up
The WordPress application has now been added to HelloID, and a trust has been configured between WordPress and HelloID. You are now free to assign the application to users within your organization and begin testing it and using it. You can learn more about managing applications and assigning permissions here.