Overdrive Sora application setup
Introduction
This manual shows you how to make a SAML connection to Sora from Rakuten Overdrive.
Requirements:
HelloID Environment
Overdrive/Sora Environment
Gather Information from Overdrive
You will need to reach out to your Overdrive Product Support Specialist as part of this process and ask them to assist in setting up Federated Authentication for your environment. More information is available from Overdrive.
They will provide you with key pieces of information for the configuration of your SAML app in HelloID, including:
Issuer URL
ACS URL
Sign-On URL
Metadata URL
When you receive these, make note of them and continue on with these instructions.
Create or Import an Application Certificate
In order to secure communications between HelloID and the service provider, a certificate must be imported or created. This can be done in the HelloID Administrator Dashboard under Settings > Certificates. For this tutorial, we will use a self-signed certificate. Learn more about certificates here.
Import the Overdrive Certificate
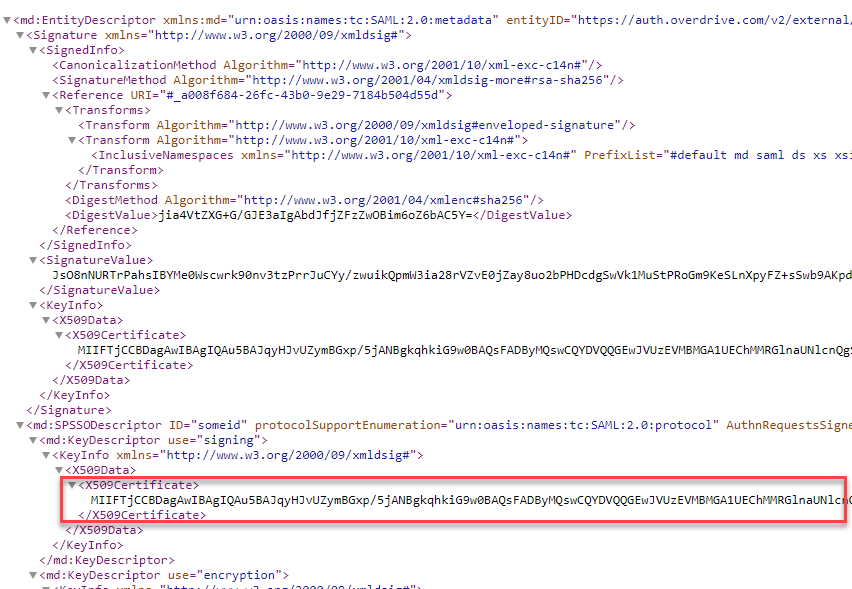
Overdrive requires the SAML assertions sent from HelloID be encrypted. In order to do this, you will need to take the X509 certificate signature that is available at the Metadata URL that Overdrive sent to you and import it into HelloID.
Open a web browser and navigate to the provided Metadata URL.
Find the <X509Certificate> node and copy its contents to your clipboard.
In the HelloID Admin Dashboard, navigate to Settings > Certificates.
Click Import Certificate.
Name the certificate "Overdrive Certificate".
Paste the copied X509 Certificate signature into the Certificate text box.
Add -----BEGIN CERTIFICATE----- and -----END CERTIFICATE----- to the beginning and end of the signature.

Click Save.
Add the Overdrive Application
Create a new application in HelloID by navigating to Applications > Applications.
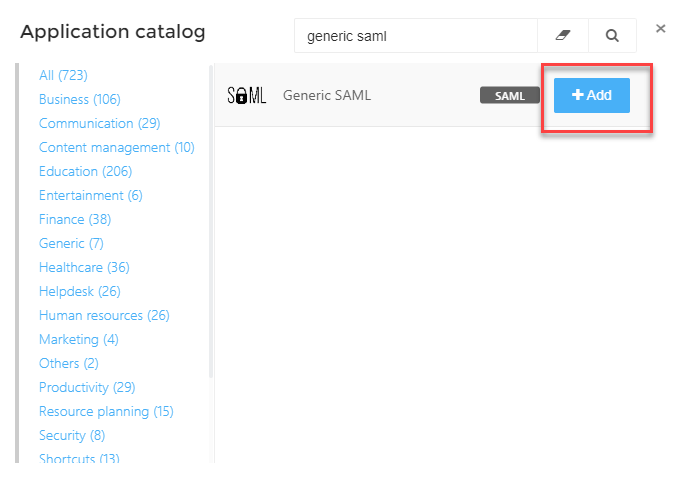
Open the Application Catalog and search for "Generic SAML". Find the Generic SAML template and click Add. Learn more about managing applications here.
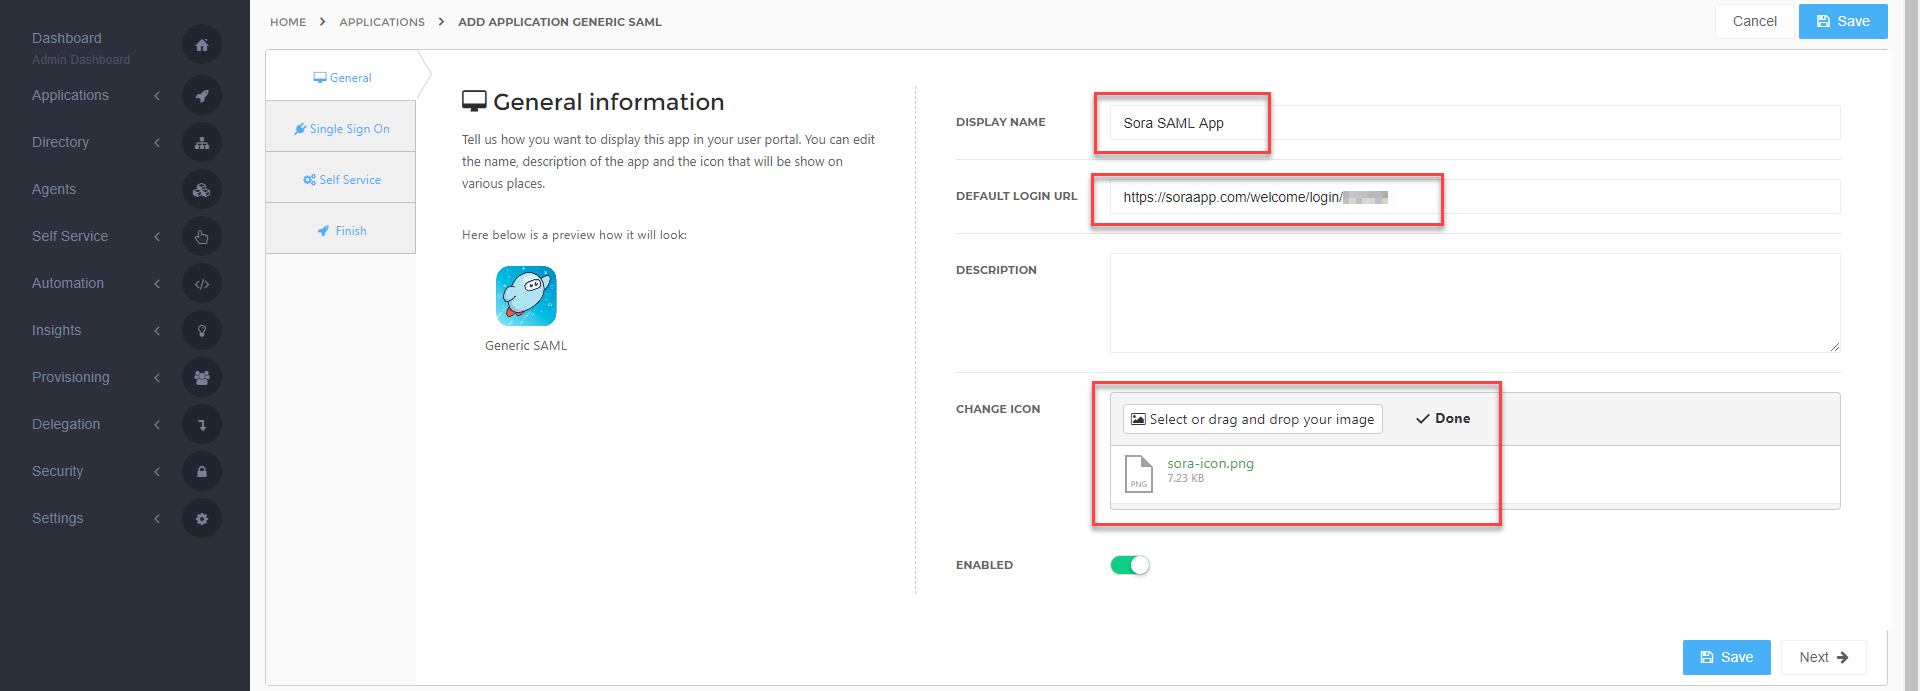
On the general tab, make the following changes and then click Next.
Change the display name of the application to Sora SAML App
Paste the Login URL from Overdrive into the Default Login URL field
Optionally, change the application icon
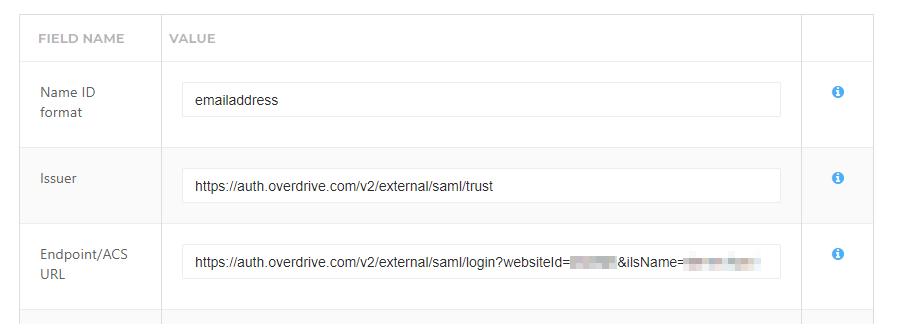
On the Single Sign-On tab, make the following changes and then click Next.
Paste the Issuer URL into the Issuer field
Paste the ACS URL into the Endpoint/ACS URL field
Select your self-signed certificate in the X509 Certificate dropdown
Enable Encrypt Assertion
Select the Overdrive certificate that you imported in the X509 Encryption Certificate dropdown
Change the Custom Digest method to sha256
Change the Custom Signature method to sha256

On the Self Service tab, leave all defaults and click Next.
On the Finish tab, click Save.
Application Metadata & Additional Configuration
After saving the Sora application, click its Edit link in the applications overview. This will bring you to the properties page.
Click the Download metadata button. This will start a download of an XML file that you will need to send to your Overdrive product support specialist.

Scroll down the page and enable Hide Application. Click Save when you are finished.
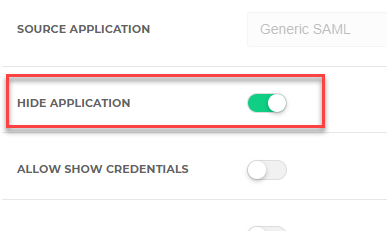
Why am I hiding the application?
At the time of this writing, Overdrive does not support Identity Provider Initiated (IdP-Initiated) authentication requests. As such, any attempt to use the SAML application directly will result in an error. Authentication attempts must first be routed through Overdrive, which will then contact HelloID for authentication (SP-Initiated). We will create a shortcut application in a later step so that this request can still be started from the HelloID portal.
Configure Attribute Mappings
Sora expects several attributes to be sent as part of the SAML authentication request. By default, the user's unique identifier (NameID) is their email address. Additional attributes should be sent that hold the grade and location values for the student accounts.
Note: In order to complete this step, you will need to have student grade and location information imported into HelloID as user attributes.
Add Grade and Location Attributes
In the HelloID Admin Dashboard, navigate to Directory > Mapping sets.
Find the Sora SAML application and click Edit.
Next to the SAML User object, click Change attributes.
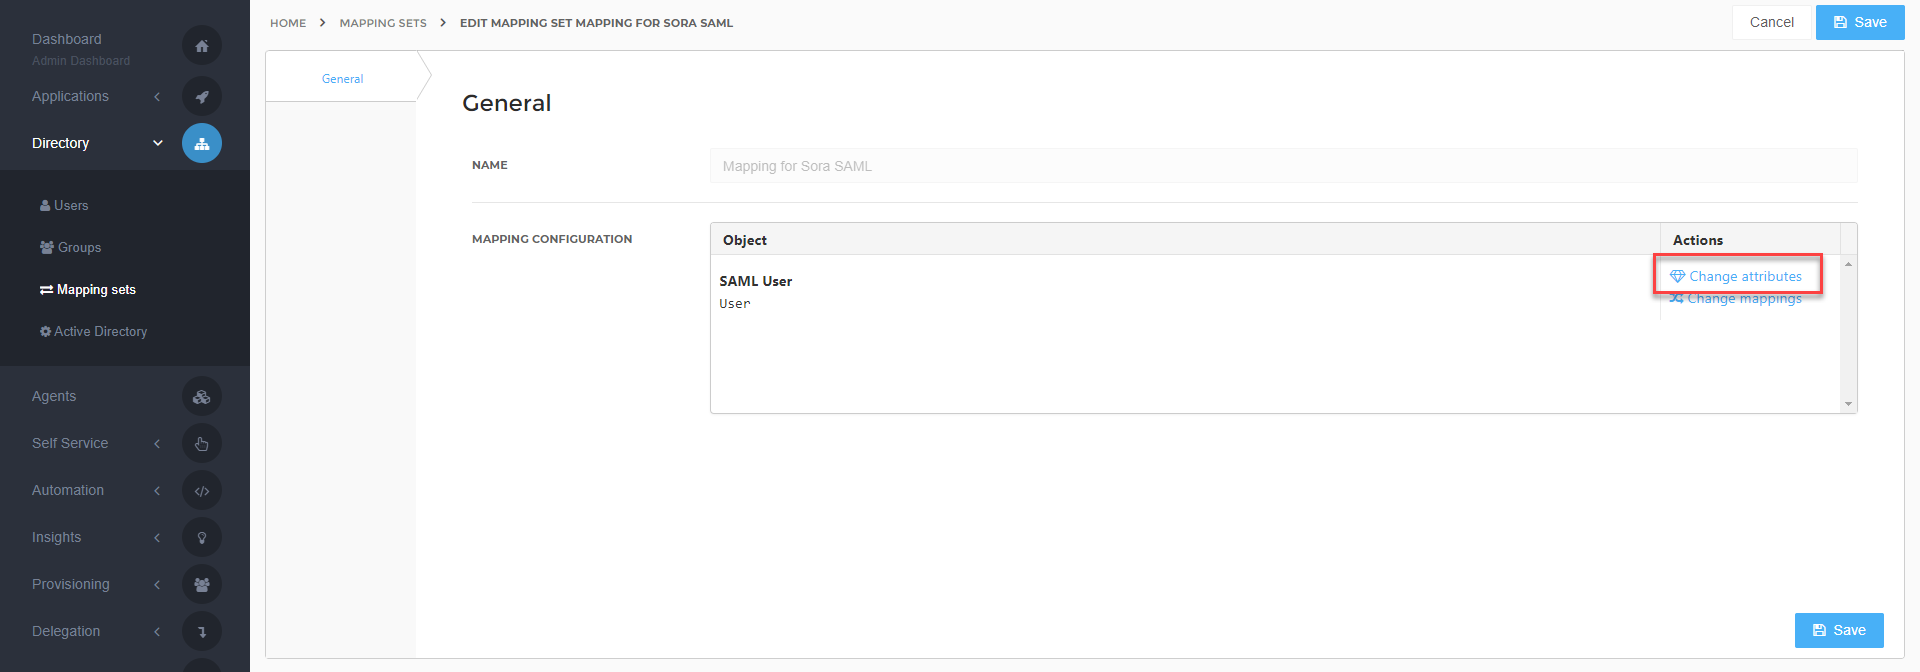
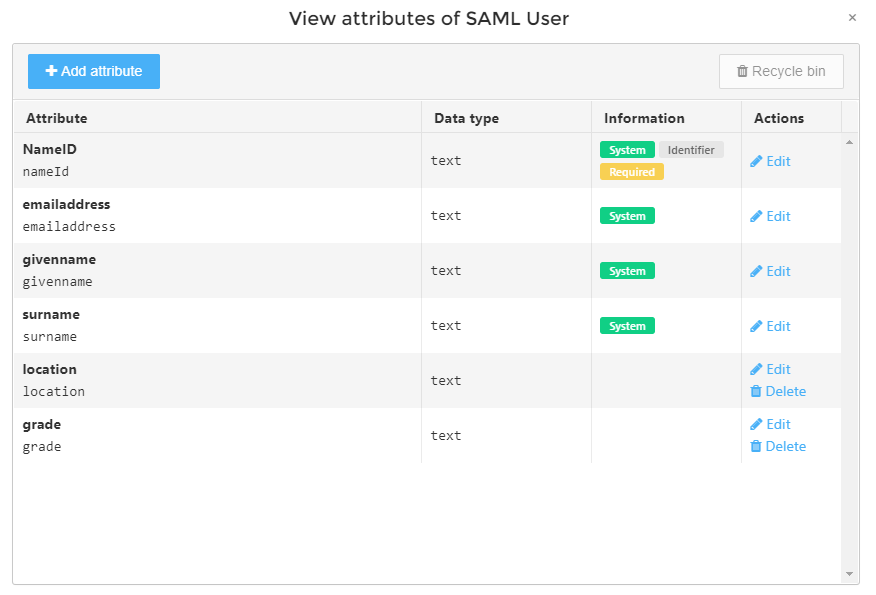
Click the Add attribute button. Add an attribute called "location". Repeat this step for an attribute called "grade".
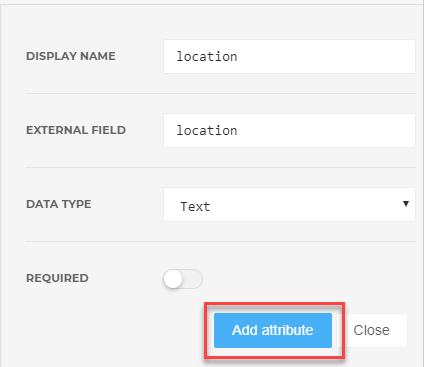
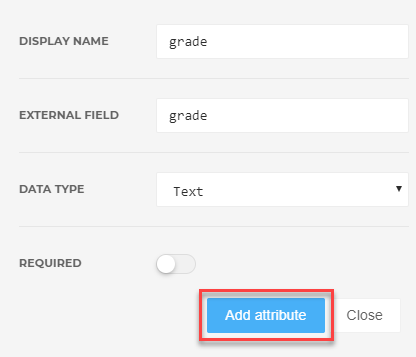
When you are finished, your attribute list should look like the screenshot below. Click Close.
Map Grade and Location Data
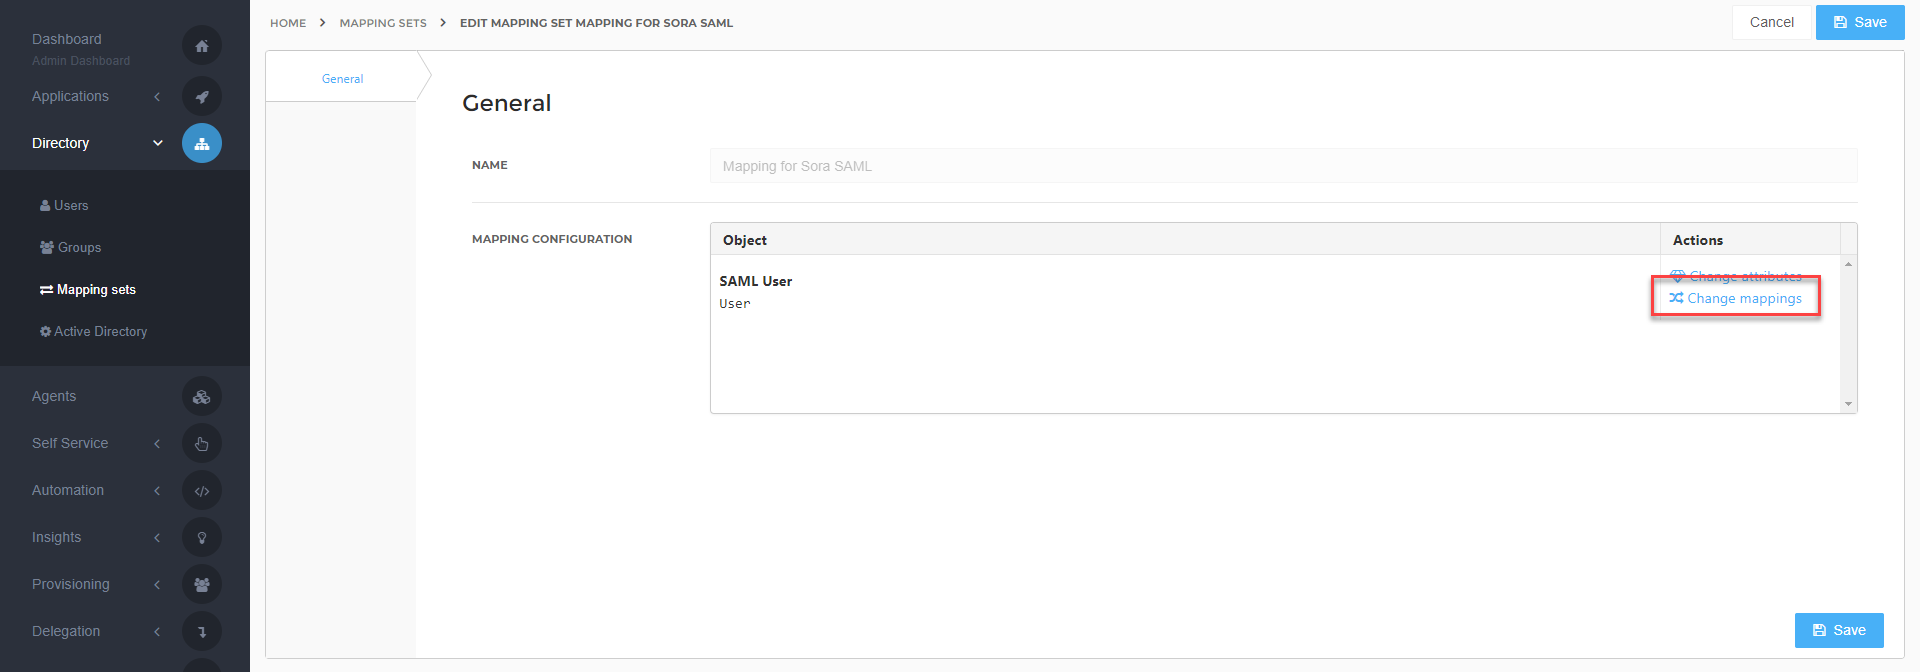
Back in the mapping set, click on Change mappings
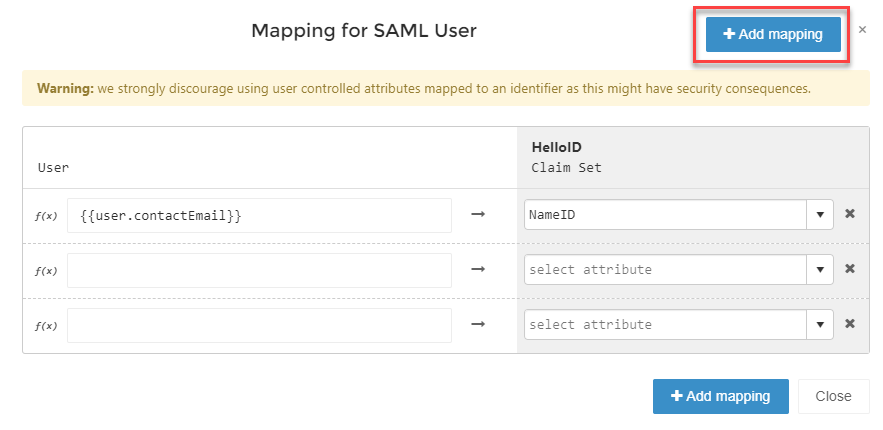
Click Add mapping twice. This will add two new rows to the mapping set.
On the HelloID Claim Set side, assign the grade and location attributes from the dropdowns.
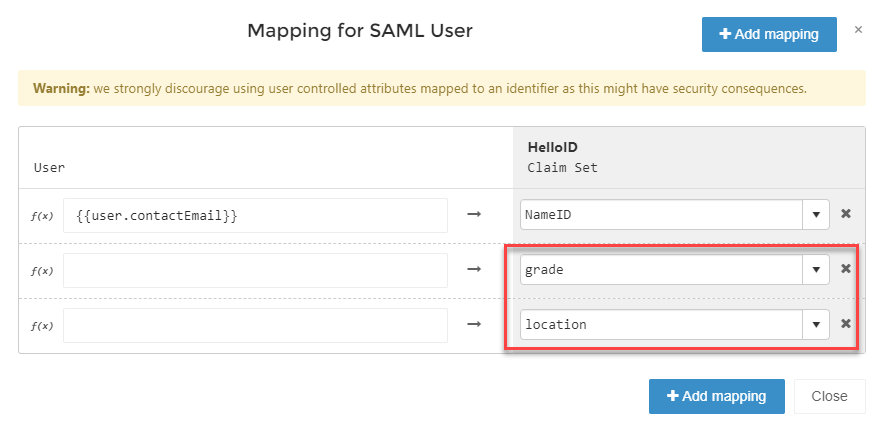
On the User side, specify the attributes from which you want to pull the grade and location data, respectively. The attributes that you are using may vary from what we show here in this article, so be sure to choose the ones that are right for you. Click Close when you are finished.
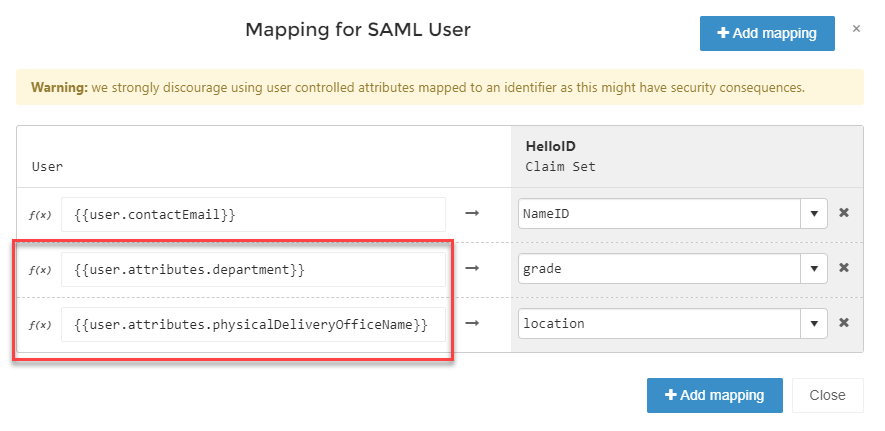
Note: As you type, the code-completion dialog may not show your intended attributes. This doesn't mean that they aren't available. If you know they exist and they have data, just keep typing.
When you have finished with the mapping updates, click the Save button. Now, when HelloID sends user information to Overdrive, grade and location information will be sent along as well from the attributes that you specified.
Add Product Shortcut
Create a new application in HelloID by navigating to Applications > Applications.
Open the Application Catalog and search for "Generic Shortcut". Find the Generic Shortcut template and click Add.
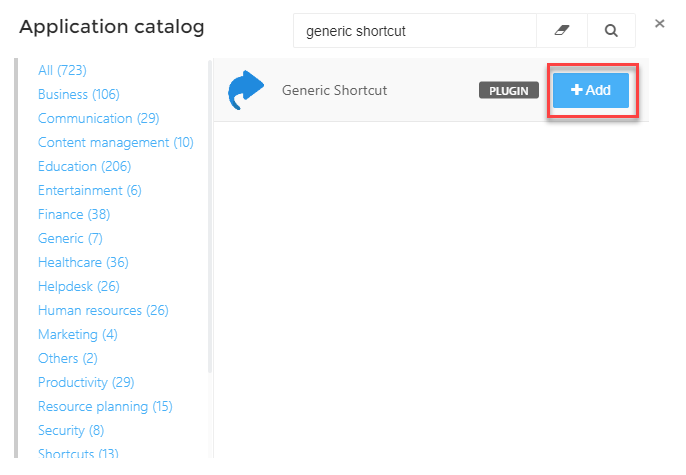
On the General tab, make the following changes and click Next.
Change the Display Name to "Sora"
Paste the provided Login URL in the Default Login URL field
Optionally, change the application icon
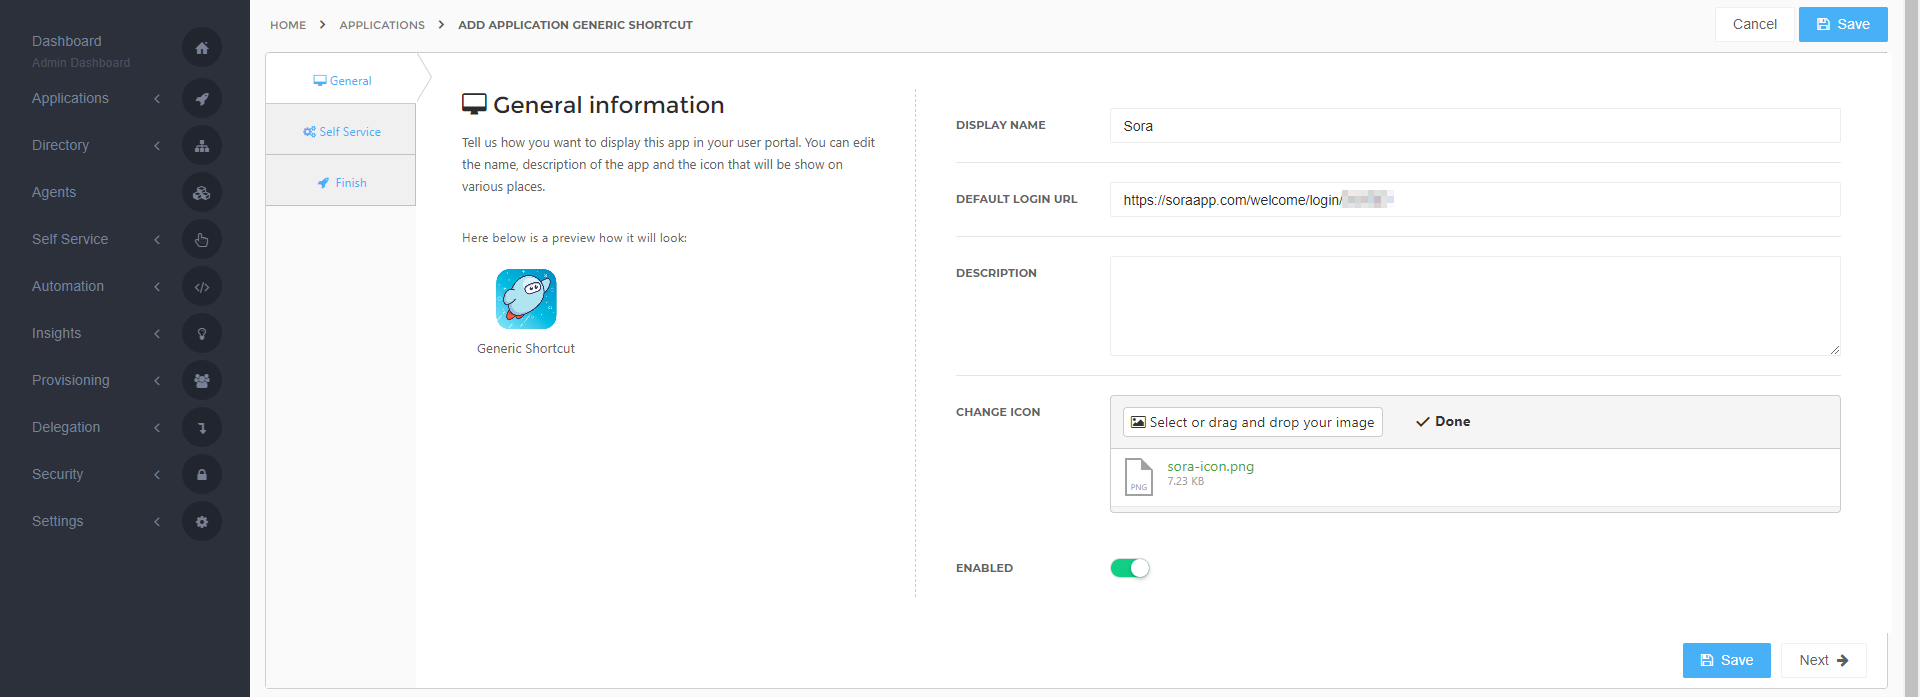
On the Self Service tab, leave all defaults and click Next
On the Finish tab, click Save.
Test the Integration
After you have added the product shortcut, authorized users will see the application icon on their HelloID User Dashboard. When they click on the shortcut, their browser will be directed to the Overdrive sign-in page. When they choose to sign in, their sign-in request will be directed back to HelloID, authenticated, and sent back to Overdrive. If successful, the user will be allowed into the Sora application.