Add Azure AD user mappings
When enabling Entra ID directory sync (previously: Azure AD), you may need to add one or two user Azure AD sync mappings.
Add user mappings only when your HelloID modules depend on attributes that are not automatically included in the default synchronization.
Access Management: Add
employeeIdif your SSO applications rely on this attribute.Service Automation: Add
manager.idif product requests must be approved by a user’s manager and HelloID is not configured as a target system in Provisioning (which is the preferred setup).
Caution
After enabling directory synchronization, it may take some time before these attributes appear in HelloID.
Added attributes are only synchronized after a user update in Entra ID, not during initial provisioning or sync restarts.
For manager data, synchronization occurs only after the manager account exists in HelloID. Until then, Entra ID retries may cause the SCIM task to enter a quarantine state. For more information, see Quarantine status in Microsoft Entra Application Provisioning – Microsoft Learn.
Log in to your Azure portal at https://portal.azure.com/.
Go to Enterprise Applications > HelloID > Provisioning.
Click Edit Attribute Mappings.
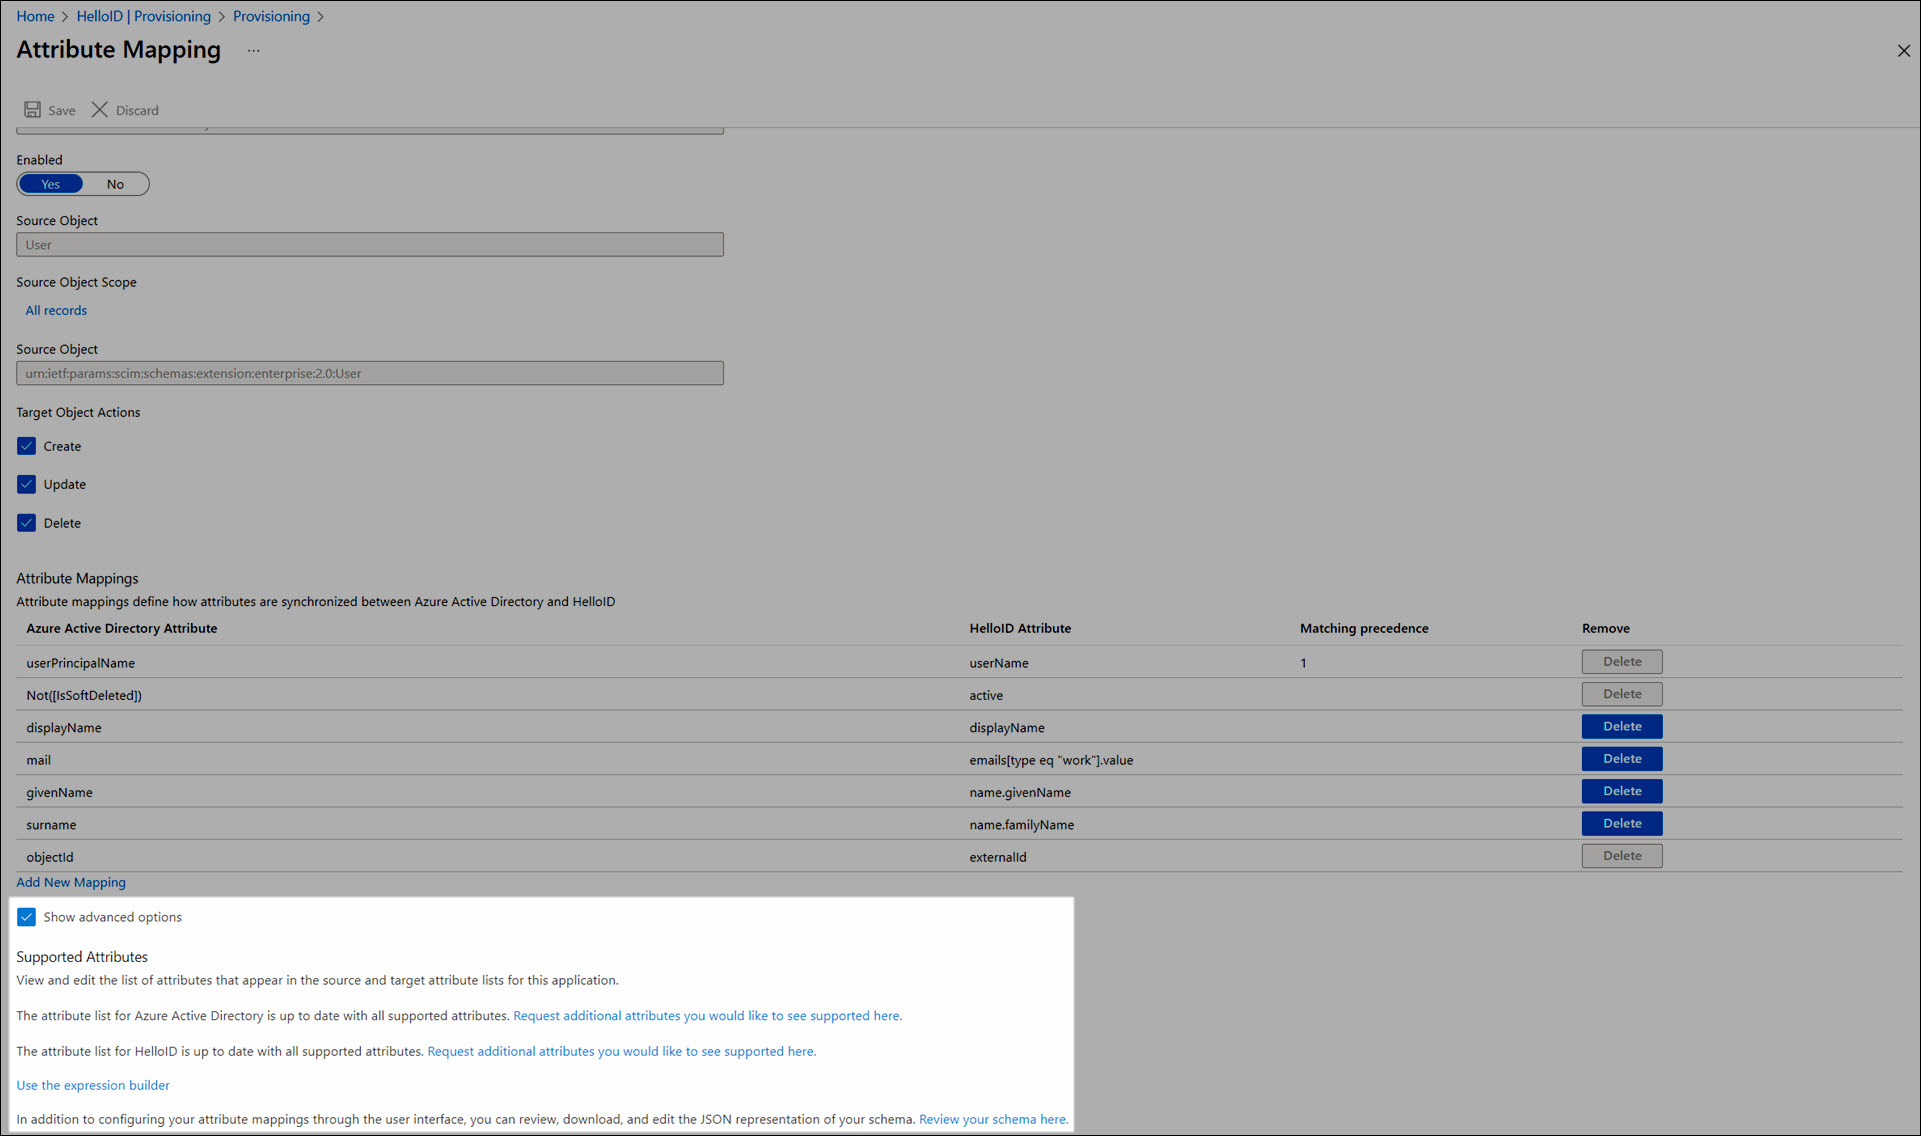
Click Provision Microsoft Entra ID Users.
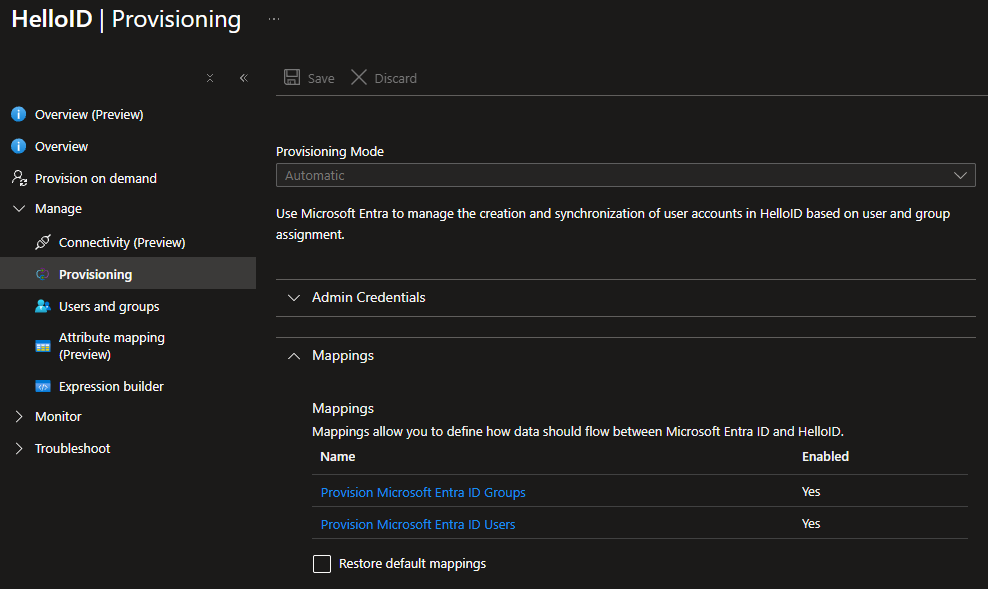
Go to Show Advanced Options > Review Your Schema Here.
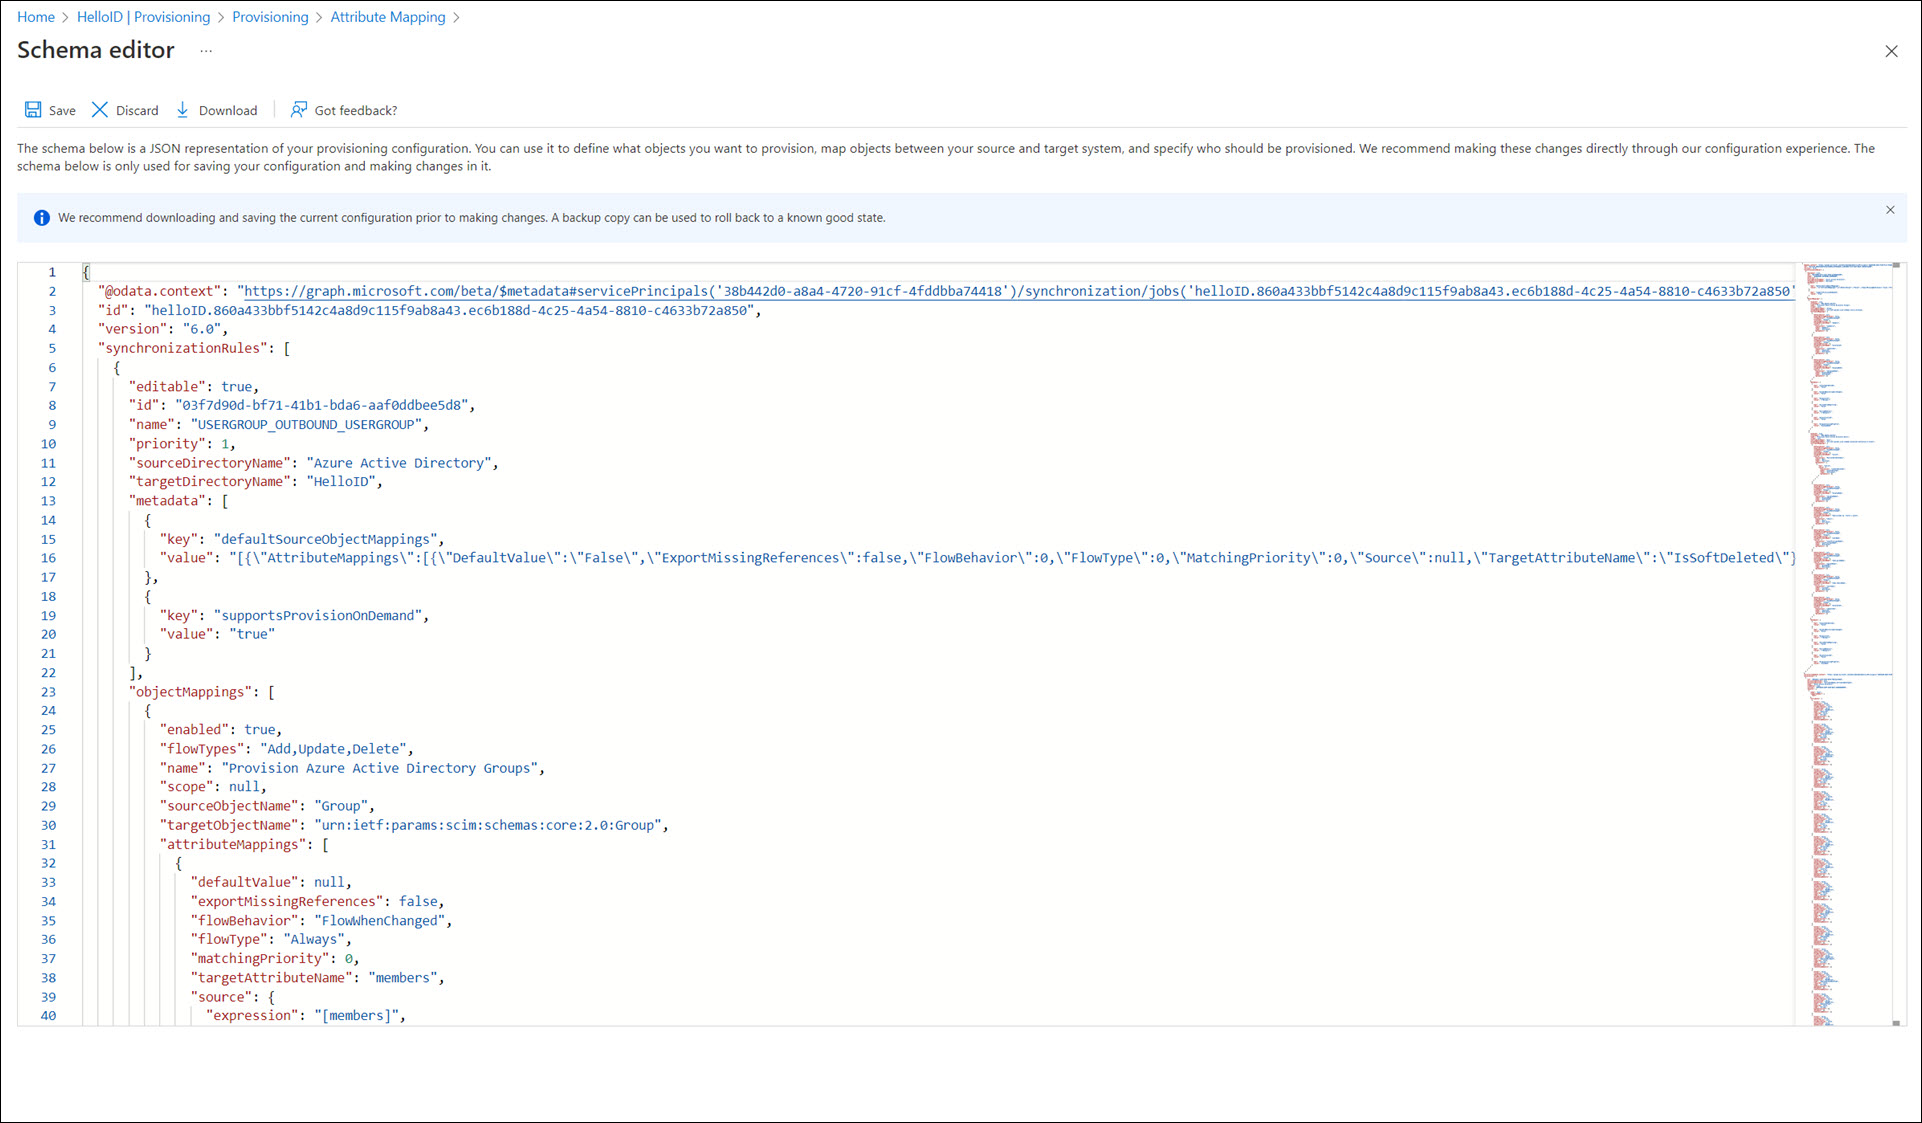
In the schema, add the
employeeIdand/ormanager.idattributes:Press Ctrl+F and search for
"name": "emails[type eq \"work\"].value",This takes you to the
object.directories[1].objects[1].attributessection, whereobject.directories[1].nameisHelloID, andobject.directories[1].objects[1].nameisurn:ietf:params:scim:schemas:extension:enterprise:2.0:User.Depending on which attribute is needed, add:
{
  "anchor": false,
  "caseExact": false,
  "defaultValue": null,
  "flowNullValues": false,
  "multivalued": false,
  "mutability": "ReadWrite",
  "name": "employeeId",
  "required": false,
  "type": "String",
  "apiExpressions": [],
  "metadata": [],
  "referencedObjects": []
}
and/or
{
  "anchor": false,
  "caseExact": false,
  "defaultValue": null,
  "flowNullValues": false,
  "multivalued": false,
  "mutability": "ReadWrite",
  "name": "manager.id",
  "required": false,
  "type": "String",
  "apiExpressions": [],
  "metadata": [],
  "referencedObjects": []
}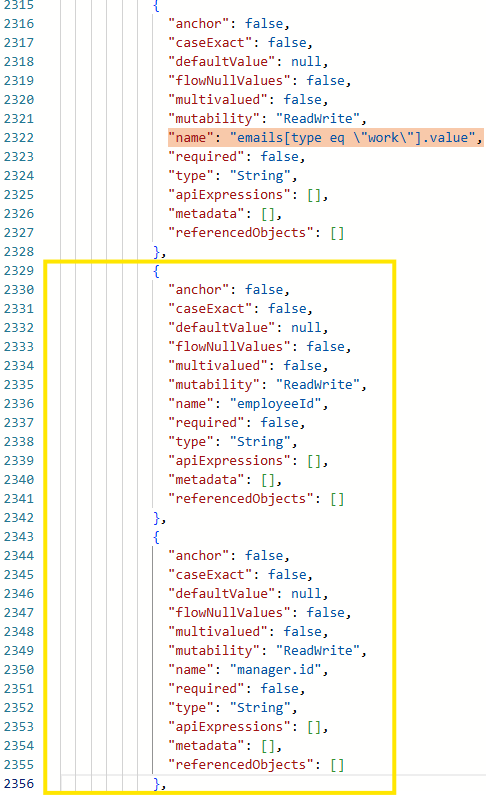
Click Save to return to the Attribute Mapping page.
Add the associated mapping(s):
Click Add New Mapping and add a mapping for each attribute that was added to the schema:
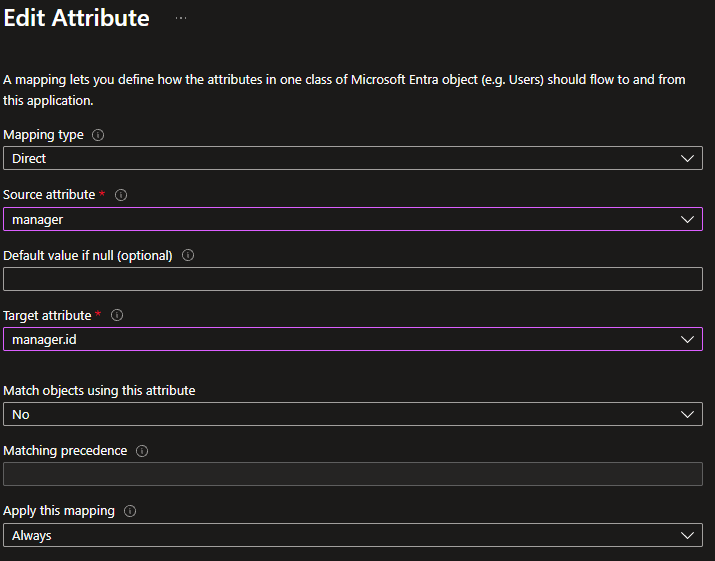
For
employeeId:Under Source attribute, select employeeId
Under Target attribute, select employeeId
For
manager.id:Under Source attribute, select manager
Under Target attribute, select manager.id
Click OK.
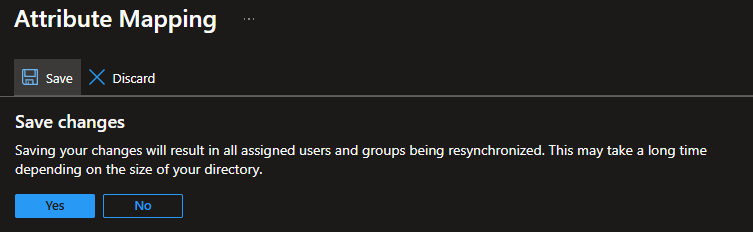
Back in the Attribute Mapping page, click Save and then Yes to confirm.
The attributes have now been added to the list.
