Enable Azure AD sync
Important
An advanced setup tutorial can also be found at https://learn.microsoft.com/en-us/azure/active-directory/saas-apps/helloid-provisioning-tutorial.
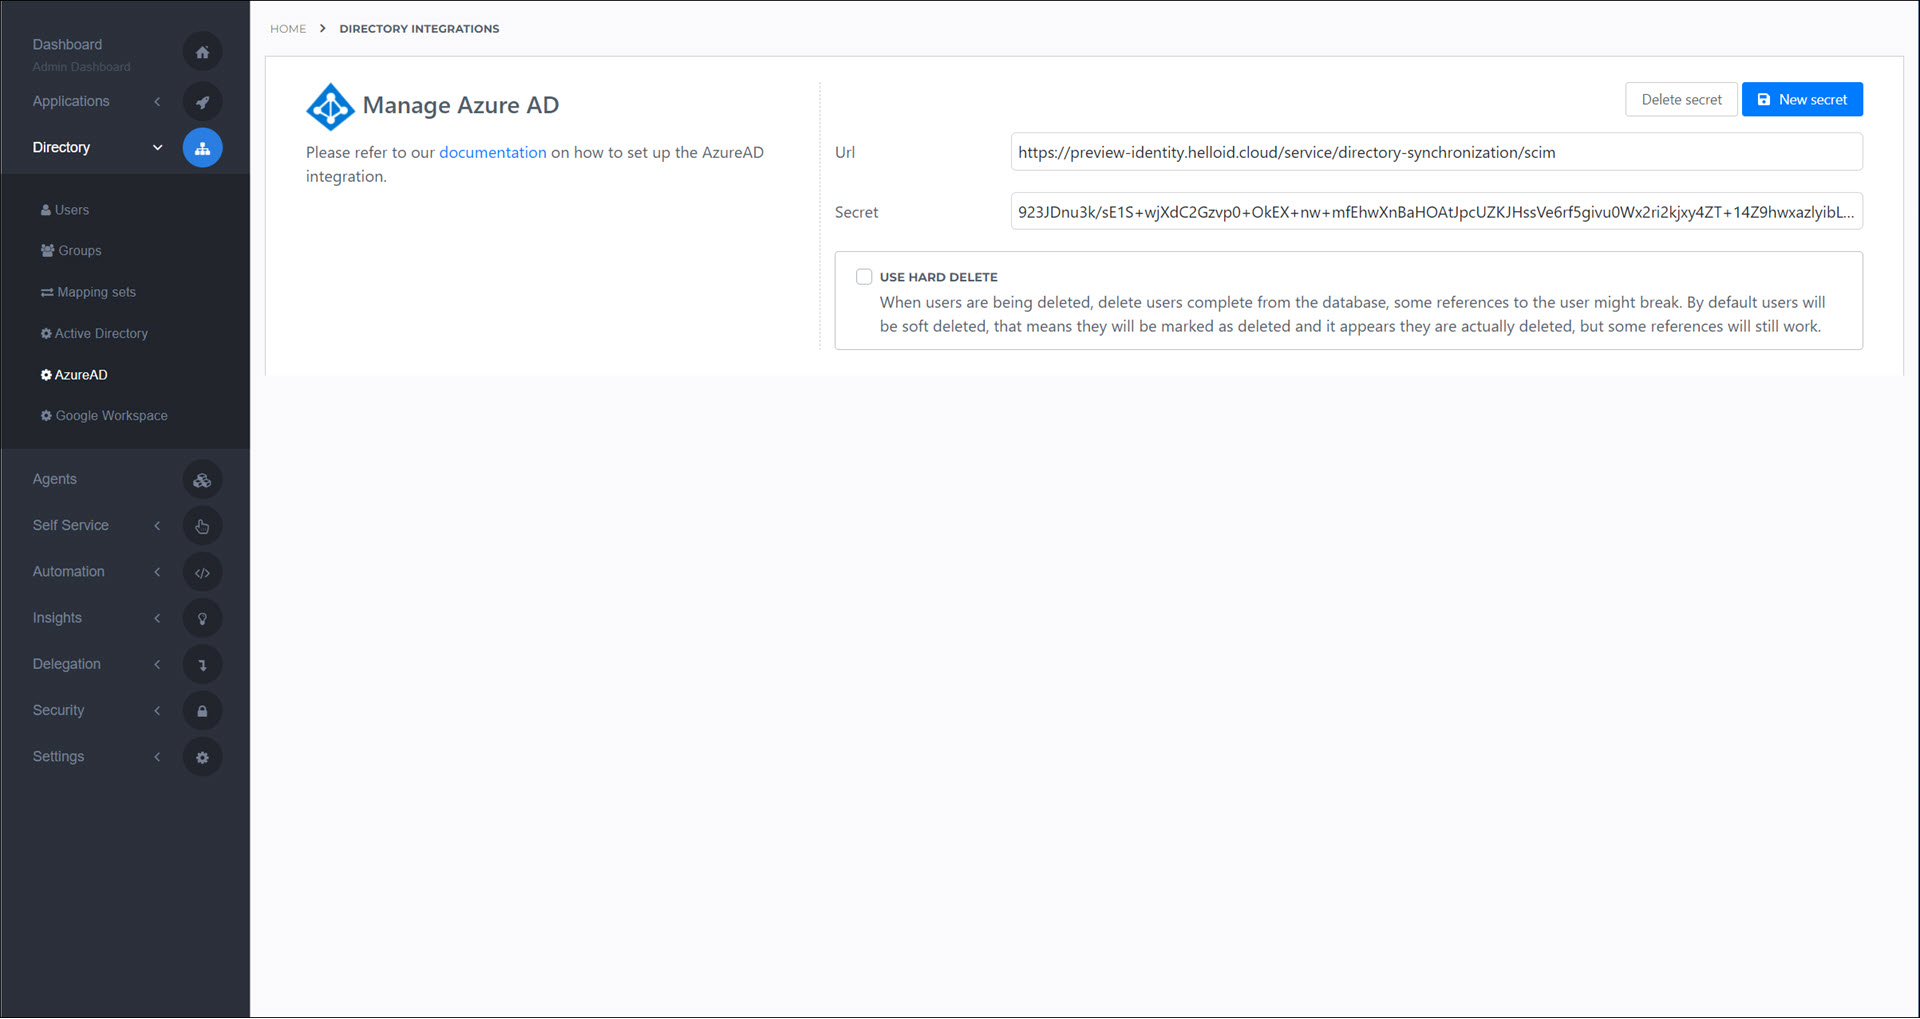
Go to Directory > Azure AD.
Click New Secret. The URL and Secret fields are automatically populated.
Log in to your Azure portal at https://portal.azure.com/.
Under Azure Services, click Microsoft Entra ID.

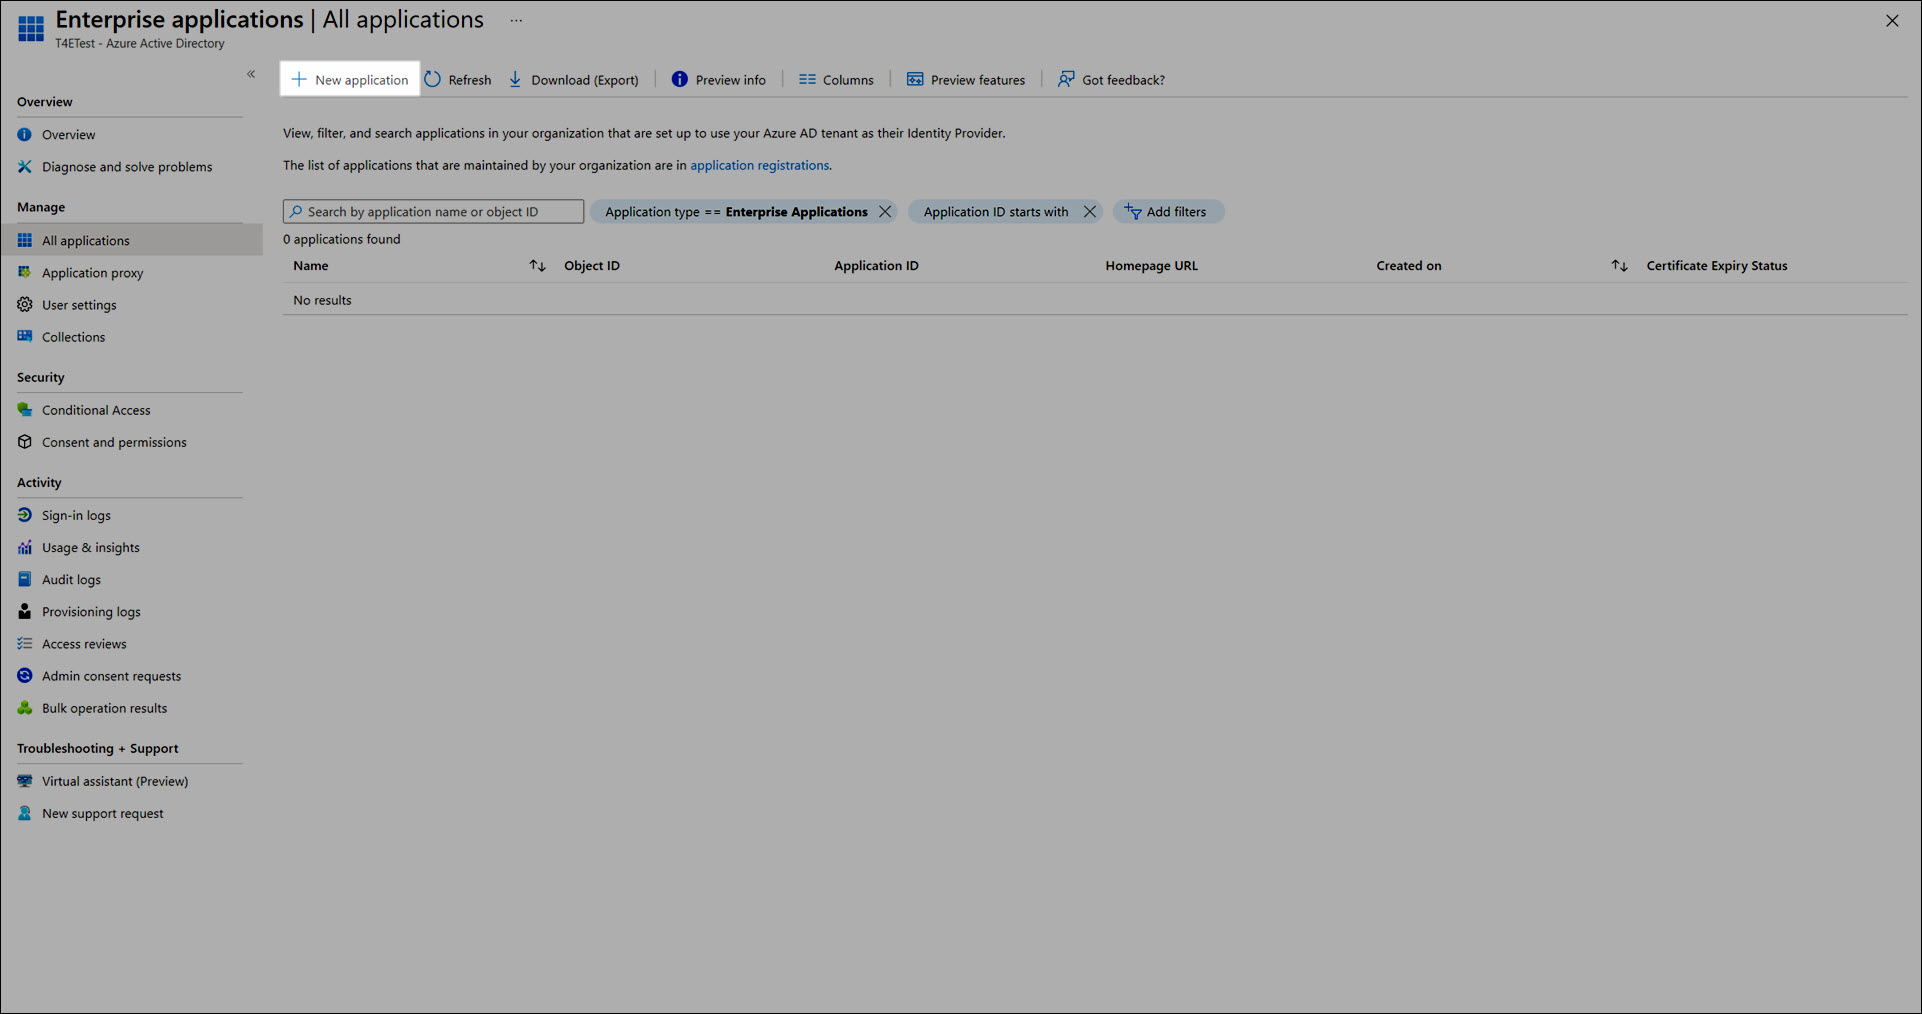
In the Manage menu, go to Enterprise Applications.
Click New Application.
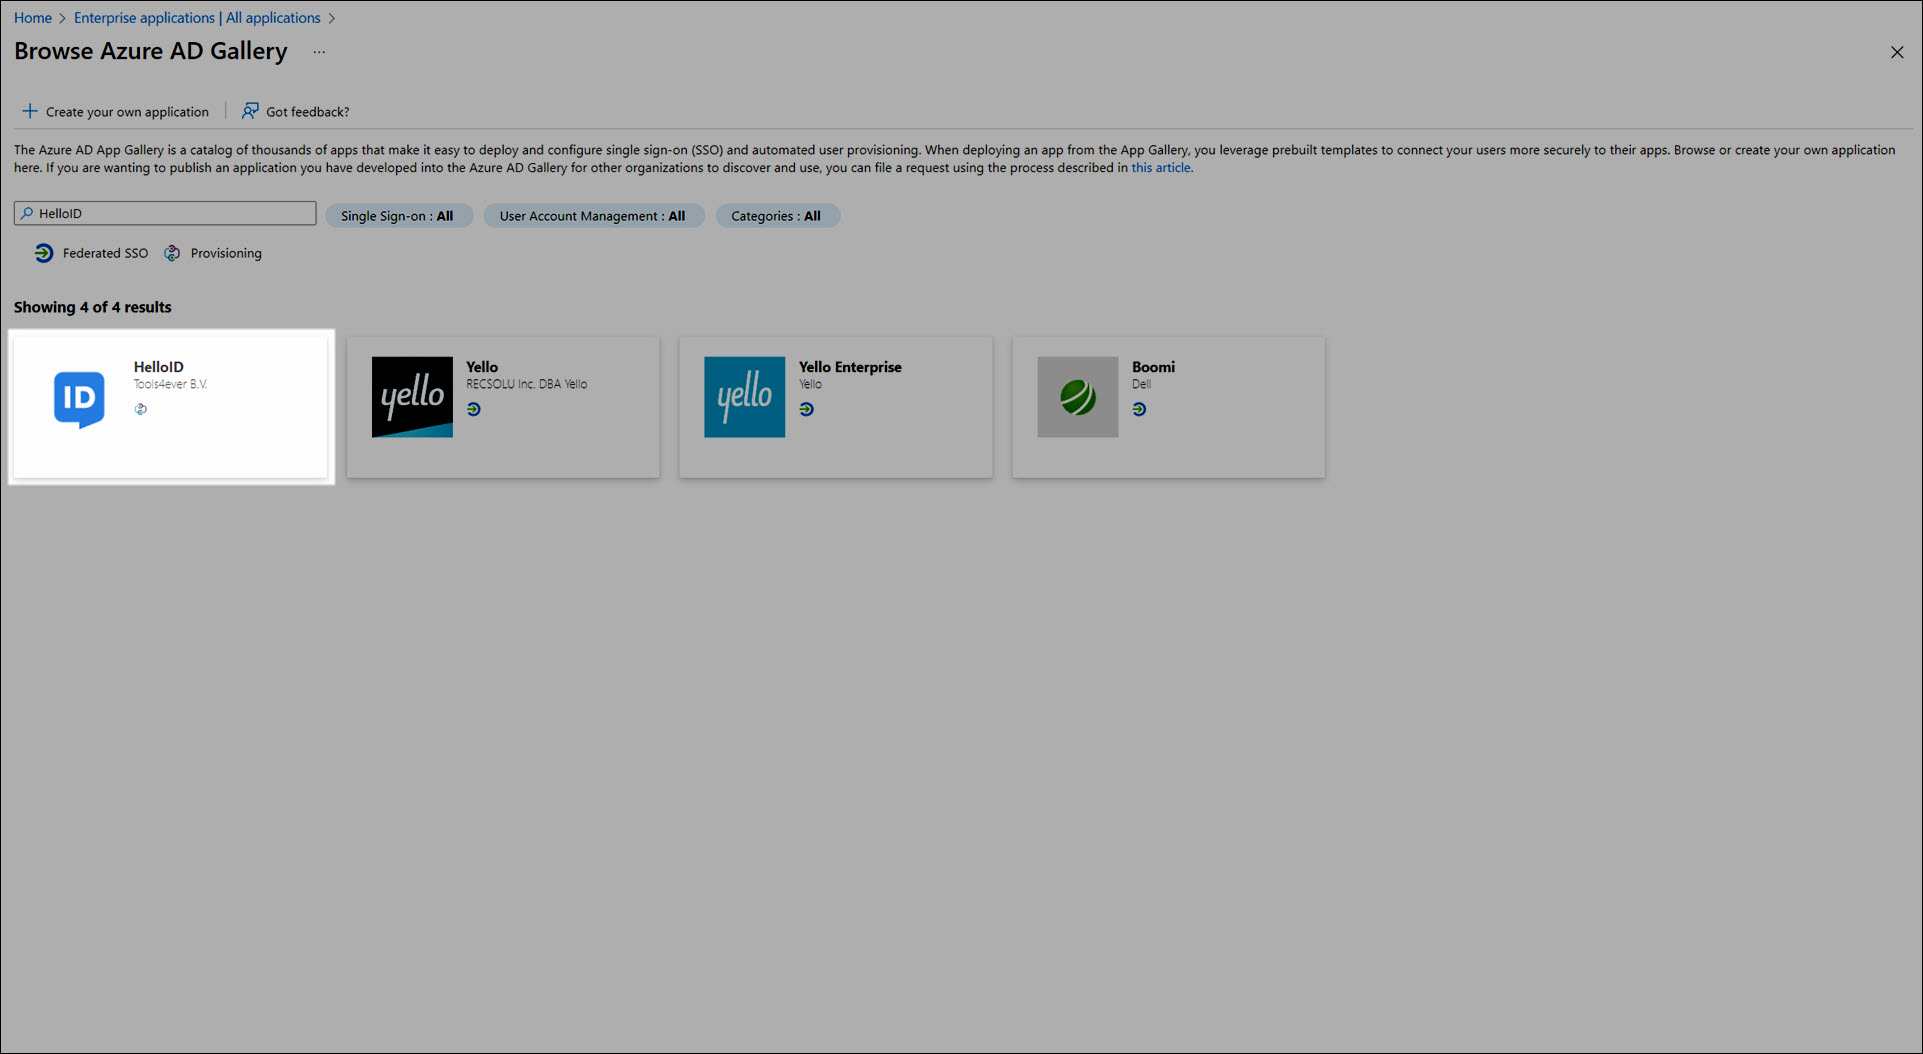
In the search box, enter
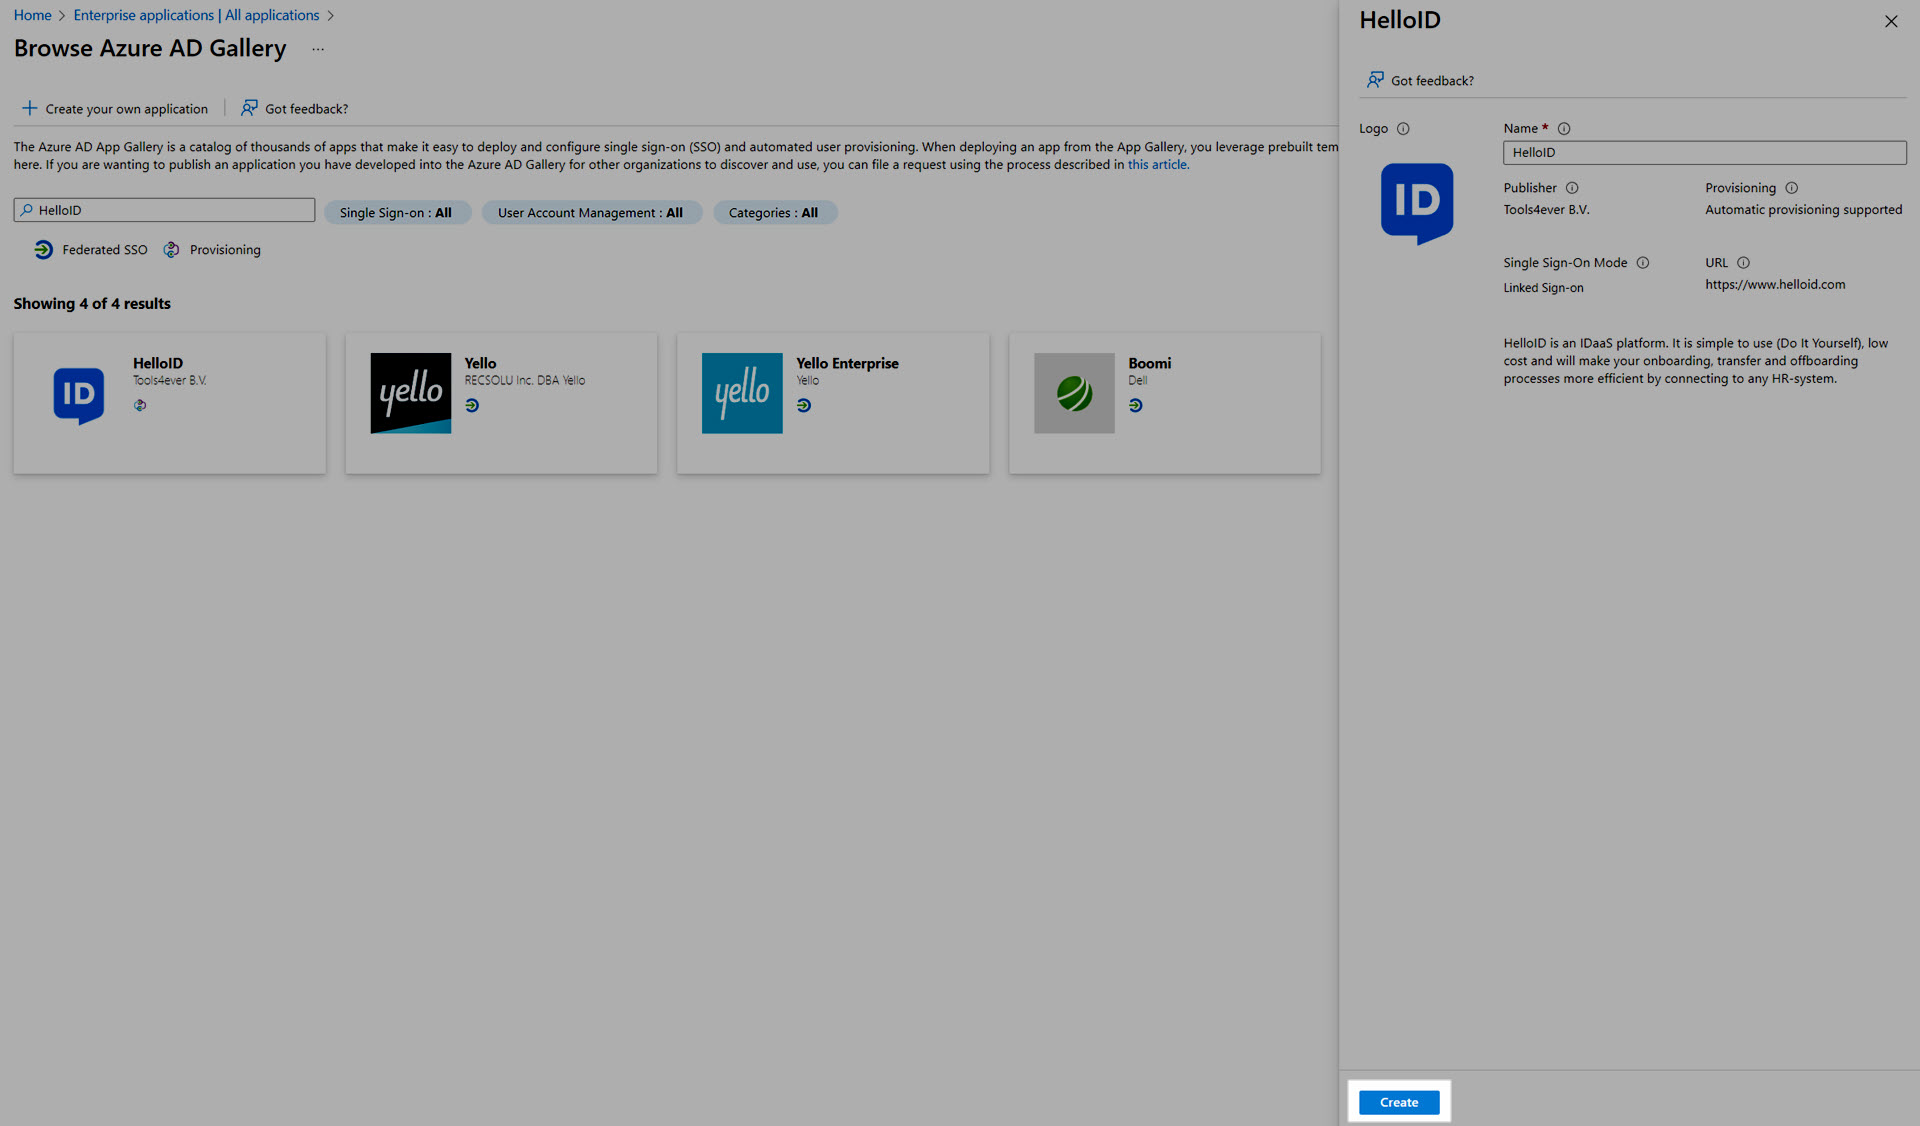
HelloID.Click the HelloID tile in the search results.
Click Create.
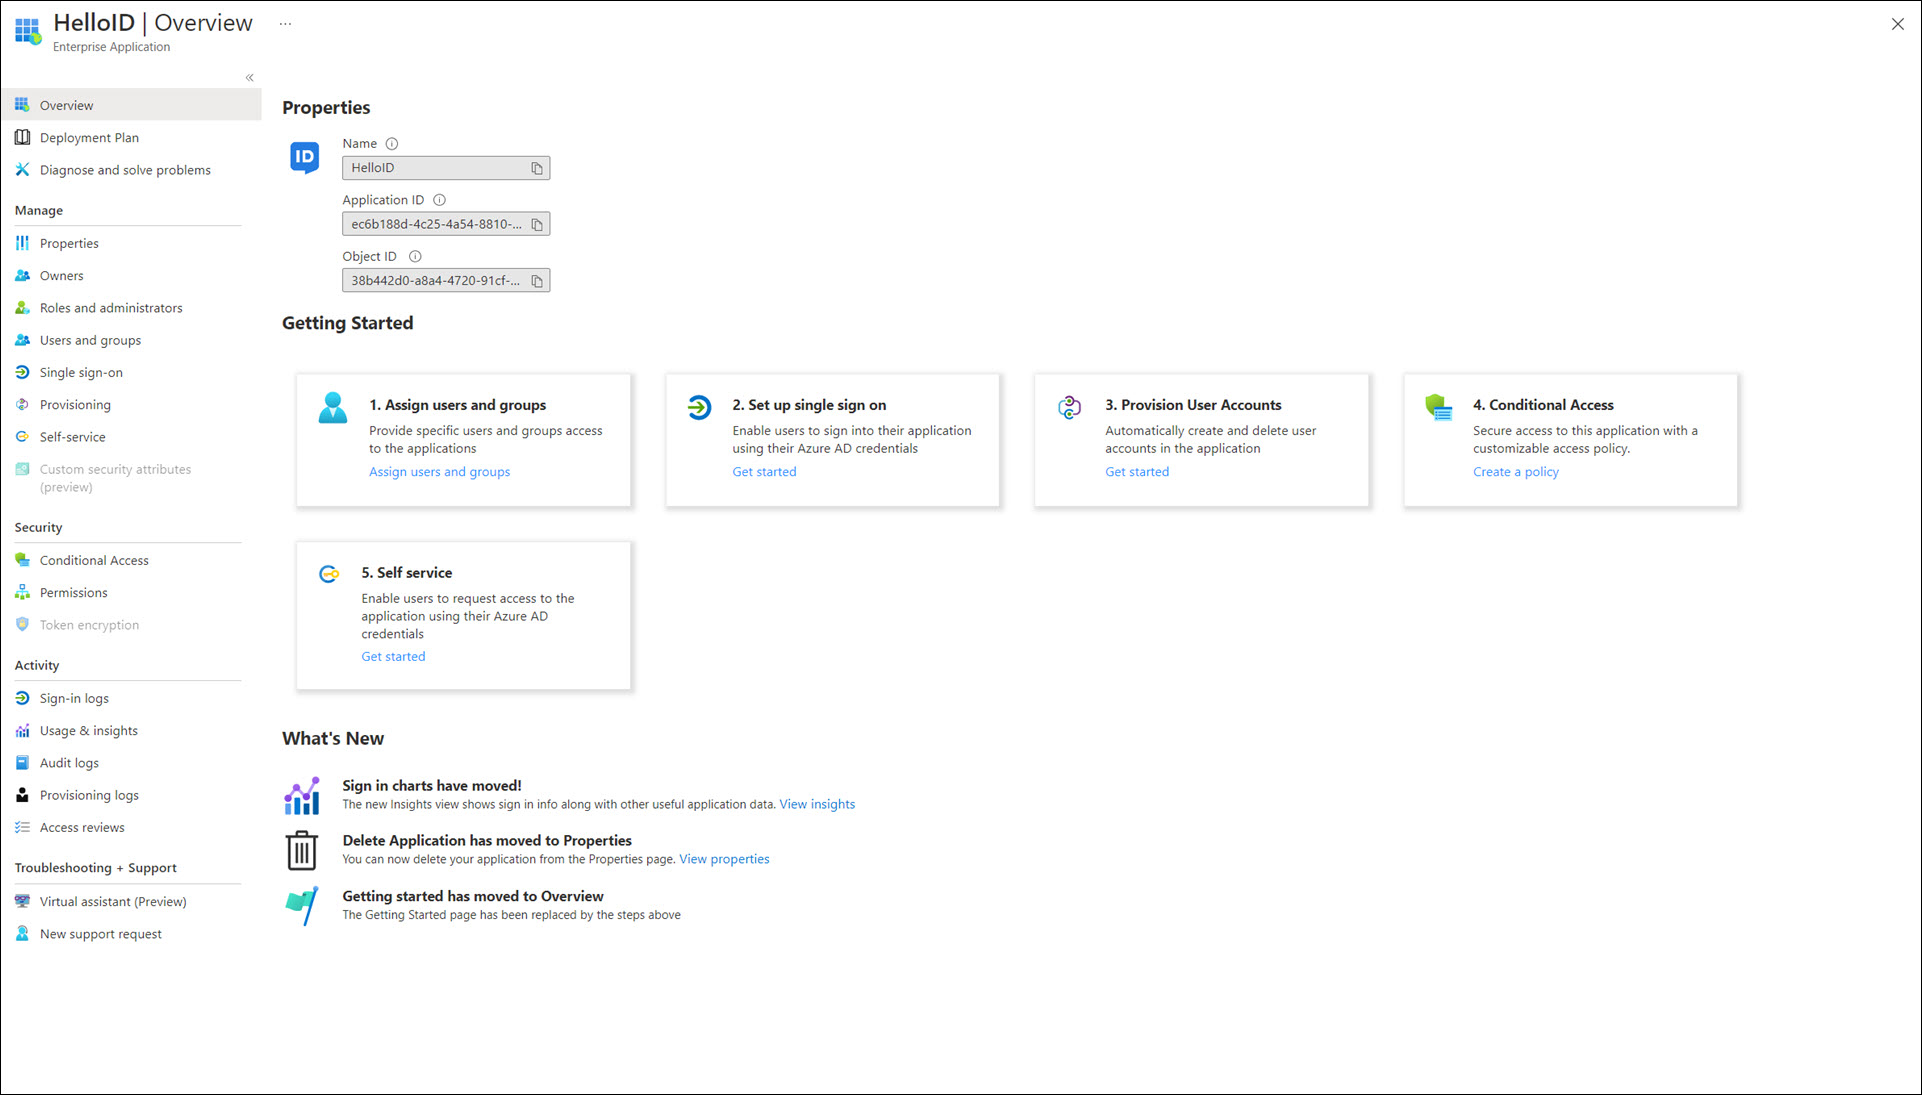
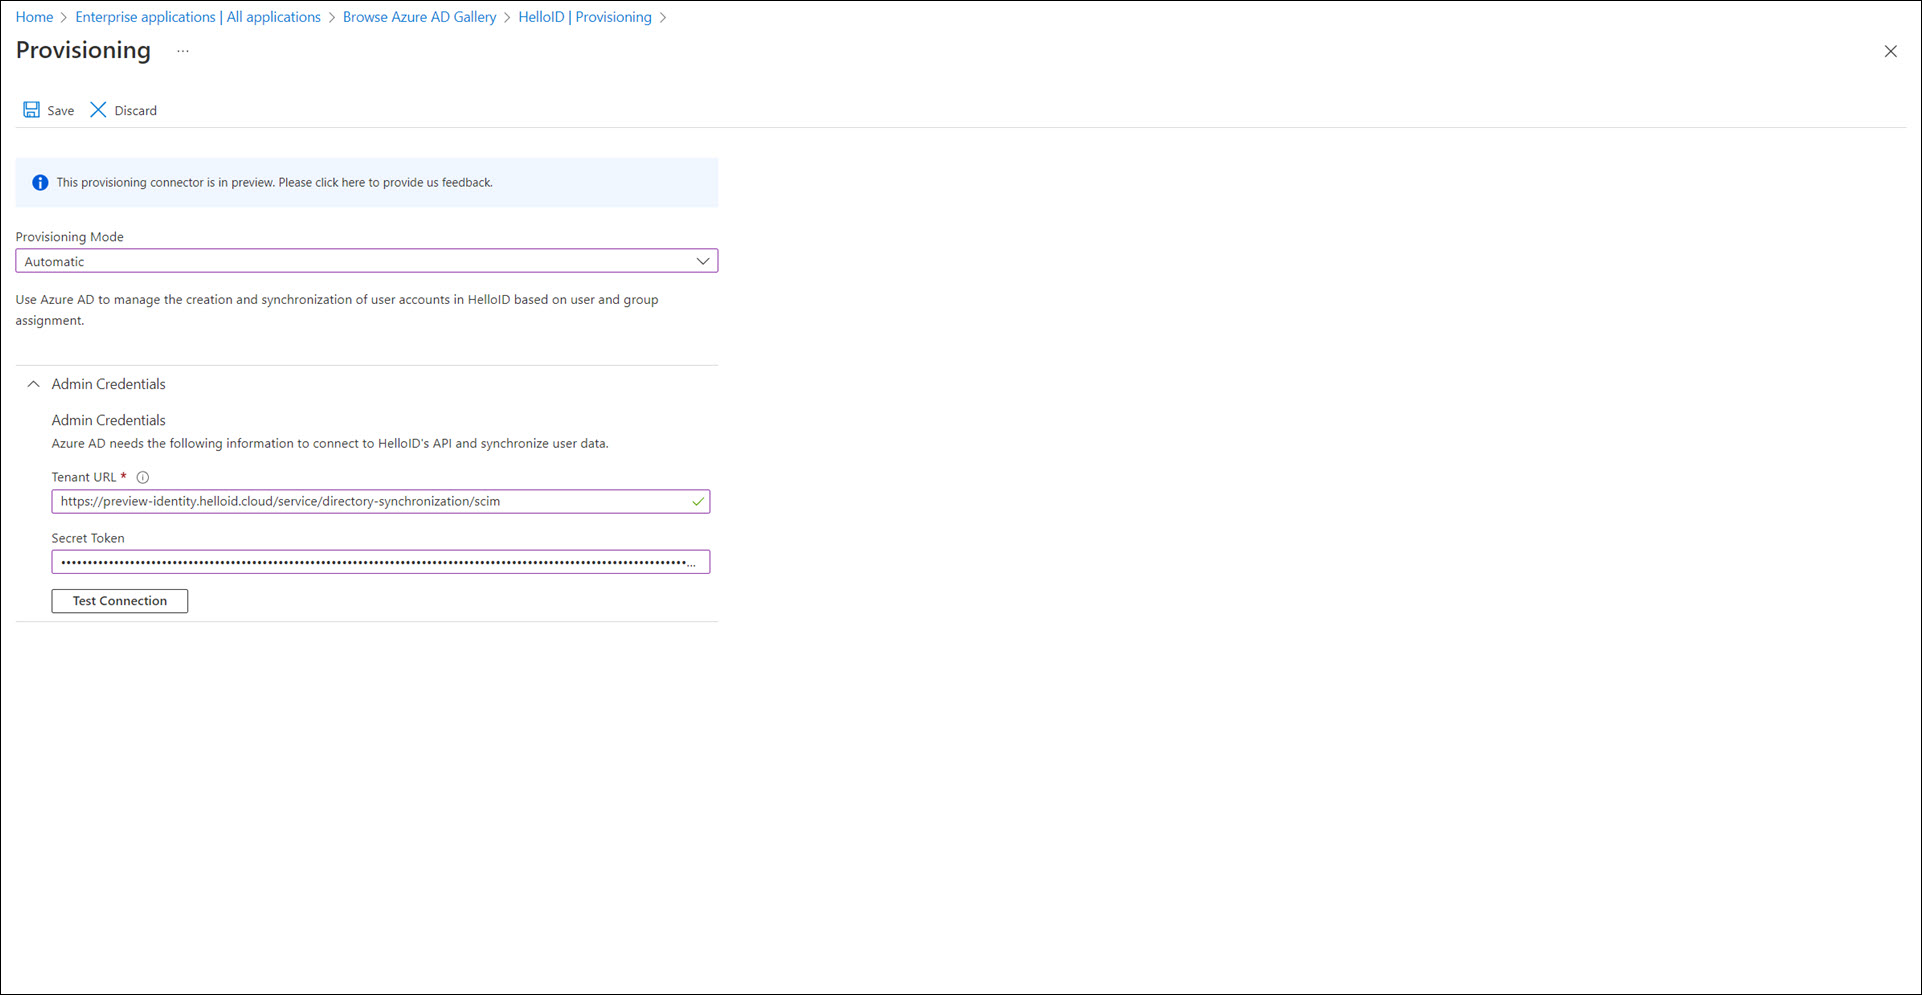
In the Manage menu, click Provisioning.
Click Get Started.
Change the Provisioning Mode to Automatic.
Copy the URL value from HelloID and paste it into Azure/EntraID's Tenant URL field.
Copy the Secret value from HelloID and paste it into Azure's Secret Token field.
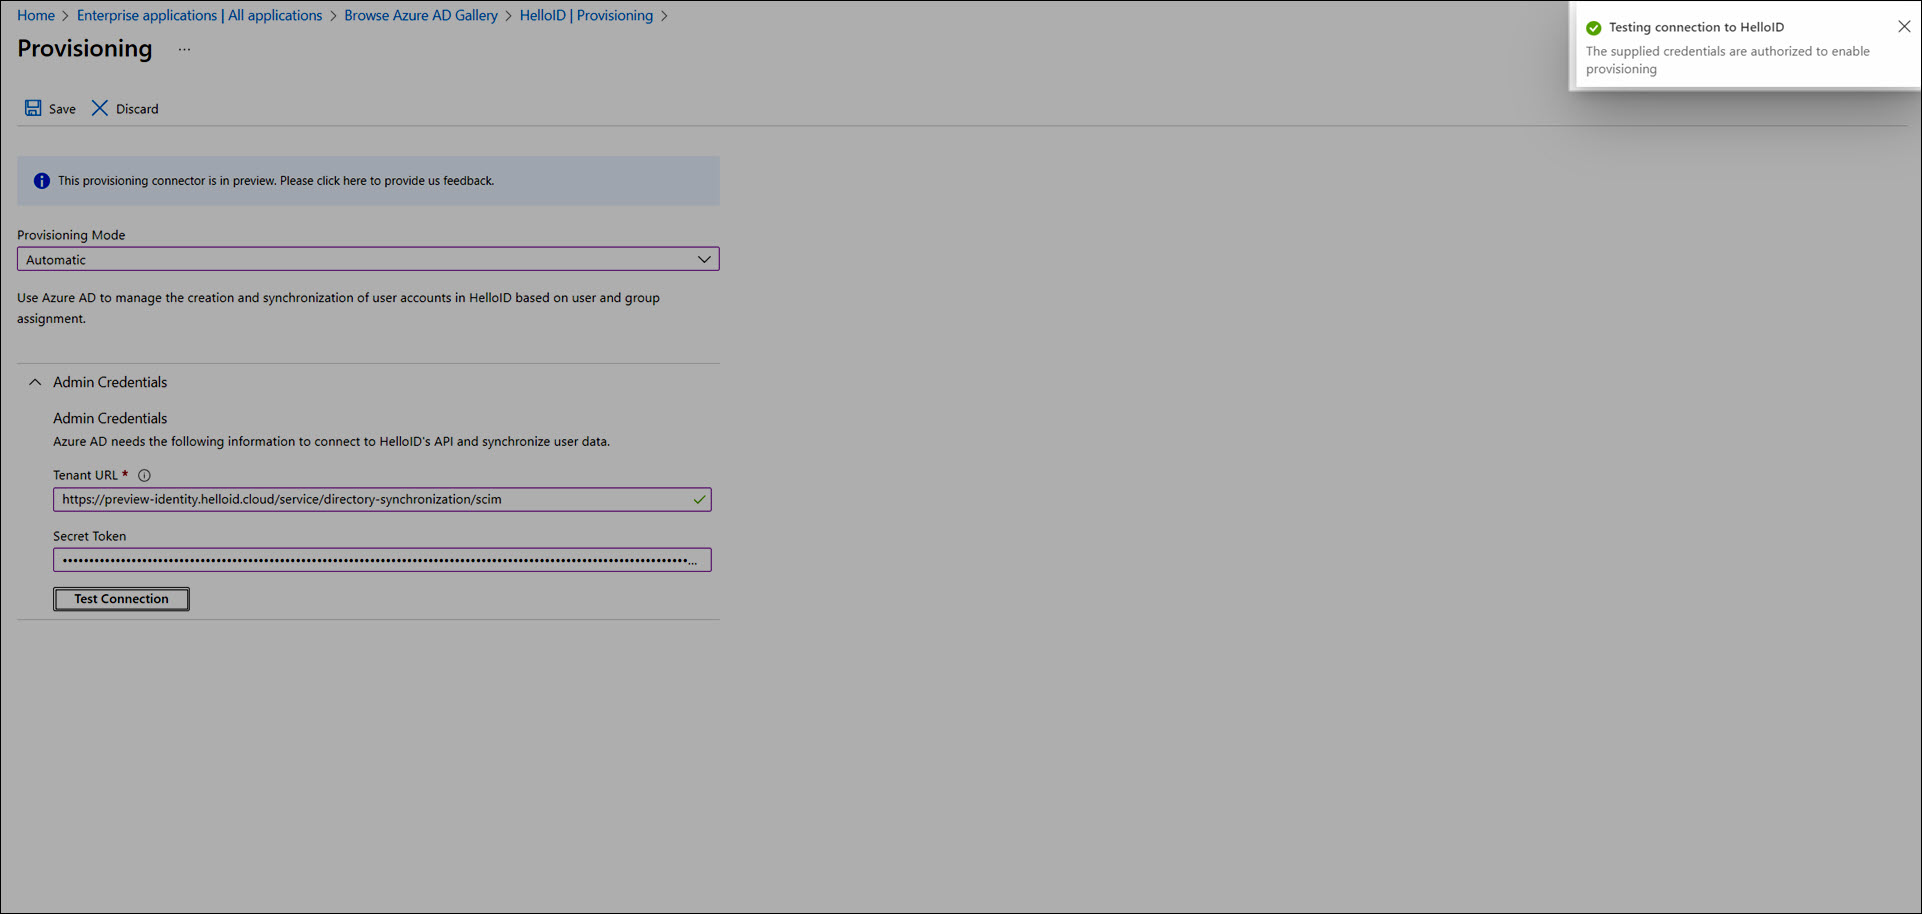
Click Test Connection.
You should get a message that reads "The supplied credentials are authorized to enable provisioning".
Click Save.
Optional: You may need to Add Azure AD user mappings. Do this only if HelloID depends on attributes that are not automatically included in the default synchronization:
Access Management: Add
employeeIdif your SSO applications rely on this attribute.Service Automation: Add
manager.idif product requests must be approved by a user’s manager and HelloID is not configured as a target system in Provisioning (which is the preferred setup).
Enable the Provisioning Status toggle.
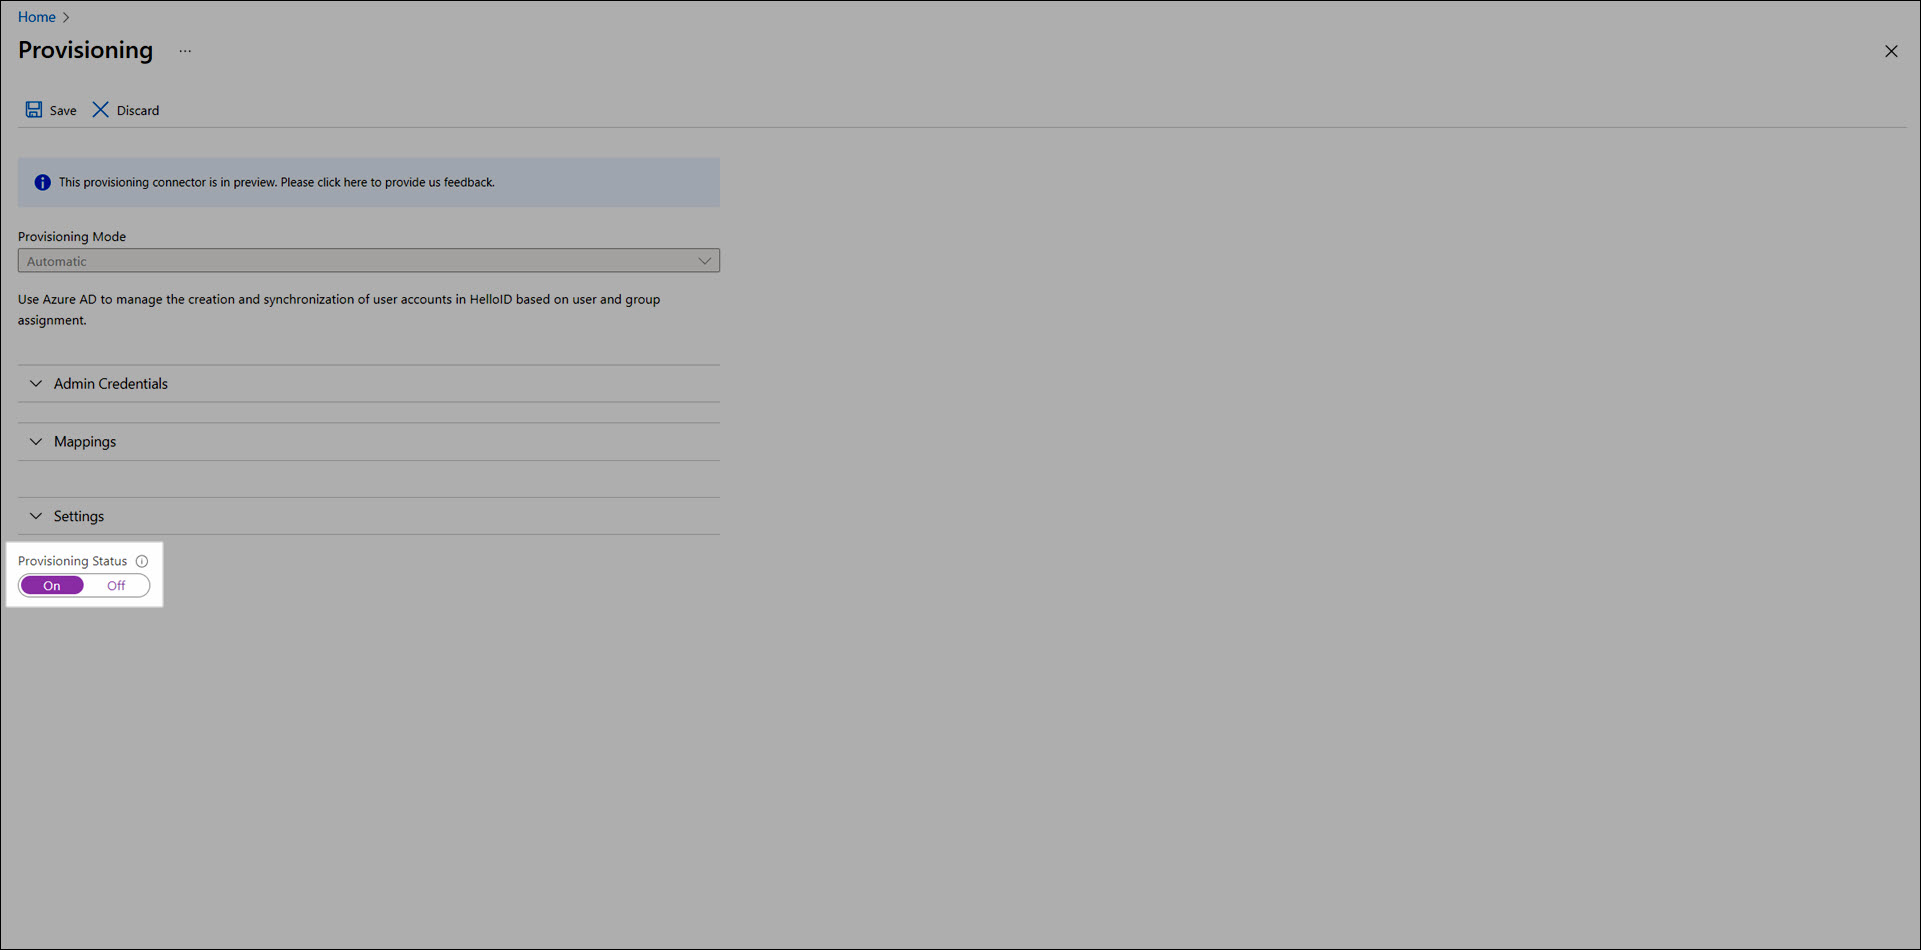
Click Save.
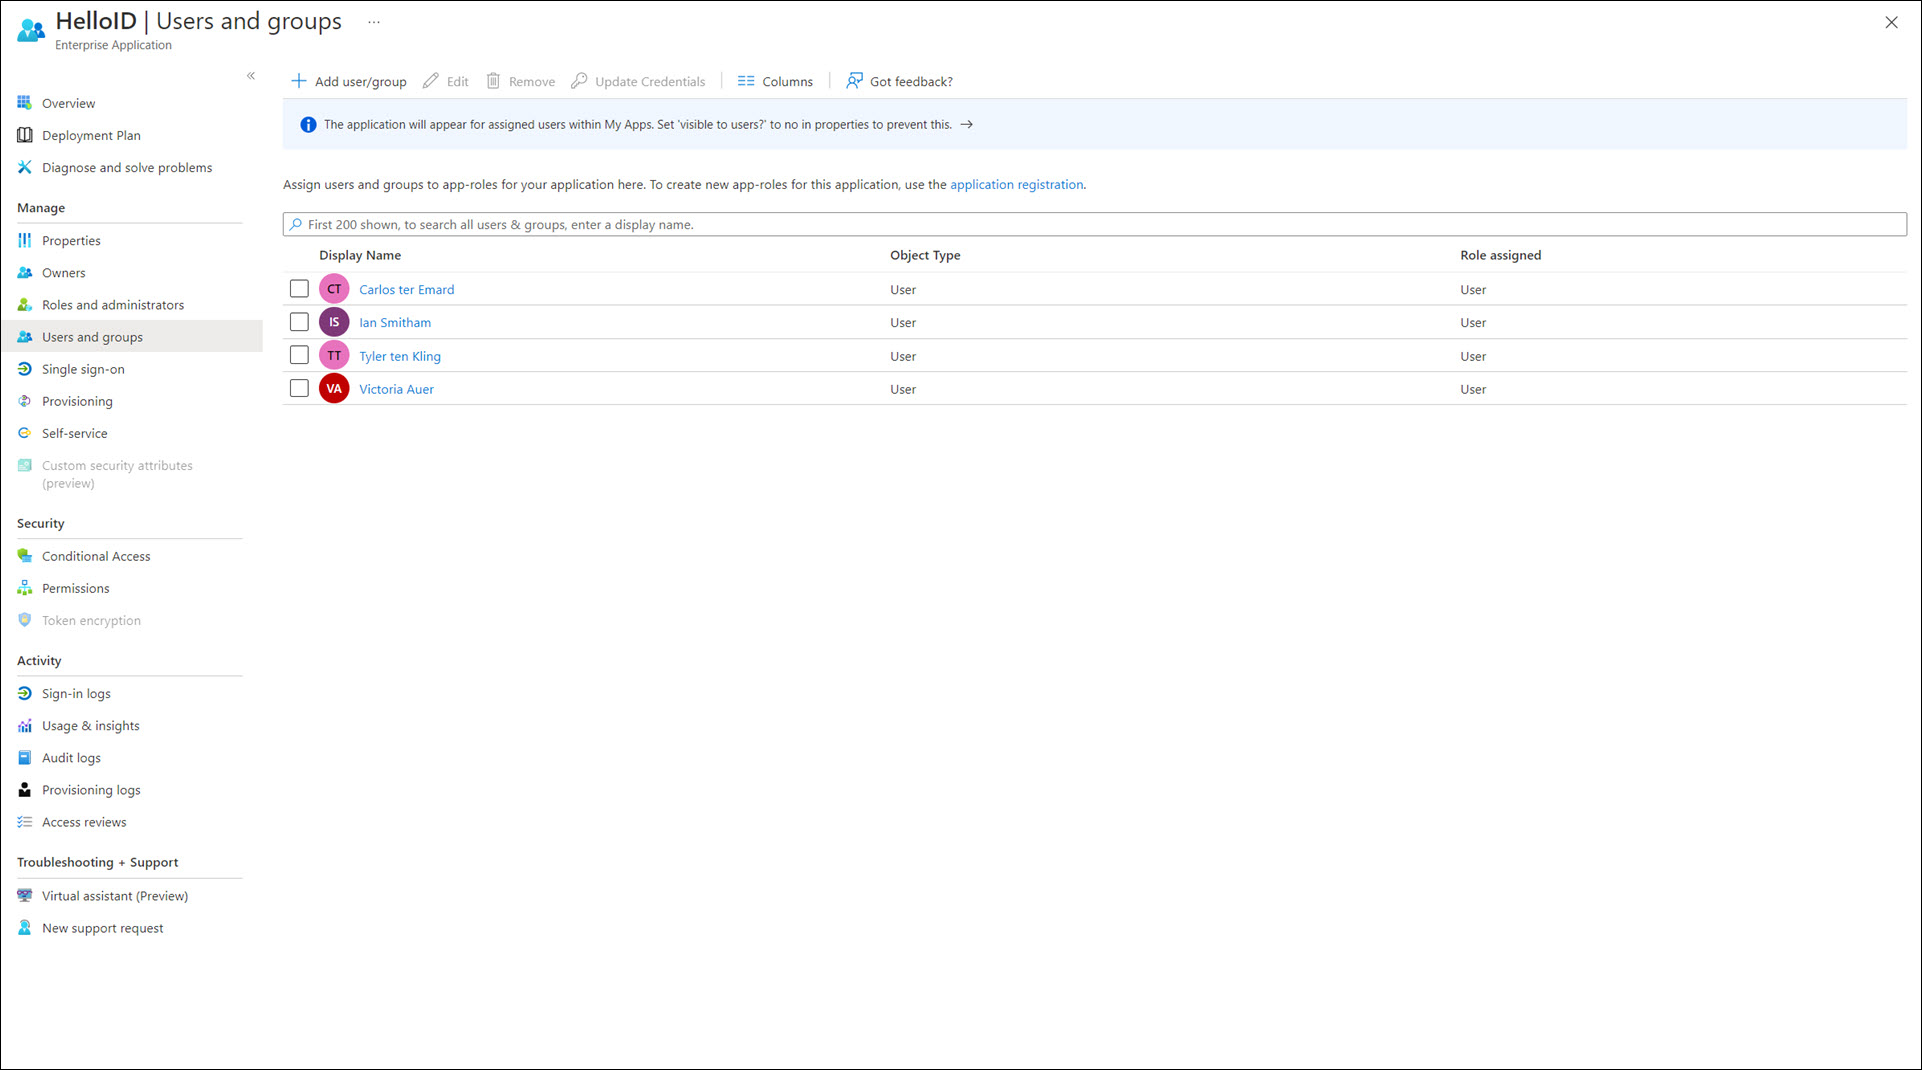
Go to Enterprise Applications > HelloID > Users And Groups. Assign all relevant users and groups to this application.
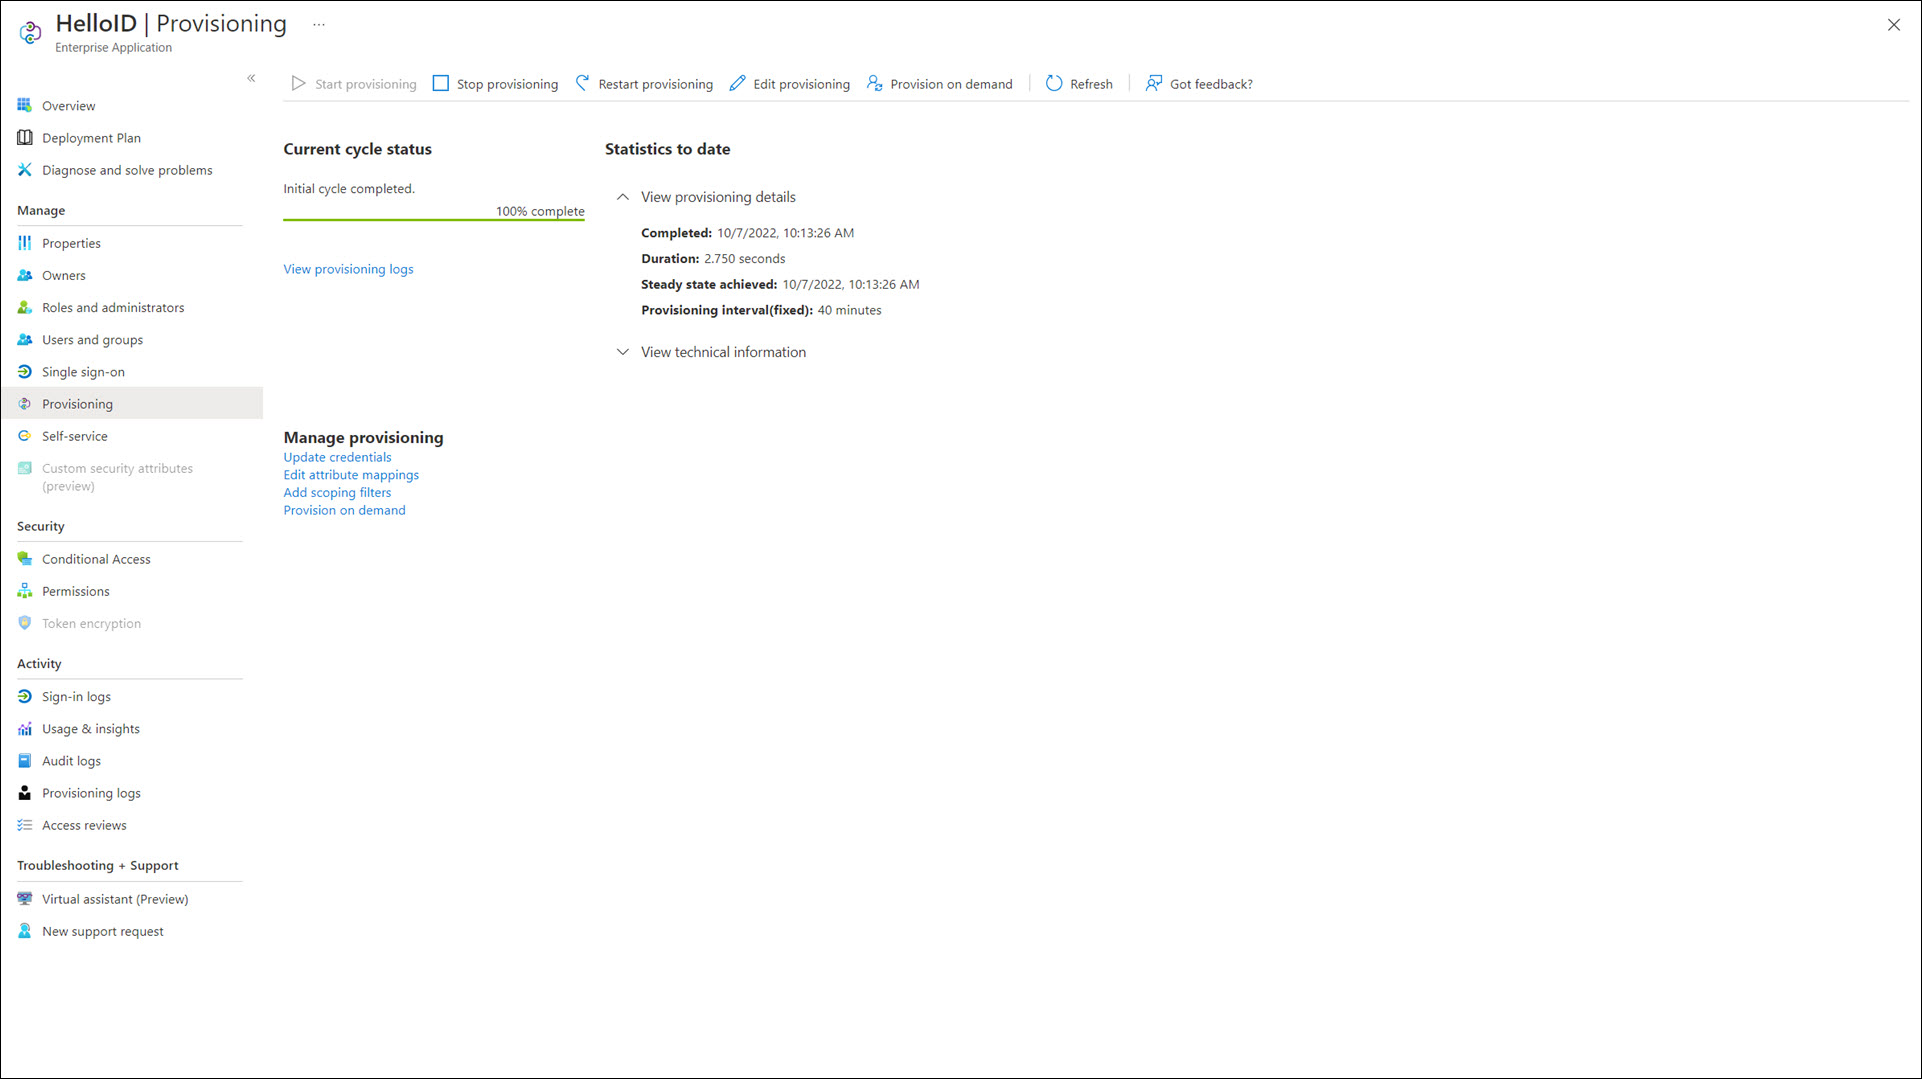
Go to Enterprise Applications > HelloID > Provisioning. Refresh this page after a few minutes, and it should report "Initial cycle completed".
Tip
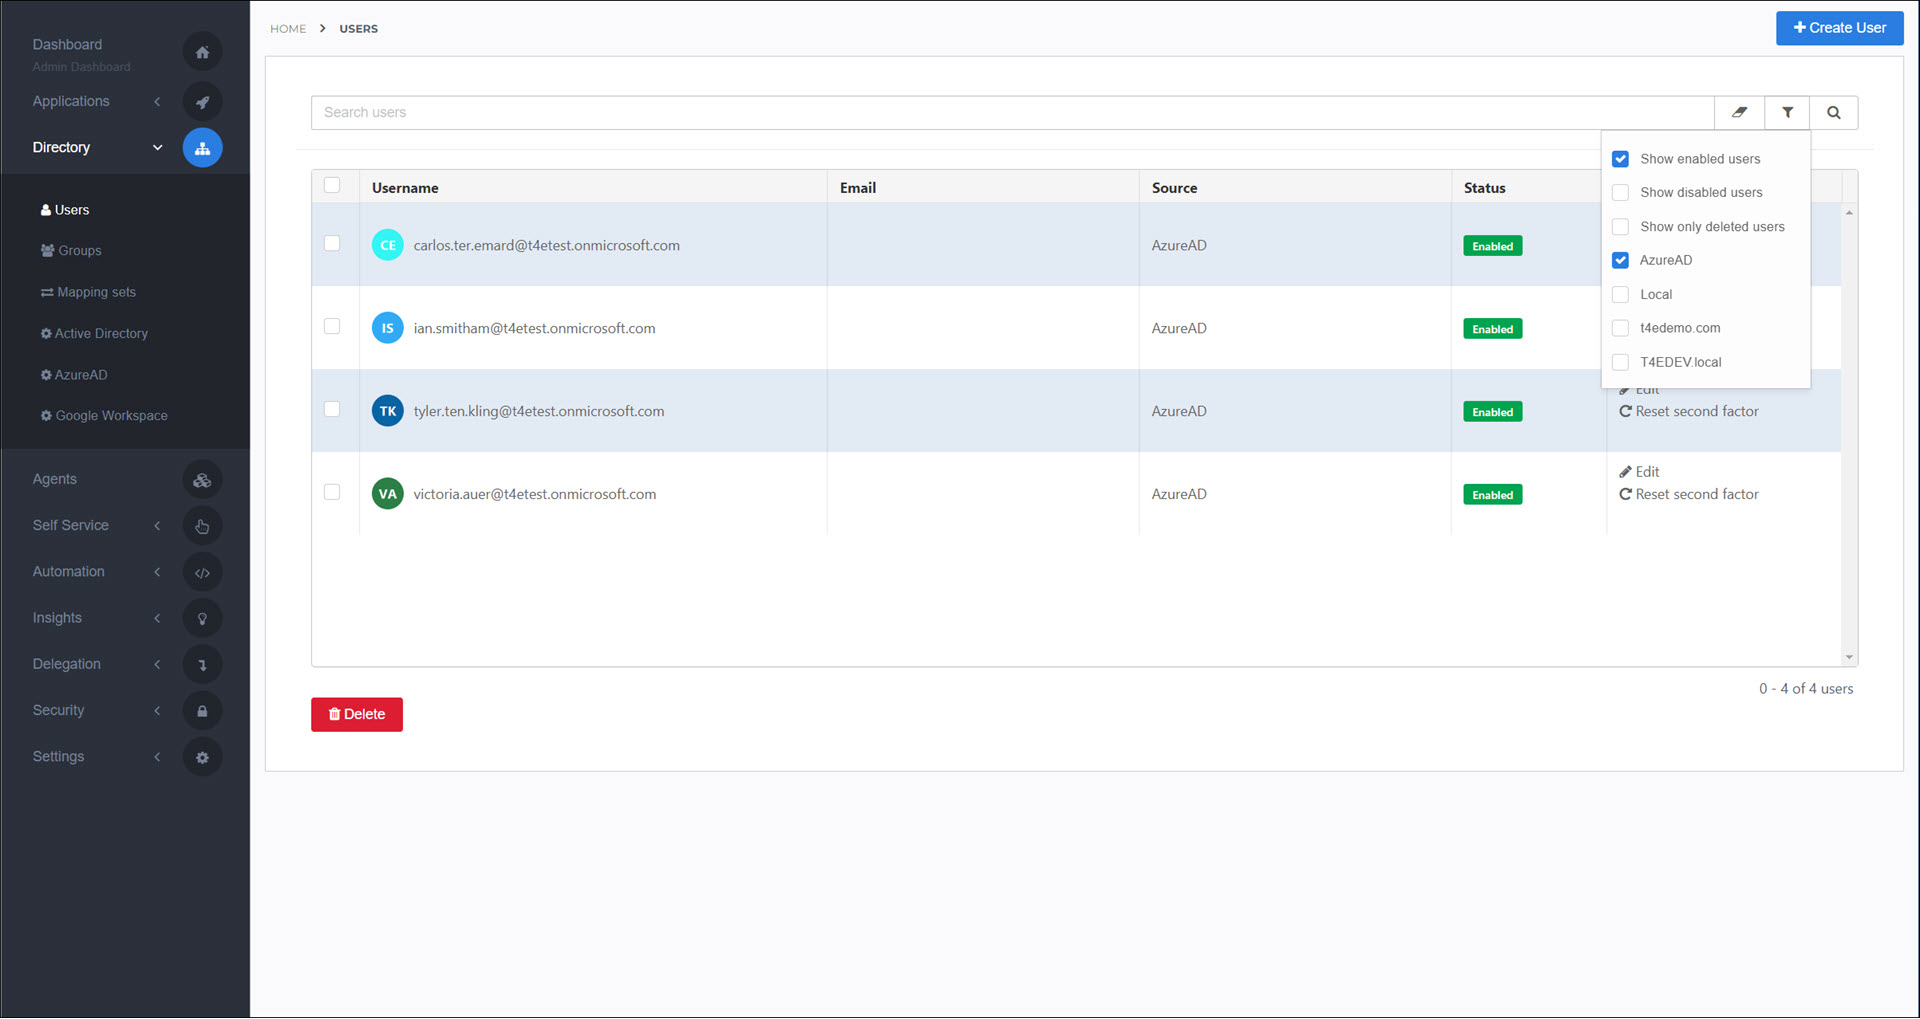
If a specific user or group is not being synchronized, Test Azure AD sync.