ADFS SAML application setup
Introduction
This manual shows you how to set up SSO to ADFS using the SAML protocol. The configuration takes place in HelloID and requires you to send information to ADFS. In this instance, HelloID will be the identity provider (IdP) for ADFS. If you want ADFS to be the IdP for HelloID, please visit this article.
Requirements:
HelloID environment
ADFS environment
Create or Import a Certificate
If there is no certificate yet, a certificate must be imported or created. This can be done in the HelloID Administrator Portal under Settings > Certificates. For this tutorial, we will use a self-signed certificate. Learn more about certificates here.
Application Setup
Add the ADFS Application
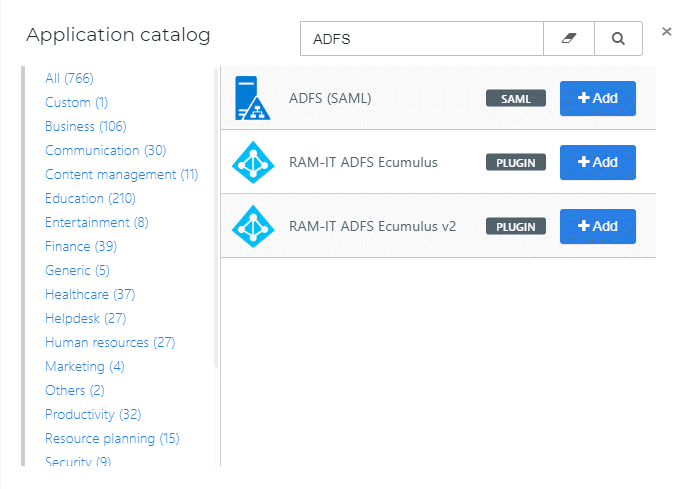
Create a new application in HelloID by navigating to Applications > Applications. Open the Application Catalog and search for "ADFS". Find the SAML template, and click Add. Learn more about managing applications here.
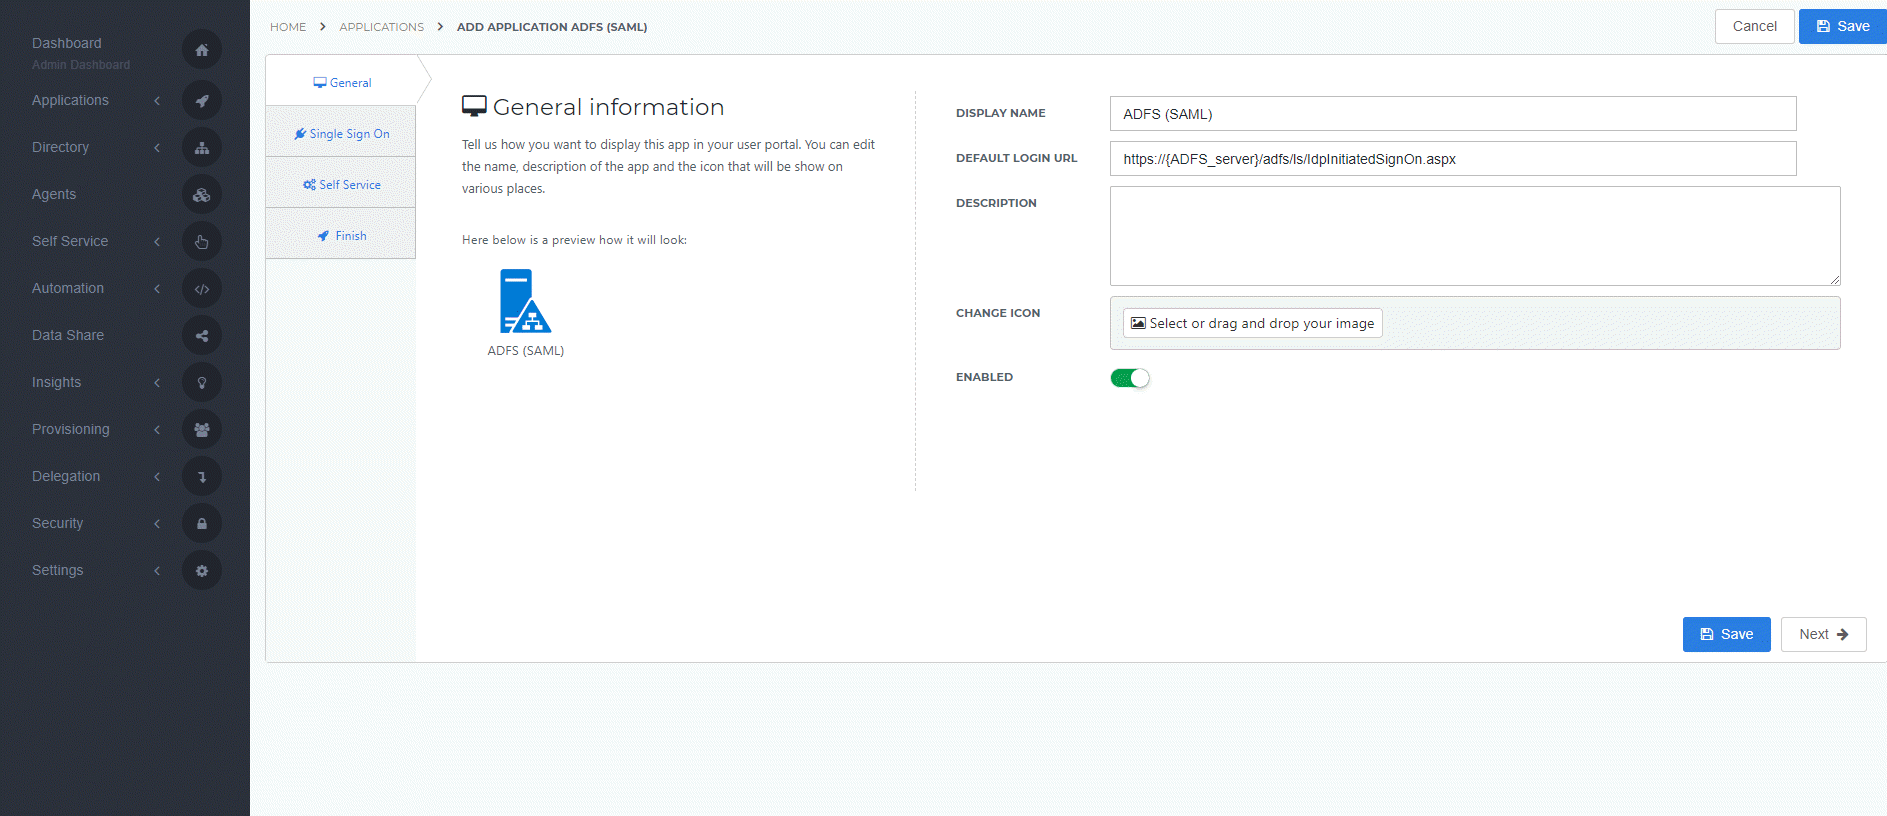
General tab
On the General tab, fill the default login URL with the ADFS environment SSO URL (replace {ADFS_server} with your ADFS server). Optionally, you may also add a description. Click Next.
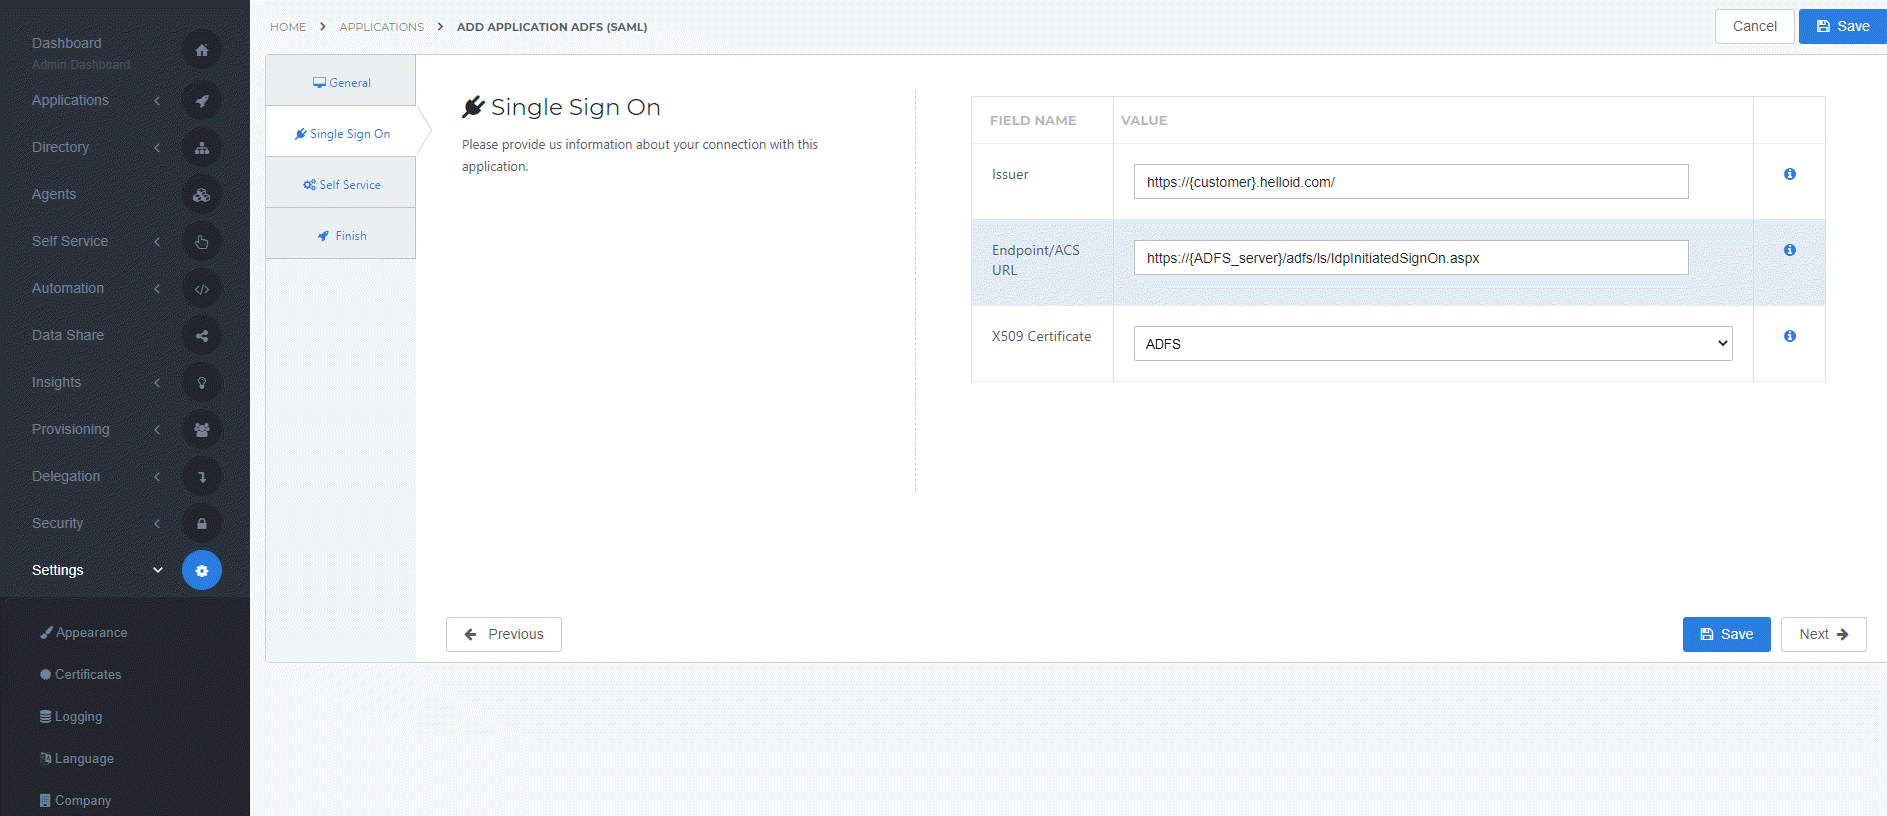
Single Sign-on tab
On the Single Sign-On tab, perform the following steps:
For the Issuer field, provide your HelloID domain in the format "https://{customer}.helloid.com/".
Note: The trailing slash (/) is required!
Endpoint/ACS URL should be set with the logon URL of your ADFS environment, mostly in the format "https://{ADFS_server}/adfs/ls/IdpInitiatedSignOn.aspx".
In the X509 Certificate dropdown, select the certificate that you created or imported previously.
Click Next.
Self service tab
On the Self Service tab, choose whether to automatically create a Self Service product, which makes the application requestable. This is optional. Click Next.
Finish tab
On the Finish tab, click Save to add the application to HelloID.
Application metadata
After saving the ADFS application, click its Edit link on the applications overview. This will bring you to its properties page.
You now have the option to obtain the application metadata.
ADFS uses the metadata URL, right-click Download metadata and copy the link address (something along the lines of https://enyoi.helloid.com/metadata/download?ApplicationGUID=e6e741f5-a469-4849-93f7-fe2e259a339f) at the right top of the screen.
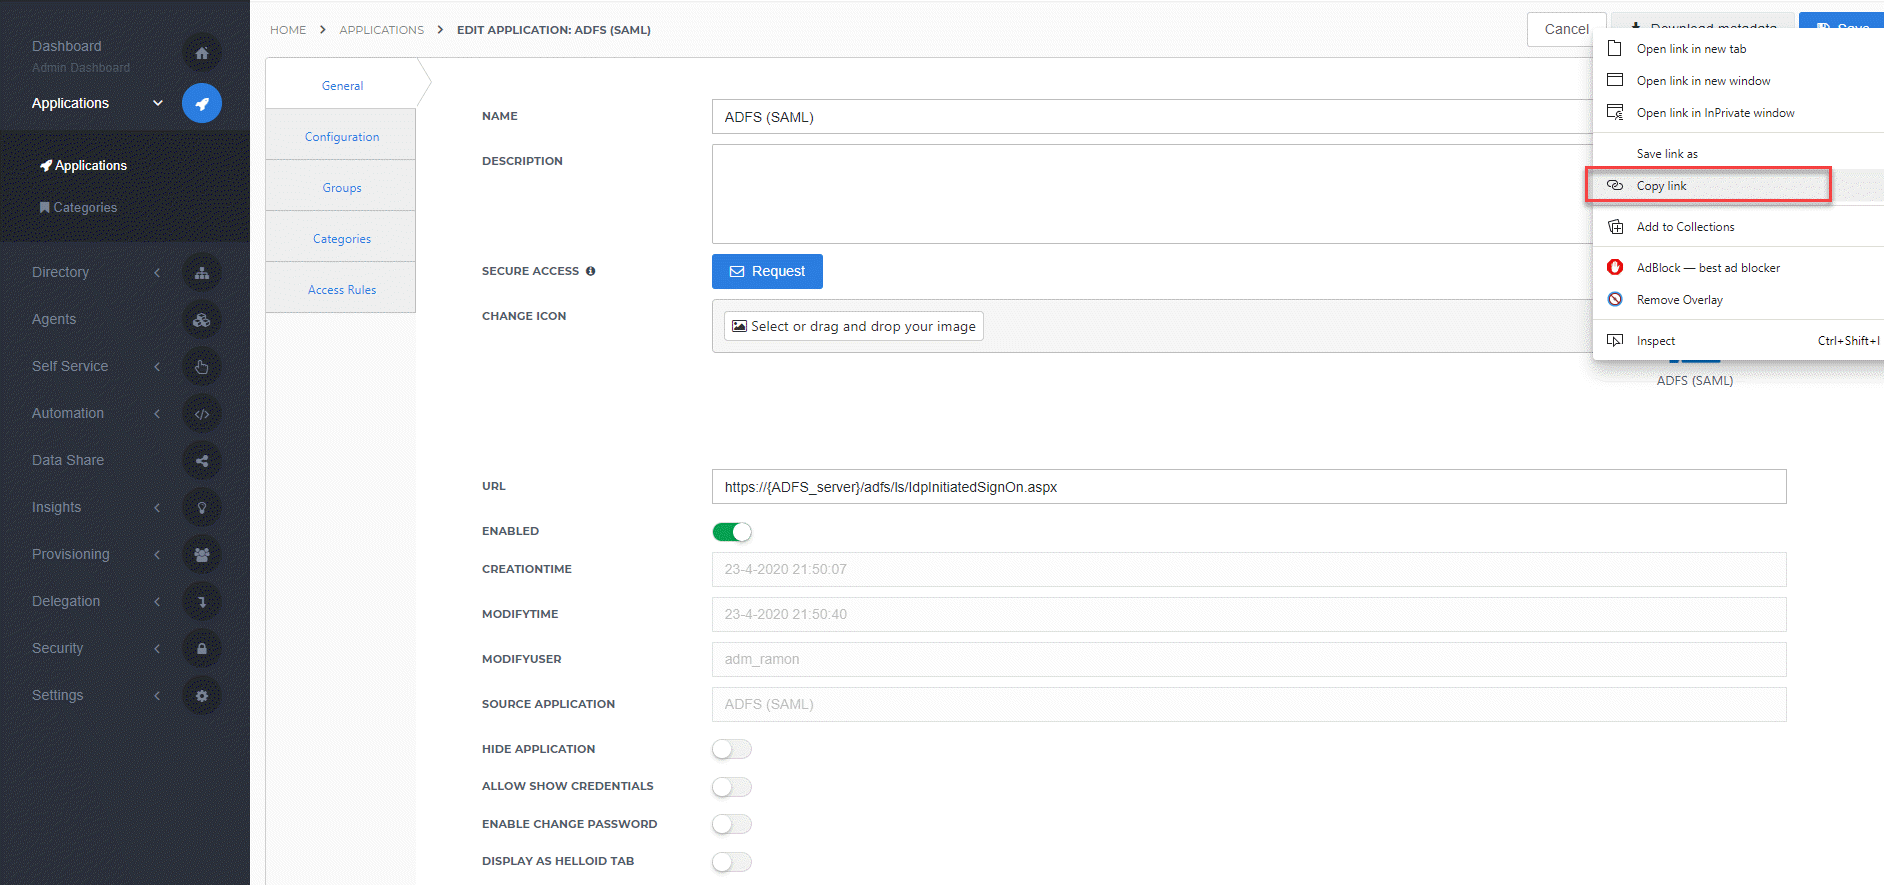
Take note of the metadata URL as we will need it for the ADFS configuration.
The configuration of the HelloID application is finished.
ADFS Configuration
Request SAML
In order to make the connection, you need to add HelloID as a Claims Provider Trust in ADFS.
If HelloID has been previously registered as a Relying Party Trust in ADFS, you will need to disable the Relying Party Trust configuration before proceeding. HelloID can be either a Claims Provider Trust or a Relying Party Trust, but not both.
To configure the SSO on the ADFS side, you will need the following information:
Metadata URLfound at step 3.2 - Application metadata
Perform the following steps:
On the AD FS server, open the AD FS Management console.
On Claims Provider Trusts click Add Claims Provider Trust...
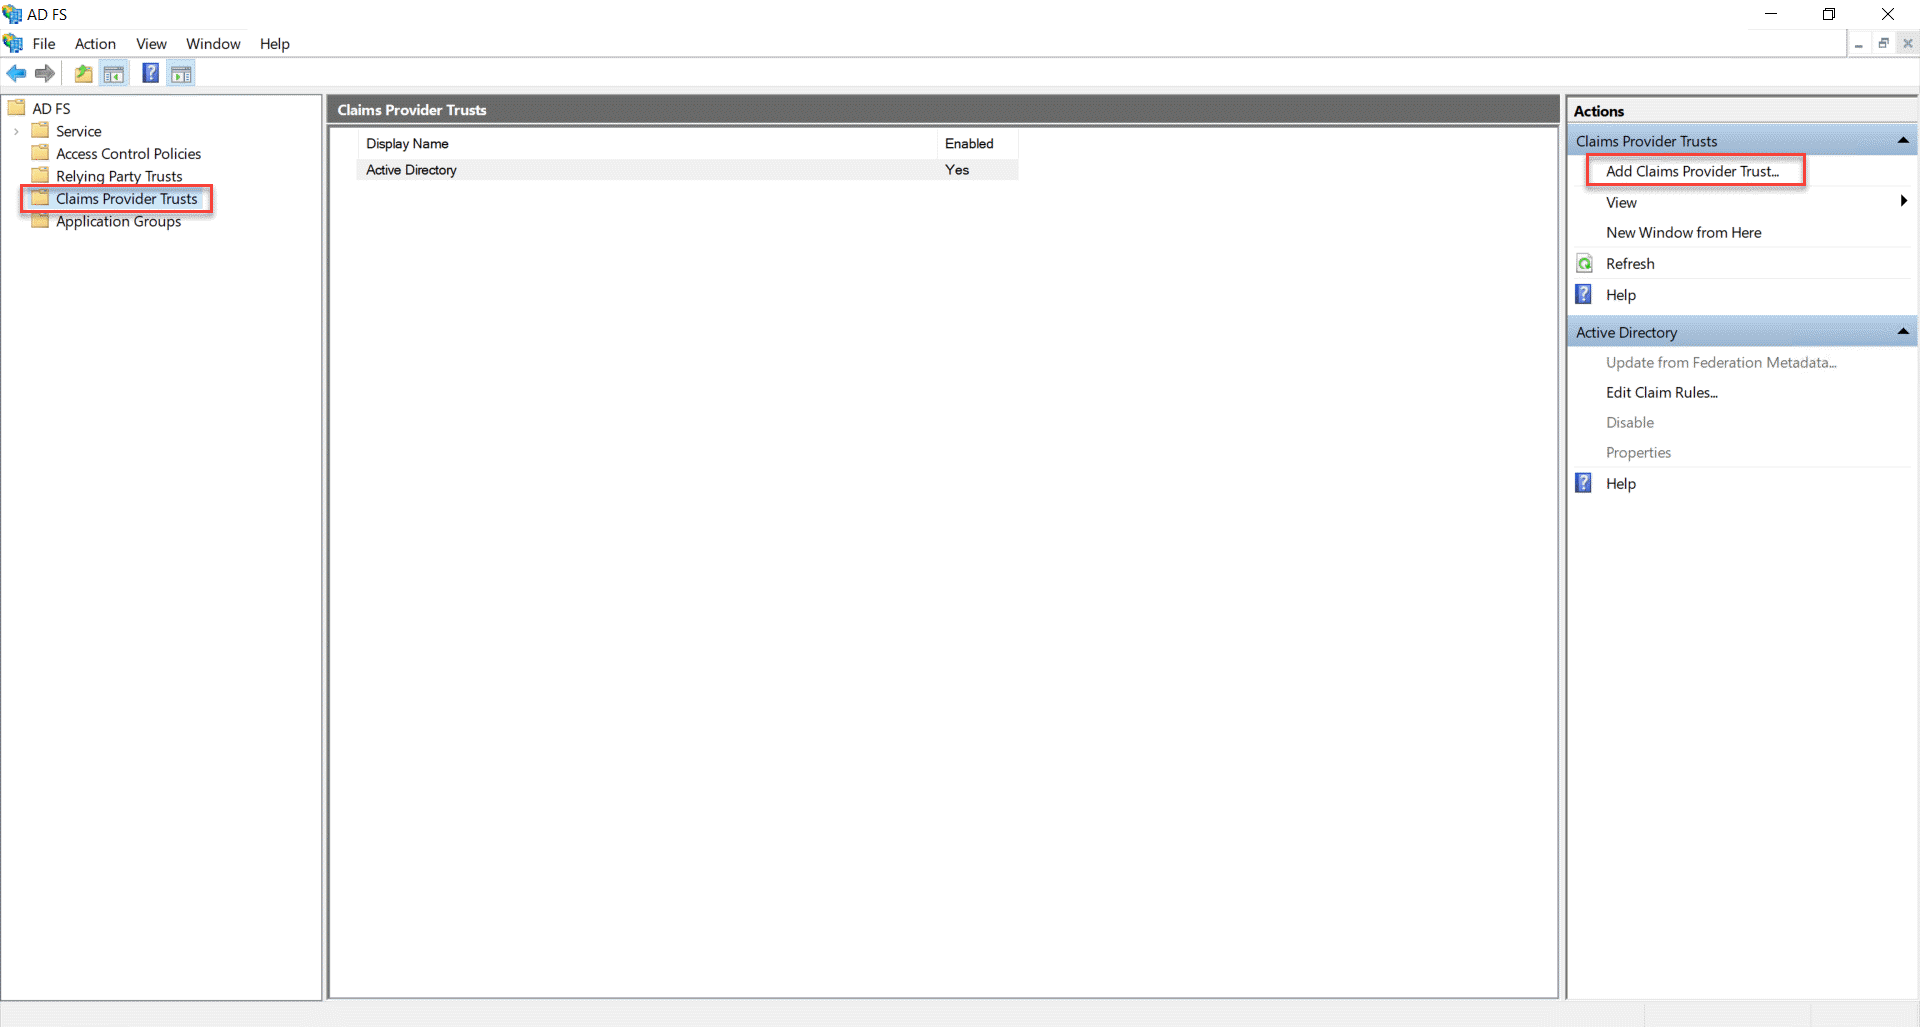
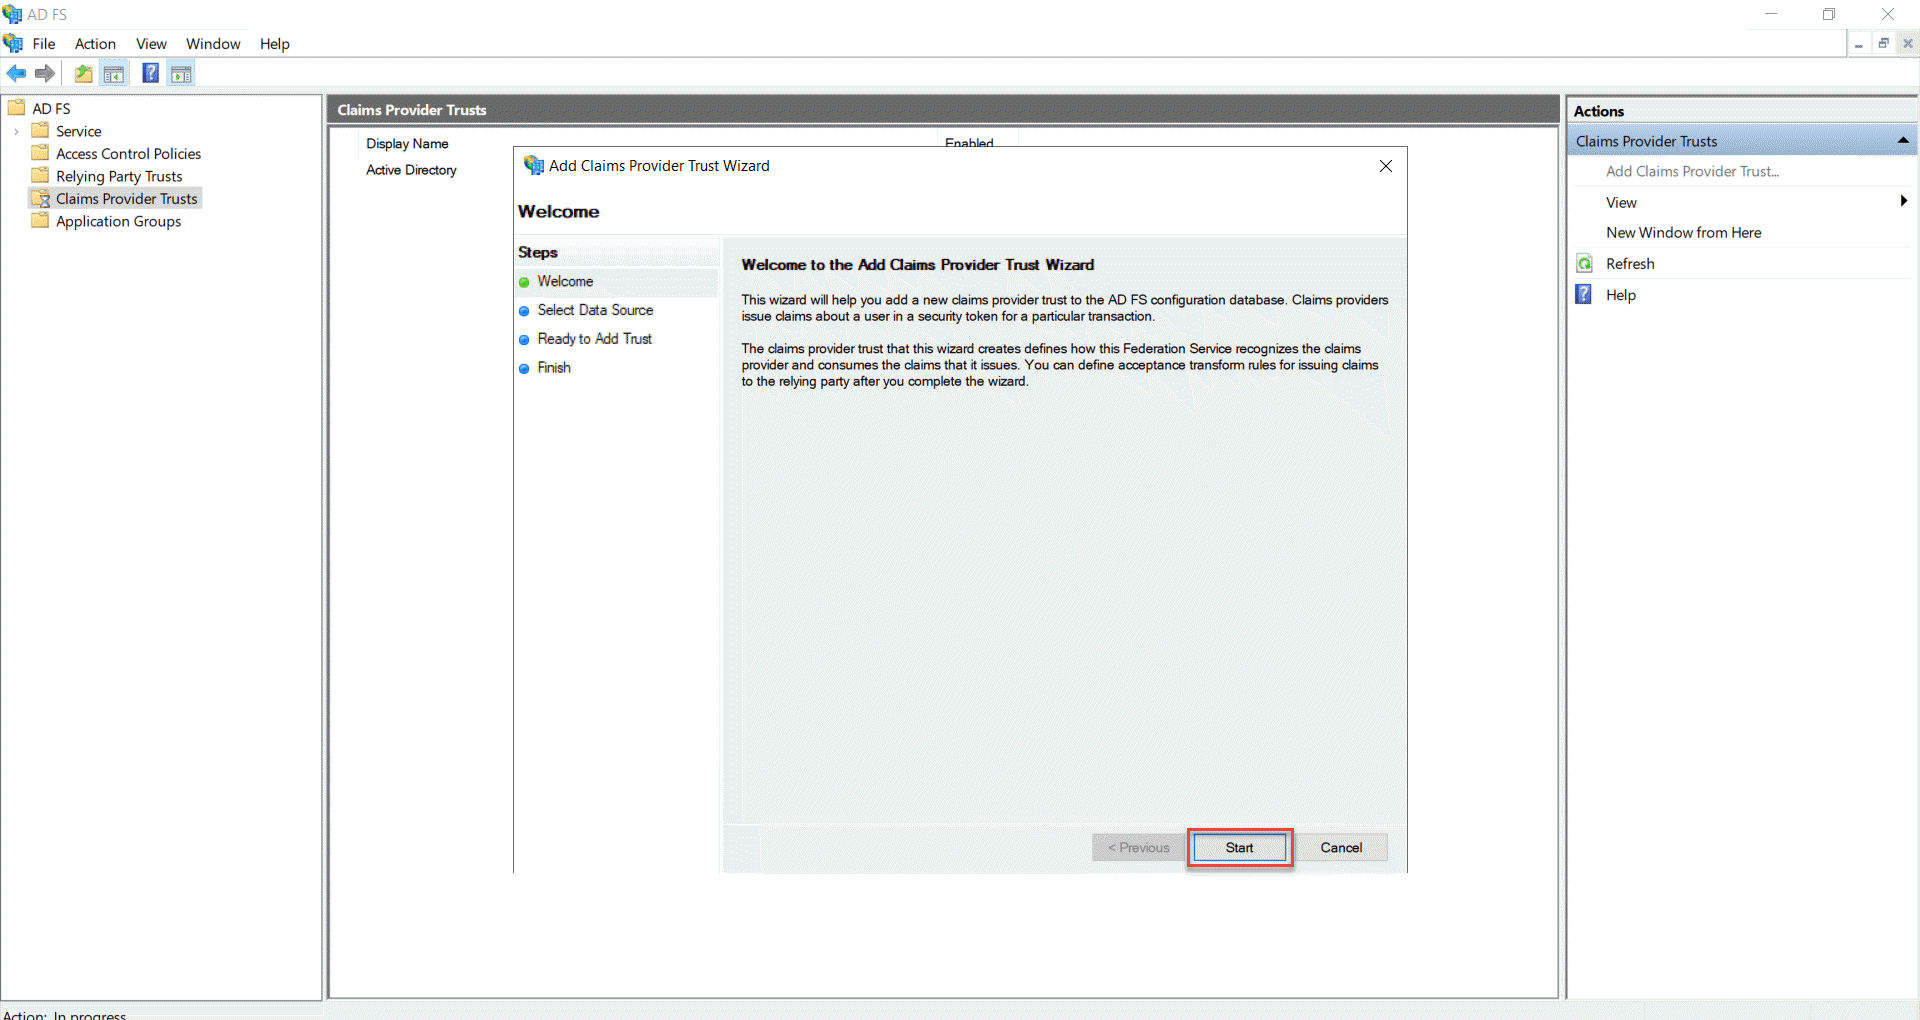
The Add Claims Provider Trust Wizard will open. At the Welcome page, click Start.
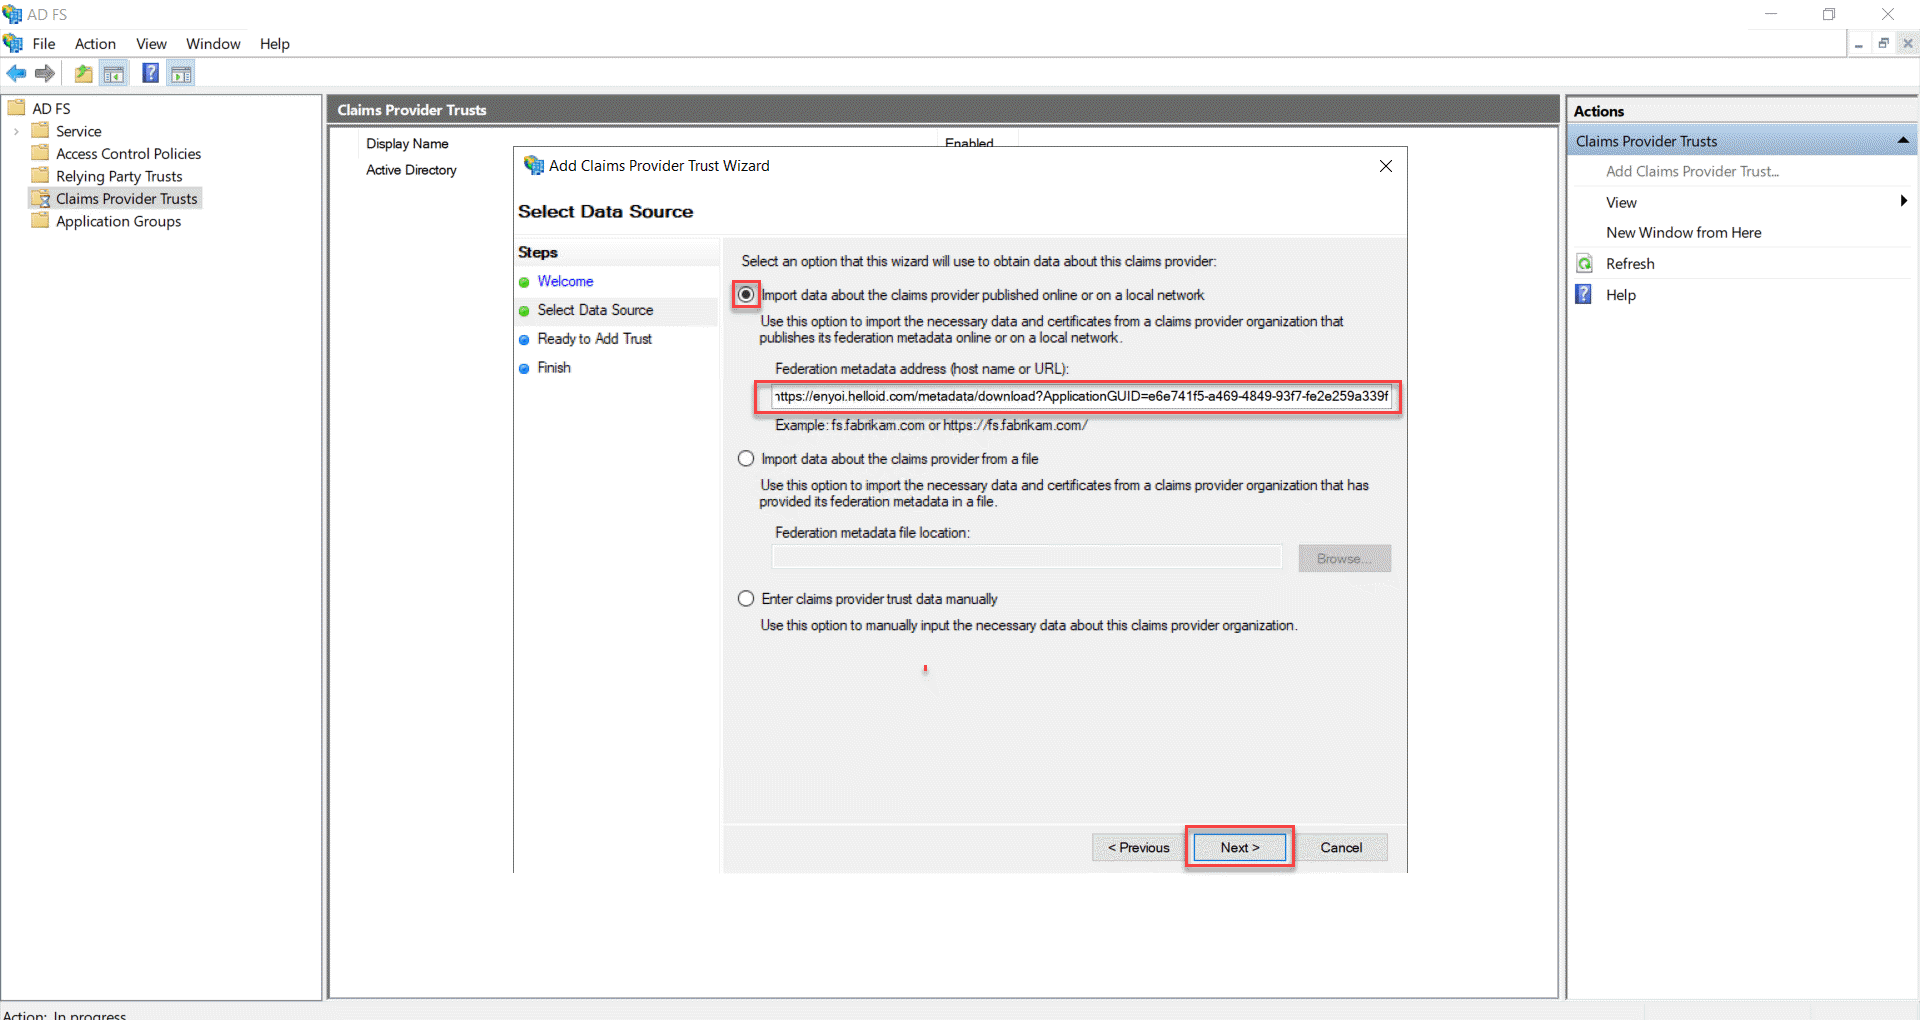
On the Select Data Source page, select Import data about the claims provider published online or on a local network and enter the Metadata URL you copied at step 3.2 - Application metadata. Click Next to continue.
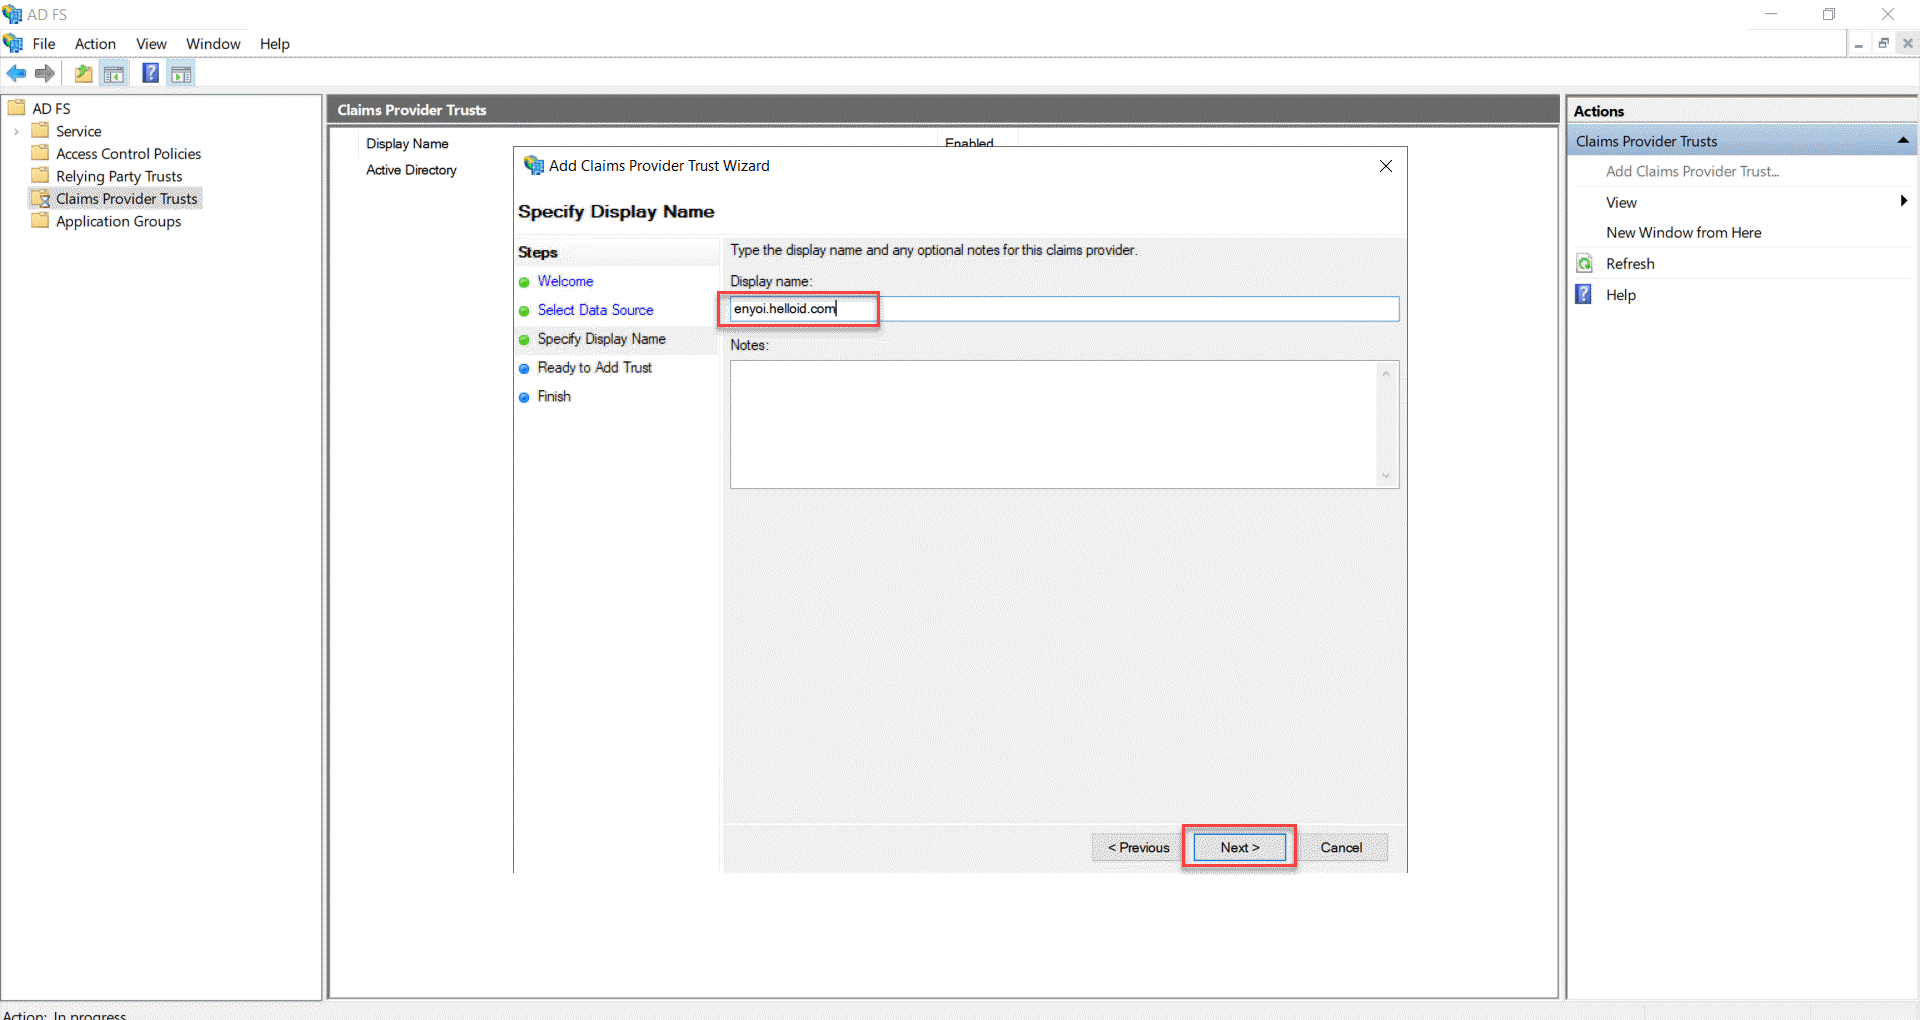
Specify Display Name page, enter a recognizable Display name and click Next.
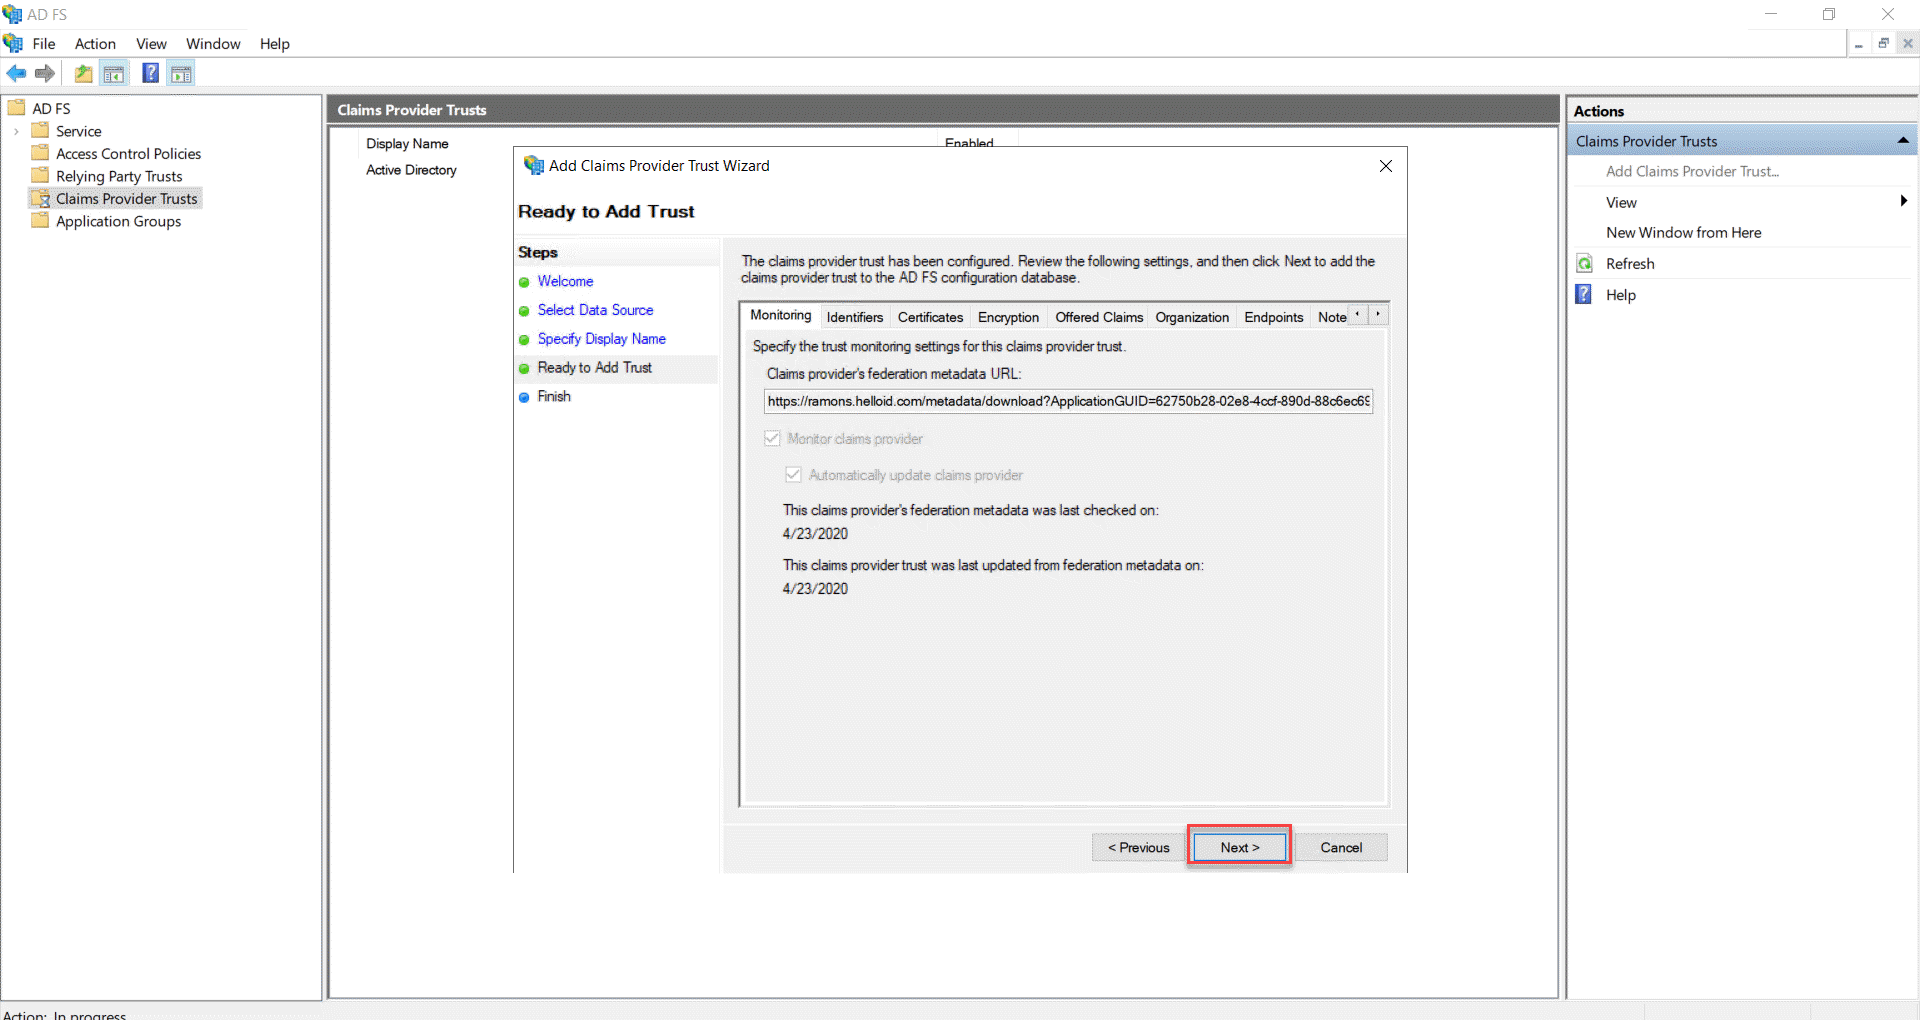
On the Ready to Add Trust page, verify that all settings are correct and click Next.
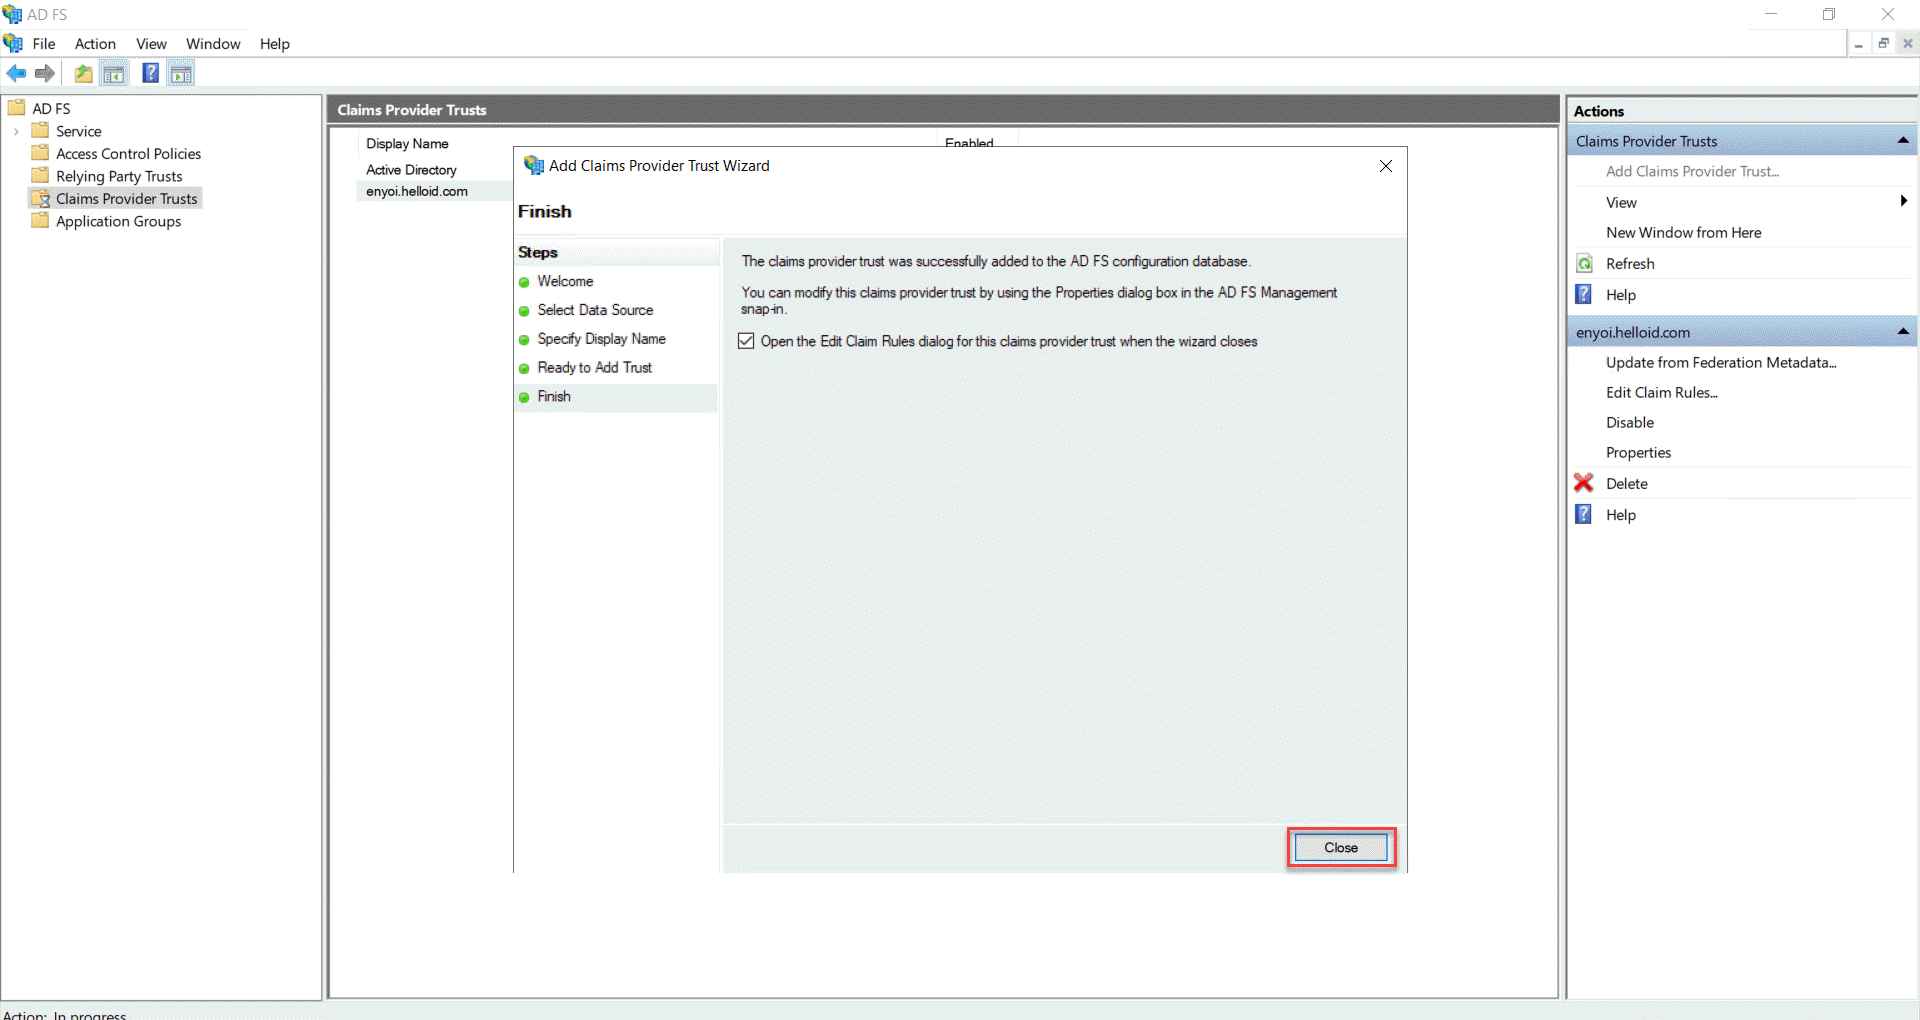
And finally, on the Finish page, click Close.
Open PowerShell and add the login page of your ADFS server as acceptable identifier using the following command (replace "https://{ADFS_server}/adfs/ls/IdpInitiatedSignOn.aspx" with the login page of your ADFS server):
# Add audience URI to ADFS
Set-ADFSProperties -AcceptableIdentifier 'https://{ADFS_server}/adfs/ls/IdpInitiatedSignOn.aspx'
Test the Configuration
The configuration is now finished and may be tested on a computer that has access to both the AD FS as well as HelloID.
Launch a browser and navigate to your ADFS login page (mostly in the format "https://{ADFS_server}/adfs/ls/IdpInitiatedSignOn.aspx"). You should now see a new login option for HelloID as the IDP, as shown below.
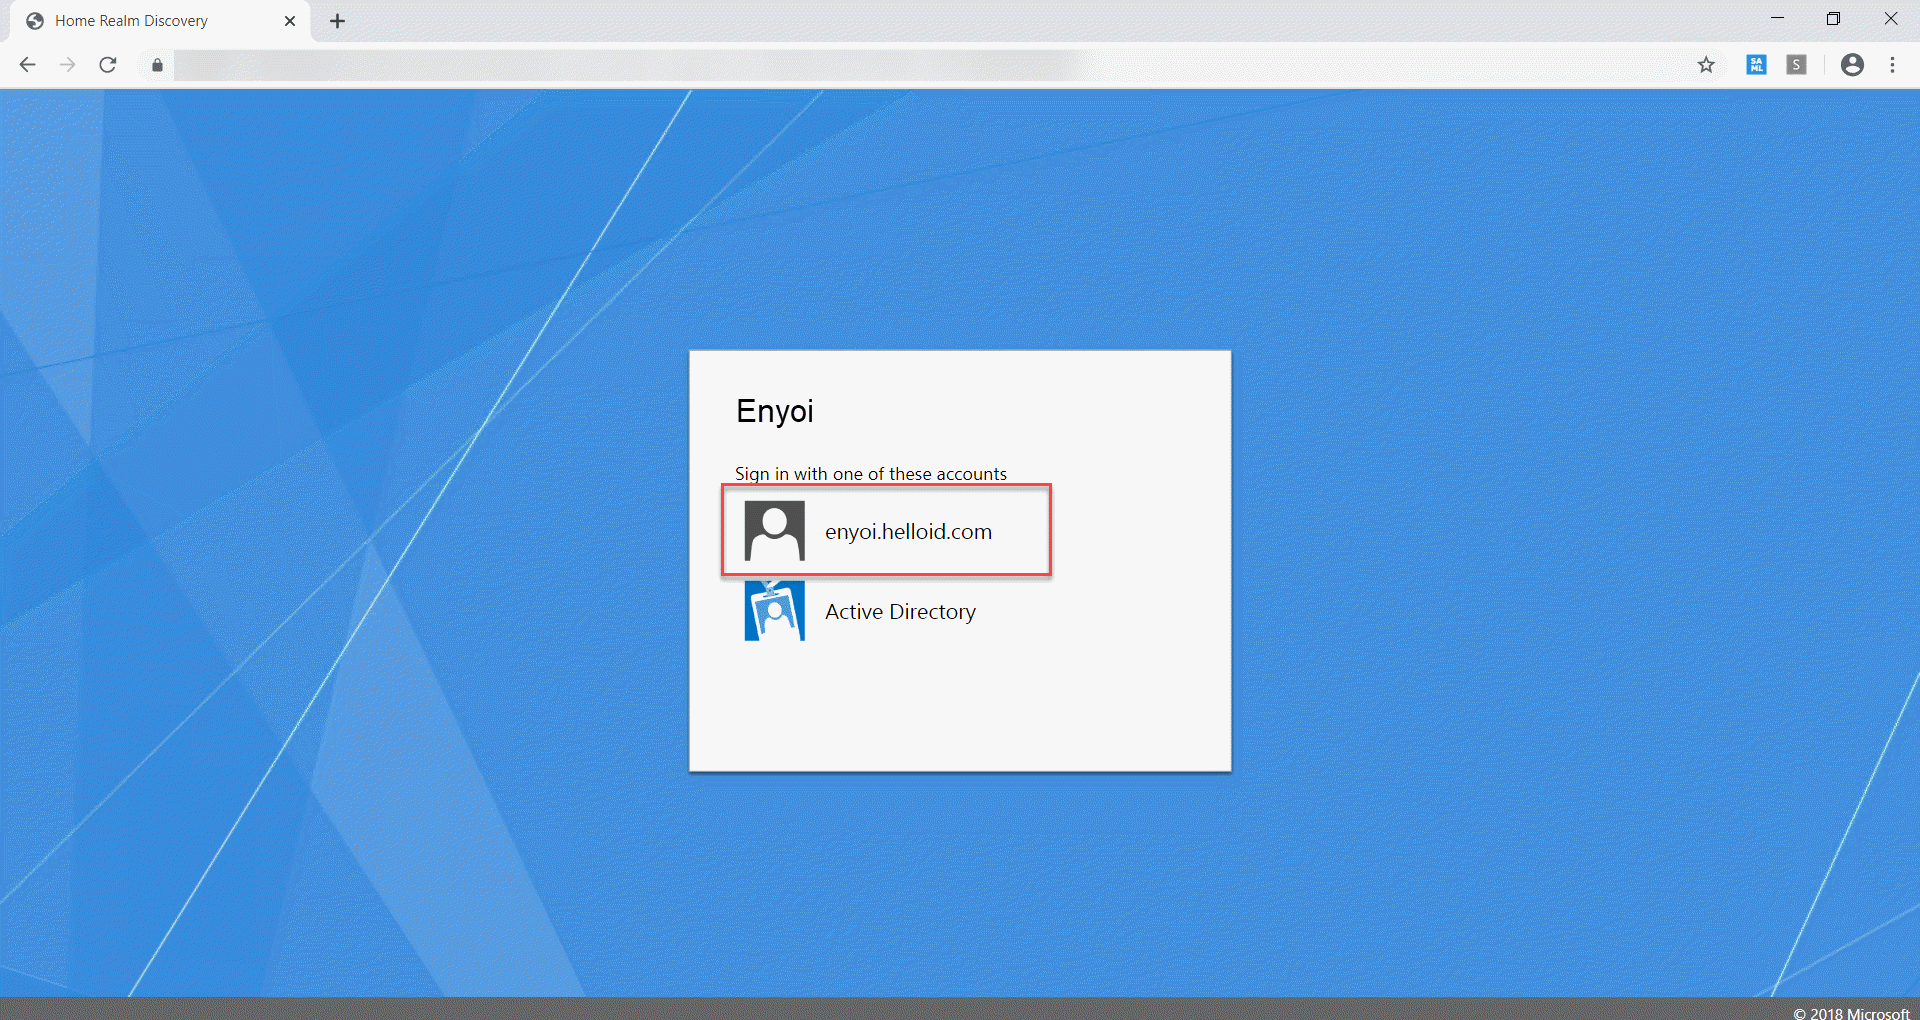
Click on the HelloID login, and you will be redirected to the HelloID login page.
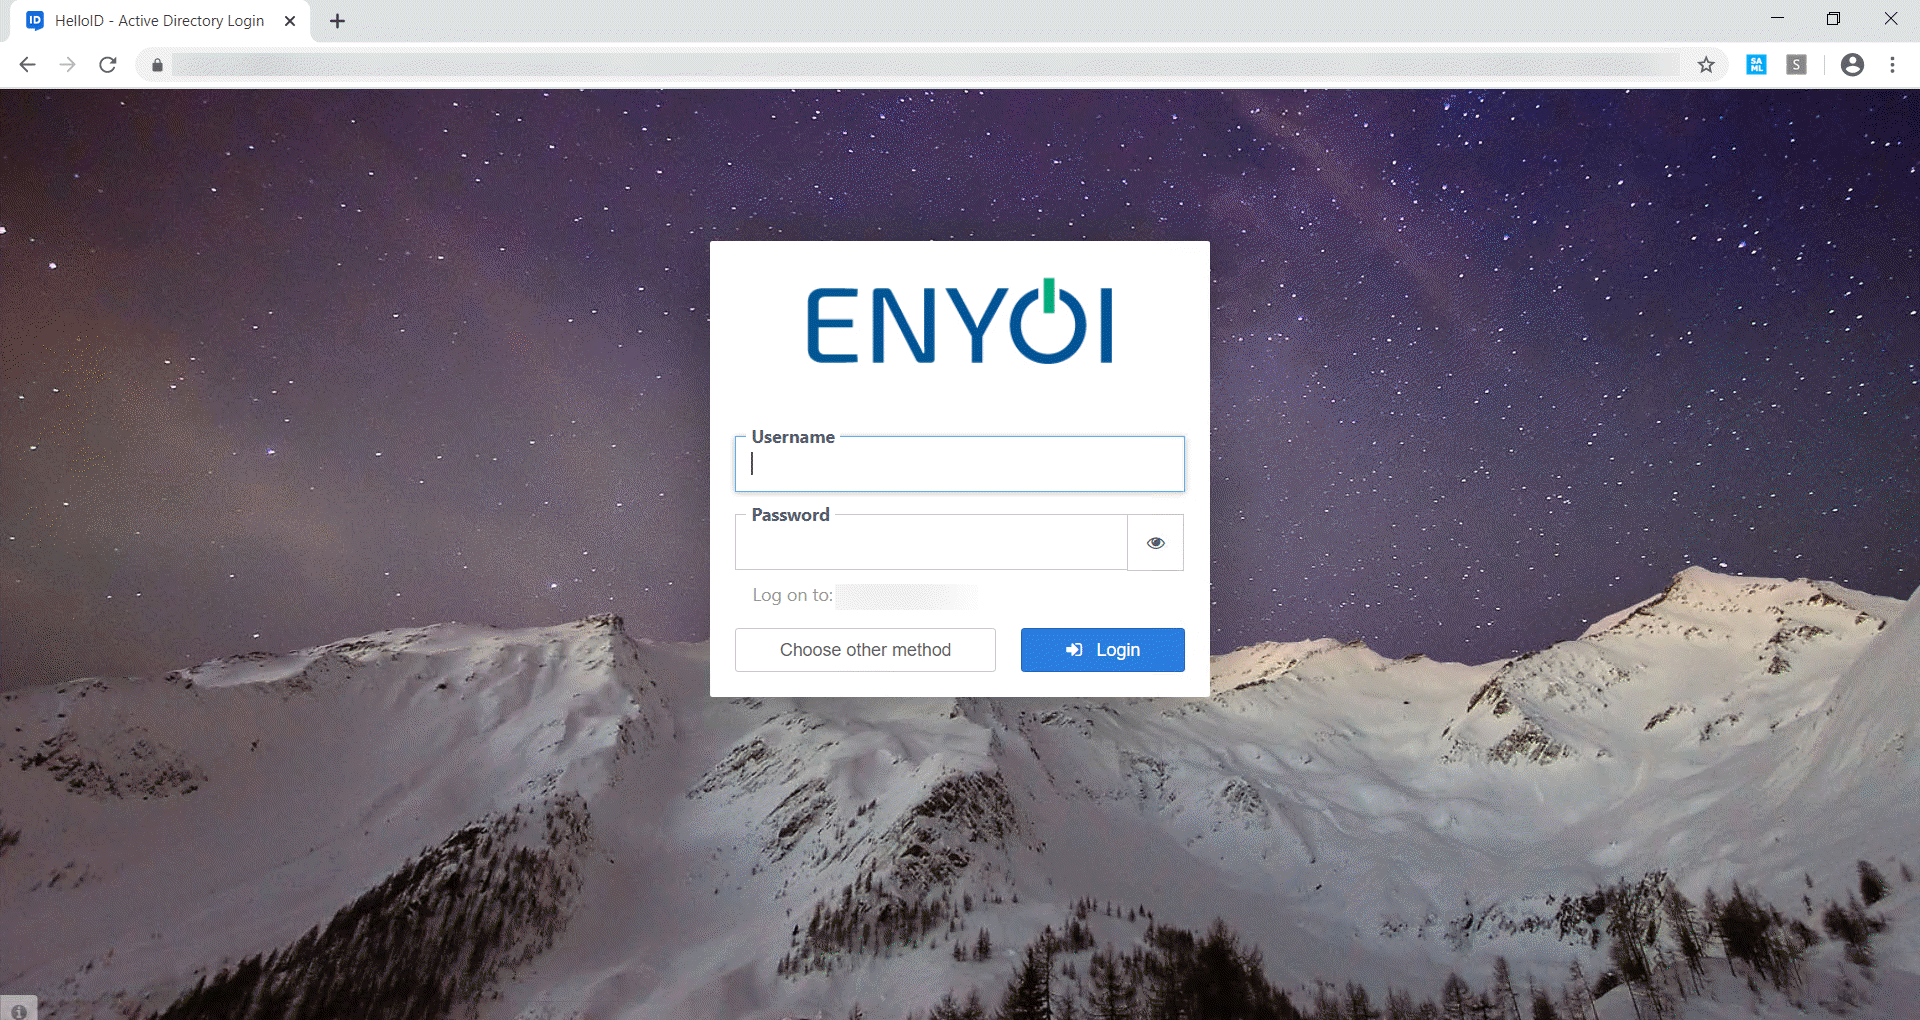
Enter your credentials. There will be a brief redirect, and you will be routed to the ADFS login page, now successfully logged on.
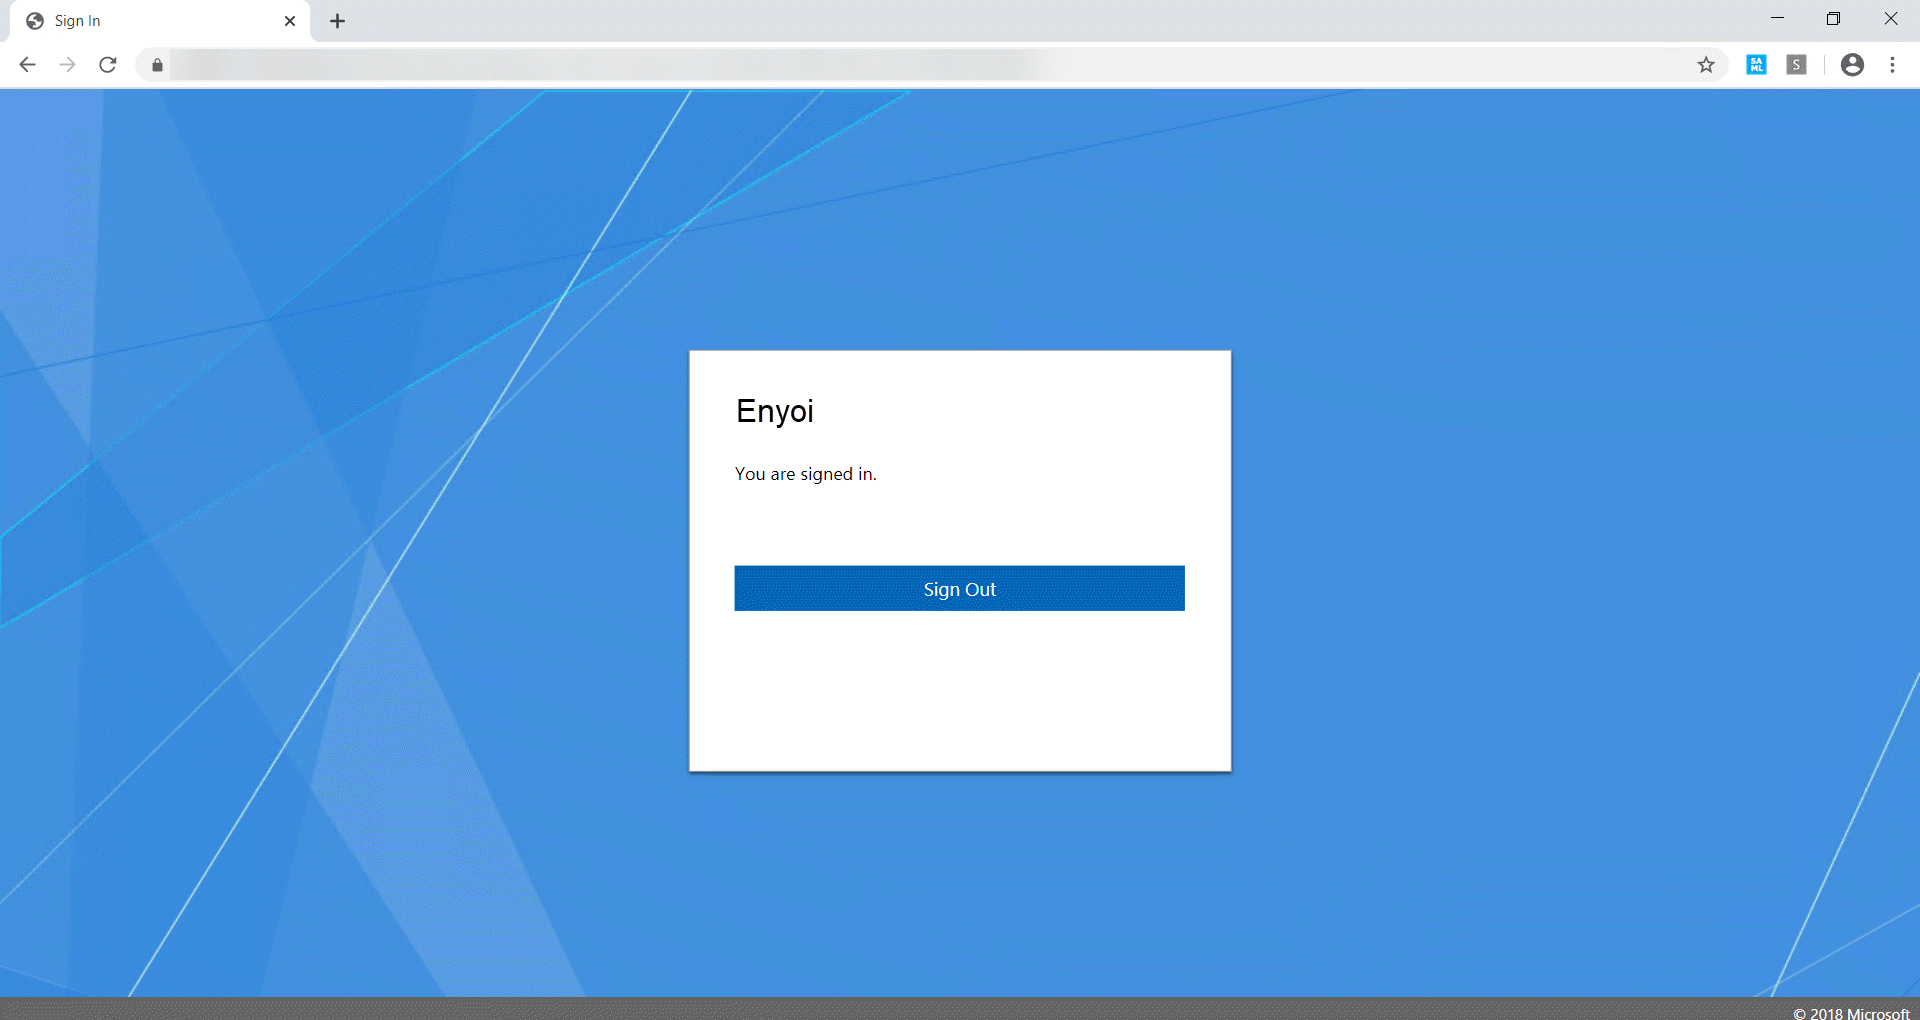
Optional configuration
Hide the Active Directory login
By default, the Active Directory login is shown as a login method to choose from. With HelloID now as our new and preferred login method, we can hide the Active Directory login option. Use the script below for this:
# Hide Active Directory login option on ADFS
Set-ADFSProperties -EnableLocalAuthenticationTypes $false
AzureAD integration
If AzureAD is connected to ADFS it is possible to still log in to ADFS through HelloID and be immediately logged in at AzureAD. Resulting in AzureAD having HelloID as the IDP. This does, however require some additional steps.
Changing the mapping set in HelloID
The matching identifier used for SSO for AzureAD is the immutableId of the AzureAD users.
In most cases, the On-premises AD environment is the source for AzureAD and the local AD users are synced to AzureAD with AzureAD Connect. In this case, the ImmutableId of the AzureAD users is, by default, the base64 encoded string of the objectGUID (of the AD account) converted to a byte array.
The 'immutableId' for AzureAD SSO through ADFS is looked up by the Windows Account Name. Therefore we need to send this attribute in the SAML response.
By default, the value for the SAML attribute windowsAccountName is set with {{company.defaultAdDomain}}\{{user.attribute.sAMAccountName}}. This is assuming, this will result in the Windows account name in the format "DOMAIN\samaccountname". Change this where necessary, click here to learn more about attribute mappings.
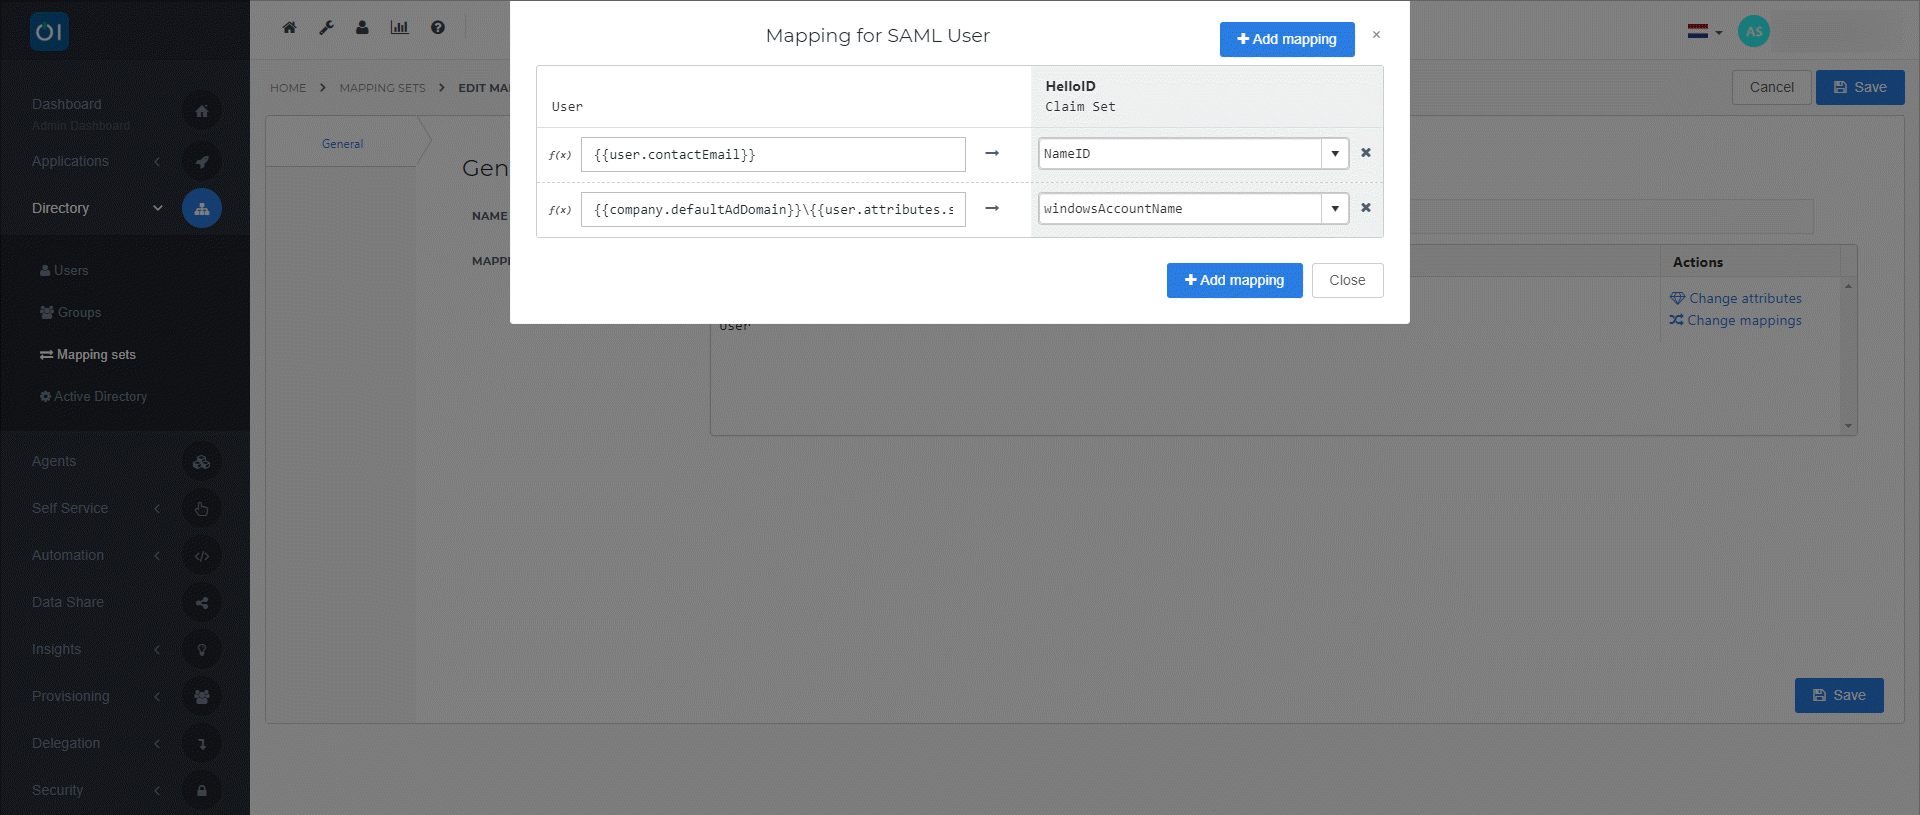
Adding Claim Rules in ADFS
On the AD FS server, open the AD FS Management console.
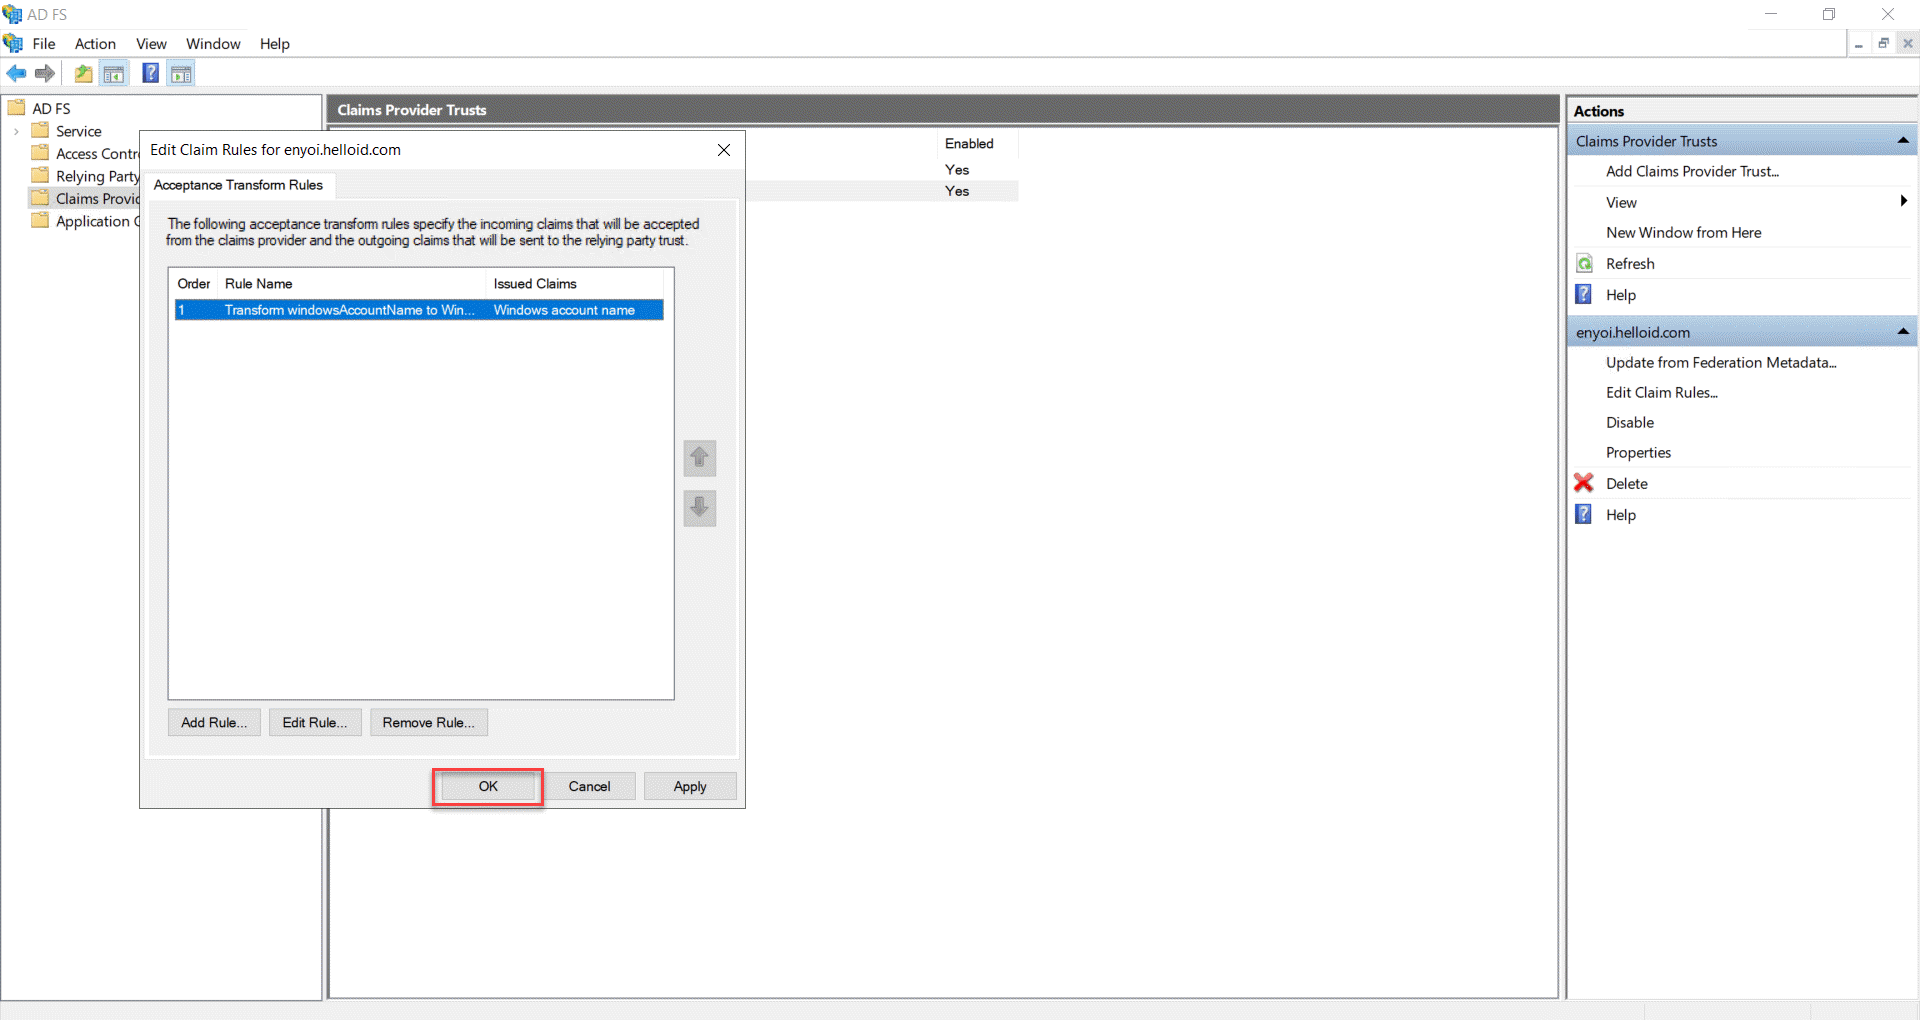
On Claims Provider Trusts click Edit Claim Rules...
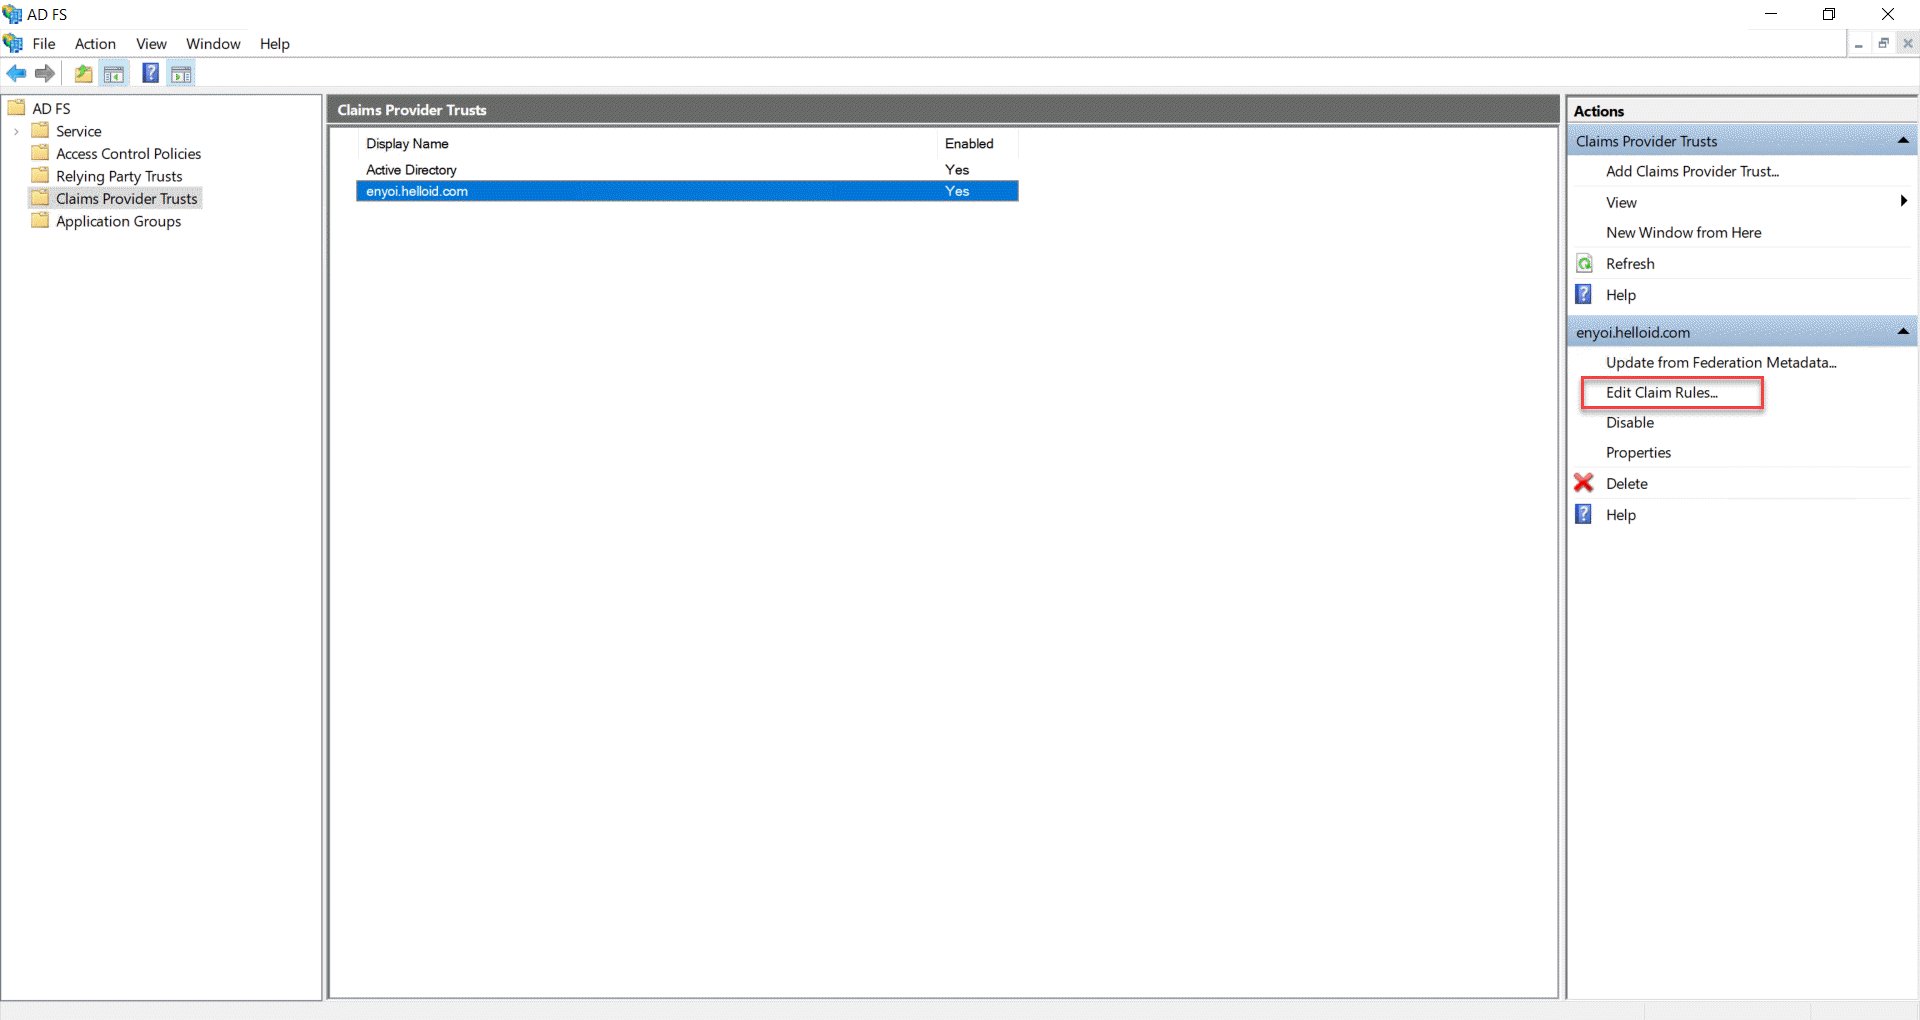
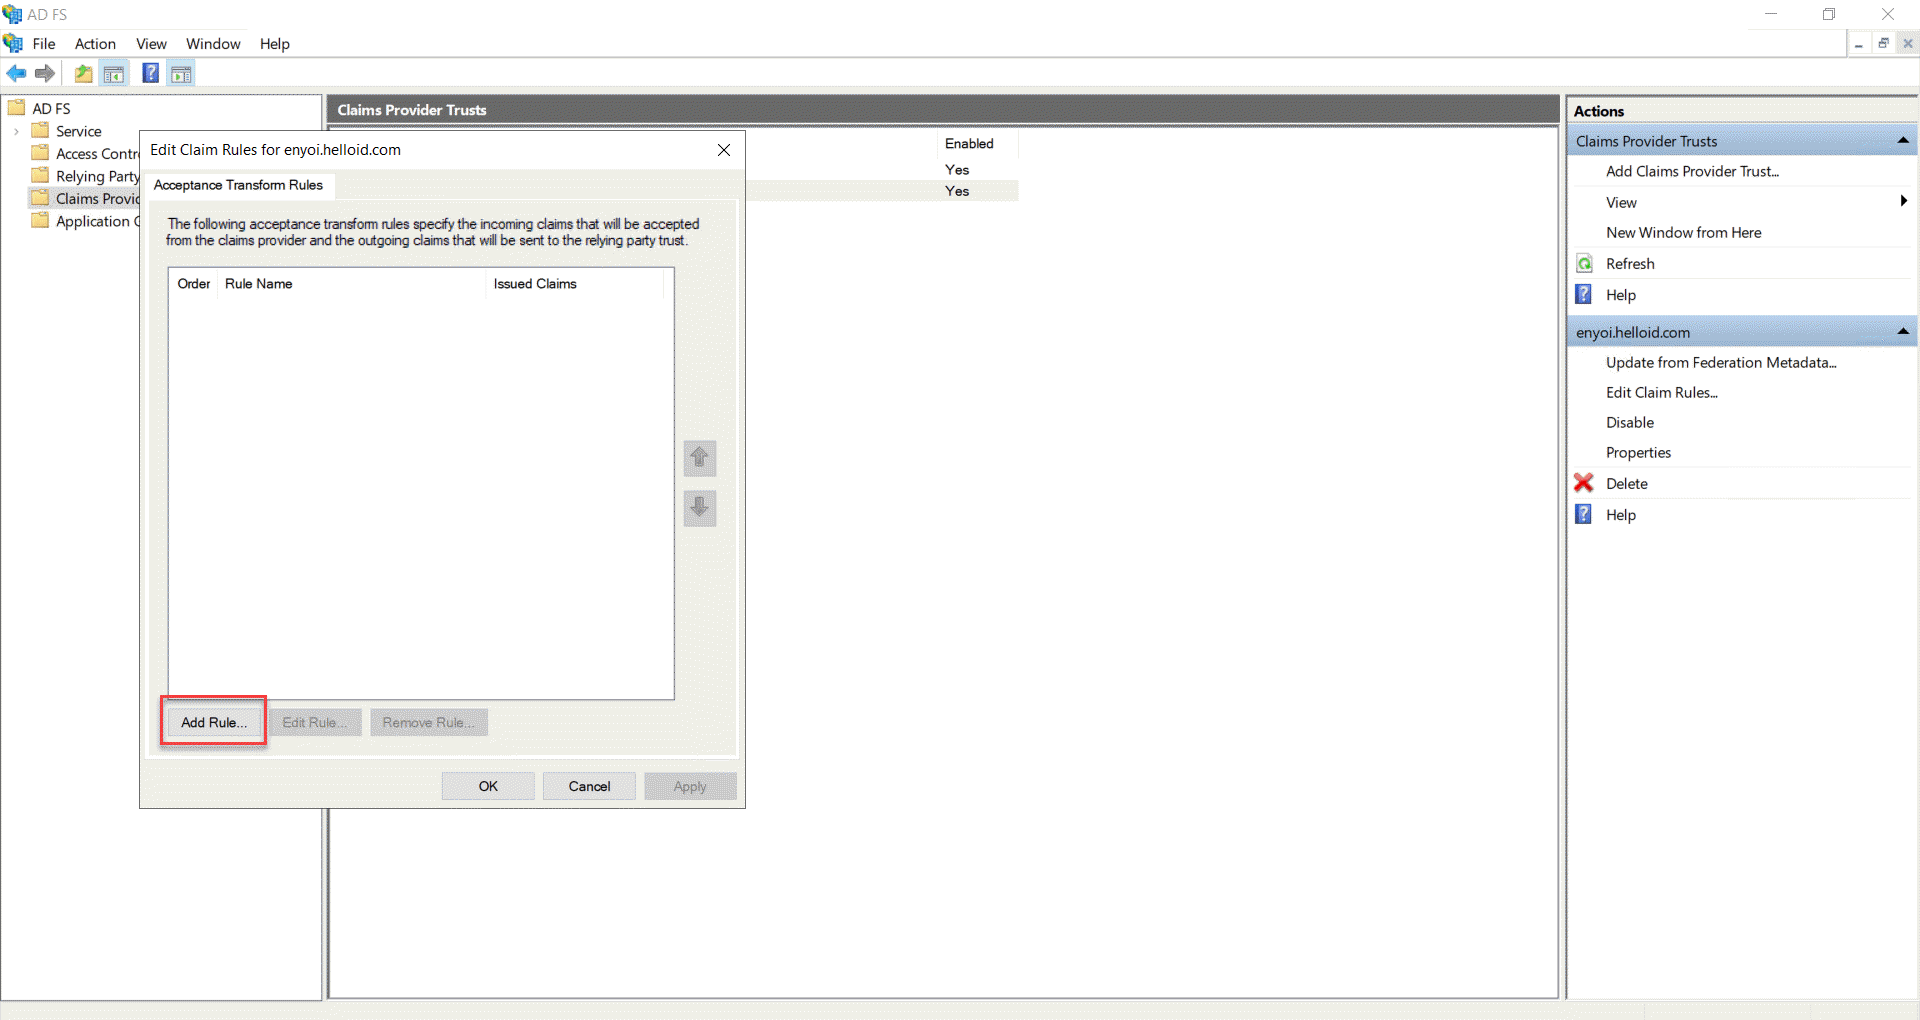
The Edit Claim Rules window will open. At the Acceptance Transform Rules page, click Add Rule...
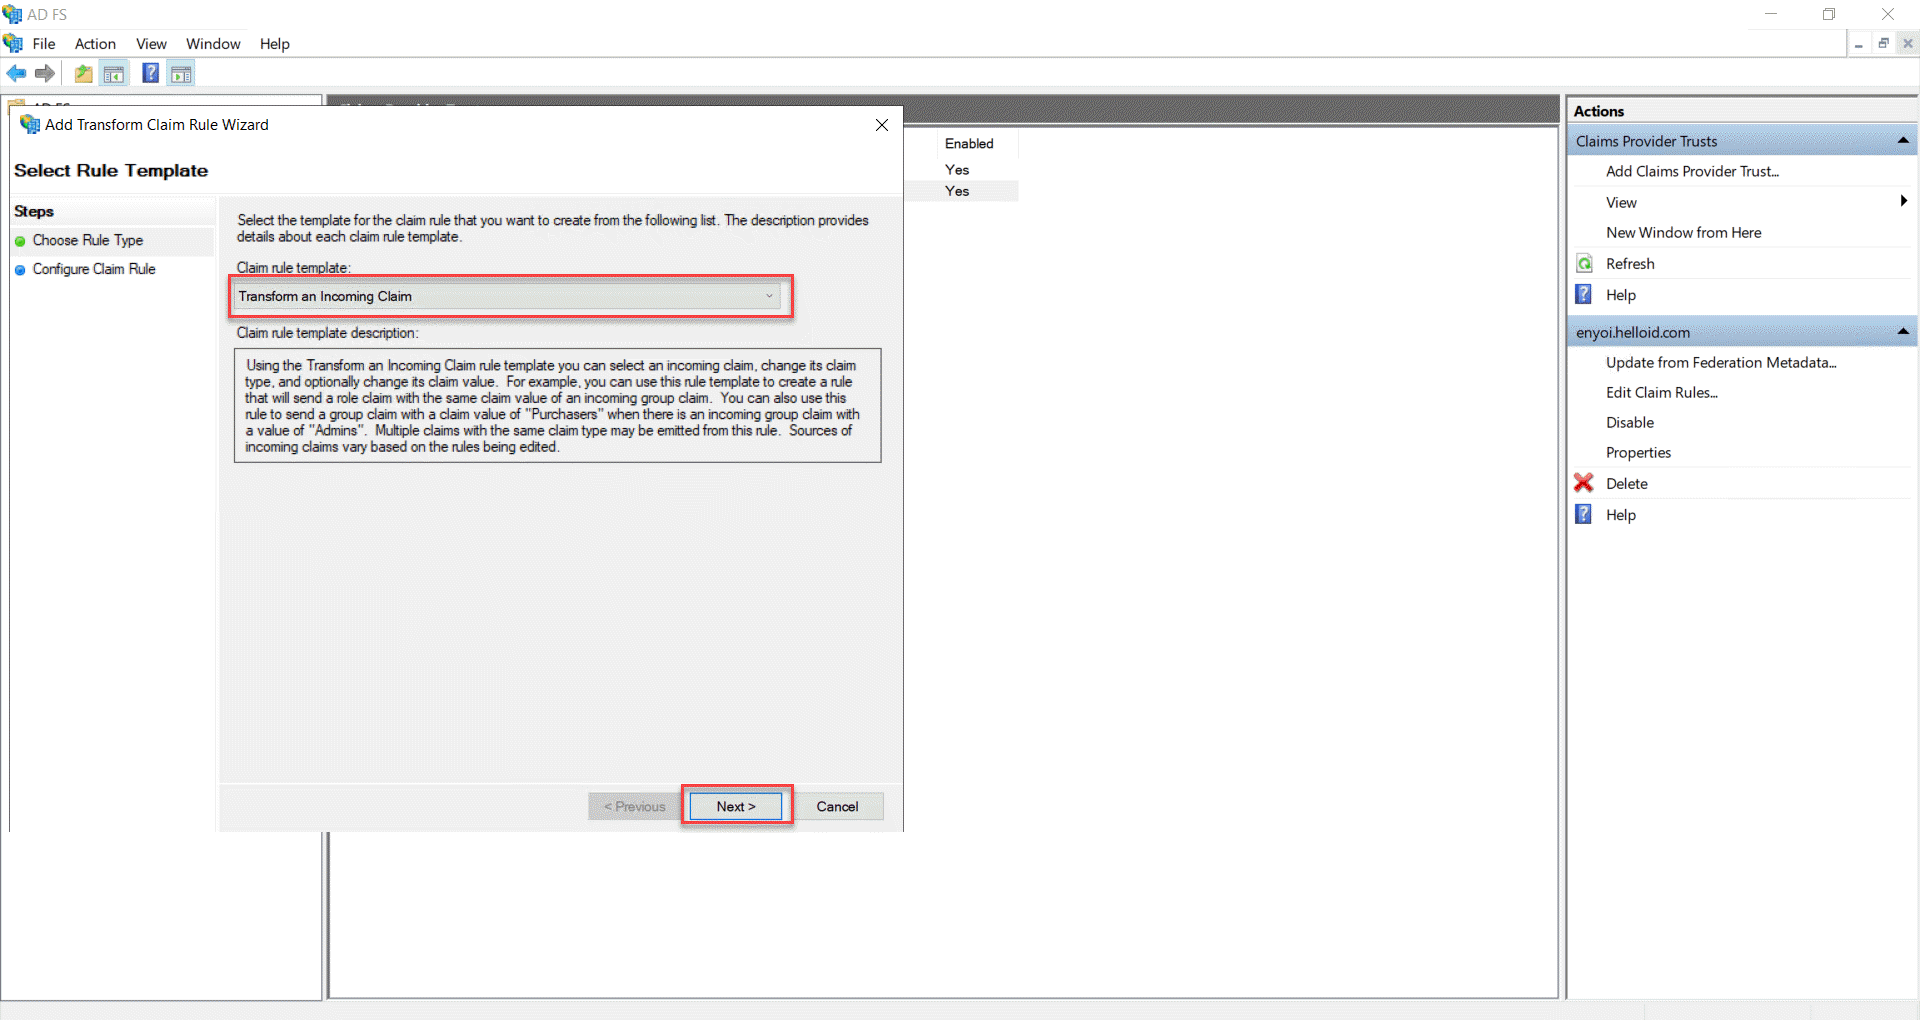
The Add Transform Claim Rule Wizard will appear. On the Choose Rule Type page, select Transform an Incoming Claim from the Claim rule template dropdown. Click Next to continue.
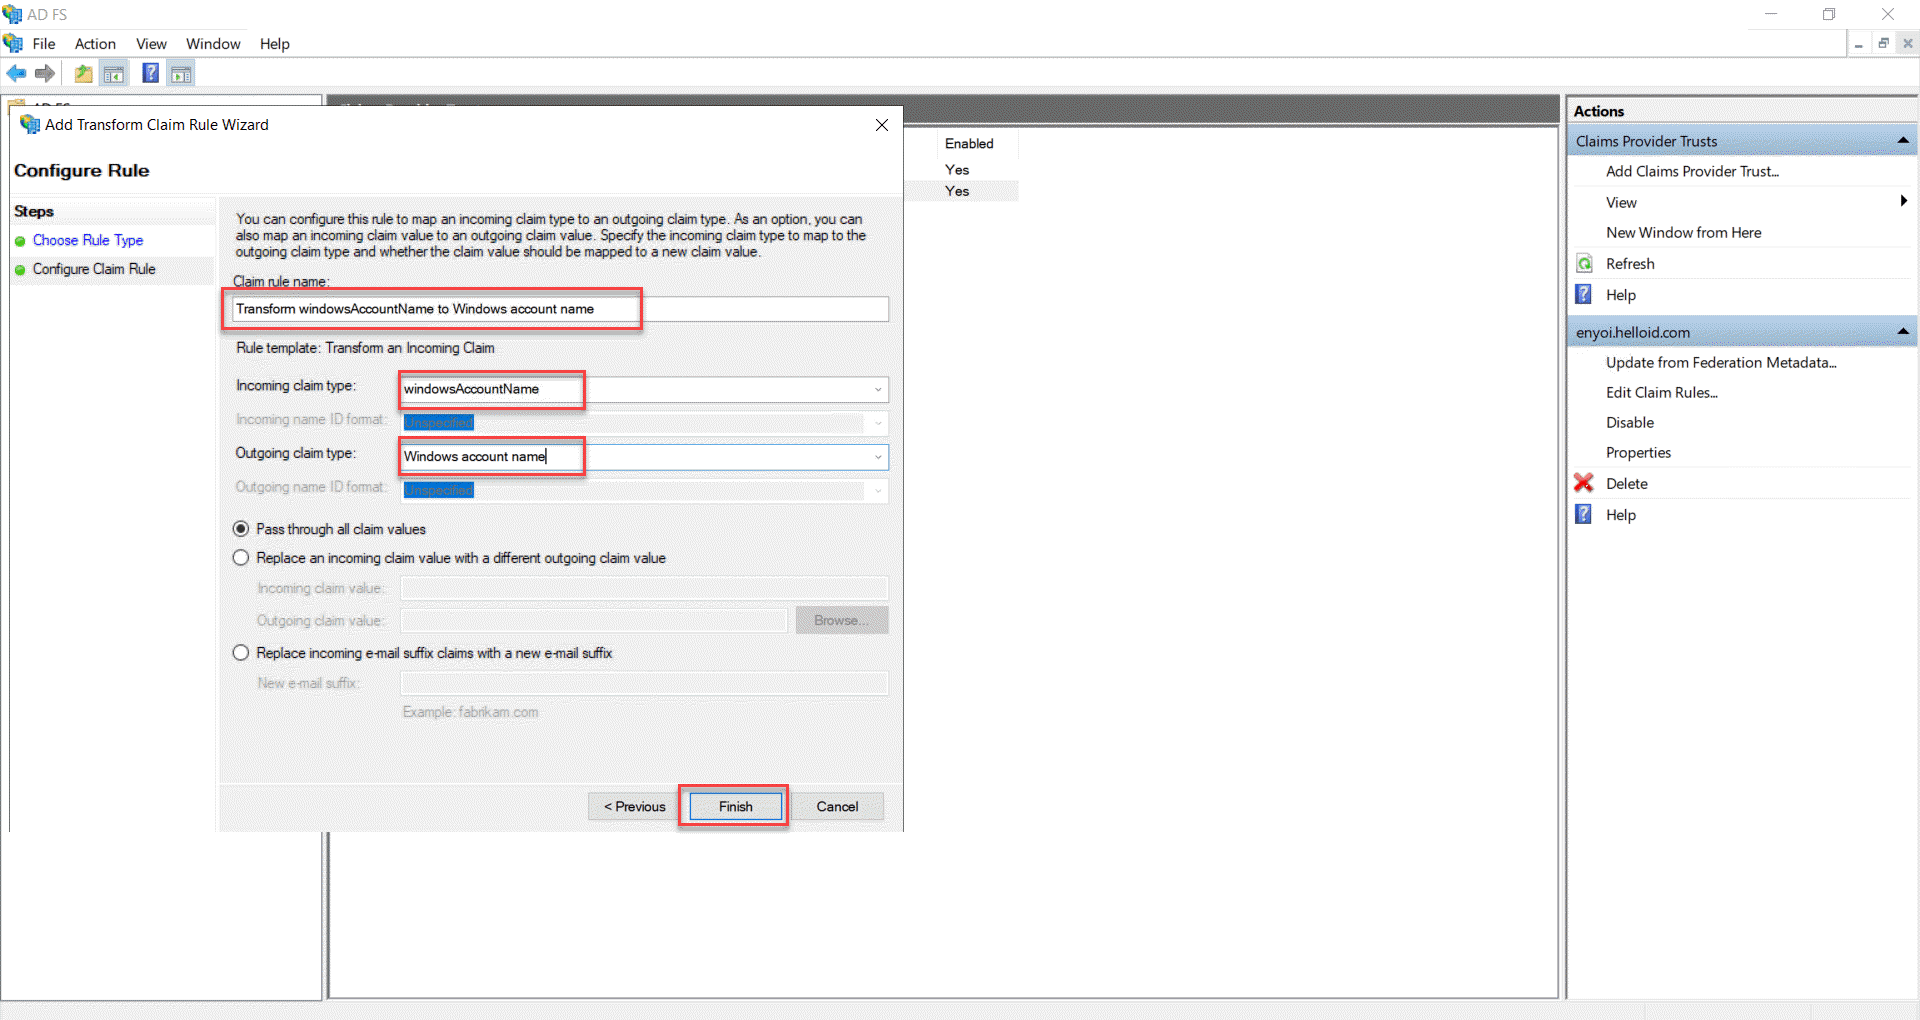
On the Configure Claim Rule page, enter the following settings.
Claim rule name: Transform windowsAccountName to Windows account name
Incoming claim type: windowsAccountName
Outgoing claim type: Windows account name
Note: In HelloID, the Windows account name is stored in "windowsAccountName" attribute. In order to make a claim work from HelloID, a transformation must be applied to the claim.Click Finish to add the rule.
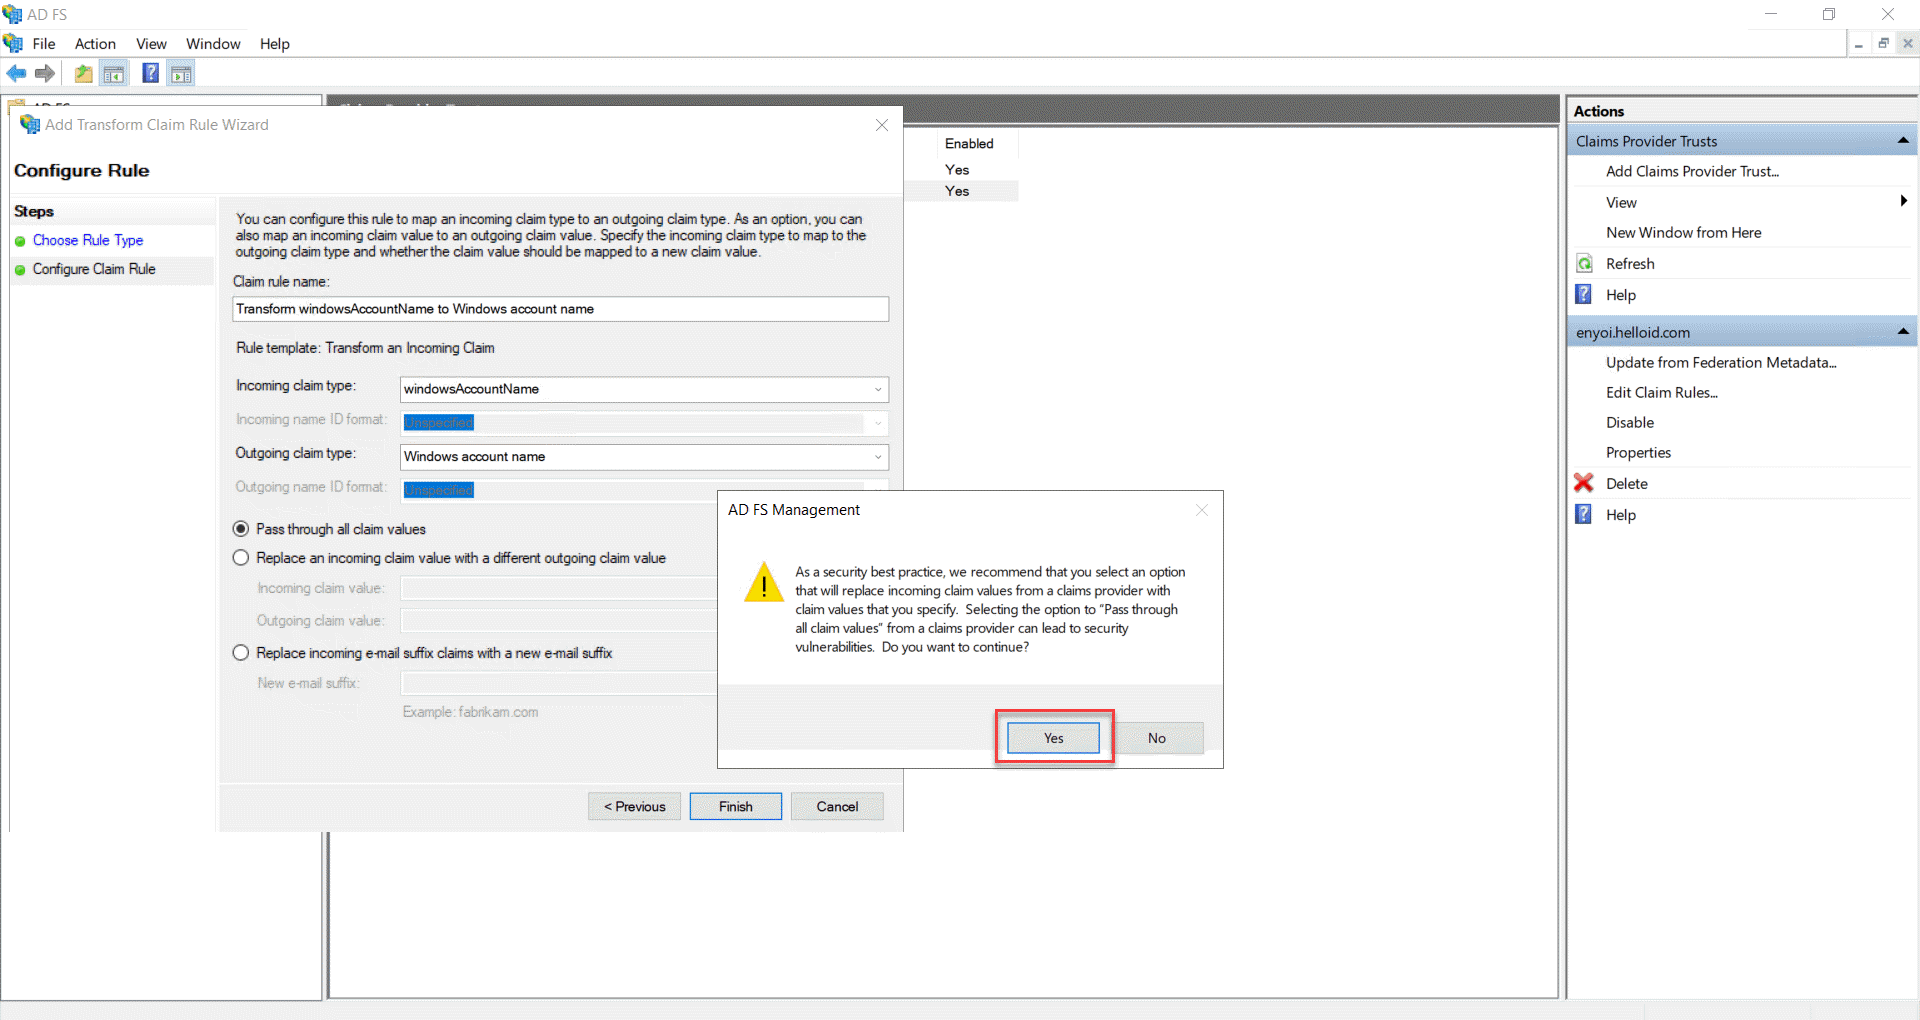
If a warning pops up, this is expected click Yes to confirm the Claim Rule.
Finally, back Acceptance Transform Rules page click OK to activate the claim rule.
Finishing Up
The ADFS application has now been added to HelloID, and a trust has been configured between ADFS and HelloID. You are now free to assign the application to users within your organization and begin testing it and using it. You can learn more about managing applications and assigning permissions here.