Configure Exchange Online
For more information, see Exchange Online.
For the relevant Azure AD target system, Edit a target system.
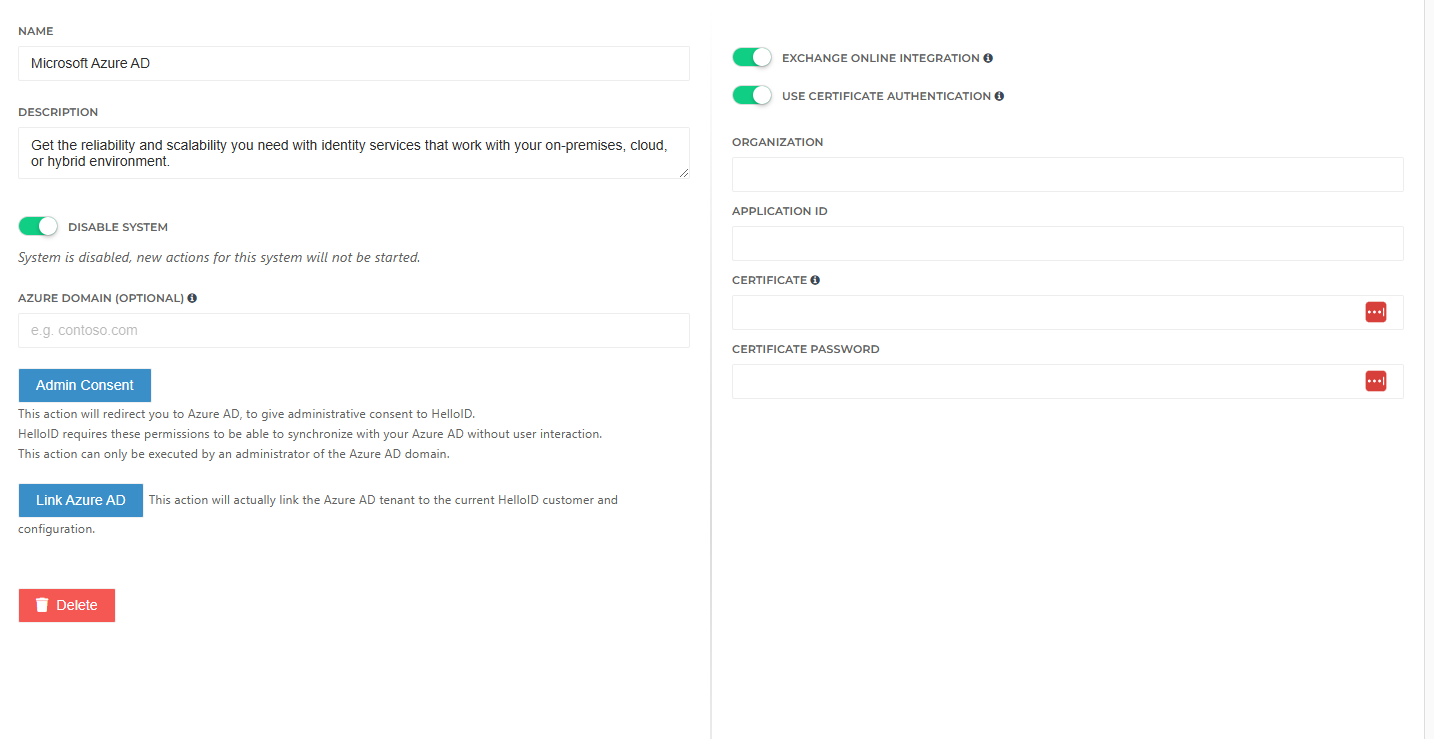
On the General tab, enable the Exchange Online Integration toggle.

Choose between Modern Authentication or Certificate Authentication (Recommended).
Tip
Using Certificate Authentication (SSL) is considered a security best practice.
Modern Authentication:
Create account in Azure with sufficient rights (Requires at least Exchange Online permissions to create and update mailboxes).
Enter username (above created account).
Enter password (above created account).
Certificate Authentication (Recommended)
Create an app registration in Azure with sufficient permissions (Requires at least Exchange Online permissions to create and update mailboxes)
Assign certificate to app registration for authentication (in Azure).
Enter Organization (domain of tenant).
Enter Application ID (ID of the app registration created above).
Enter Certificate (a Base64-encoded string representation of the certificate assigned to the app registration).
Tip
To convert a PFX file into a Base64-encoded string, open PowerShell as an administrator and run the following code (replacing the path with the actual path to your PFX file):
$fileContentBytes = Get-Content "C:\Path\To\HelloID_Exchange_Cert.pfx" -Encoding Byte [System.Convert]::ToBase64String($fileContentBytes) | Out-File "C:\Path\To\HelloID_Exchange_Cert_Base64.txt"Enter Certificate Password (The password for the certificate assigned to the app registration).
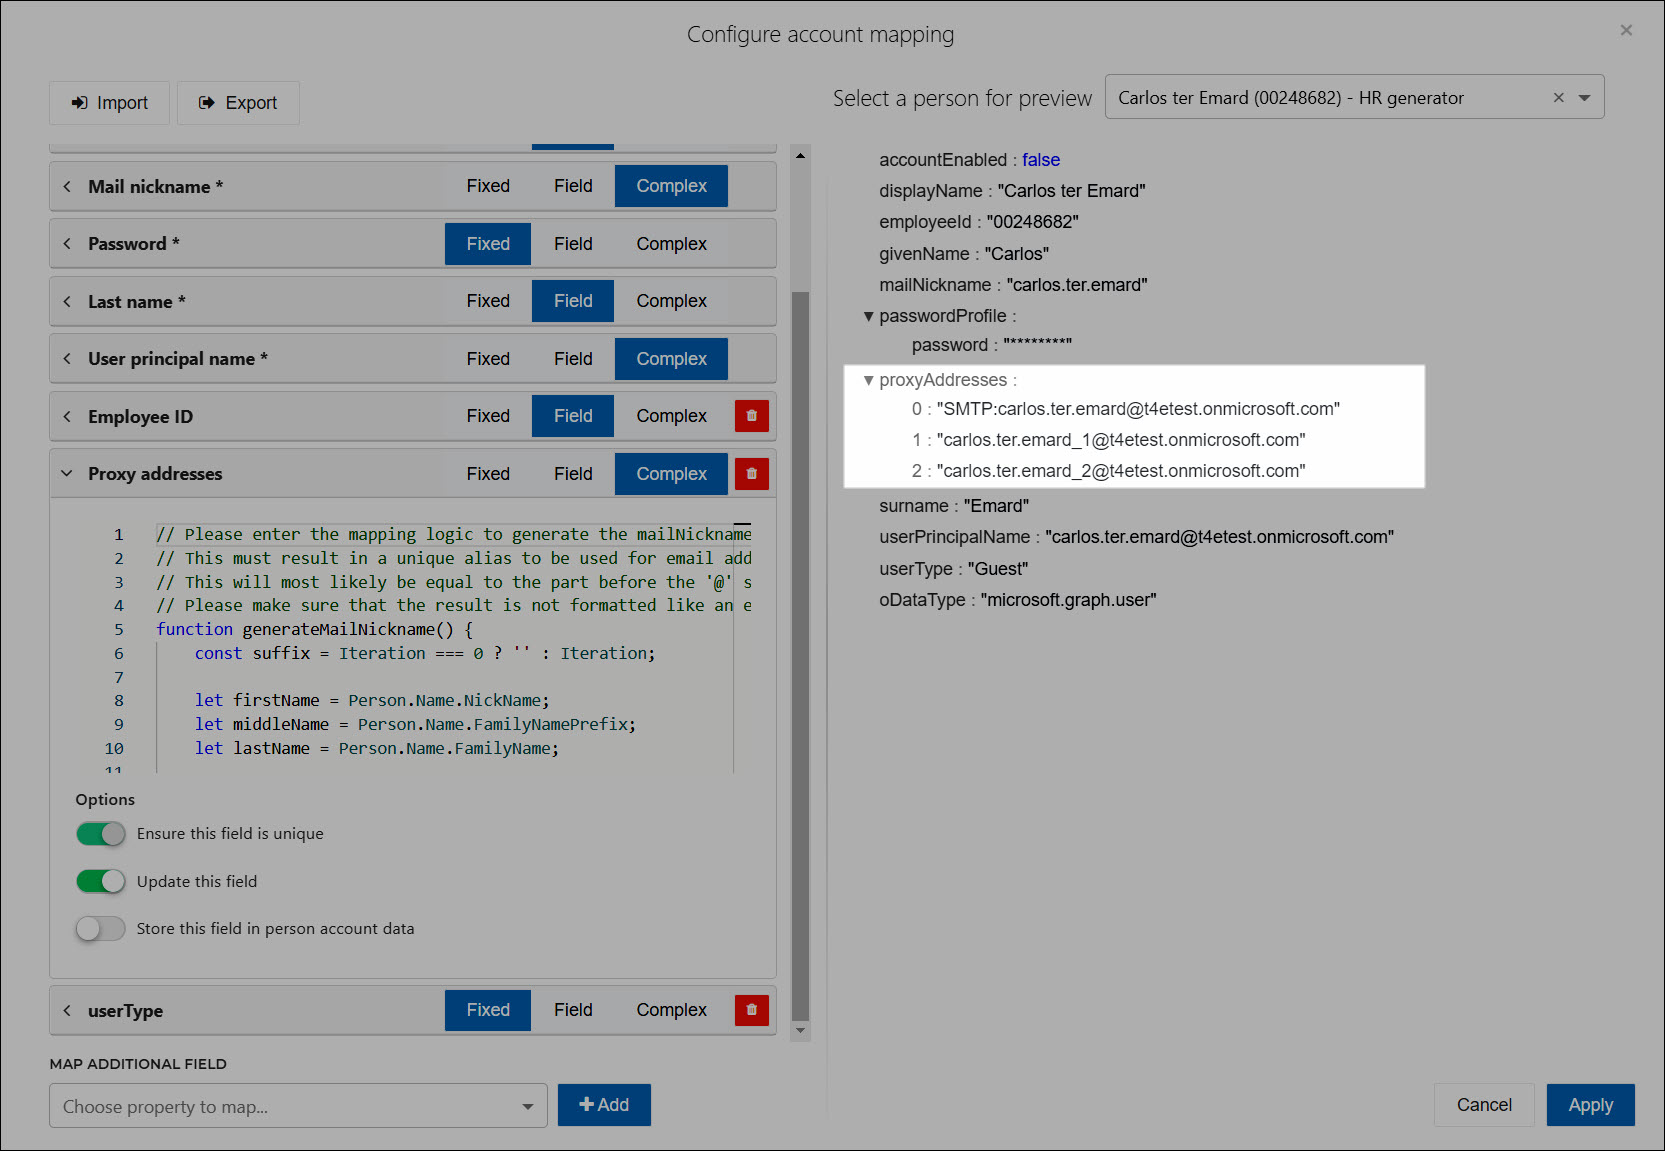
Ensure that the proxyAddresses mapping has been configured (see Configure initial mappings).
When Exchange Online is enabled, this mapping defines the SMTP addresses for target accounts.

Caution
Do not attempt to map the mail attribute when Exchange Online is enabled.
Exchange Online is now enabled, and mailboxes will be created when Account entitlements are granted for this Azure AD target system.