ADP Workforce SAML application setup
Introduction
This manual shows you how to setup SSO to ADP Workforce using the SAML protocol. The configuration takes place in HelloID and in the ADP Workforce admin center.
Requirements:
HelloID environment
ADP Workforce environment
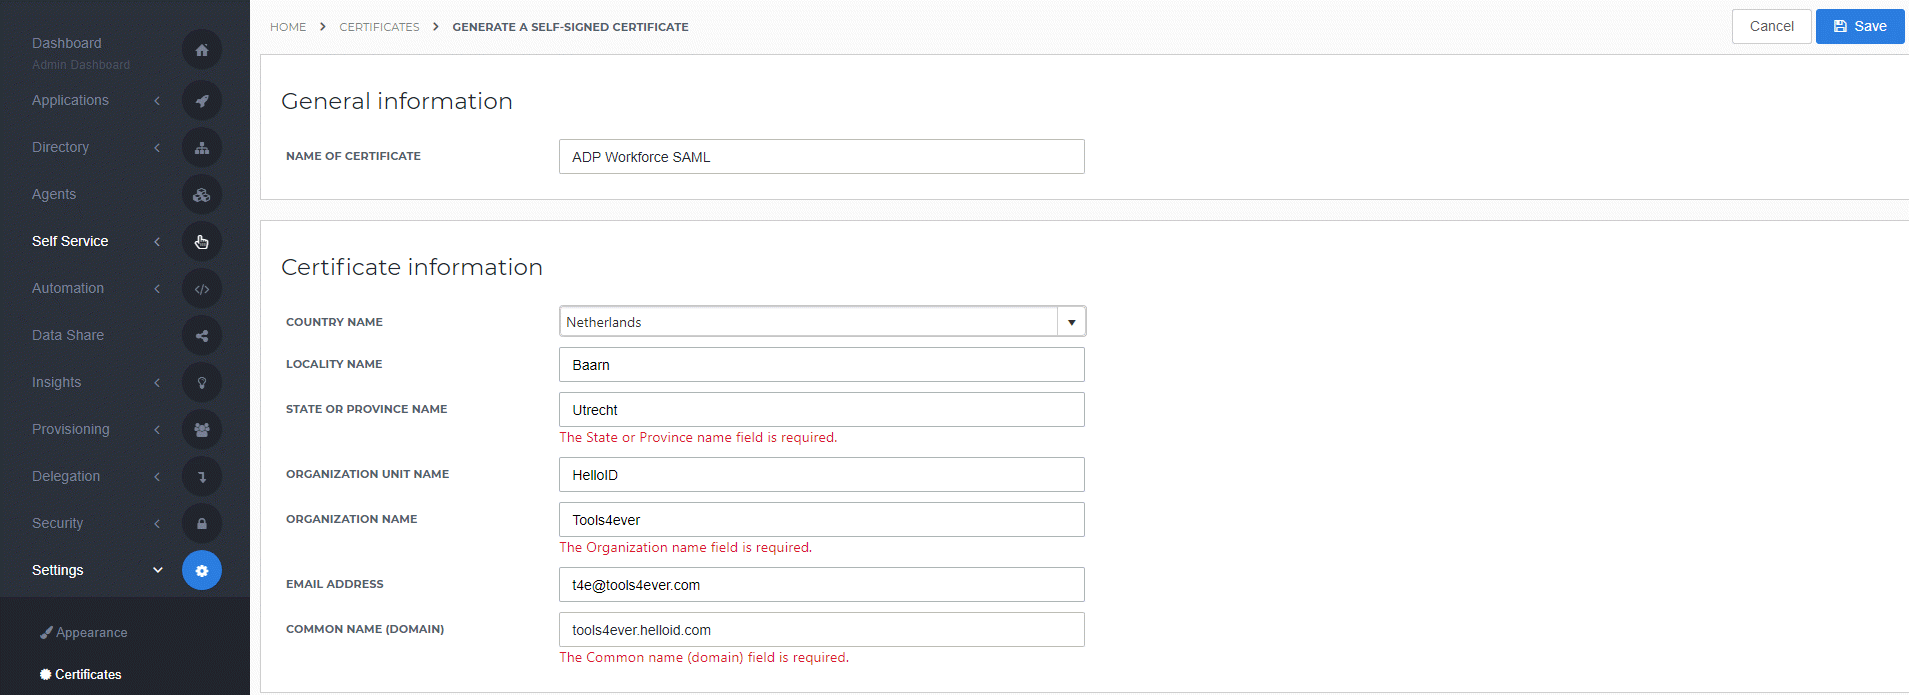
Create or Import a Certificate
If there is no certificate yet, a certificate must be imported or created. This can be done in the HelloID Administrator Portal under Settings > Certificates. For this tutorial, we will use a self-signed certificate. Learn more about certificates here.
Application Setup
Add the ADP Workforce Application
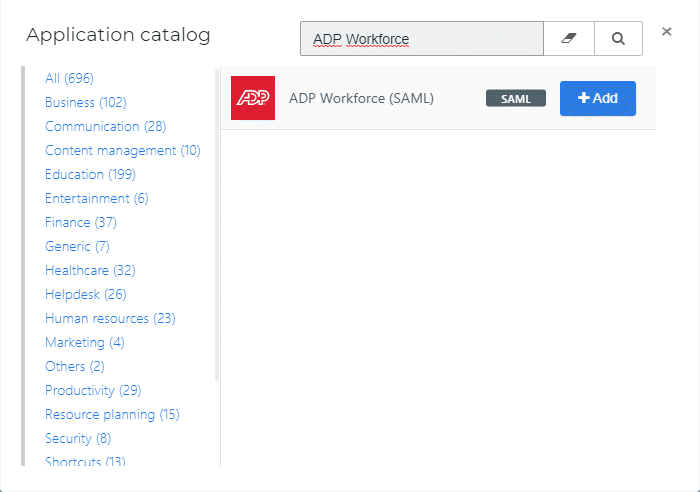
Create a new application in HelloID by navigating to Applications > Applications. Open the Application Catalog and search for "ADP Workforce". Find the SAML template, and click Add. Learn more about managing applications here.
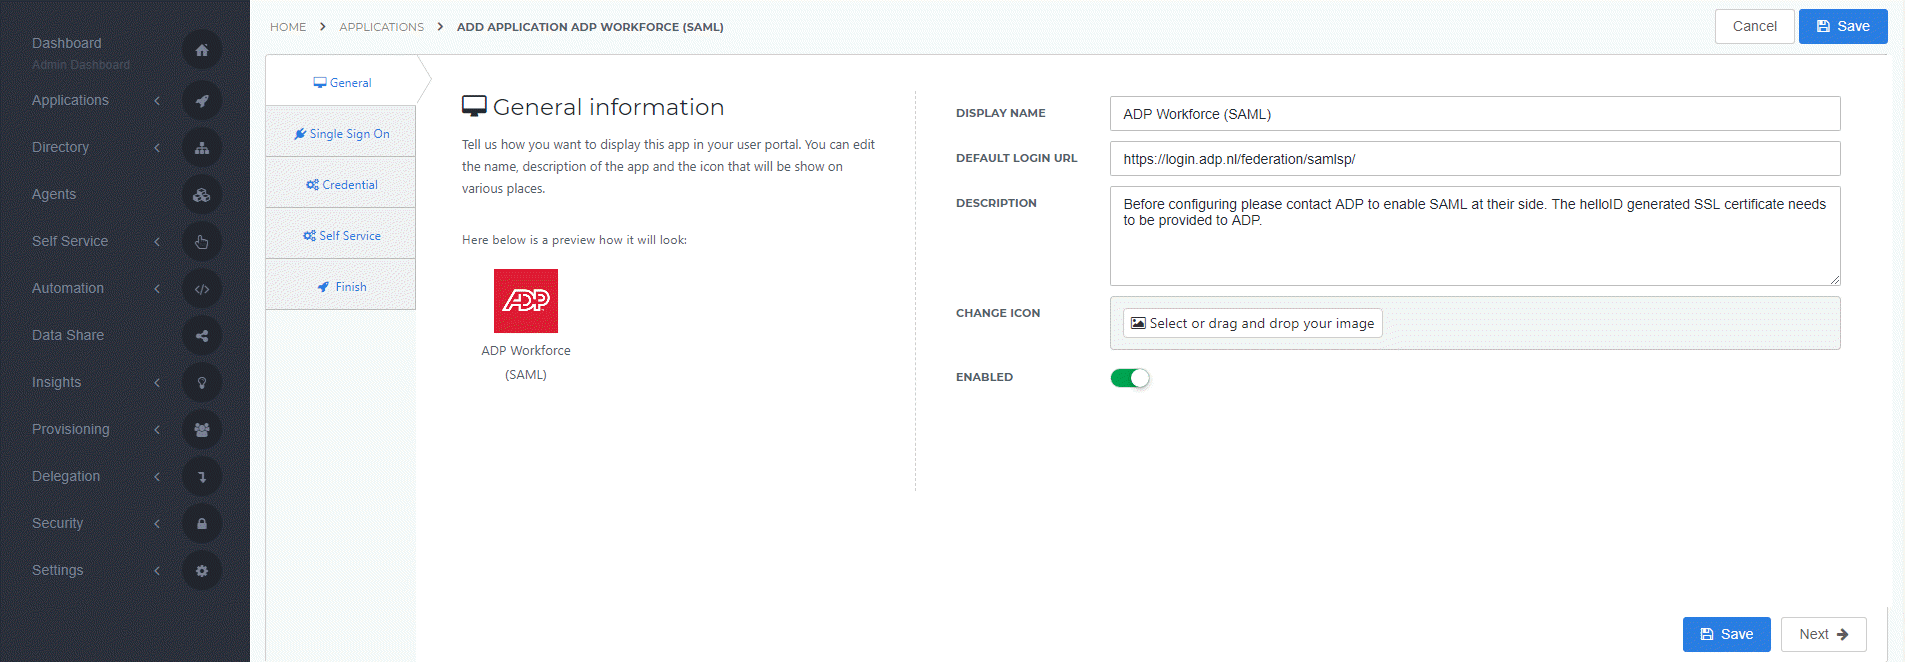
General tab
On the General tab, fill the default login URL with the ADP Workforce environment SSO URL. Optionally, you may also add a description. Click Next.
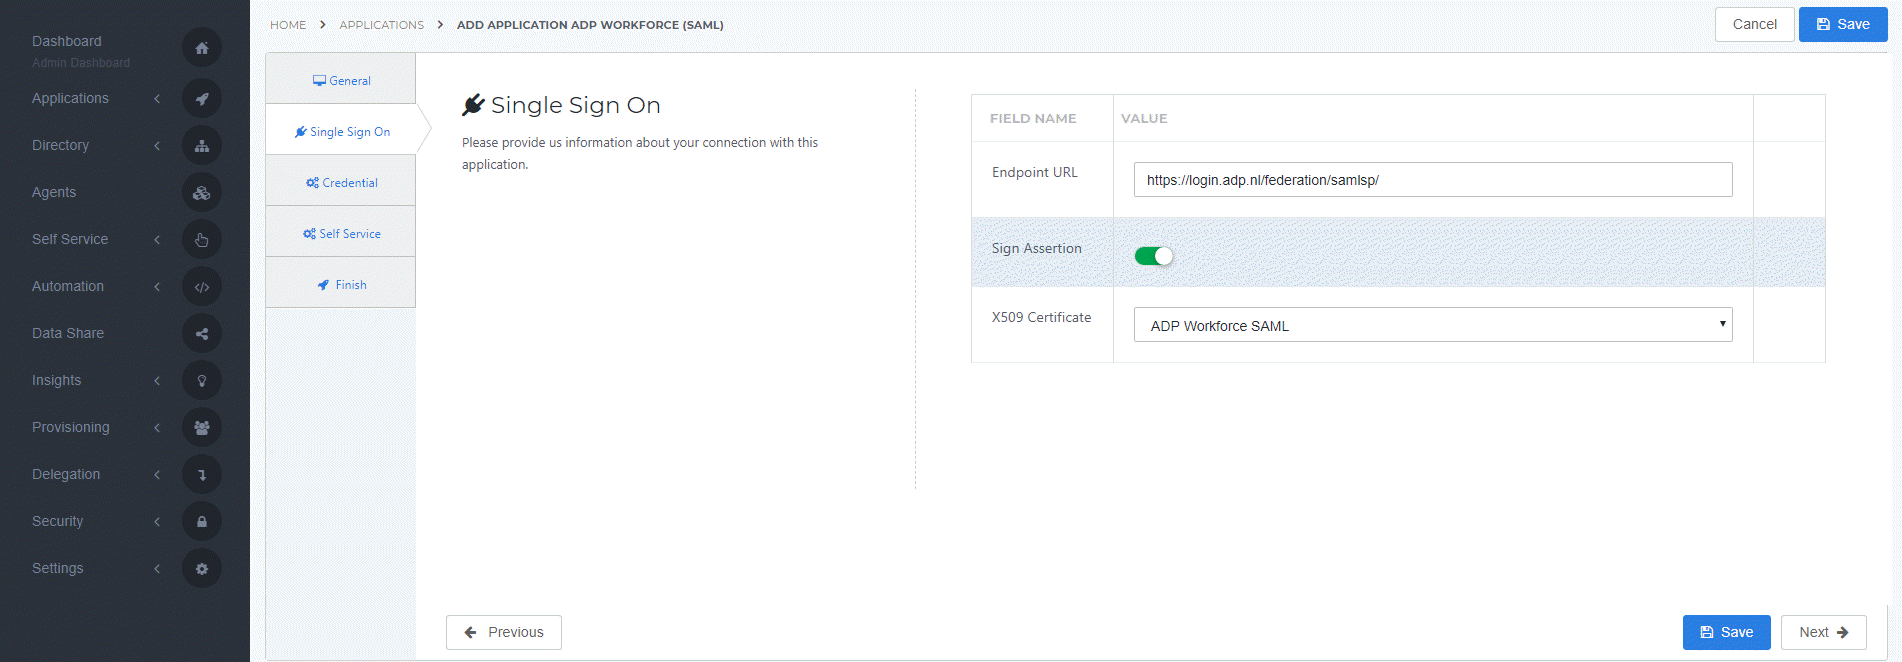
Single Sign-on tab
On the Single Sign-On tab, perform the following steps:
The Endpoint URL is already filled in. We recommend not changing this value.
Select or deselect the Sign Assertion, depending on the ADP Workforce environment settings.
By default, ADP Workforce requires a signed assertion, so the default and recommended setting is having this selected.
In the X509 Certificate dropdown, select the certificate that you created or imported previously.
Click Next.
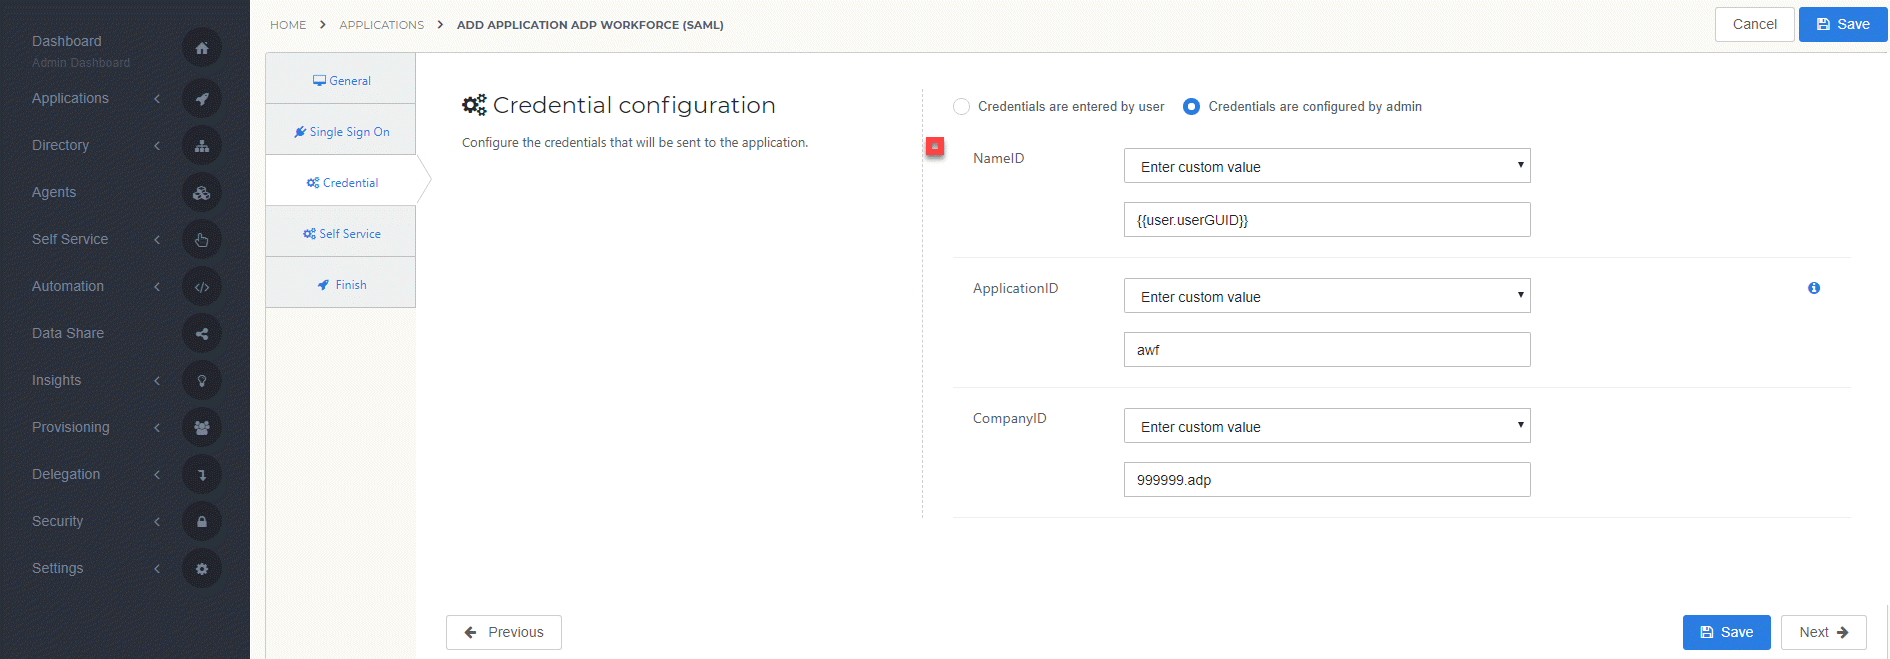
Credential tab
On the Credential tab, perform the following steps:
Select 'Enter custom value' and enter '{{user.userGUID}}' for the NameID.
For ApplicationID, select 'User's contact email'.
The ApplicationID defines the ADP application which will be started if the call to ADP Identity Federation Services is successful. Allowed application ID’s are:
ApplicationID
ADP application
awf
ADP Workforce
pess
ADP Perman/ESS
ipdl
Digital payslip for employees
test
Shows the test/debug page for Identity Federation Services
ess2
For ESS (legacy)
Note: This value has to match the 'Netwerknaam' in ADP Workforce (to be configured later on).
Enter a CompanyID, the CompanyID defines the ADP CompanyID for your organization. Normally it is a 6 digit number followed by ‘.adp’.
Note: ADP provides different CompanyID’s per phase. This has to be changed during development, testing/QA and production.
Click Next.
Self service tab
On the Self Service tab, choose whether to automatically create a Self Service product, which makes the application requestable. This is optional. Click Next.
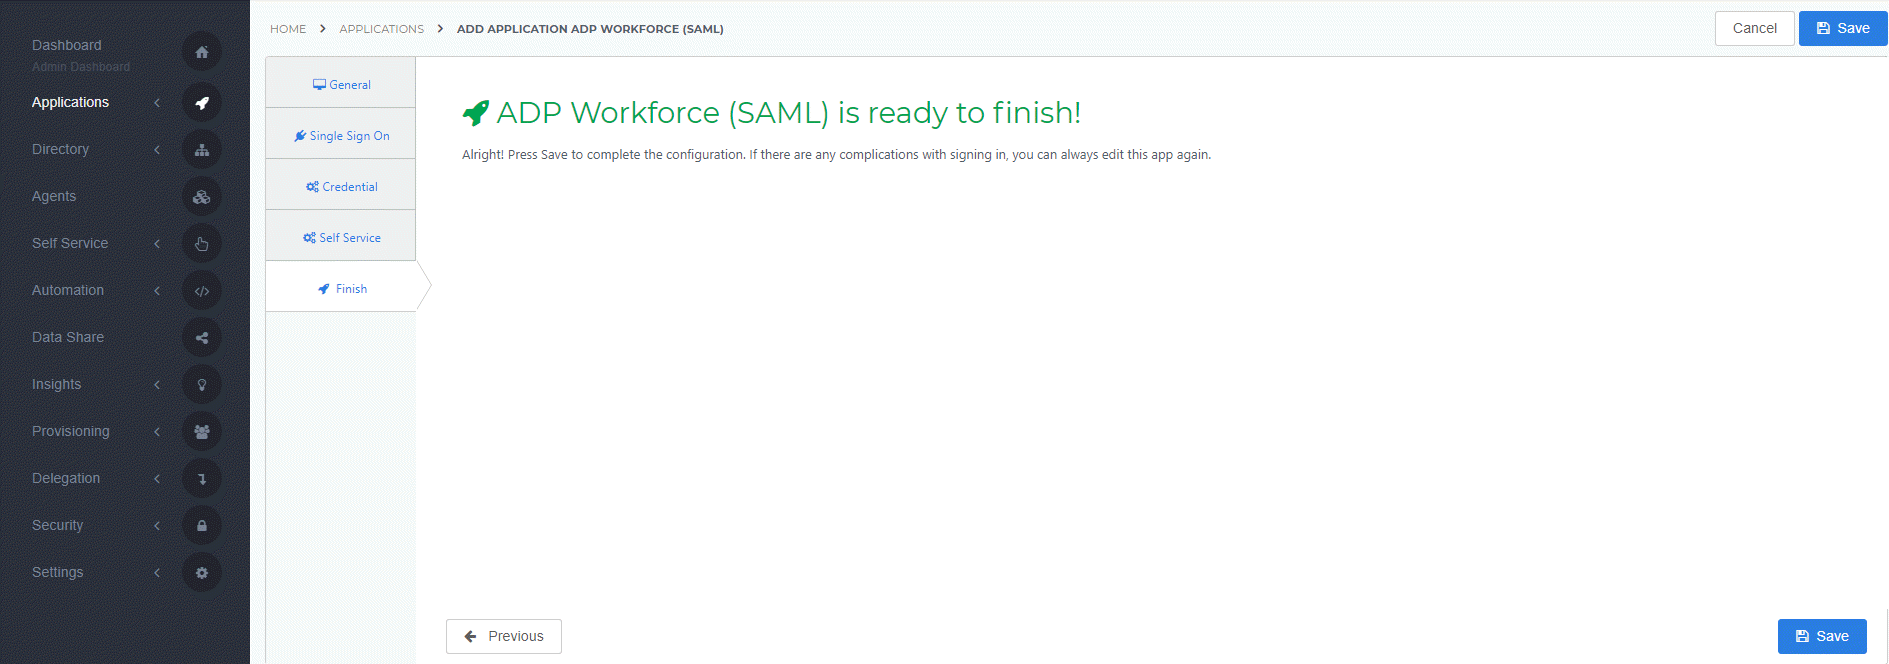
On the Finish tab, click Save to add the application to HelloID.
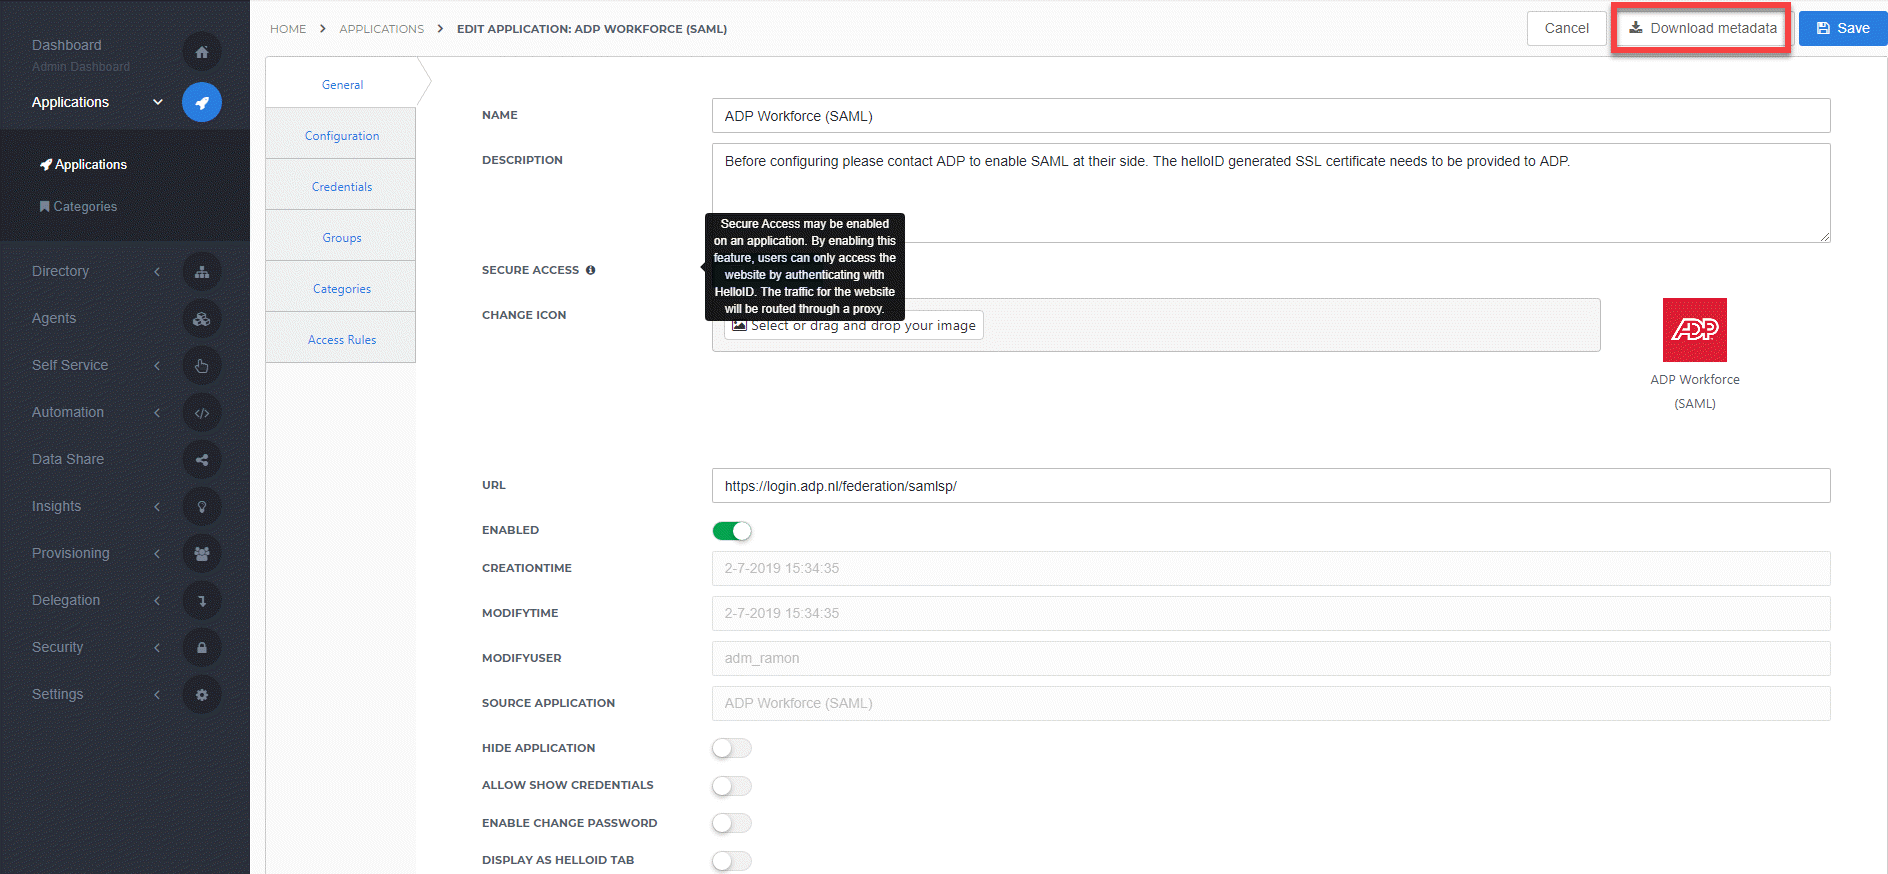
Application metadata
After saving the ADP Workforce application, click its Edit link on the applications overview. This will bring you to its properties page.
You now have two options to obtain the application metadata.
Static metadata (download)
You can simply click Download metadata at the right top of the screen and save the file to your local computer for later use in ADP Workforce.
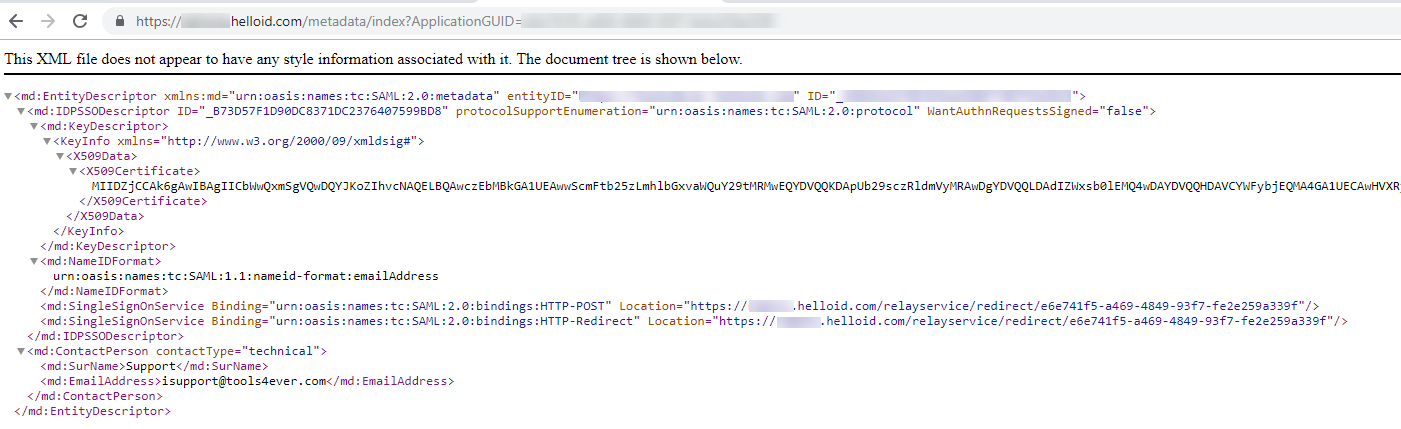
Dynamic Metadata (URL)
You can copy the link address (something along the lines of https://enyoi.helloid.com/metadata/download?ApplicationGUID=e6e741f5-a469-4849-93f7-fe2e259a339f) and replace 'download' with 'index' to view the metadata.
The configuration of the HelloID application is finished.
ADP Workforce Configuration
Request SAML
In order to make the connection, ADP needs to add the connection on their side. All that's left to do is to contact ADP and provide them with the metadata of the HelloID application.
After ADP has added the connection, they will contact you to test the connection.