Customize an Active Directory mapping set
For more information, see Active Directory mapping set.
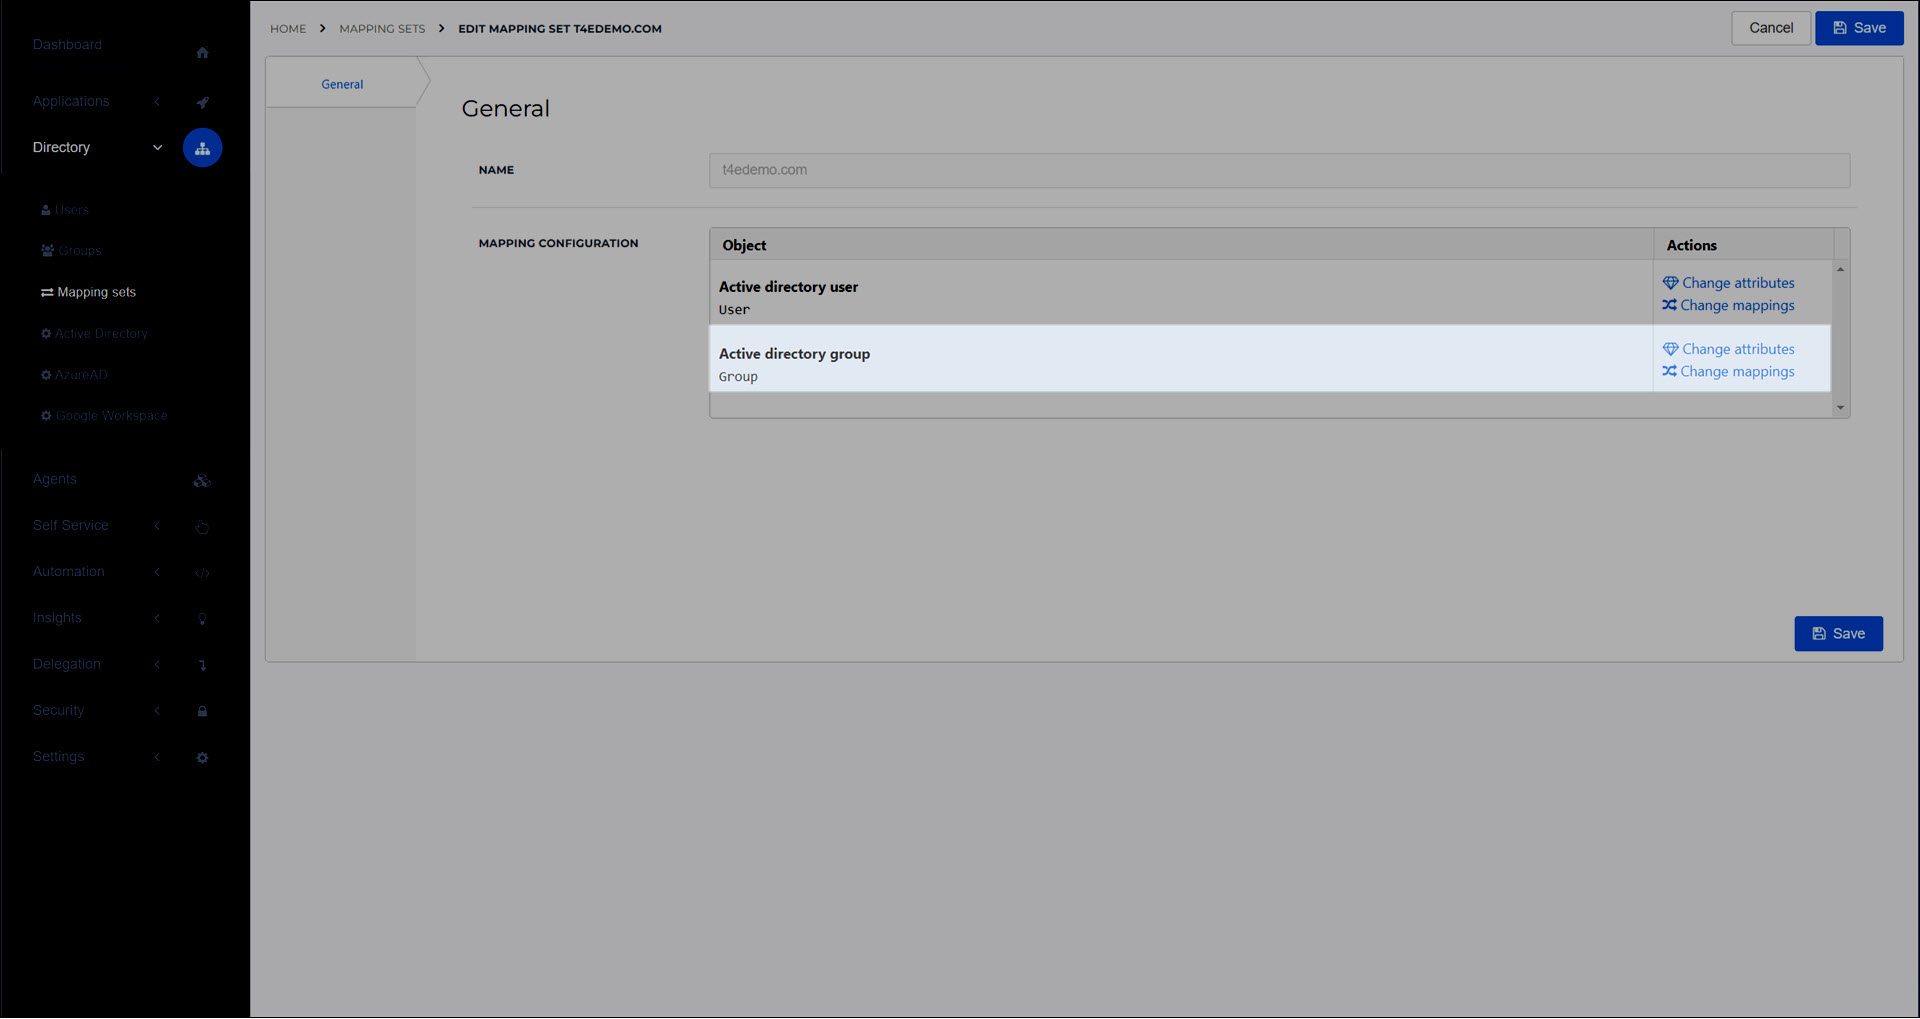
Go to Directory > Mapping Sets.
For the relevant AD mapping set, click Edit.
For this example, we'll edit our
t4edemo.commapping set.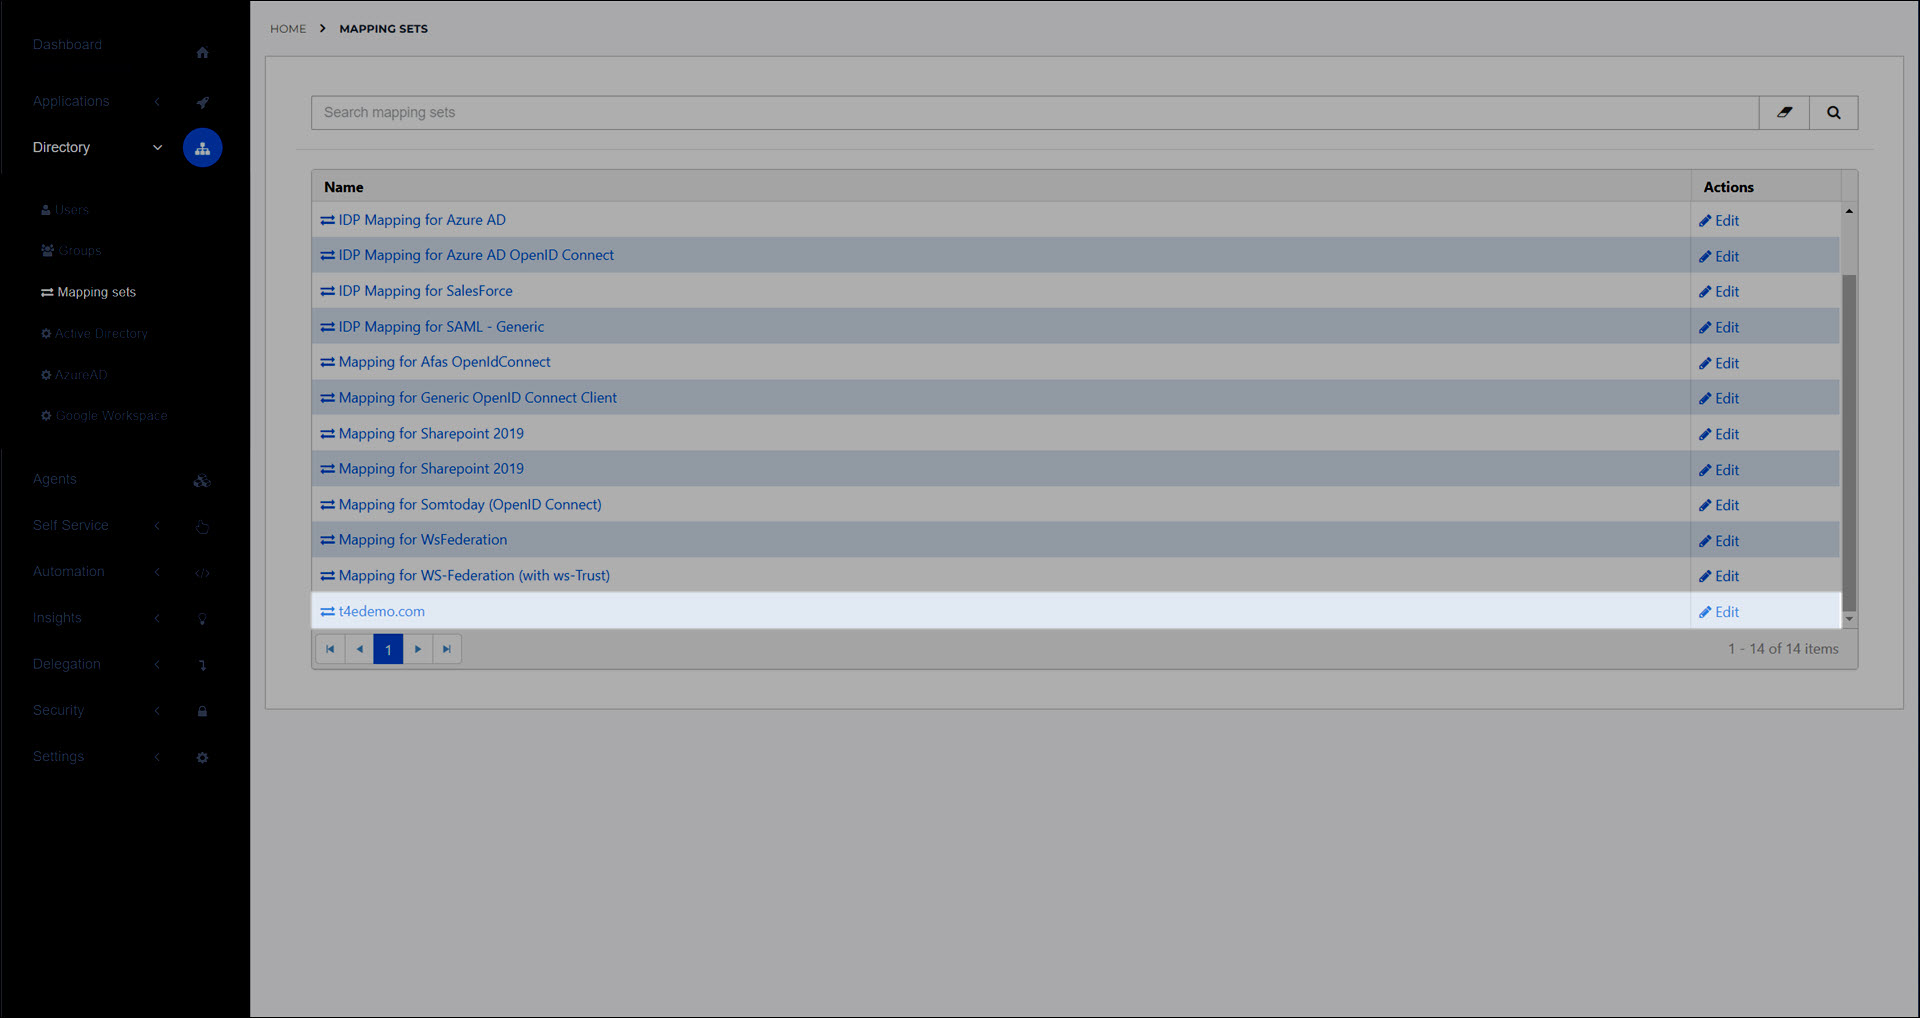
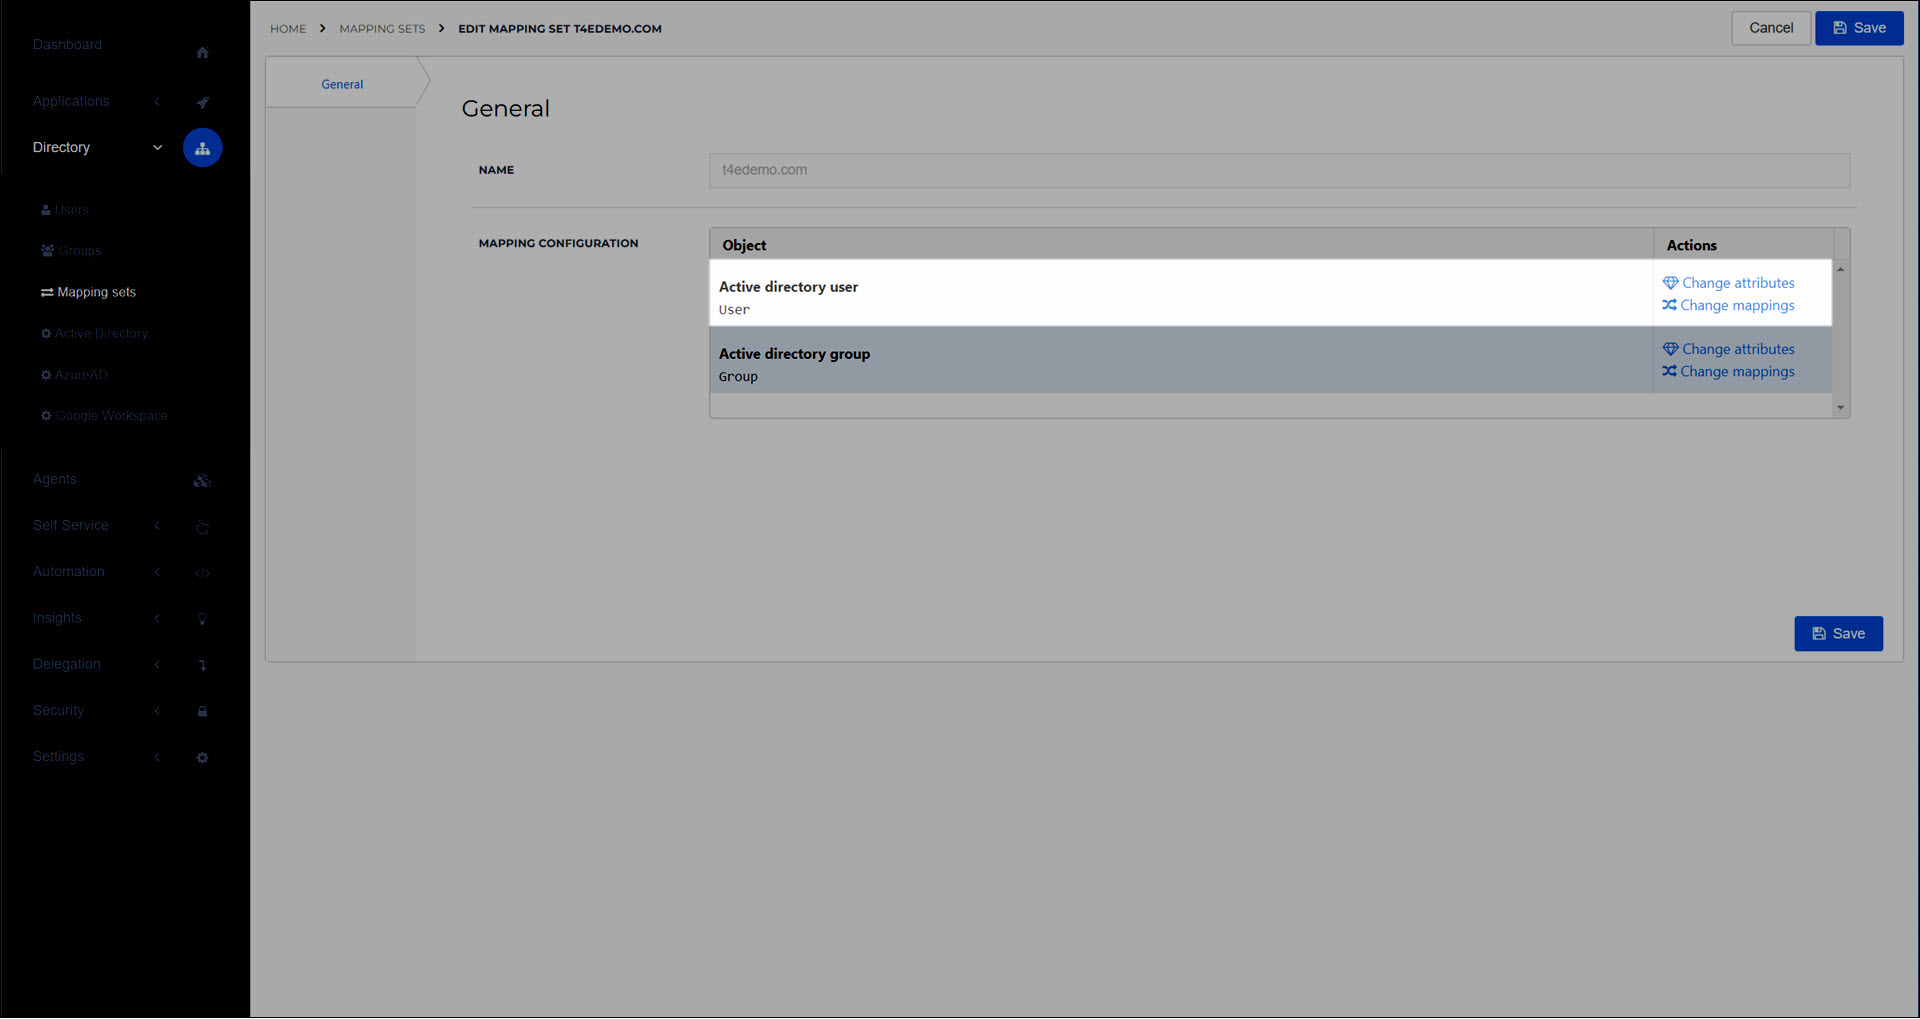
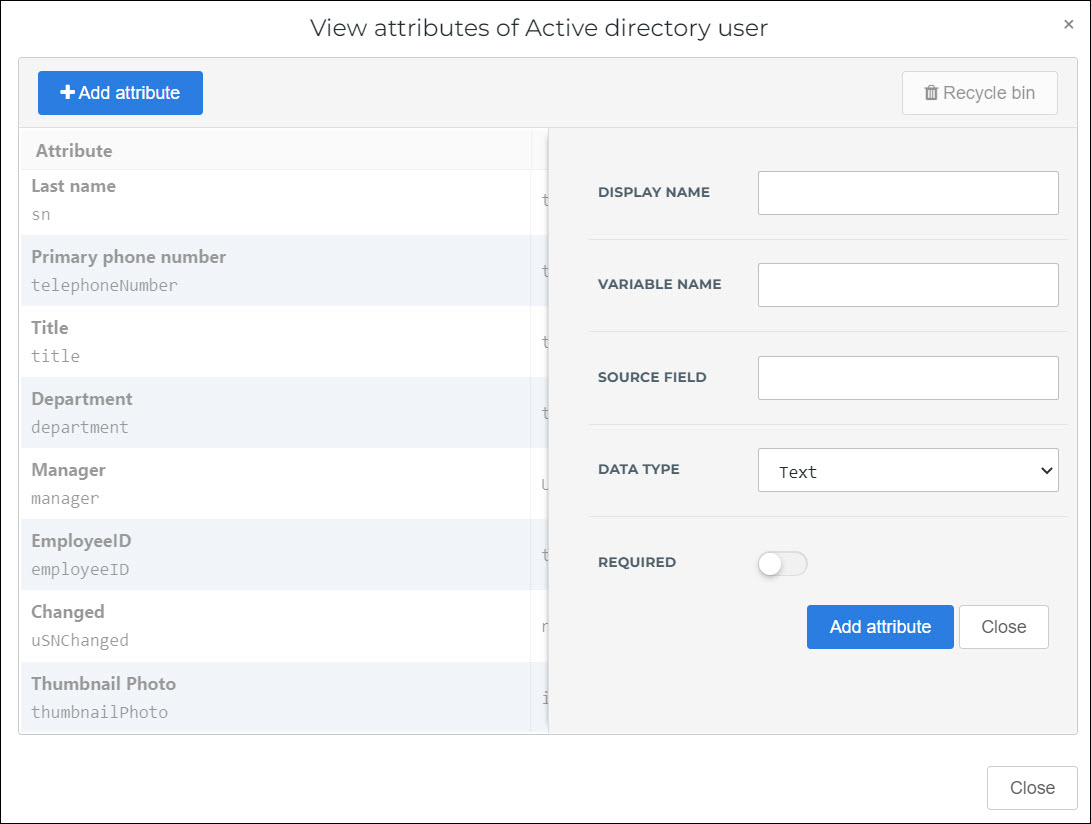
Click Change Attributes for Active Directory User to go to the Change Attributes (AD mapping) screen, where you define the attributes that HelloID will pull out of the AD user schema.
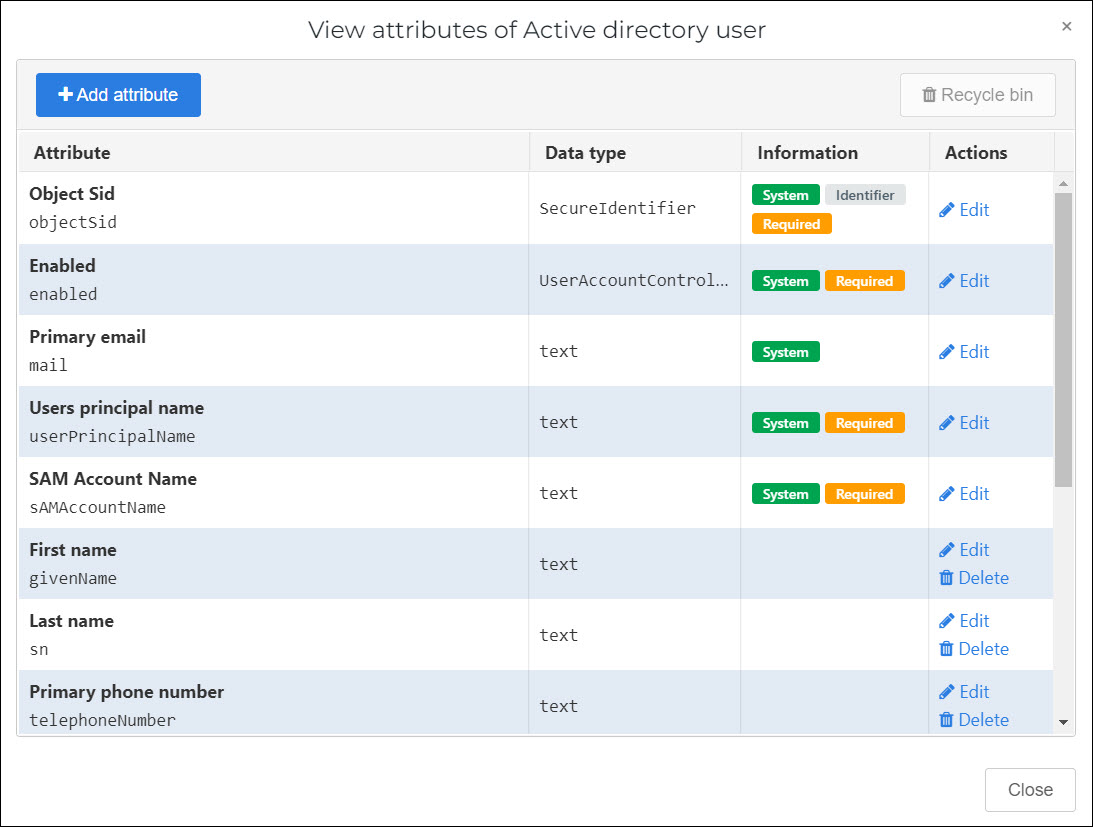
Choose one of the following:
To edit an existing attribute, click Edit.
To add a new attribute, click Add Attribute.
For this example, we'll add a Mobilephone attribute.
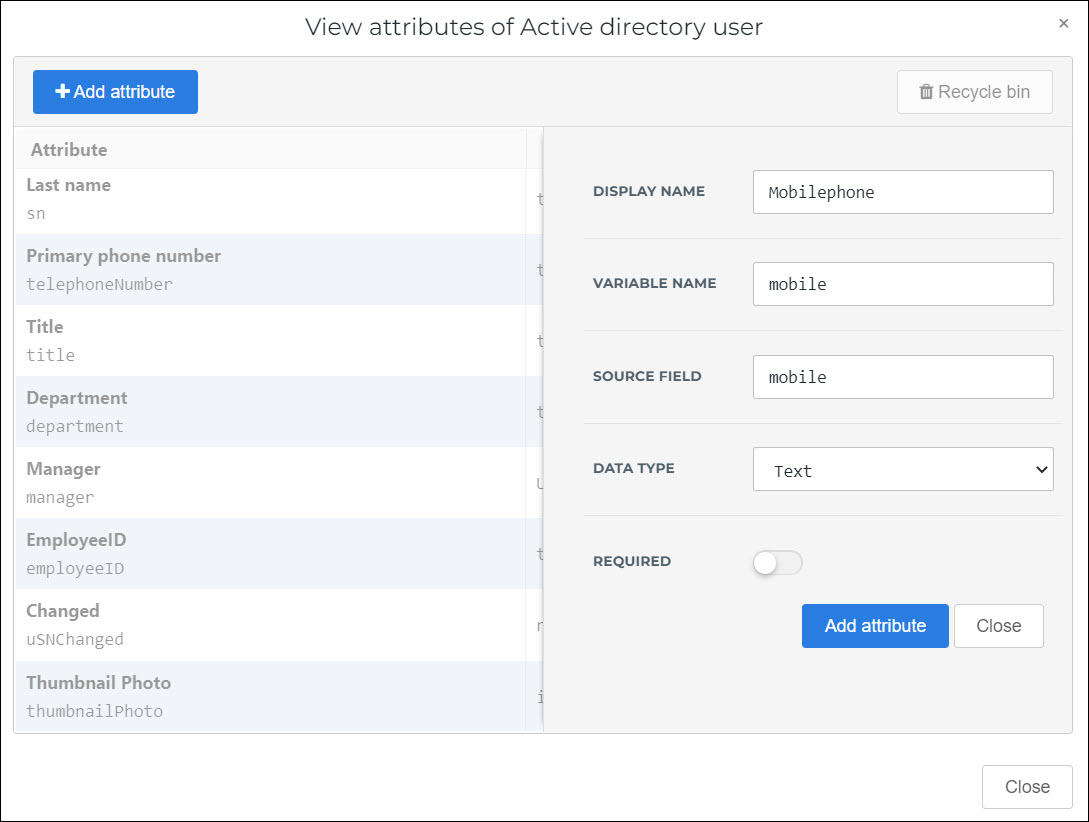
Click Add Attribute to confirm.
The new attribute is added to the claim set.
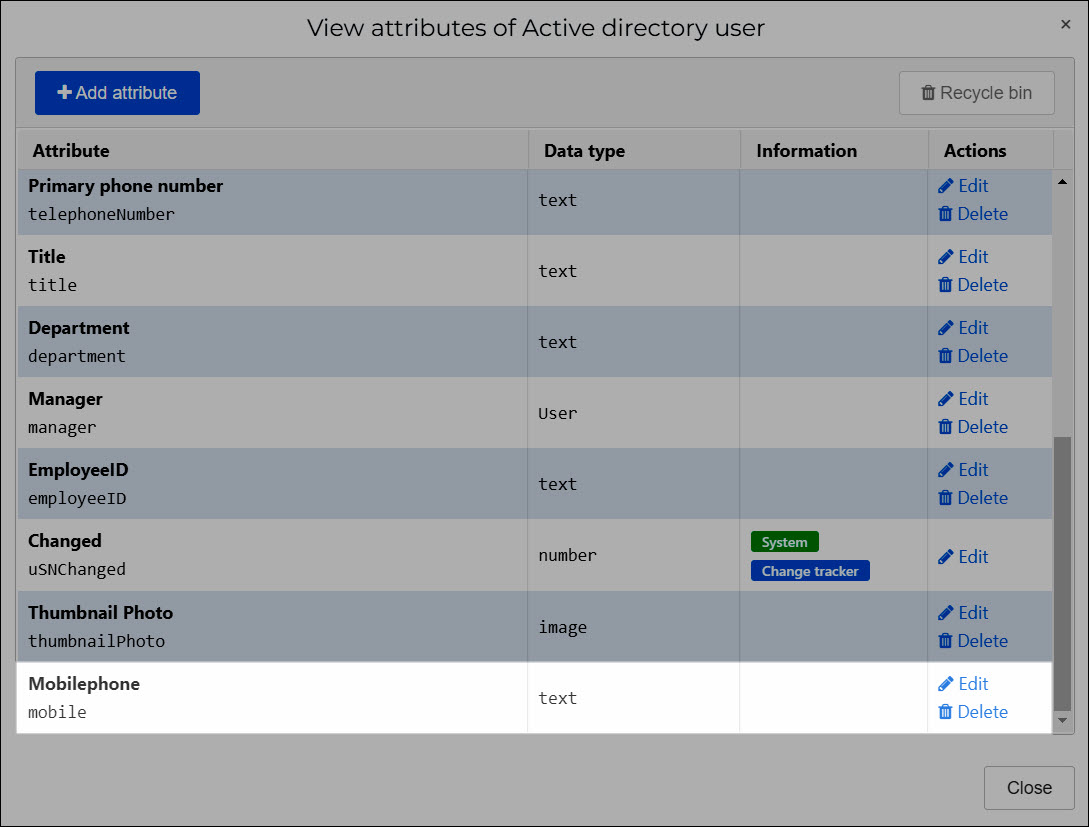
Click Close.
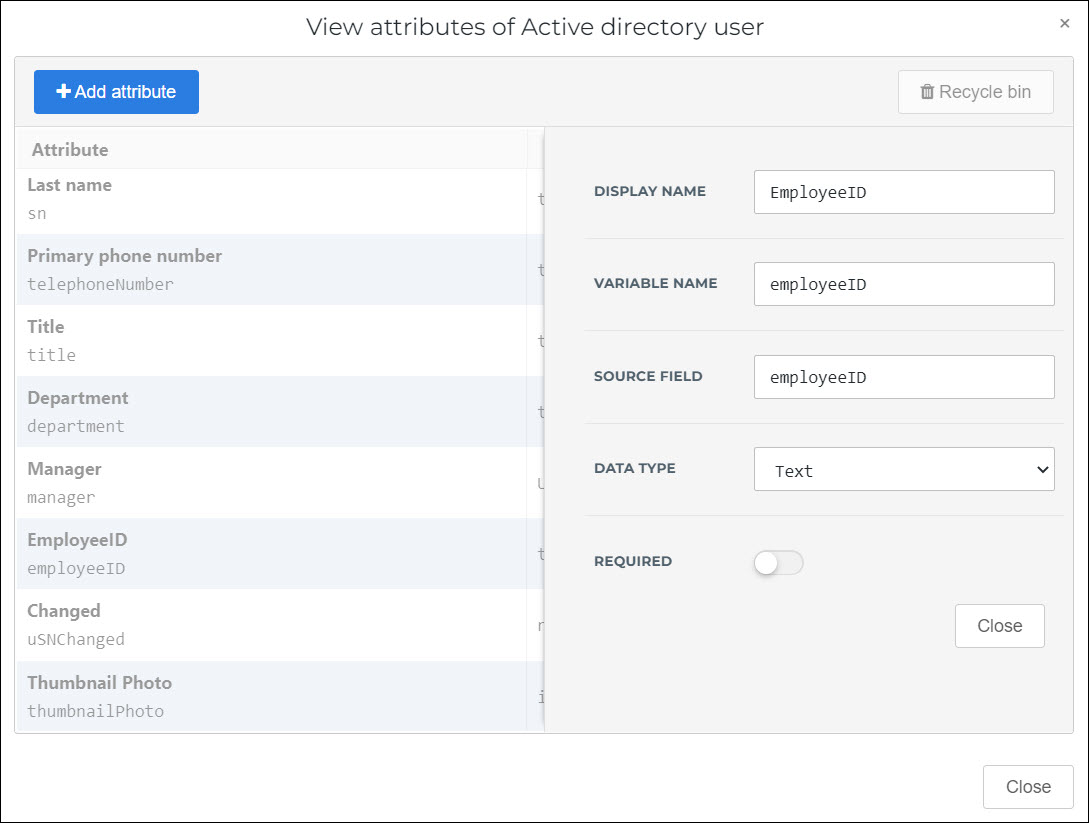
- Display Name
Not used.
- Variable Name
The intermediary name of the attribute, which will be shown in the User column of the Change Mappings screen, in the next step. Typically should be the same as the Source Field.
- Source Field
The name of the attribute to pull from the AD user or group schema.
- Data Type
The data type of the attribute.
- Required
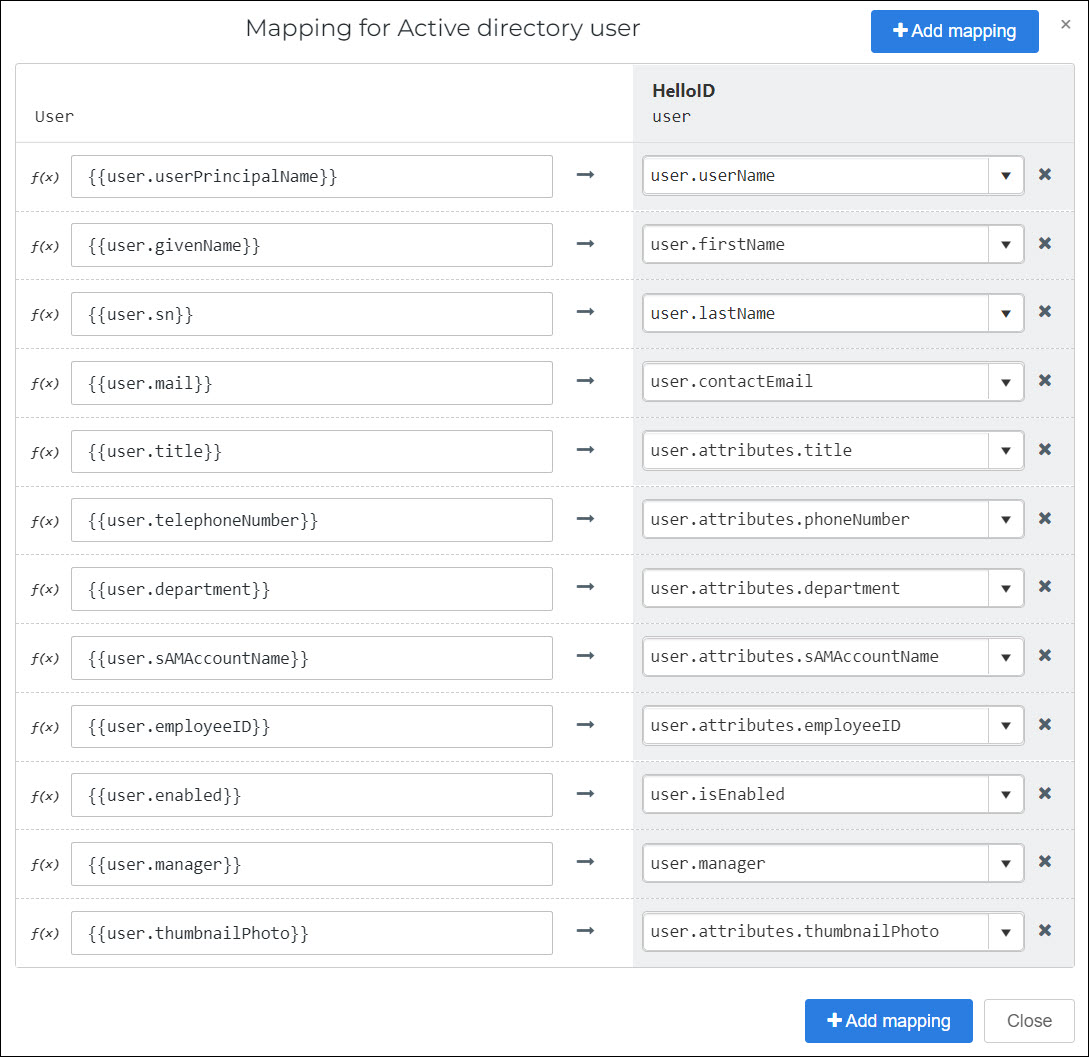
Click Change Mappings for Active Directory User to go to the Change Mappings (AD mapping) screen.
In the User column, you specify attributes pulled from AD, using their Variable Name. In the HelloID User column, you specify which attribute in the HelloID user schema to map the AD attribute on to.
Tip
In autocomplete, you have access to attributes defined on the Change Attributes (AD mapping) screen, as well as Custom variables.
To remap an existing mapping, delete the text in the User field, and then type
{{to activate autocomplete. Select the new mapping.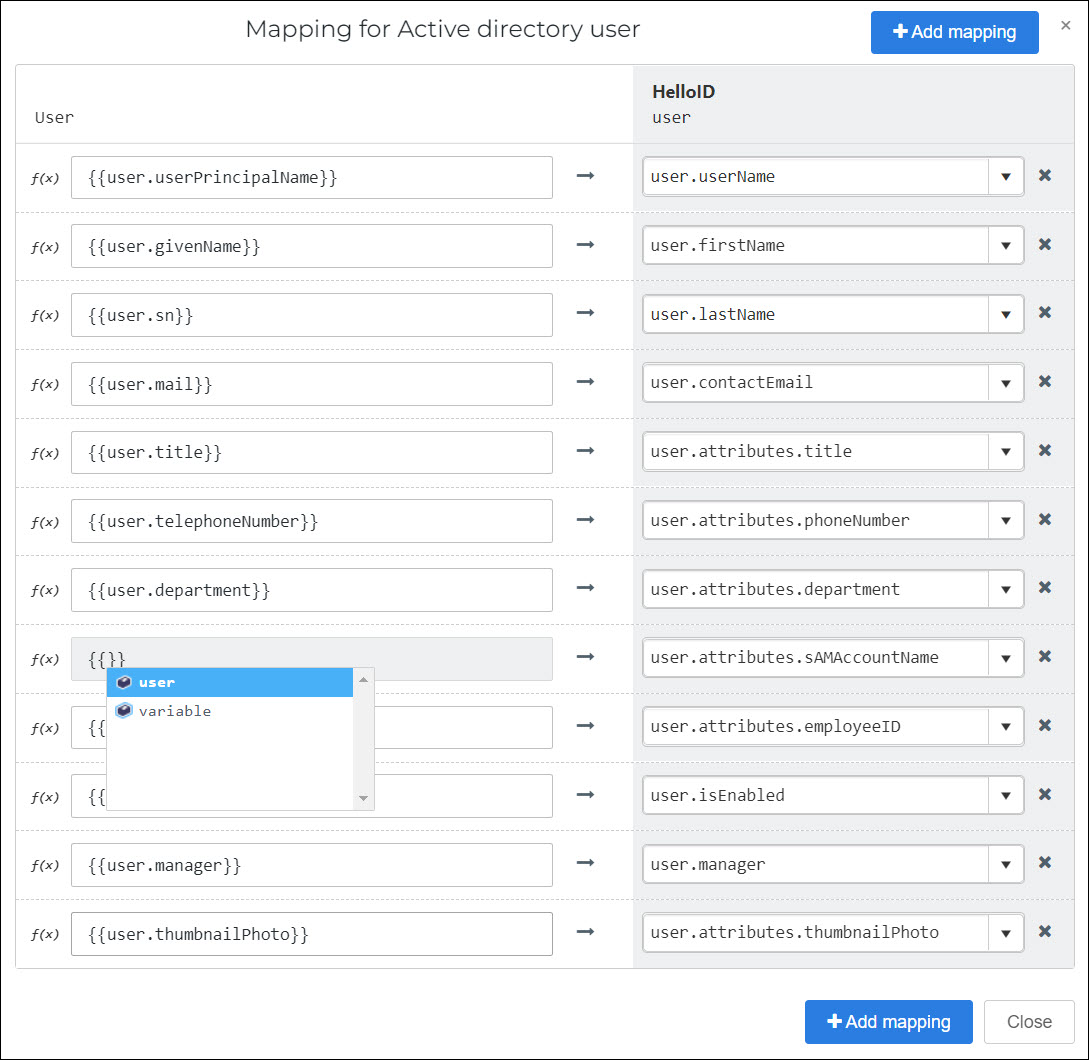
To add a new mapping, click Add Mapping. Select an attribute in the HelloID User column, and then type
{{in the User field to activate autocomplete.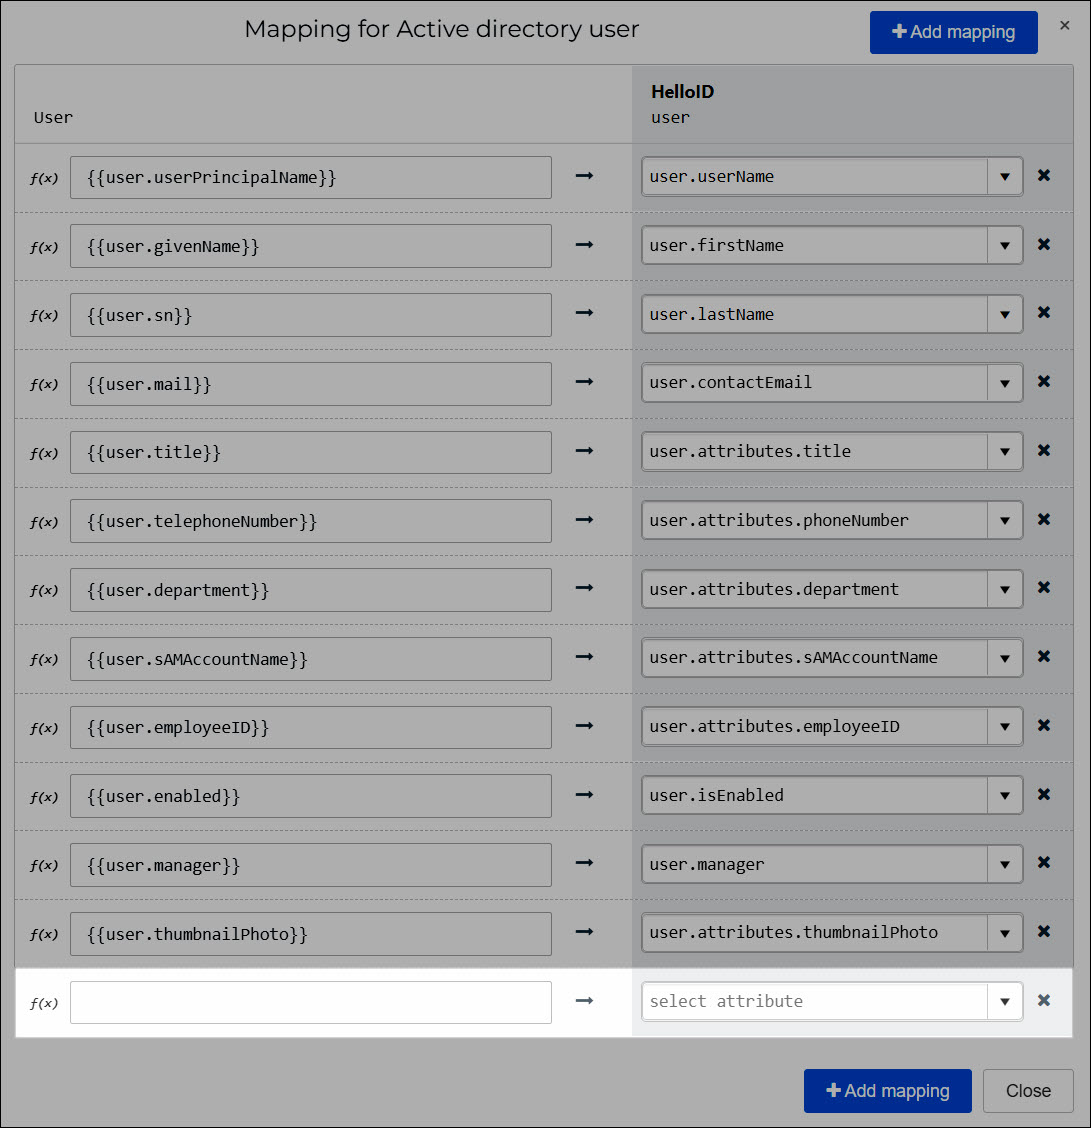
For this example, we'll select the
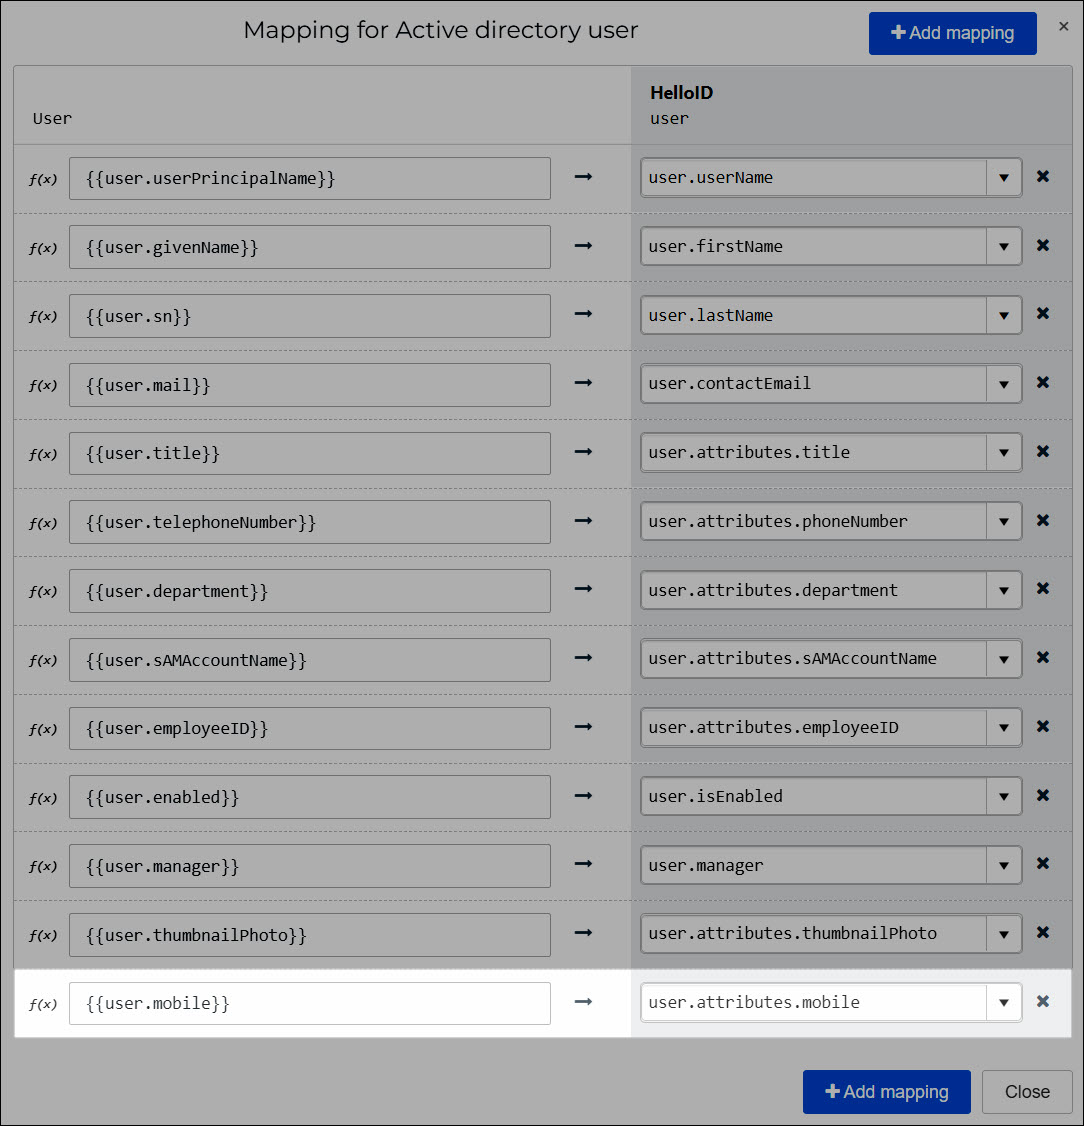
user.attributes.[new-entry]option, and change it touser.attributes.mobile. This will create a new custom attribute in the HelloID user schema (see Custom user attributes).Then we'll map the
{{user.mobile}}attribute onto it (wheremobileis the Variable Name we defined on the Change Attributes screen).
Click Close.
Repeat steps (3) - (5) for Active Directory Group, to specify how AD groups will be mapped onto HelloID Groups.
Click Save.
The mapping set has been saved, and will now be used for the associated AD configuration.