AFAS OpenID application setup
Introduction
This manual shows how to make an OpenID connection to AFAS. The configuration takes place in HelloID and the AFAS admin portal.
Requirements:
HelloID environment
AFAS Online environment
Has to be migrated to the "new" login
Users who wish to log on through HelloID are required to have the 'single-sign-on' field in AFAS
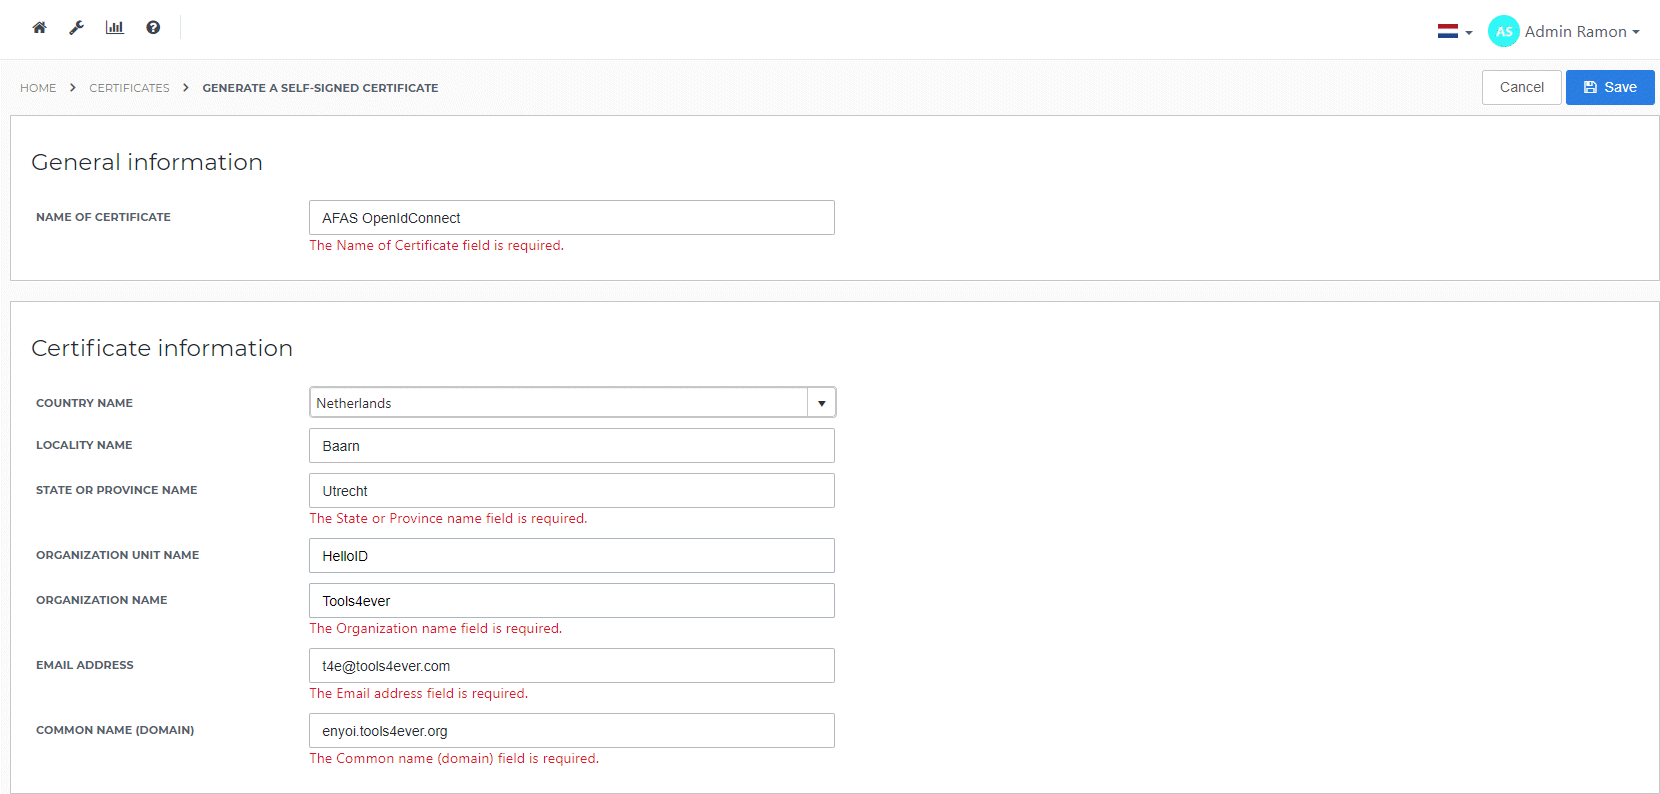
Create or Import a Certificate
If there is no certificate yet, a certificate must be imported or created. This can be done in the HelloID Administrator Portal under Settings > Certificates. For this tutorial, we will use a self-signed certificate. Learn more about certificates here.
Application Setup
Add the AFAS Application
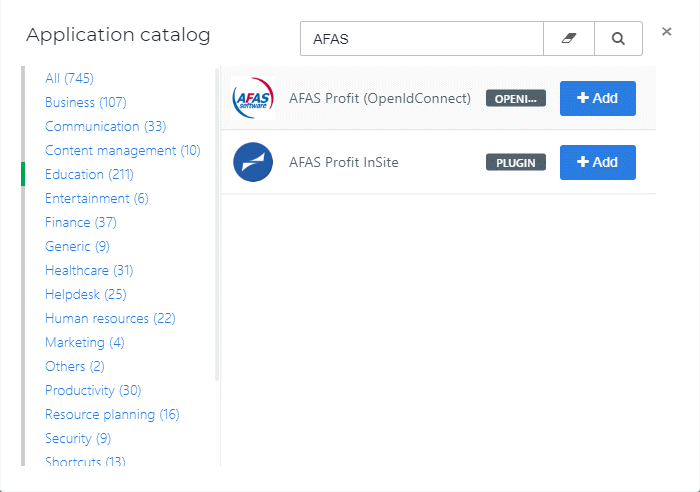
Create a new application in HelloID by navigating to Applications > Applications. Open the Application Catalogue and search for "AFAS". Find the OpenID template, and click Add. Learn more about managing applications here.
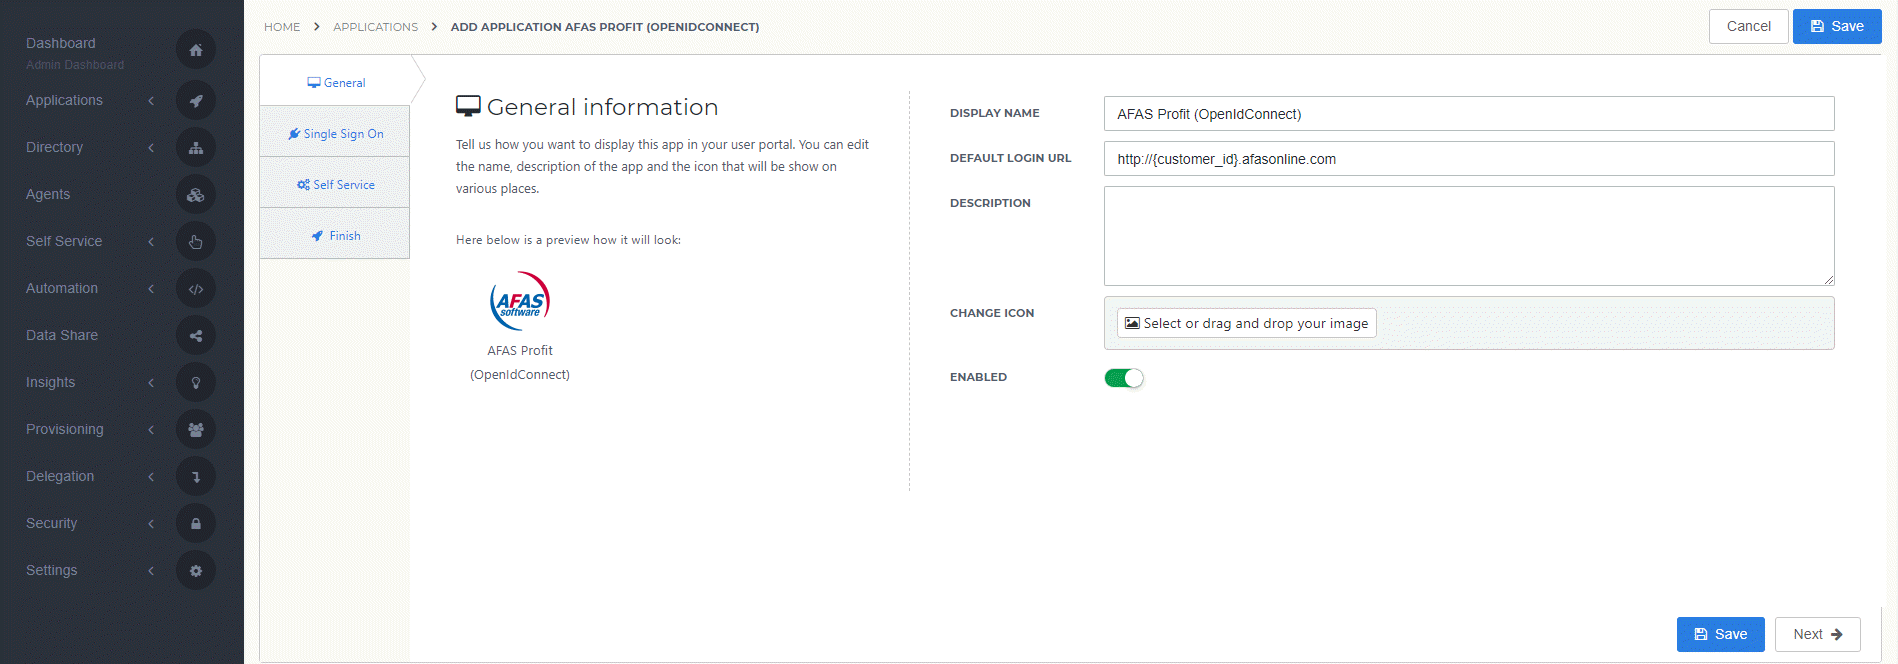
General tab
On the General tab, replace the customer id {customer_id} in the Default Login URL field. Optionally, you may also add a description. Click Next.
Single Sign-on tab
On the Single Sign-On tab, perform the following steps:
Provide a value in the Secret field.
This can be any value that you want. Although we suggest a string of at least 52 characters.
Make note of it, as you will need to enter it in AFAS later on.
In the Signing Certificate dropdown, select the certificate that you created or imported previously.
Click Next.

Self service tab
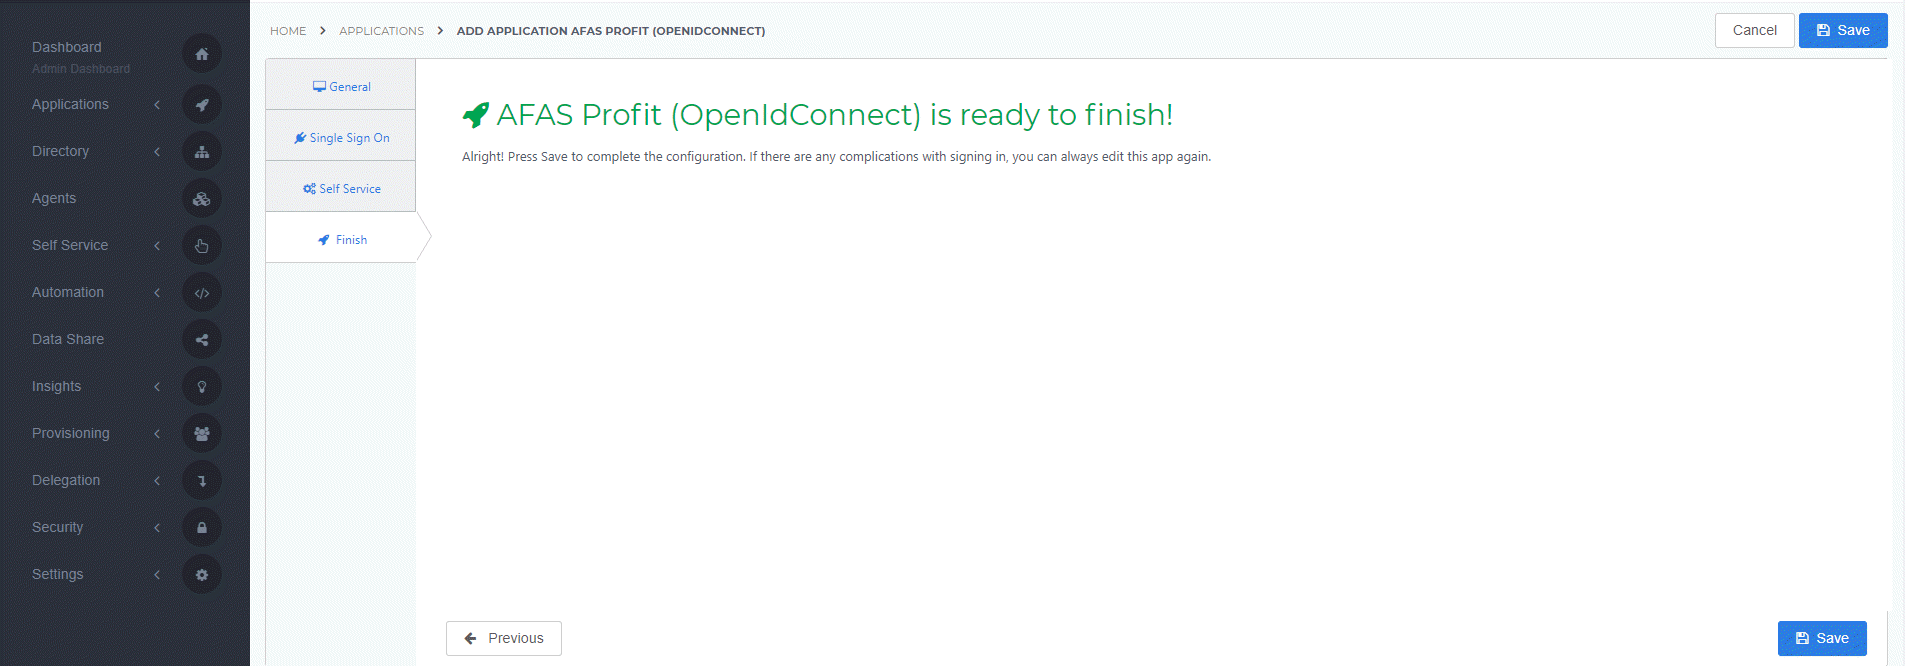
On the Self Service tab, choose whether to automatically create a Self Service product, which makes the application requestable. This is optional. Click Next.
On the Finish tab, click Save to add the application to HelloID.
Additional Configuration
After adding the AFAS application, click its Edit link on the applications overview. This will bring you to its properties page. Right-click View discovery document at the right top of the screen and Copy link address.
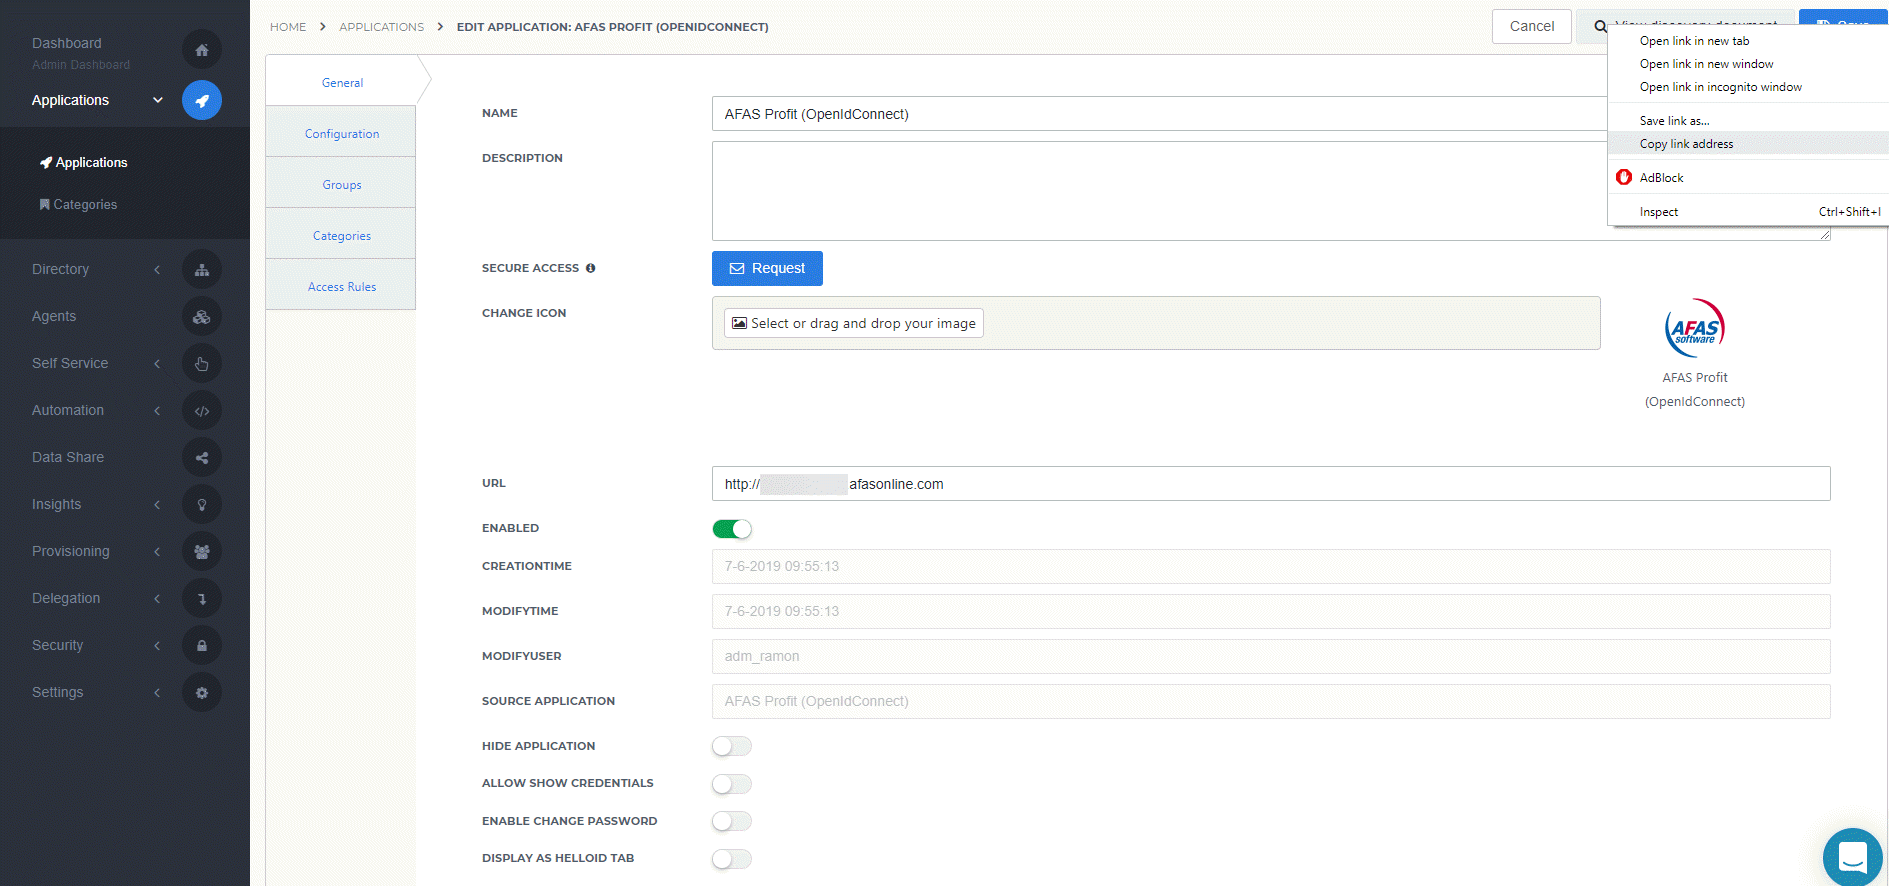
Click Close and then click Save. The configuration of the HelloID application is finished.
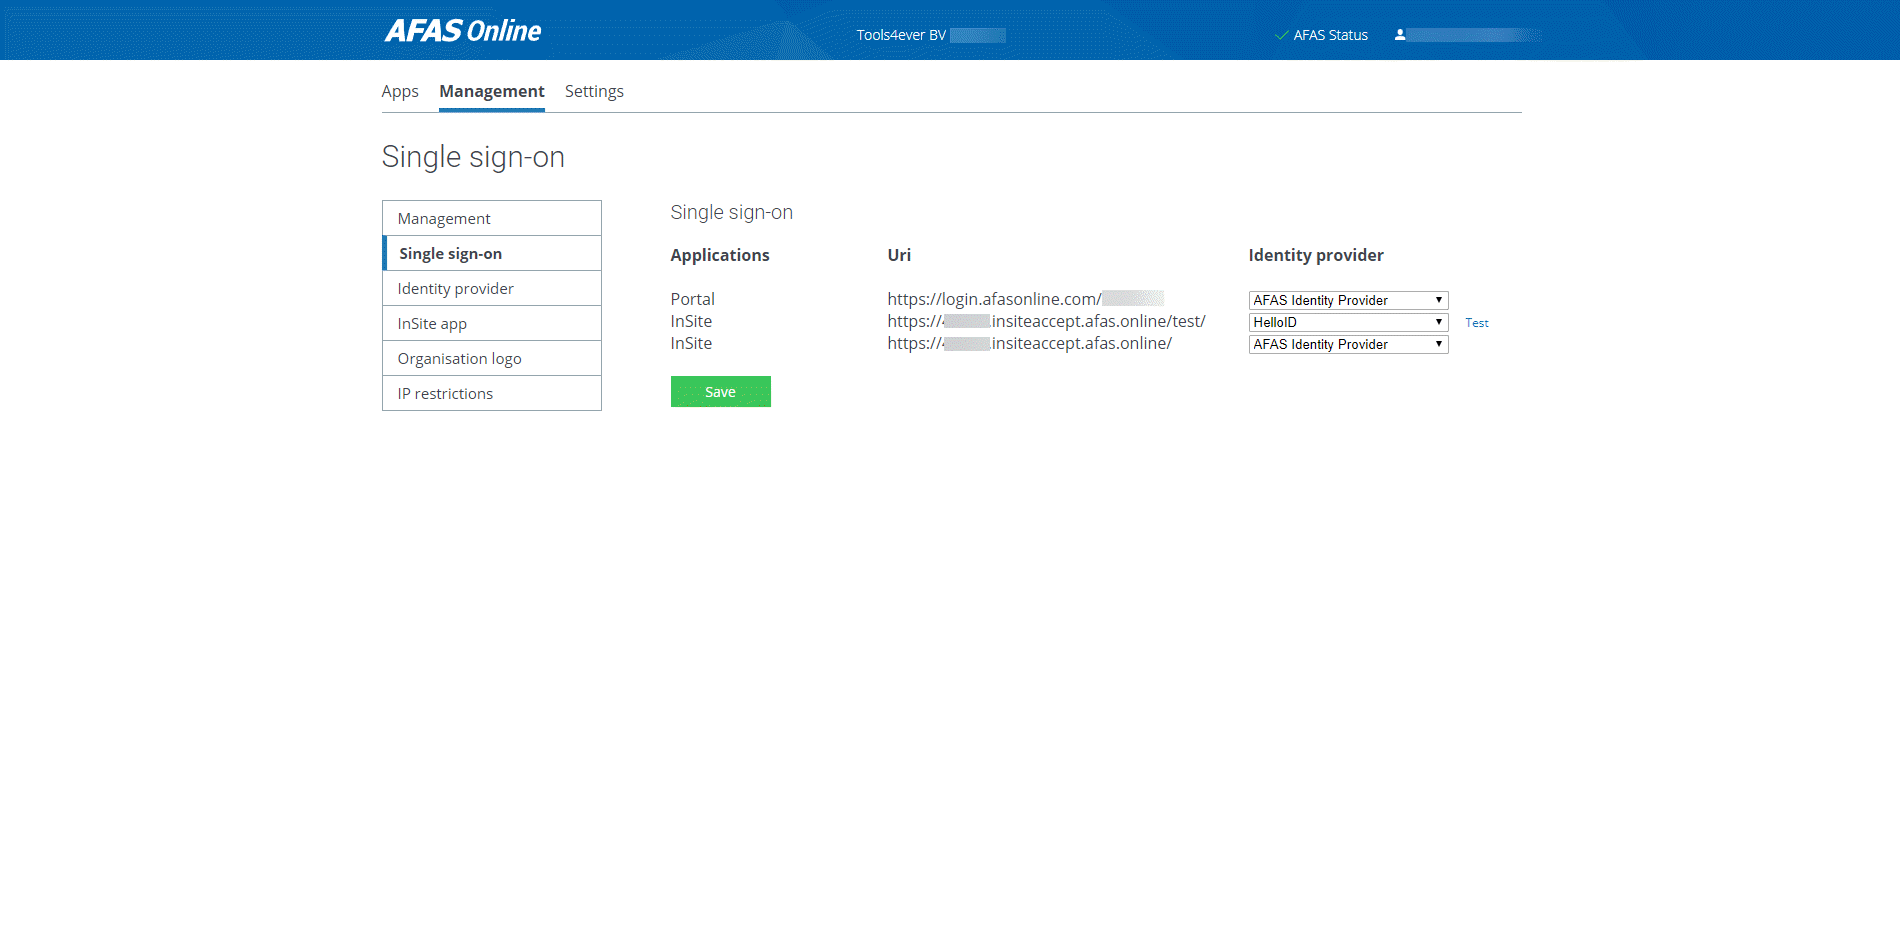
AFAS Configuration
In order to make the connection, we need to set up the configuration in AFAS aswell. Log on to the AFAS portal as an administrator (https://login.afasonline.com), click the Management tab and select Identity provider.
To add the identity provider, perform the following steps:
As Type select 'OpenId Connect'.
Enter a Description so the identity provider is recognizable, e.g. 'HelloID'.
At the OpenID Connect URL configuration enter the copied link address of the HelloID application discovery document.
For the C lient ID use the client ID found at the configuration tab of the HelloID application (the client id is also in the HelloID application discovery document URL).
Copy the Client Secret which you created earlier.
Note: You cannot copy this secret from the configuration tab in HelloID.
Enter the Scope 'openid'.
As Claim enter 'email'.

Click Save and the AFAS Identity provider configuration is finished.
Now all that is left to do is selecting the Identity provider for the environment and pressing Save.
Note: Make sure that the selected environment matches the Default login URL configured for the HelloID application.