Add an Active Directory configuration
For more information, see AD sync.
Note
Prerequisite: Install Agent on a server in your network with HTTPS access, which is not a domain controller.
Go to Directory > Active Directory and click Create Configuration.

Select the Agent Pool which contains the Agent you installed.
For this example, we'll select our
Demo LabAgent Pool.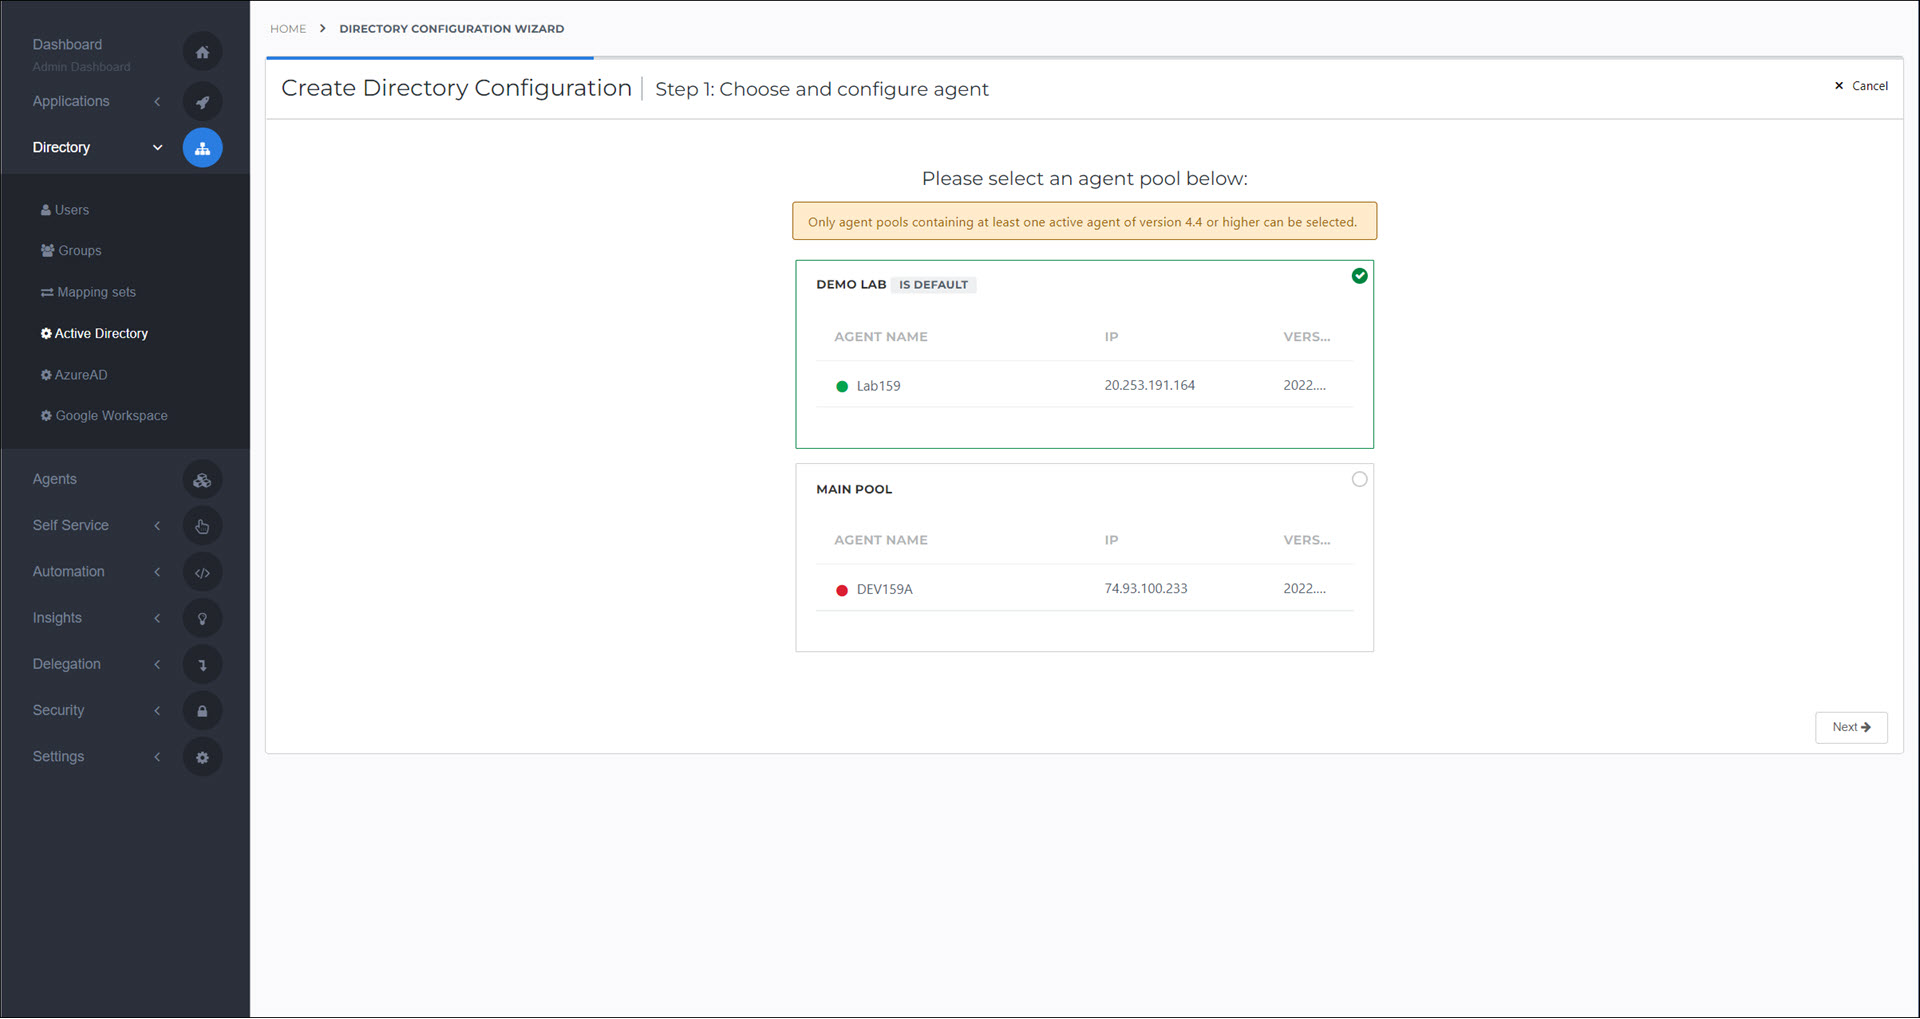
Click Next.
Select the services that you want this directory configuration to handle.
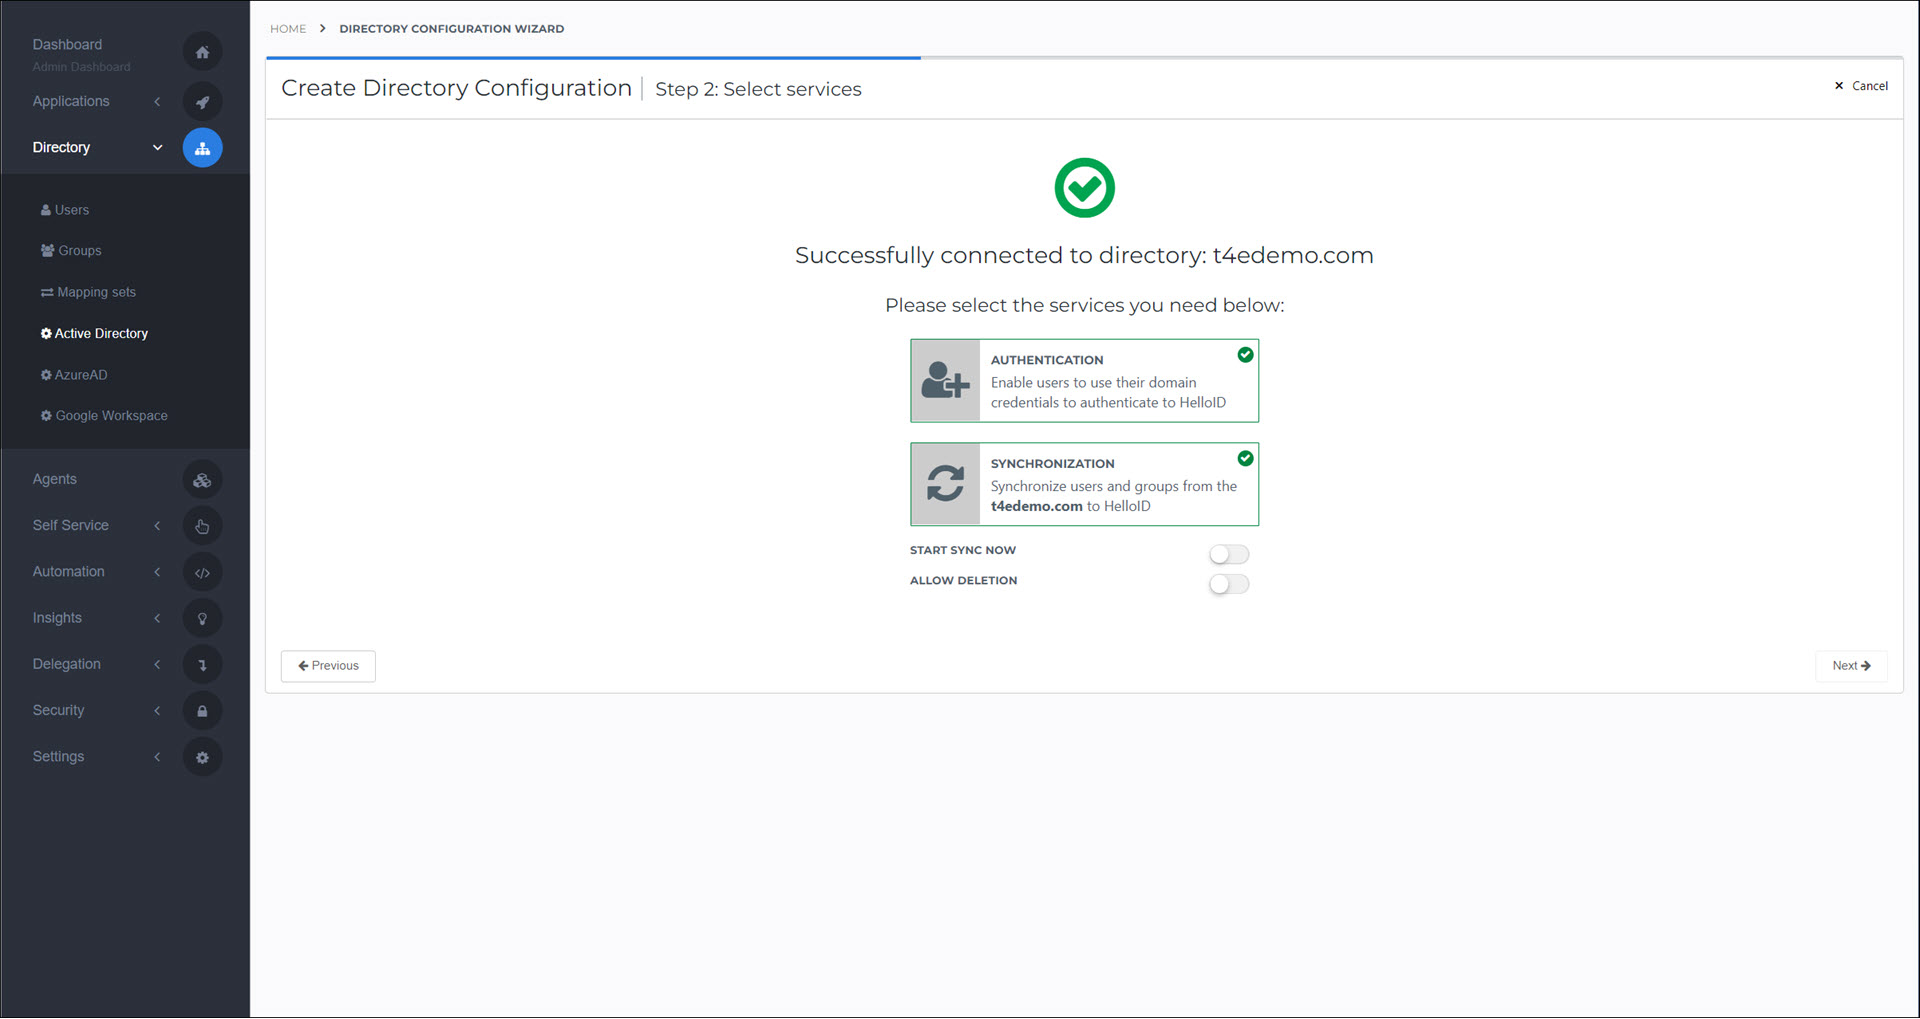
- Authentication
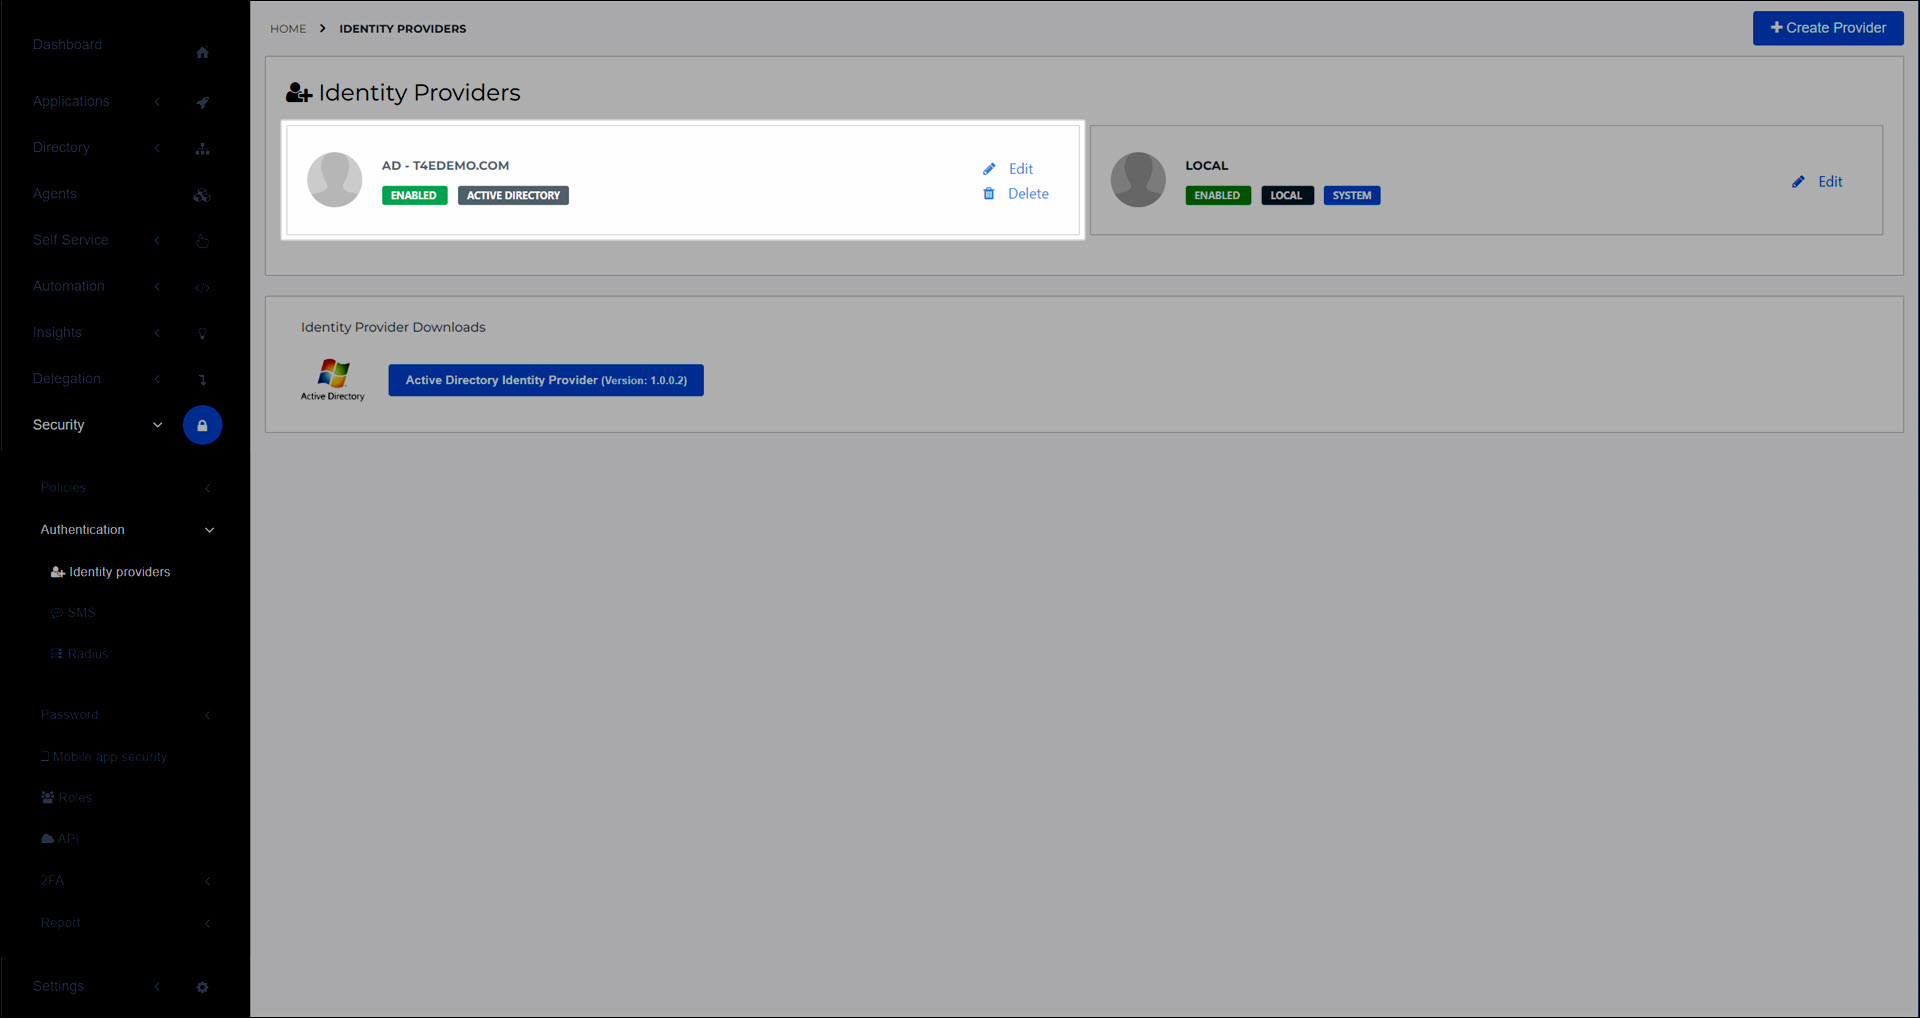
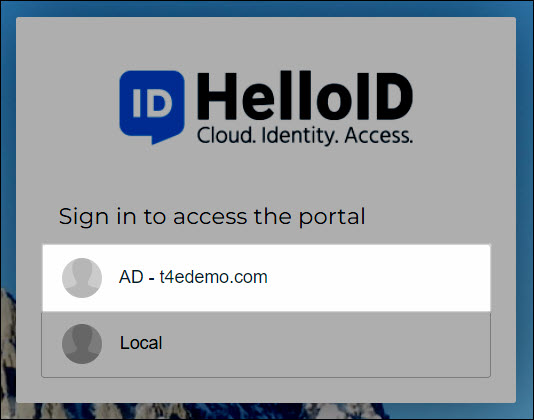
An AD Agent IdP will be created, to let users log into HelloID via AD.
- Synchronization
An Active Directory synchronization task will be created, to regularly sync AD accounts and groups to HelloID Users and Groups.
Start Sync Now: Run the AD sync task immediately after this configuration is created.
Allow Deletion: The AD sync task will be allowed to soft delete users and groups from HelloID when they have been deleted in AD. See Soft deleted users.
Enable Deletion Threshold / Deletion Threshold: Provides a safeguard against the accidental mass deletion of HelloID users and groups when the AD sync task runs. If the percentage of users or groups that will be deleted exceeds this value, all deletions will be canceled instead. By default, this safeguard is set to 10%.
Enable User Hard Delete: The AD sync task will hard delete users instead of soft deleting them. See Hard deleted users.
Click Next.
Select the user sync scope within your AD domain.
- Synchronize All Users
Sync all users from all OUs.
- Choose Specific OUs
Only sync users from specified OUs.
- Enter OU Manually
Only sync users from a single specified OU.
Caution
To prevent synchronizing service accounts, we recommend not using Synchronize All Users.
For this example, we'll select the Choose Specific OUs option and select our
docsOU.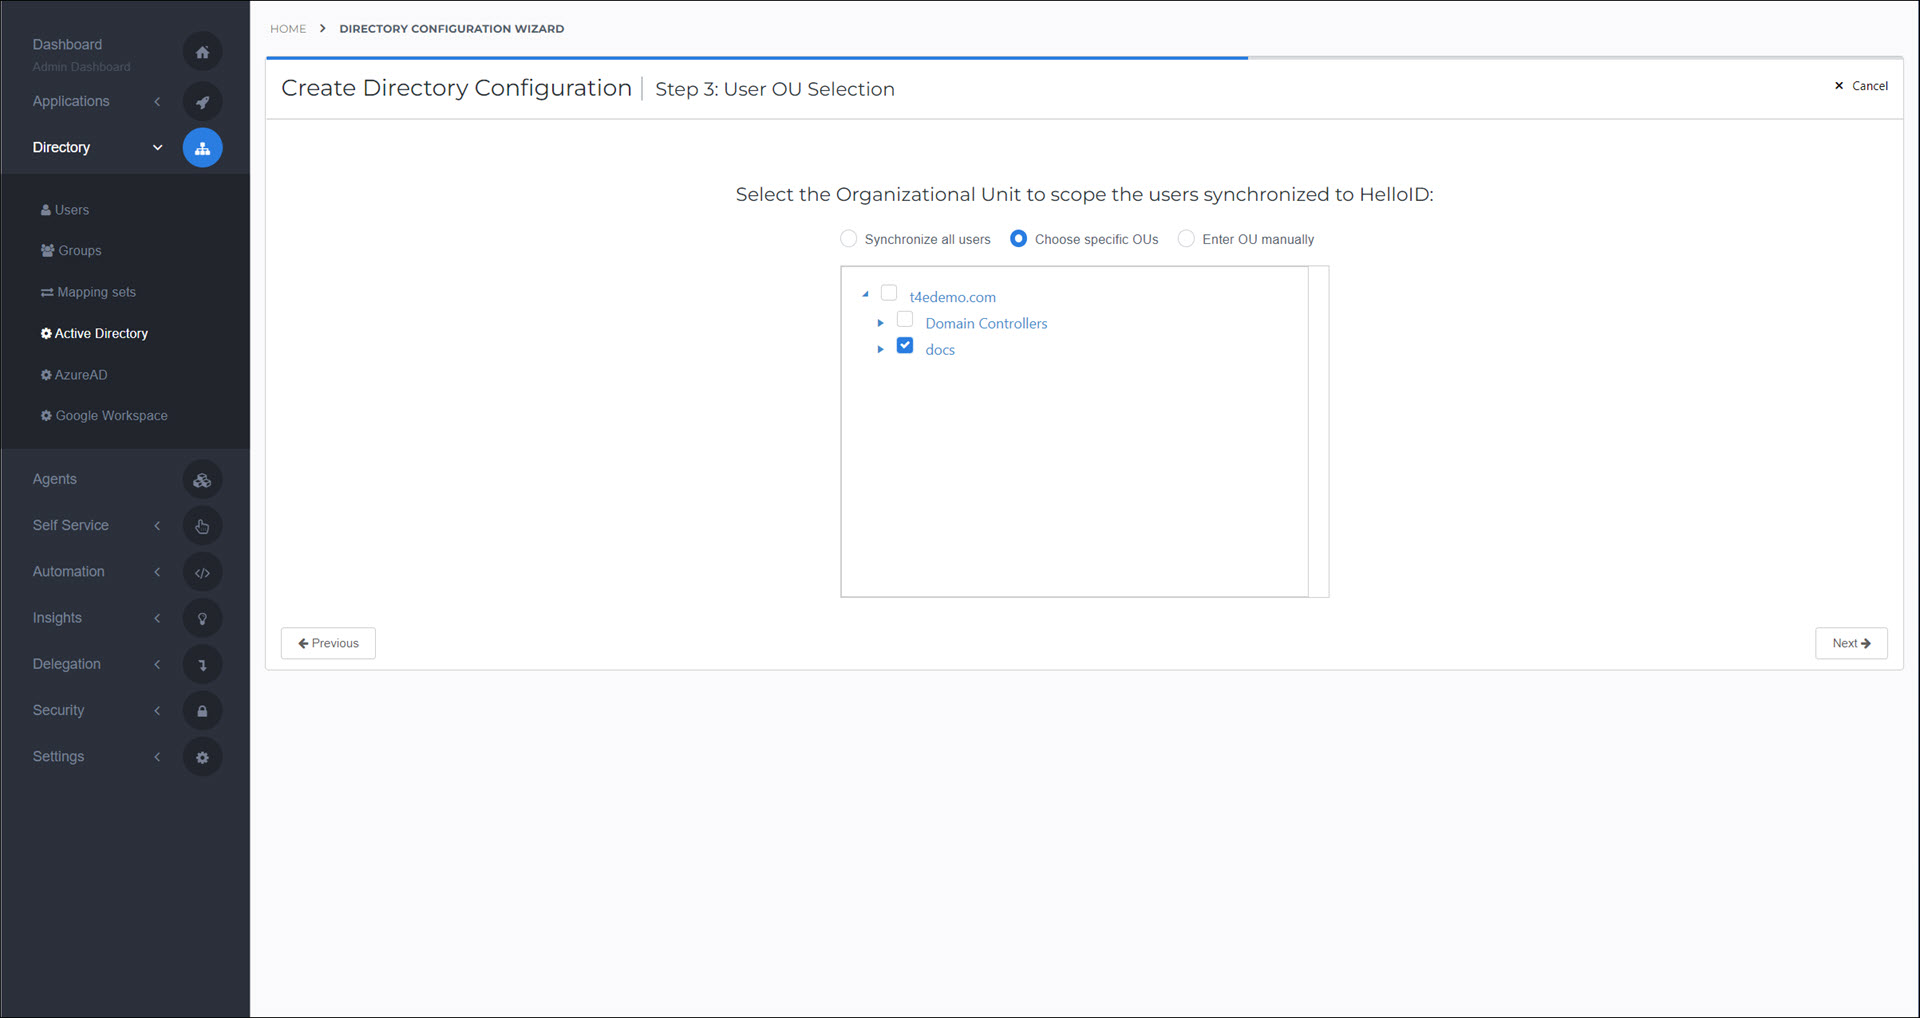
Click Next.
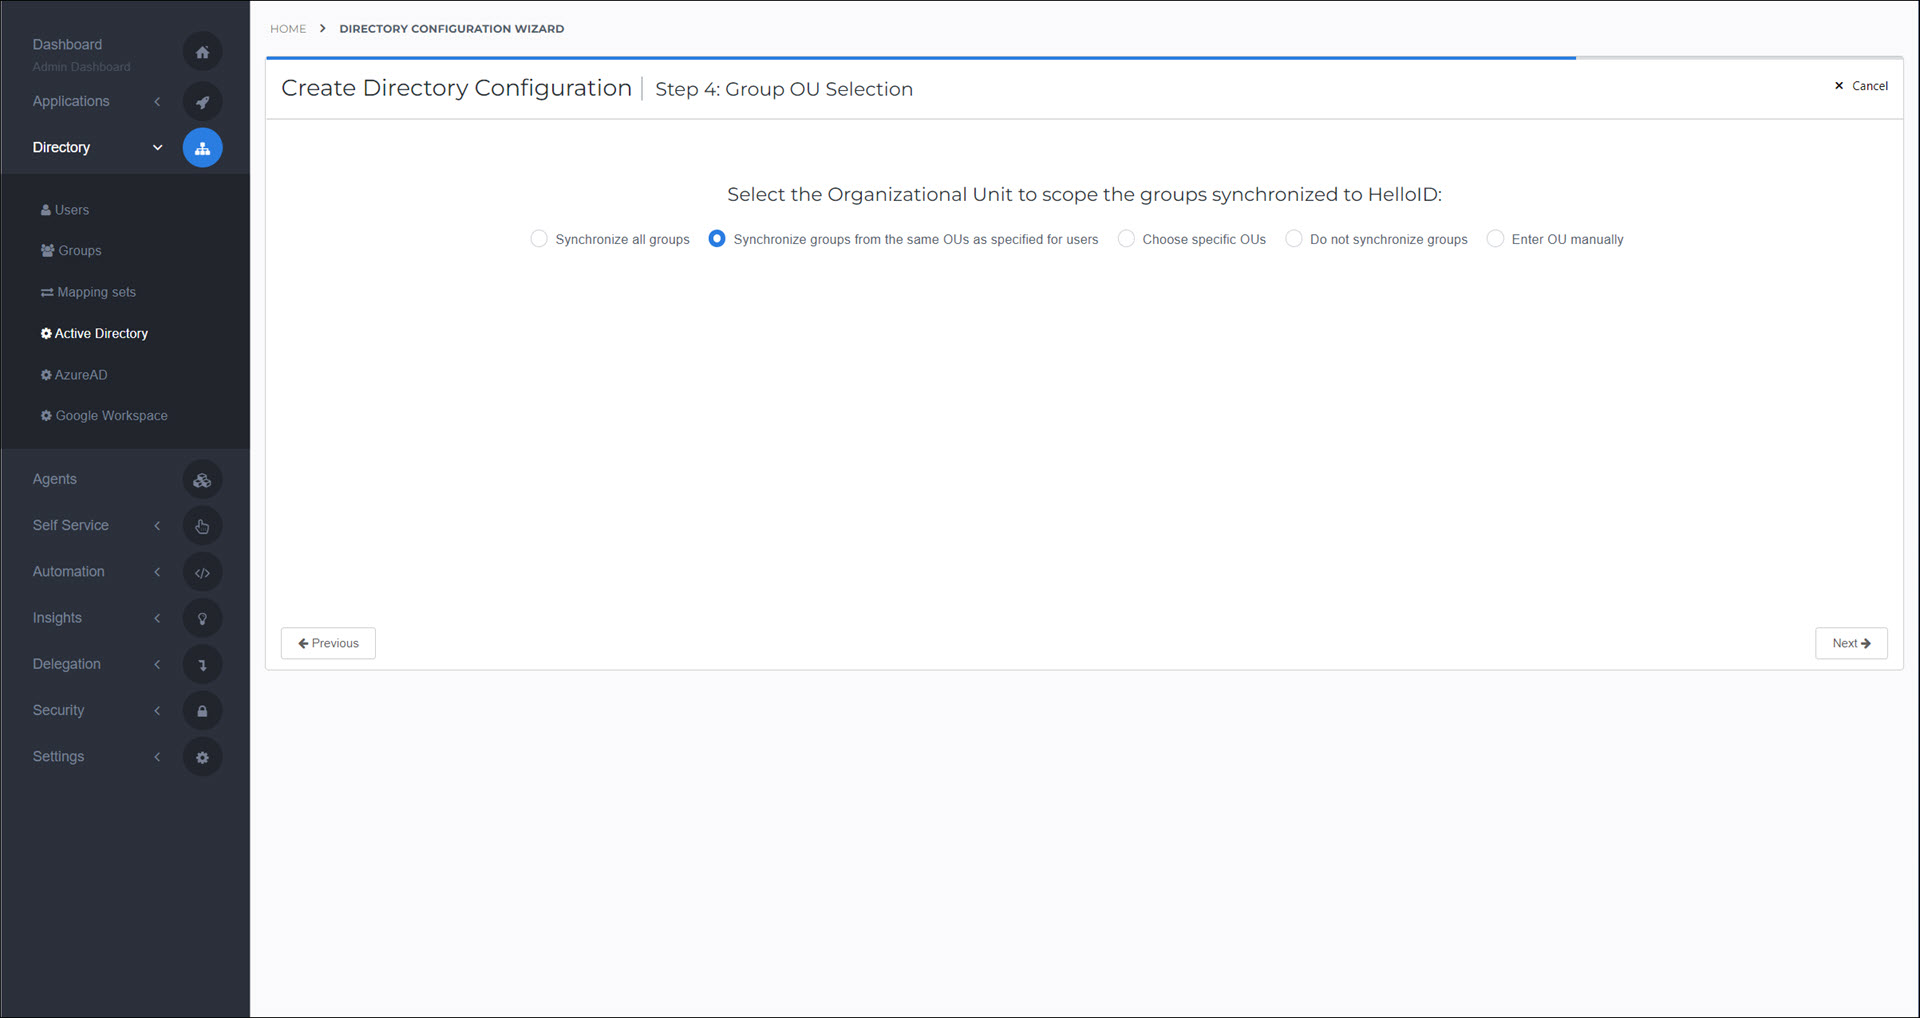
Select the group sync scope within your AD domain.
- Synchronize All Groups
Sync all groups from all OUs.
- Synchronize Groups From The Same OUs As Specified For Users
Use the same OUs from the user sync scope.
- Choose Specific OUs
Only sync groups from specified OUs.
- Enter OU Manually
Only sync groups from a single specified OU.
- Do Not Synchronize Groups
Do not sync any groups from AD.
For this example, we'll select the Synchronize Groups From The Same OUs As Specified For Users option.
Click Finish.
If you enabled the Start Sync Now toggle, the AD sync task will run for the first time, and sync AD users and groups from the selected OUs into HelloID Users and Groups.
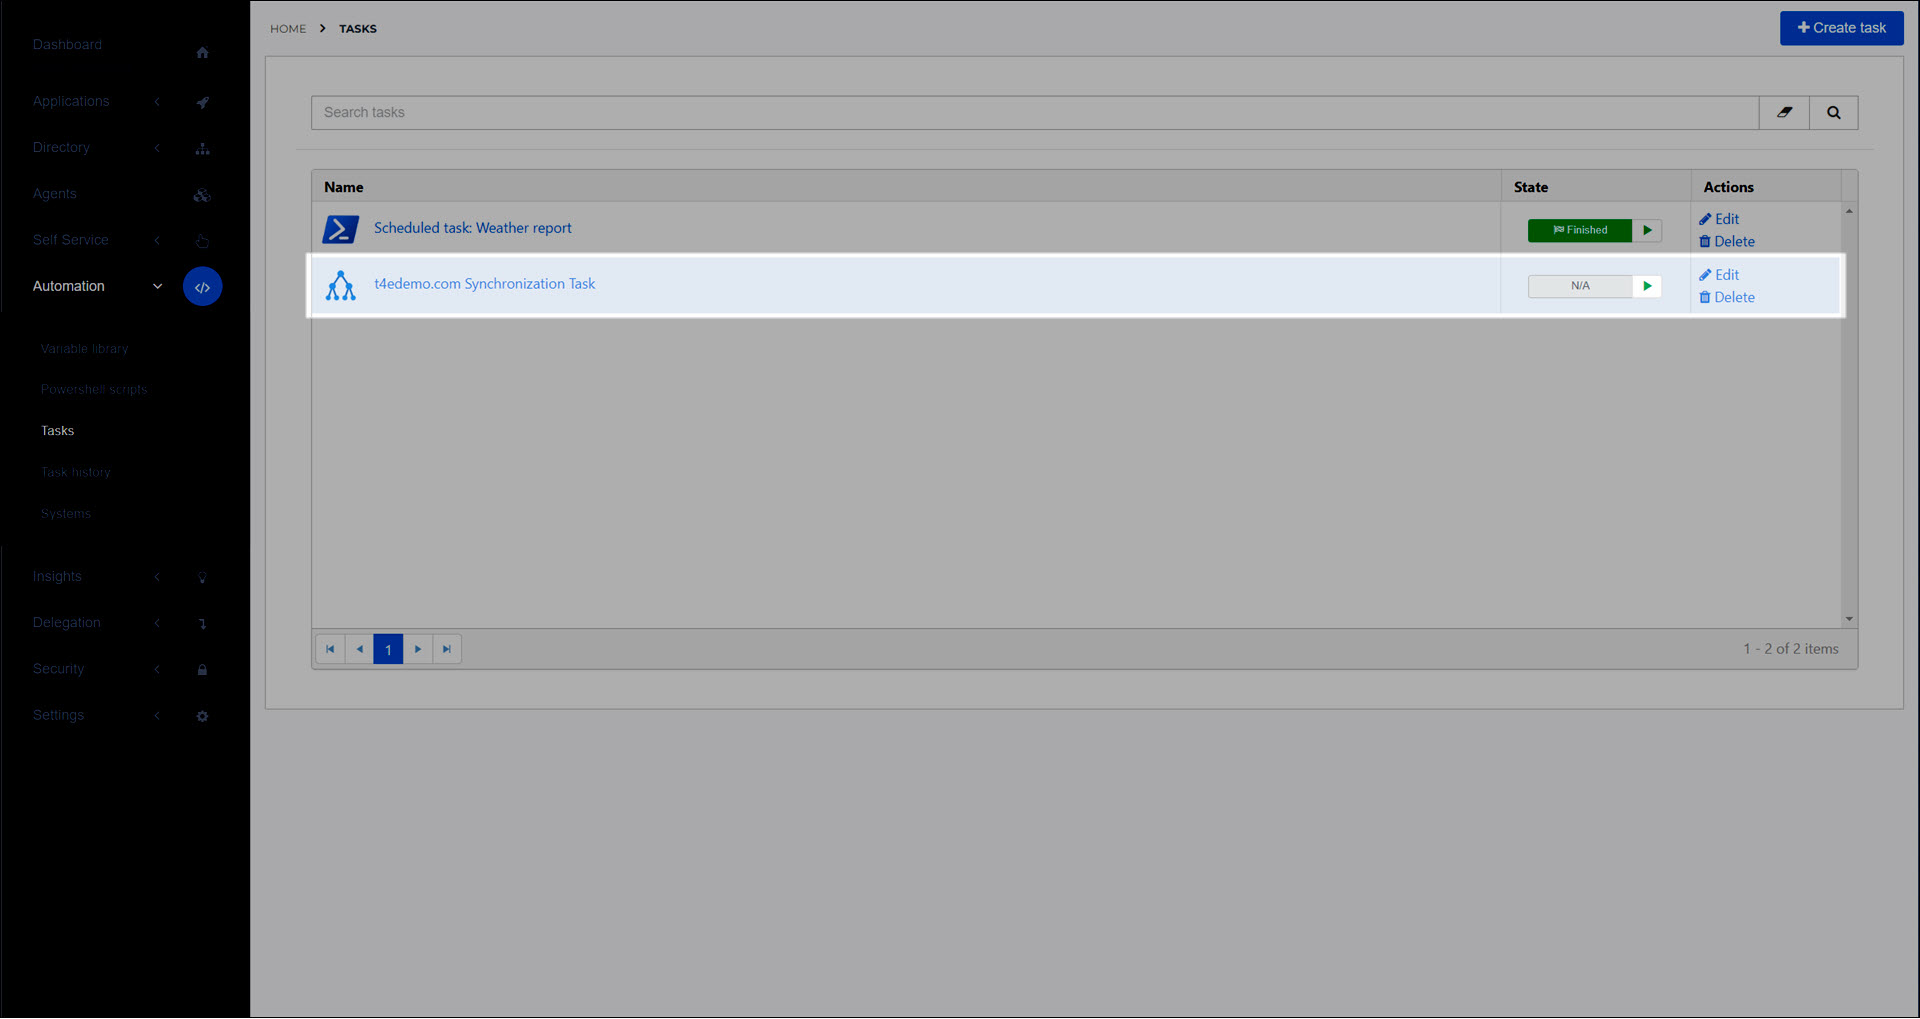
If you didn't enable the Start Sync Now toggle, you can Manually run a scheduled task for the Active Directory synchronization task.
Optional: Customize this IdP. See AD Agent IdP and IdP settings reference.
Optional: Customize the Active Directory mapping set.

Users synced from AD (see Synced users) will now be able to log into HelloID via the AD IdP.
Users and groups will be regularly synchronized from AD into HelloID according to the schedule set on the Active Directory synchronization task.