Service Automation GitHub resources
The Tools4ever GitHub account contains three types of resources for use with HelloID's Service Automation module:
Script templates for PowerShell Scheduled tasks
Code snippets for PowerShell Product actions
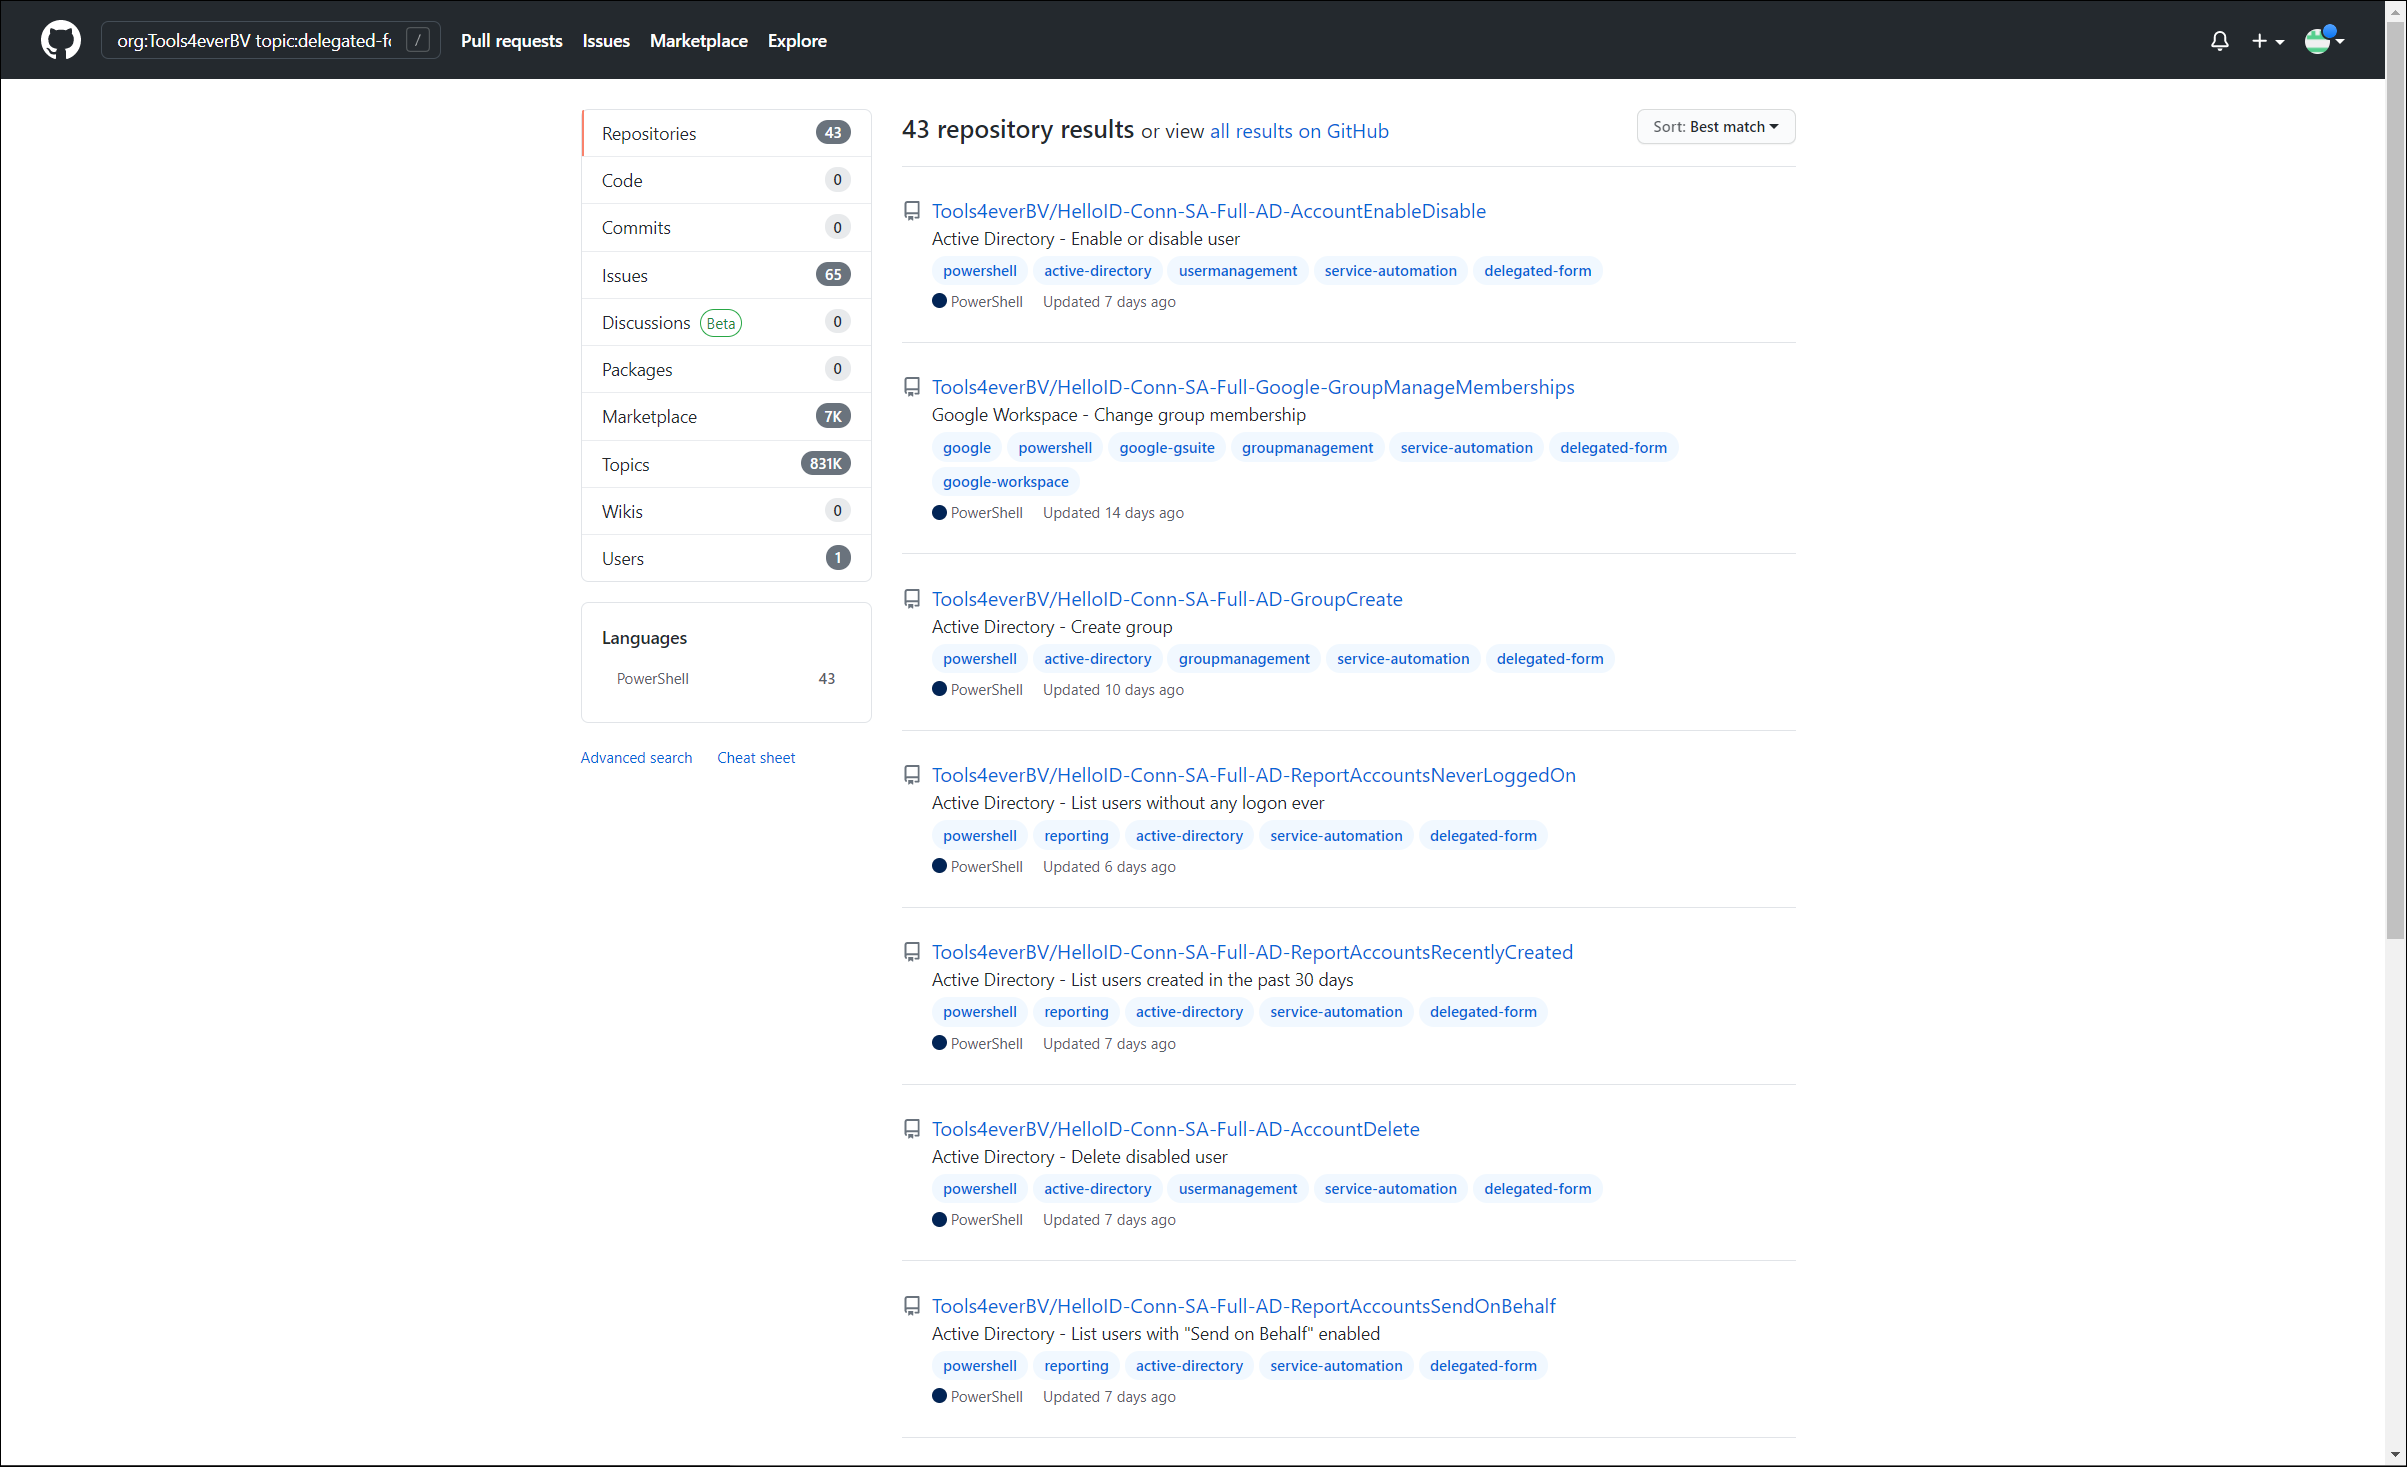
To browse all repositories in the T4E GitHub account that contain pre-defined delegated forms, search GitHub for org:Tools4everBV topic:delegated-form:

Important
If no suitable pre-defined delegated form exists for your needs, you will need to create one from scratch. See Add a custom delegated form.
Each repository comprises a set of PowerShell scripts and JSON files:
Filename | Description |
|---|---|
[root]\readme.md | Readme file describing the repository's functionality. Includes any relevant special instructions, limitations, or recommendations. |
[root\All-in-one setup] | Folder containing resources to automatically set up the delegated form. |
[root\All-in-one setup]\createform.ps1 | The all-in-one automatic PowerShell setup script. |
[root\Manual resources] | Folder containing resources to manually set up the delegated form. |
[root\Manual resources]\datasource_{HelloID data source name}.ps1 | Data source manual setup script. |
[root\Manual resources]\task_{HelloID task name}.ps1 | Task manual setup script. |
[root\Manual resources]\dynamicform.json | Dynamic form manual setup JSON definition. |
[root\Assets] | Miscellaneous assets folder. |
There are two ways to bring a delegated form into your HelloID environment from GitHub: automated import or manual import.
Automatic import via delegated form catalog (recommended)
Manual import via all-in-one PowerShell script
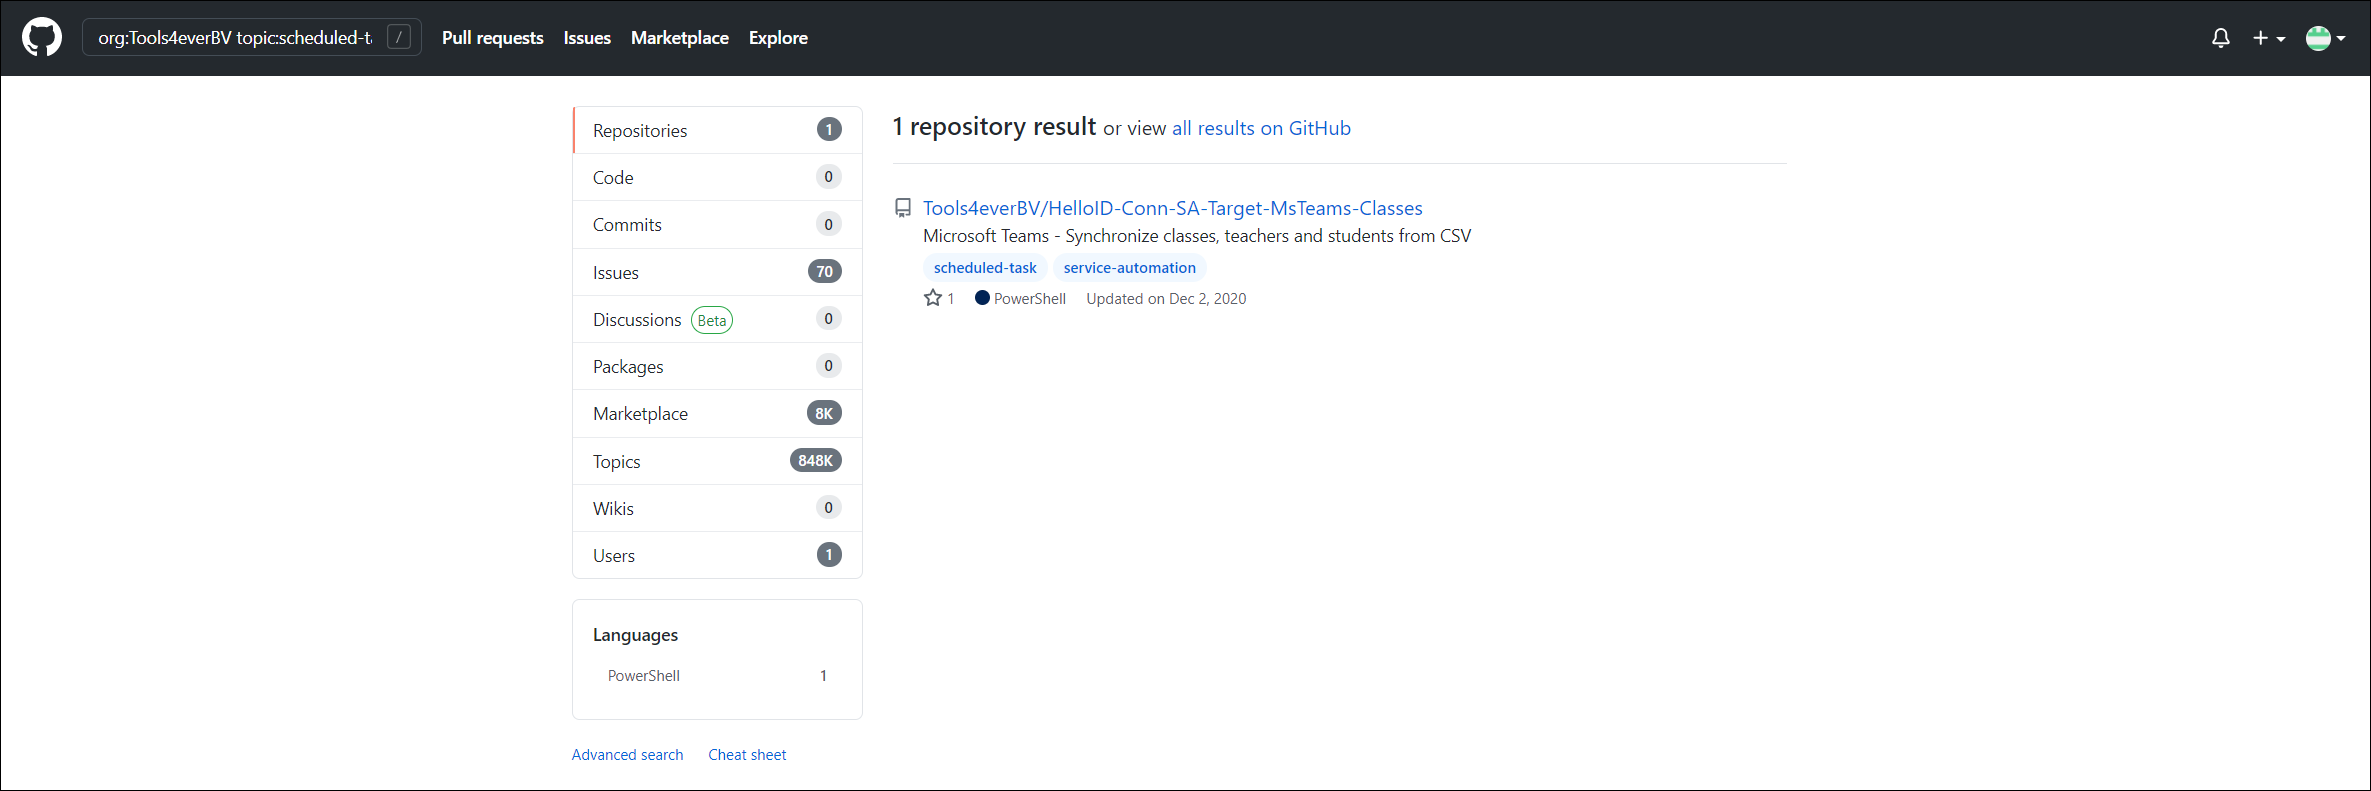
To browse all repositories in the T4E GitHub account that contain PowerShell Scheduled tasks, search GitHub for org:Tools4everBV topic:scheduled-task:

Each repository comprises a PowerShell script and miscellaneous assets.
There is only one way to bring a task into your HelloID environment from GitHub: manual import.
Manual import via GitHub
Add a PowerShell scheduled task, and copy and paste the contents of the repository's .ps1 file into the body of the PowerShell script.
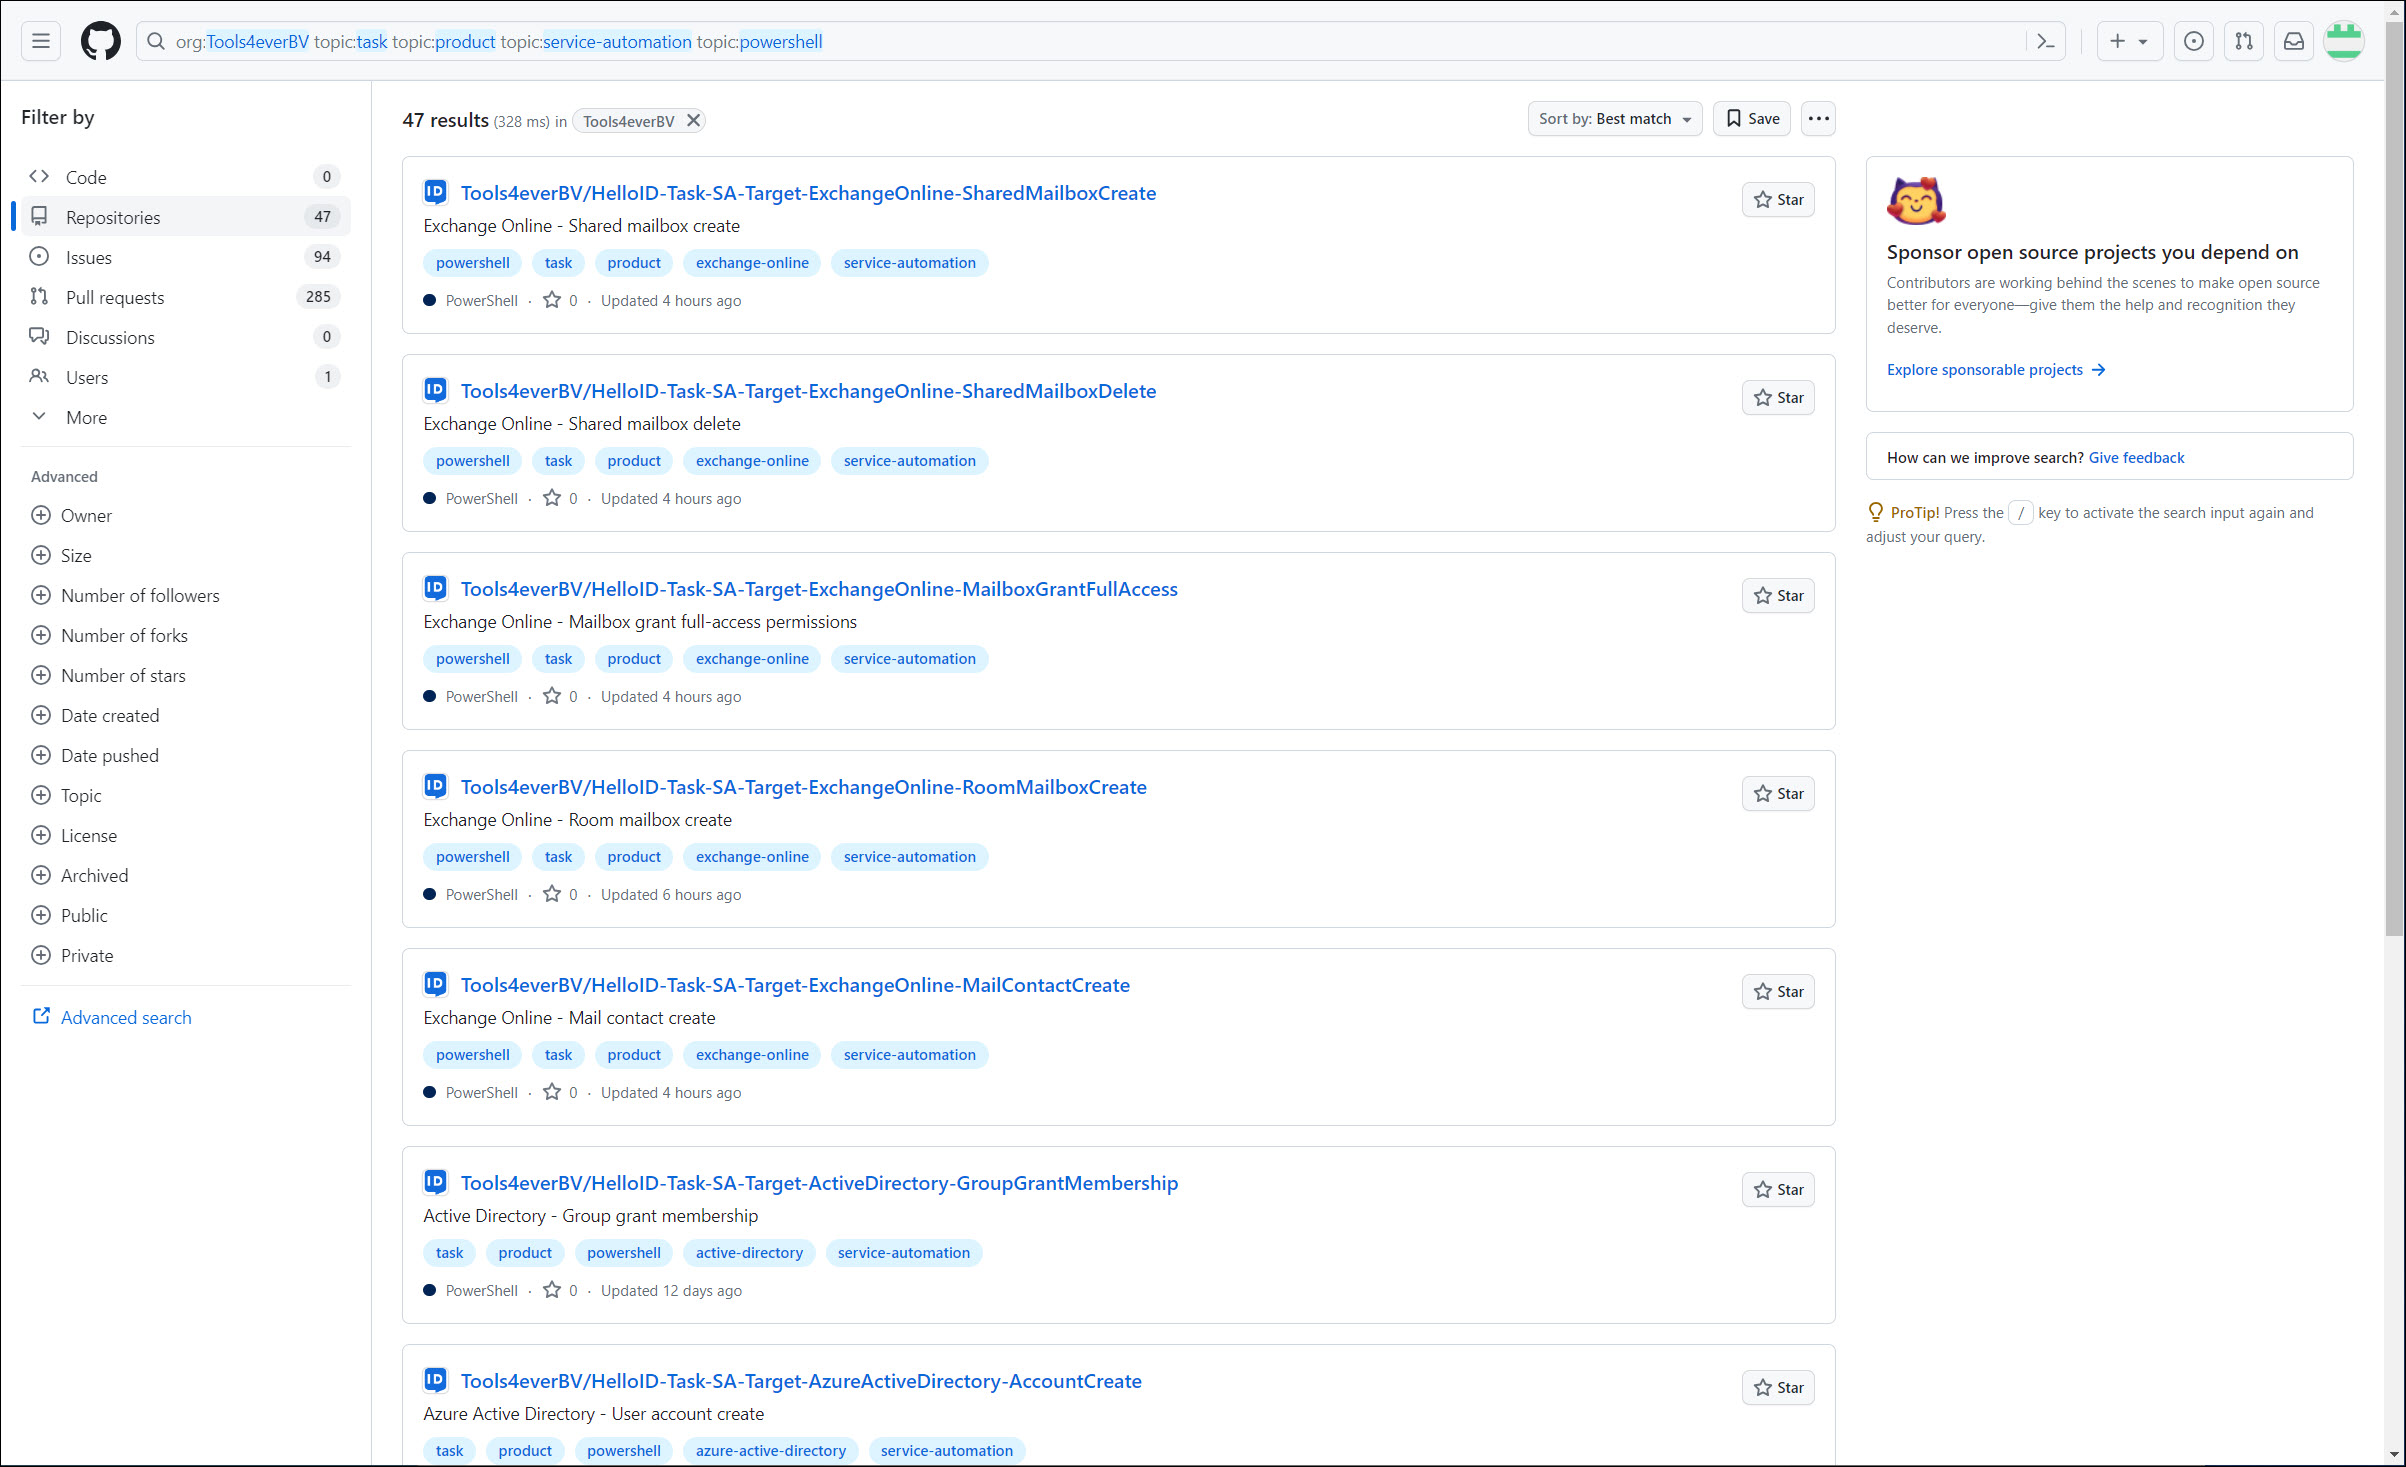
To browse all repositories in the T4E GitHub account that contain code snippets for PowerShell Product actions, search GitHub for org:Tools4everBV topic:task topic:product topic:service-automation topic:powershell:

Tip
Repositories with this combination of four topics appear in the Code snippet library tab of PowerShell product actions. See Use a code snippet in a product action.
Most snippets are suitable to use either as standalone scripts, or as a portion of a larger custom script.
Each repository comprises the following files:
Filename | Description |
|---|---|
[root]\readme.md | Readme file describing the repository's functionality. Includes any relevant special instructions, limitations, or recommendations. If the snippet requires a dynamic form to be linked to the product, the readme file contains sample JSON that describes what the form needs to collect. The collected data are accessible via $formObject. |
[root]\action.ps1 | The code snippet. |
[root]\icon.png | An icon to use for the underlying dynamic form. |