Install the on-premises Agent services
Note
This procedure installs all three Agent services (HelloID Directory Agent service, On-premises Service Automation Agent service, and On-premises Provisioning Agent service).
Caution
Service accounts which run on-premises Agents require certain hardware/software minimums & permissions to work correctly. See Agent requirements.
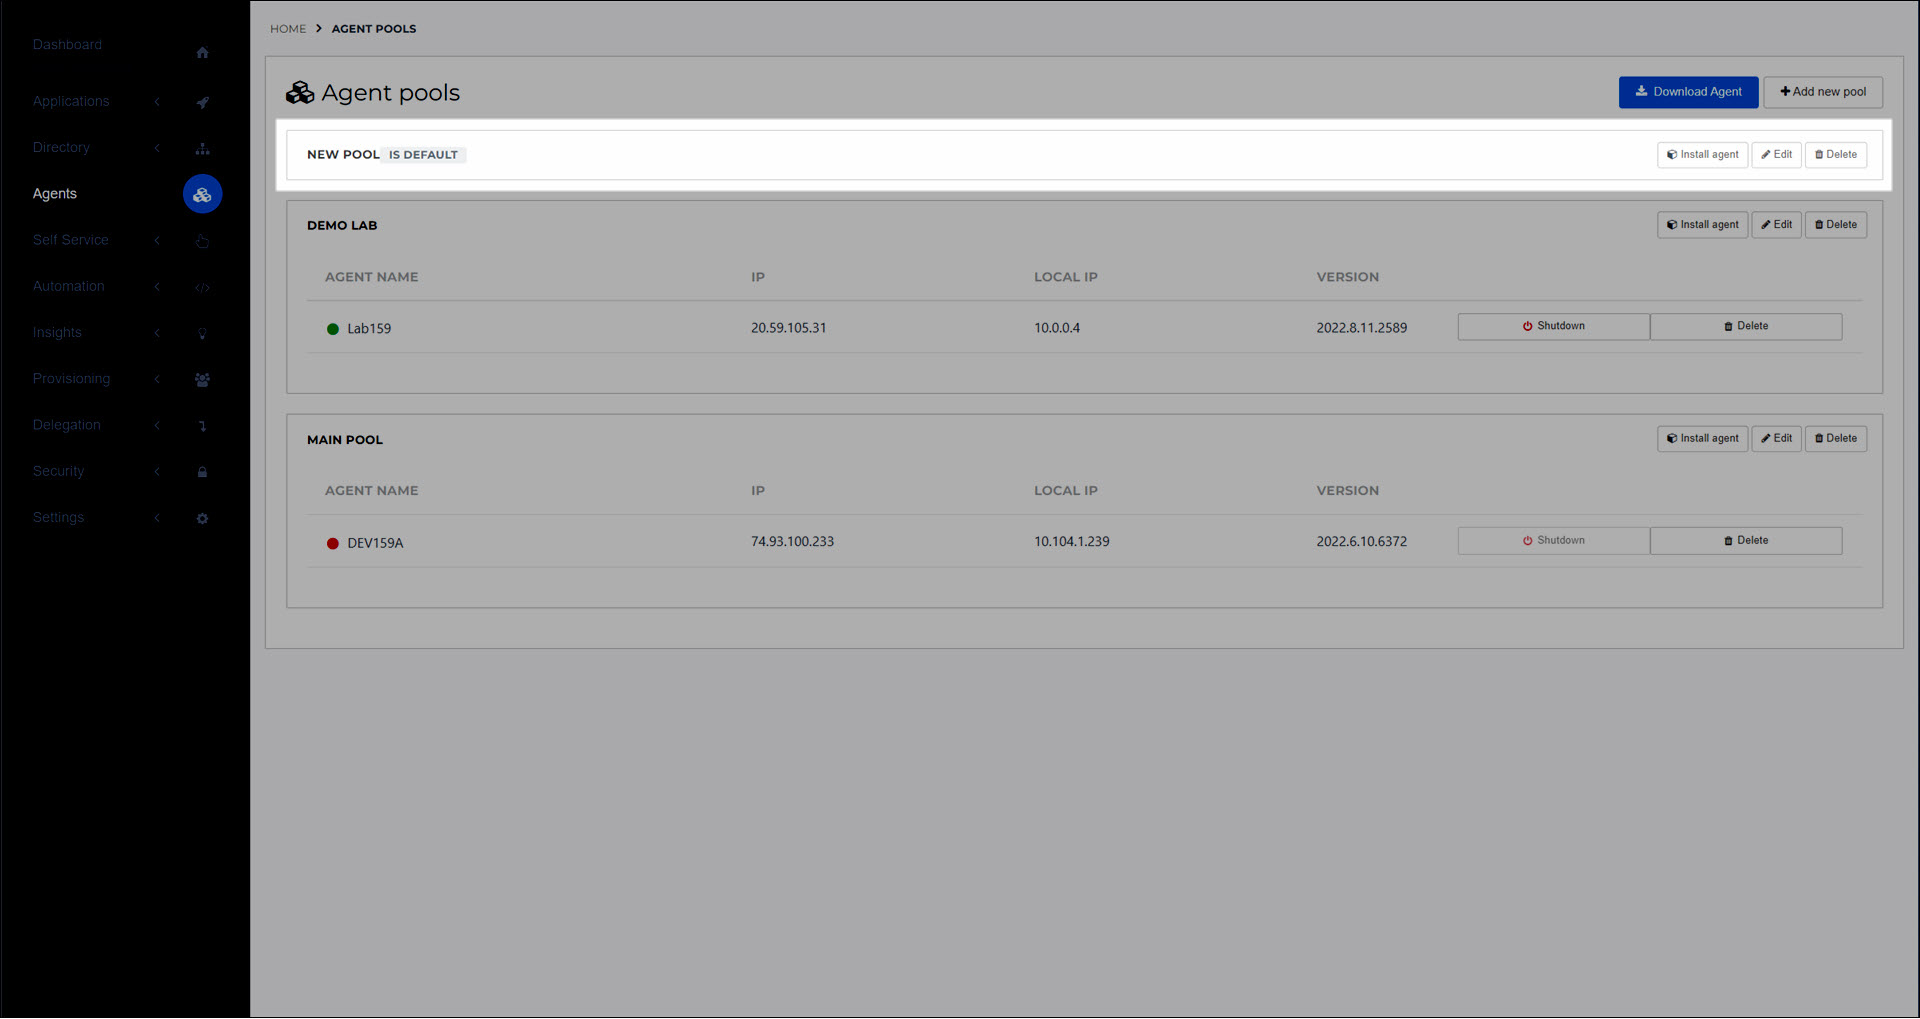
Optional: If necessary, Add an Agent Pool.
HelloID includes a single agent pool named Default pool. In most environments, this default agent pool is sufficient and can be used as-is. Renaming the default pool or creating additional pools is typically unnecessary.
Additional agent pools are only required in exceptional situations, such as when agents are installed in separate networks or locations.
Go to Agents.
For the relevant Agent pool, click Install Agent.
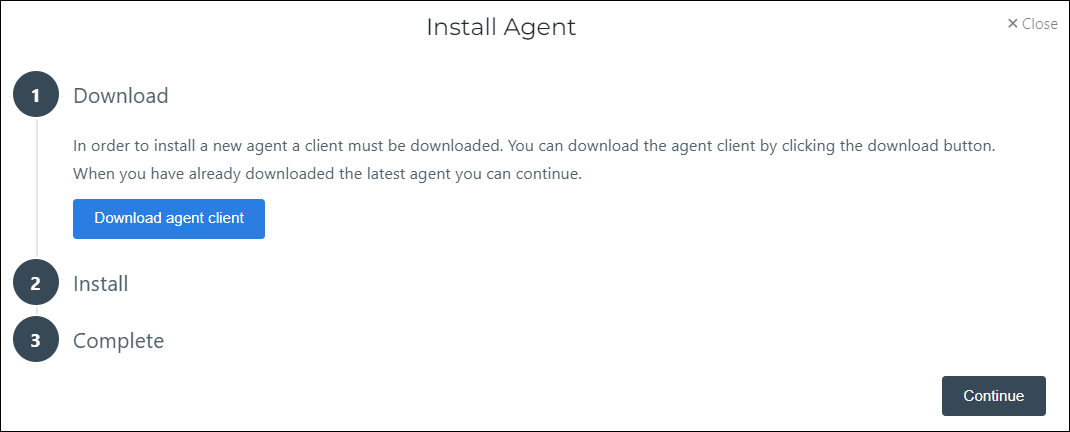
On the Install Agent dialog box, click Download Agent Client.
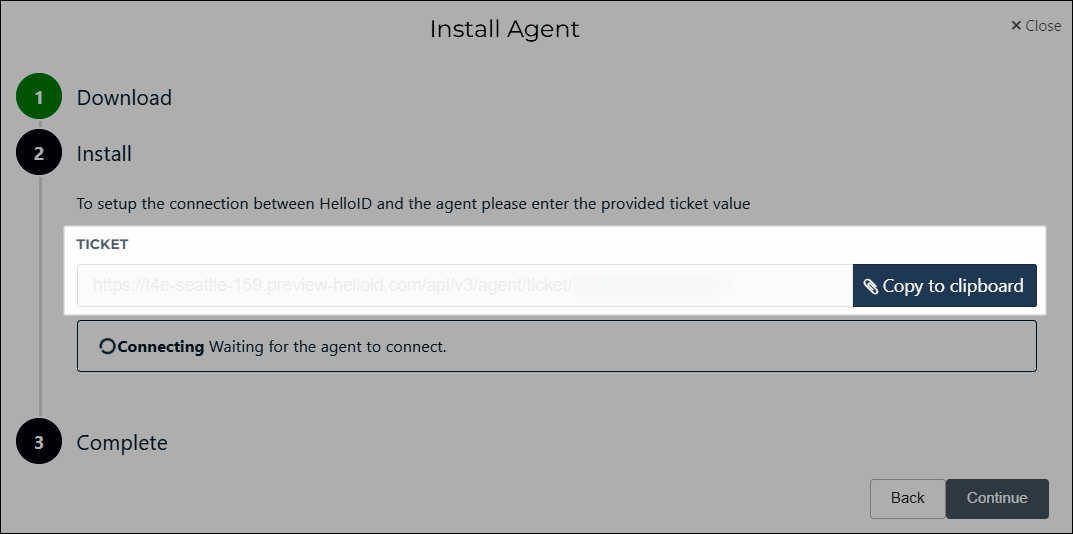
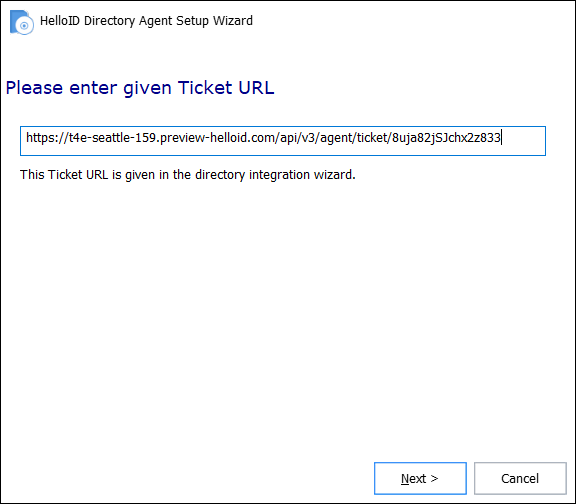
For the Ticket value, click Copy To Clipboard.
Run the HelloID Agent installer on the target machine.
On the welcome message, click Next.
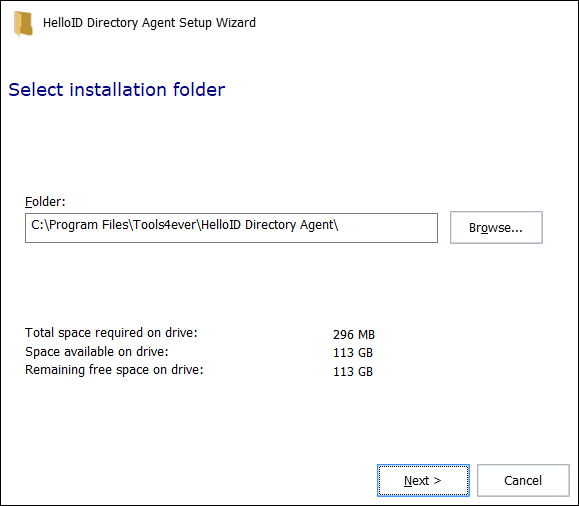
Select your preferred installation folder and click Next.
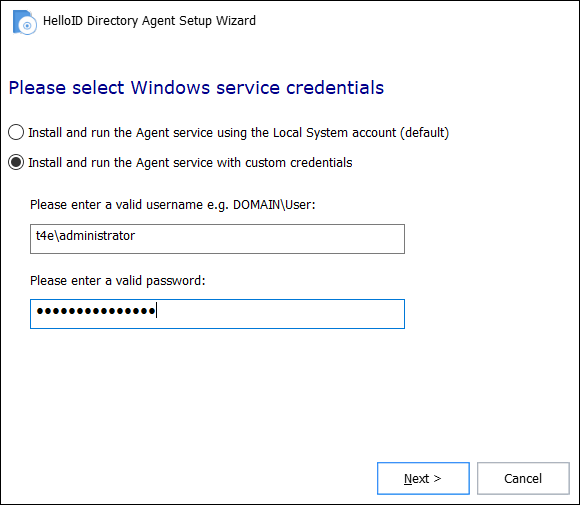
Choose the account which will run the Agent services. We recommend using a Local Administrator account to ensure that all files can be installed and that auto-updates will successfully run. Click Next.
Paste the Ticket URL you copied previously and click Next.
Click Install.
When the installation is complete, click Finish.
The Install Agent dialog box in your browser should now report a successful connection.
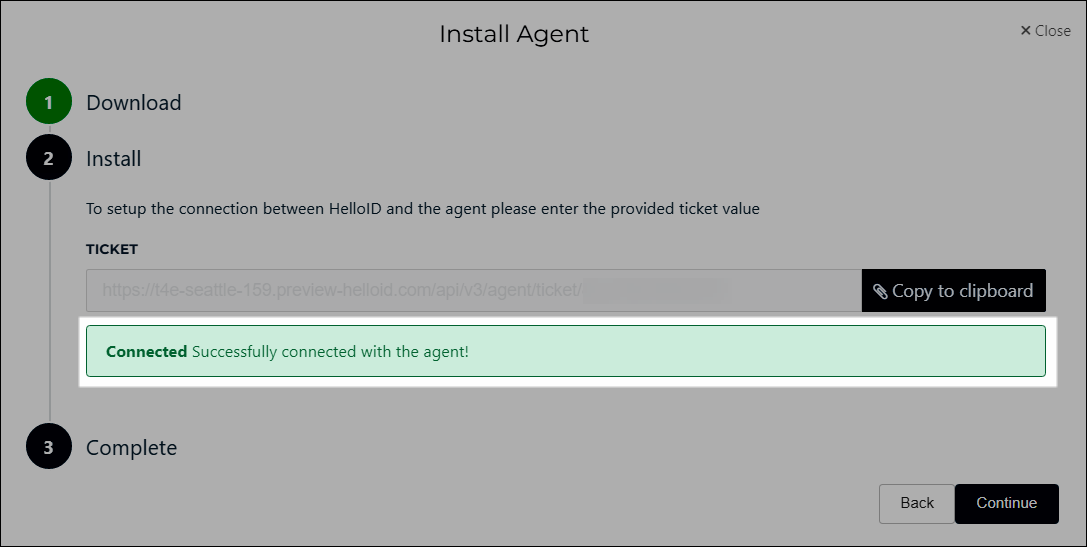
Click Continue and then click Complete to finish the installation.
Note
Once the Agent is installed, Whitelist domains for it.