Cura BackOffice OpenID application setup
Introduction
This manual shows how to make an OpenID connection to the Cura BackOffice application. The configuration takes place in HelloID and requires you to send information to Cura.
Requirements:
HelloID environment
Cura BackOffice environment
Users who wish to make use of the SSO are required to have their email address in Cura.
Create or Import a Certificate
If there is no certificate yet, a certificate must be imported or created. This can be done in the HelloID Administrator Portal under Settings > Certificates. For this tutorial, we will use a self-signed certificate. Learn more about certificates here.
Application Setup
Add the Cura Web Application
Create a new application in HelloID by navigating to Applications > Applications. Open the Application Catalogue and search for "Cura backoffice". Find the OpenID template, and click Add. Learn more about managing applications here.

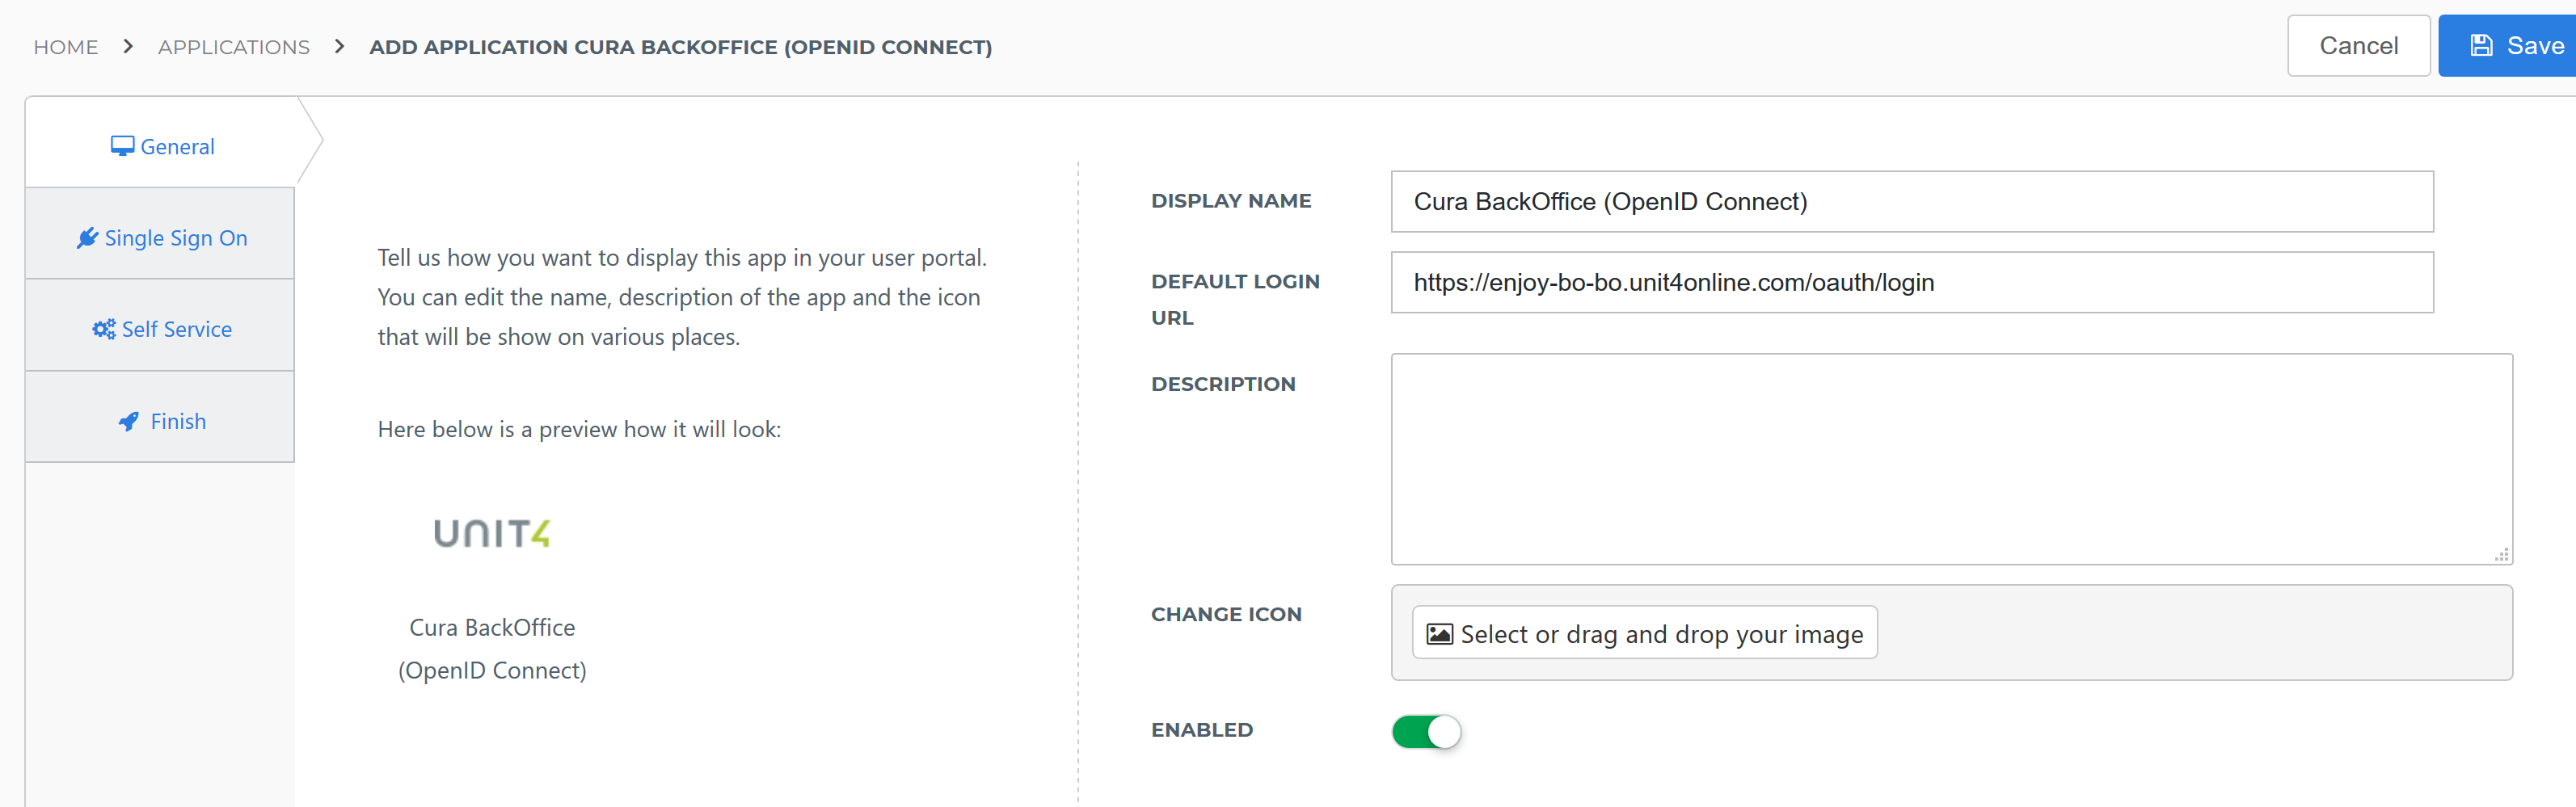
General tab
On the General tab, replace the URL in the Default Login URL field with your Cura Web environment URL.
Example: https://enyoiecd.unit4online.com/CuraWebEcdAcc
Optionally, you may also add a description. Click Next.
Single Sign-on tab
On the Single Sign-On tab, perform the following steps:
Provide a value in the Secret field.
Make sure this secret has no special characters, we suggest a string of at least 52 characters with uppercase, lowercase and numbers.
In the Signing Certificate dropdown, select the certificate that you created or imported previously.
Change the Redirect Uri to the redirect Uri provided by Cura in the format of https://{customer}.unit4online.com/oauth/login.
Example: https://enjoy-bo.unit4online.com/oauth/login
Click Next.

Self service tab
On the Self Service tab, choose whether to automatically create a Self Service product, which makes the application requestable. This is optional. Click Next.
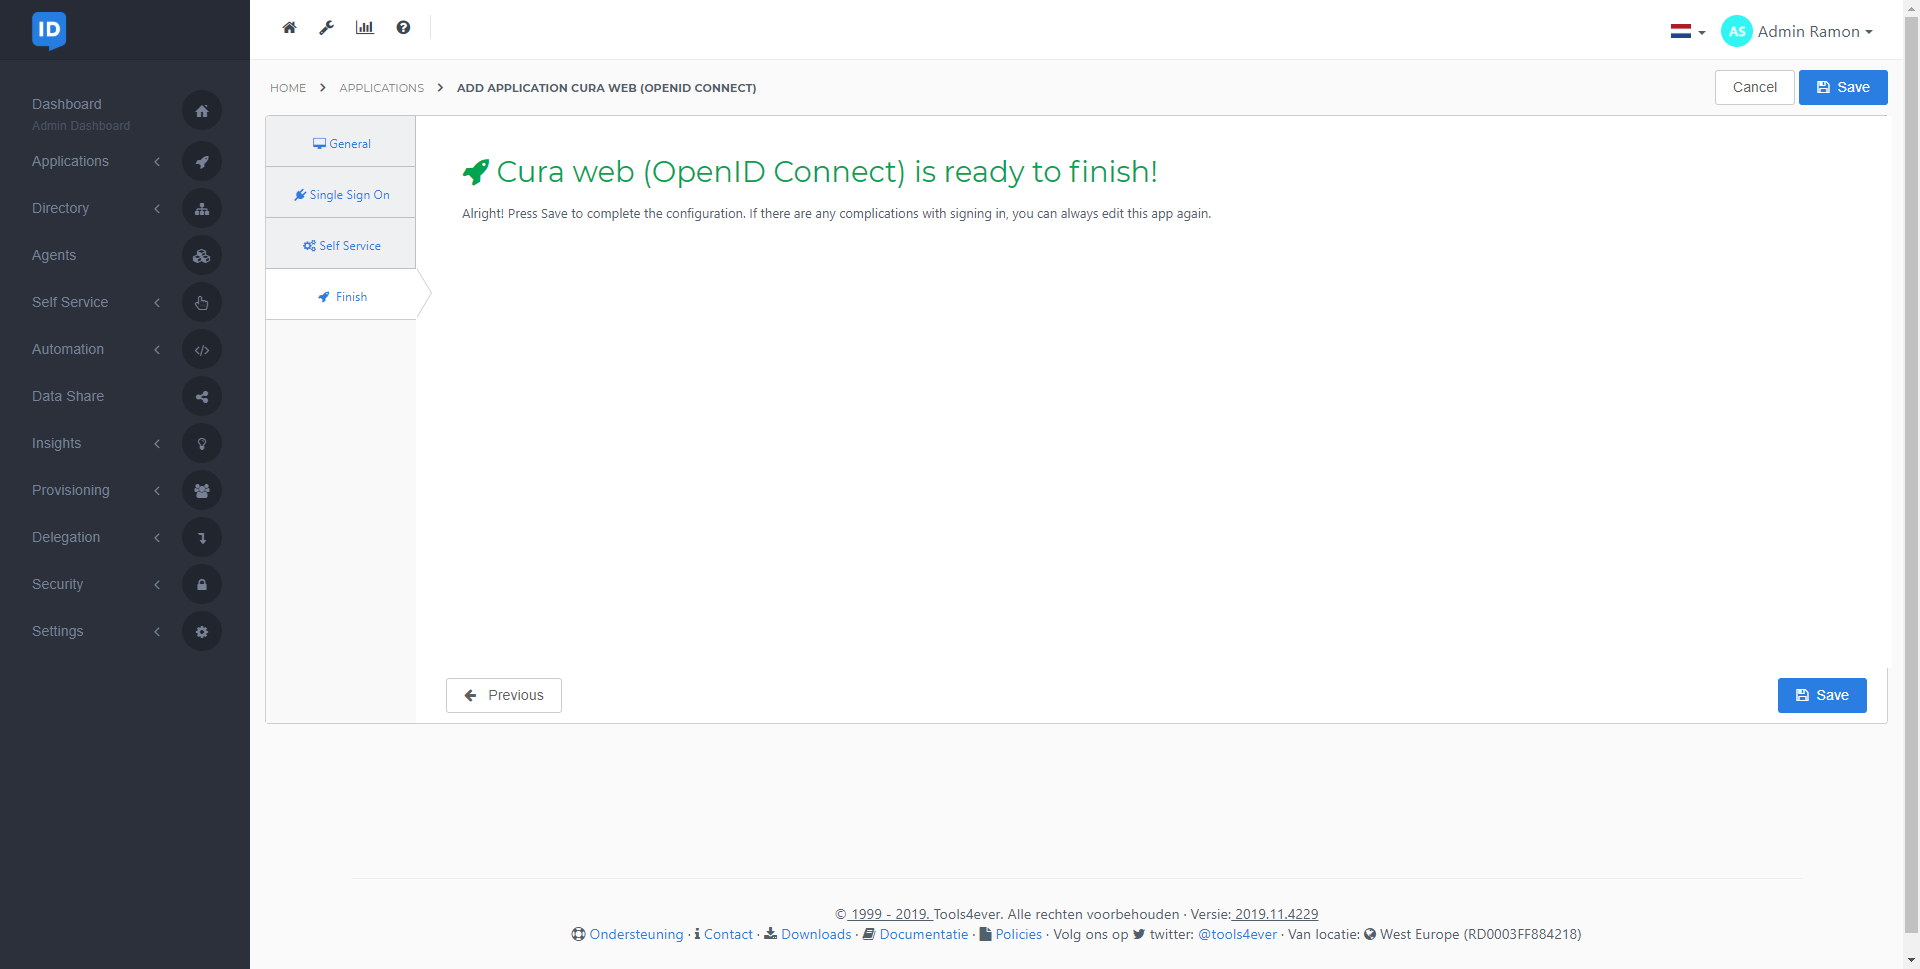
Finish tab
On the Finish tab, click Save to add the application to HelloID.
Additional Configuration
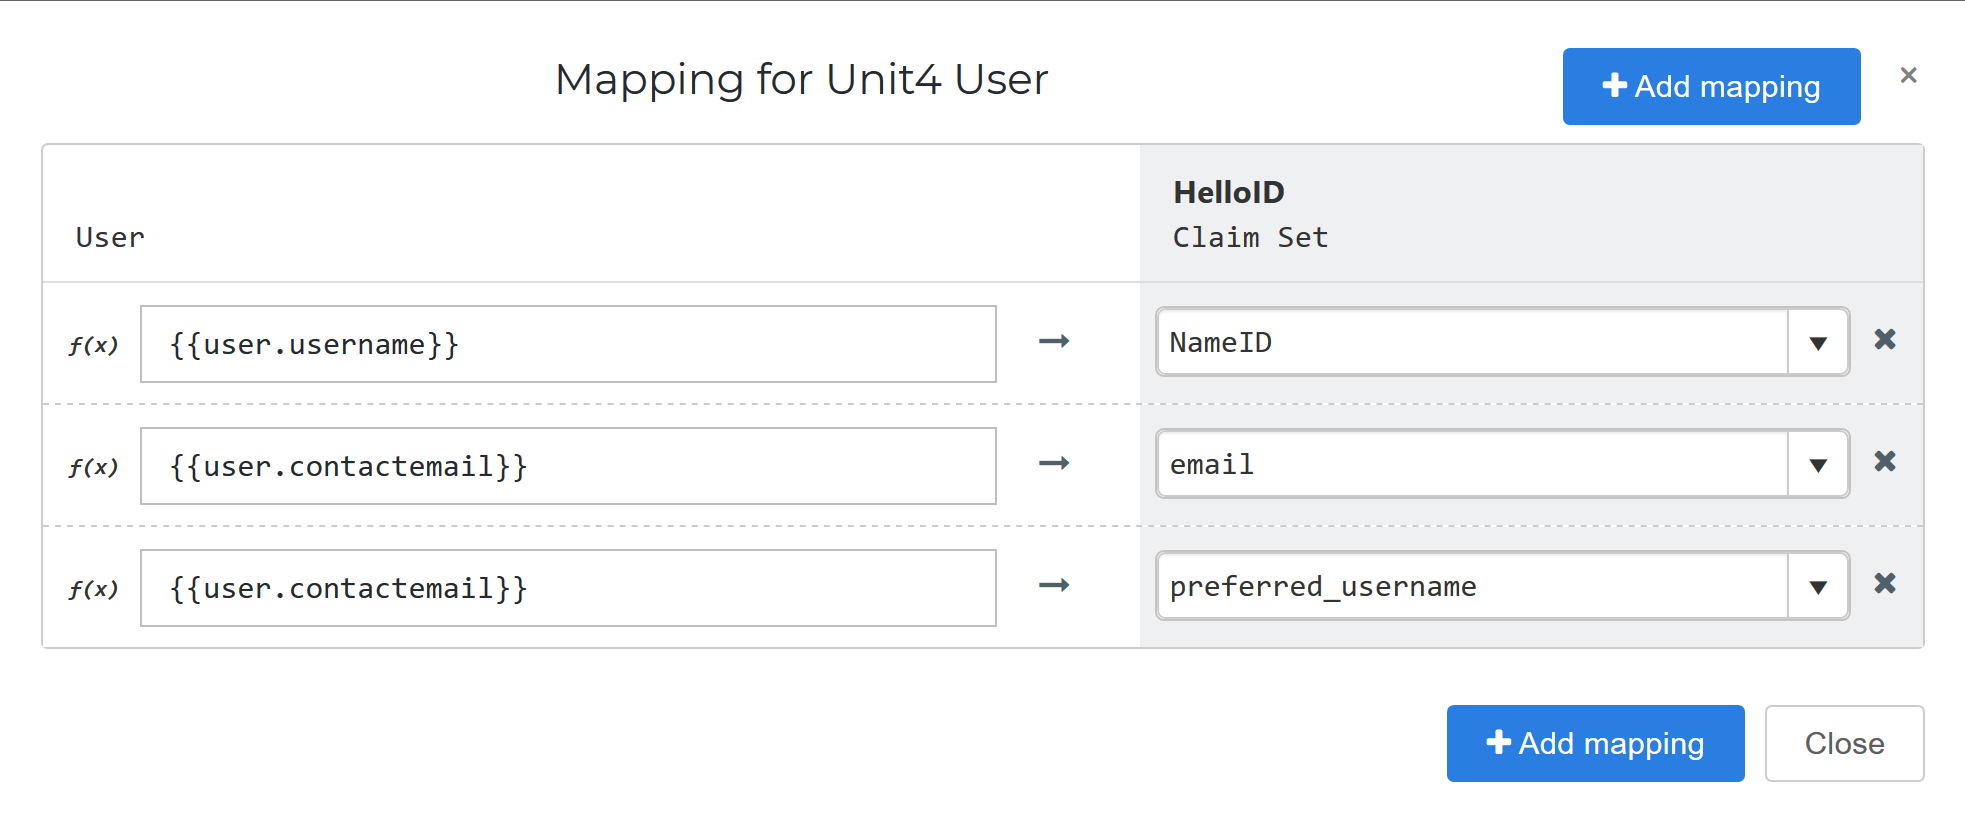
Mapping
Make sure the correct user identifier is sent to the Cura BackOffice application. By default the contact email address is used. Learn more about configuring application mapping here.
Discovery document
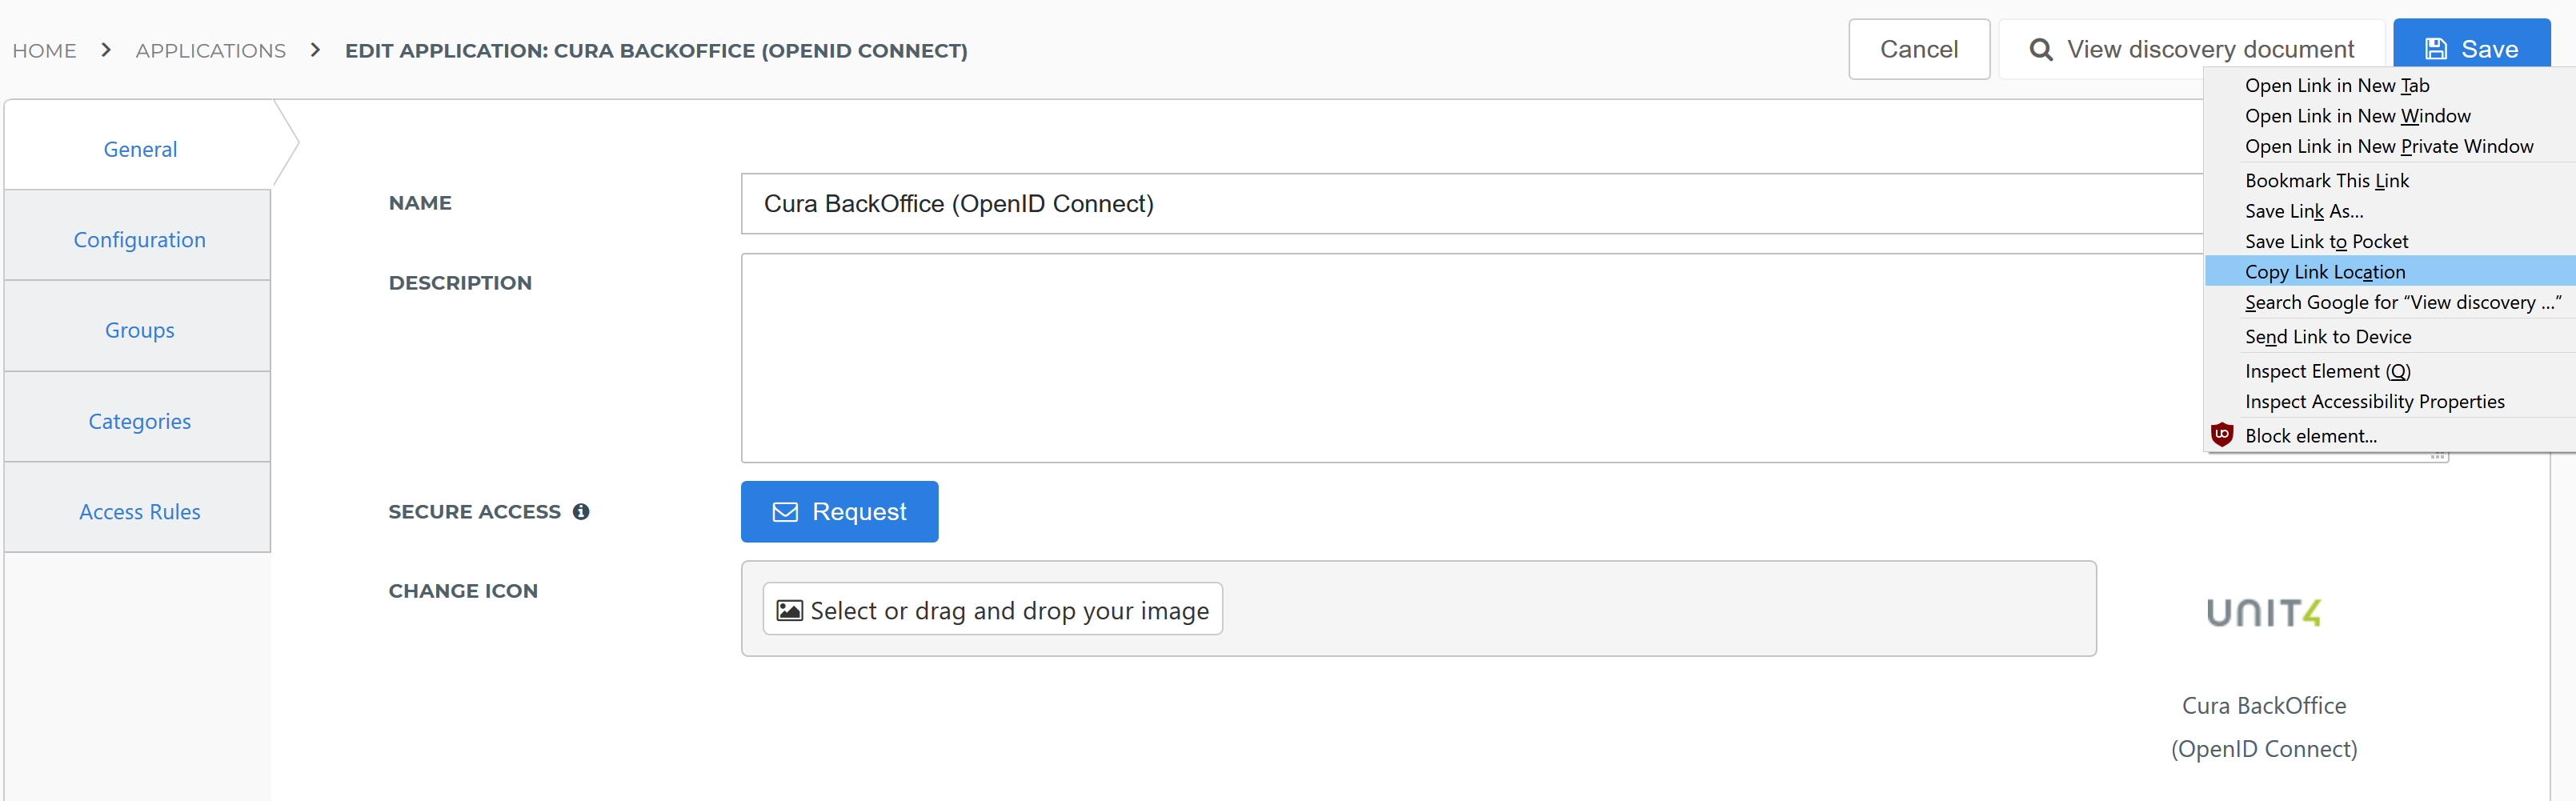
After adding the Cura Web application, click its Edit link on the applications overview. This will bring you to its properties page. Right-click View discovery document at the right top of the screen and Copy link Location. Make note of it, as you will need to provide this information to Cura later on.
Client ID & Client Secret
Go to the Configuration tab of the application. Make note of the Client ID. Additionally, click the "eye" icon next to the Secret to view the secret. Make note of the Secret as well.

Click Close and then click Save. The configuration of the HelloID application is finished.
Cura Web Configuration
Request SSO
In order to make the connection, Cura needs to add the connection on their side. This can be requested at Cura.
To configure the SSO on the Cura side, they will need the following information:
Client IDThe Client ID is a GUID automatically generated when creating an application in your HelloID environment. At Additional Configuration - Client ID & Client Secret is described where to find this.
For example: 478ecc46-0b96-4e74-baa4-b08995cd35fb
Client SecretThe Client Secret you specified at step 1. at the Single Sign-on Tab of the HelloID configuration (if forgotten, at the Additional Configuration - Client ID & Client Secret is described where to find this again).
For example: Hc2V5v4fJmPm4vNFgX2tGmNWdUGEy2PCtXXTLkBQQUvsgrC3TeUR
Discovery documentPlease provide the discovery document URL to Cura. This is the link address you copied at the Additional Configuration - Discovery document For example: https://enyoi.helloid.com/oauth2/v2/478ecc46-0b96-4e74-baa4-b08995cd35fb/.well-known/openid-configuration/