Google Workspace SAML application setup
Follow these instructions to set up HelloID and Google Workspace / Google Apps for single sign-on using the SAML protocol.
Tip
For more information about managing applications, see Applications.
Requirements
Google Workspace environment
Notes
Single sign-on for Google Workspace can only be applied to all users or none of them. Super Administrators are the exception, and are exempt from the requirements to use SSO once it is enabled.
Any service or generic accounts you use in Google Workspace will need to be able to use HelloID as well, otherwise they will not be able to log in unless they are Super Administrators.
Step 1: Add a certificate
Go to Settings > Certificates.
Click Create Self-Signed Certificate.
Set the following fields:
Name Of Certificate:
GoogleWorkspaceSelfSignedCommon Name (Domain):
<yourcustomerid>.helloid.comAll other fields: set according to your organization's requirements.
Click Save.
Export the certificate you just created in .CER format. See Export a certificate.
Step 2: Add the application
Go to Applications > Applications.
Click Open Application Catalog.
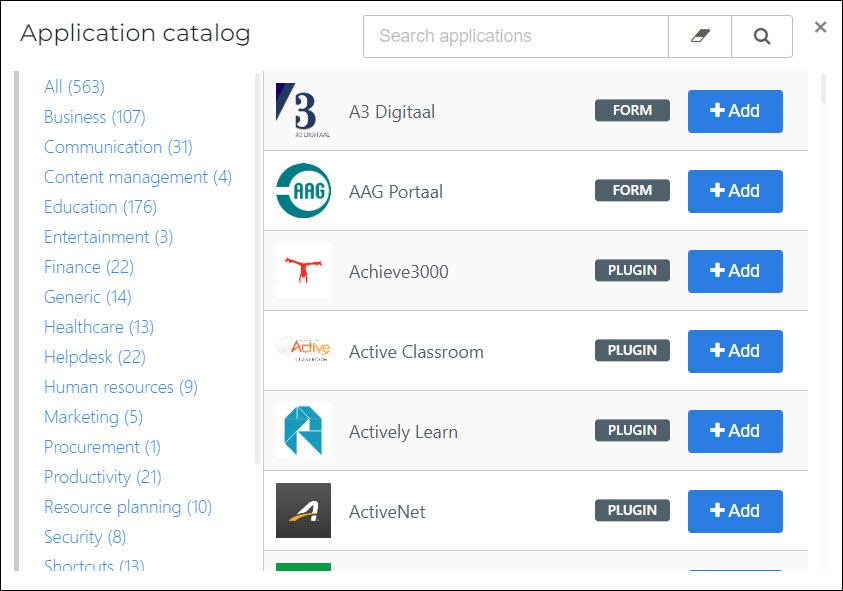
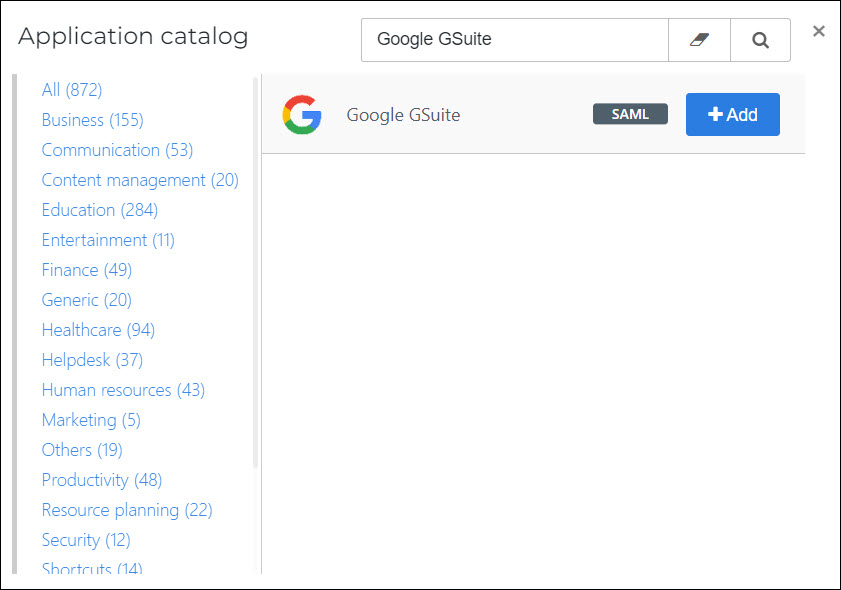
Search for the Google GSuite (SAML) template, and click Add.
Step 3: Application setup
Tip
For details on all available fields, see the Application settings reference.
On the General tab, set the following fields:
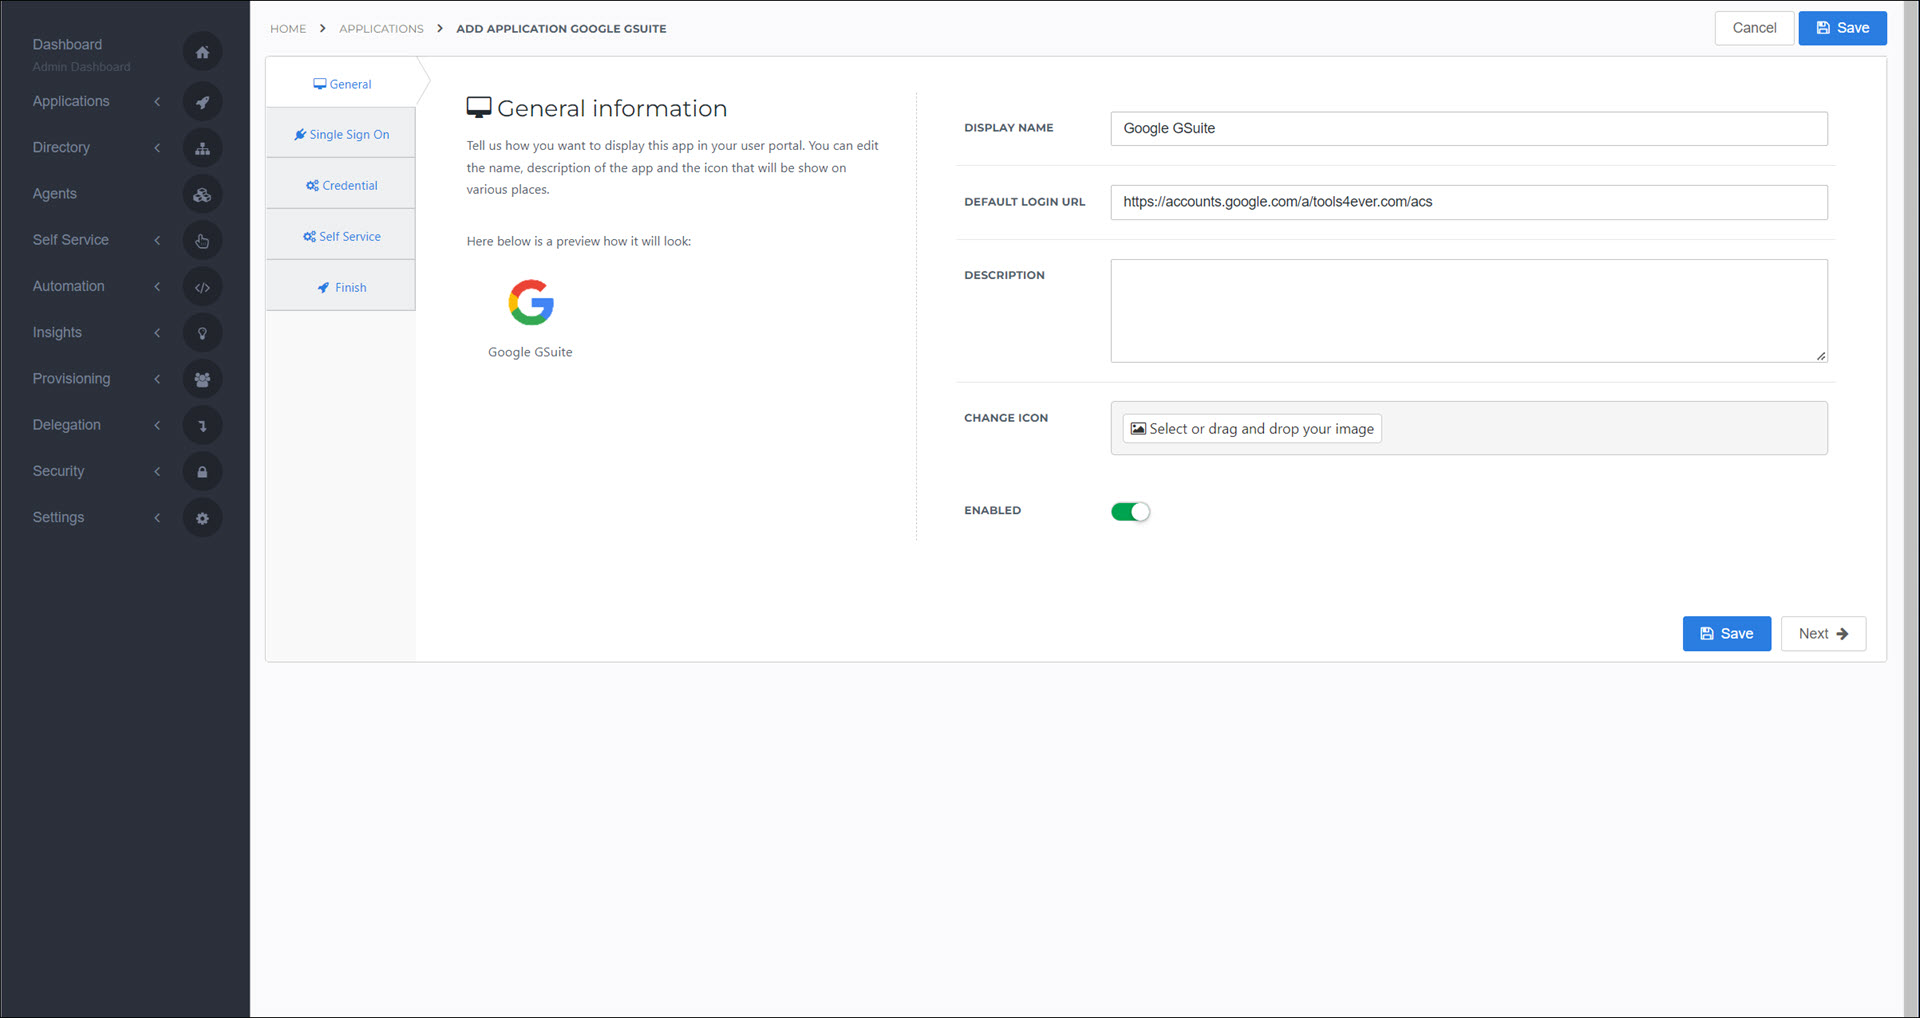
- Default Login URL
Your organization's Google Workspace domain name, in the format:
https://accounts.google.com/a/{yourGoogleDomain}/acs
Click Next.
On the Single Sign On tab, set the following fields:

- Issuer
Enter your HelloID domain in the format
https://{customer}.helloid.com.- Endpoint URL
Your organization's Google Workspace domain name, in the format:
https://accounts.google.com/a/{yourGoogleDomain}/acs- X509 Certificate
Select the
GoogleWorkspaceSelfSignedcertificate that you previously created.
Click Next.
On the Credential tab, select Credentials Are Configured By Admin. The settings for the NameID and Password depend on whether users are logging in with QR codes.
Users log in with QR codes:
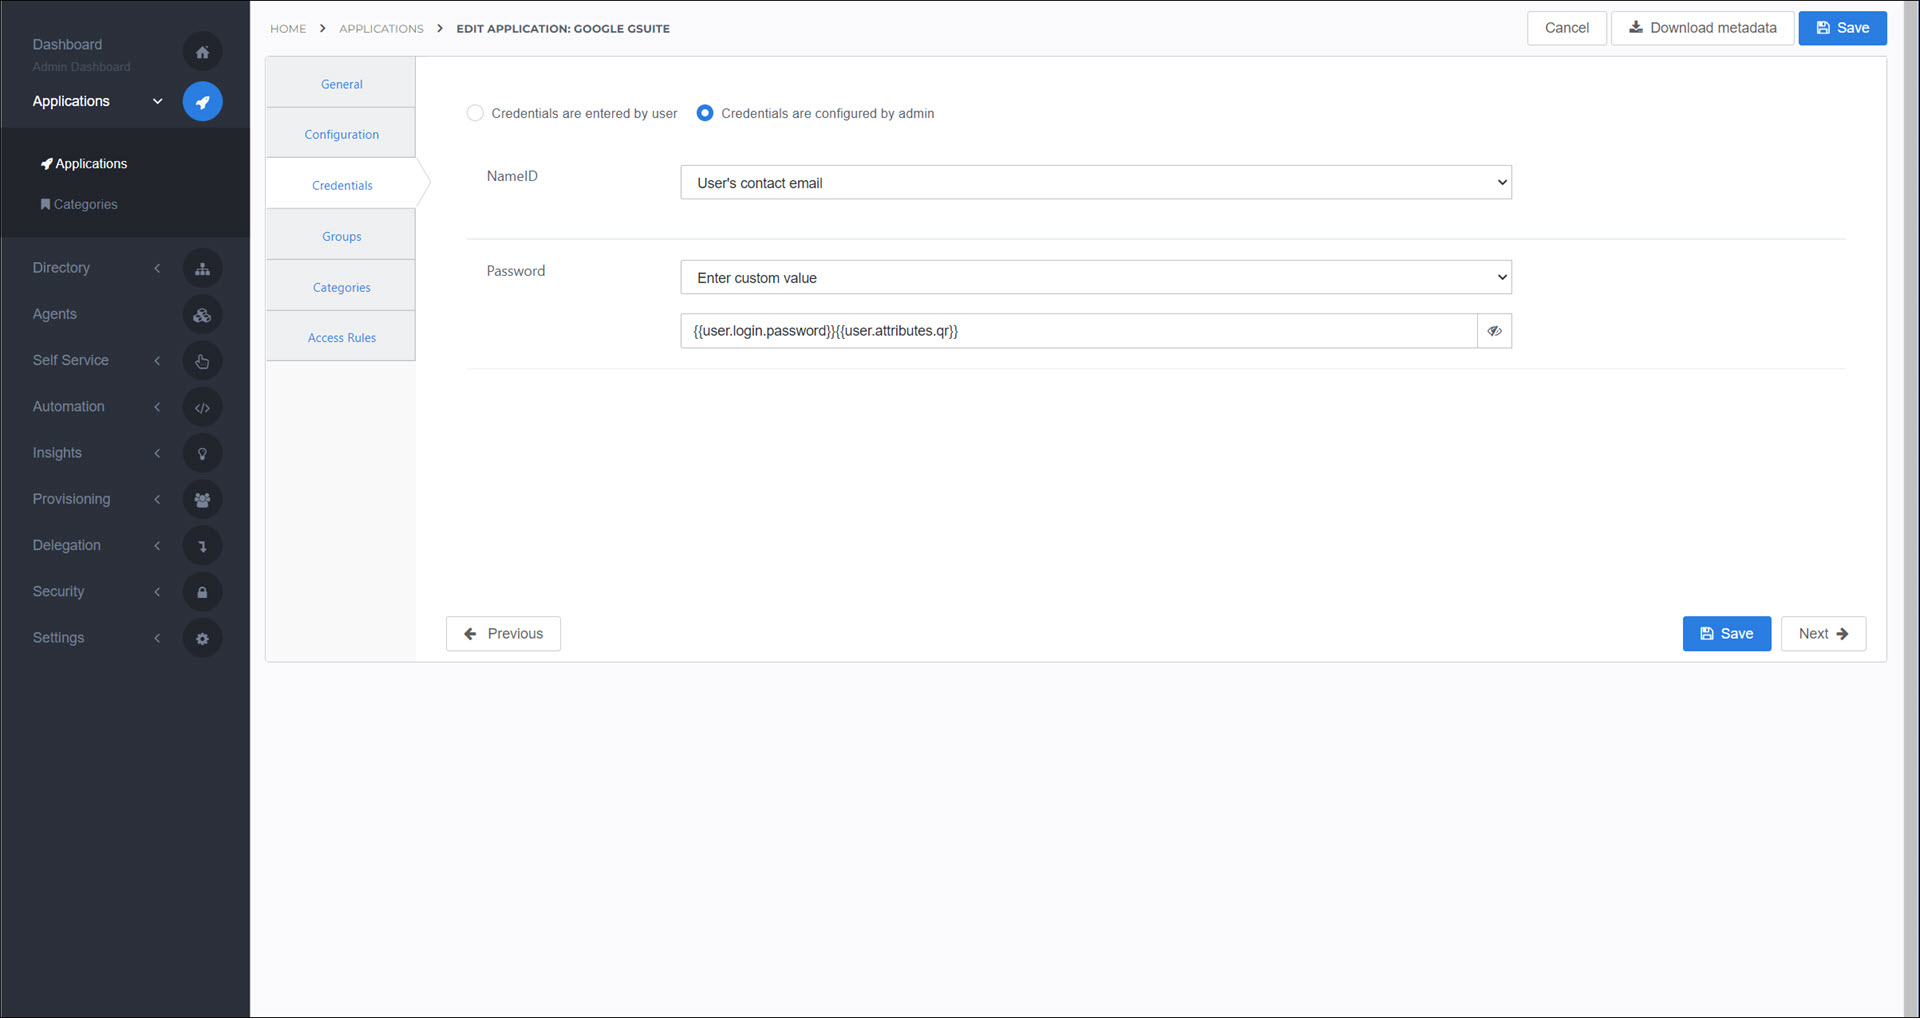
Name ID: User's contact email
Password: Enter custom value
{{user.login.password}}{{user.attributes.qr}}
Users do not log in with QR codes:
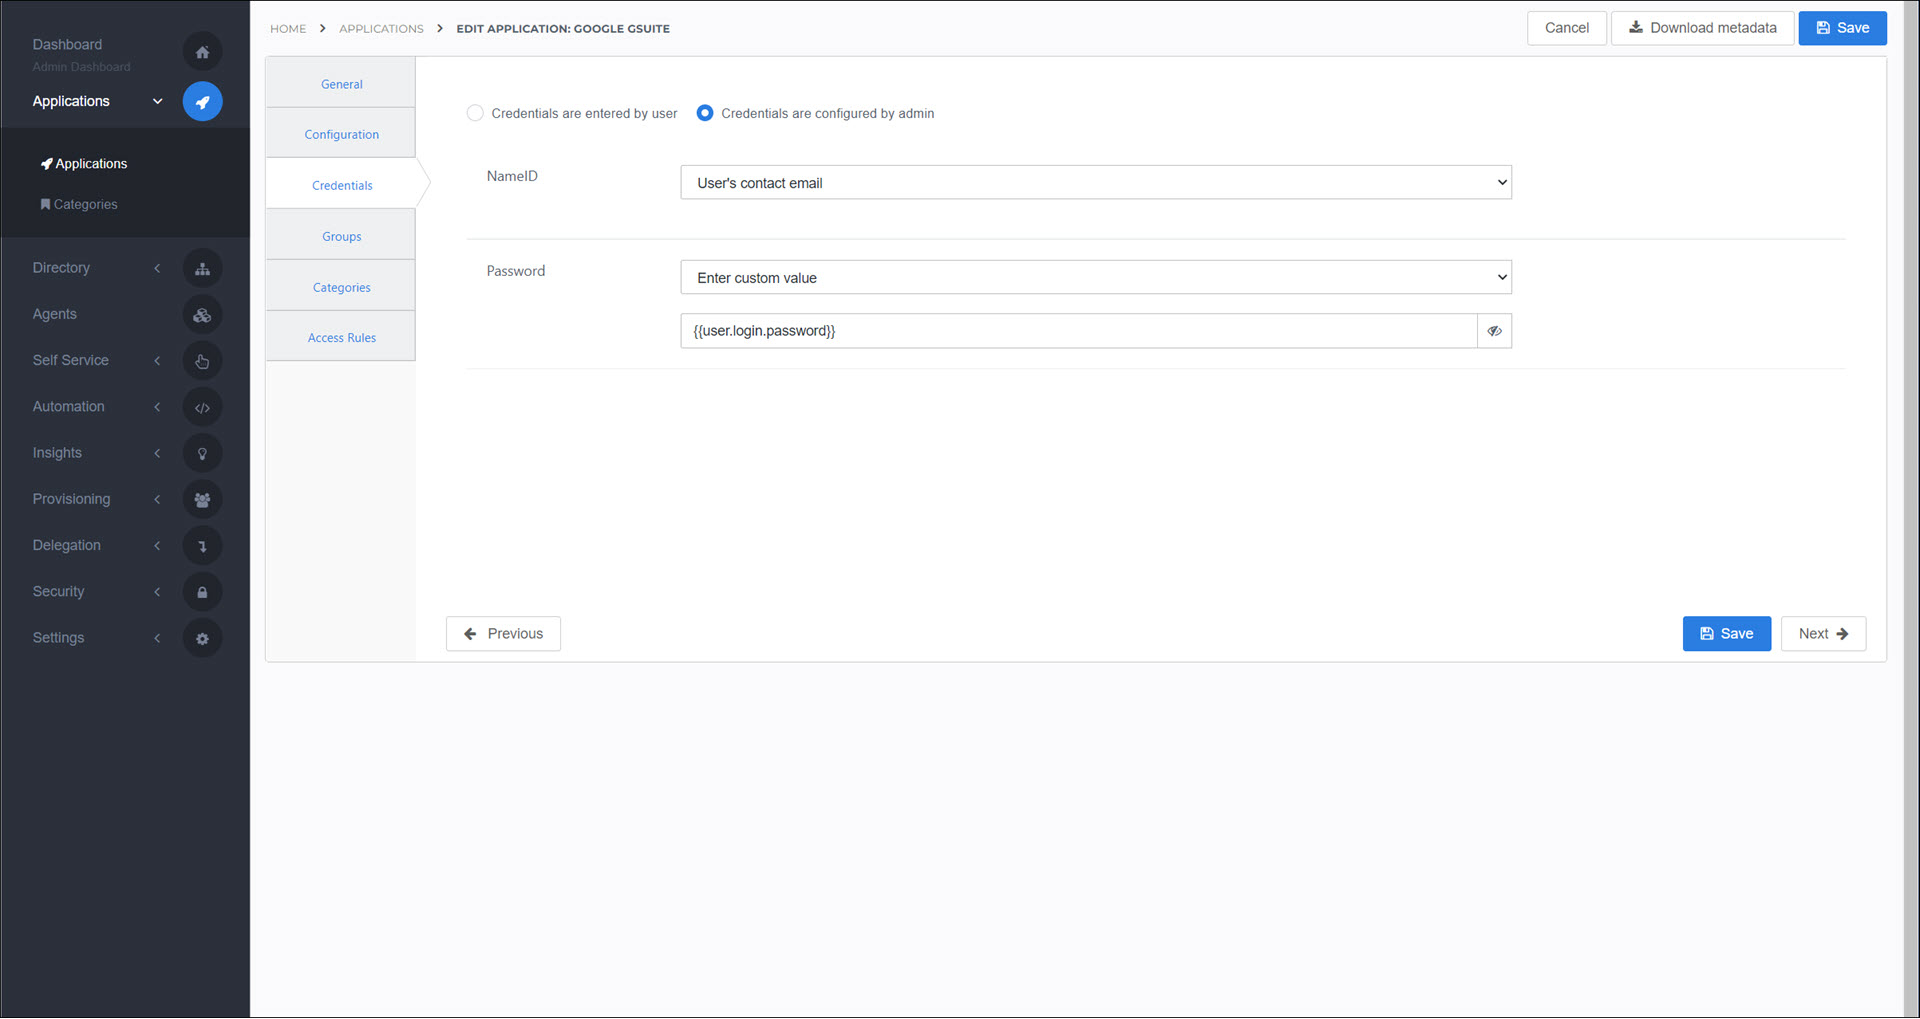
Name ID: User's contact email
Password: Enter custom value
{{user.login.password}}
Click Next.
Optional: On the Self Service tab, choose whether to generate a product (see Products) for users to request this application. If you do, select the Group that will be linked to the product.
Click Next.
On the Finish tab, click Save.
Step 4: Post-setup configuration
HelloID side
Get the application's metadata.
Go to Applications > Applications and click Edit for this application.
Right-click Download Metadata and click Copy Link Address.
Example 1. SAML Metadatahttps://enyoi.helloid.com/metadata/download?ApplicationGUID=c277185a-cd1f-451c-8068-c751ed85a028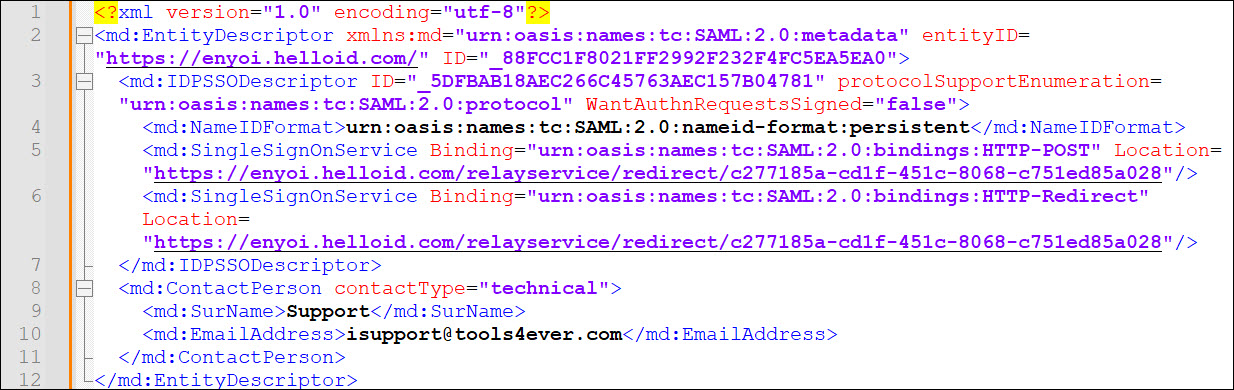
Open the metadata URL in a browser and copy the SingleSignOnService HTTP-POST location to a local text file. It will resemble:
https://t4e-seattle-159.helloid.com/relayservice/redirect/c46bfd46-c569-4274-bd6e-031b9c021423.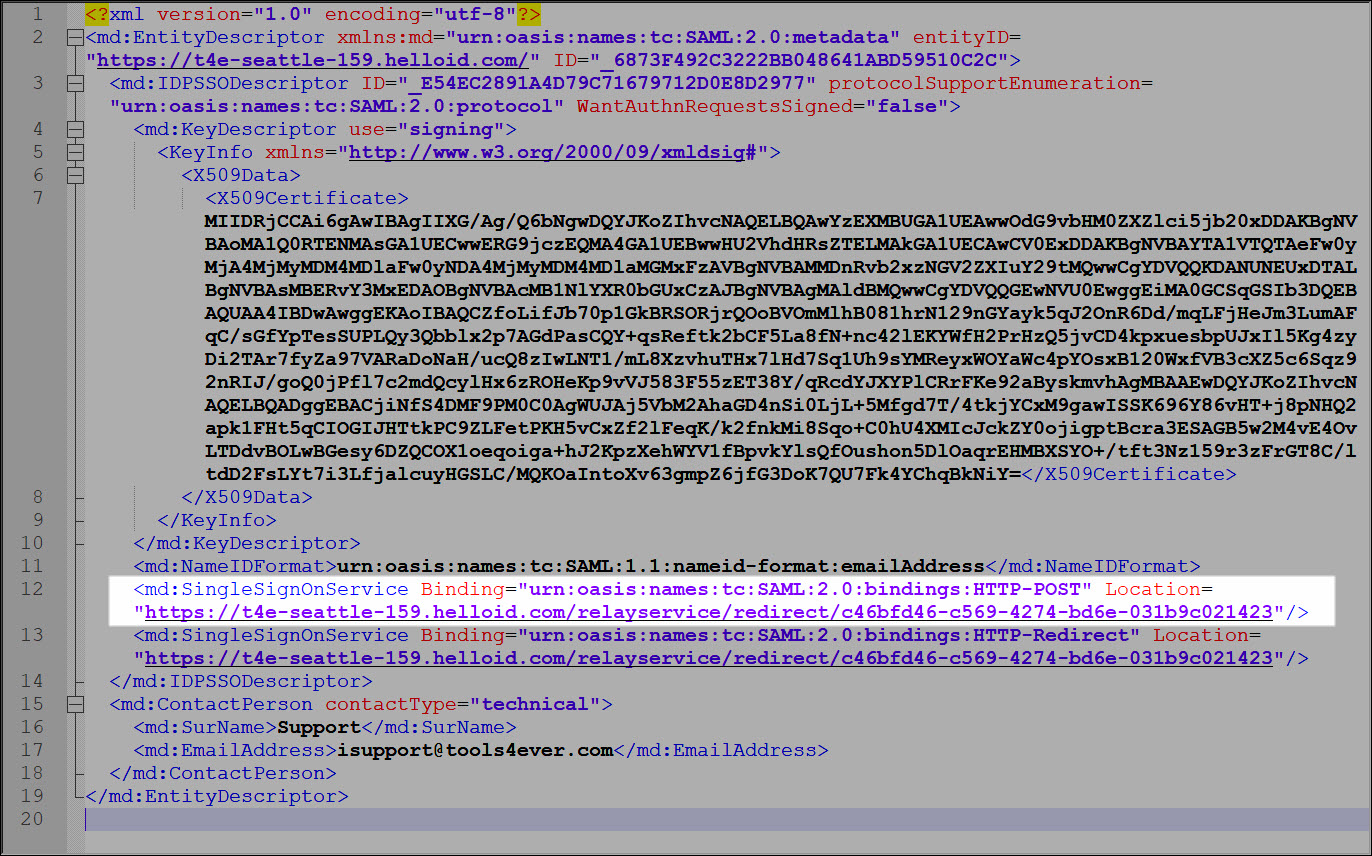
Enable Hide Application.
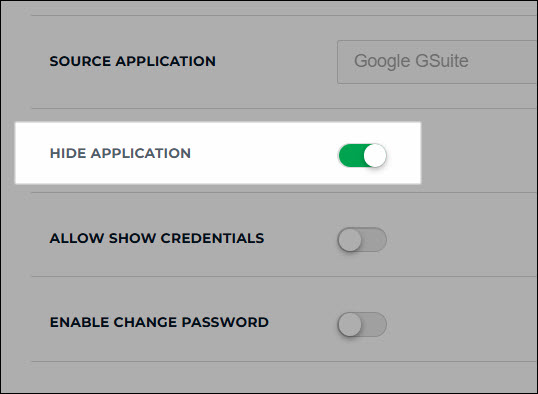
Tip
Why am I hiding the application?
Some service providers, including Google Workspace, have a number of different applications or "endpoints". Instead of having users navigate directly to the main Google Workspace application, you will provide users with shortcuts to the various endpoints, such as Gmail and Drive. They are indirectly routed through the primary service provider application that you have hidden. We will configure this below.
Click Save.
SP side
Log on to your organization's Google Workspace Admin Console and go to Security > Authentication > SSO with third-party IdP.
In the Third-party SSO profile for your organization pane, click Edit.
Enter the following information and click Save.
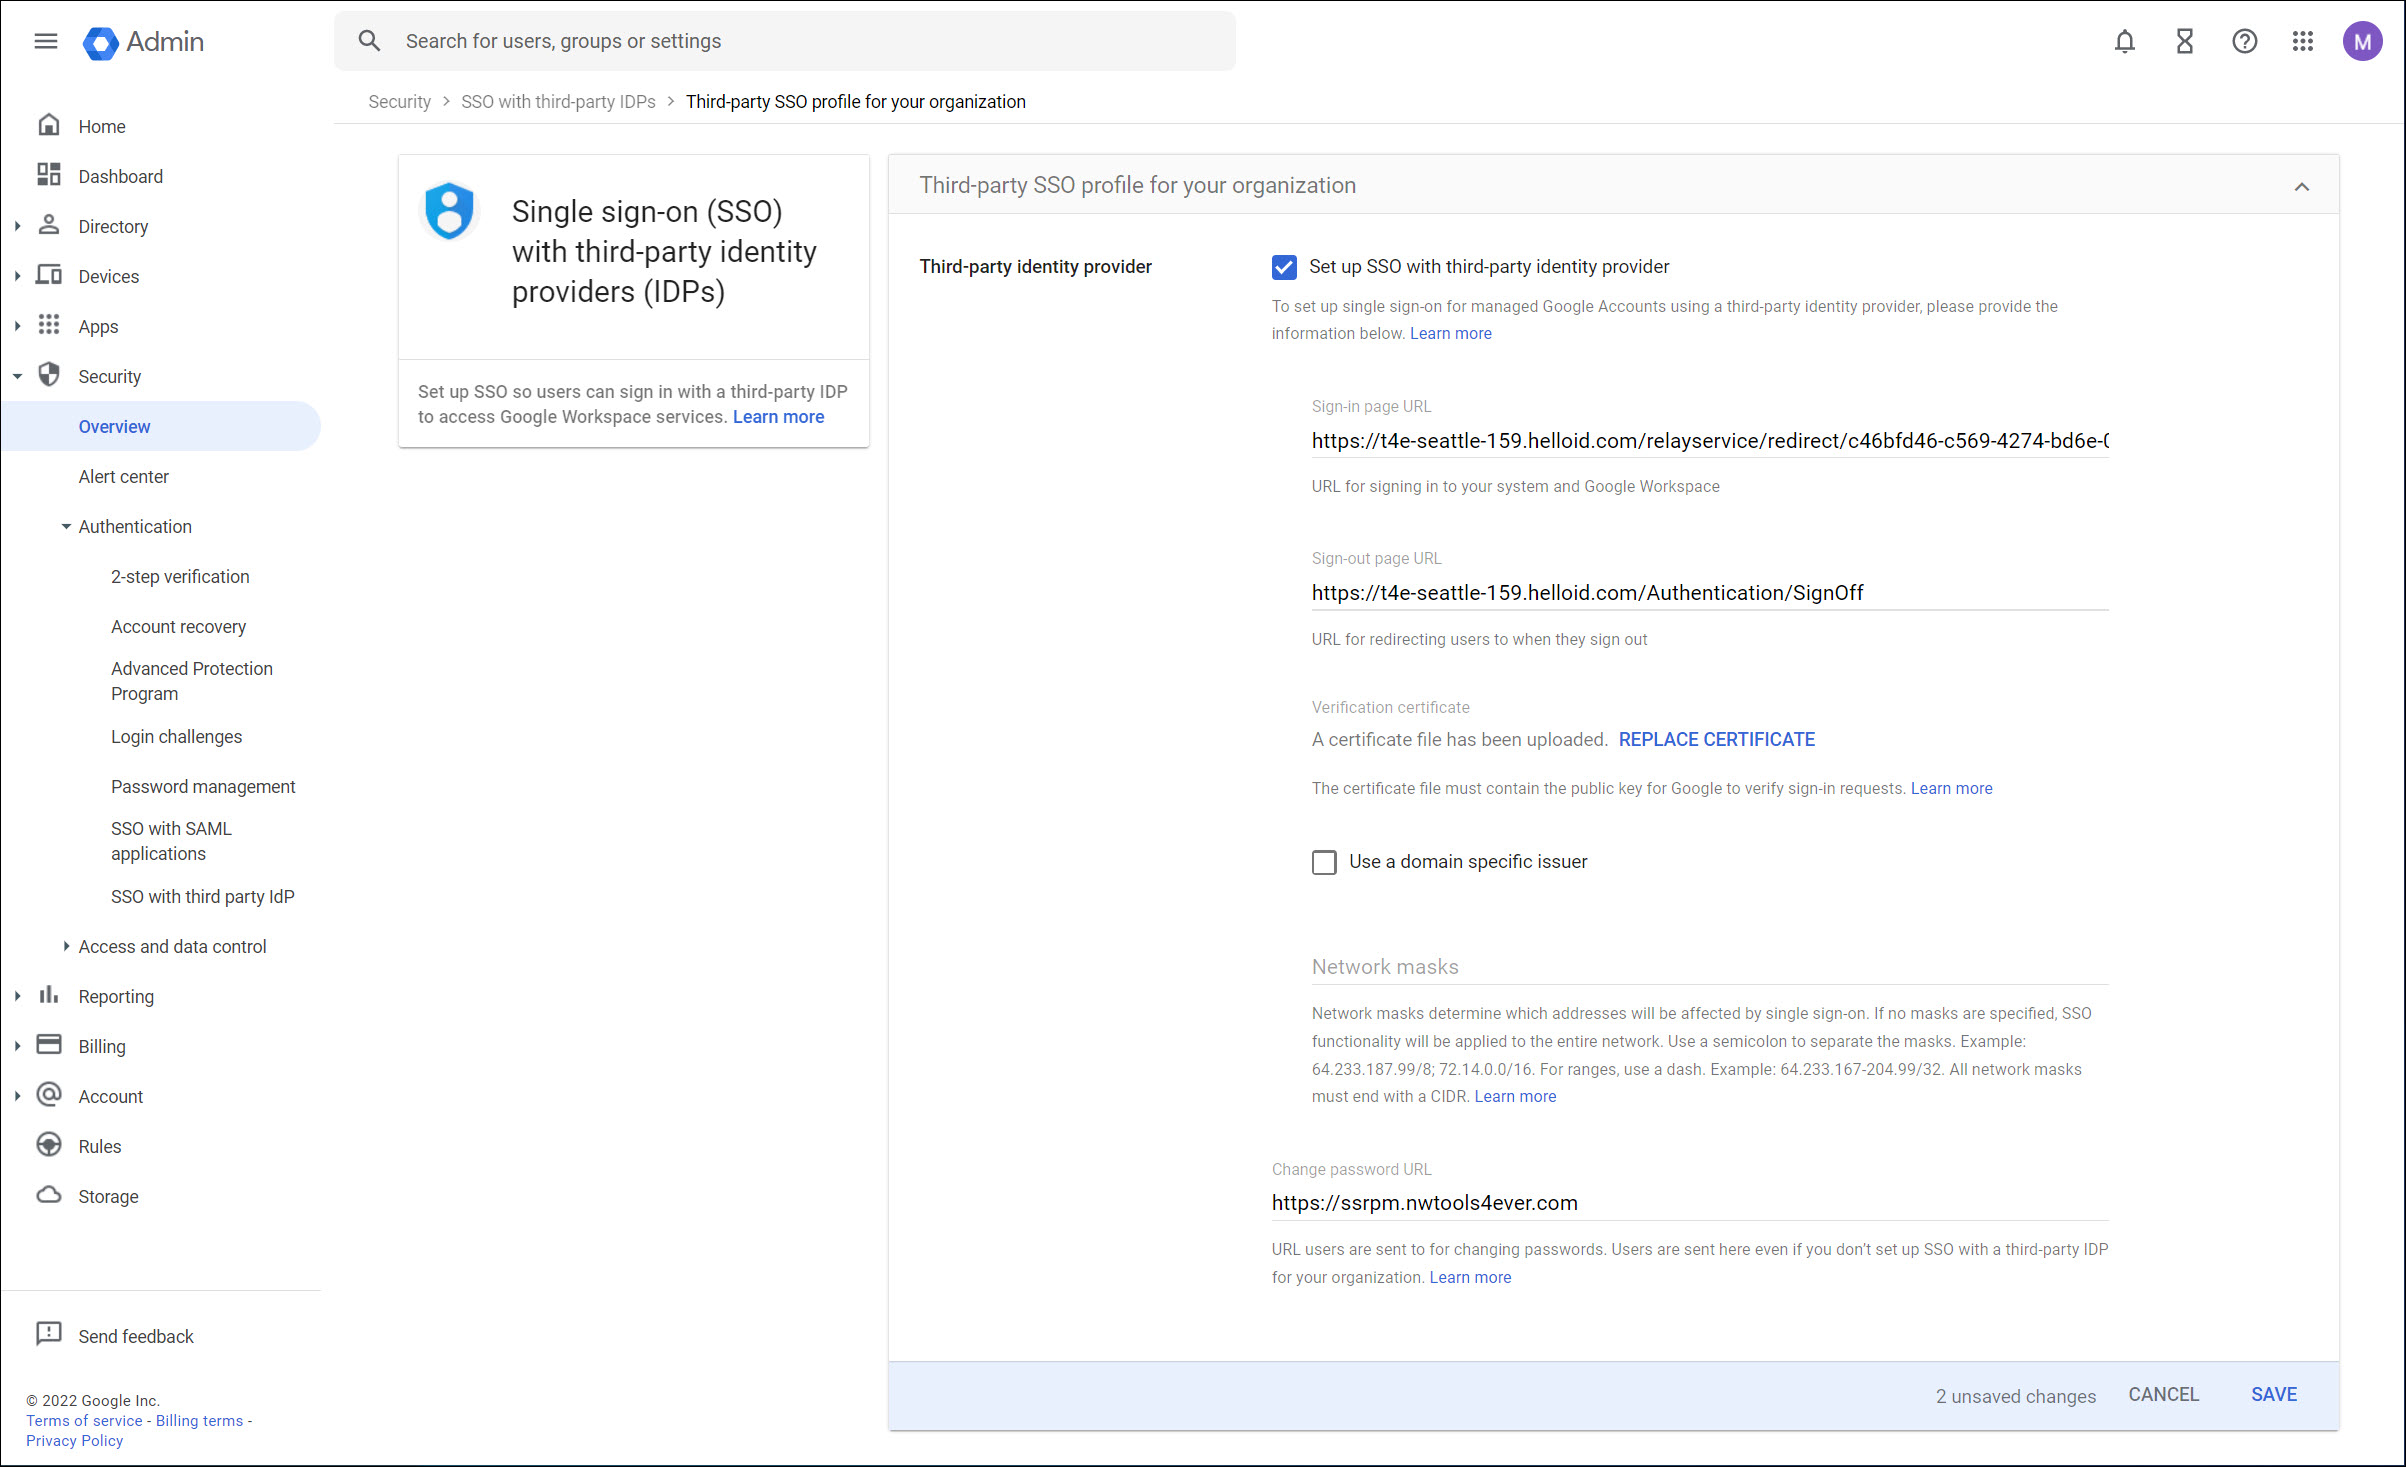
Set up SSO with third-party identity provider: Enable
Sign-in page URL: Paste the SingleSignOnService URL that you copied from the application metadata.
Sign-out page URL: Enter
https://{yourdomain}.helloid.com/authentication/signoff.Verification Certificate: Upload the .CER certificate you exported earlier.
Change password URL (optional): Enter the URL of your password reset manager. For example, SSRPM.
Step 5: Add product shortcuts
The SAML connection is now configured. The next step is to add shortcuts to the Google products.
Go to Applications > Applications.
Click Open Application Catalog.
Search for
Googleand click Add for the first Google App you want to create a shortcut for. For example, Google Drive.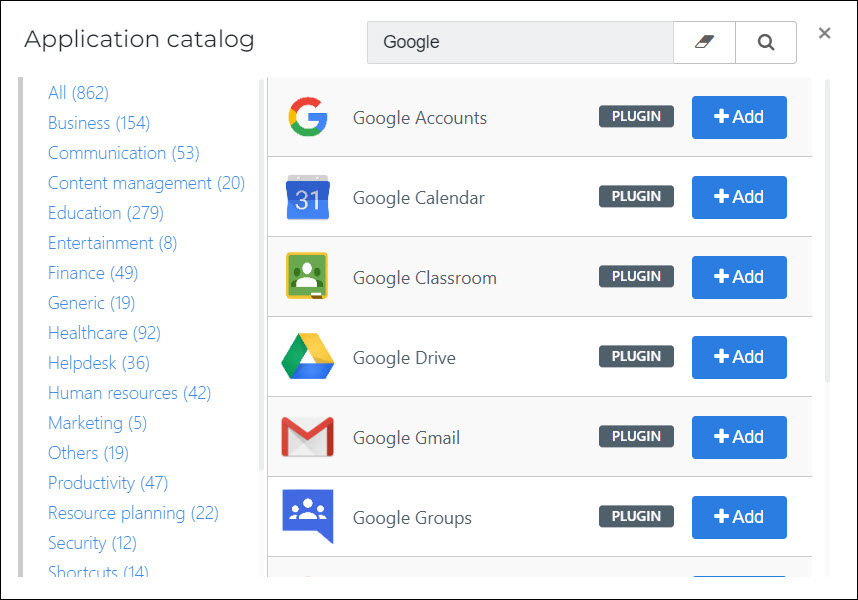
On the General tab, replace
{company domain}in the Default Login URL with your organization's Google Workspace domain name.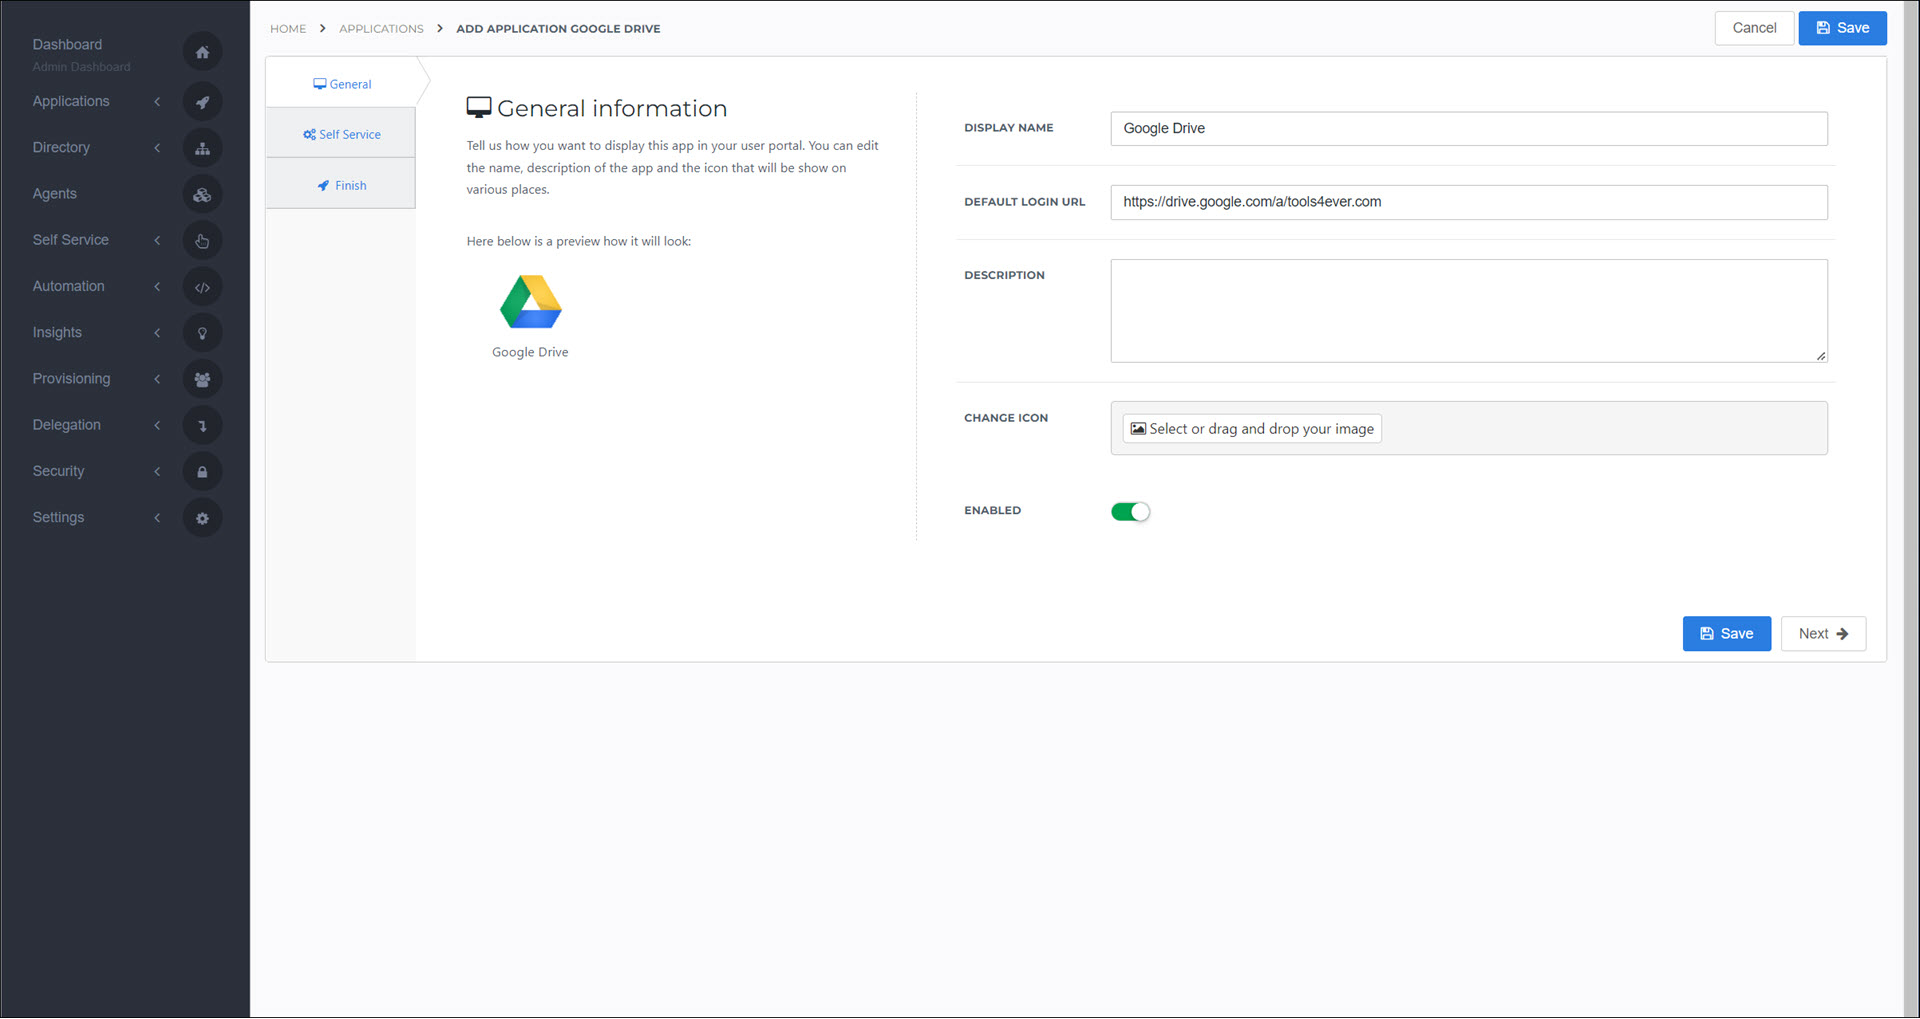
Click Save.
Repeat steps (1) - (5) for any other Google App product shortcuts you want to create.
After you have finished adding product shortcuts, authorized users will see the shortcuts in Applications for users. When they launch an application, they will be authenticated to Google with the credentials stored in the attribute you specified on the Google Workspace application. If any users are not able to access their Google products, double check that they have the required information in the chosen attribute.
Step 6: Test the application
Using a HelloID account that has access to these application shortcuts, go to Applications for users on the user dashboard, and launch the application to test it.
Step 7: Finish up
The application has been added to HelloID, and a trust has been configured. You may now want to do the following:
To grant additional group(s) access to this application, Grant a group access to an application.
If you generated a product that grants access to this application, Link a product to a group to make the product requestable for additional users.