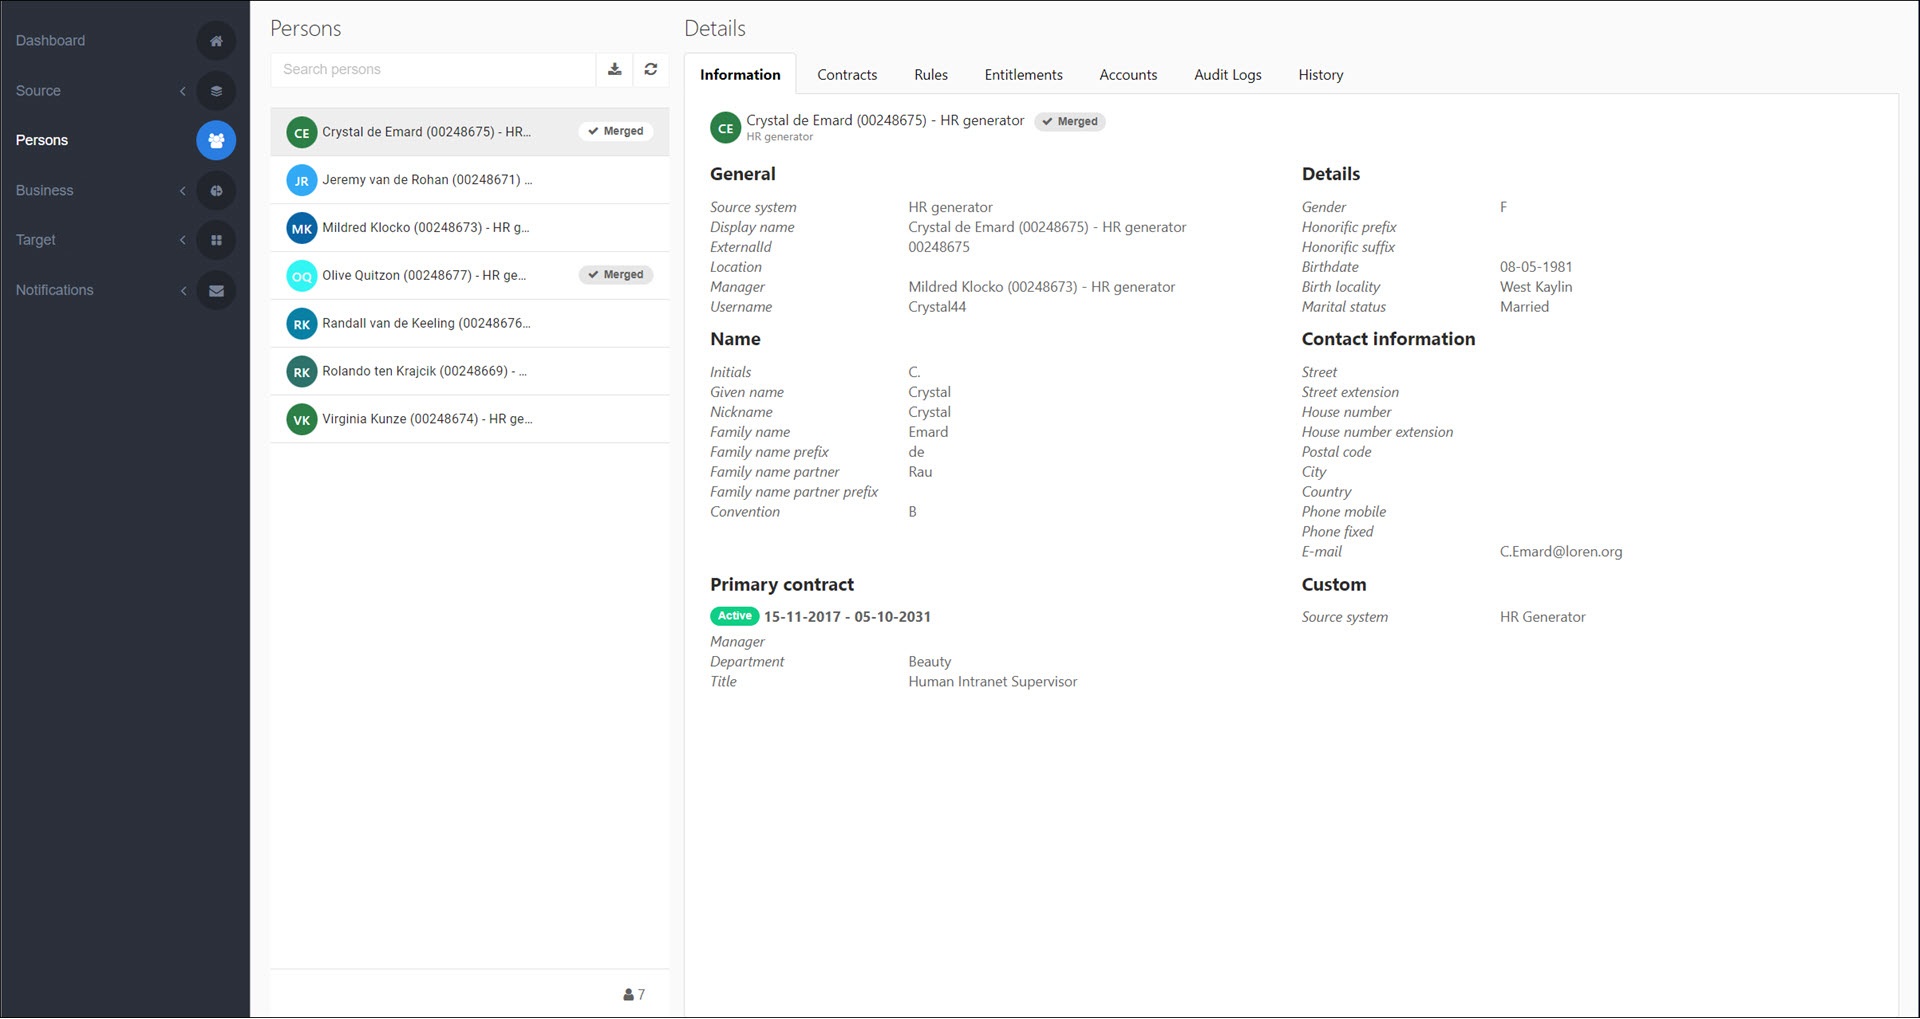
Manually merge persons
Tip
Optional: Click  Inspect for any main or non-main person to inspect their data and contracts (shows the same information as View a person's data and View a person's contracts).
In Source > Aggregation, the left pane contains all persons available as main persons. The right pane contains all persons available as non-main persons. The center pane contains all current (pending and applied) sets of merged persons.
Go to Source > Aggregation > Manual.
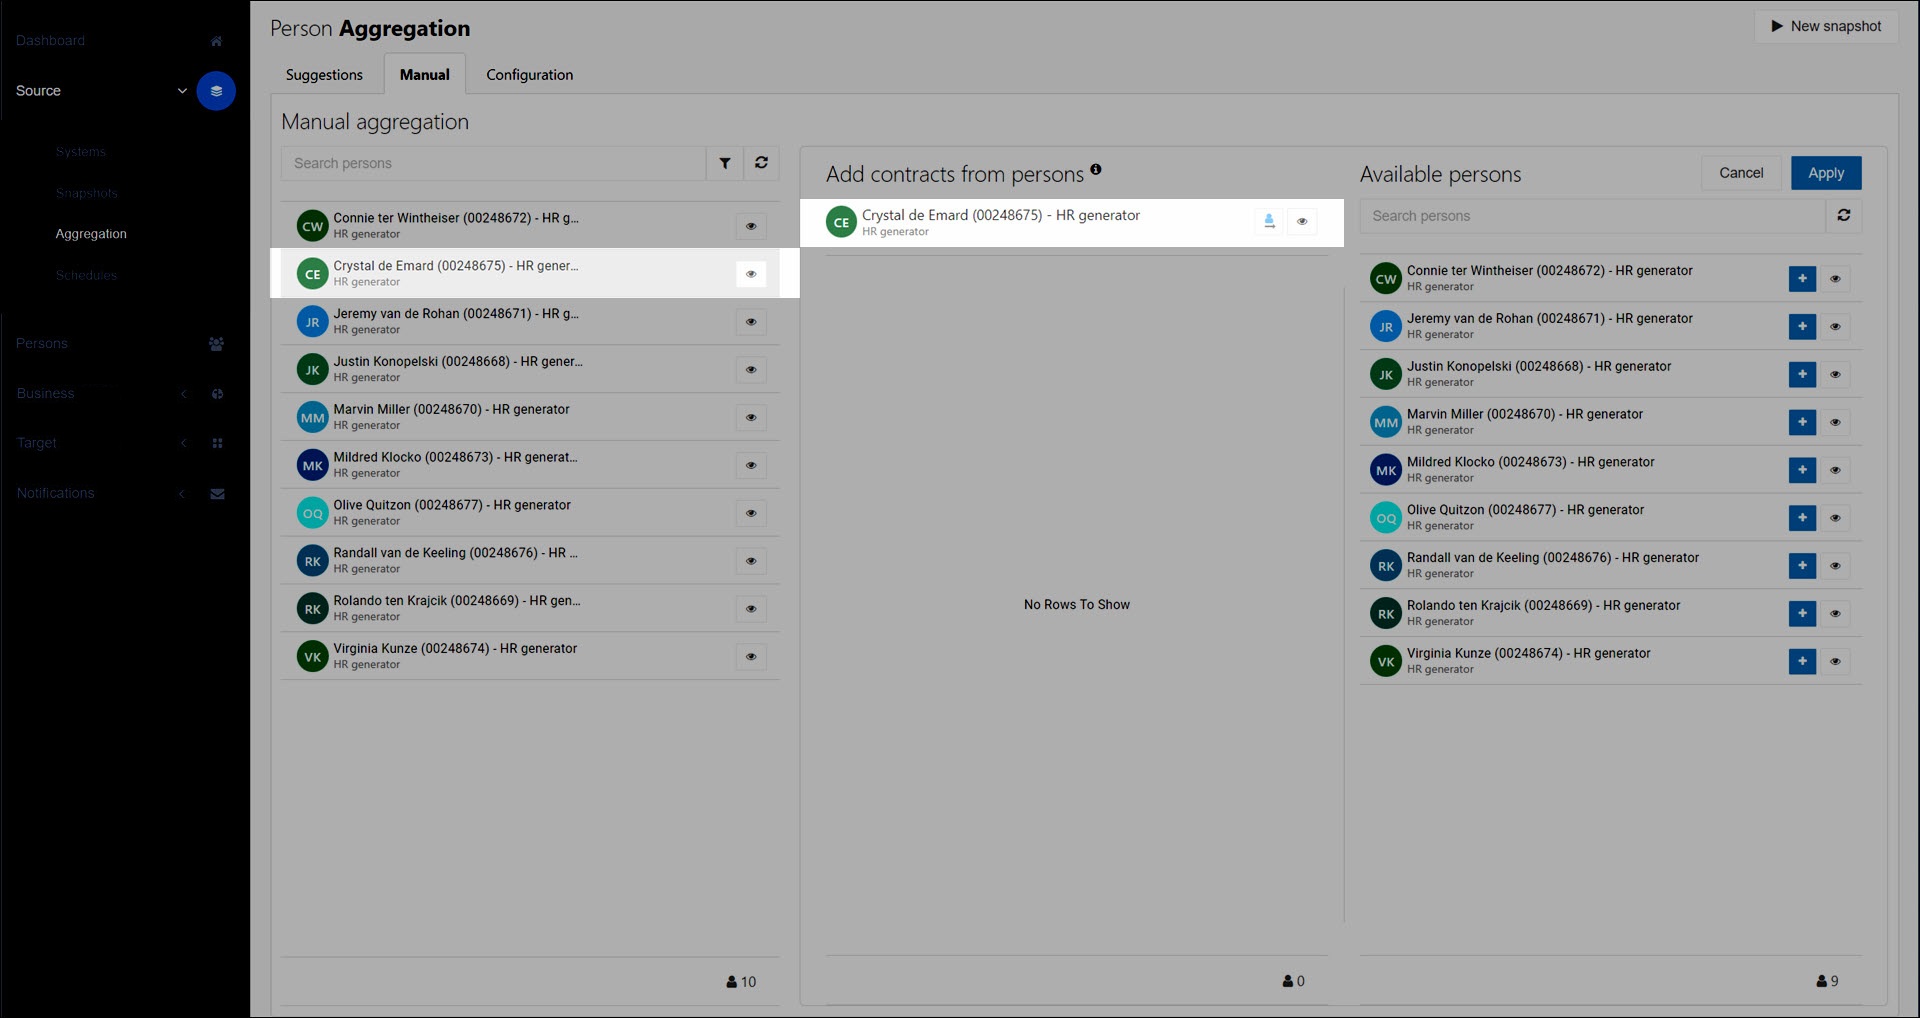
In the left pane, select a person.
A new merge set is created in the center pane, and the selected person becomes a main person in it.
For this example, we've created a new merge set with Crystal as the main person.
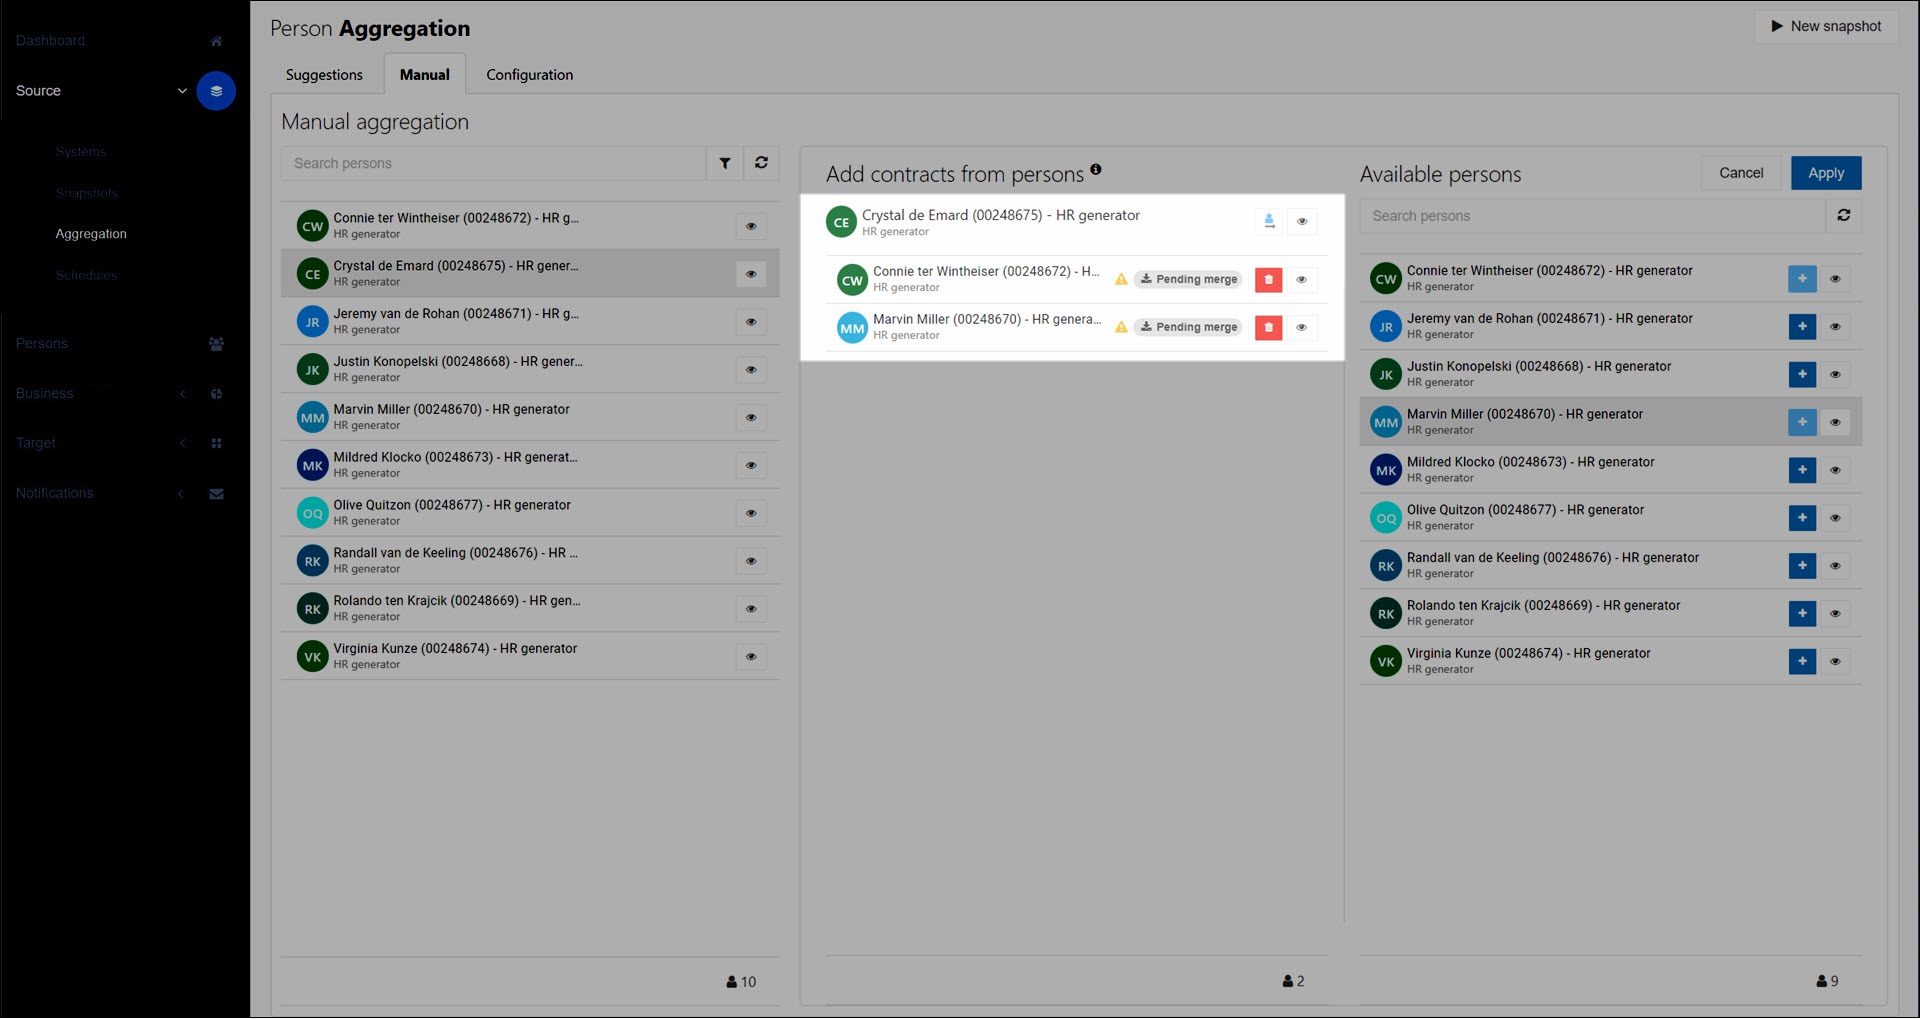
In the right pane, click
 Add for a person (or drag-and-drop).
The selected person is added to the merge set in the center pane as a non-main person, and is marked Pending Merge.
For this example, we've added Connie and Marvin to the merge set as non-main persons.
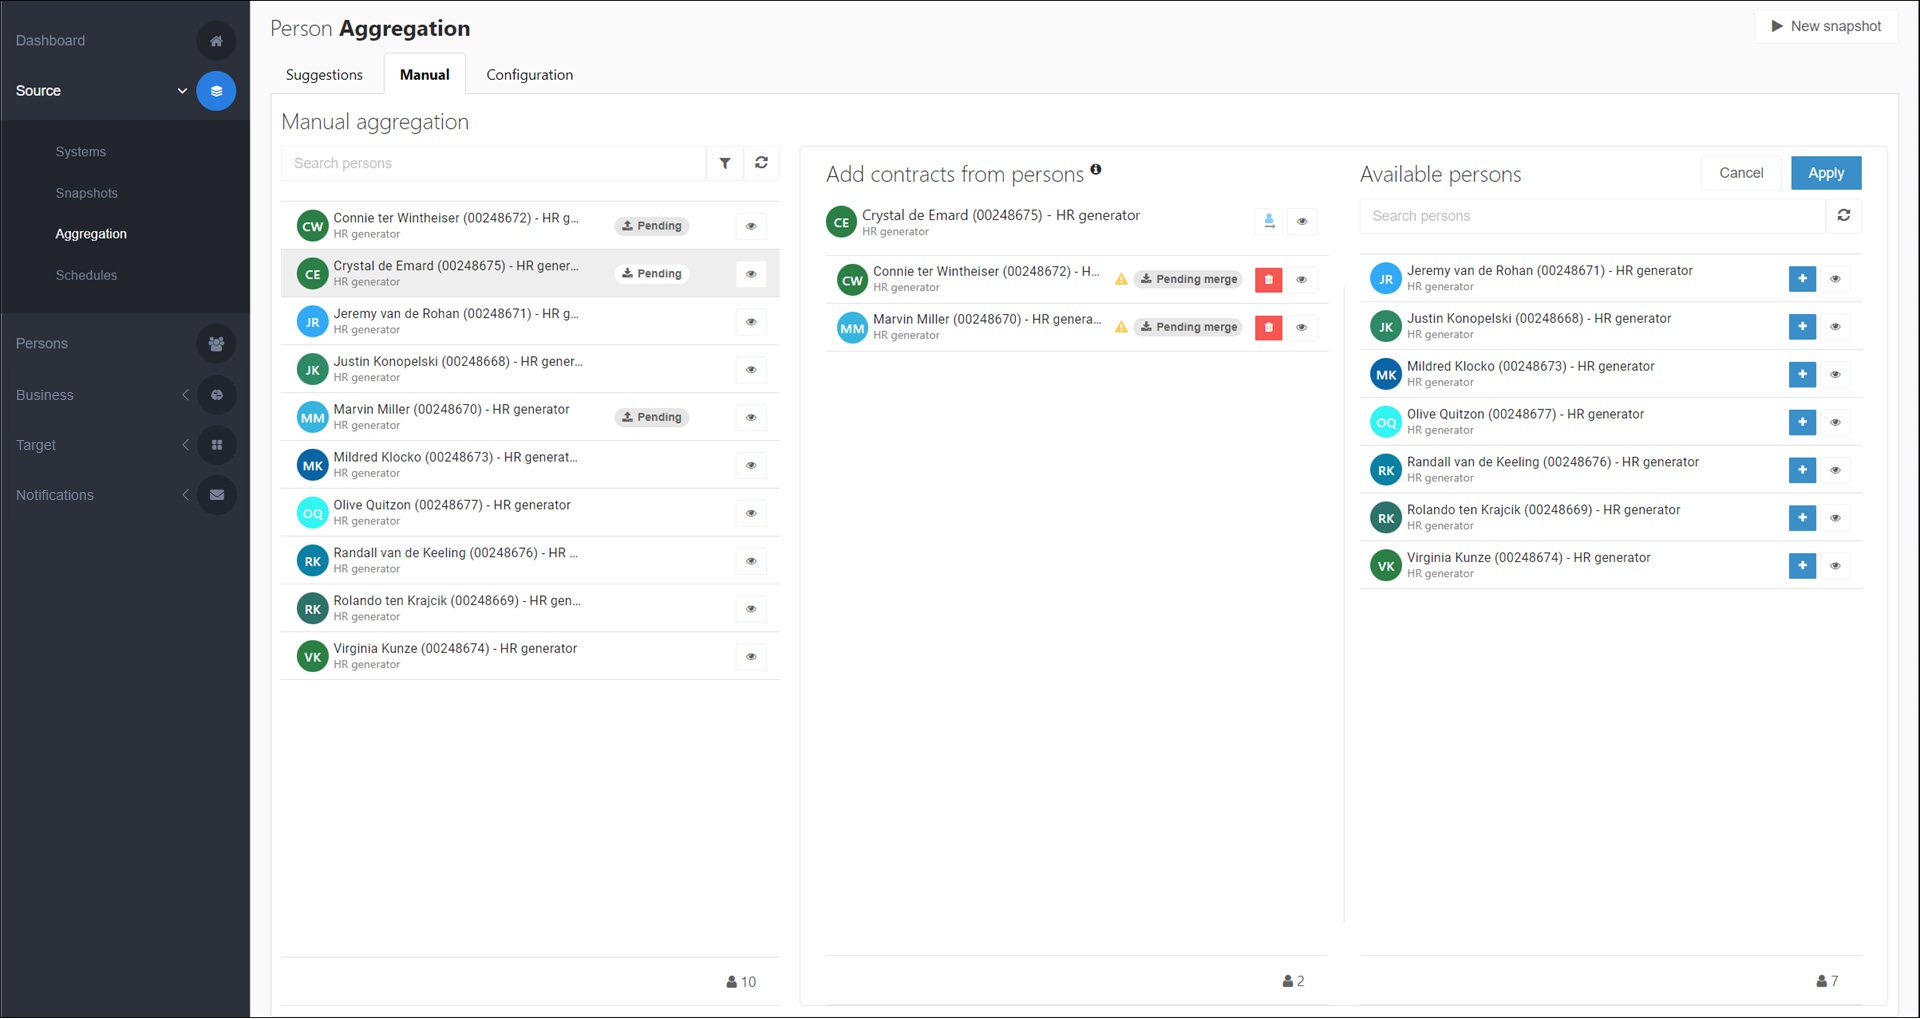
To save the merge set, click Apply.
All involved persons are labeled as Pending in the left pane. Non-main persons are no longer available to be selected as main persons in new merge sets.
Optional: Repeat steps (1) - (4) to create additional merge sets (with new main persons), or to merge more non-main persons into existing merge sets.
For this example, we've added one additional merge set. Olive is the main person and Justin is the only non-main person.
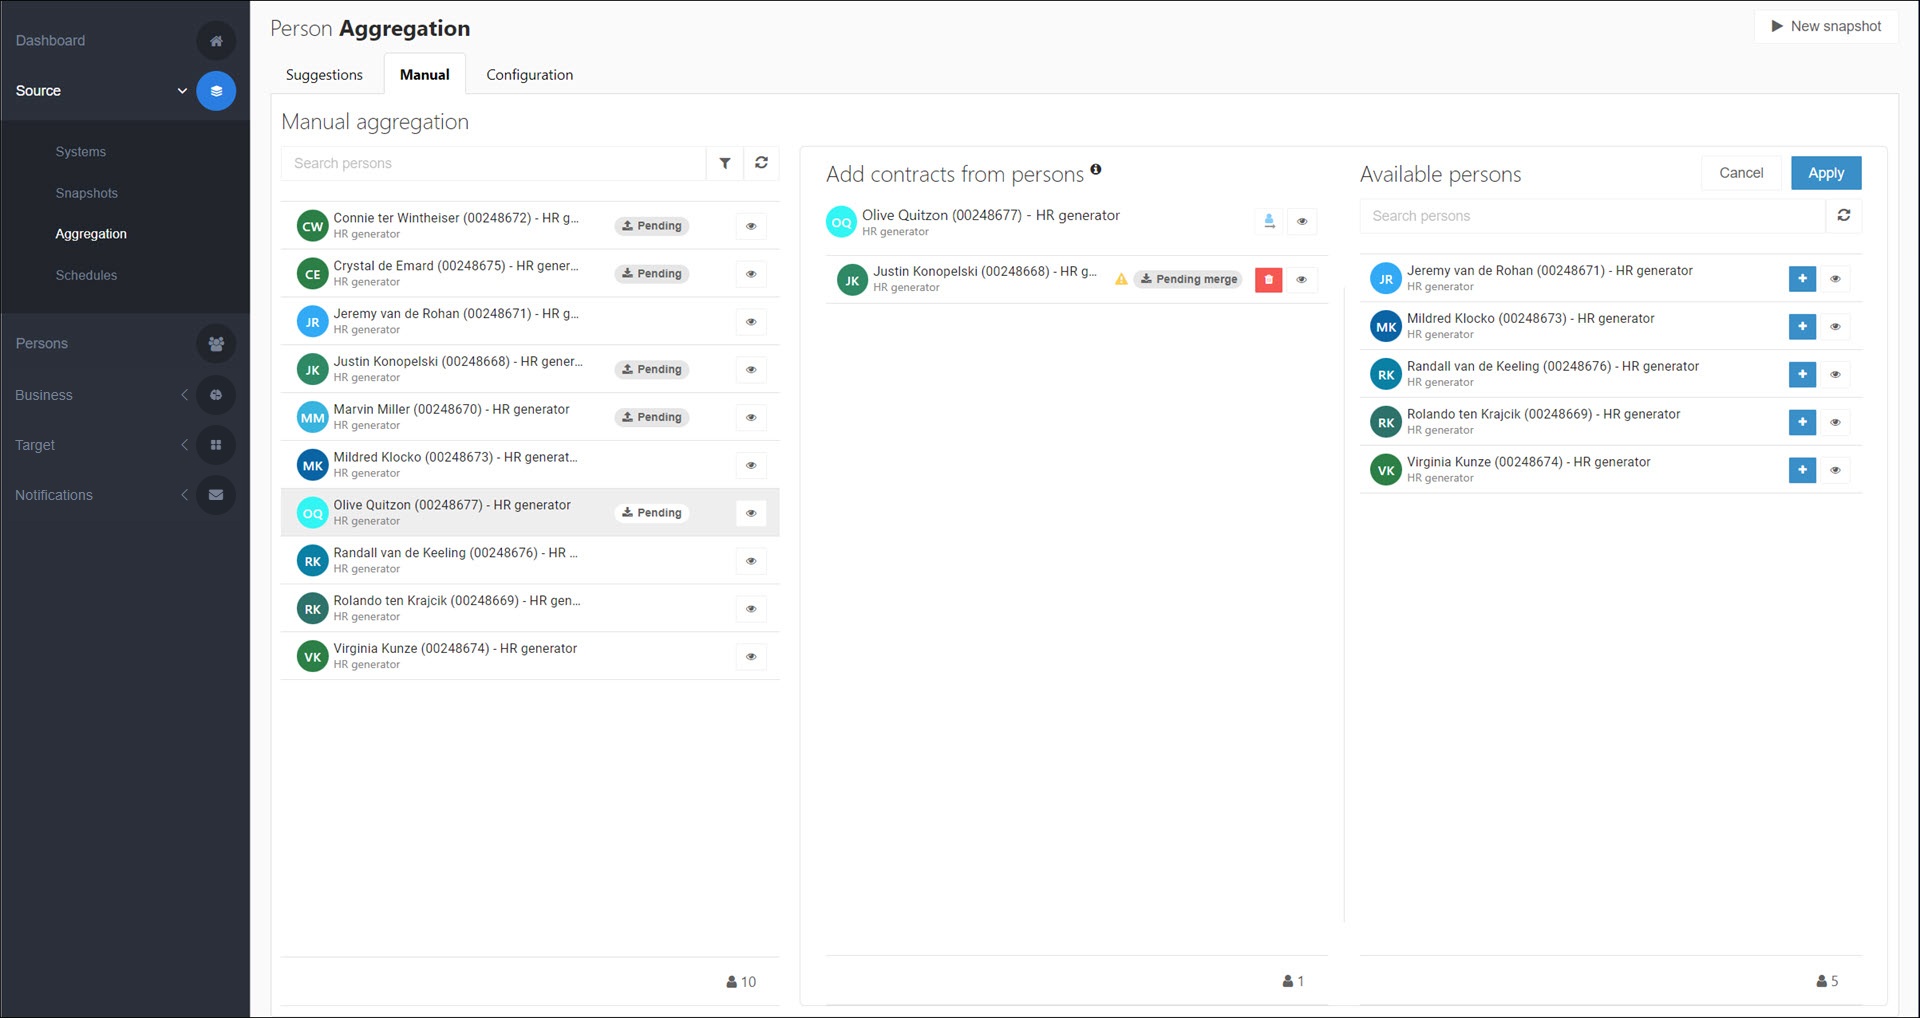
To put your pending merge sets into production, manually generate a snapshot by clicking the New Snapshot button.
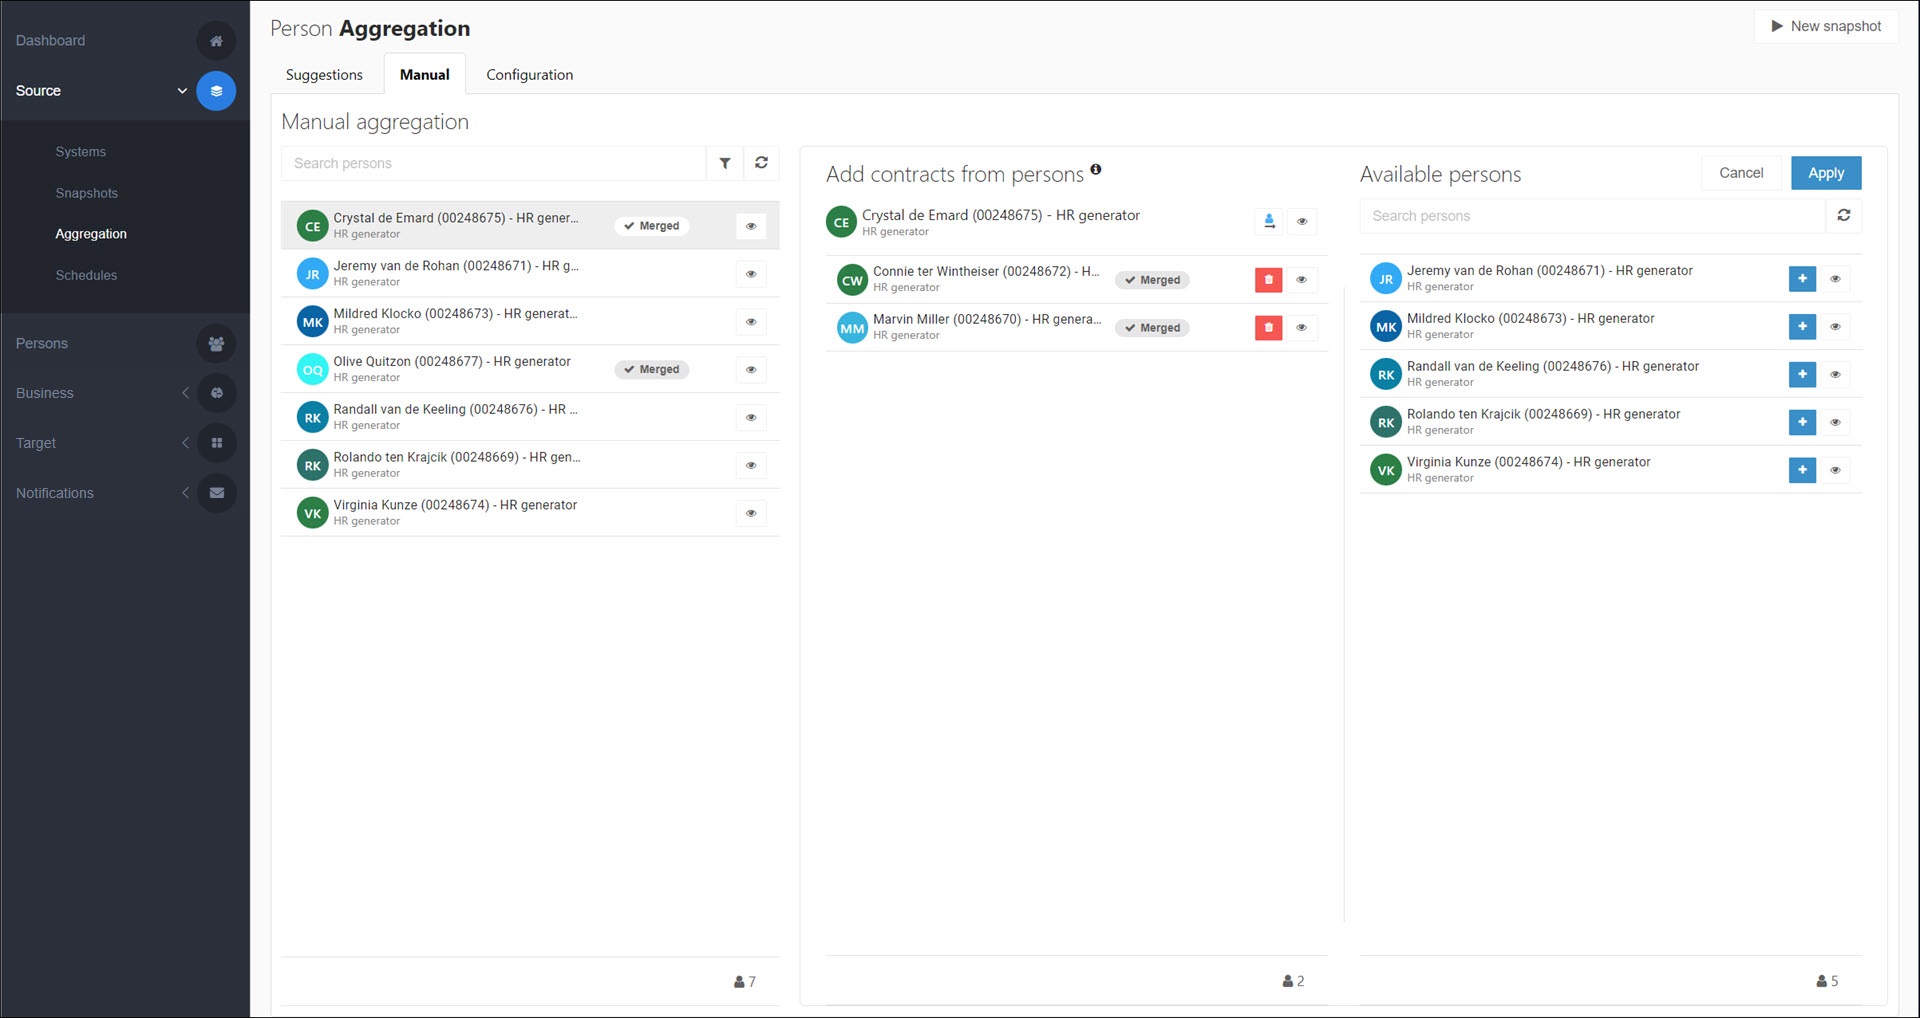
All involved main persons are marked as Merged in the left pane.
All involved non-main persons are removed from the left pane, as well as from in-production persons.
For example, Connie, Marvin, and Justin have all been removed:
Your changes will be written into target systems during the next Enforcement, according to the Manual merge scenario.
