Map target account fields
For more information, see Target mappings.
For the Azure AD target system into which you want to map persons fields, Edit a target system.
Go to the Account tab.
Under Mapping, click Configure.
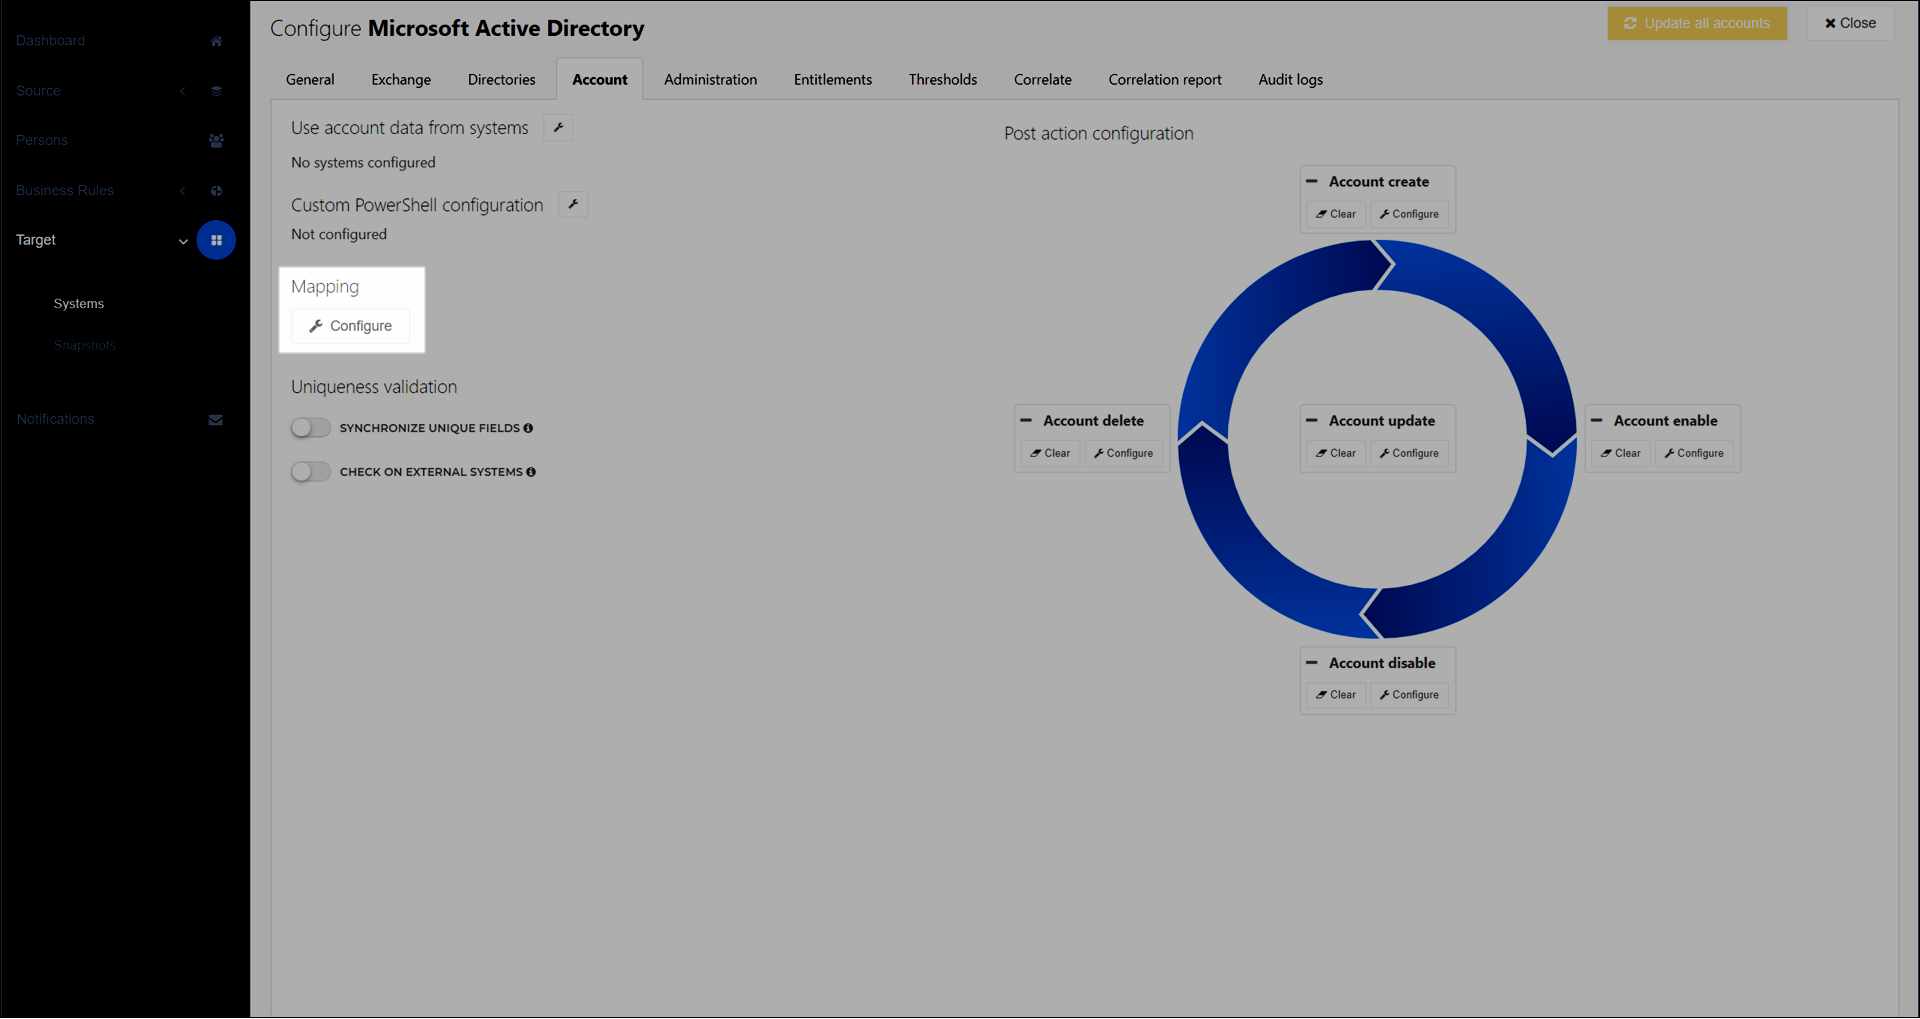
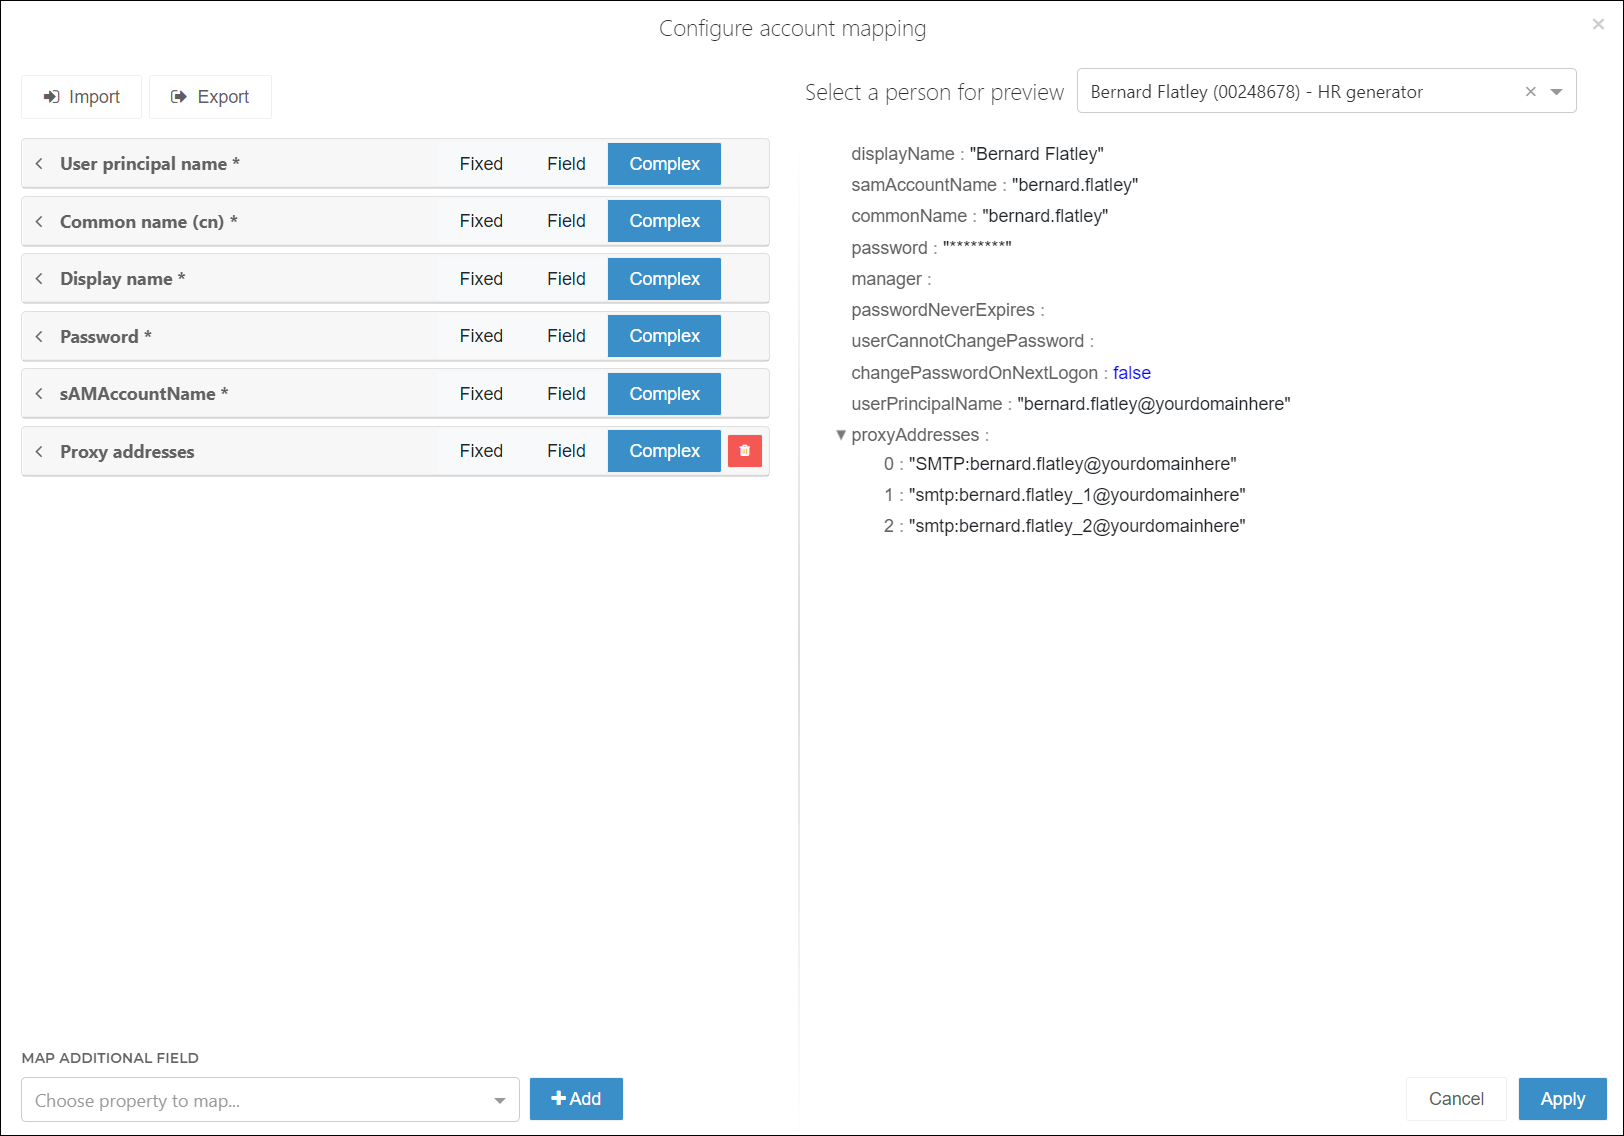
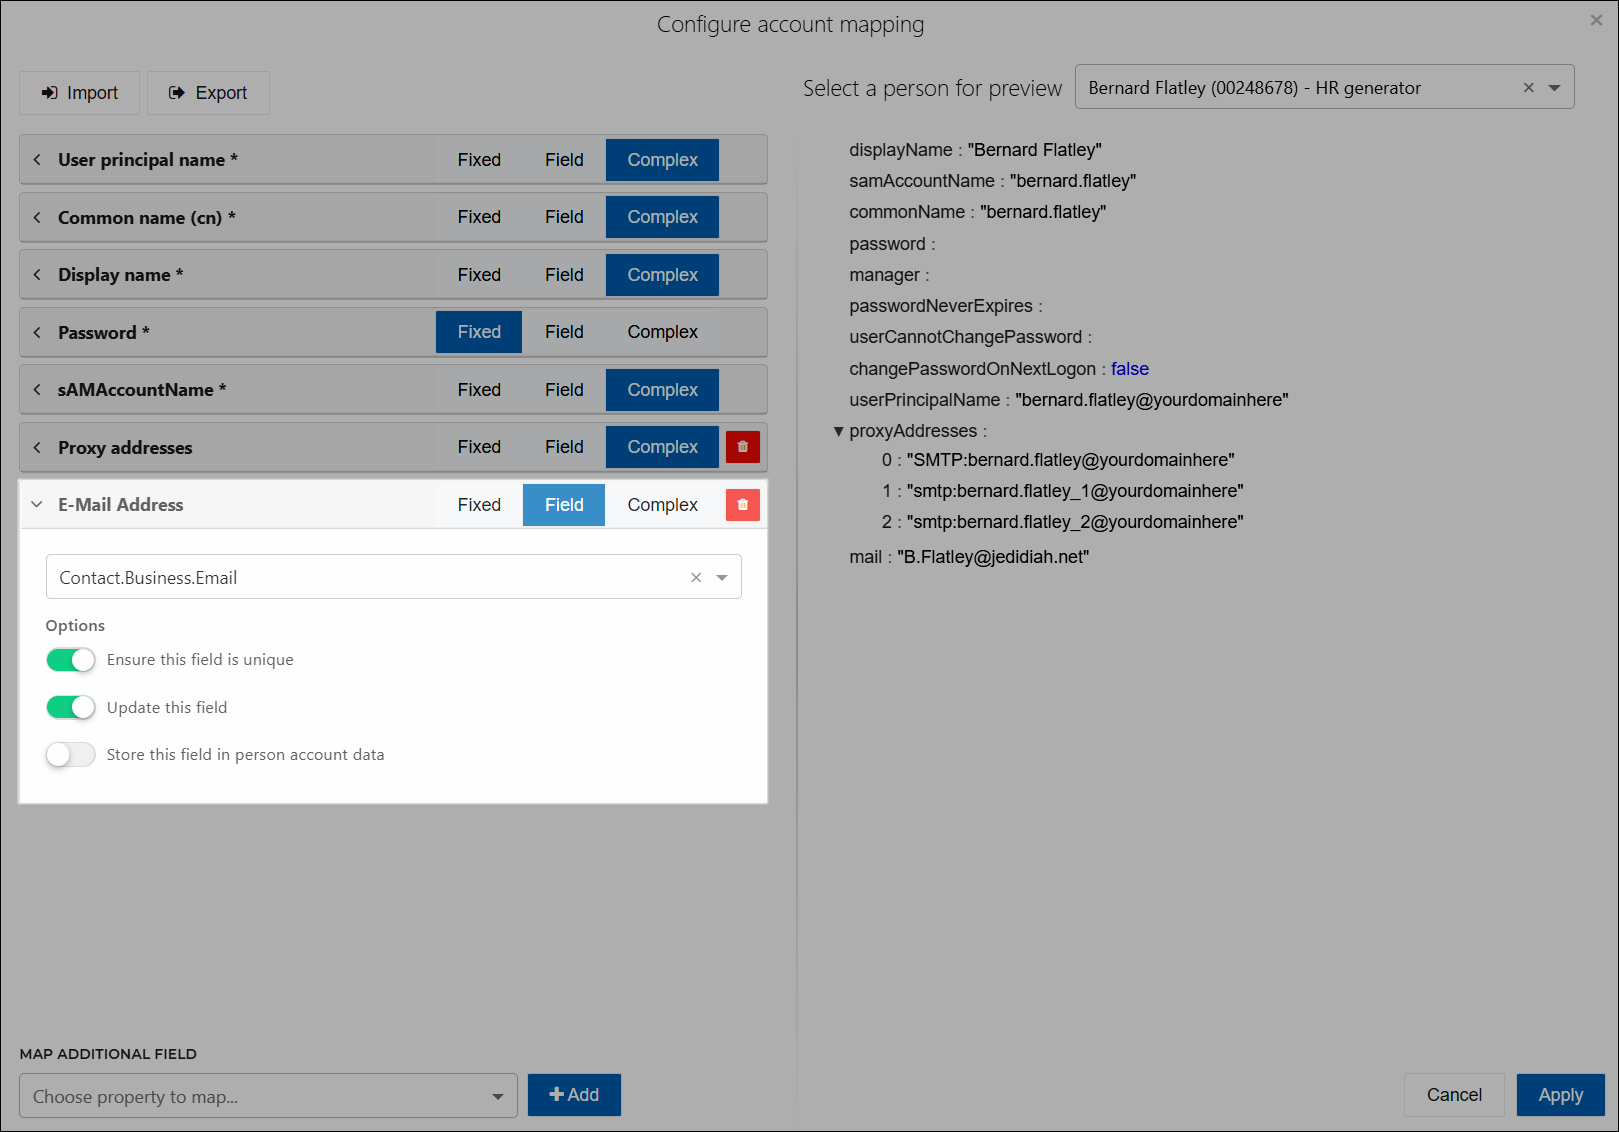
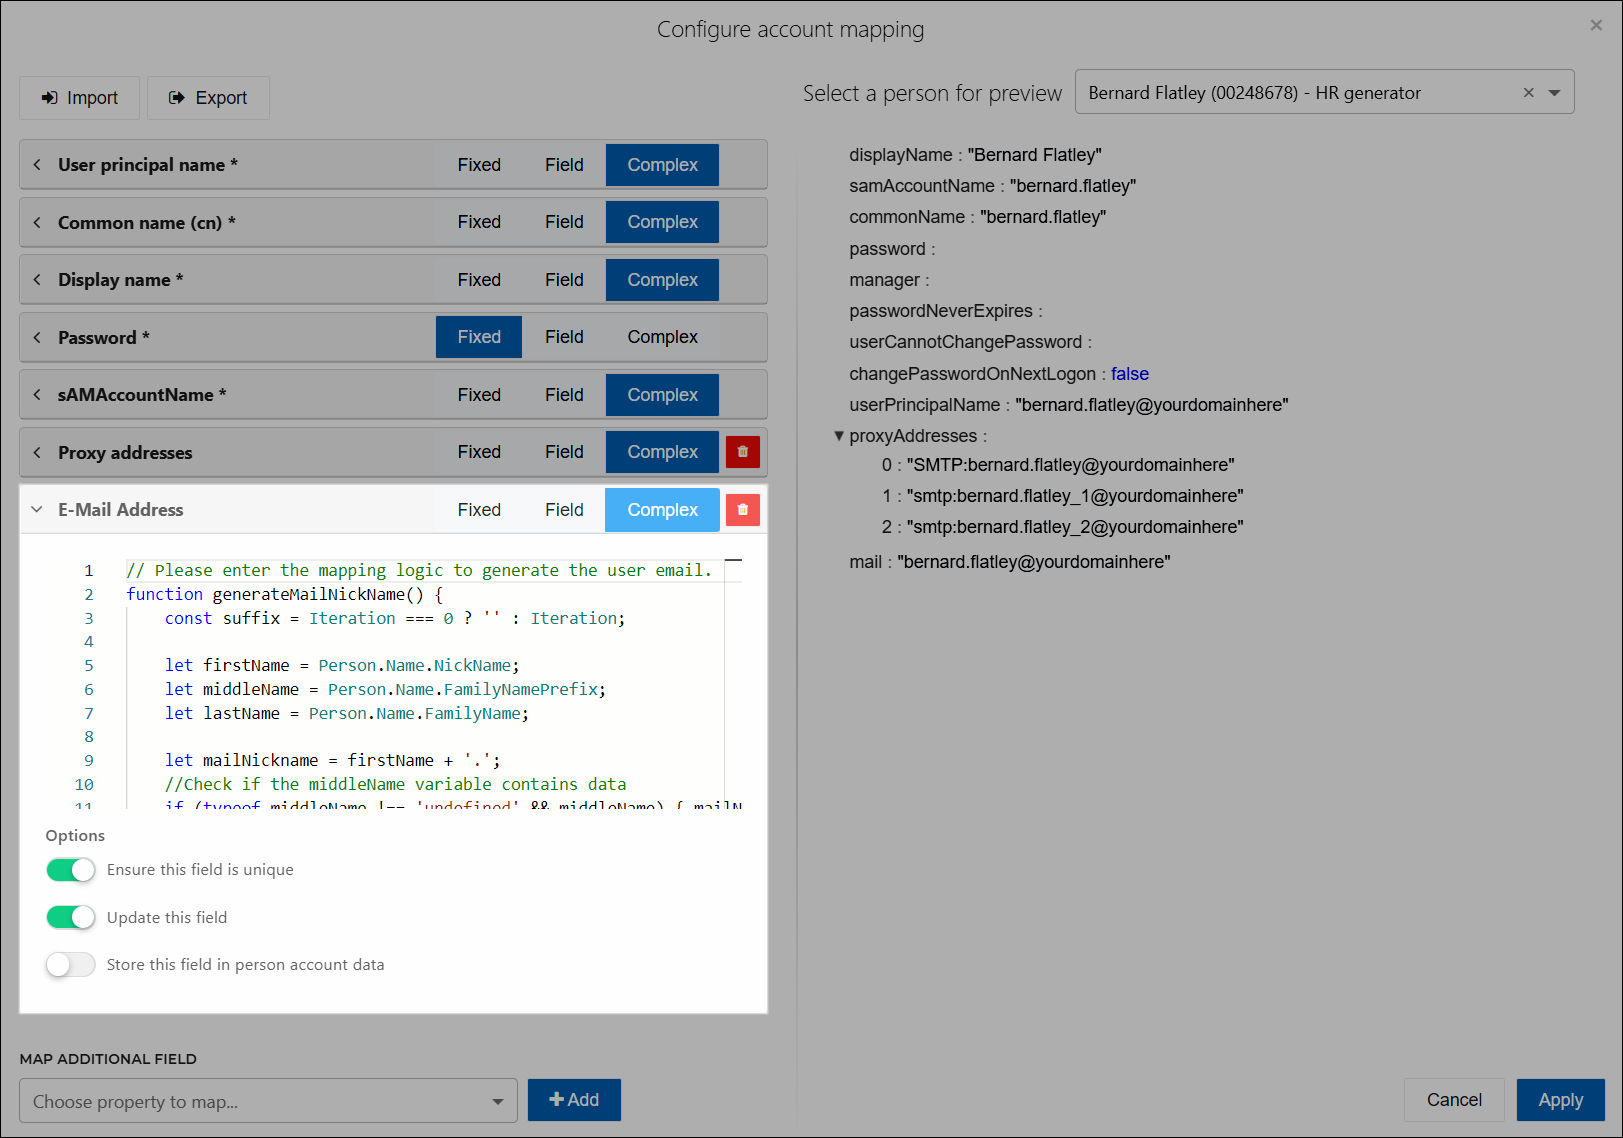
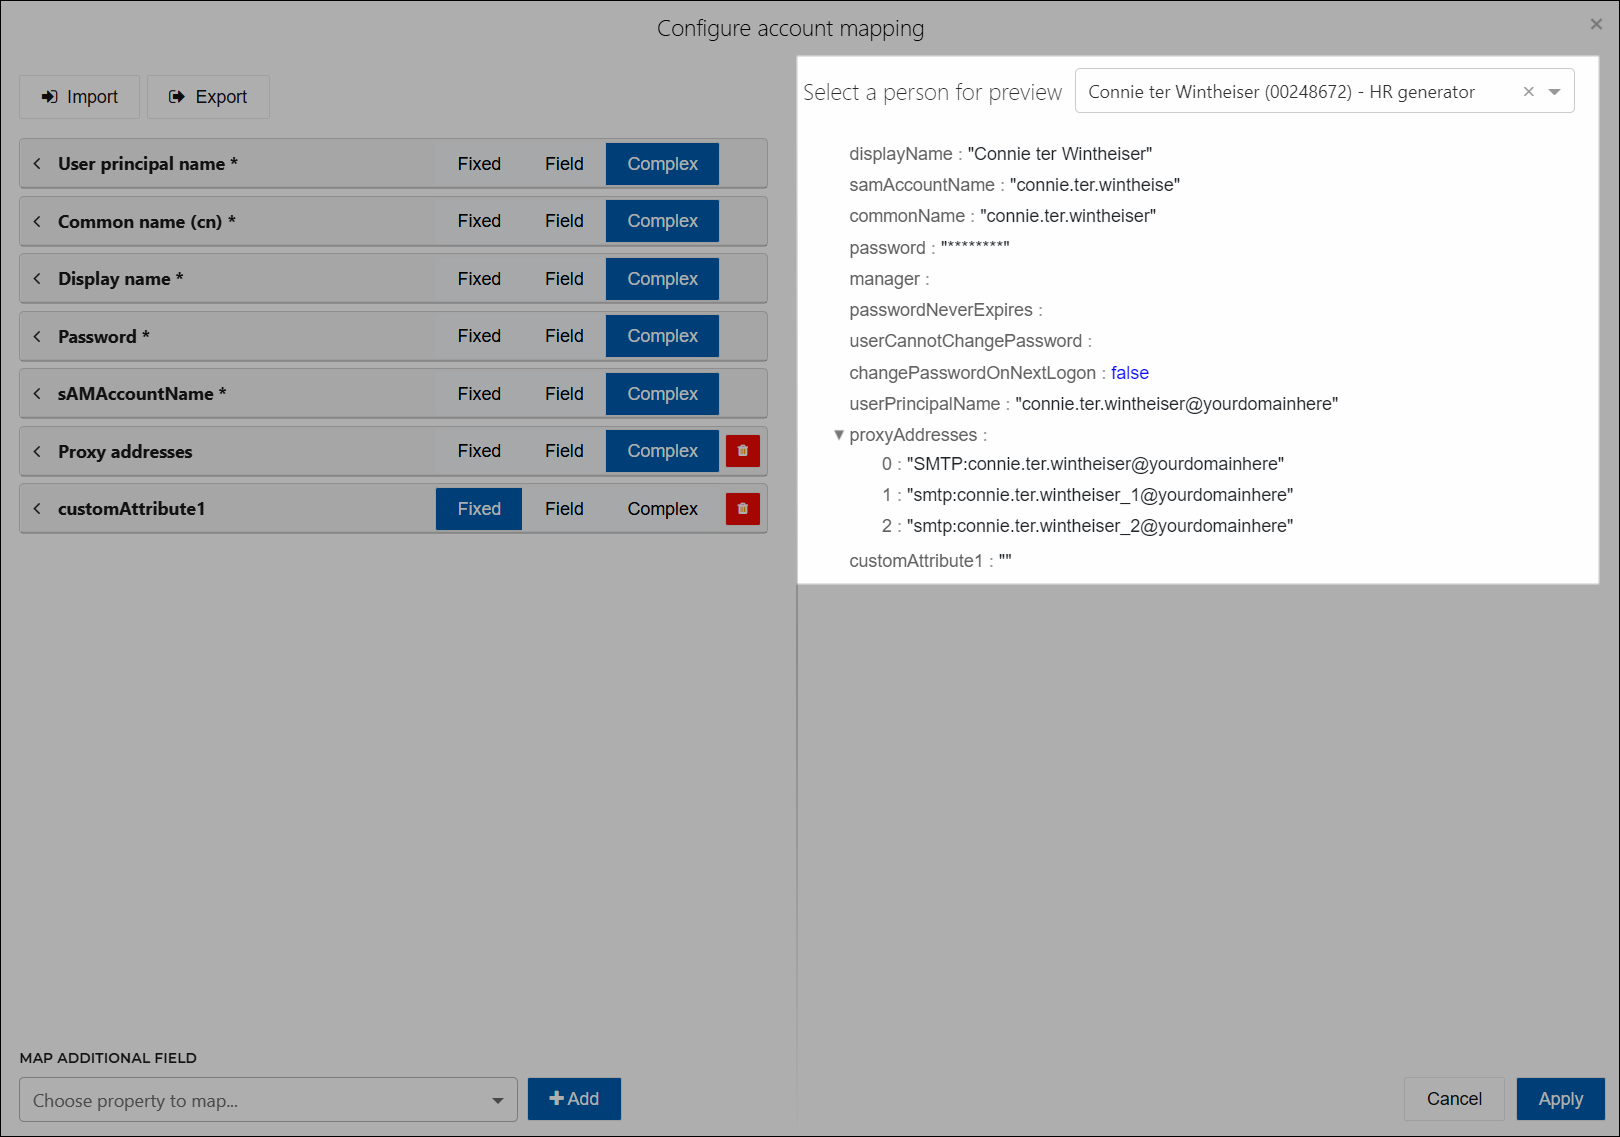
Each gray row represents a field in the target account schema.
Choose one:
To remap an existing field:
Click the field to expand it:
For example,
Email Address.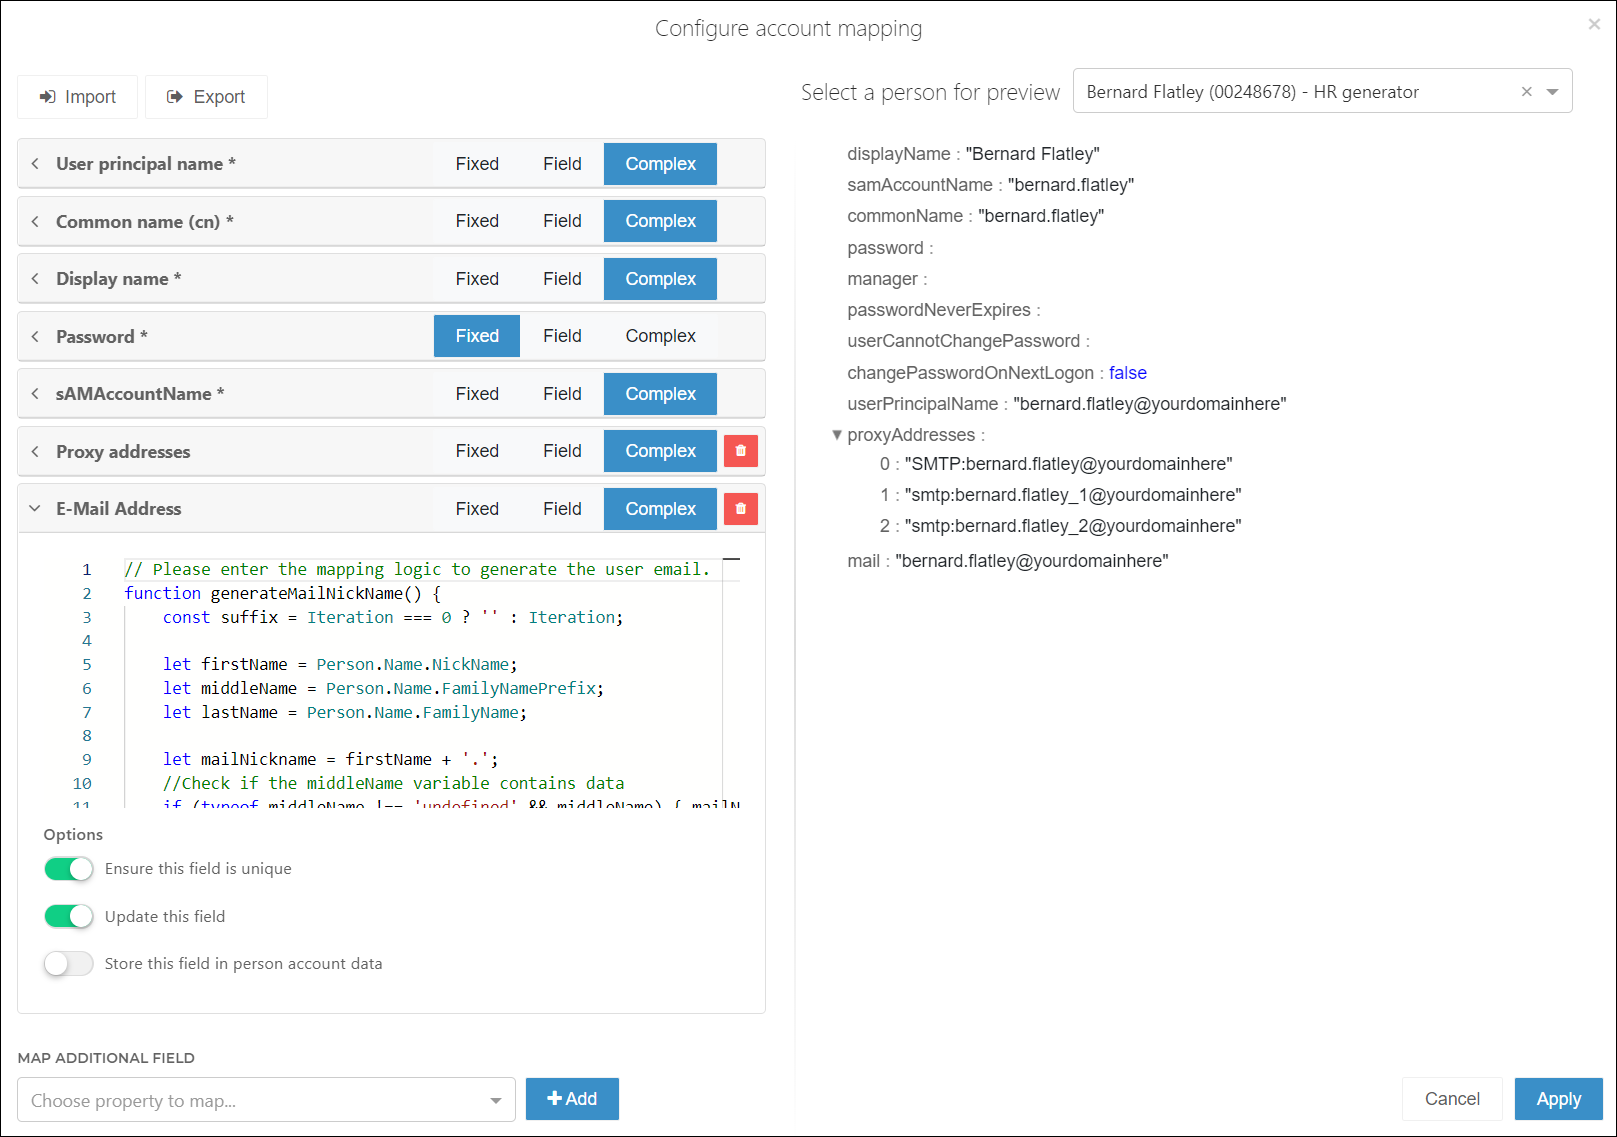
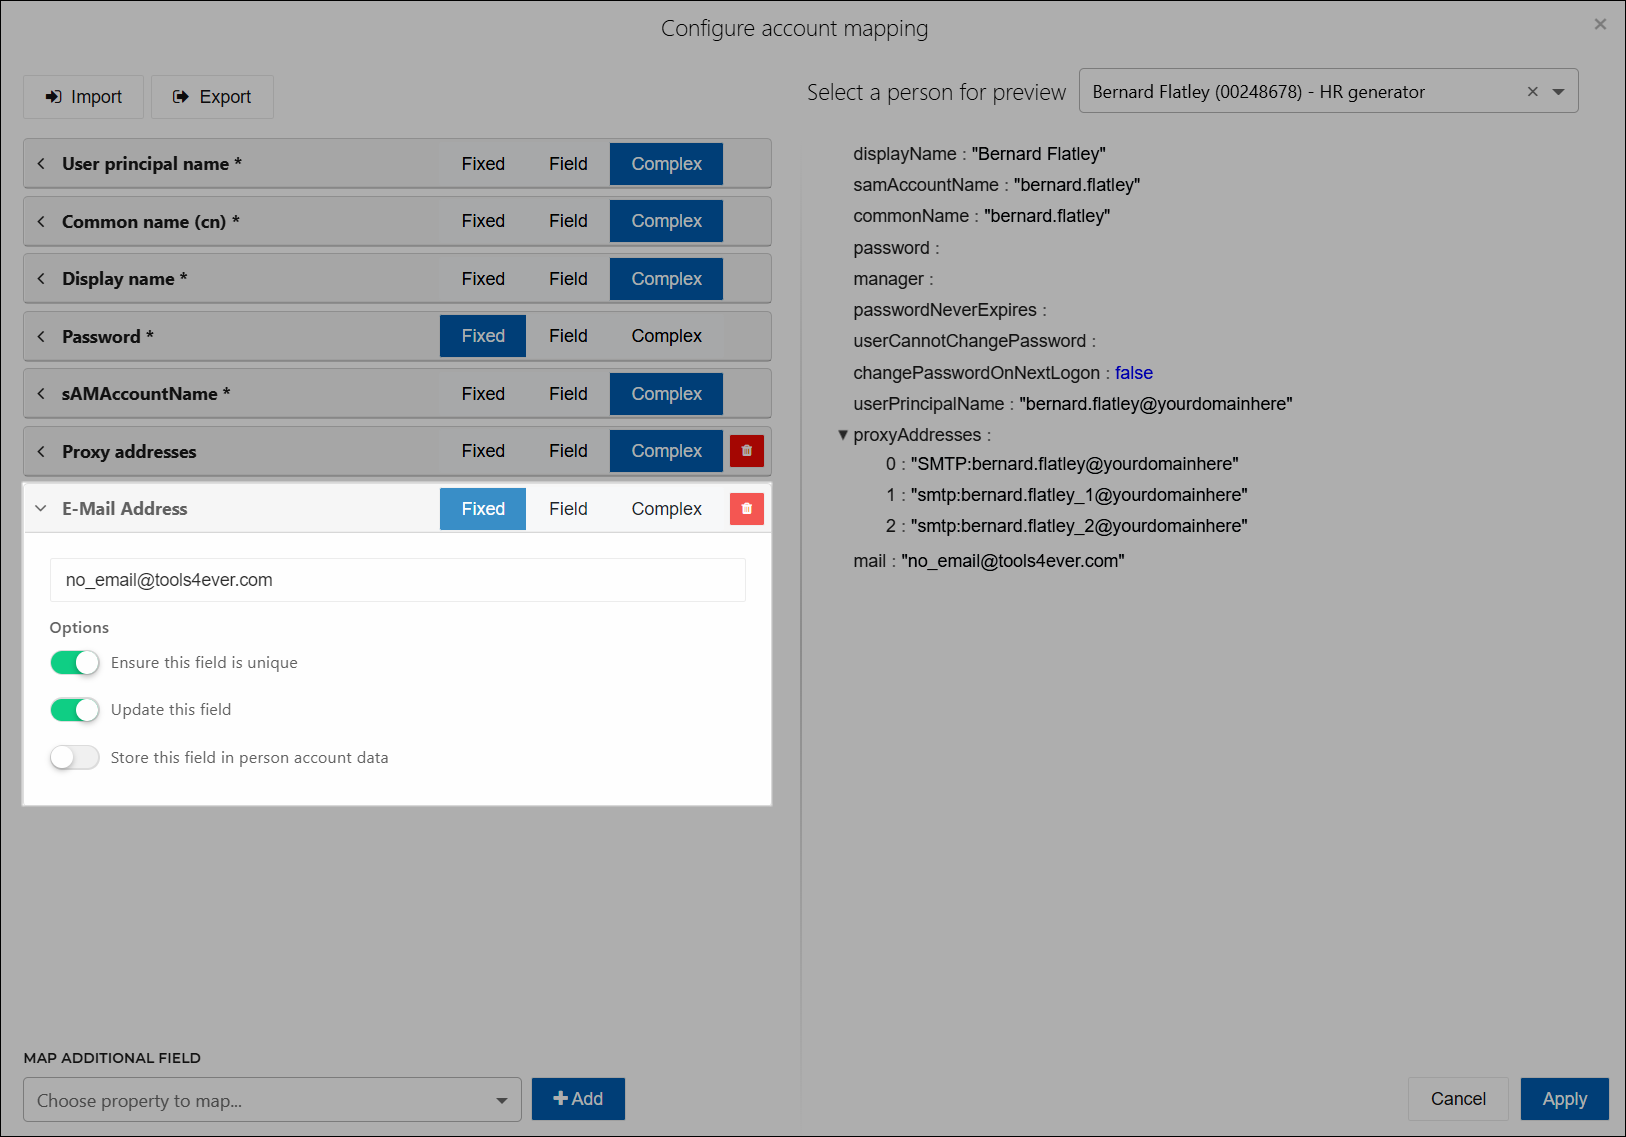
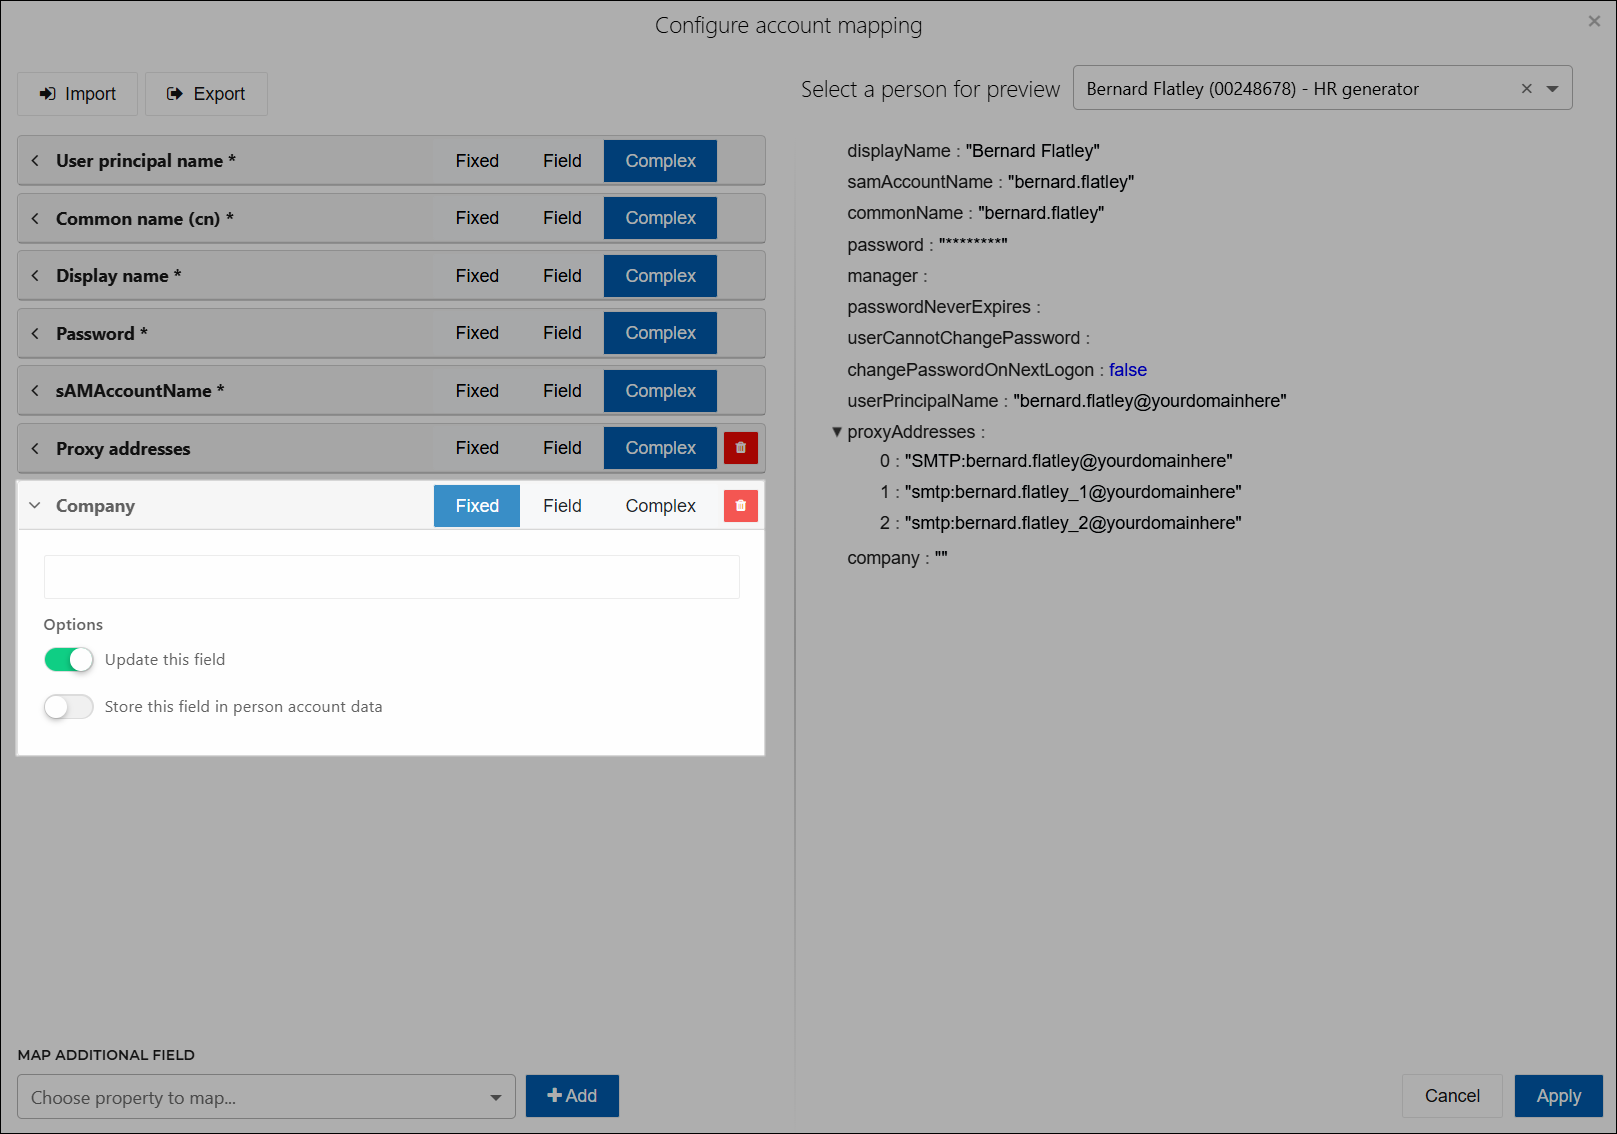
Select Fixed, Field, or Complex for the field type.
Fixed: Enter a new string value. All accounts in this target system will receive the same fixed value for this field.
Field: Click the dropdown menu and select a field from the Person schema to map onto this target account field.
Complex: Write a custom JavaScript function that returns the desired value. See Complex mappings.
To map an additional field that is already known to exist in the target account schema, click the Map Additional Field dropdown, select the relevant field, and then click Add.
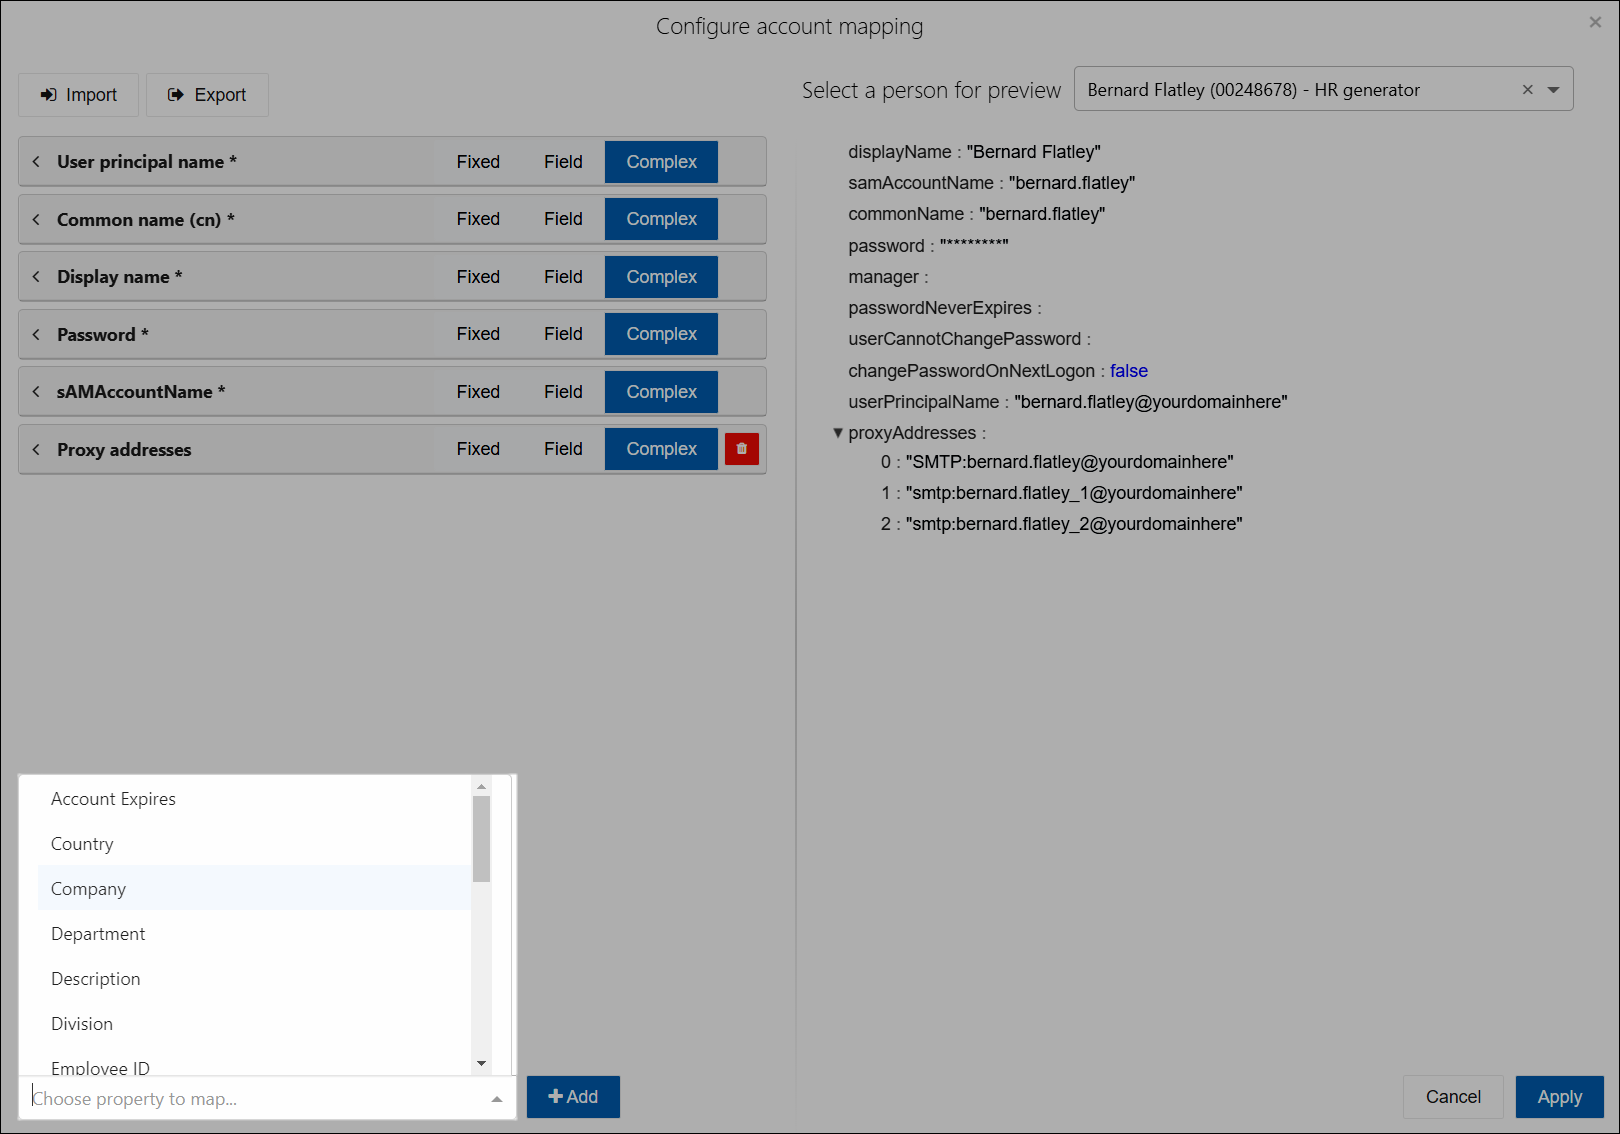
The new field is added at the bottom of the list. Map it using the instructions in step (4a).
To add and map a new field in the target account schema: Add a custom field.
To preview mappings, Preview mappings.
When you are finished editing mappings, click Apply.
The new mappings will be written to target accounts during the next Enforcement, depending on their Update This Field settings.