Add, edit, or remove a RADIUS configuration
For more information, see RADIUS.
Add a RADIUS configuration
Go to Security > Authentication > Radius.
Click Add Server.
Enter a Name.
For example,
T4E-Radius.Enter the Server IP Address And Port of your Radius server.
For example,
127.0.0.1:1812.Enter the Shared Secret.
Turn on the Enabled toggle.
Turn on the Server Require OTP Verification toggle.
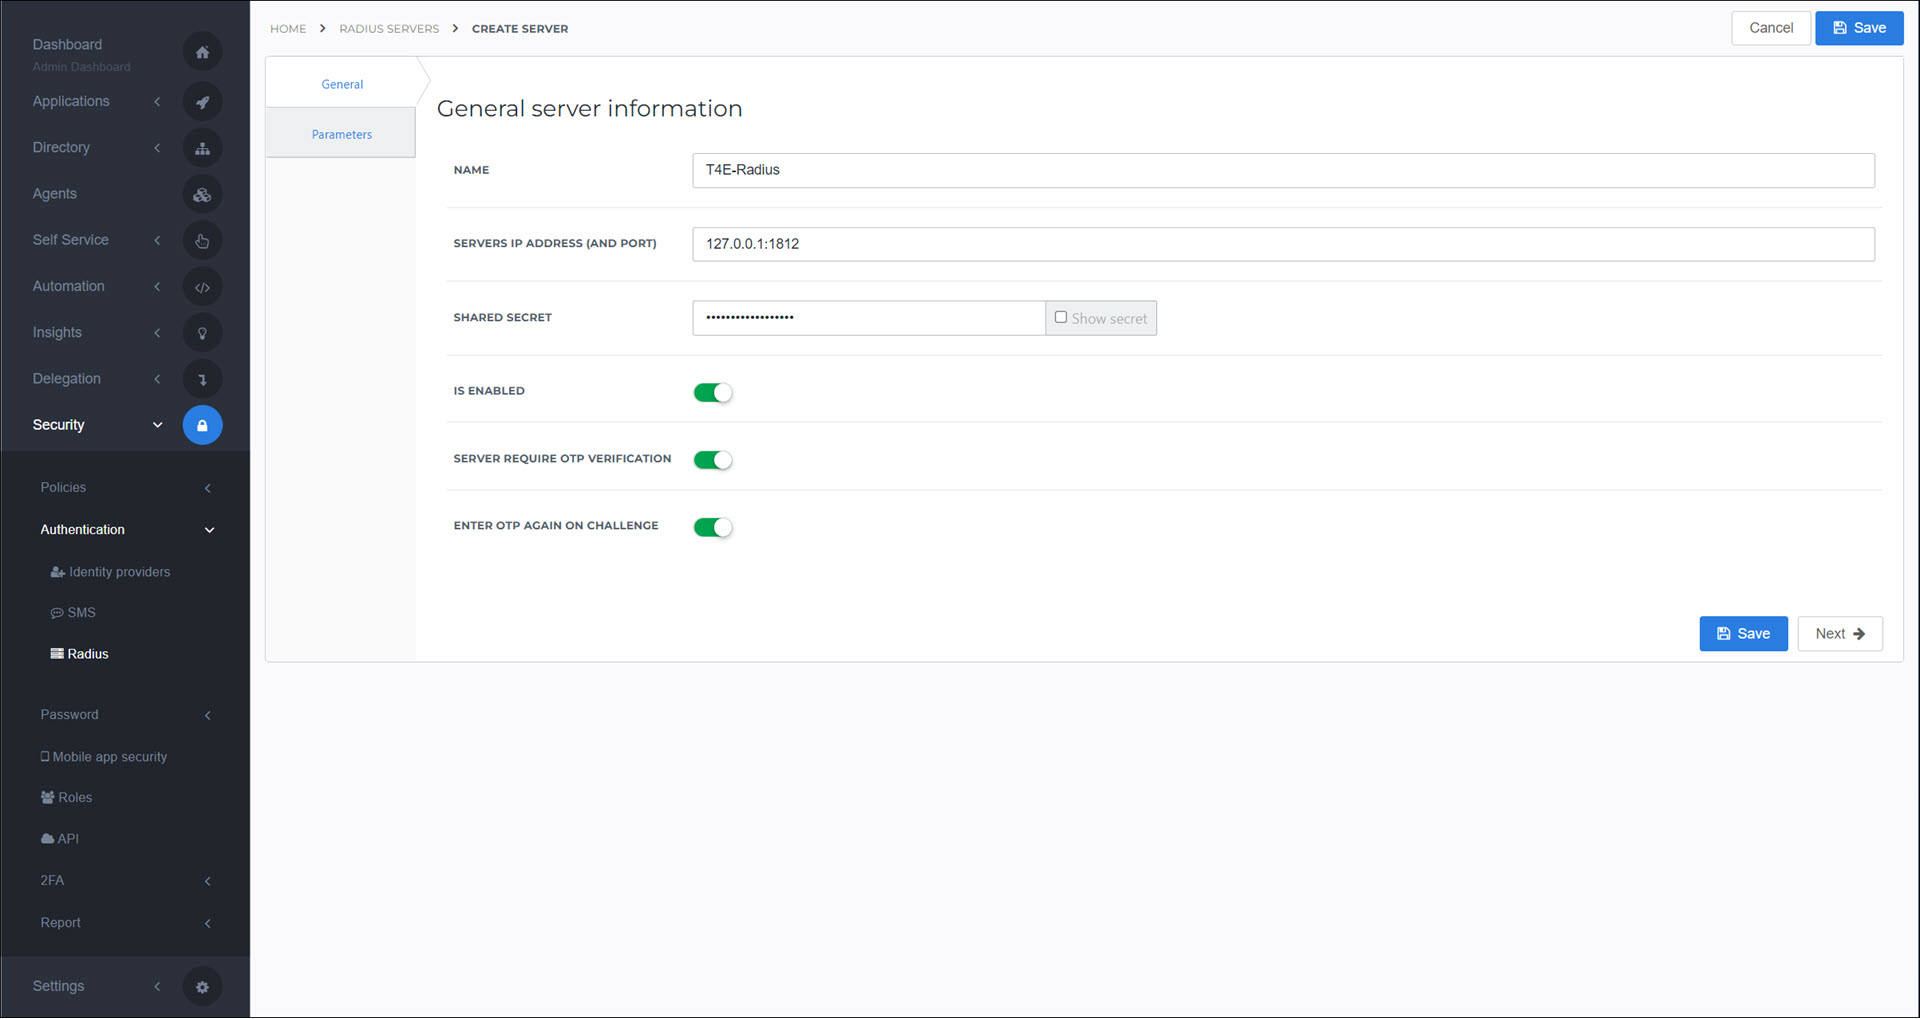
Turn on the Enter OTP Again On Challenge toggle.
Go to the Parameters tab.
Specify the values that will be sent for the Username and Password.
Typically, these should be set to
{{user.login.username}}and{{user.login.password}}, respectively, to send the user's Username and Password values.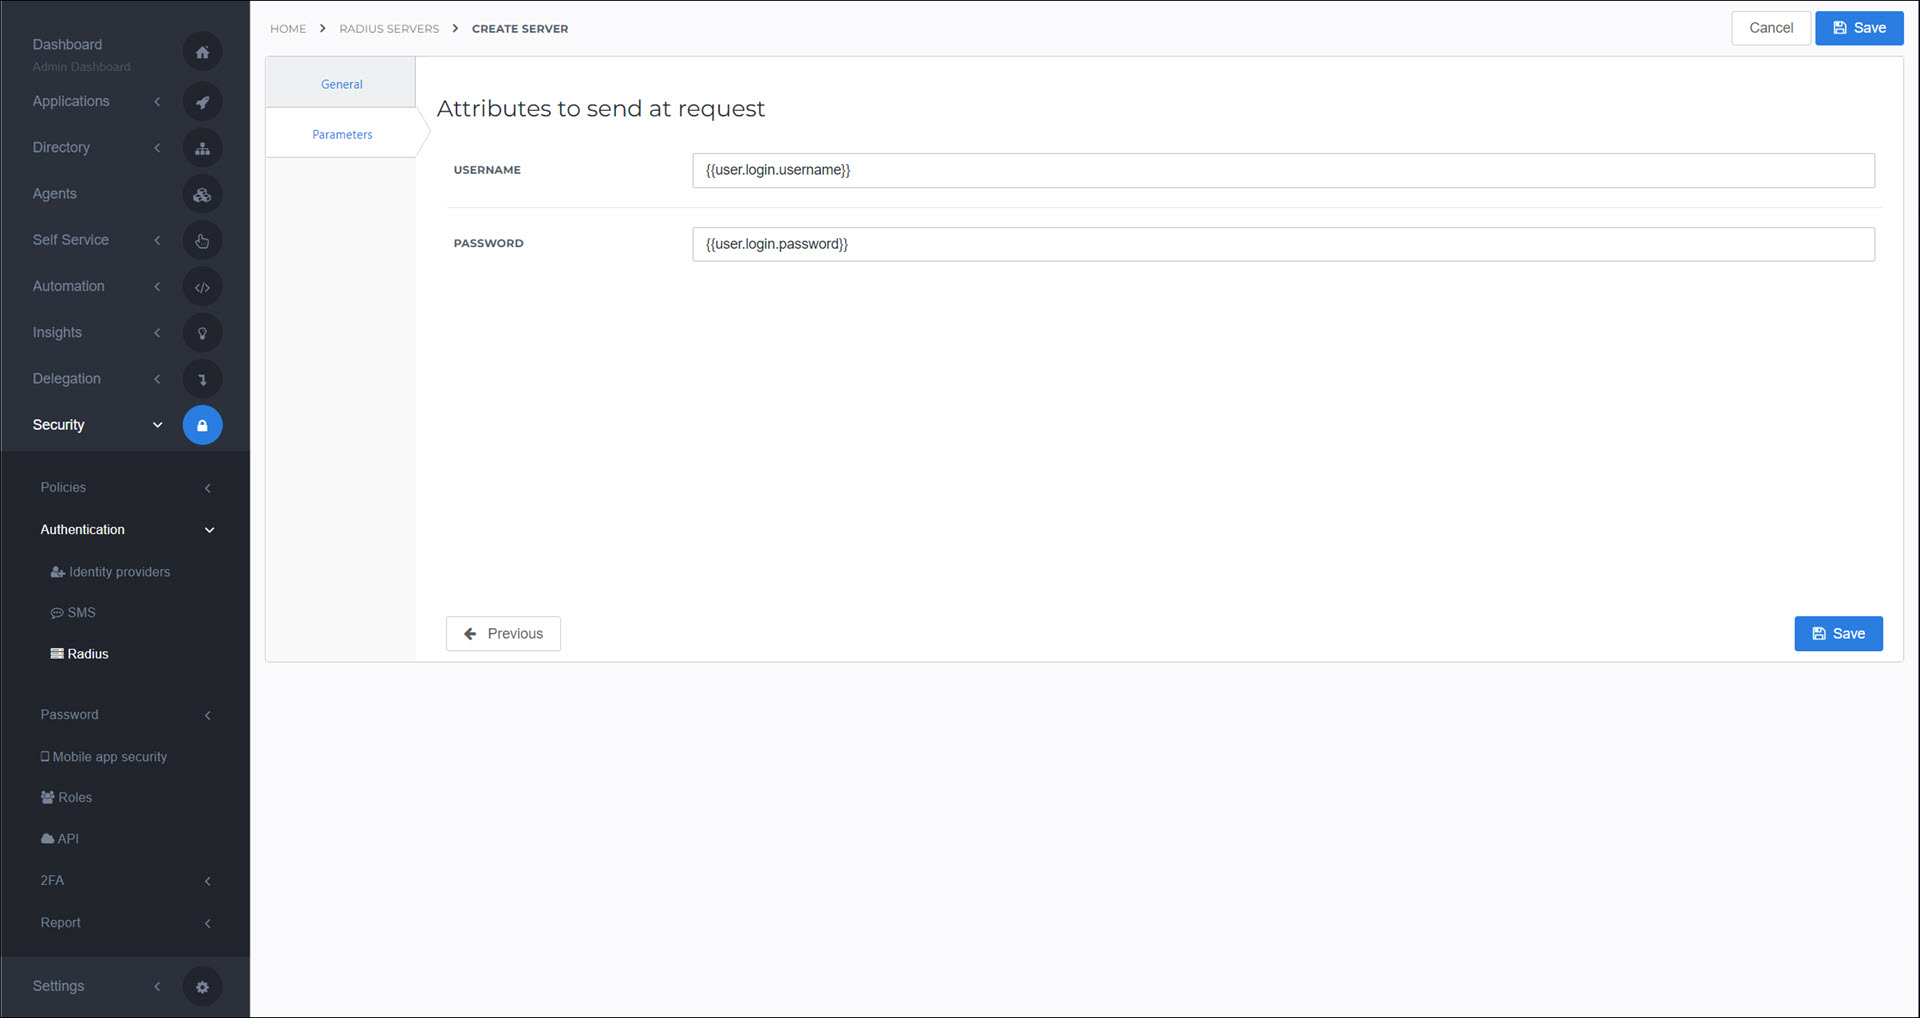
Tip
Type
{{to activate autocomplete in these fields. You have access to System variables, Custom variables, and Access Management variables.Click Save.
The Radius configuration has been added. The next step is typically to configure a portal access rule to use Radius as its 2FA option. See Portal access rules.
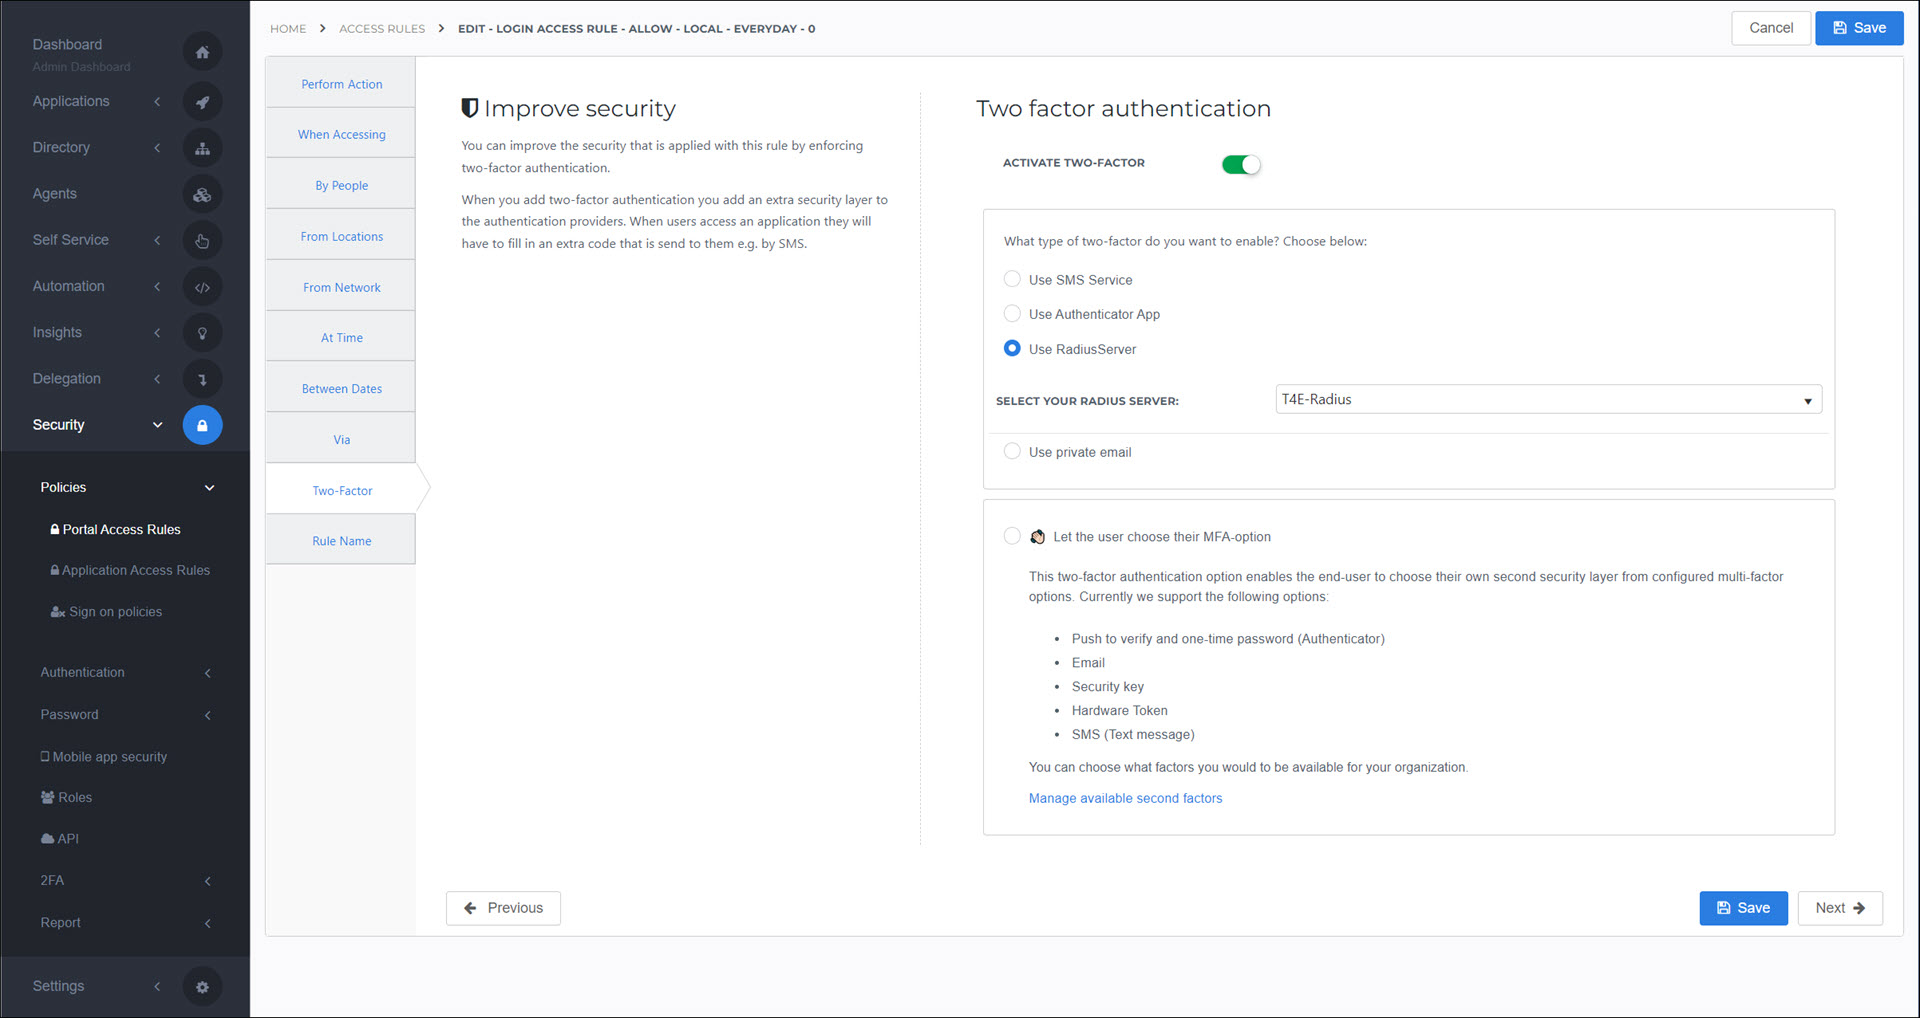
Note
Currently, Radius can only be used with fixed 2FA. The dynamic 2FA setting does not support it. See Fixed vs. dynamic 2FA.
Go to Security > Authentication > Radius.
For the relevant Radius configuration, click Edit.
Continue by following the instructions in Add a RADIUS config.
Go to Security > Authentication > Radius.
For the relevant Radius configuration, click Delete.
To confirm, click Delete.