Add, edit, or remove a product action
For more information, see Product actions.
Note
In this example, we use the Google Chrome product shown in the Add a product article, and the Weather report form shown in the Add a dynamic form article.
Go to Self Service > Products and click Edit for the relevant product.
For this example, we'll edit our Google Chrome product.
Go to the Actions - New tab.
In the States pane, select the state of the Product request lifecycle during which this action will run.
For this example, we'll select the Approved state.
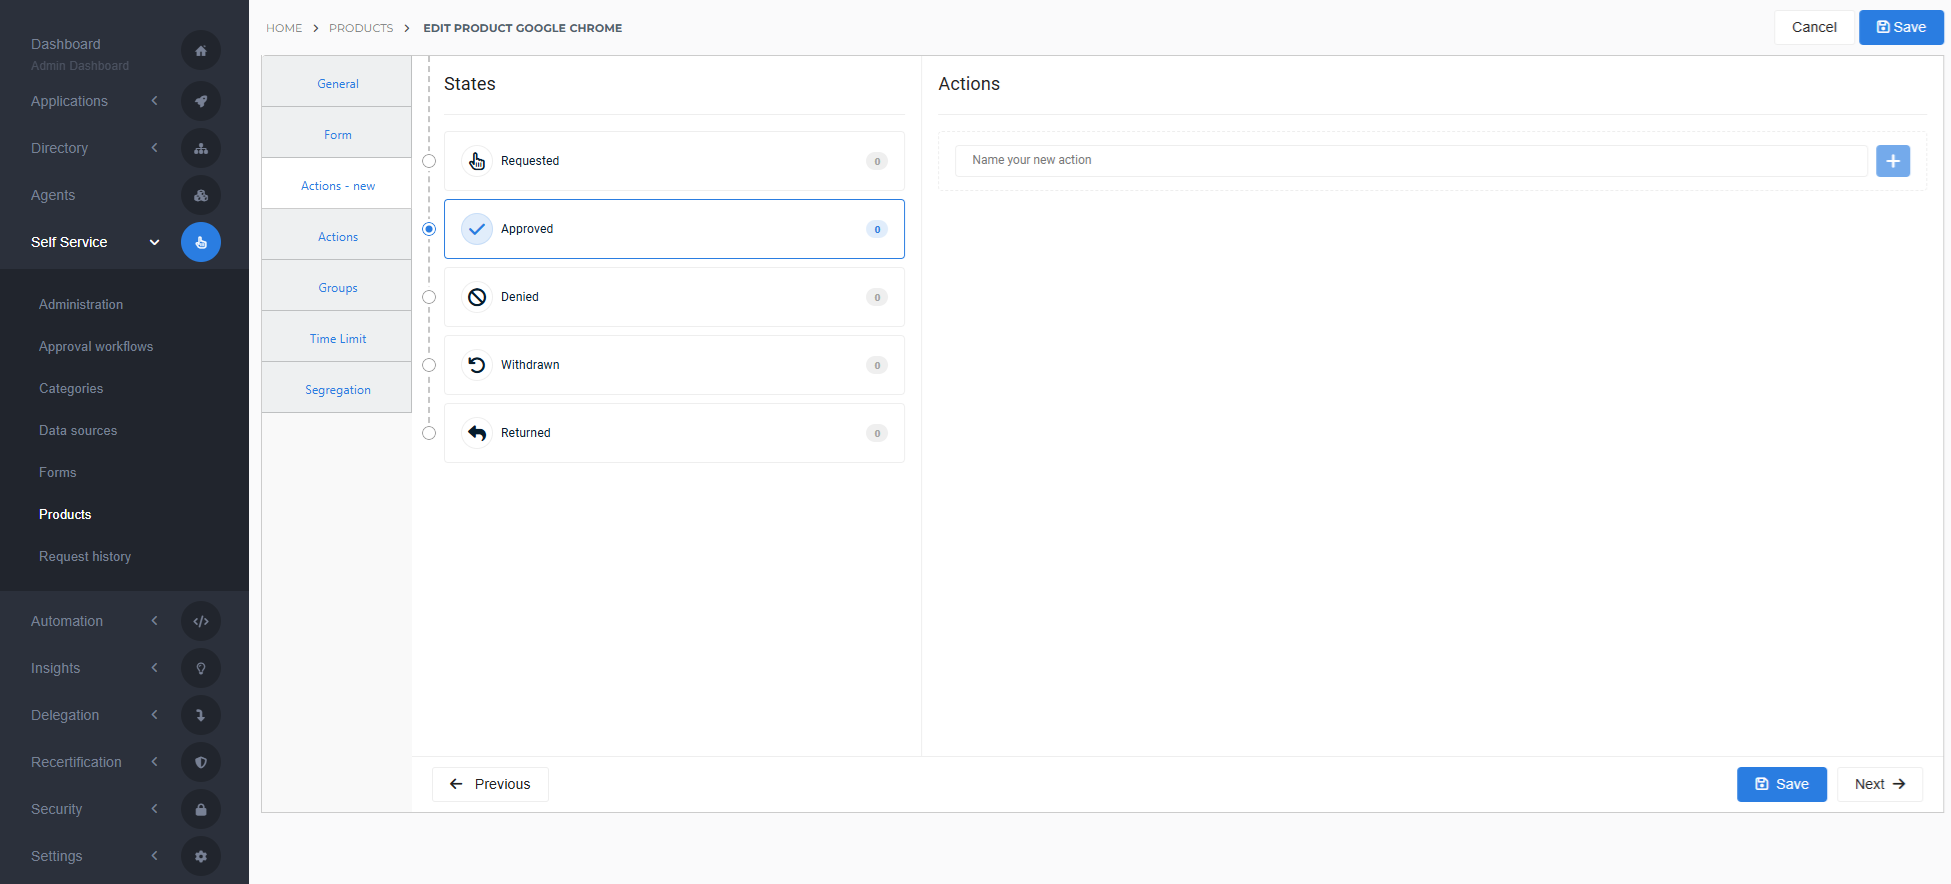
Enter a Name for the action.
For this example, we'll call it
Product task: Google Chrome: Approved.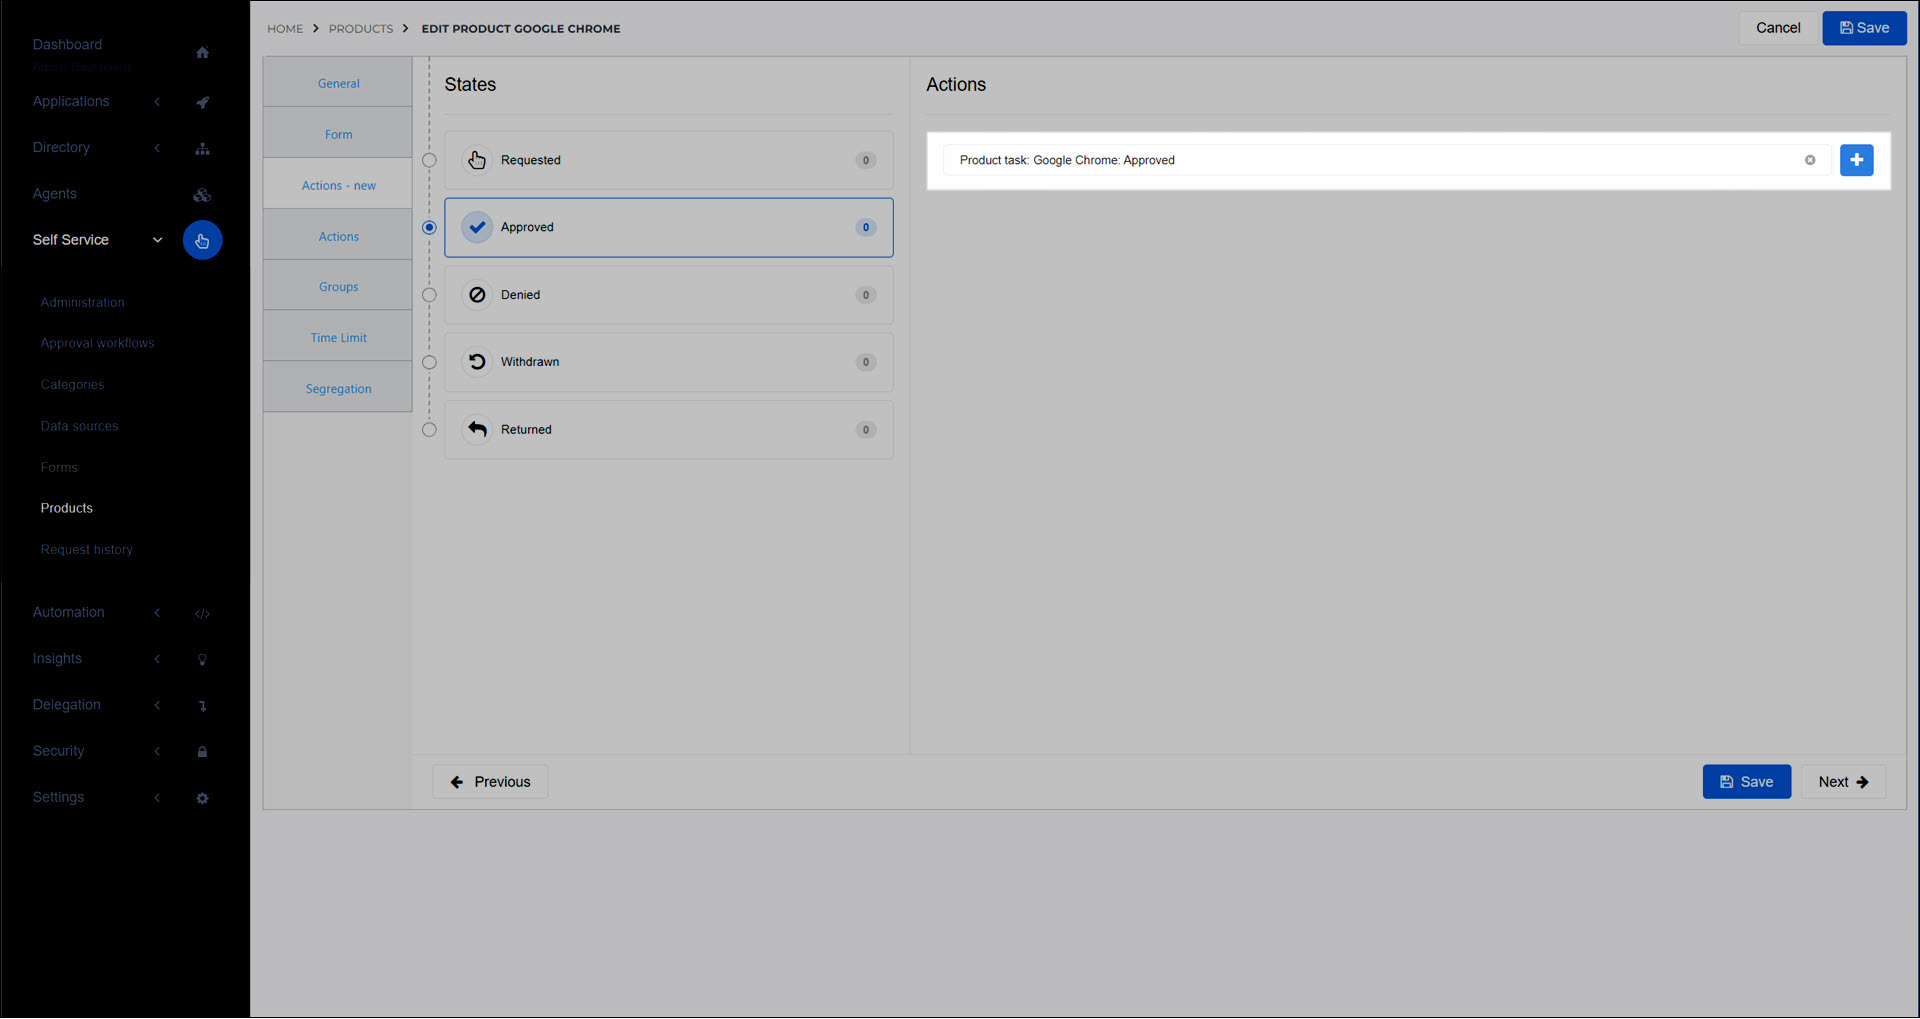
Click
 Add product action.
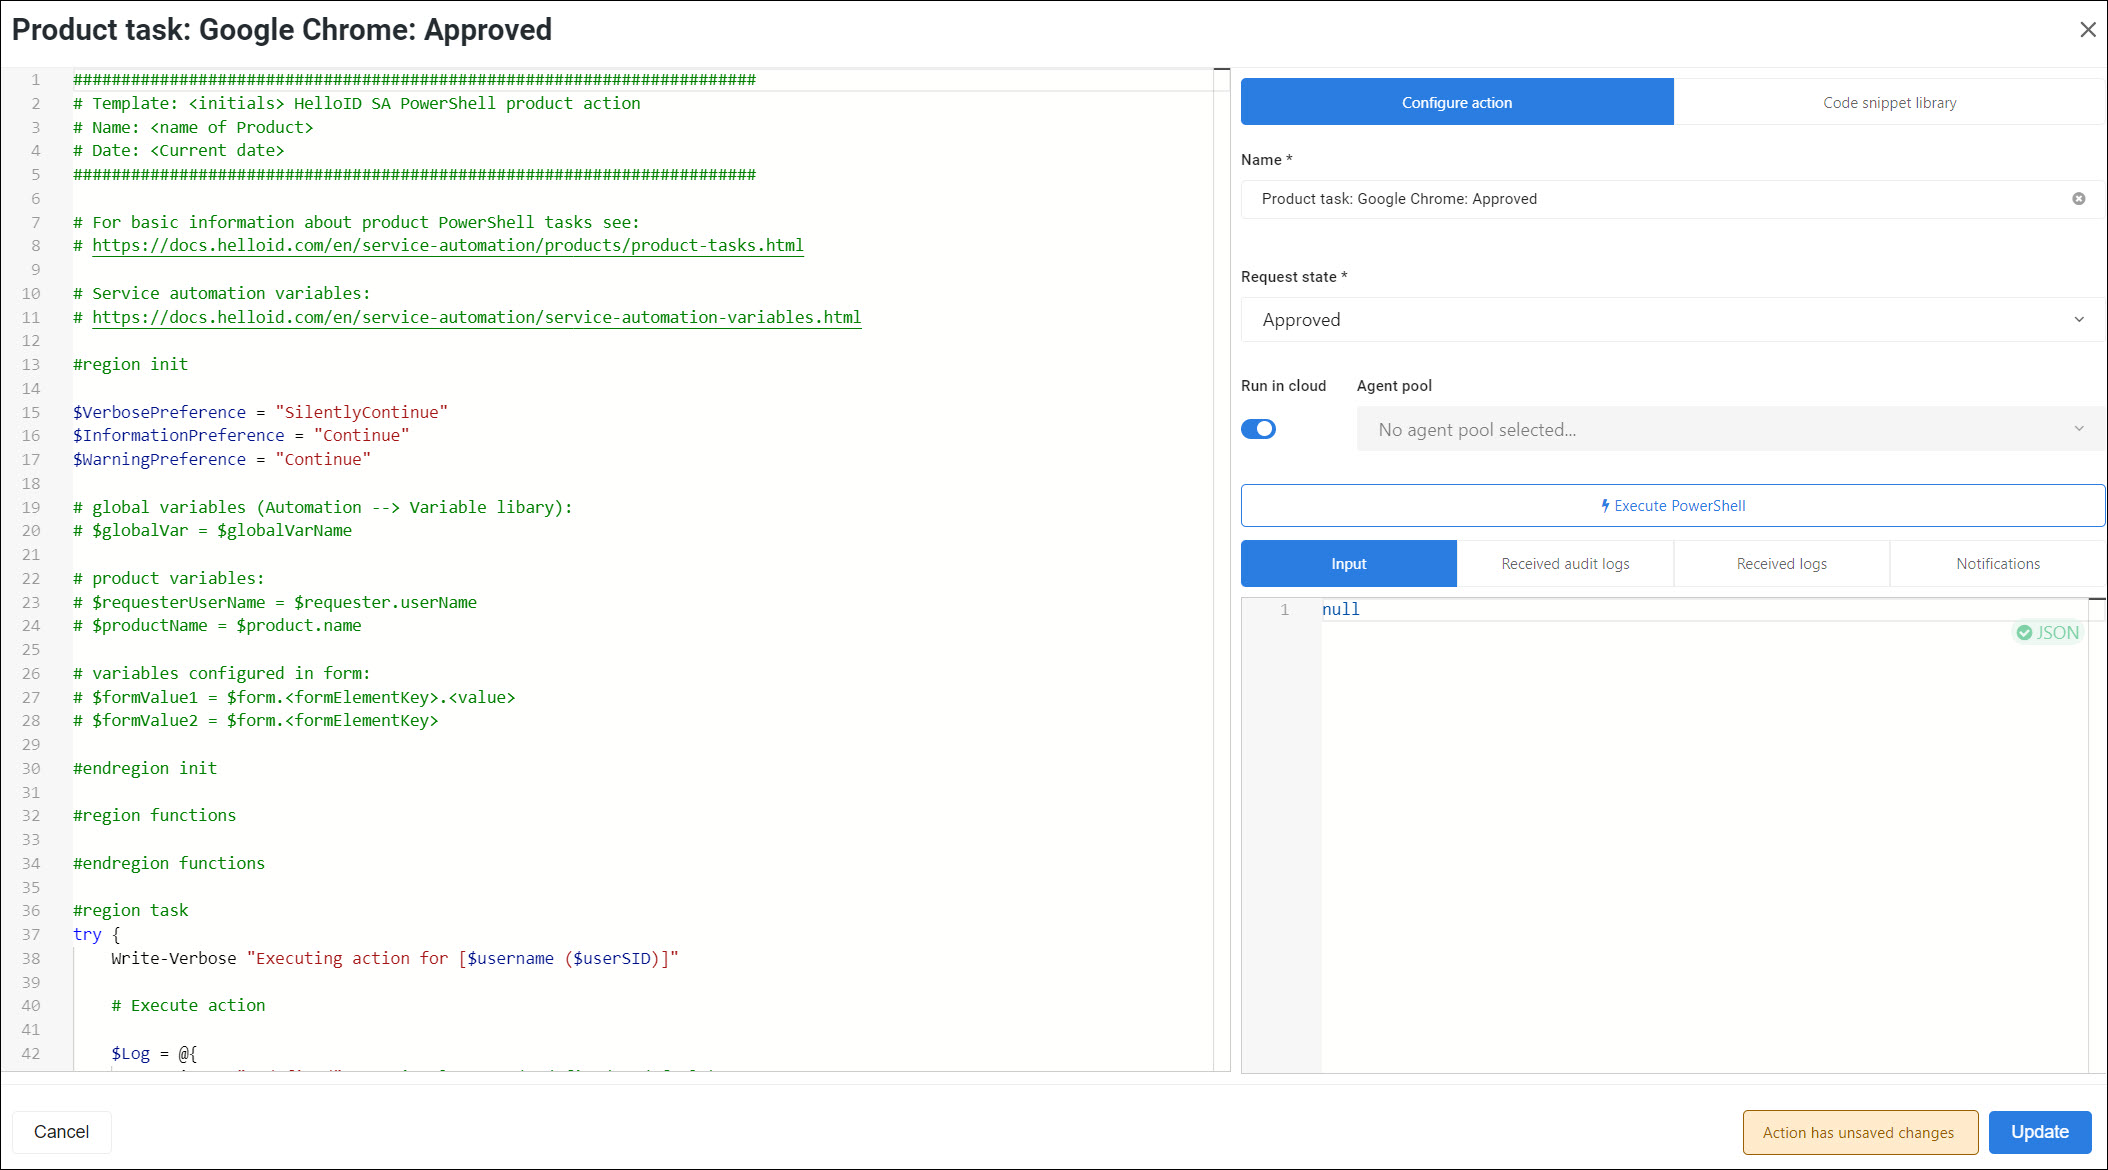
The code editor is shown.
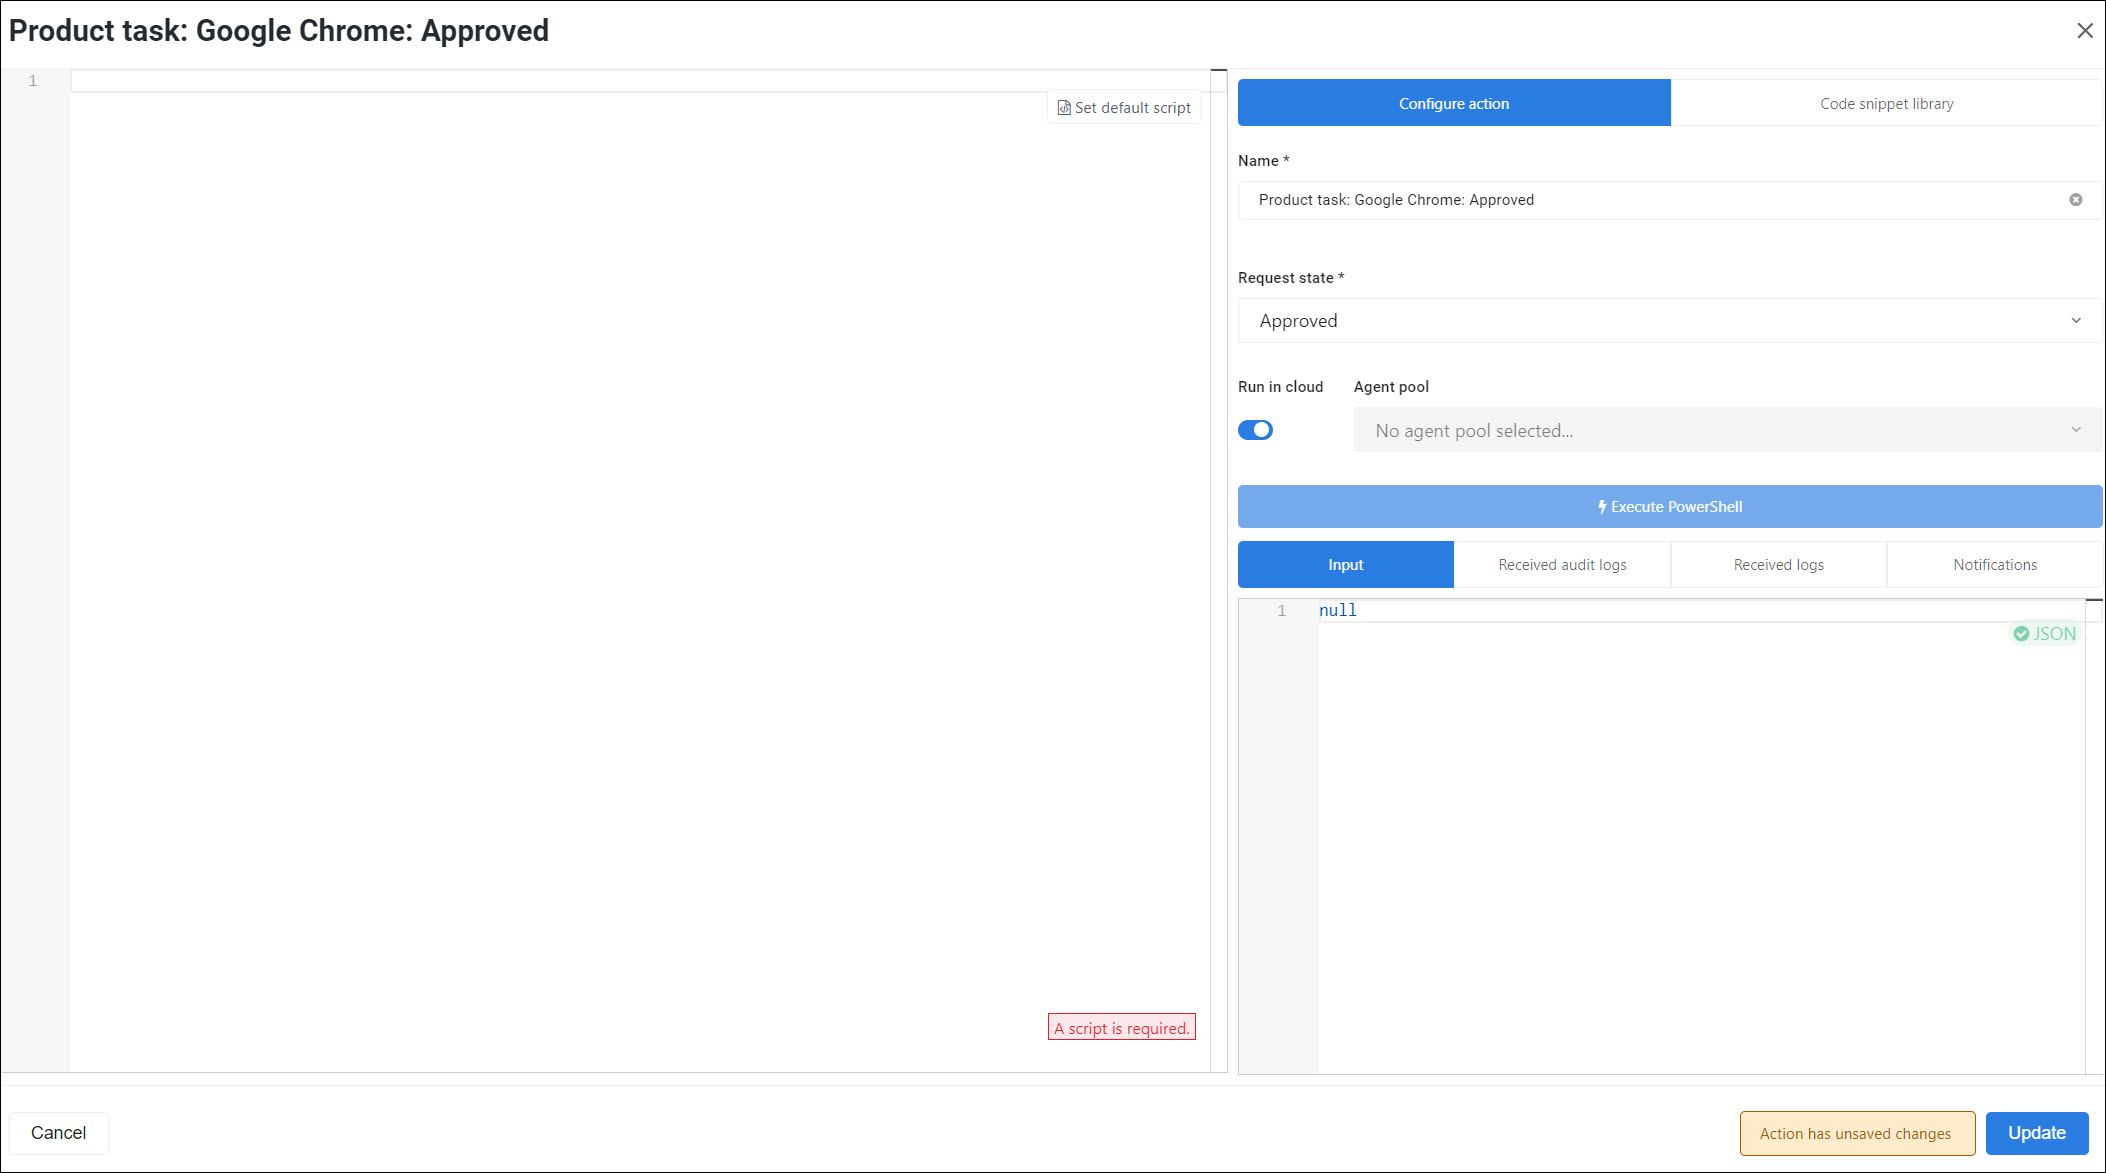
There are two ways to start writing the script:
Click the Set Default Script button to start with the default script.
Find a code snippet in the Code snippet library, click its Copy to clipboard button and paste the code into the editor.
For more detailed instructions, see Use a code snippet in a delegated form task.
In this example we are starting with the default script.
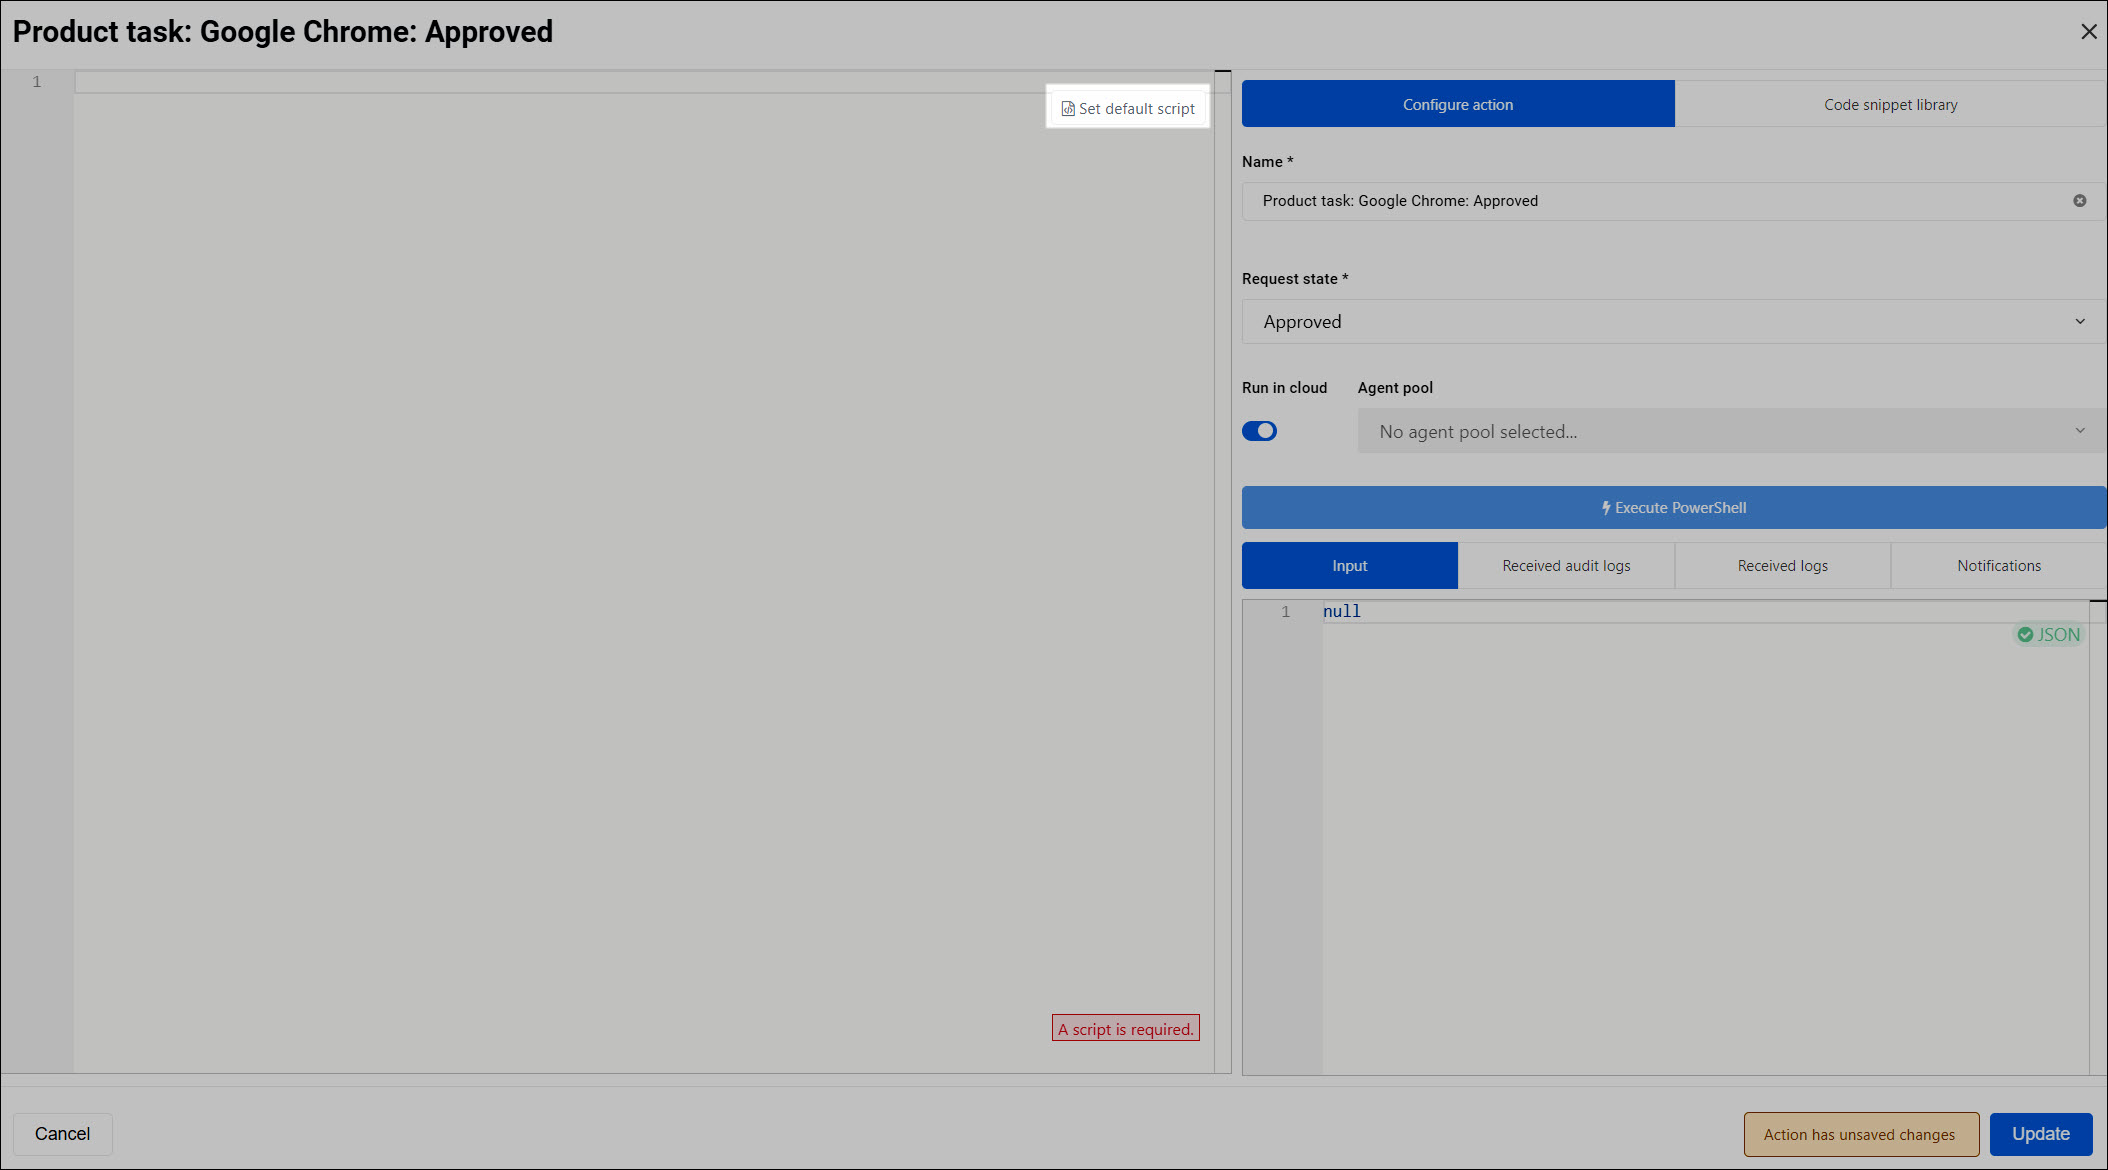
Tip
To start over at any time, delete all text from the script field. The Set Default Script button reappears.
Customize the script according to what should happen during the selected stage of the product lifecycle for this product. For example, make API calls into external systems based on the data available in the product, the request, etc.
Keep the following in mind when writing code for a product action:
Wrap your code in a try/catch block.
Two types of logging are available: PowerShell console logging, and HelloID audit logging. See Logging in product actions and Audit logging in product actions. You can preview your PowerShell logs on the Received logs tab, and your audit logs on the Received audit logs tab.
Warning
Product actions that run frequently and log a lot of lines can quickly fill up your system's database. Limit the amount of logging to avoid running out of database space and hitting the Performance limits.
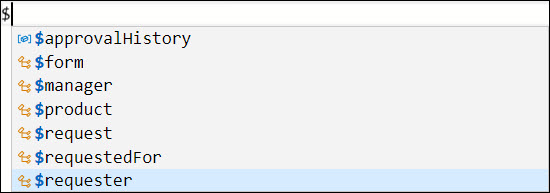
You have access to the following variables through autocomplete: $approvalHistory, $form, $manager, $product, $request, $requester, and $requestedFor. Open autocomplete by typing
$.
You also have access to all System variables and Custom variables, which are not included in autocomplete.
Use the Run In Cloud toggle to choose whether this script will run using the Cloud Service Automation Agent (enabled) or the On-premises Service Automation Agent service (disabled).
The Input tab lets you specify JSON form input in order to test scripts that use the $form variable.
Tip
To generate test JSON based on a form, Generate test JSON.
Email sends in product actions are supported, and you can preview them on the Notifications tab.
PowerShell product action scripts should not return any data to HelloID.
For this example, we will query a weather API. We'll use the following script:
#######################################################################
# Template: HelloID SA PowerShell product action
# Name: Google Chrome: Approved
# Date: 8.7.2023
#######################################################################

#region init

$VerbosePreference = "SilentlyContinue"
$InformationPreference = "Continue"
$WarningPreference = "Continue"

# global variables (Automation --> Variable library):
$globalVarExample = $companyName

# product variables:
$requesterUsernameExample = $requester.userName
$requesterUserGUIDExample = $requester.userGUID
$productNameExample = $product.name

# variables configured in form:
$formVarExample = $form.tempUnitDropdown.tempUnitValue

#endregion init

#region functions

Function Get-Current-NYC-Weather {
    $locationEndpoint = "https://api.open-meteo.com/v1/forecast?latitude=40.71&longitude=-74.01&hourly=temperature_2m&temperature_unit=$formVarExample&windspeed_unit=mph&precipitation_unit=inch"
    $response = Invoke-RestMethod -uri $locationEndpoint
    Write-Information "Response: $response"
    return @{weather = "Current time: $($response.hourly.time[0]); current temperature: $($response.hourly.temperature_2m[0]) degrees $formVarExample"}
}

#endregion functions

#region task
try {
    Write-Verbose "Looking up NYC weather for [$requesterUsernameExample ($requesterUserGUIDExample)] at $globalVarExample, in product $productNameExample"

    $result = Get-Current-NYC-Weather
    Write-Information "Result: $($result.weather)"

    $Log = @{
        Action = "Undefined"
        System = "OpenMeteo"
        Message = "Successfully executed action for [$requesterUsernameExample ($requesterUserGUIDExample)]"
        IsError = $false
        TargetDisplayName = $requesterUsernameExample
        TargetIdentifier = $([string]$requesterUserGUIDExample)
    }

    Write-Information -Tags "Audit" -MessageData $log

    $email = @{
        from = "[email protected]"
        to = "[email protected]"
        subject = "Your weather report"
        body = "<strong>$($result.weather)</strong>"
        confidential= $false
    }

    Write-Information -Tags "Email" -MessageData $email
} catch {
    $ex = $PSItem
    Write-Warning "Error at Line '$($ex.InvocationInfo.ScriptLineNumber)': $($ex.InvocationInfo.Line). Error: $($ex.Exception.Message)"

    Write-Error "Error executing action for [$requesterUsernameExample ($requesterUserGUIDExample)]. Error Message: $($ex.Exception.Message)"

    $Log = @{
        Action = "Undefined"
        System = "OpenMeteo"
        Message = "Error executing action for [$requesterUsernameExample ($requesterUserGUIDExample)]. Error Message: $($ex.Exception.Message)"
        IsError = $true
        TargetDisplayName = $requesterUsernameExample
        TargetIdentifier = $([string]$requesterUserGUIDExample)
    }
    Write-Information -Tags "Audit" -MessageData $log
}
#endregion task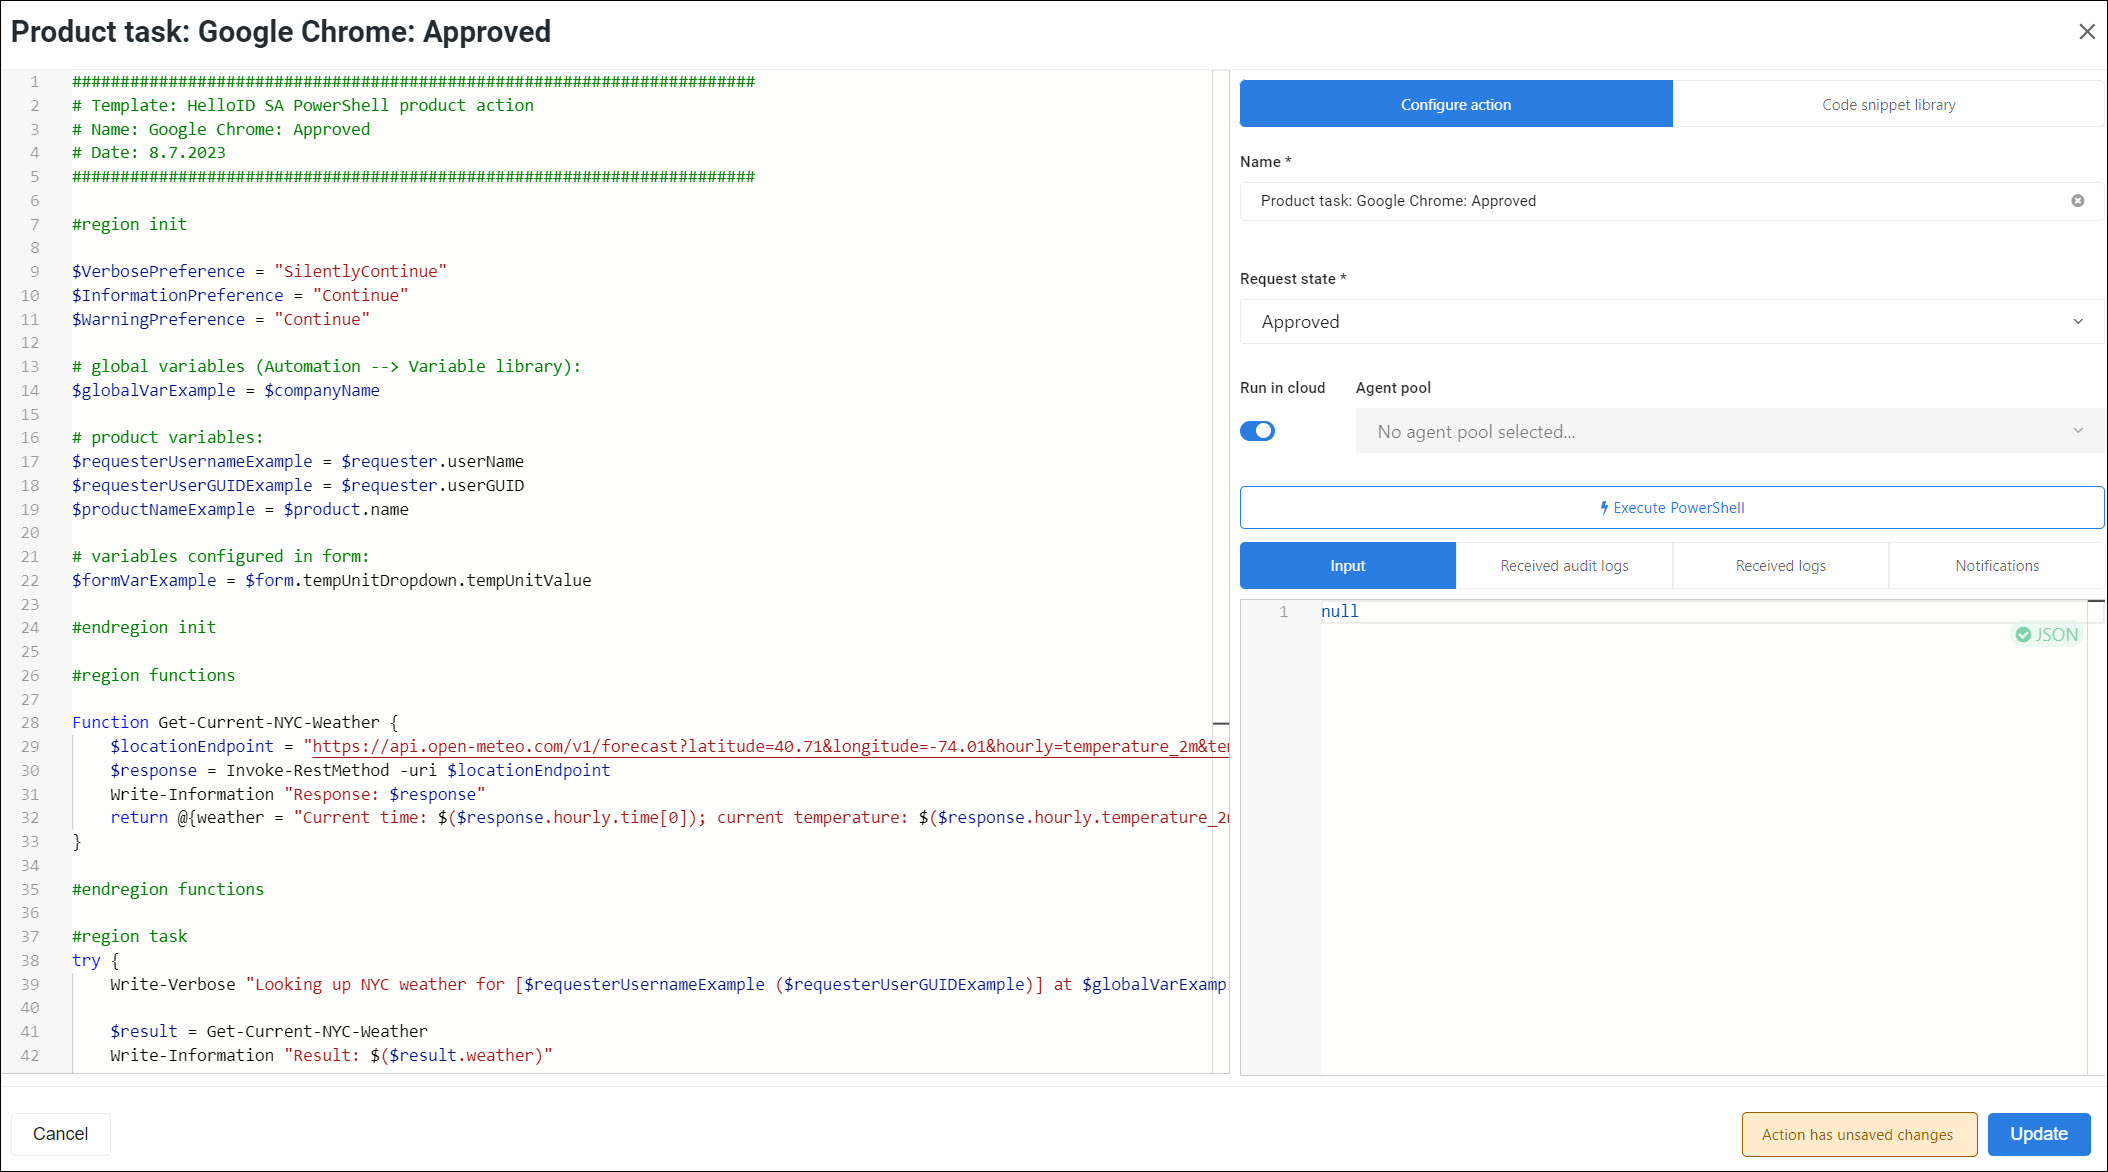
If your script relies on form data, enter JSON in the Input tab to simulate form input.
For this example, we'll enter the following JSON to simulate input from our
Weather reportform:{ "tempUnitDropdown": { "tempUnitLabel": "Fahrenheit", "tempUnitValue": "fahrenheit" } }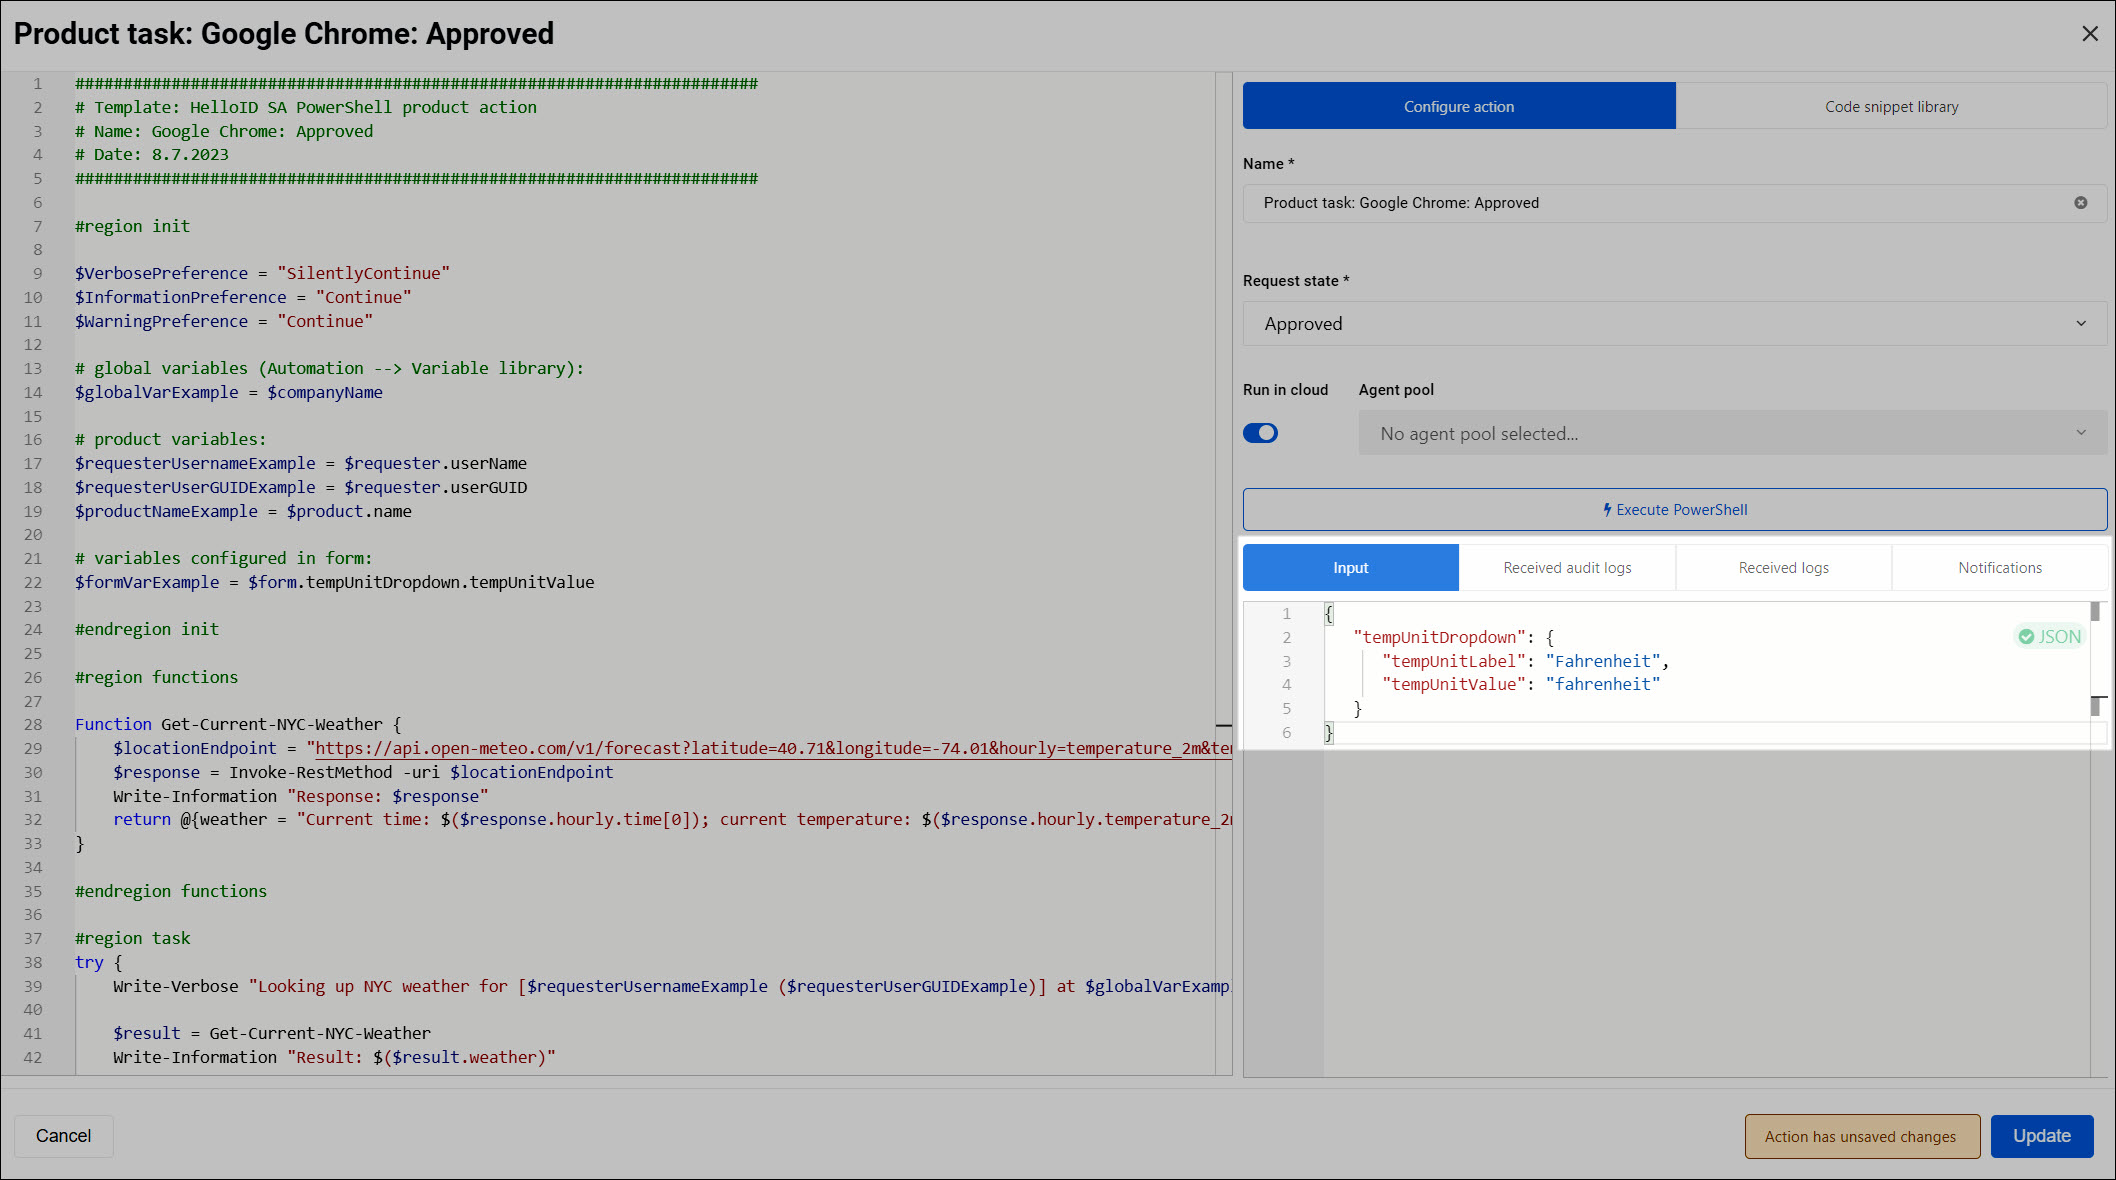
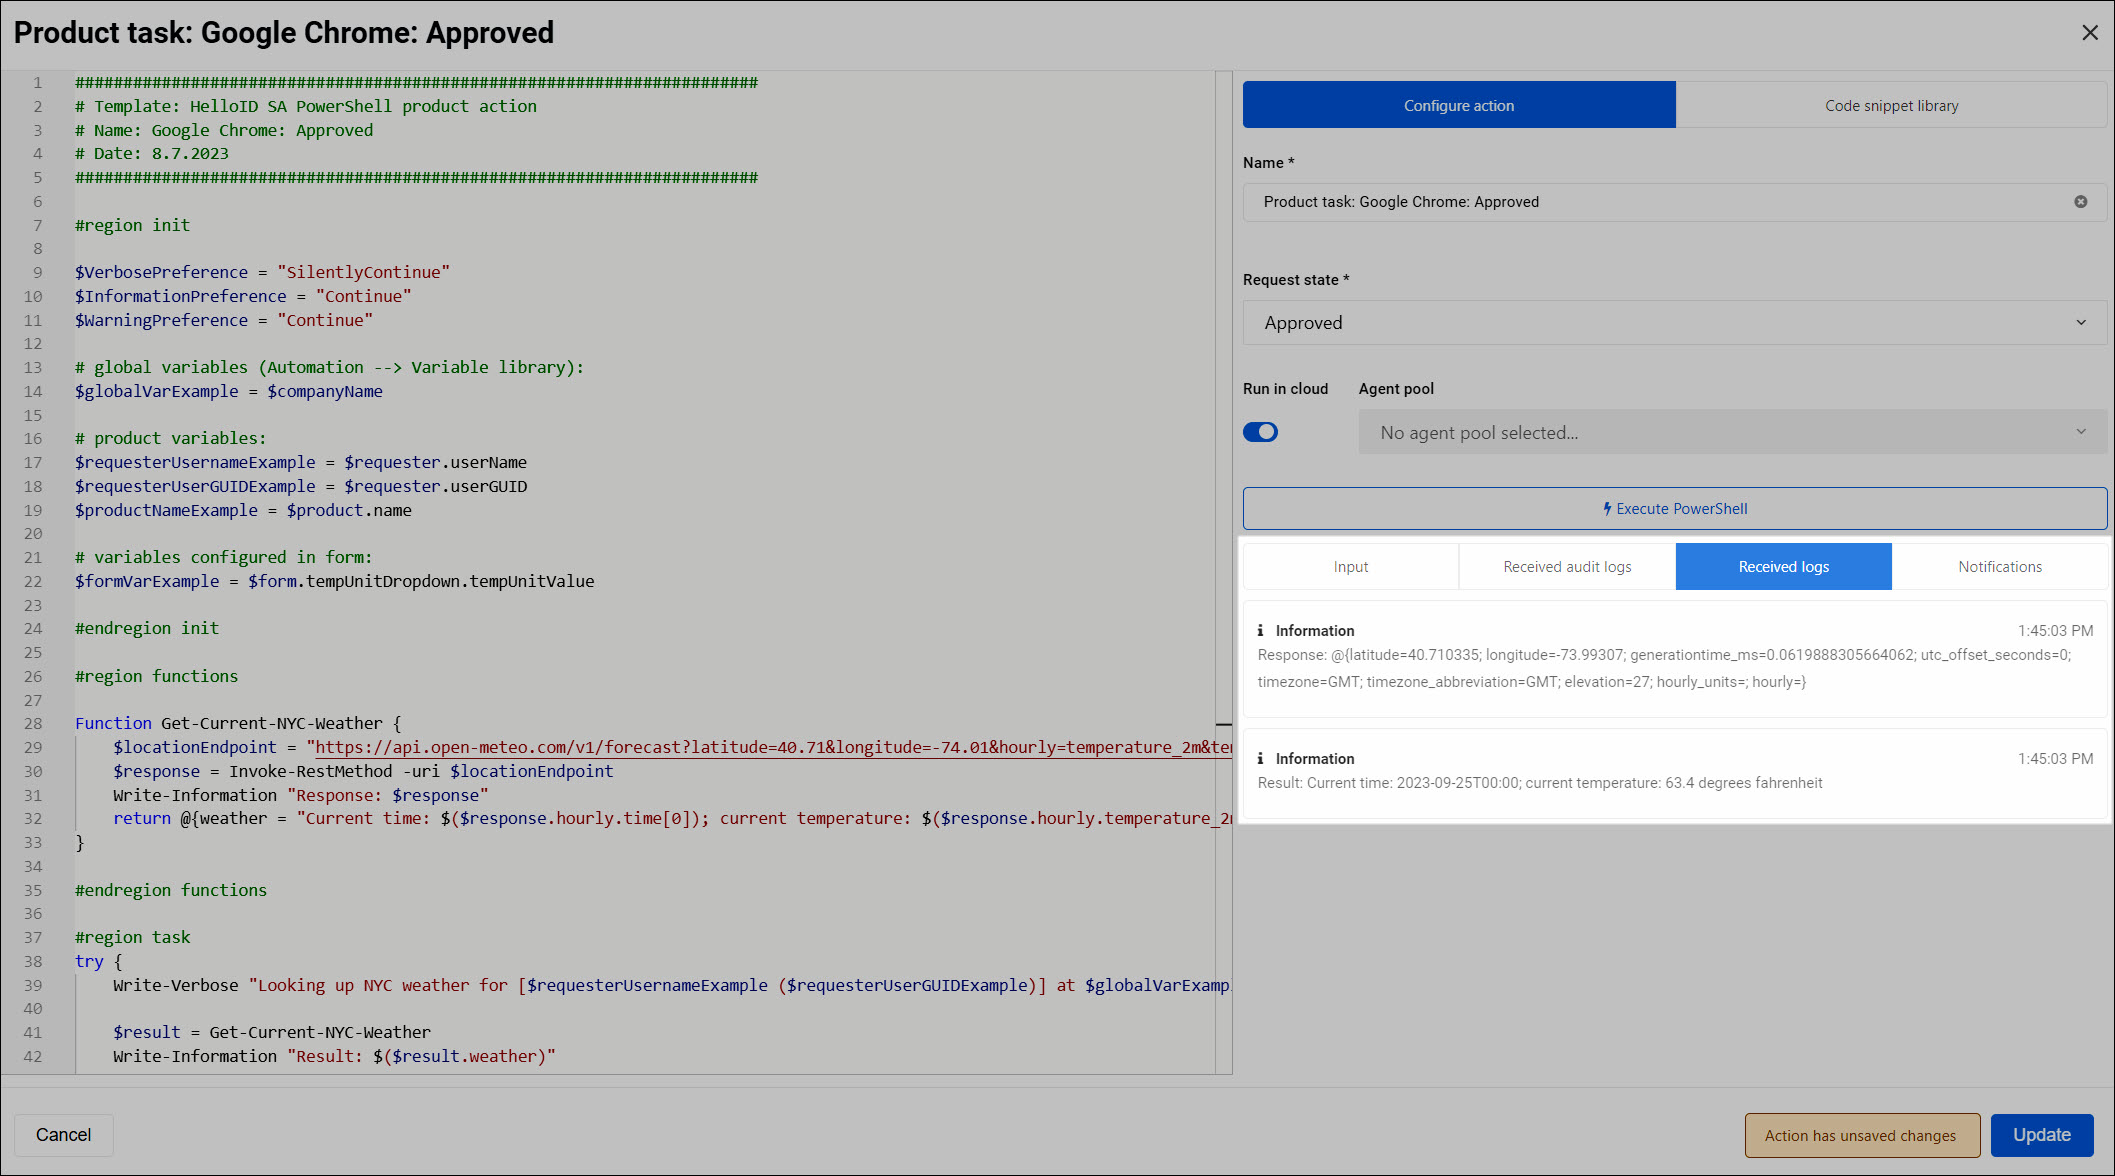
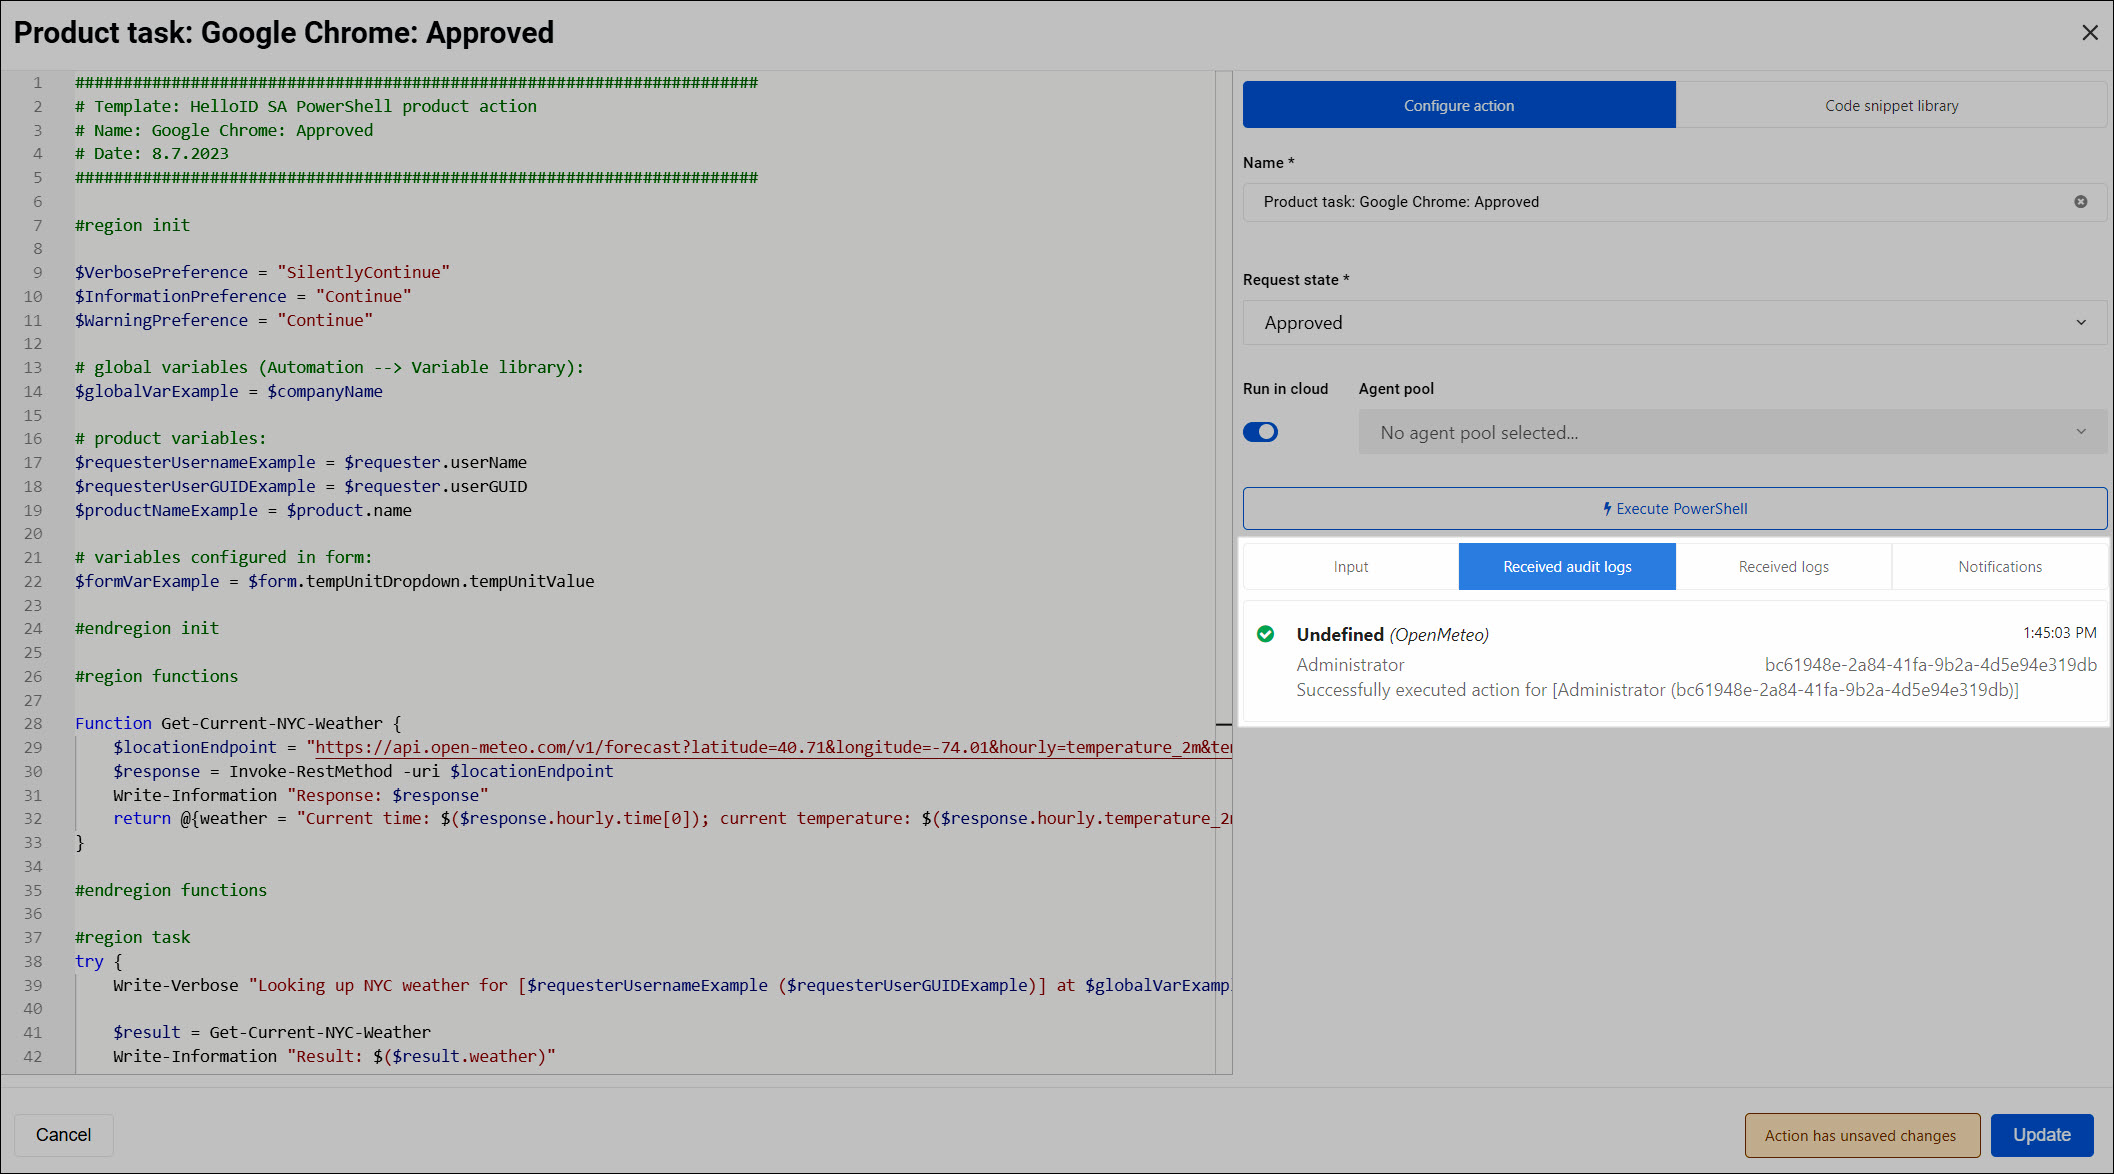
To test your script, click Execute PowerShell. View the results on the Received logs and Received audit logs tabs.
For this example, the NYC weather has been fetched and logged.
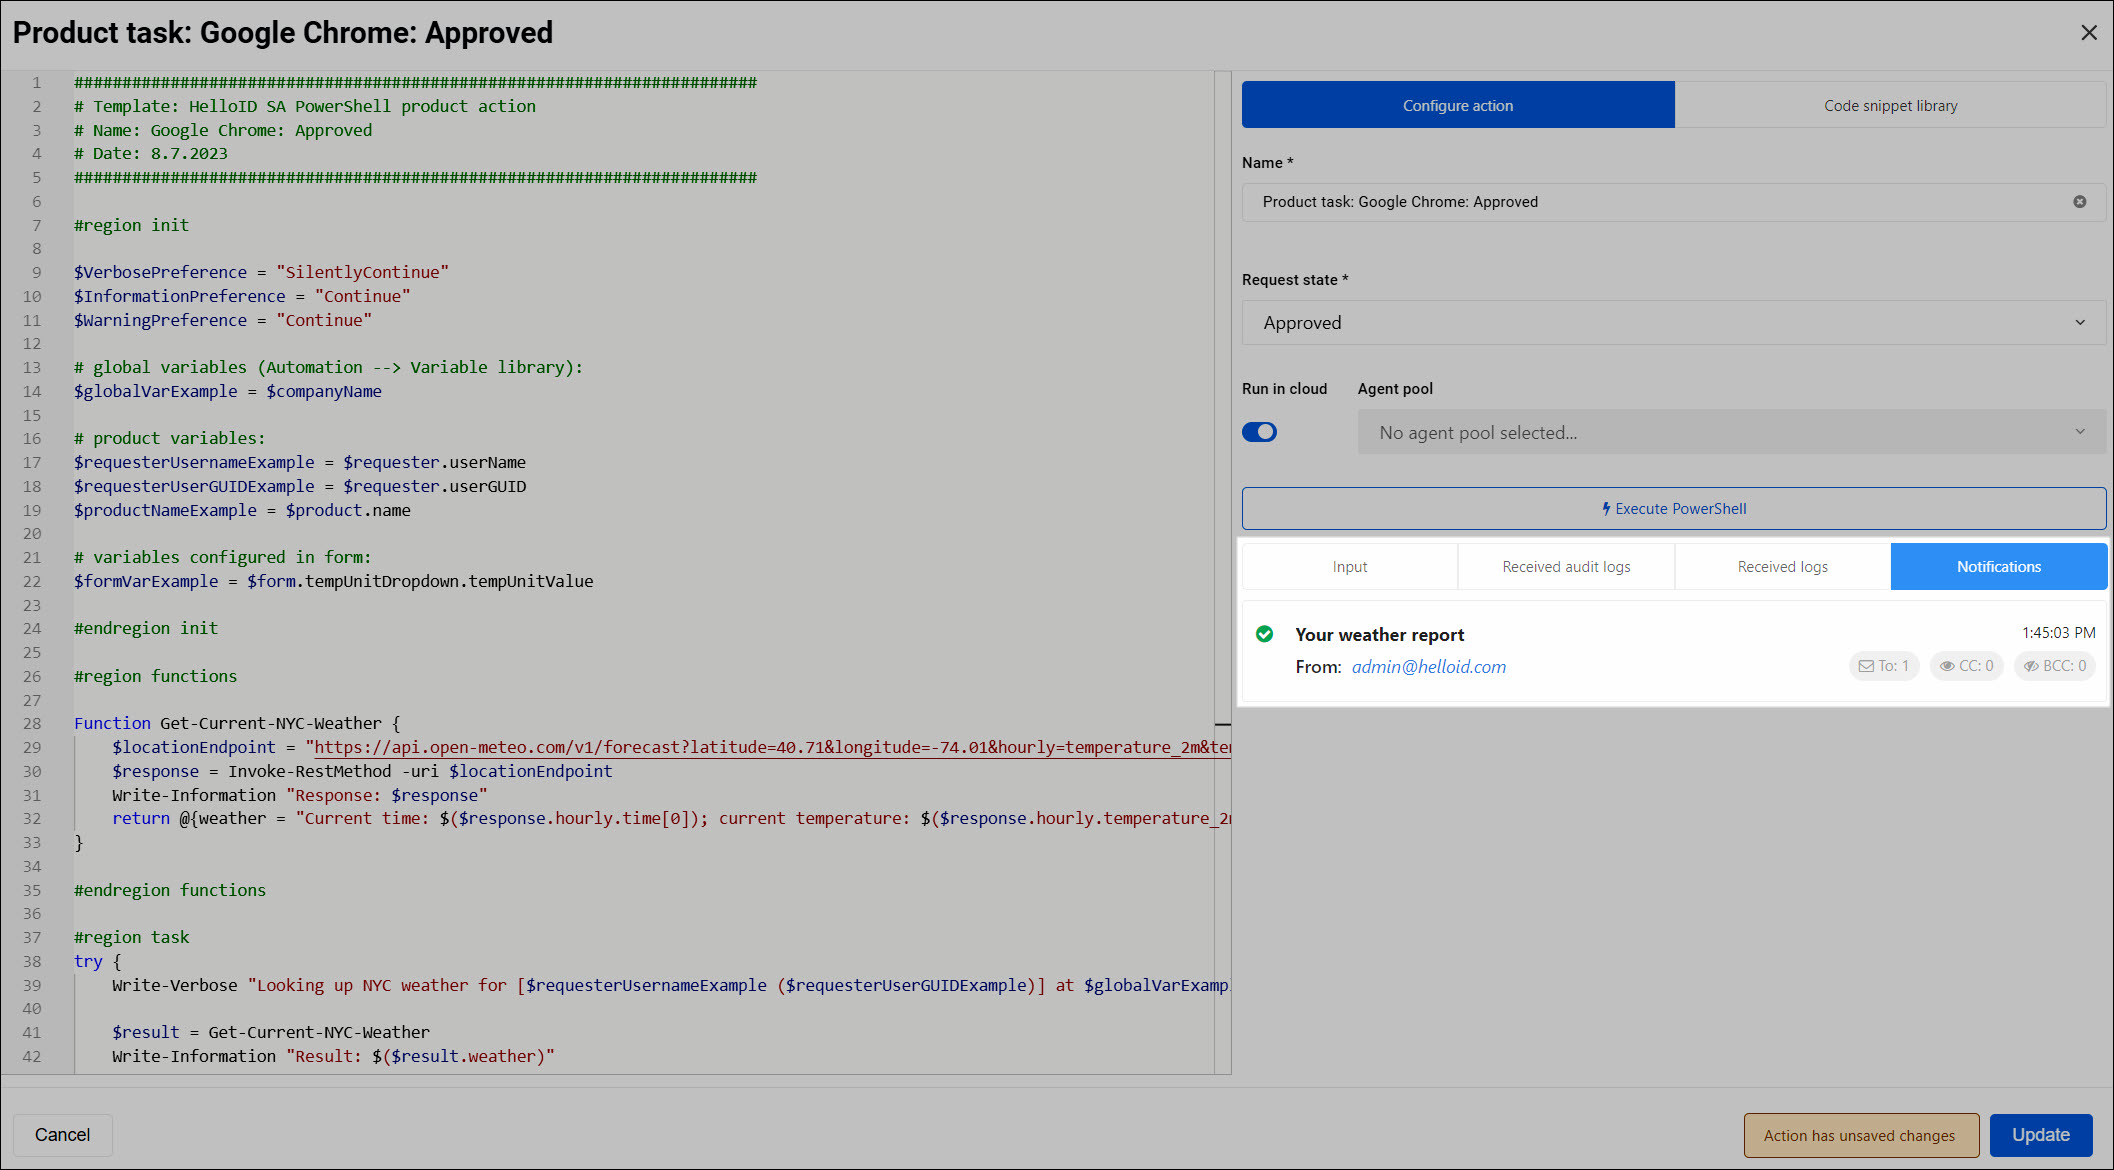
Preview any email sends on the Notifications tab.
Click Update.
Click Save.
The action(s) will run during the appropriate lifecycle stage(s) during users' Product requests for this product.
Note
it is strongly recommended to Add a product action on the product's Actions - new tab, using a code snippet from the newer Code snippet library.
Go to Self Service > Products and click Edit for the relevant product.
Go to the Actions tab.
Click
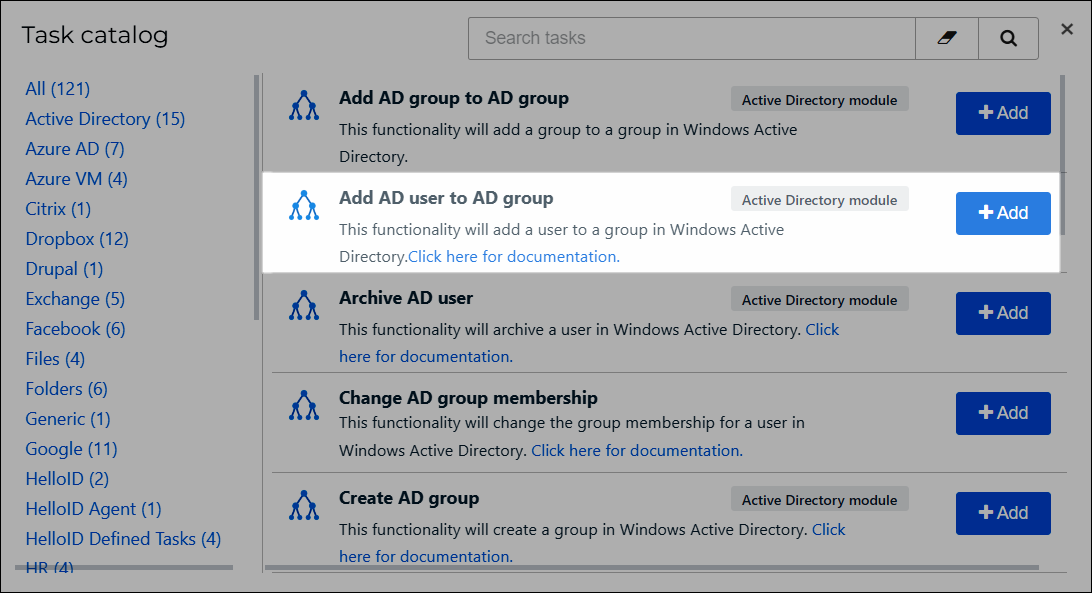
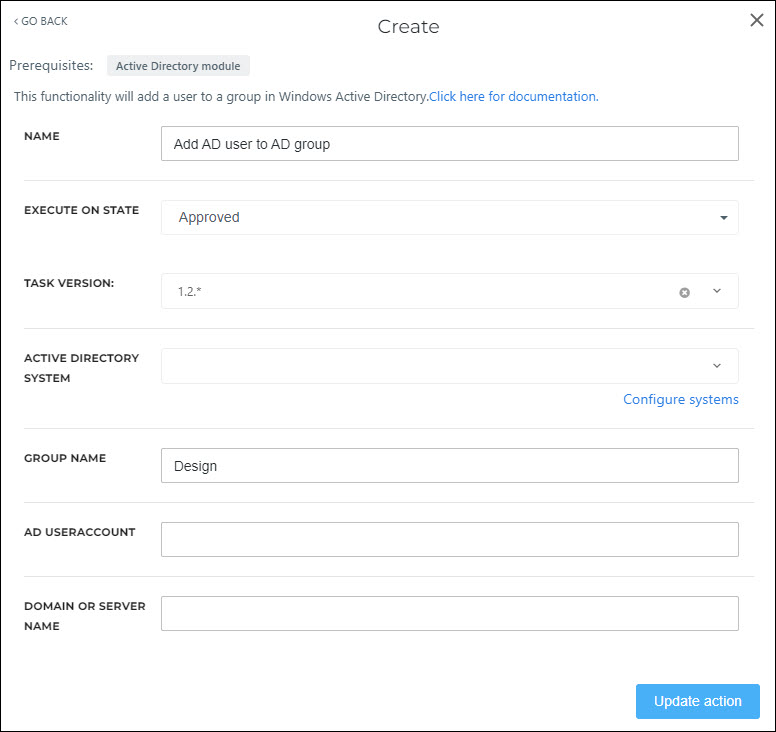
Add product action.In the Task catalog dialog box, search for the pre-defined task that you want to create.
For this example, we'll add the Add AD user to AD group action.
Optional: Change the task's default Name.
For this example, we'll use
Add AD user to AD group.Set Execute On State to the stage of the Product request lifecycle when this script should be executed.
For this example, we'll set it to Approved.
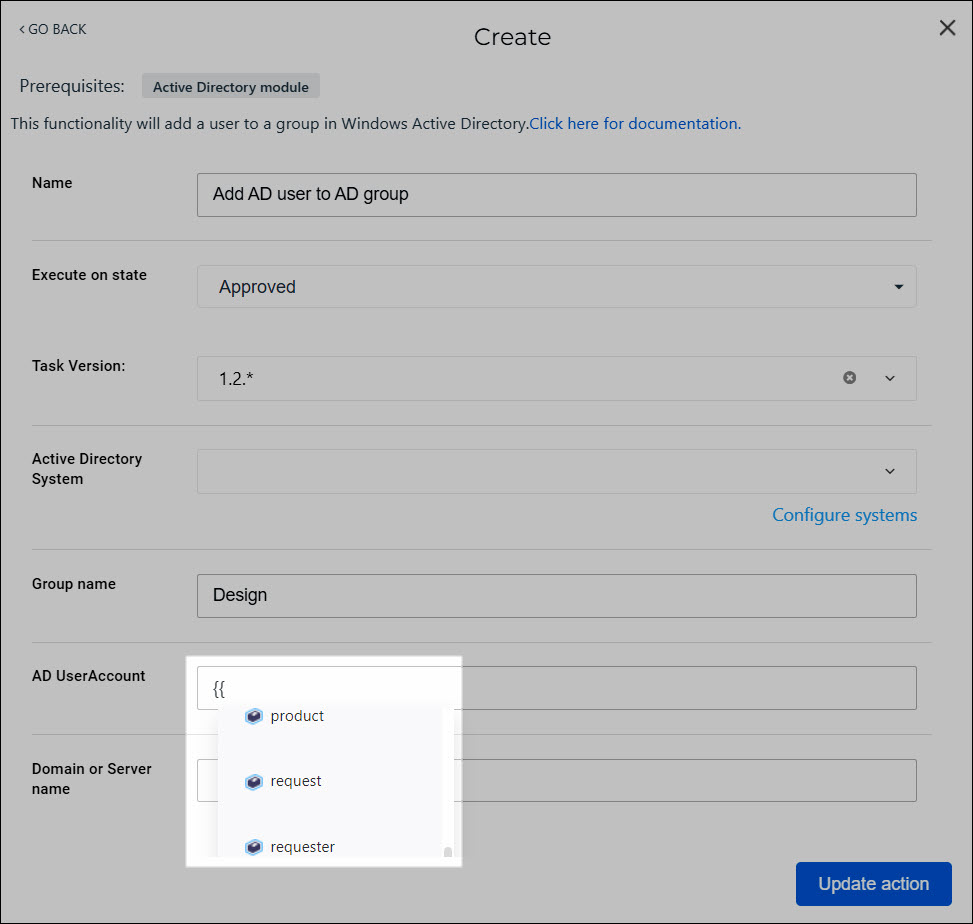
Enter the required input values for the task.
Tip
Type
{{in a text field to activate autocomplete.You have access to $manager, $product, $request, $requester, and $resourceOwnerGroup. You also have access to System variables (under {{portal.}}) and Custom variables (under {{variable.}}).
Click Update Action.
Optional: Add additional actions for other stages of the Product request lifecycle.
For example, here we've added the Remove AD user from AD group action to the product's Returned stage.
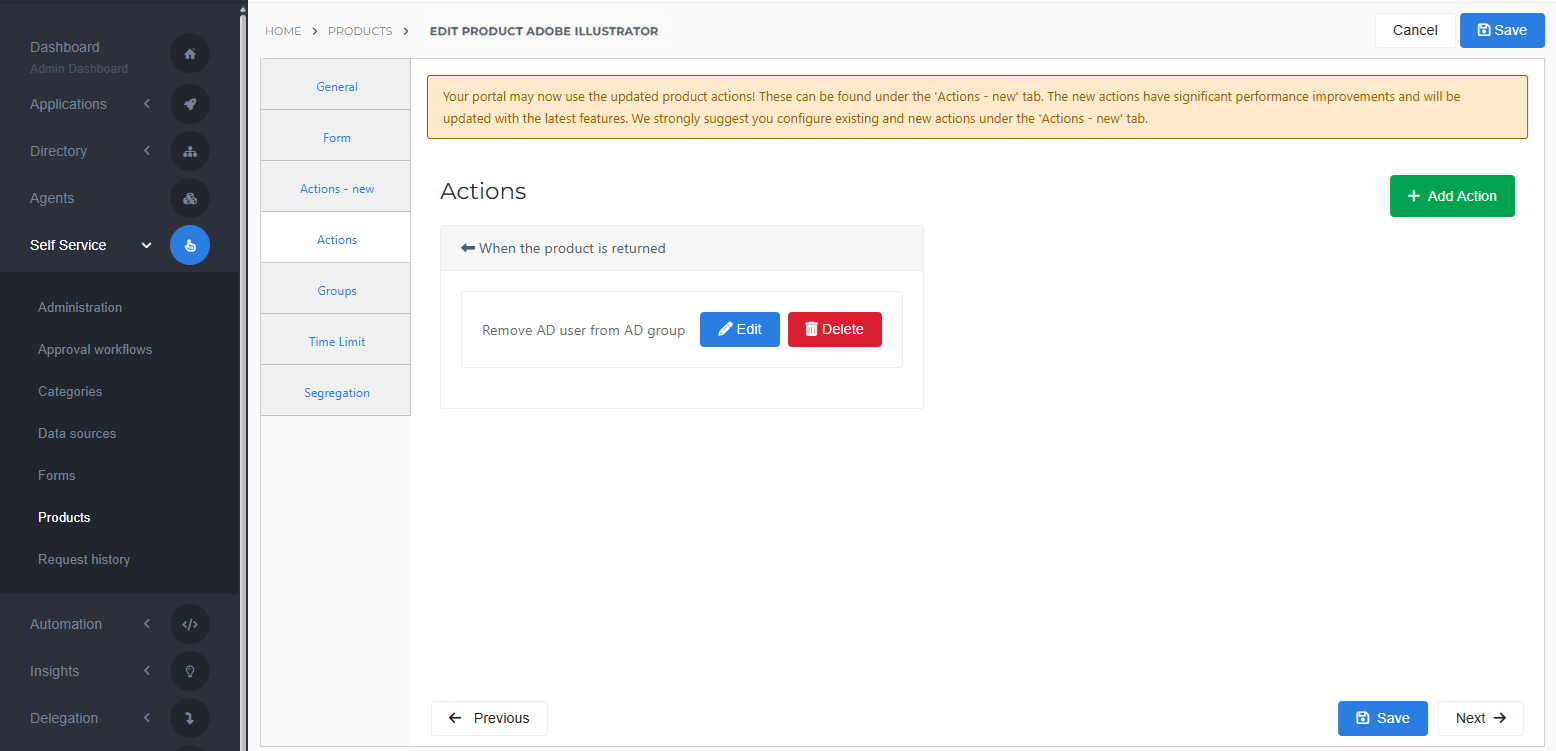
Click Save.
The action(s) will run during the appropriate lifecycle stage(s) during users' Product requests for this product.
Go to Self Service > Products and click Edit for the relevant product.
Go to the Actions - New tab.
Click the relevant State.
For the relevant task, click
Edit product action.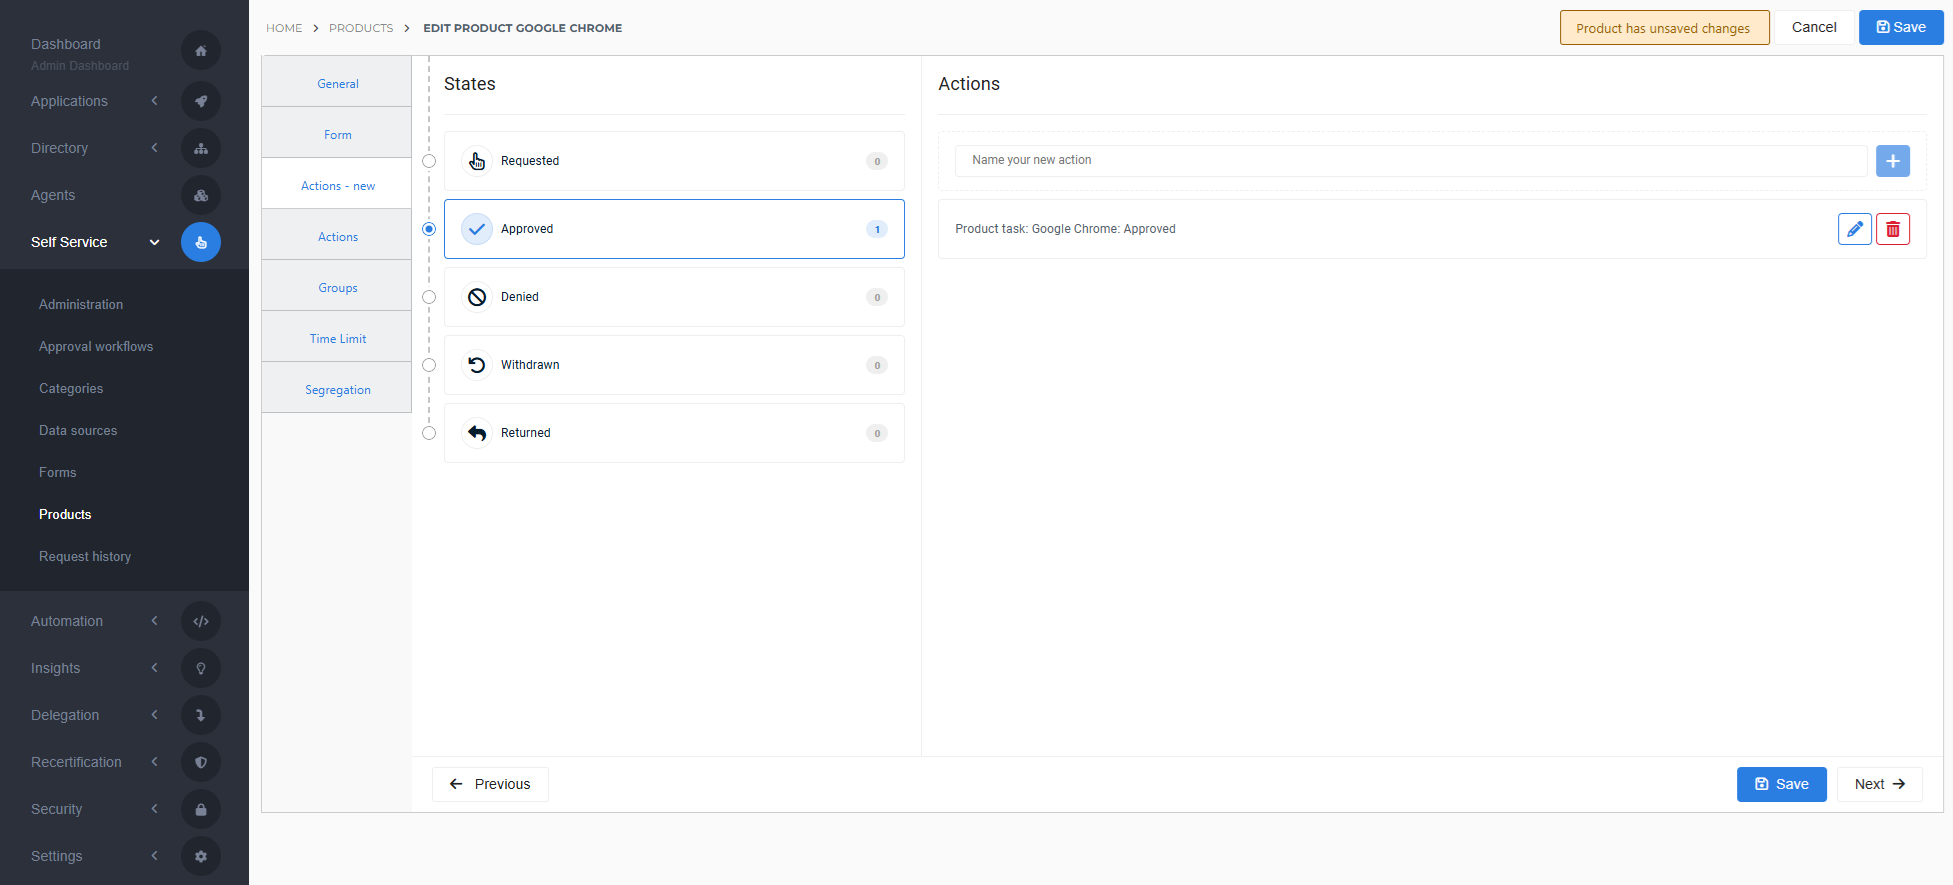
Continue by following the instructions in Add a product action.
Edit a product action added from the Task catalog
Go to Self Service > Products and click Edit for the relevant product.
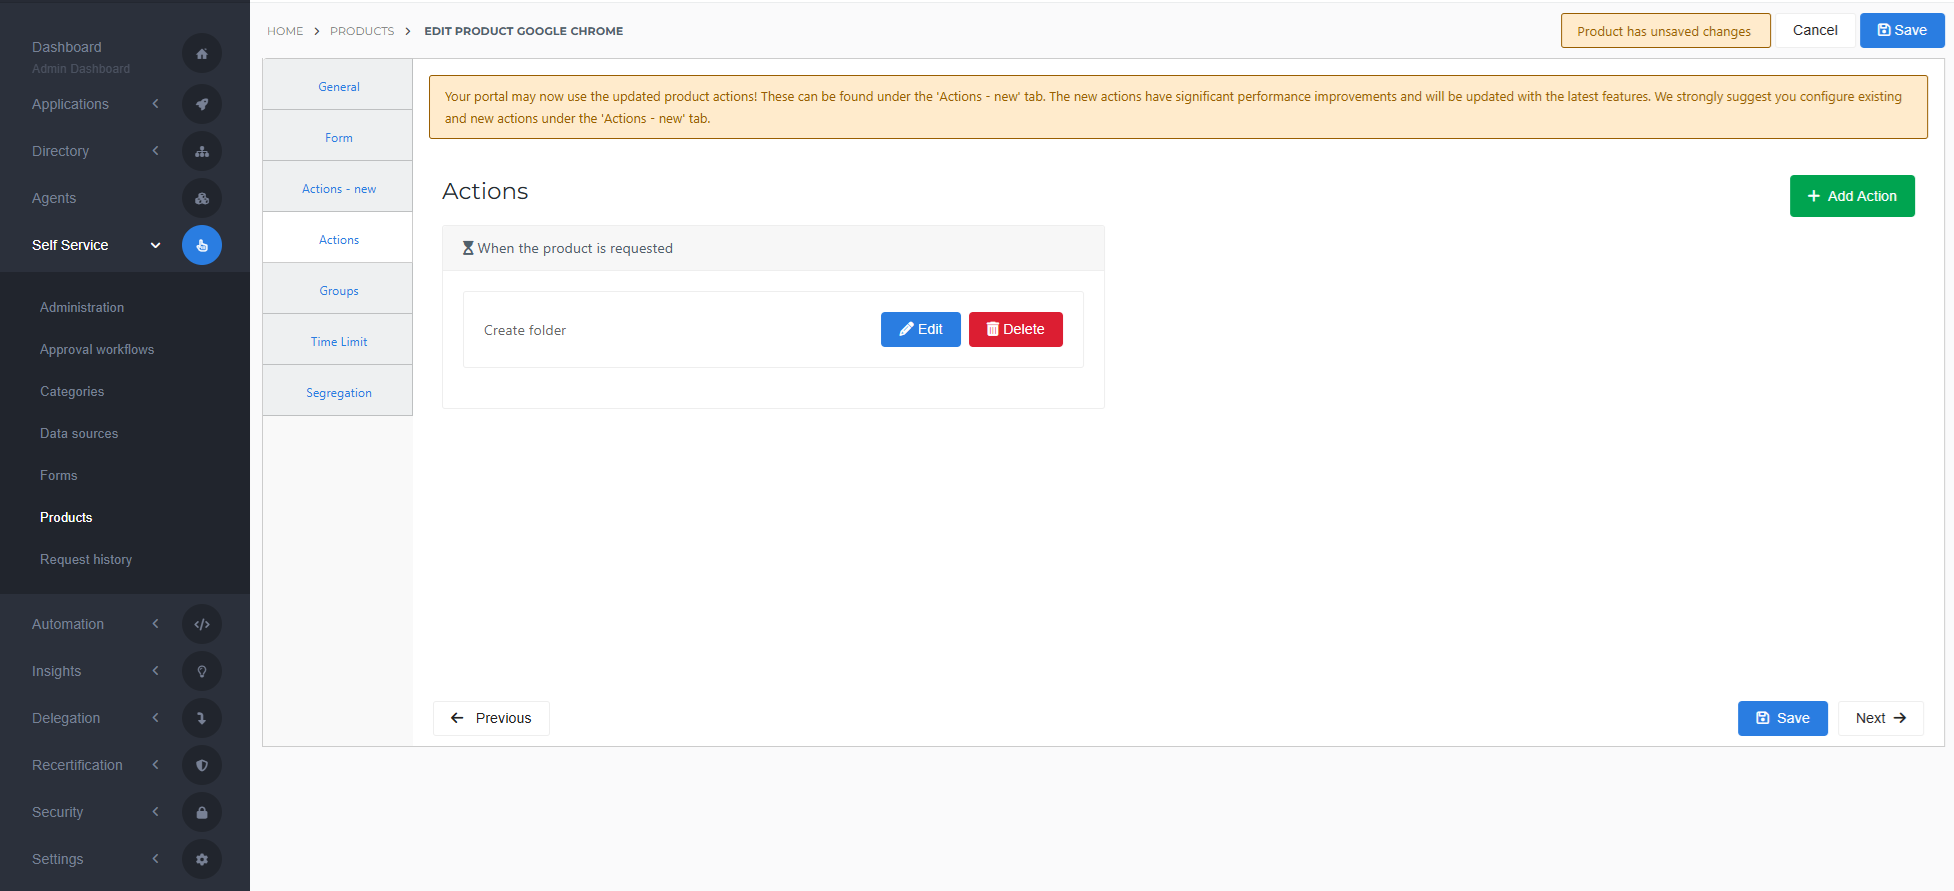
Go to the Actions tab.
For the relevant product action, click Edit.
Continue by following the instructions in Add a product action from the Task catalog.
Go to Self Service > Products and click Edit for the relevant product.
Go to the Actions - New tab.
Click the relevant State.
For the relevant action, click
Delete product task.To confirm, click Delete.
Click Save.
Remove a product action added from the Task catalog
Go to Self Service > Products and click Edit for the relevant product.
Go to the Actions tab.
For the relevant product action, click Delete.
To confirm, click Delete Action.
Click Save.