Add, edit, or remove a PowerShell data source
For more information, see PowerShell data sources.
Note
Prerequisite: The Weather report form shown in the Add a dynamic form article.
Go to Self Service > Forms and click Edit for the relevant form.
For this example, we'll edit our
Weather reportform.Click
 Edit Form Element to edit the form element that you want to populate via a PowerShell data source.
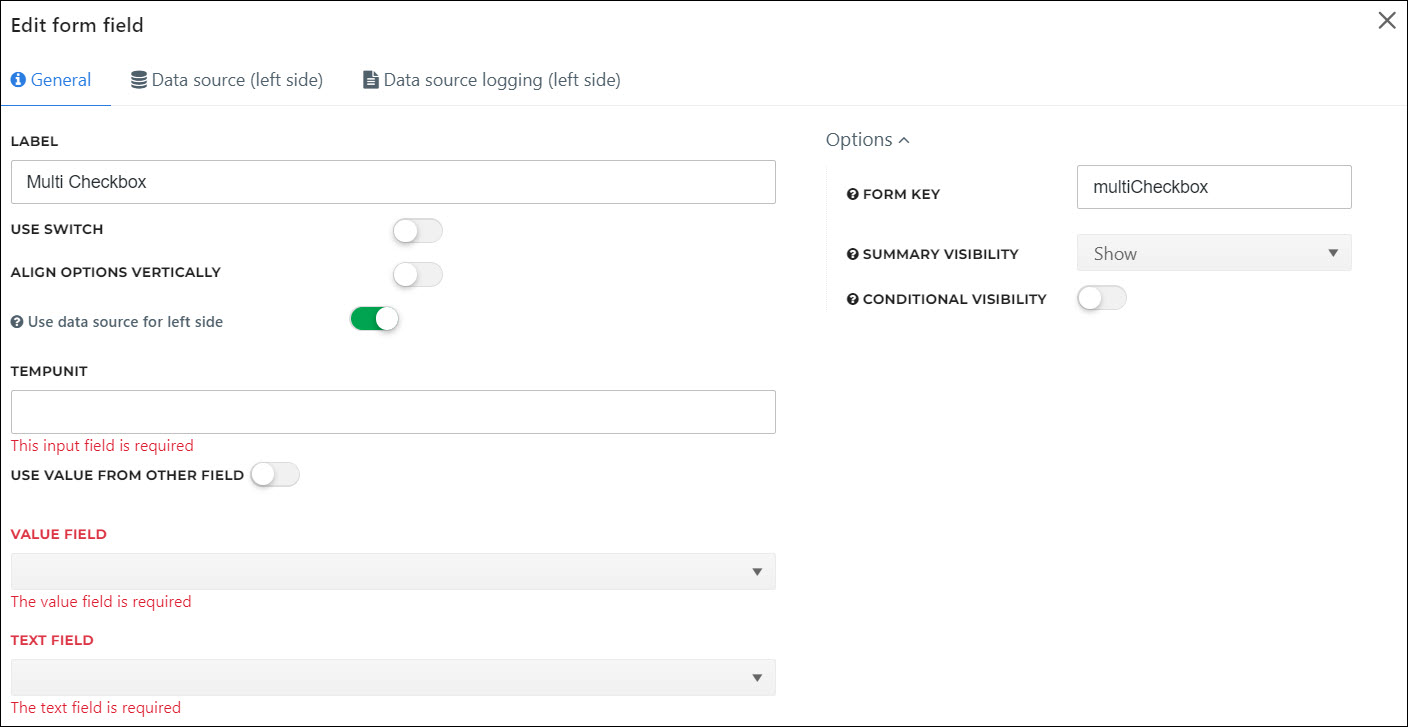
For this example, we'll edit the Multi Checkbox element on step 2 of our form.
Enable the Use Data Source toggle.
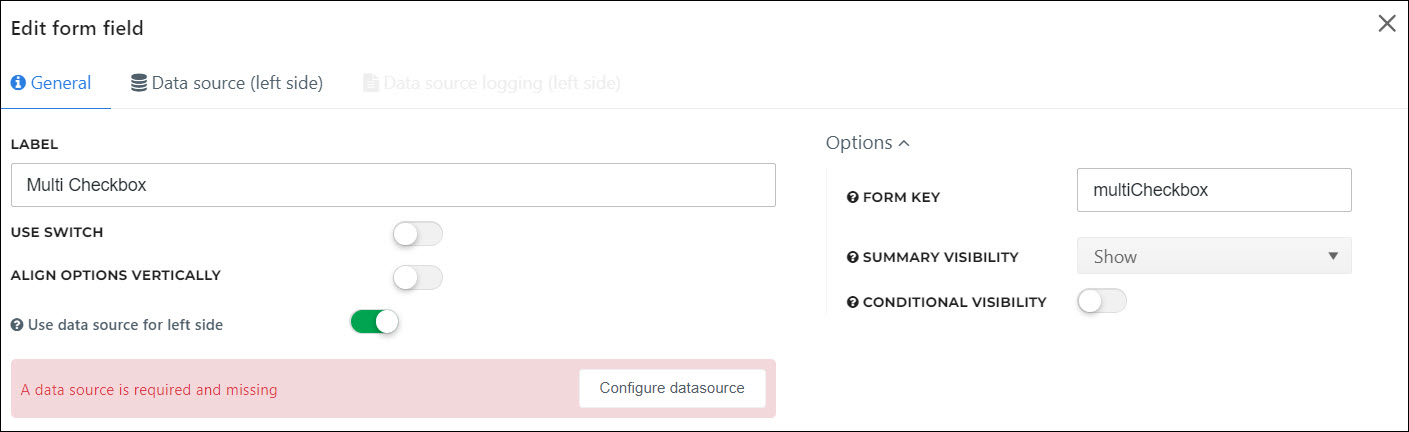
Click Configure Datasource.
Enter a Name and select a Type.
For this example, we'll name it
Weather report PowerShell datasourceand select PowerShell as the Type.
Click Next.
On the Data Source Input tab, create any input variables that your PowerShell script needs. Typically, this is only necessary when your script needs to read the states of other elements on the same form.
For this example, we'll create one Required input variable named
tempUnit. (We will ultimately feed the output of ourTemperature unitdropdown into this variable.)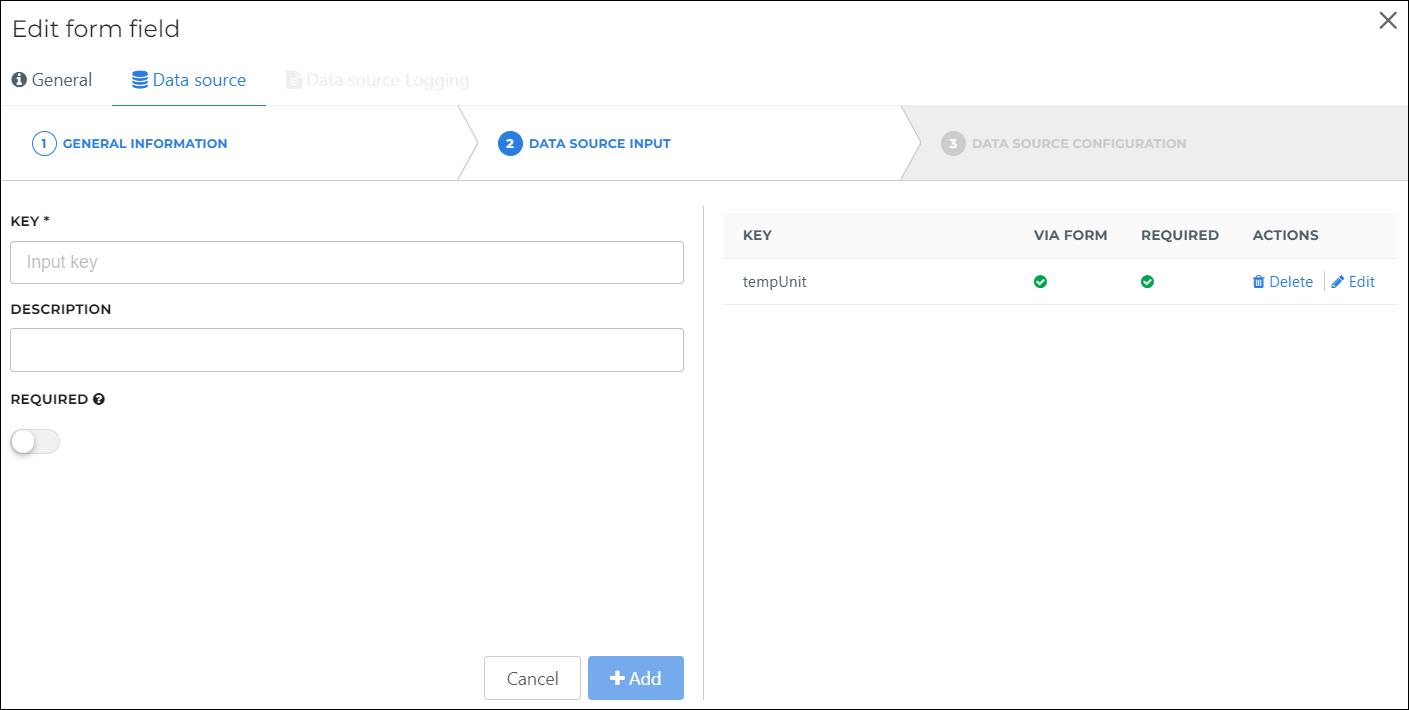
Click Next.
We can choose to get any code snippet from our code snippet library or start with an default script. In our case we are starting with the default script.
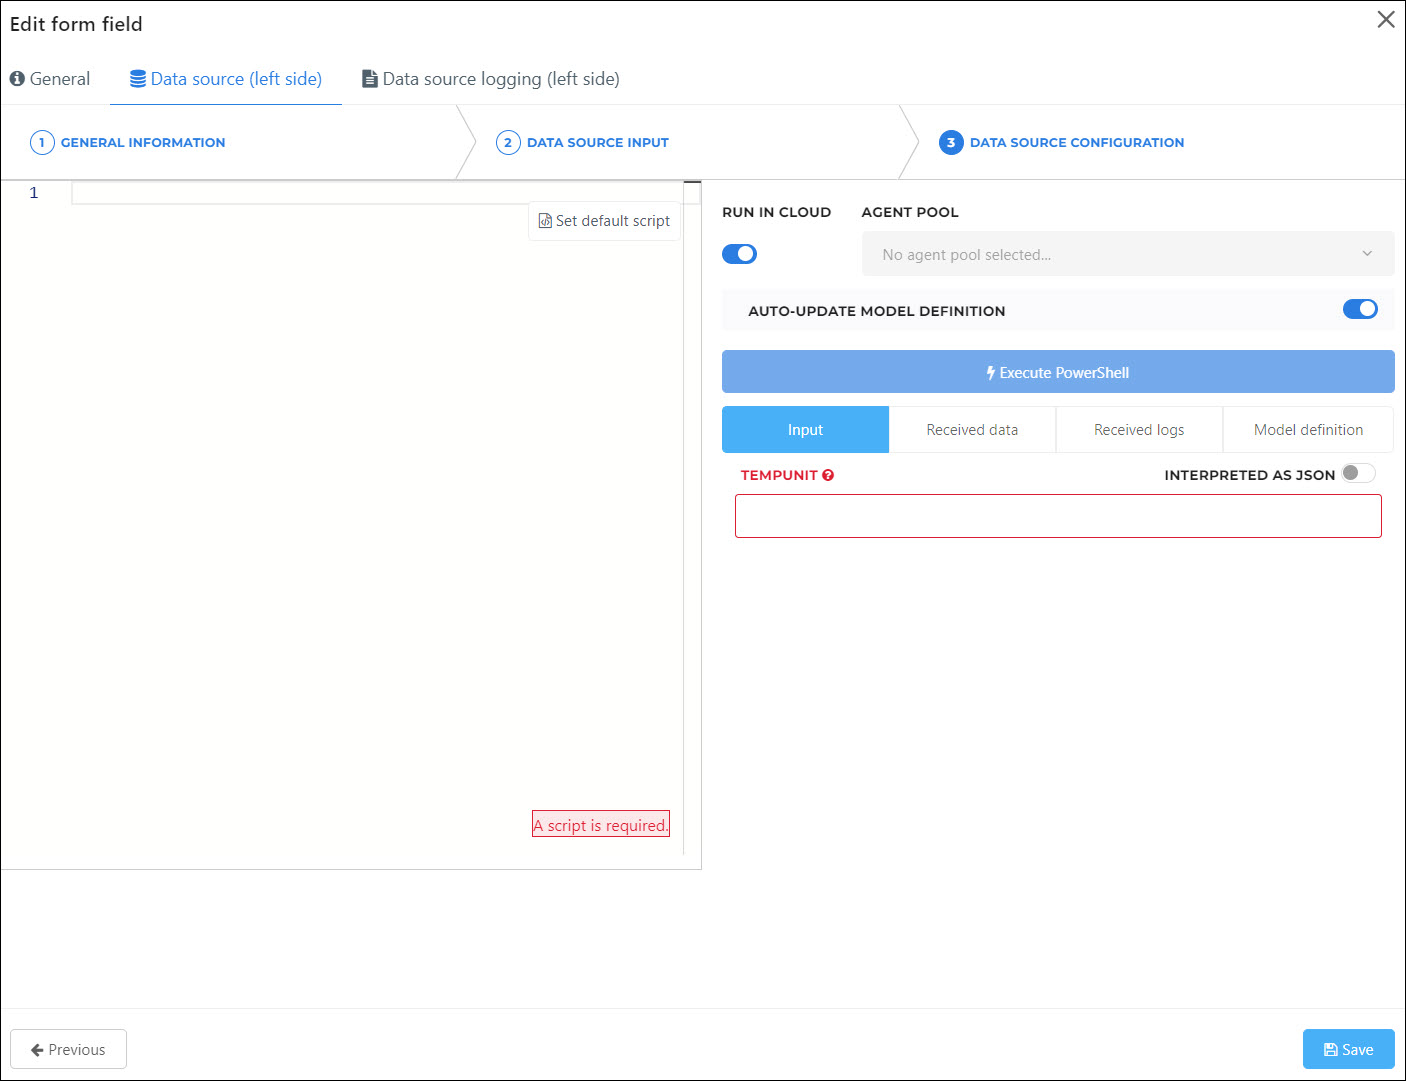
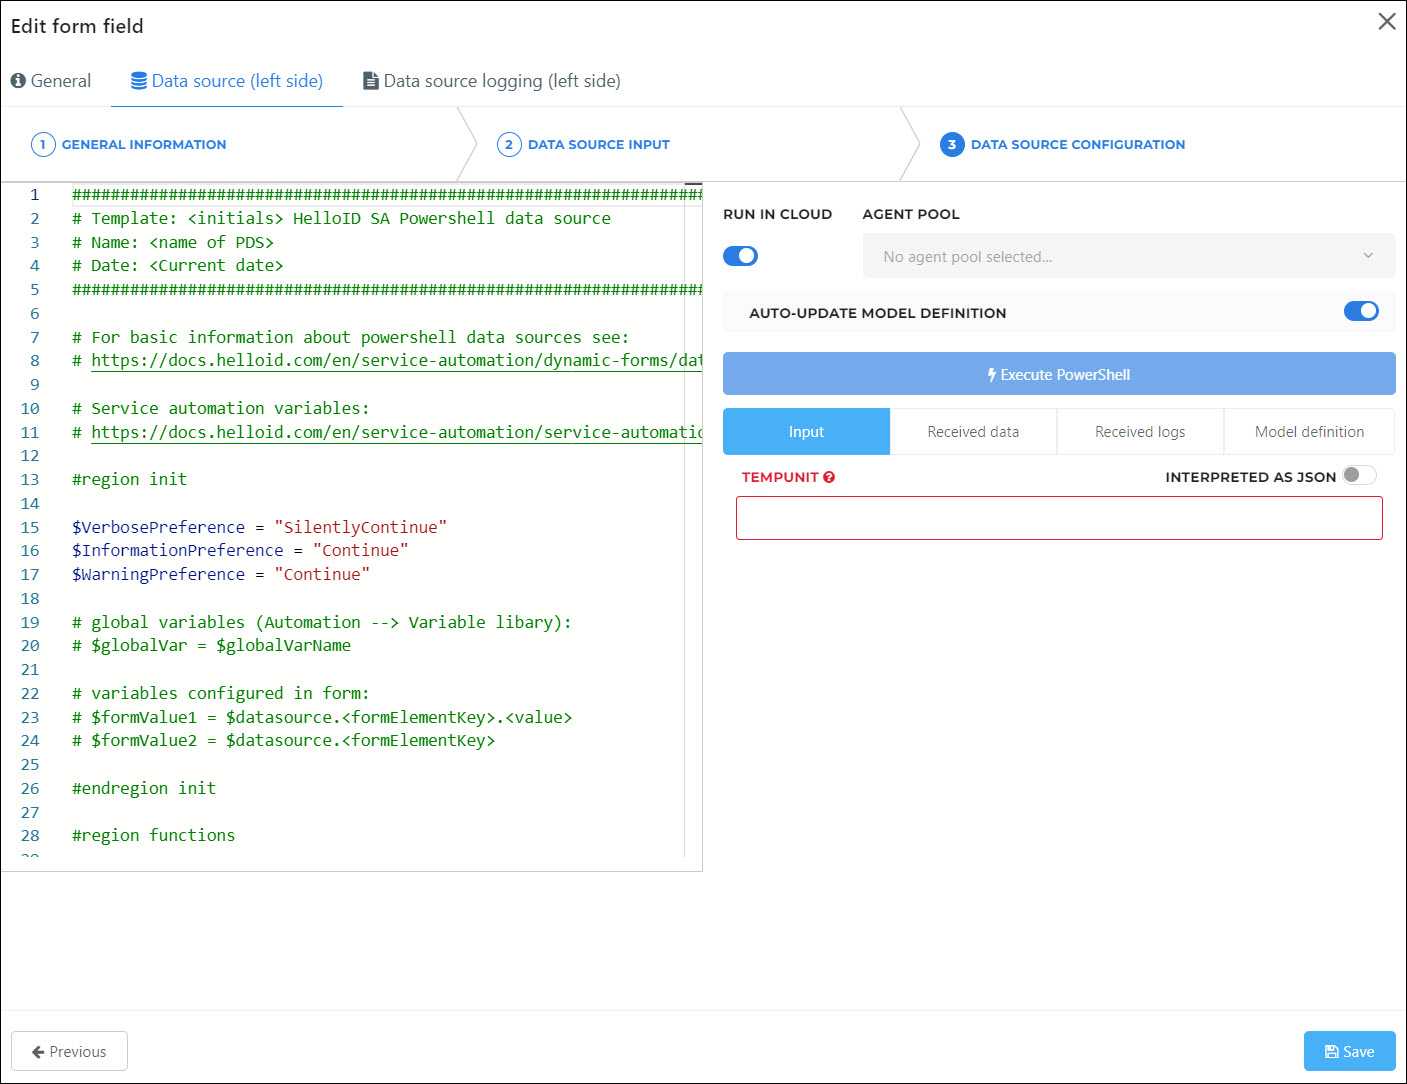
Click Set Default Script to populate the task with a default script template.
Tip
To start over at any time, delete all text from the script field. The Set Default Script button reappears.
The key points about the script template are as follows. Examples are shown later in this article.
Wrap your code in a try/catch block.
You can preview your PowerShell logs on the Received Logs tab. See Logging in PowerShell data sources.
You have access to $requester and $requestedFor, as well as all System variables and Custom variables. You also have access to variables defined on the Data Source Input page using their Keys, which lets you bind to values of other form elements. To do so, use the syntax
$datasource.<DataSourceInputKey>. Autocomplete is not currently supported.Use the Run In Cloud toggle to choose whether this script will run using the Cloud Service Automation Agent (enabled) or the On-premises Service Automation Agent (disabled).
You can preview your script's output on the Received Data tab.
You can manually define a data model for your script's output on the Model Definition tab. When the Auto-Update Model Definition toggle is enabled, this is not usually necessary.
The Input tab lets you specify test values for variables that you declared on the Data Source Input tab. Enable the Interpreted As JSON toggle if the input value is in JSON format.
PowerShell data source scripts must return one or multiple hashtables via the Write-Output cmdlet, depending on the type of form element it's connected to. See Return results in PowerShell data sources.
Customize the script according to what should be populated into the connected form element. For example, fetch data from an external system using an API call.
For this example, we will simply show a few important variables in action. We'll use the following script:
#######################################################################
# Template: HelloID SA Powershell data source
# Name: Weather report PowerShell datasource
# Date: 8.7.2023
#######################################################################

#region init

$VerbosePreference = "SilentlyContinue"
$InformationPreference = "Continue"
$WarningPreference = "Continue"

# global variables (Automation --> Variable library):
$globalVarExample = $companyName

# variables configured in form:
$formVarExample = $datasource.tempunit.tempUnitLabel

# Other SA variables
$requesterVarExample = $requester.userName

#endregion init

#region functions

Function Get-Test-Values {
	return $myObject = @(
		@{
			label = "Global variable"
			value = "$globalVarExample"
		}
		@{
			label = "Form variable"
			value = "$formVarExample"
		}
		@{
			label = "SA variable"
			value = "$requesterVarExample"
		}
	)
}

#endregion functions

#region lookup
try {
    Write-Information "Querying data"

    $result = Get-Test-Values

    Write-Output $result
} catch {
    $ex = $PSItem
    Write-Verbose "Error at Line '$($ex.InvocationInfo.ScriptLineNumber)': $($ex.InvocationInfo.Line). Error: $($ex.Exception.Message)"

    Write-Error "Error querying data. Error Message: $($_ex.Exception.Message)"
}
#endregion lookup
In order to test your script, enter test values for any input variables you declared on the Data Source Input tab. If the variable type is an object, enable the Interpreted As JSON toggle first.
For this example, we'll enable the Interpreted As JSON toggle for the
tempUnitinput variable, and manually enter the following simulated form input. (In production, this value will come from the dropdown form element on Step 1 of the form, via$datasource.tempunit.tempUnitLabel.){ "tempUnitLabel": "Celsius", "tempUnitValue": "celsius" }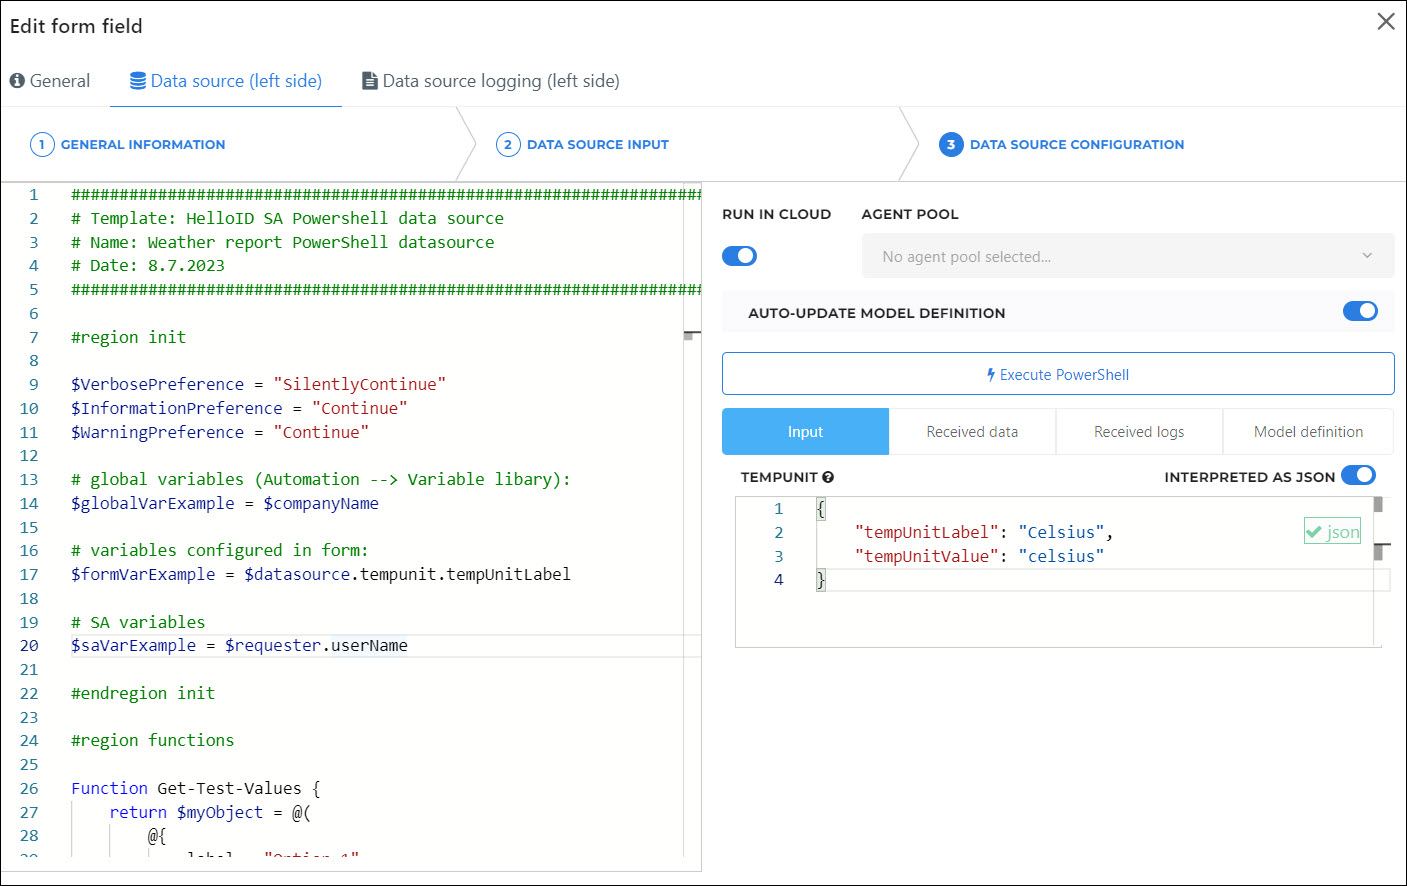
Tip
To generate test JSON based on a form, Generate test JSON.
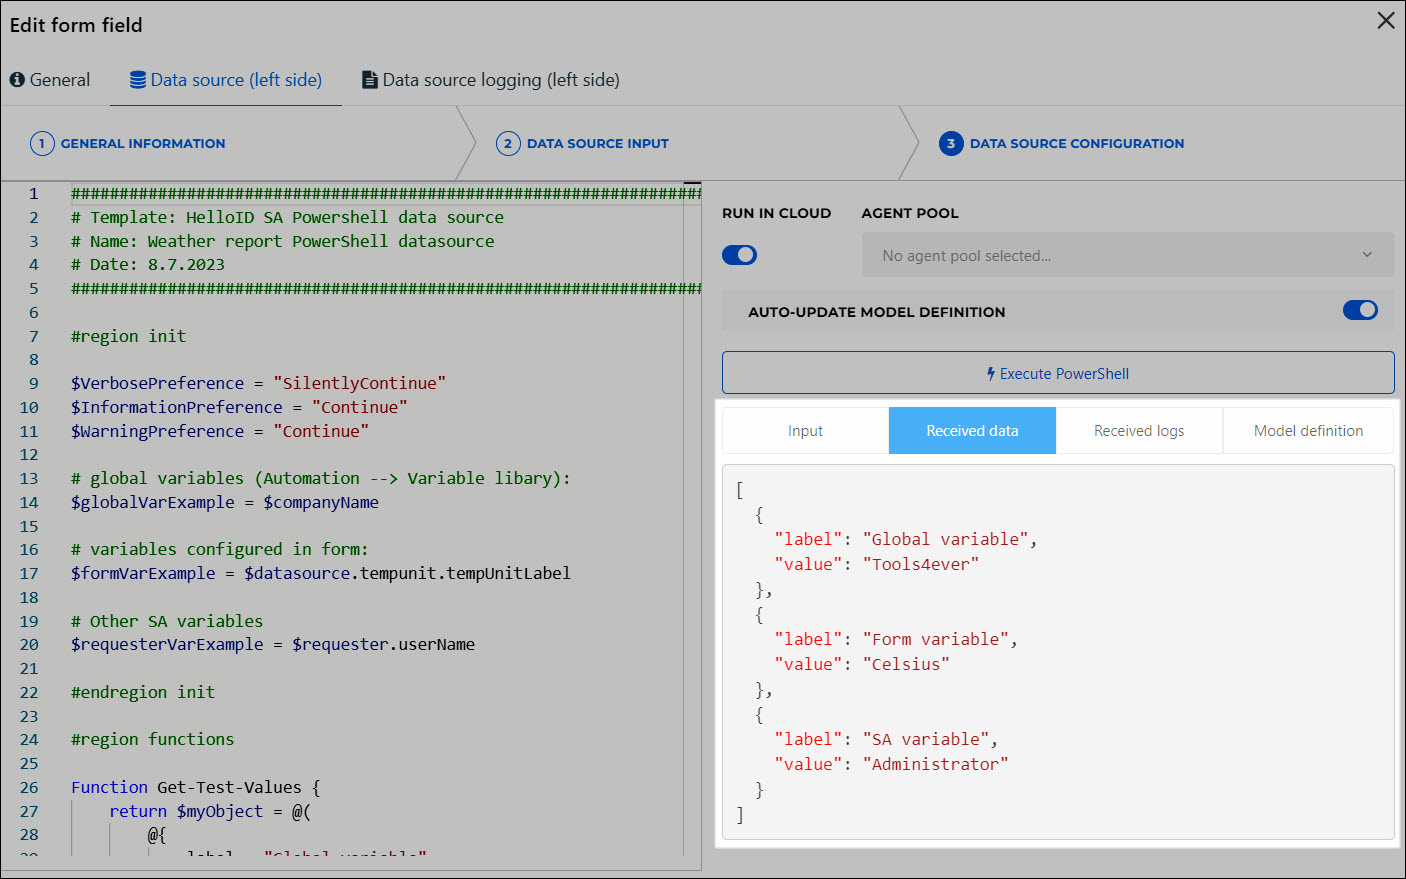
Click Execute PowerShell to test your script.
Go to the Received Data tab to view the output of the test run.
For this example, our example variables have been resolved and passed back to HelloID.
Click Save. HelloID takes us back to the Edit Form Field dialog.
Now, we can feed the outputs of other form elements into the input variables of our PowerShell data source, by enabling their Use Value From Other Field toggle(s).
For this example, we'll feed the
Temperature unitdropdown element into thetempUnitinput variable.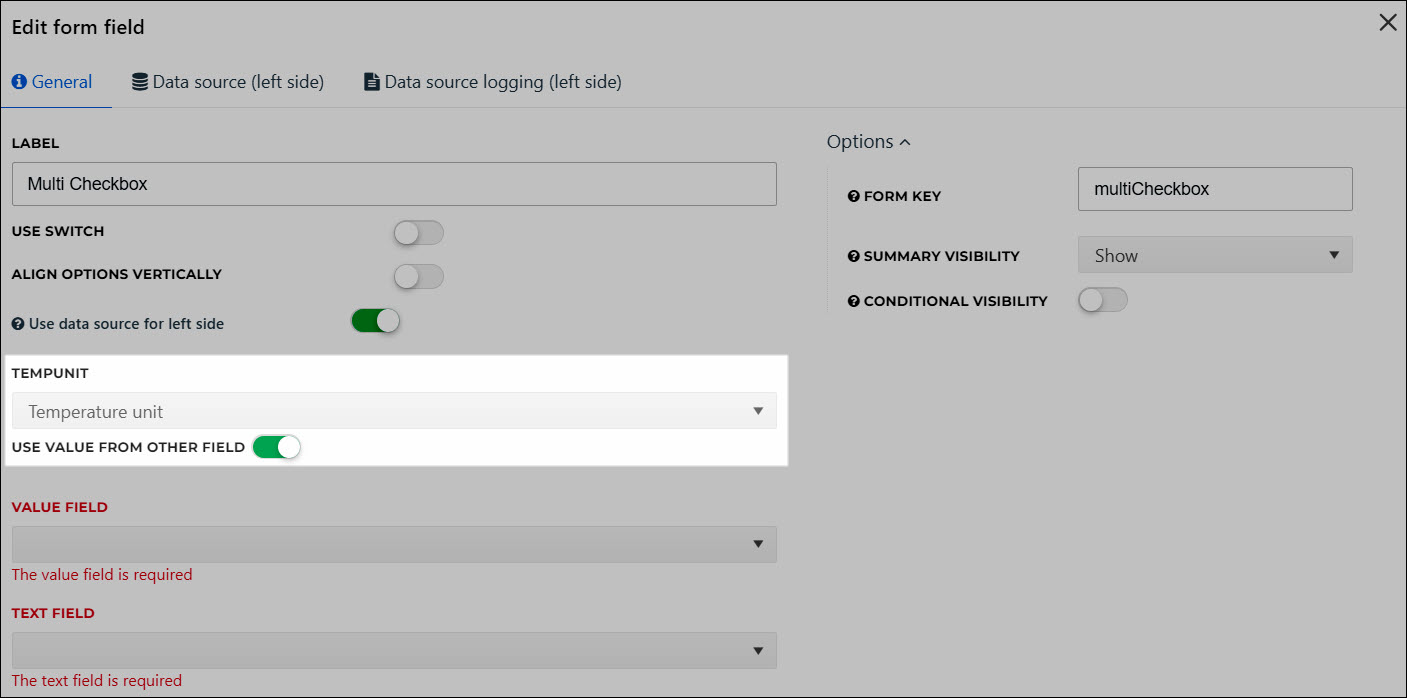
Finally, we need to choose which field from the data source's output model will be used for the form element's value, and which will be used for its display text.
For this example, we'll select
valuefor the Value Field, andlabelfor the Text Field.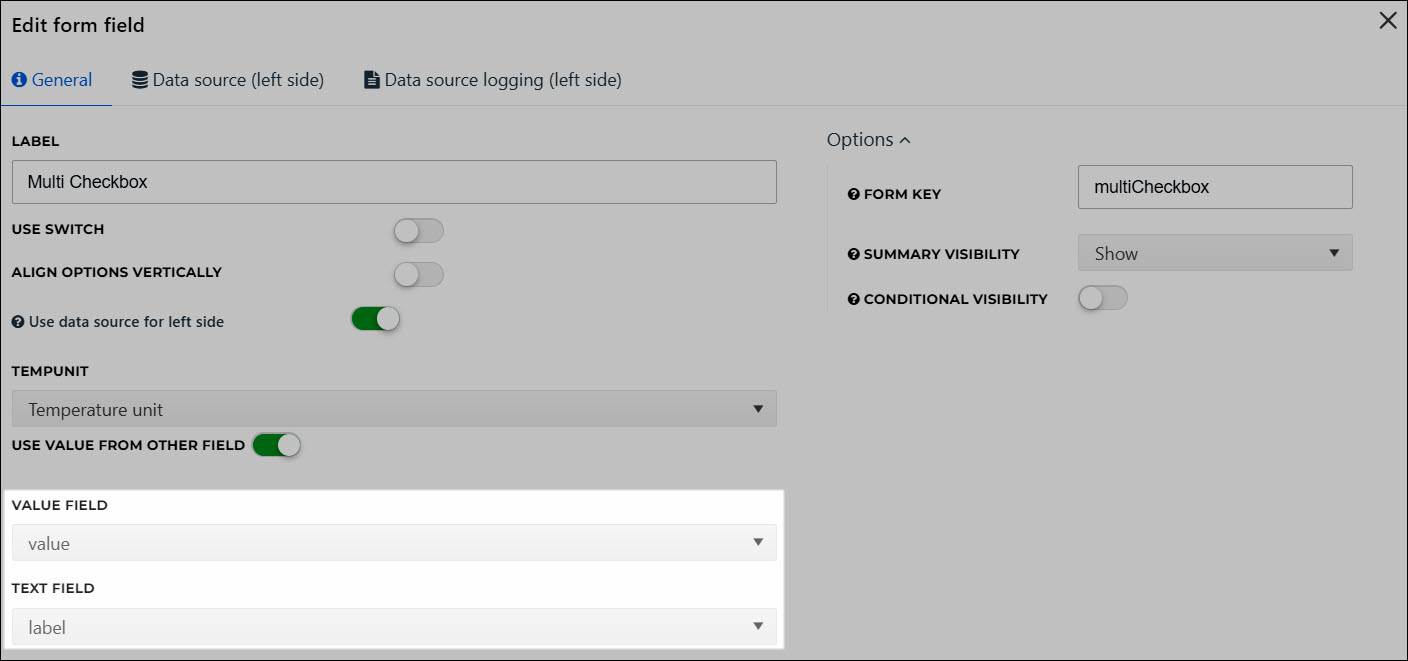
Click Update Field.
Click Save.
To view the results in production, View logs.
For the relevant dynamic form or delegated form, Edit a dynamic form or Edit a delegated form.
For the form element that contains the data source, click
Edit Form Element.Go to the Data Source tab.
Continue by following the instructions in Add a PowerShell data source.
Go to Self Service > Data Sources.
For the relevant data source, click Delete.
To confirm, click Delete.