Add, edit, or remove an identity provider (IdP)
For more information, see Identity providers (IdPs).
Add an identity provider (IdP)
To continue, select a tutorial below.
Important
An Active Directory Agent IdP is automatically created when you set up AD sync. Typically, it's not necessary to create one manually.
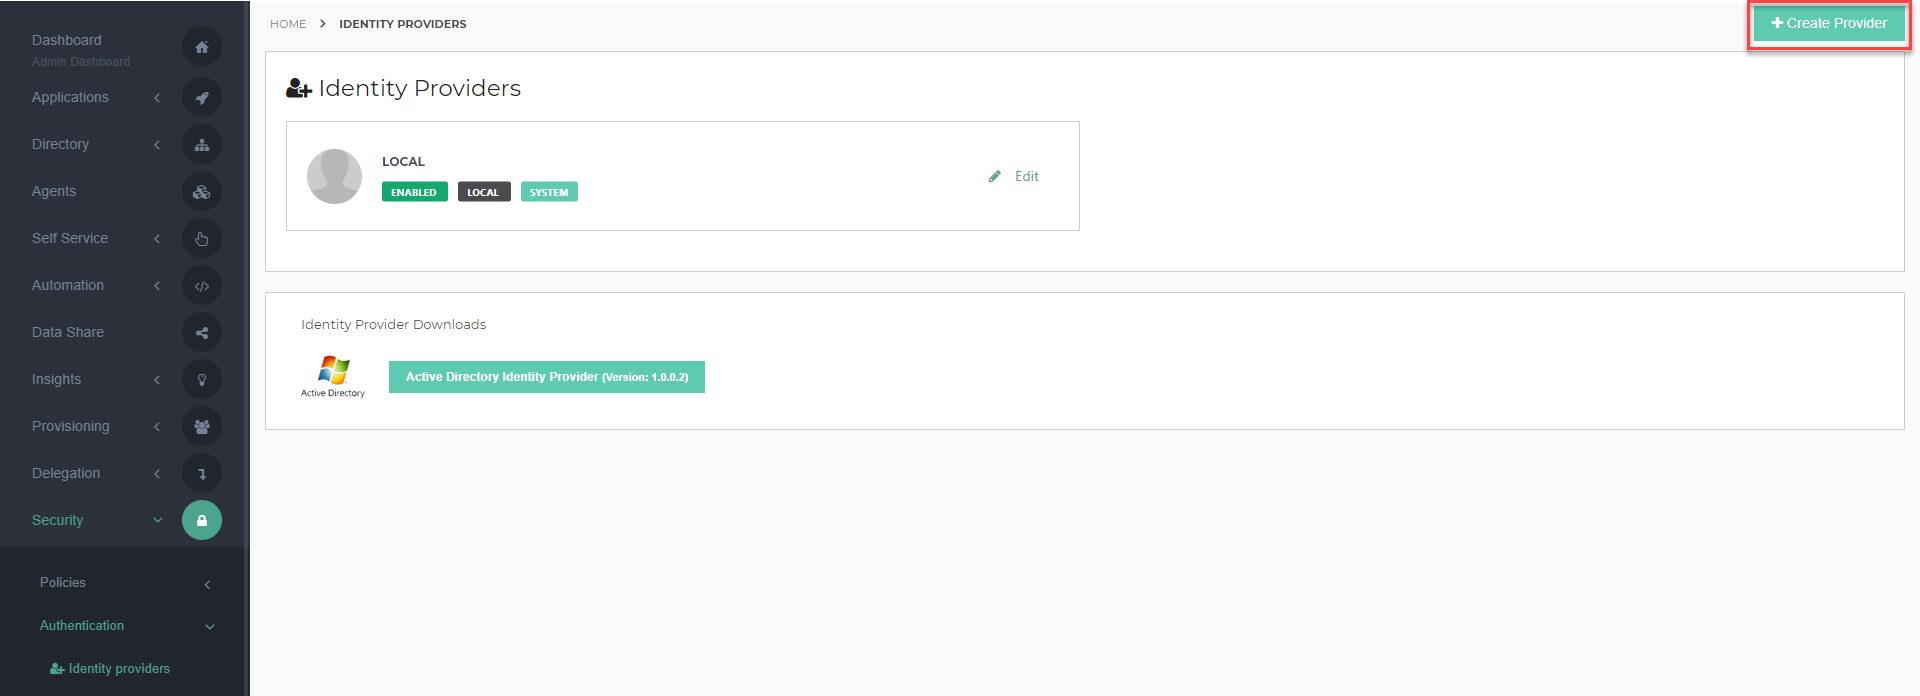
Go to Security > Authentication > Identity Providers.
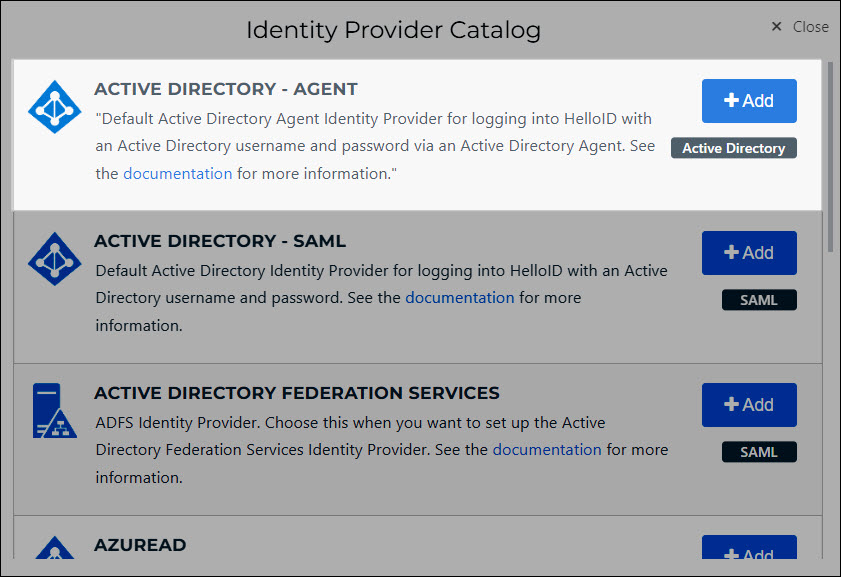
Click Create Provider.
For Active Directory - Agent, click Add.
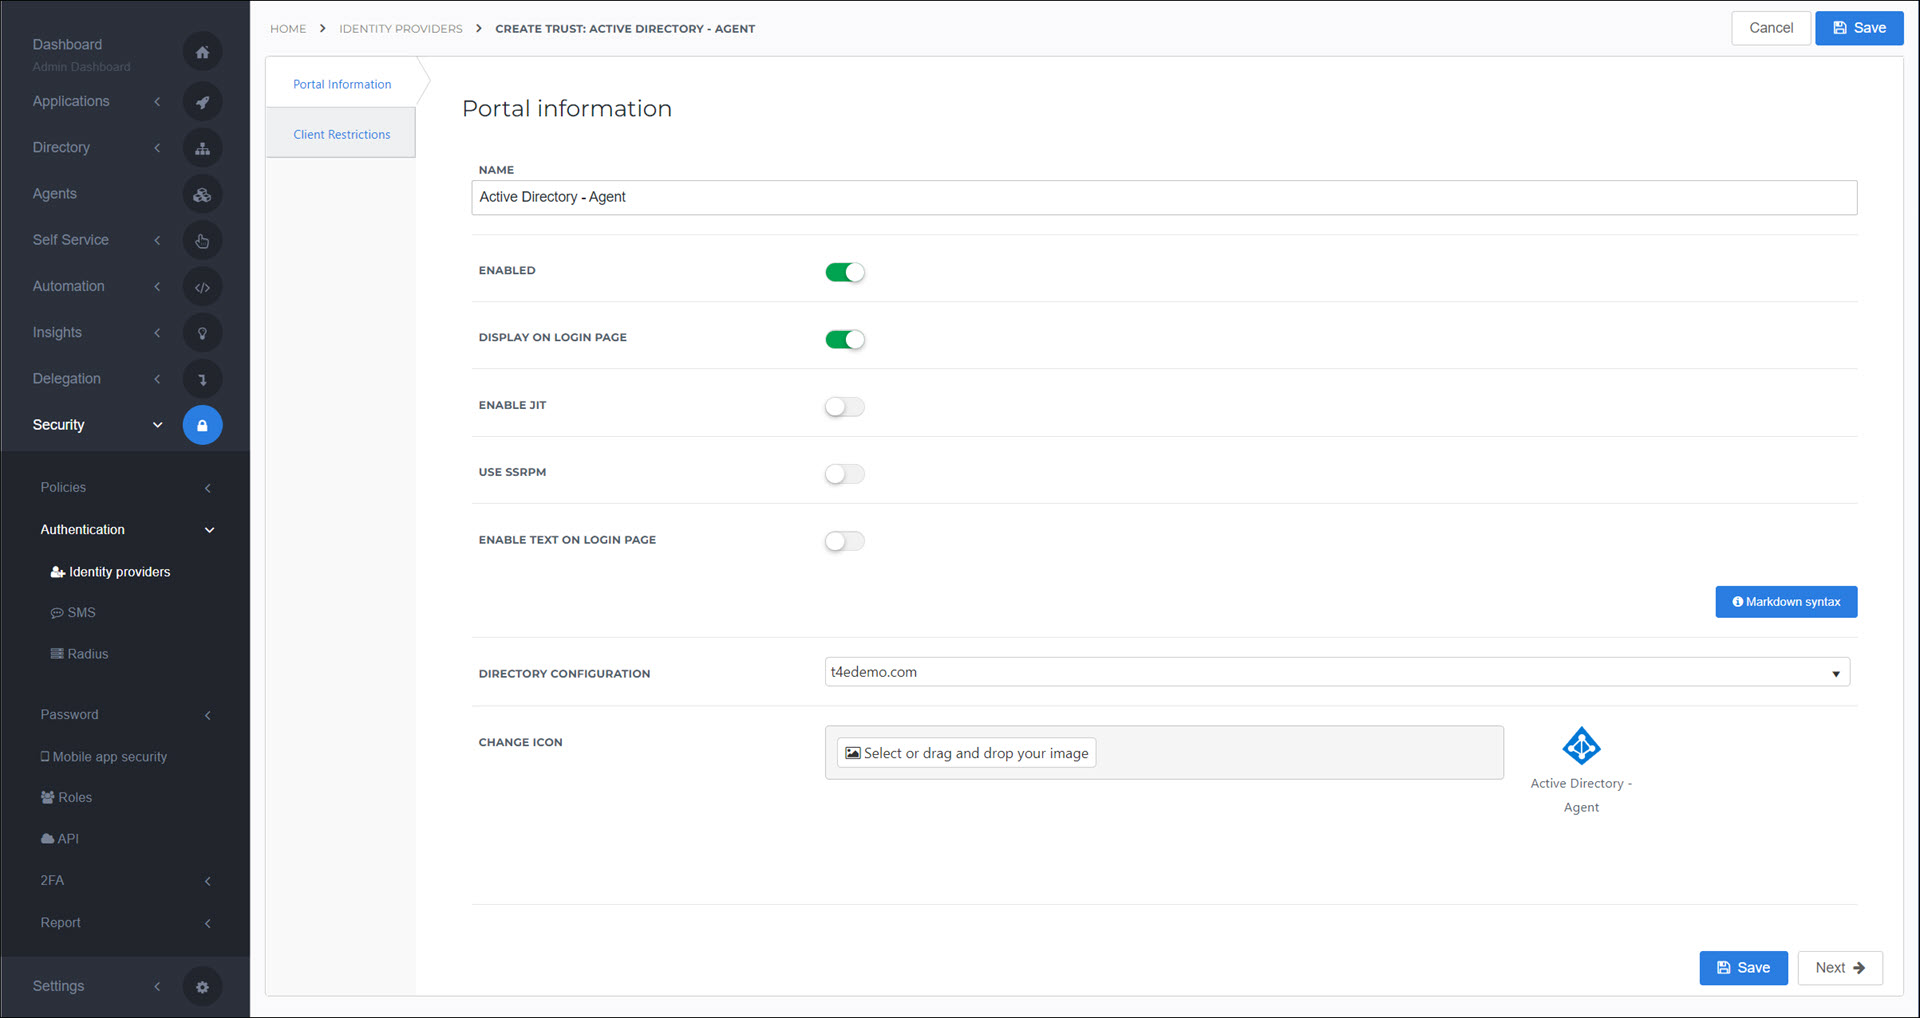
Required: Select the AD Directory Configuration to use with this IdP.
Optional: Enable JIT.
Optional: Enable SSRPM integration.
Optional: Enable login page welcome text.
Click Next.
Optional: Configure Show/hide IdPs (client restrictions).
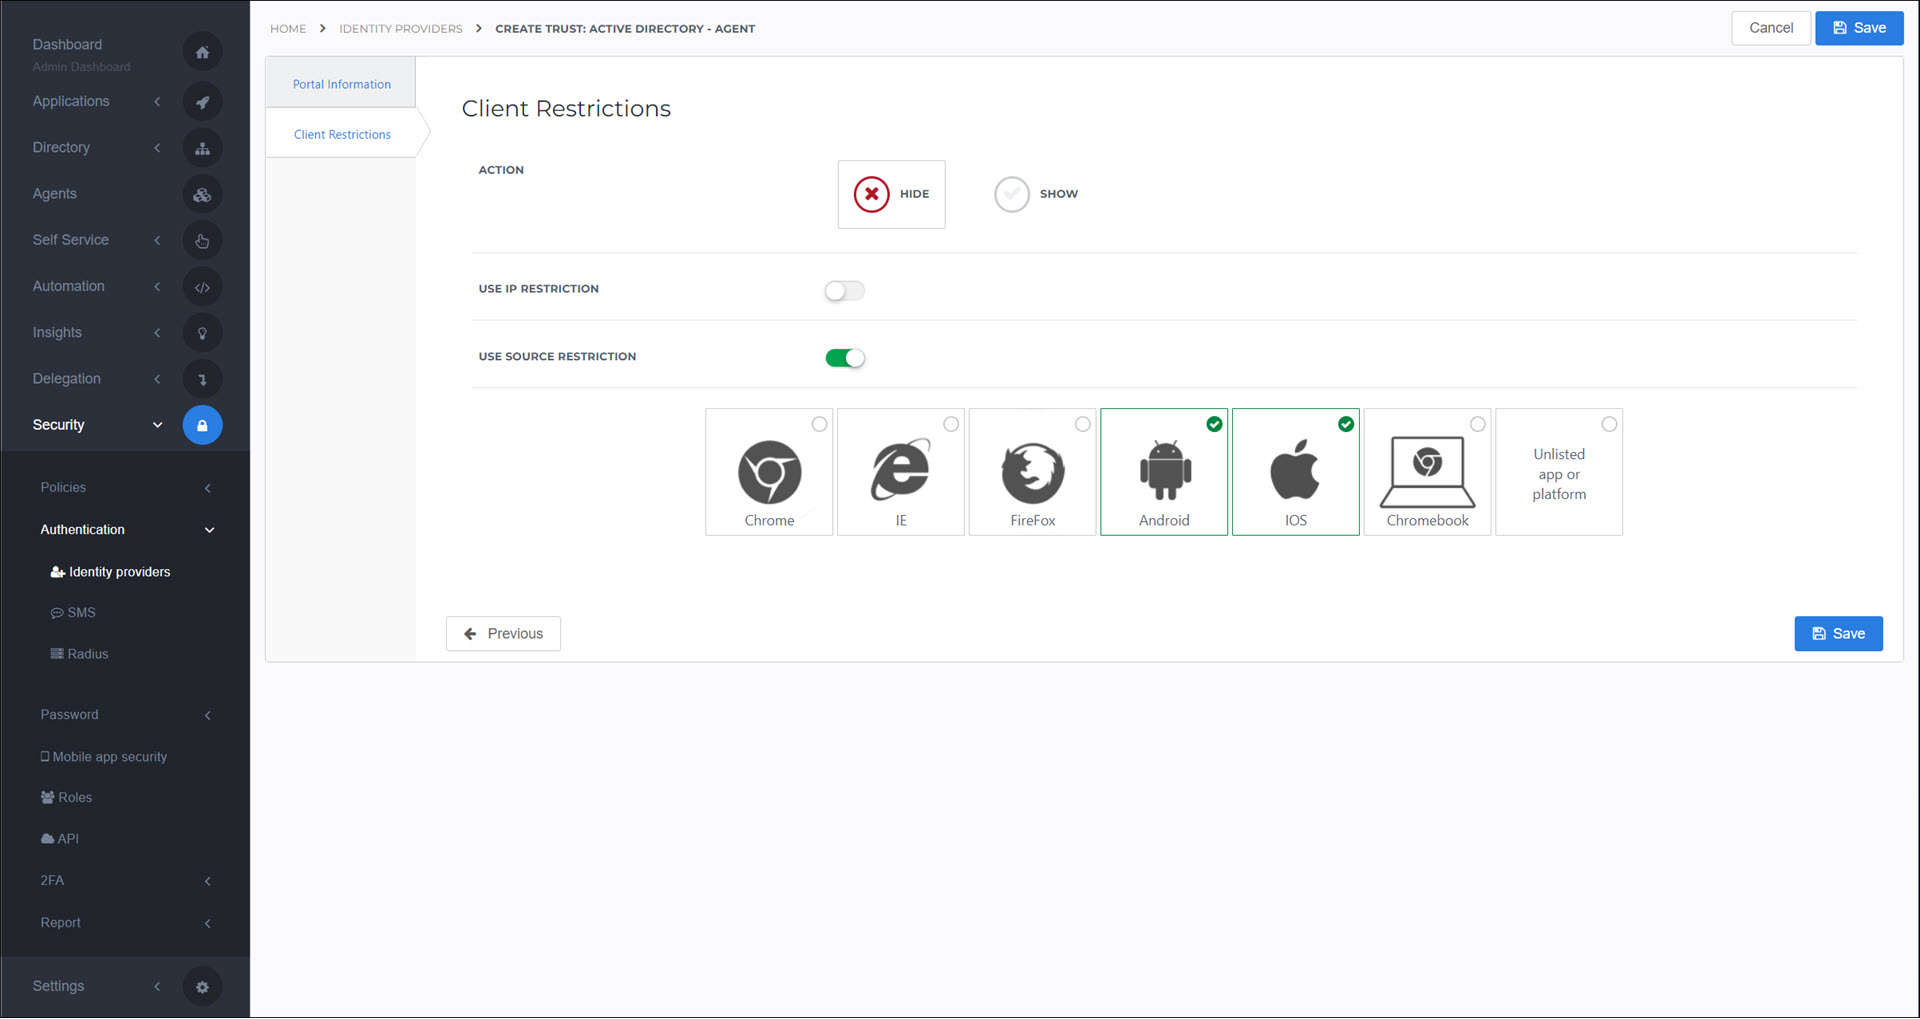
Click Save.
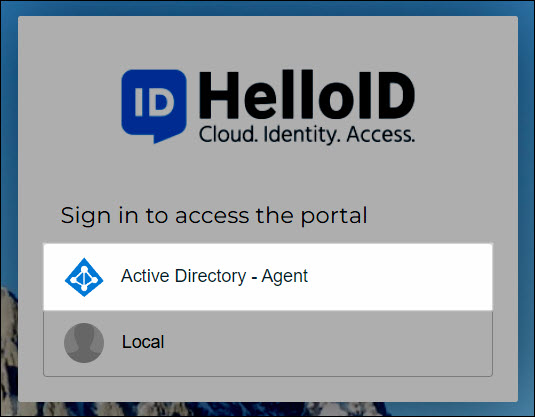
The IdP has been added.
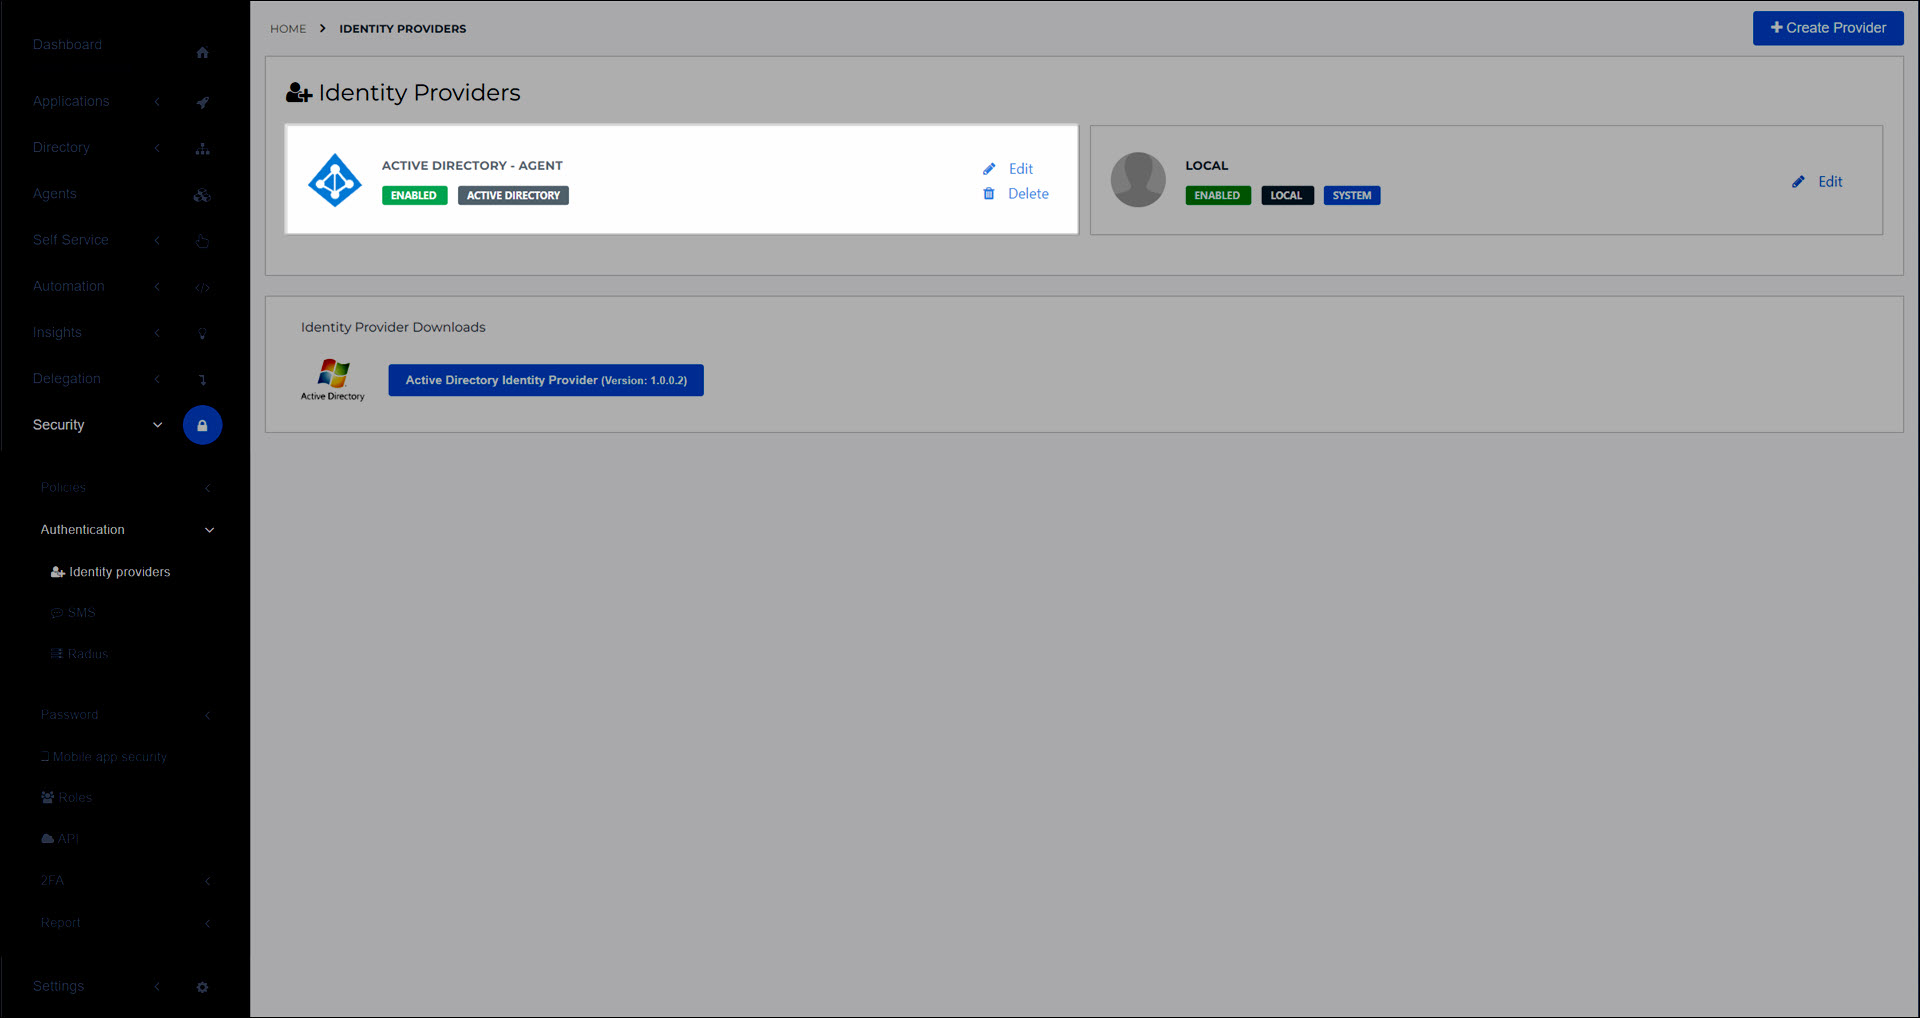
It is now available to users on the login screen:
Optional: Configure Portal access rules for this IdP.
Requirements
Introduction
If your organization doesn't use Active Directory Federation Services, HelloID offers a simple, free alternative IdP that runs on an IIS web server in your local domain. It provides automatic, pass-through SAML authentication to all workstations logged in to the domain via Windows Authentication.
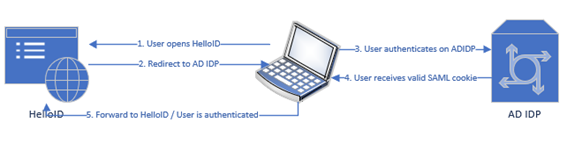
While using the HelloID Active Directory IdP, the HelloID Agent provides an alternative login method for users and devices outside the domain, while continuing to perform its normal synchronization tasks.
Install and Configure IIS
The HelloID Active Directory IdP requires an IIS web server to be configured and available to all client machines that will use it for authentication.
In this guide, the complete process for the installation of the Web Server Role is described. If you already have an IIS server set up, you may verify its installed features against those described in this section, and then move on to the installation of the IdP.
Open Server Manager.
Under the Manage menu, select Add Roles and Features.

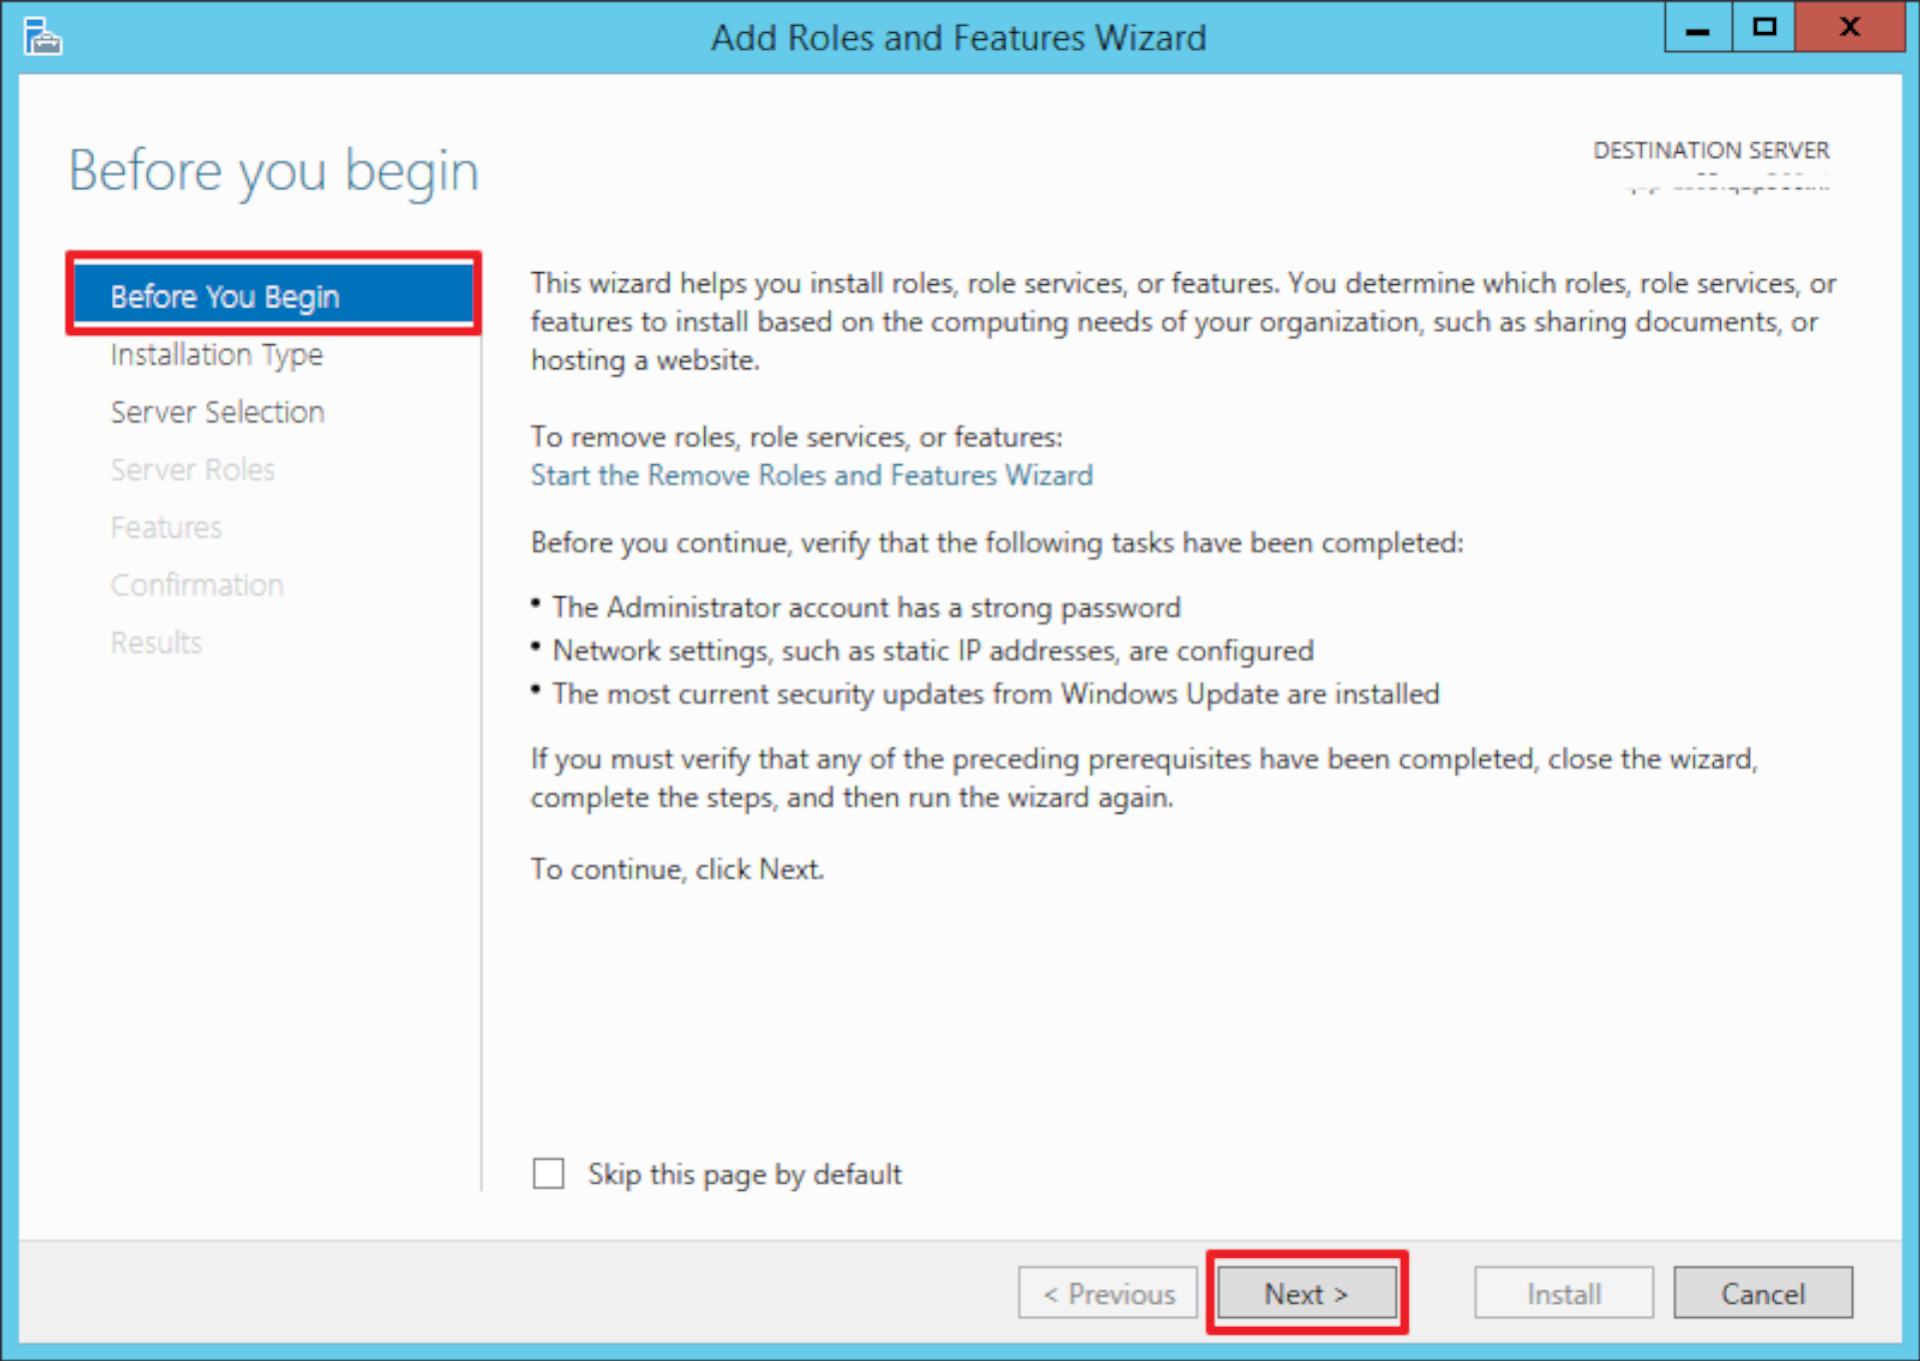
The Add Roles and Features Wizard will open. At Before You Begin, click Next.
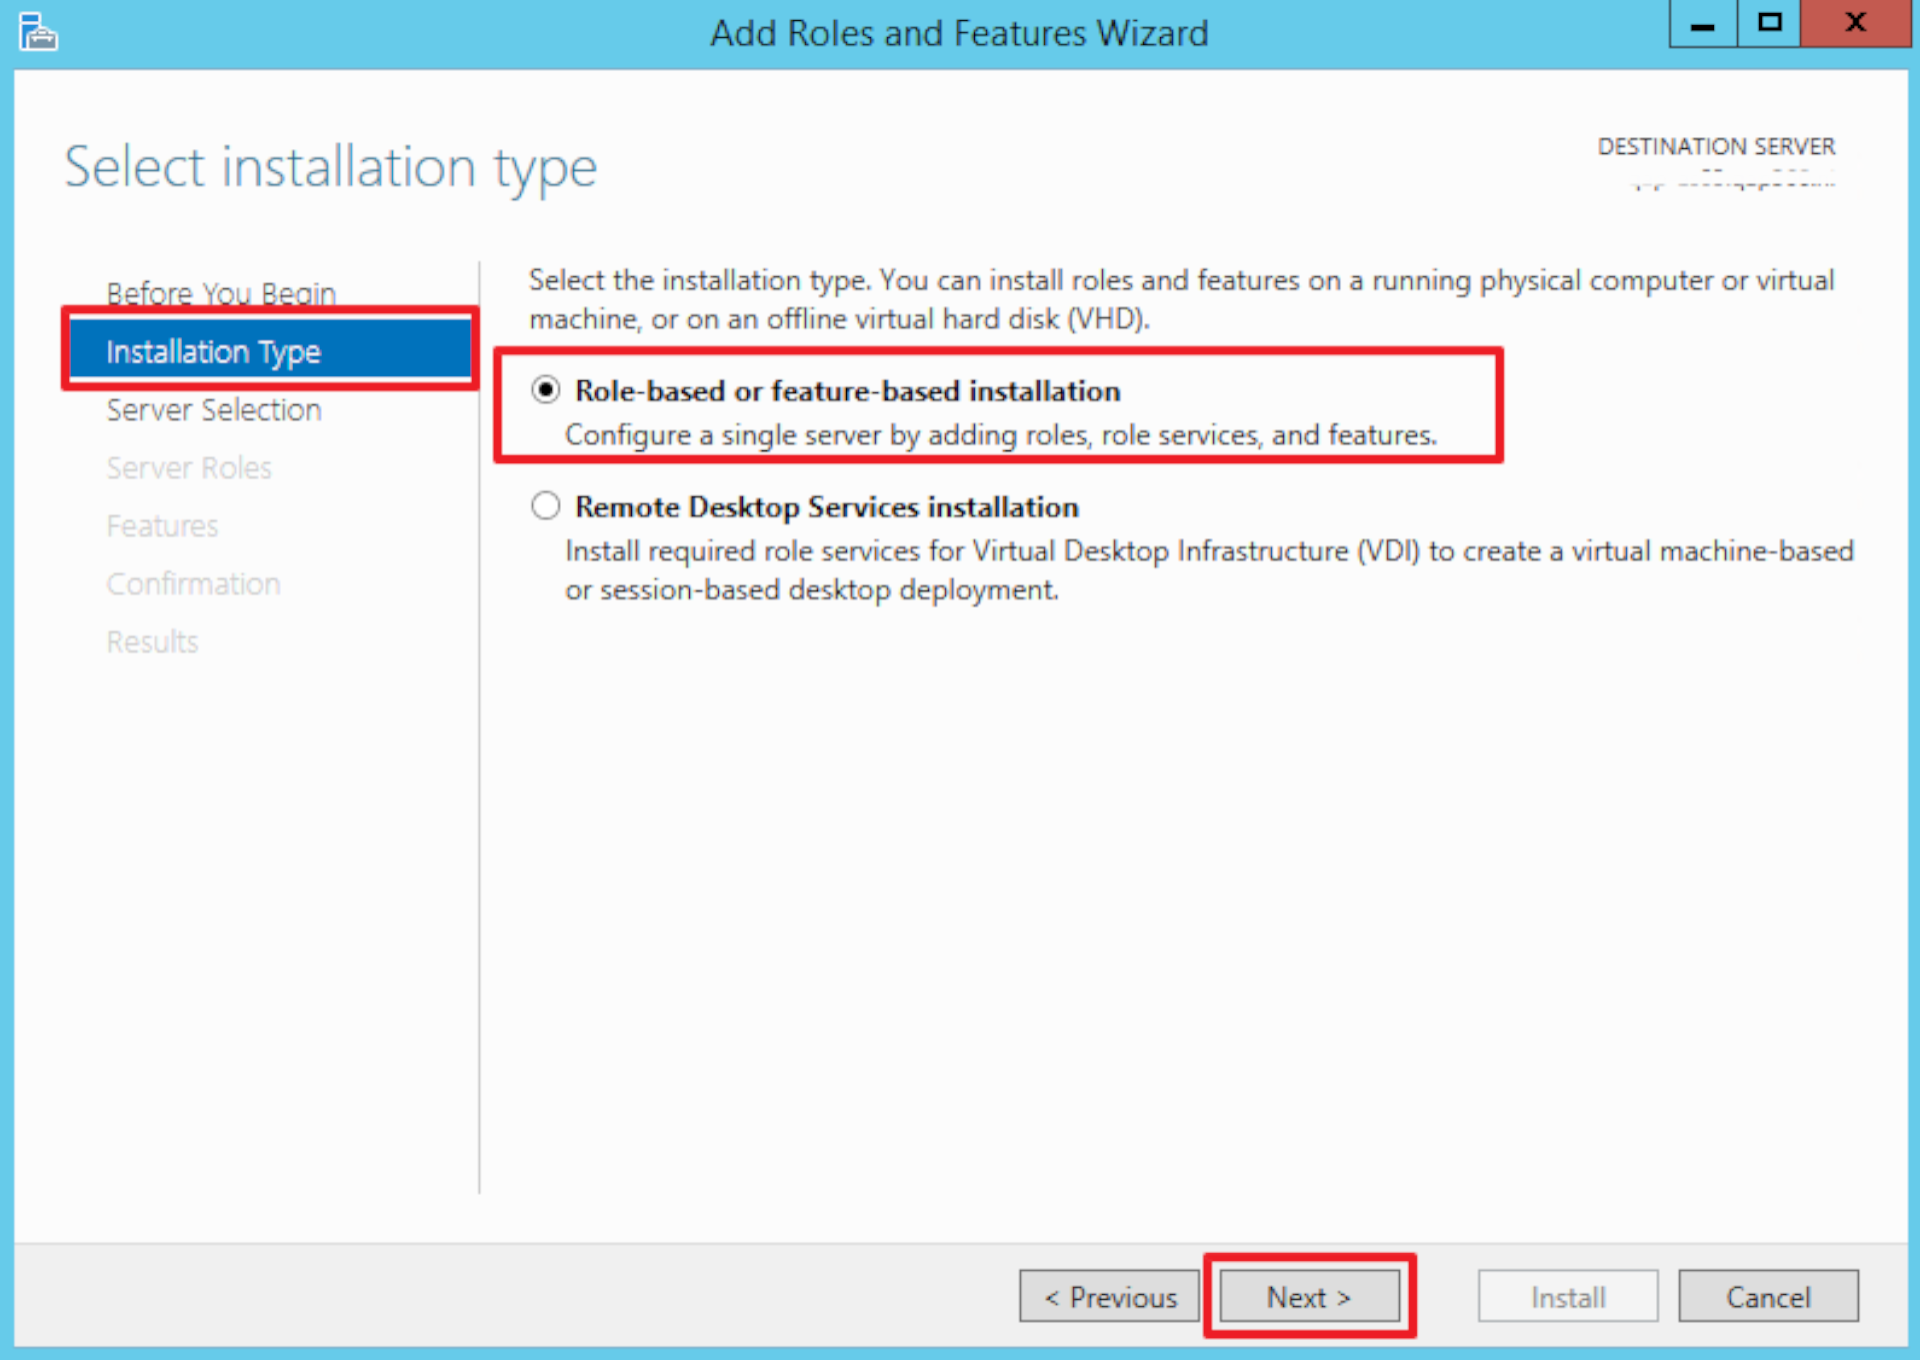
At Installation Type, select Role-based or feature-based installation and click Next.
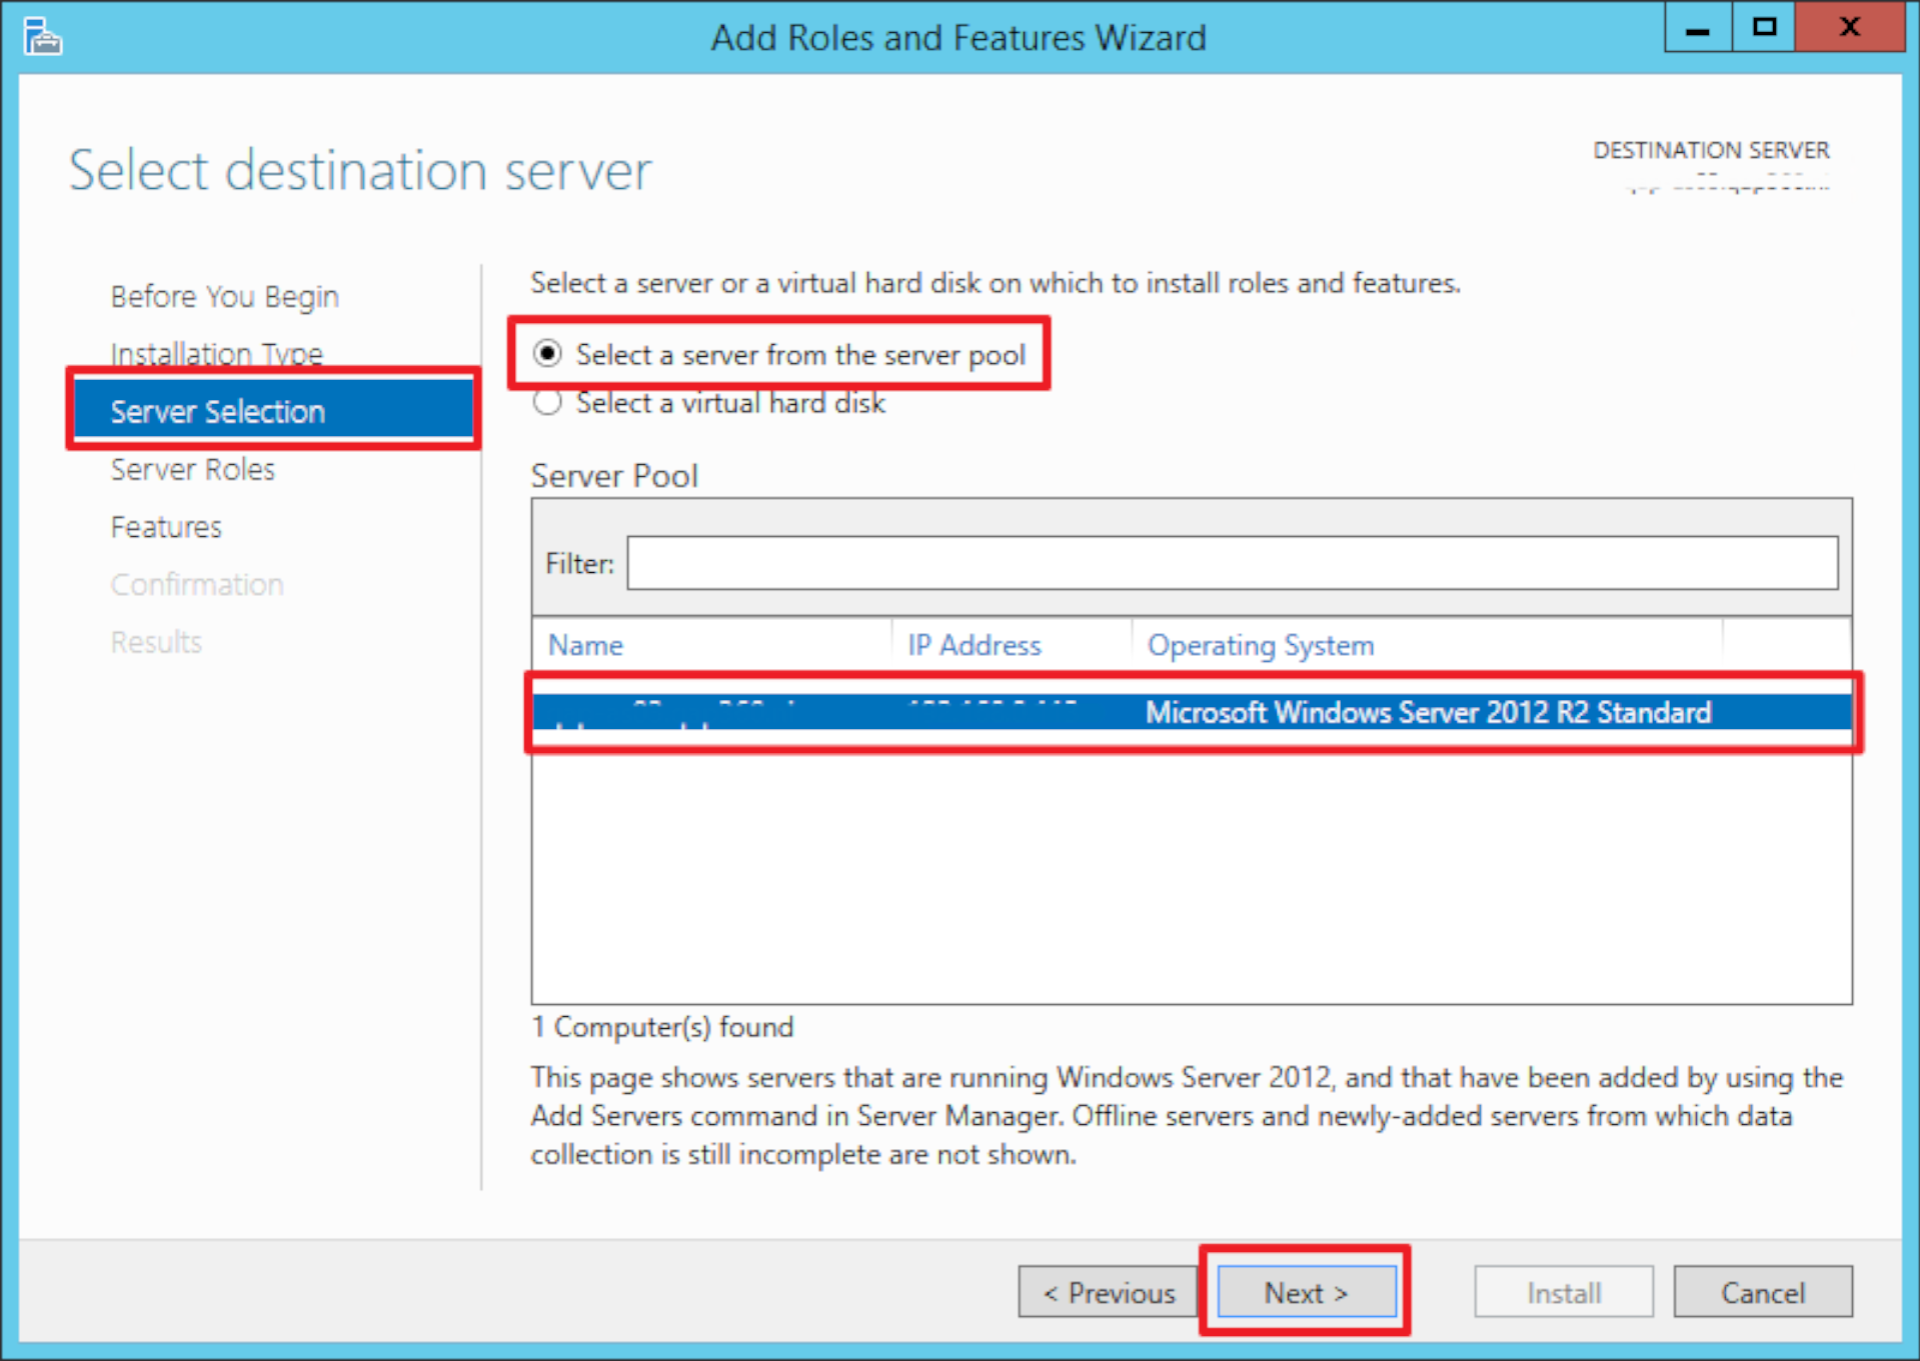
At Server Selection,click Select a server from the server pool, then select the server pool containing the server on which you want to install IIS, and click Next.
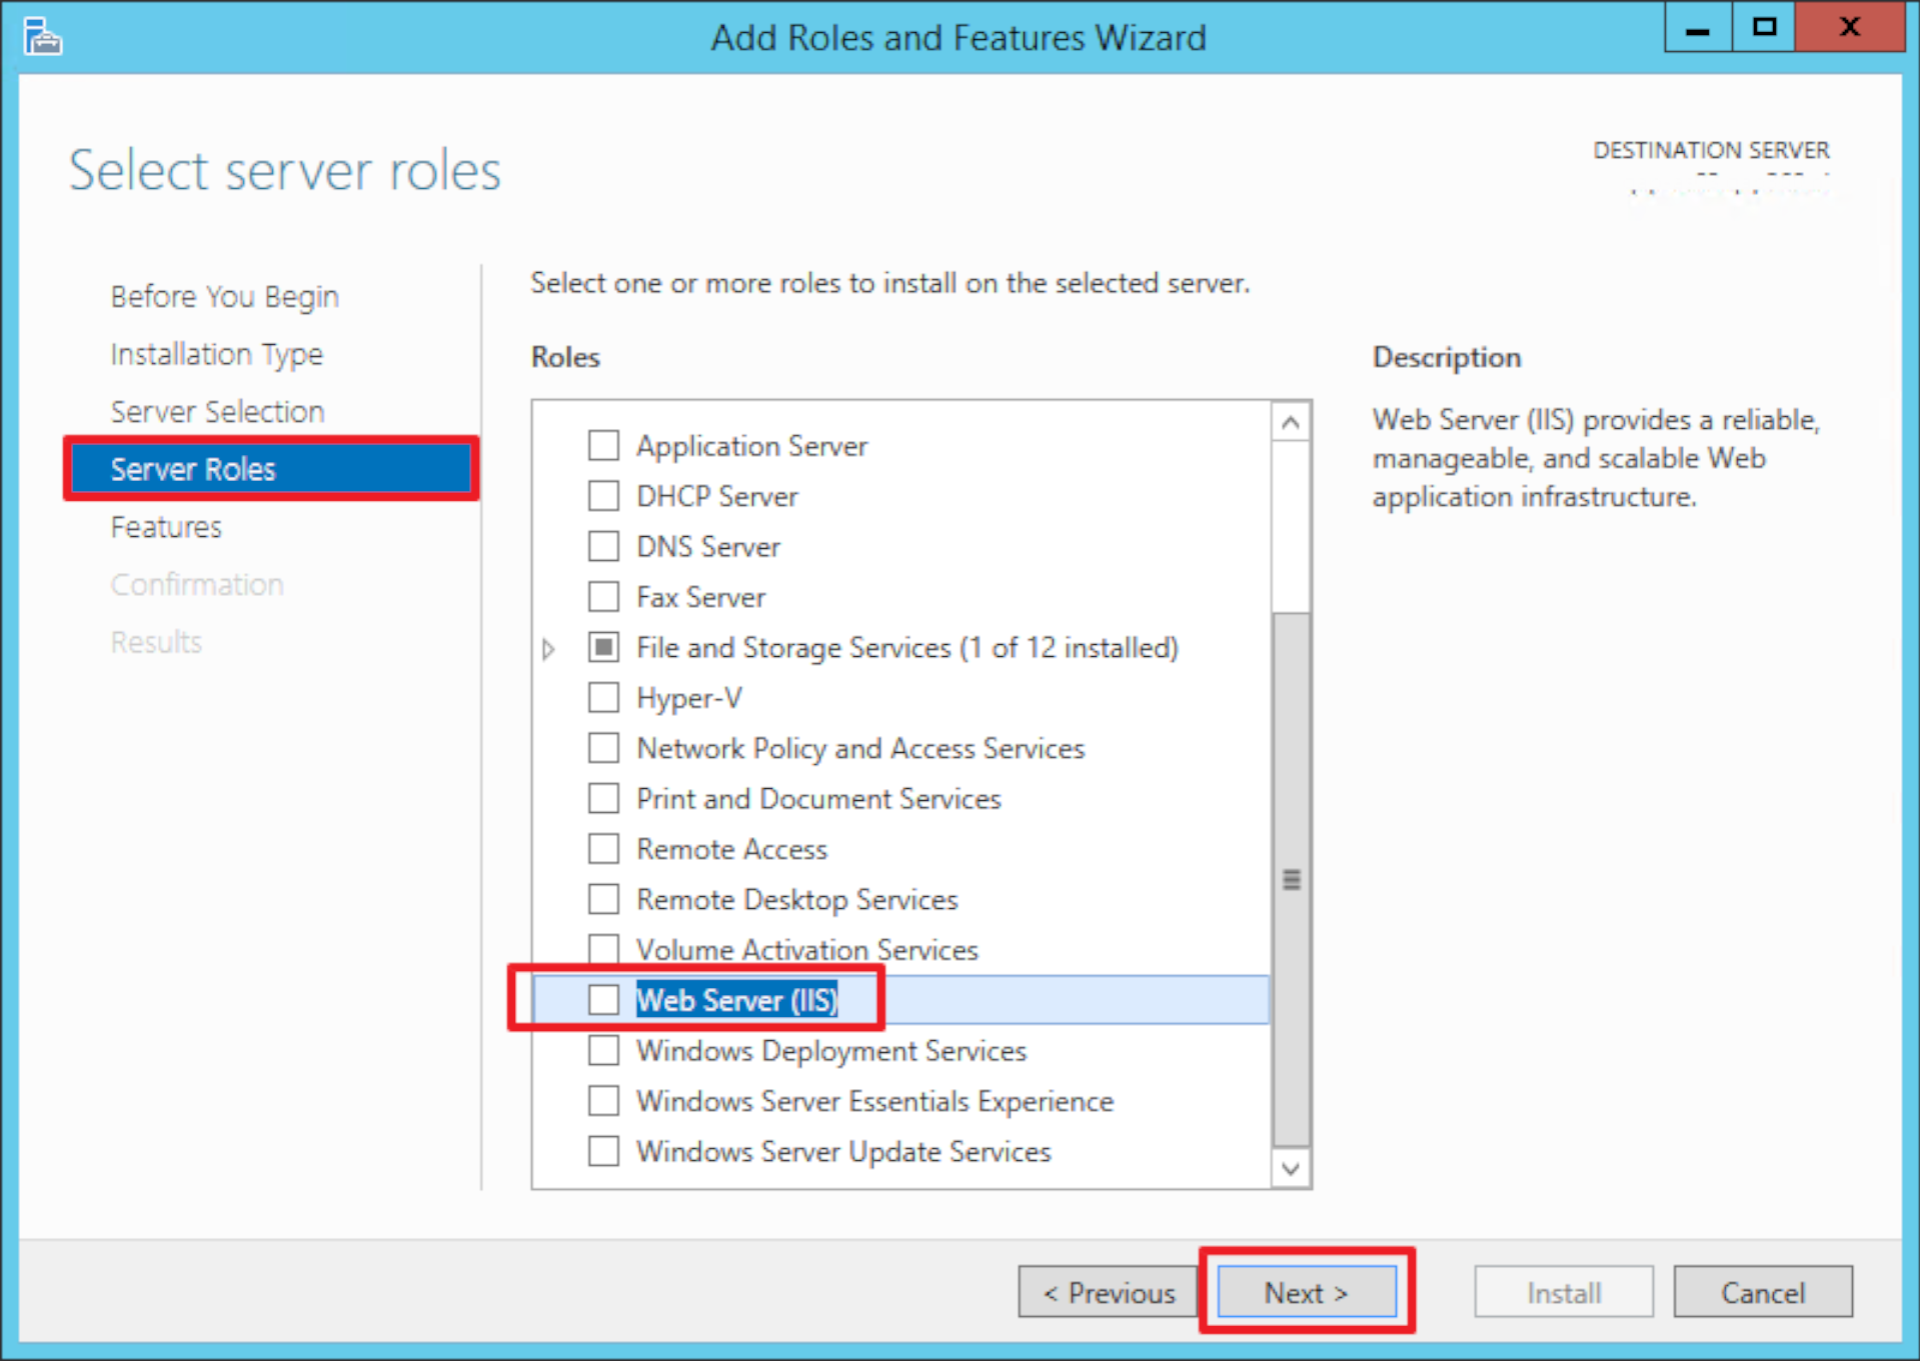
At Server Roles, select Web Server (IIS) and click Next.
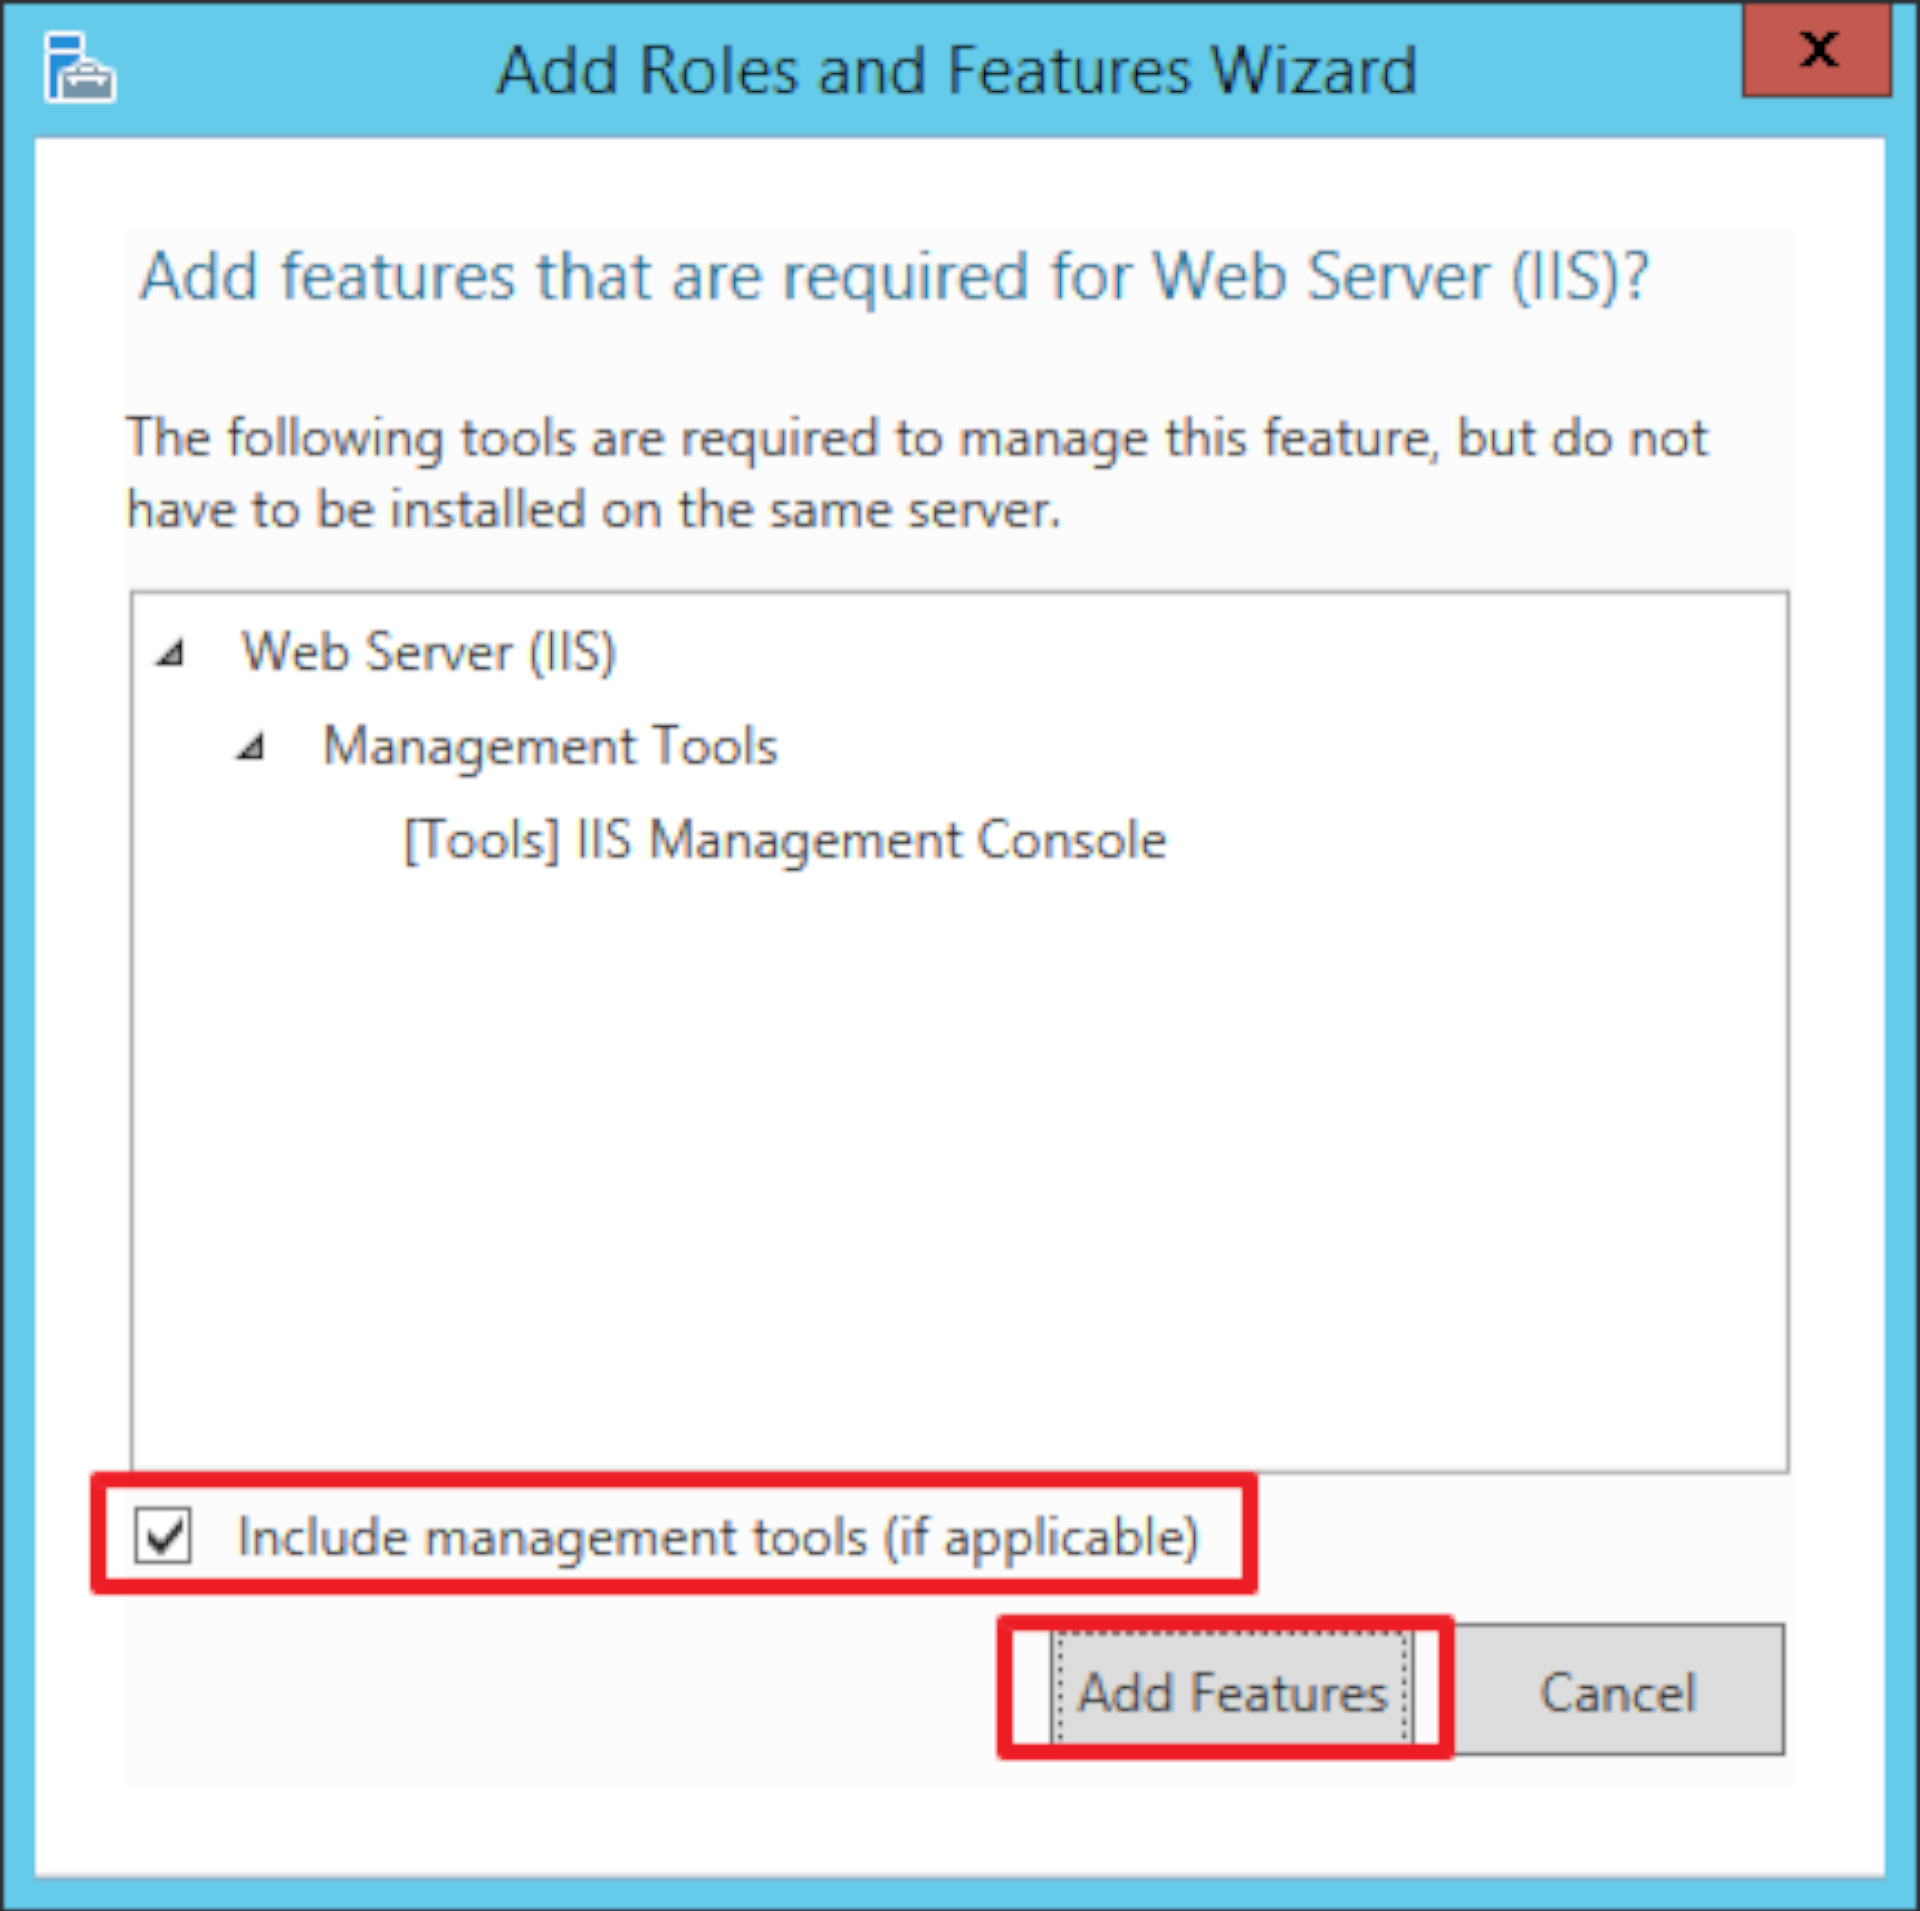
The Add features that are required for Web Server (IIS)? screen will open, verify that Include management tools (if applicable) is selected and click Add Features.
The previous windows will close. Verify that Web Server (IIS) is checked and click Next.
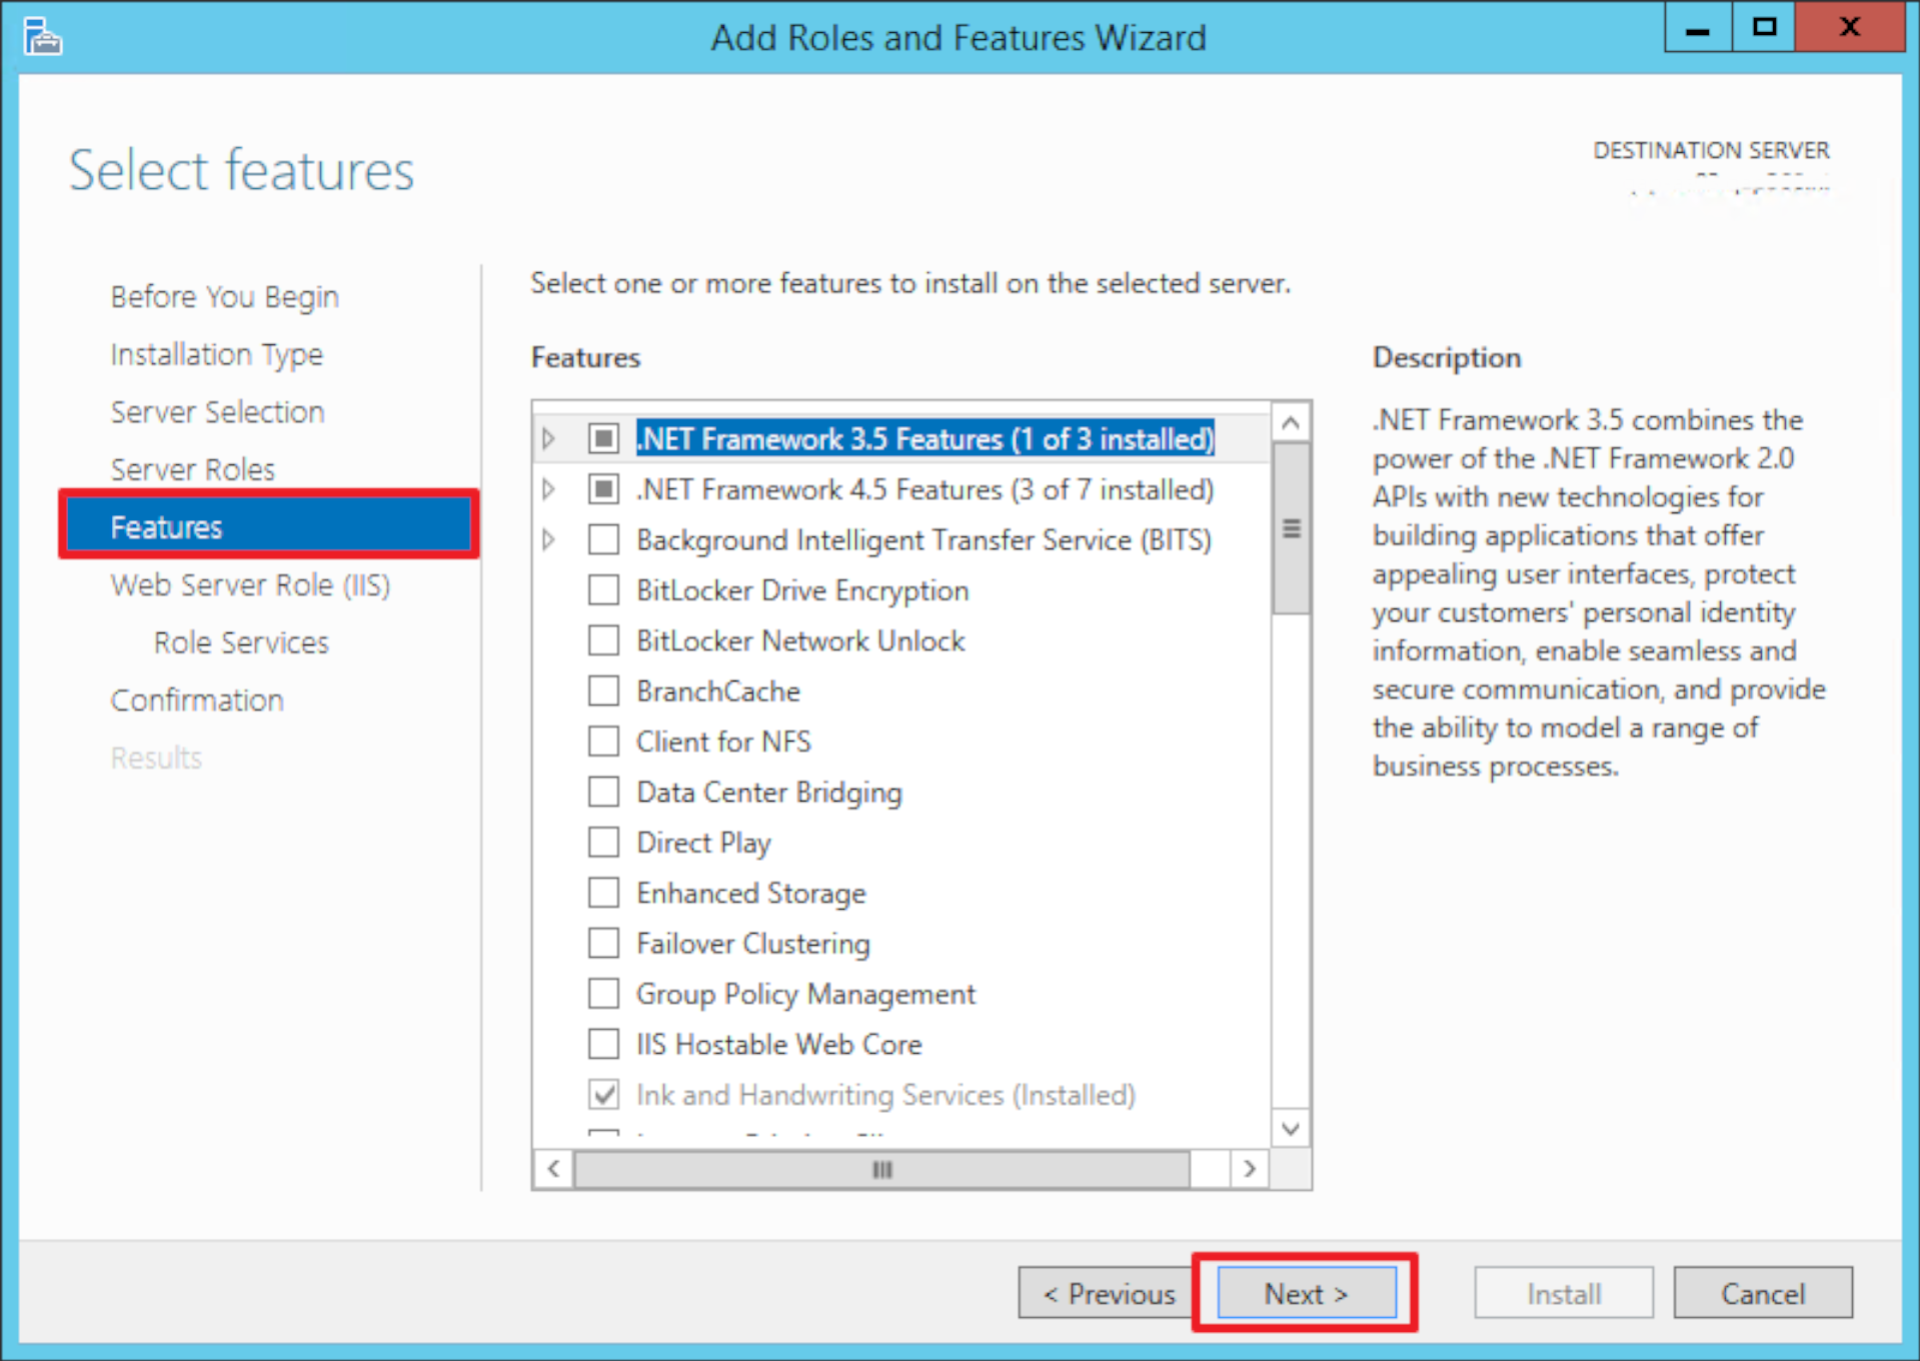
At Features, click Next.
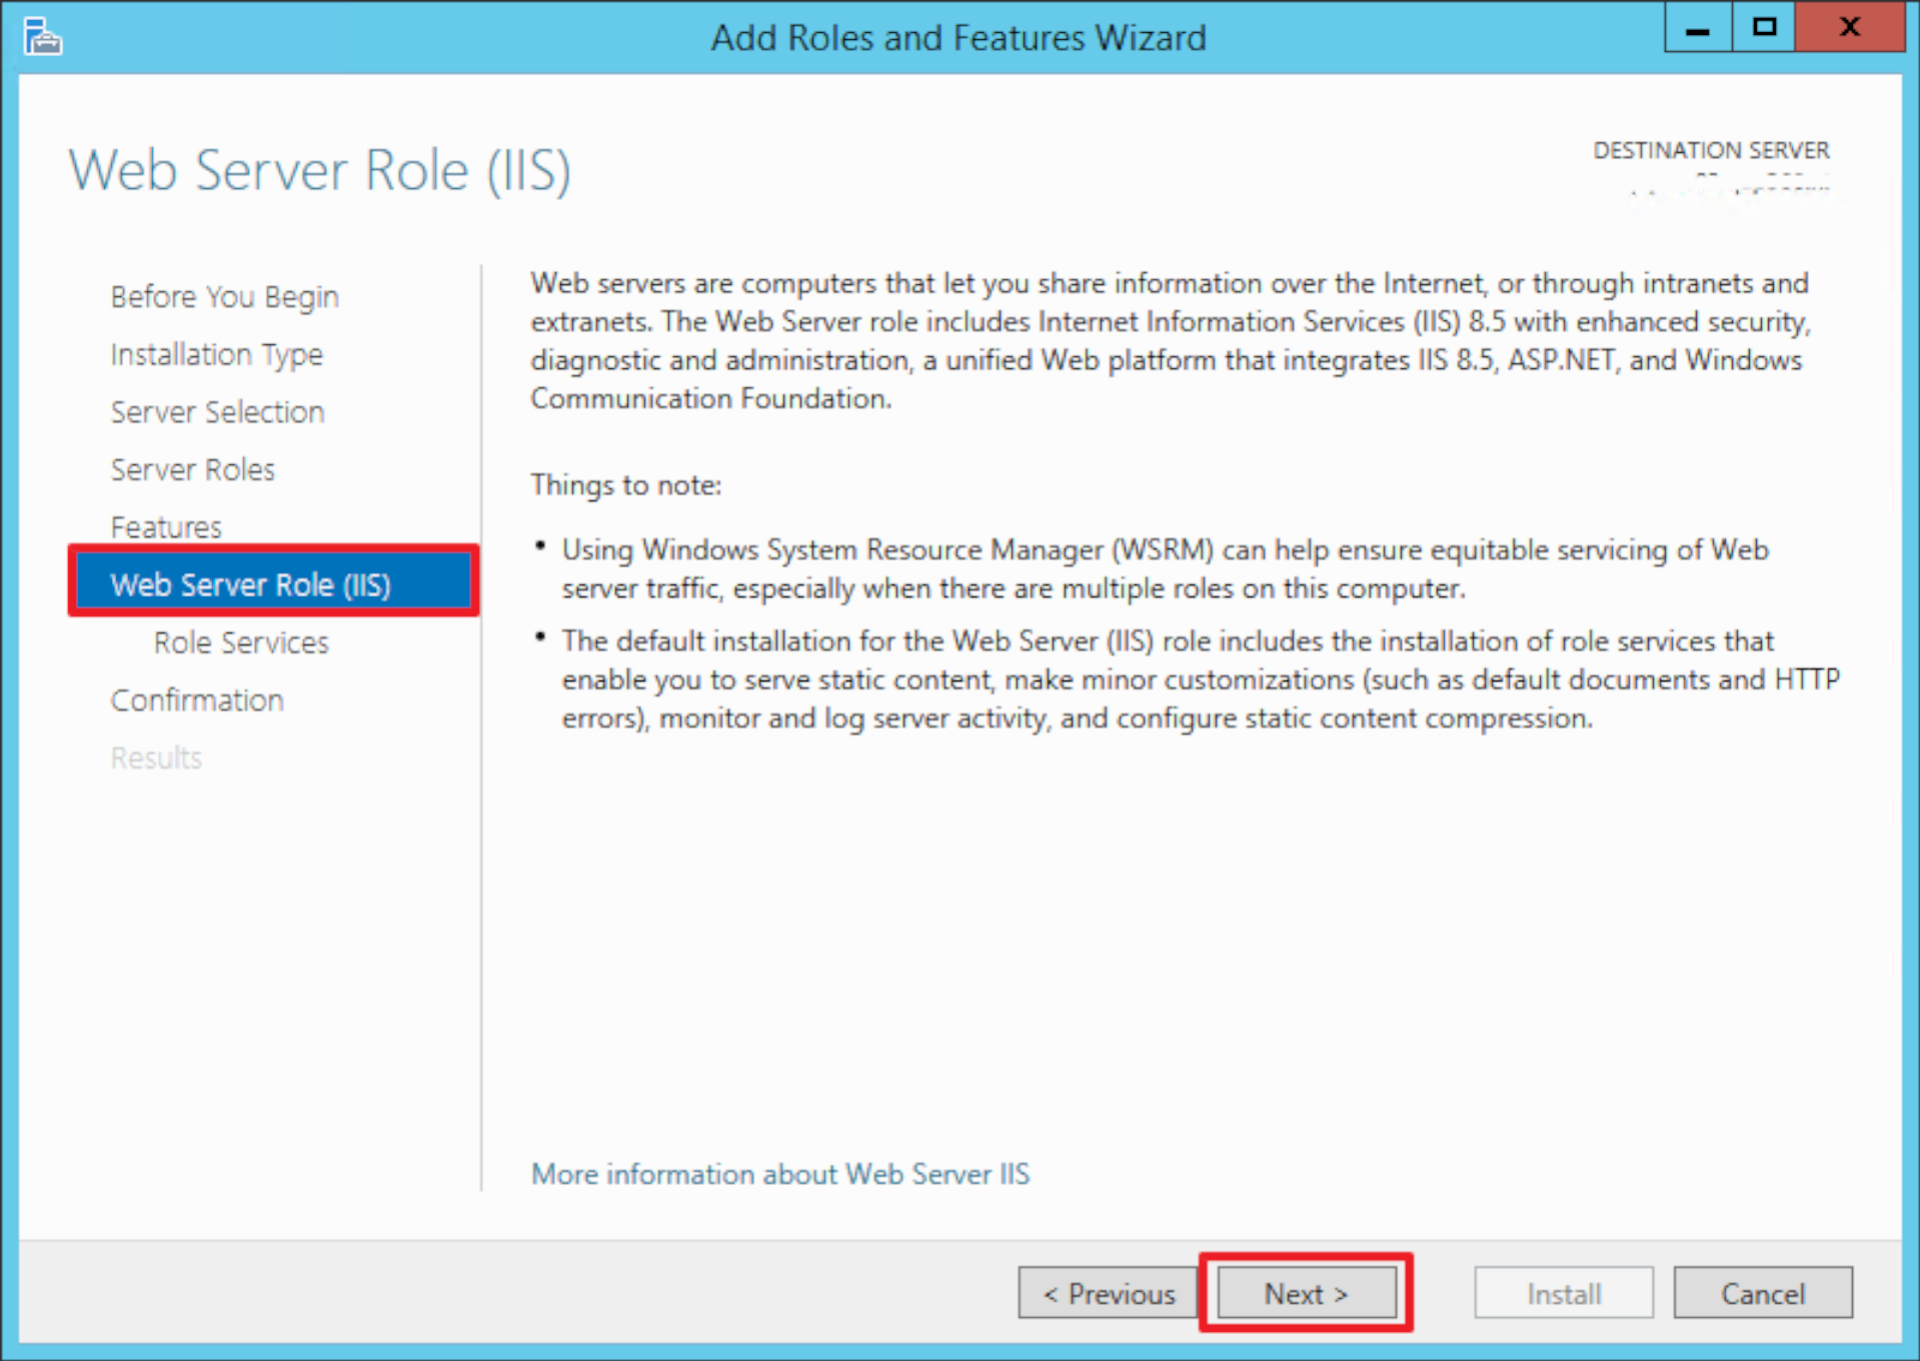
At Web Server Role (IIS), click Next.
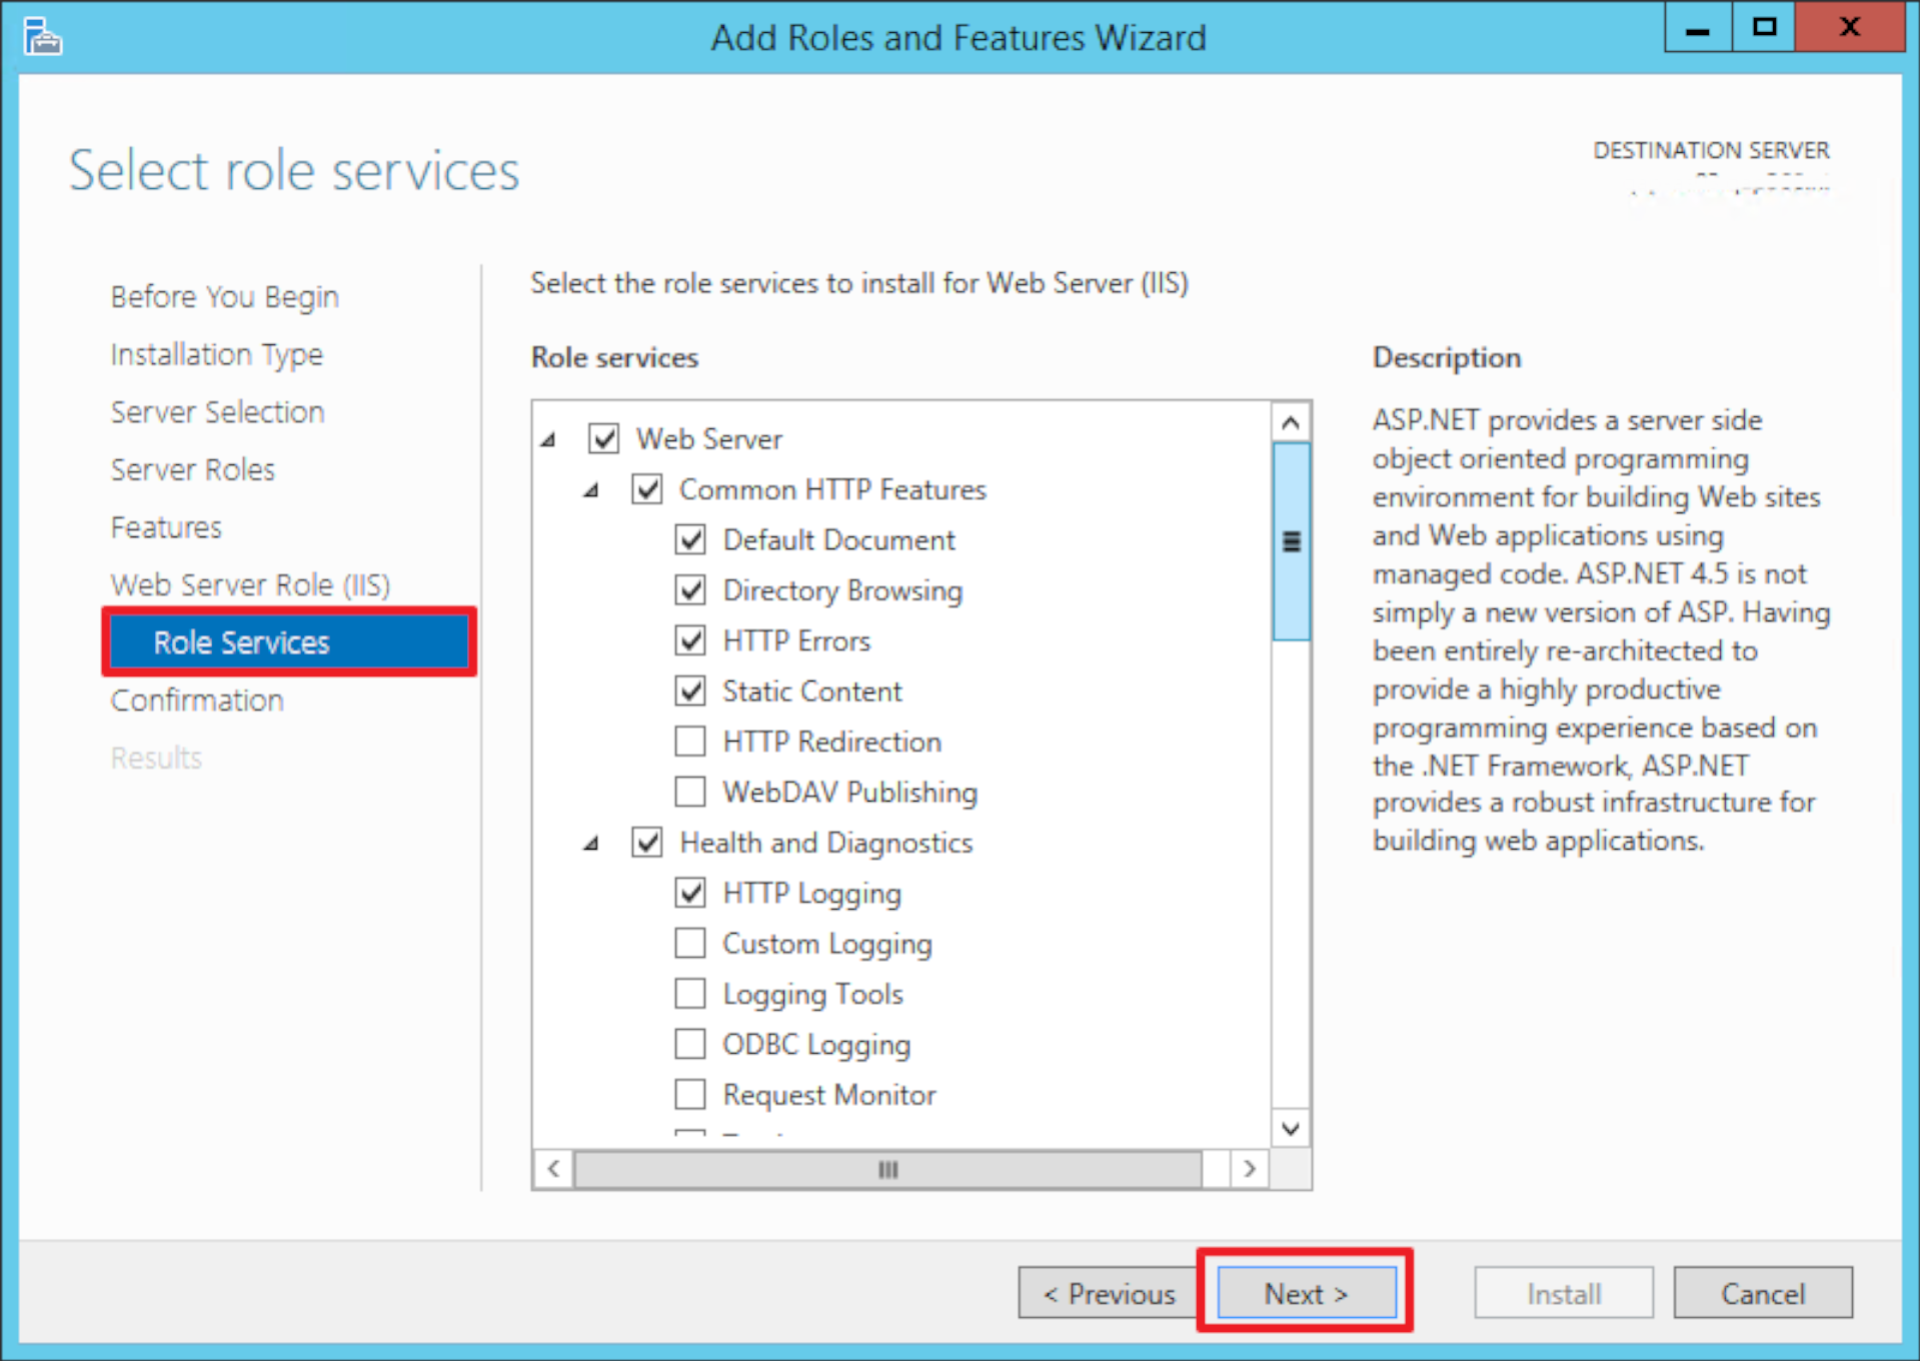
At Role Services, verify that the following Role services are selected, and then click Next. The Role Services below in bold are not selected by default, and must be selected manually.
Common HTTP Features
Default Document
Directory Browsing
HTTP Errors
Static Content
Health and Diagnostics
HTTP Logging
Performance
Static Content Compression
Security
Request Filtering
Windows Authentication (not selected by default)
Application Development
.NET Extensibility 4.5 (not selected by default)
ASP.NET 4.5 (not selected by default)
ISAPI Extensions (not selected by default)
ISAPI Filters (not selected by default)
Management Tools
IIS Management Console
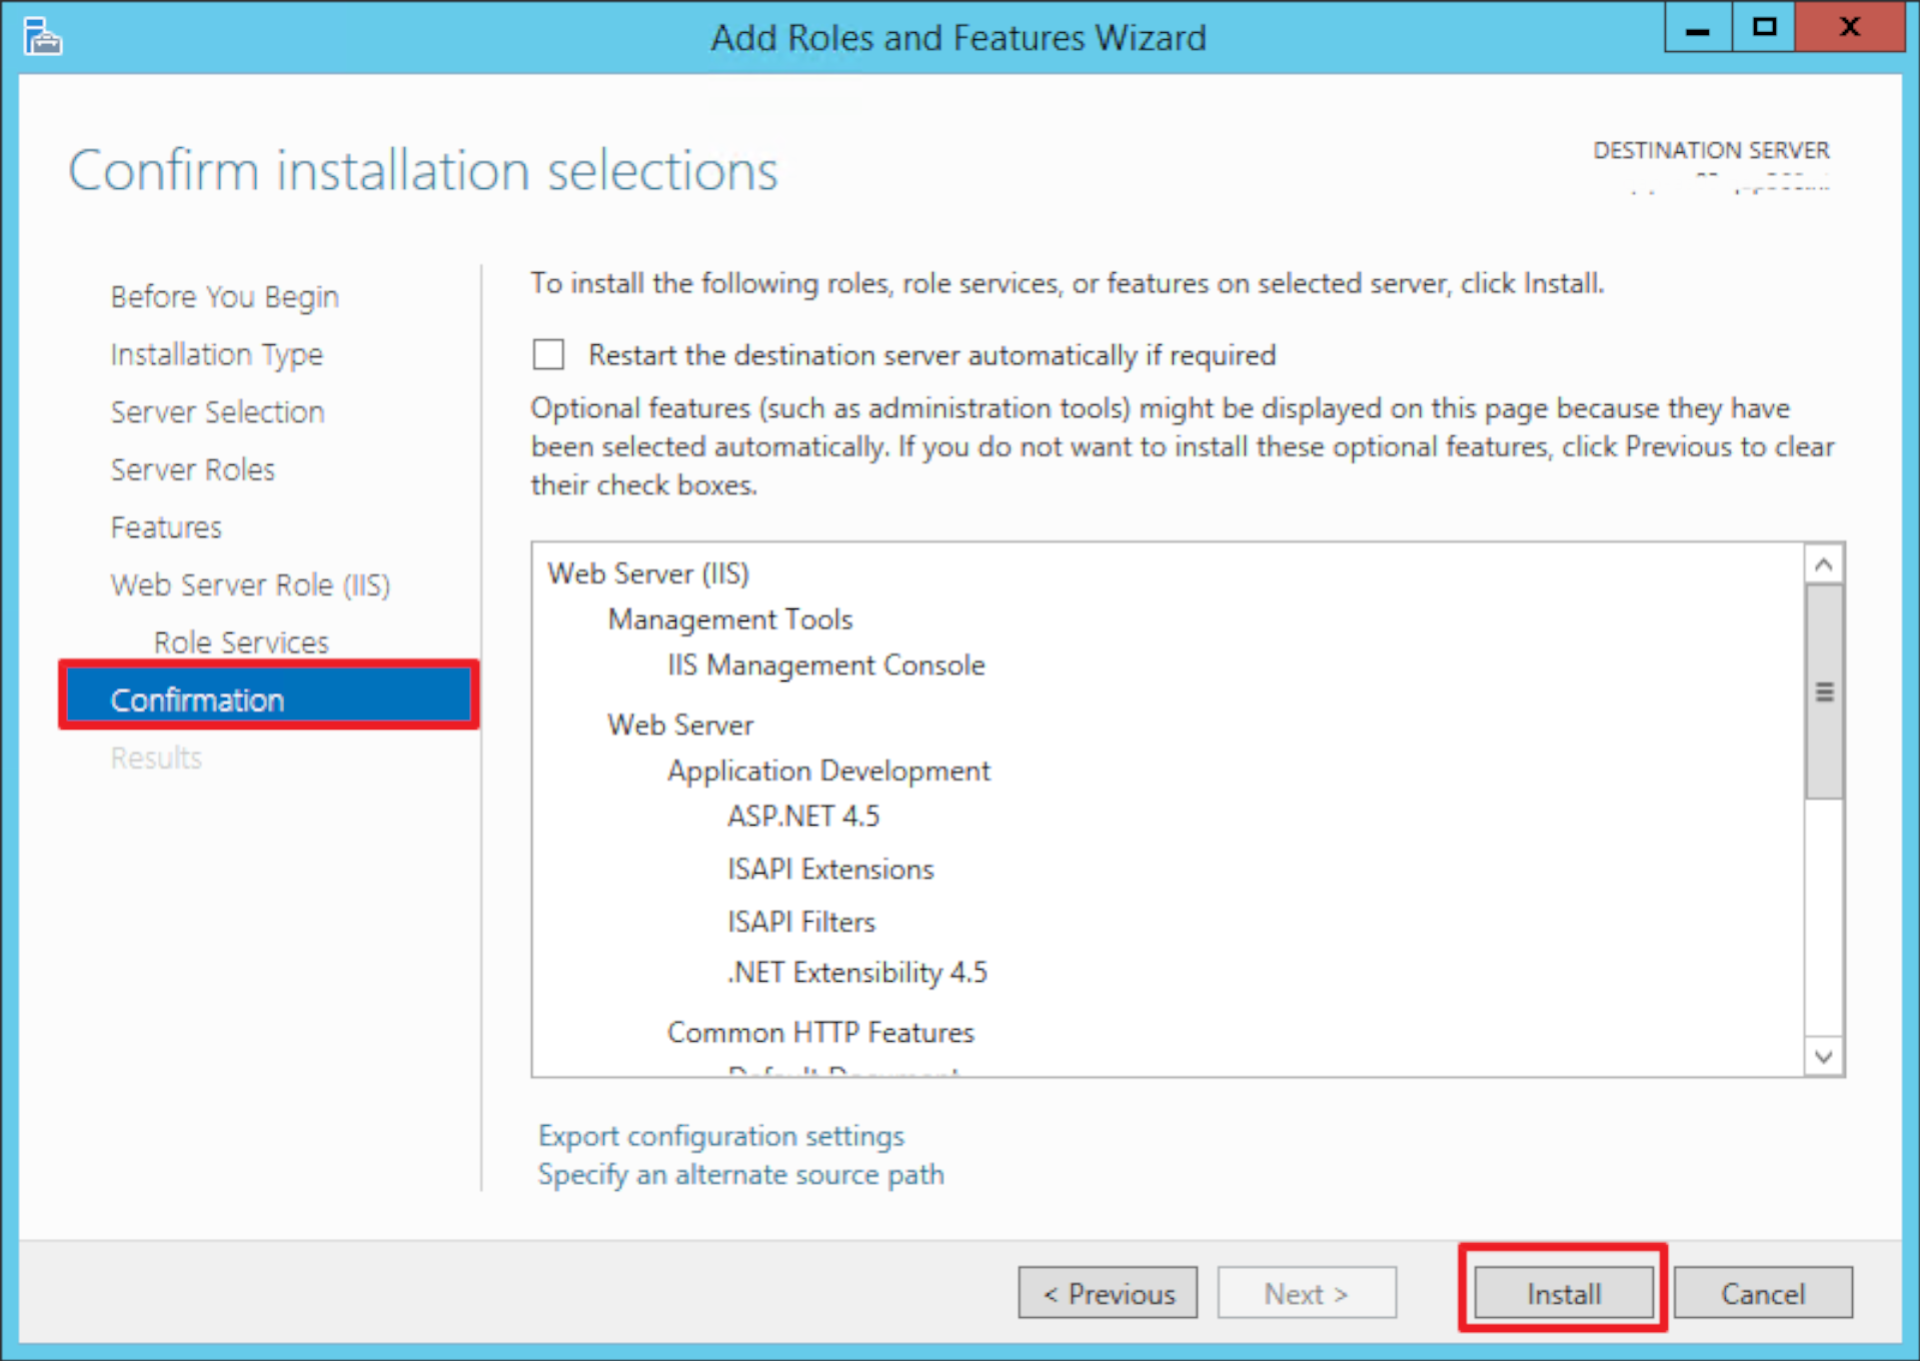
At Confirmation, click Install to begin the installation of IIS.
Install the Active Directory Identity Provider
Download and Extract the Identity Provider Files
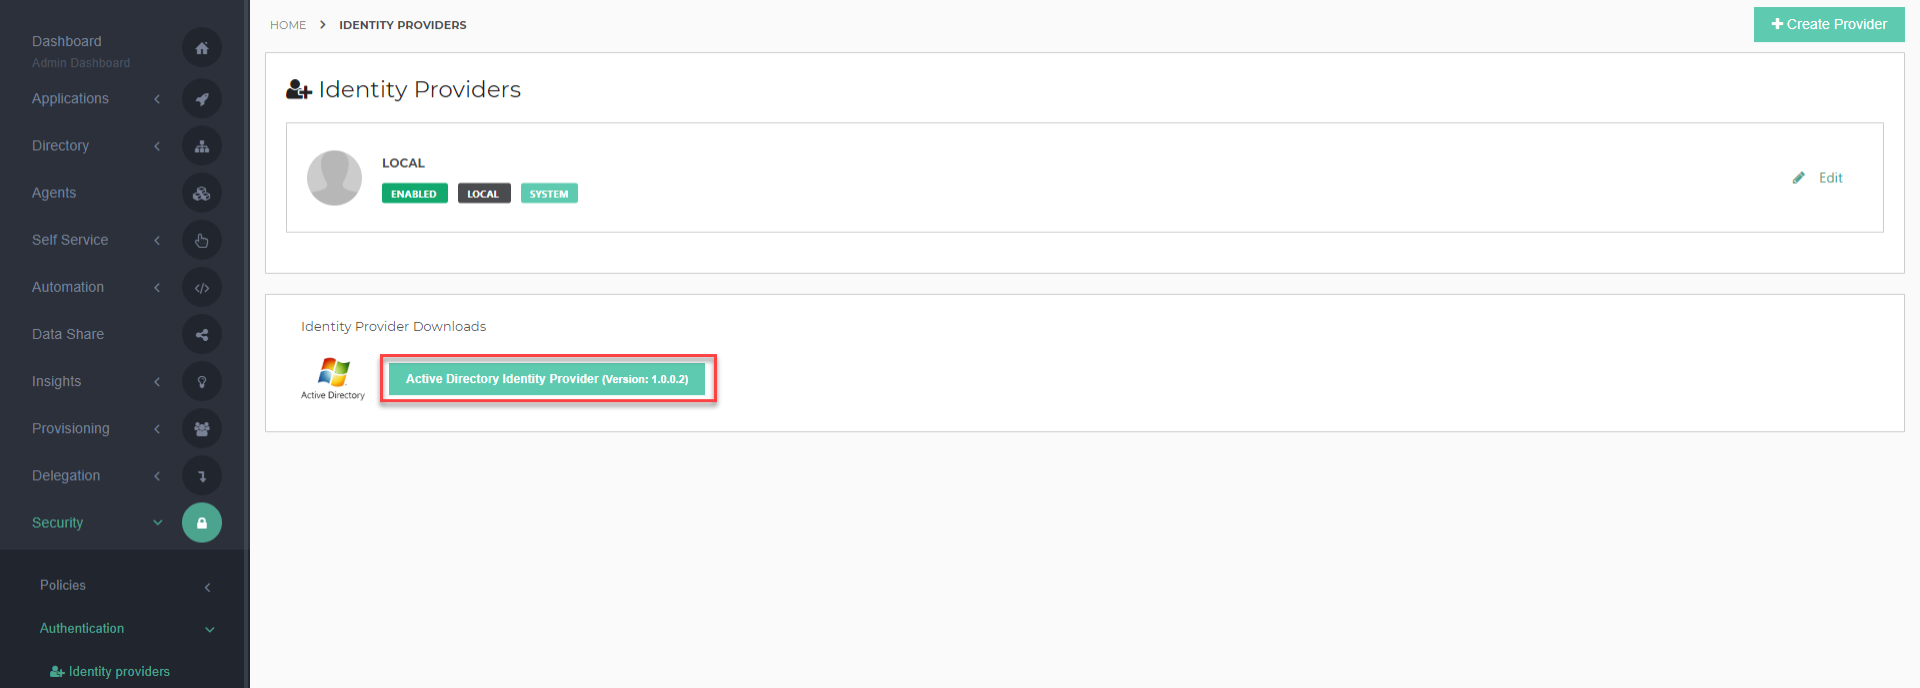
On the HelloID Administrator Dashboard, navigate to Security > Authentication > Identity Providers.
In the Identity Provider Downloads section, download the Active Directory Identity Provider. This will begin a download of a ZIP file.
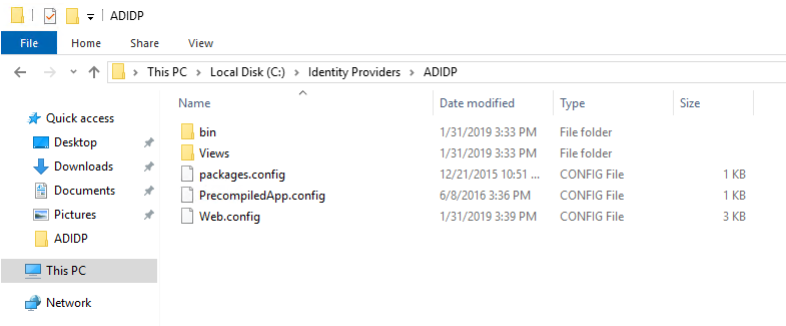
Open the ADIDP.zip file and extract its contents to a folder on the IIS server. We recommend creating a new folder for this purpose, such as C:\Identity Providers\adidp\.
Create an IIS Application
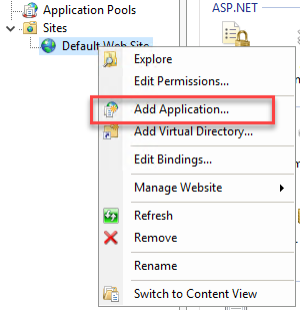
Launch the IIS Manager console.
Right click on a website (e.g., Default Web Site) and select Add Application...
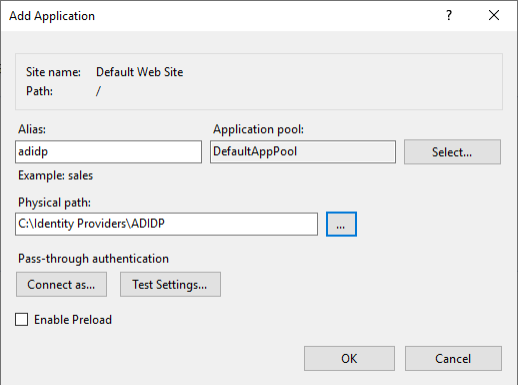
Enter the following settings and click OK.
Alias: Use a recognizable alias for application. For example, "adidp".
Physical Path: Enter the path of the folder containing the contents of the ADIDP zip file.
Configure IIS Authentication and SSL
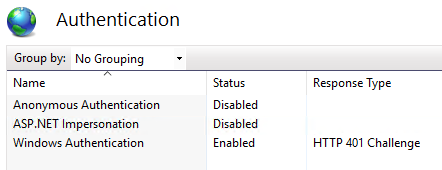
Select the IIS website that is hosting the AD IdP application (Default Web Site in this example).
Double click on Authentication.
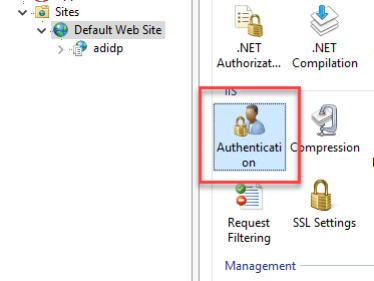
Disable Anonymous Authentication and Enable Windows Authentication.
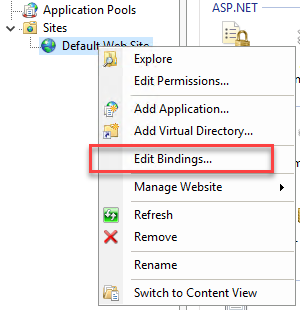
Right click on the website and select Edit Bindings...
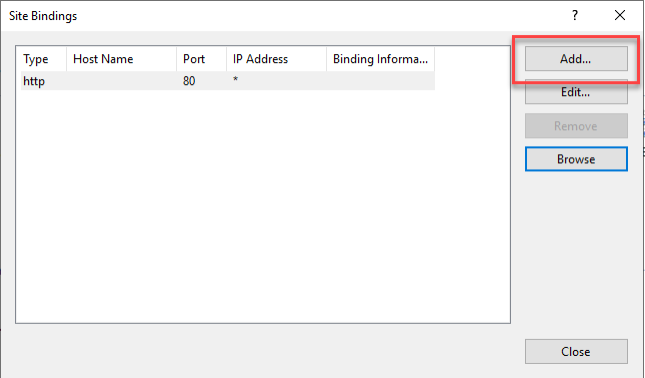
Click Add.
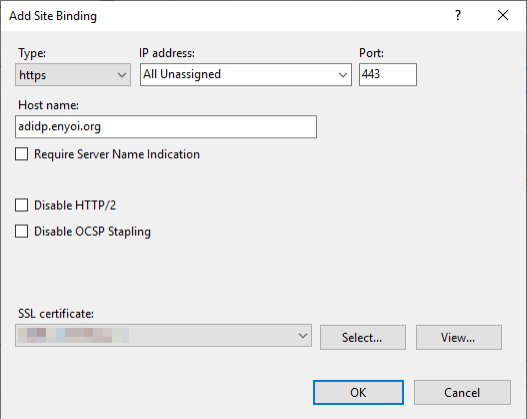
Configure the Add Site Binding dialog and click OK.
Type: https
Port: 443
Host name: Enter the host name by which the IIS website will be accessed. Make note of this for later use.
SSL Certificate: Select the SSL certificate you wish to use to encrypt this website's traffic.
Close the Site Bindings dialog.
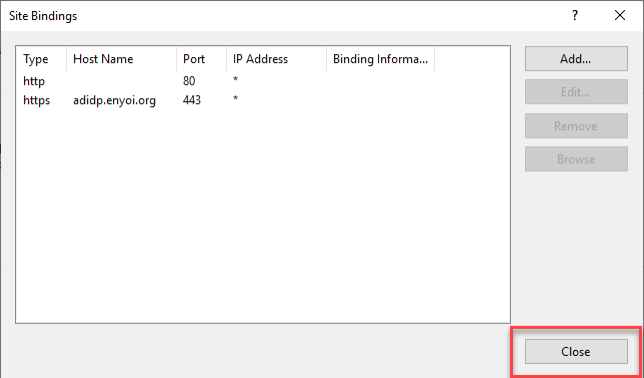
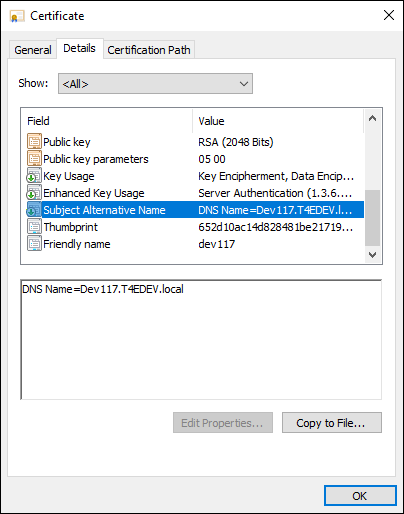
Note: Ensure that the certificate has a Subject Alternative Name. Without one, you may get certificate errors.
Create or Import a Certificate in HelloID
Communication between the Identity Provider and HelloID must be encrypted. To do this, we can either import a certificate into HelloID, or create a self-signed certificate. For this example, we will create a self-signed certificate.
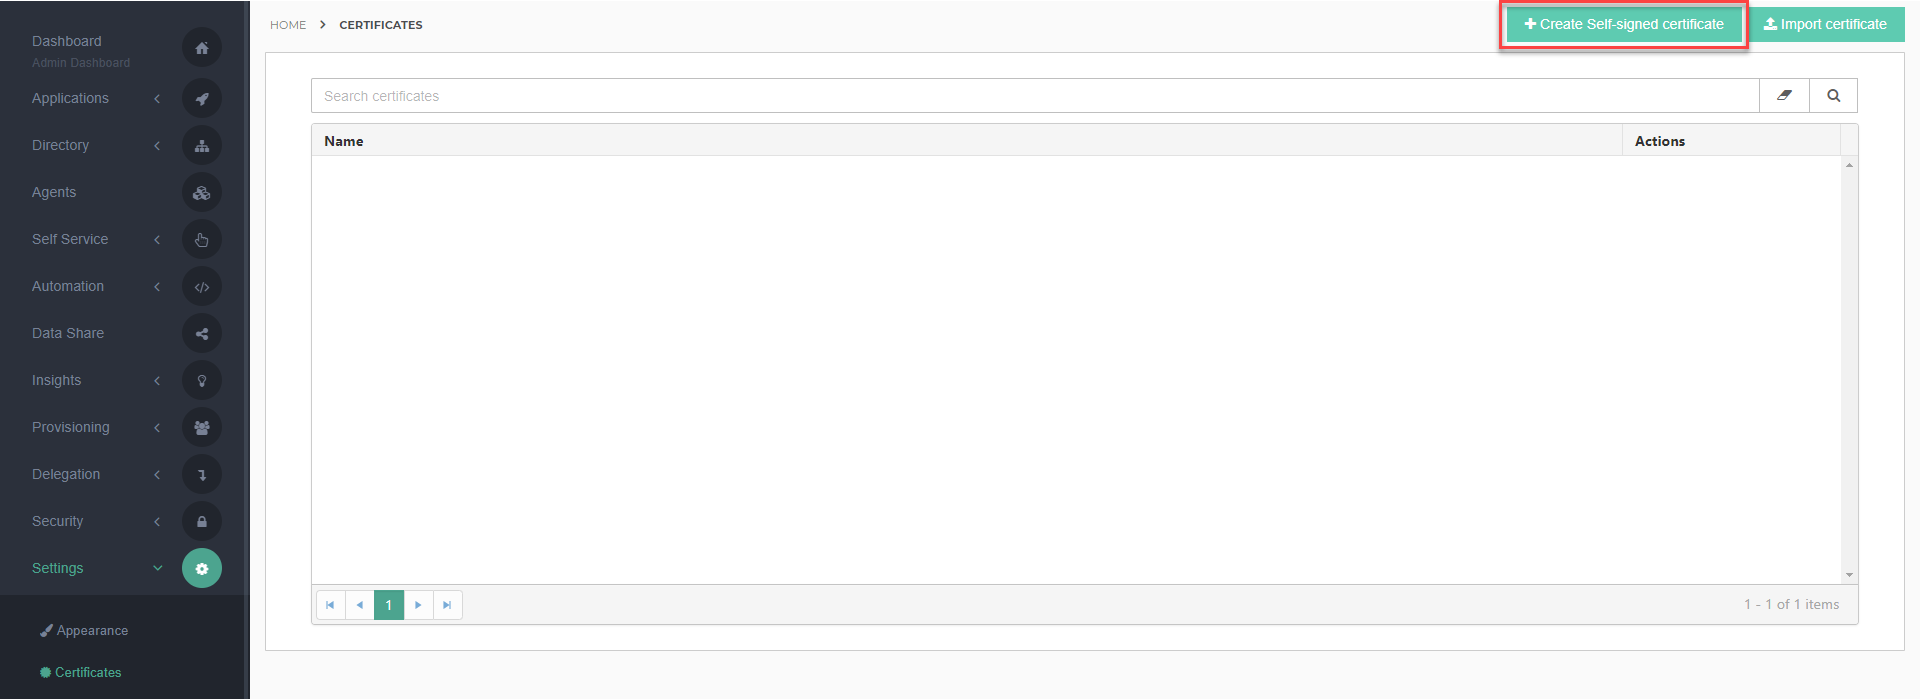
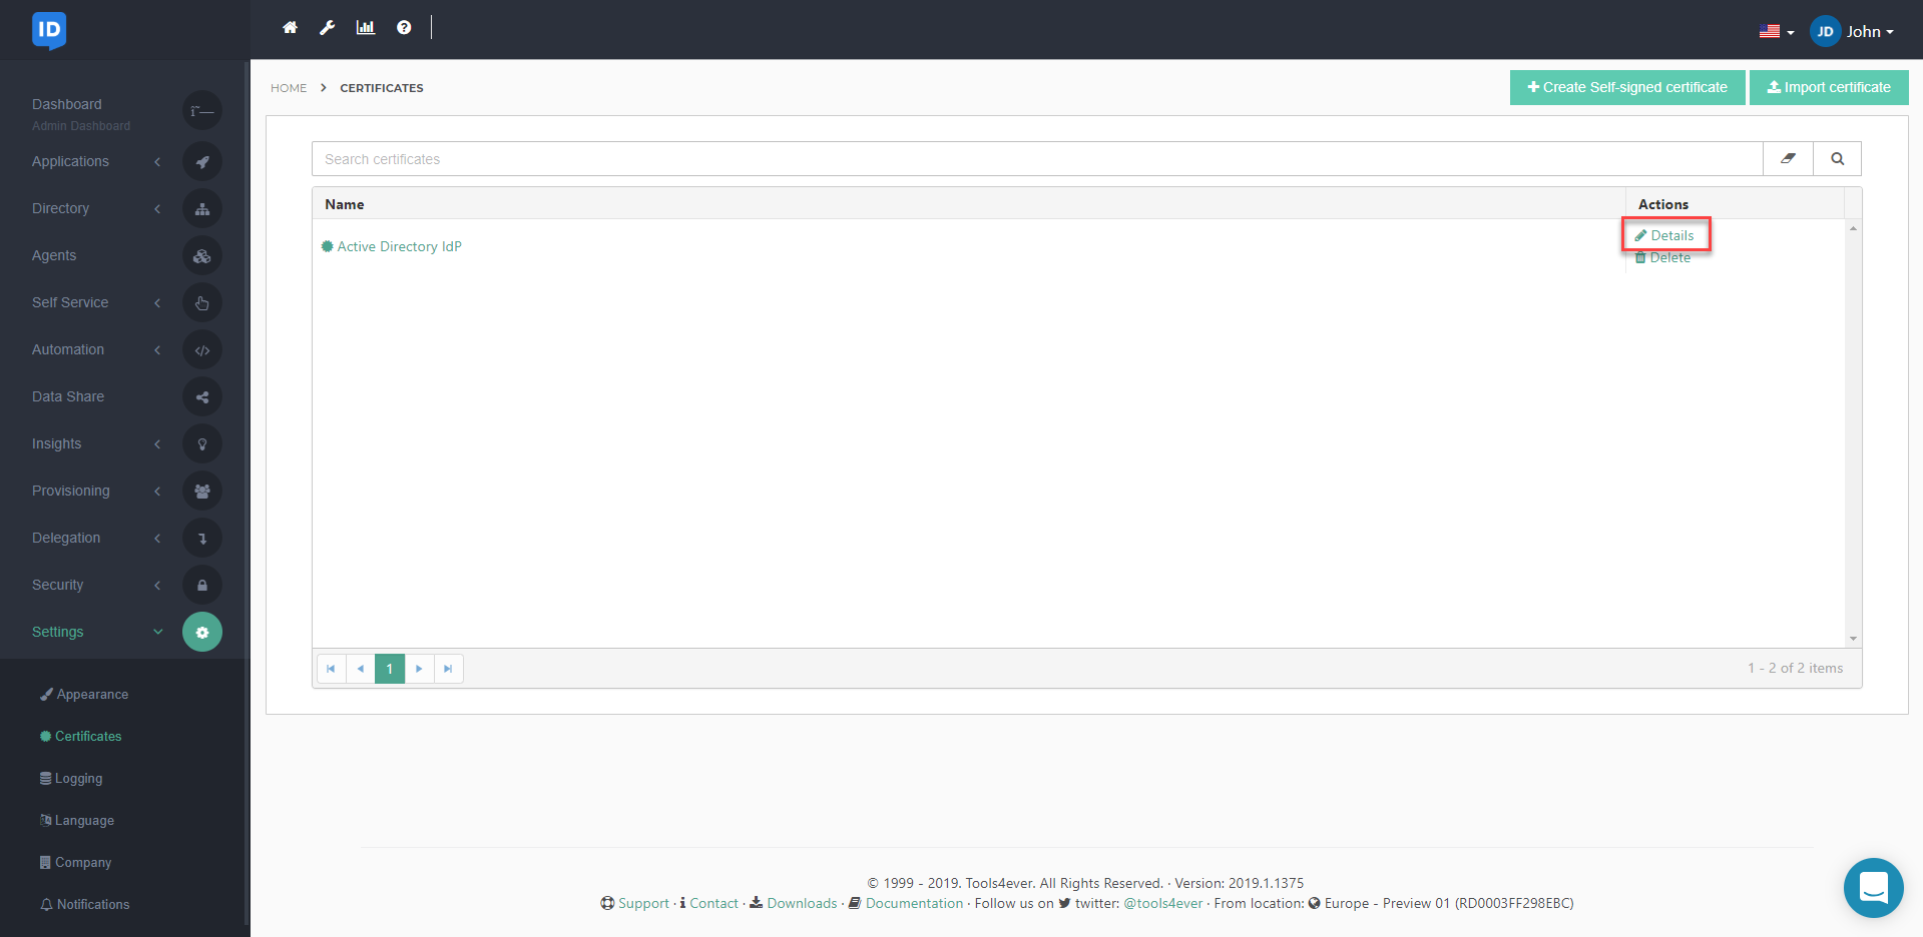
On the HelloID Administrator Dashboard, navigate to Settings > Certificates.
Click Create Self-Signed Certificate.
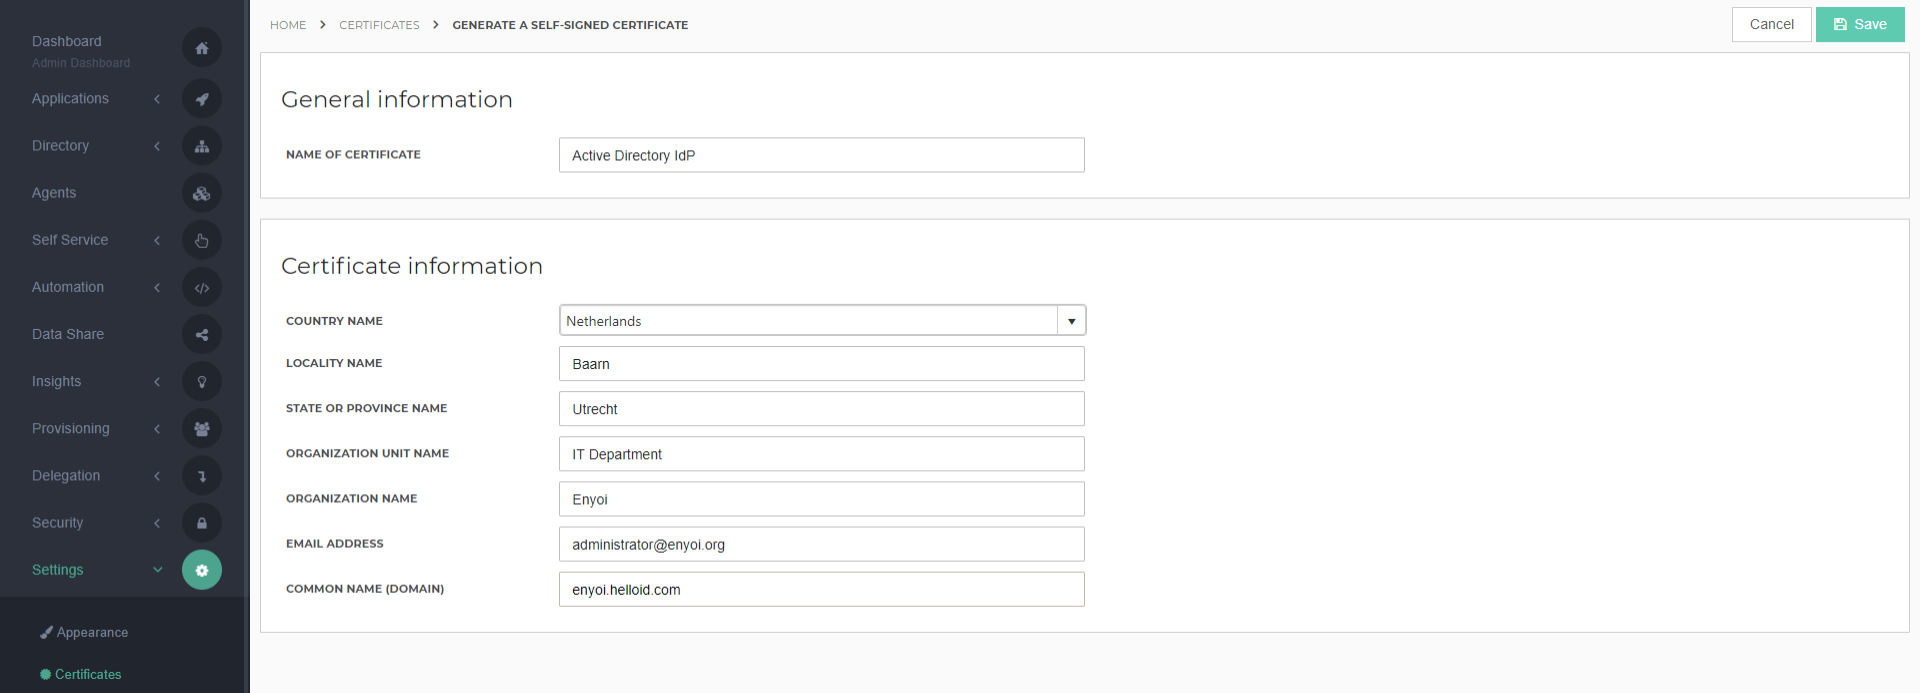
Enter the fields for the new certificate and press Save to continue. Learn more about creating and using certificates here.
Click the Details link of the new certificate.
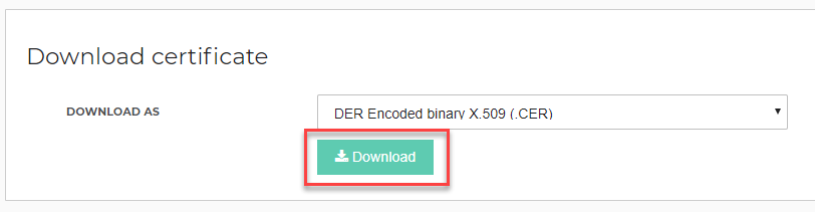
In the Download Certificate section, configure the following items:
Download As: Personal Information Exchange (.PFX)
Secure it with a Password: Enter a password that will be used to secure this certificate. Make note of this password for later use.
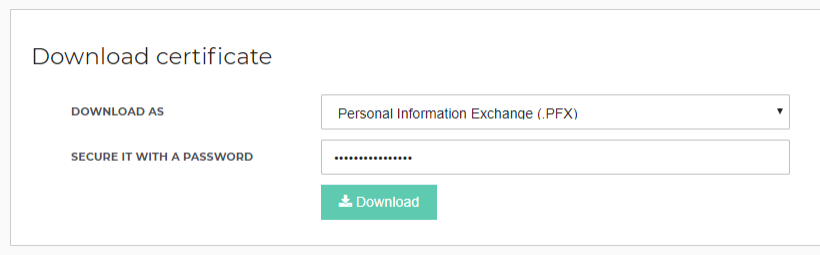
Click the Download button.
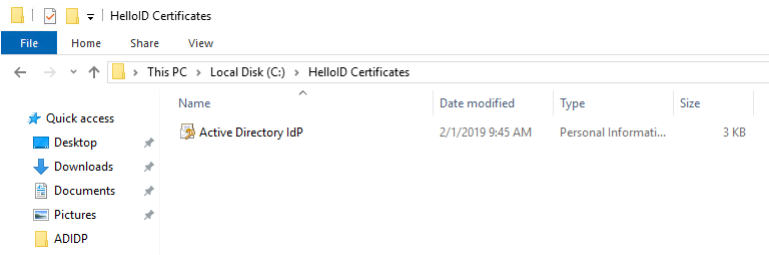
Copy the downloaded certificate to the IIS server in a new folder (e.g., C:\HelloID Certificates).

Add the Identity Provider to HelloID
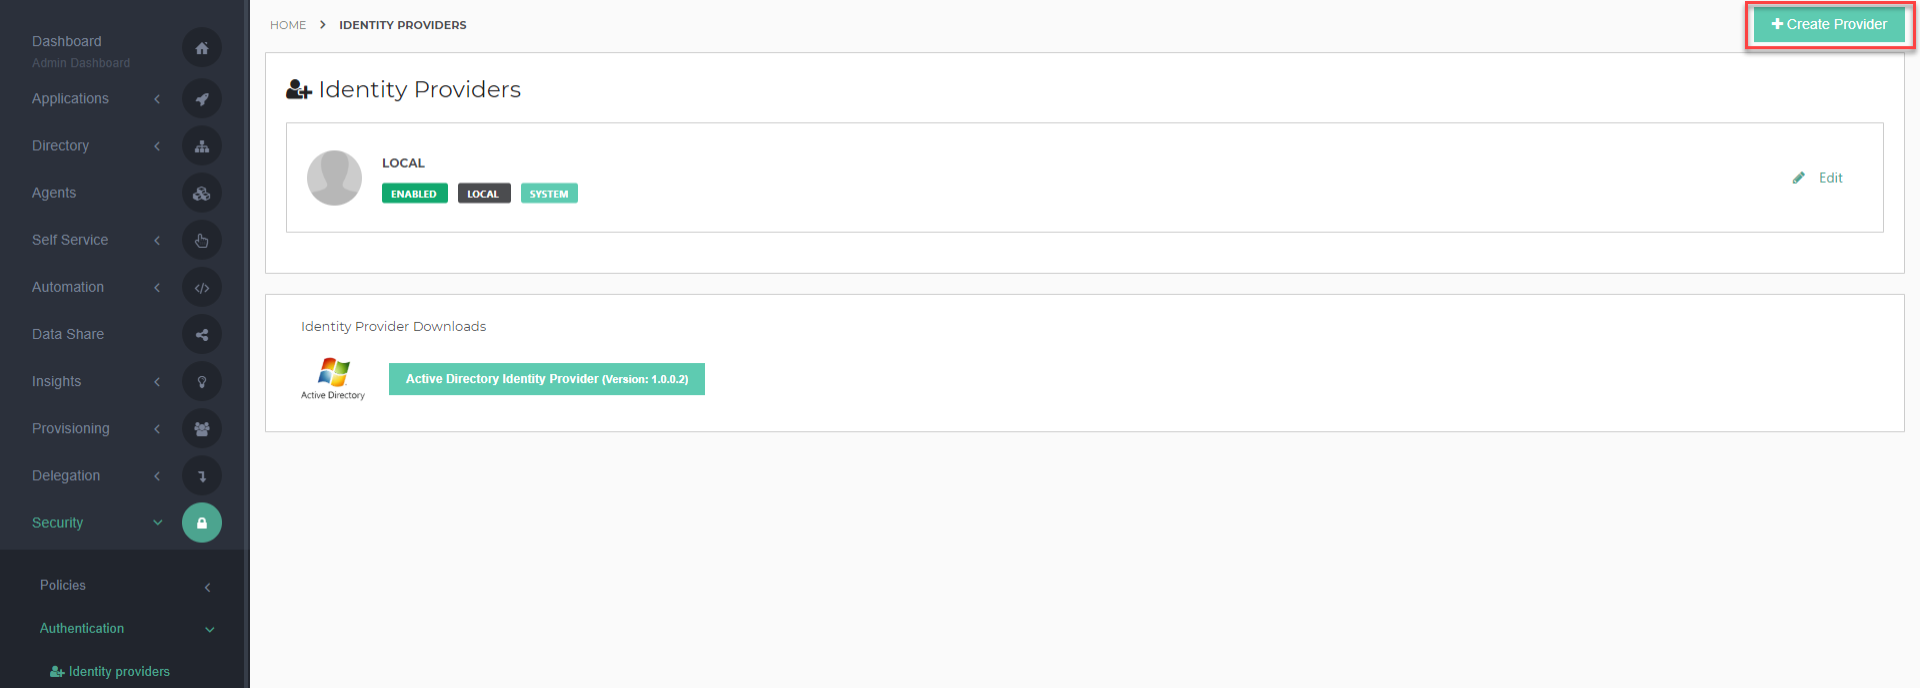
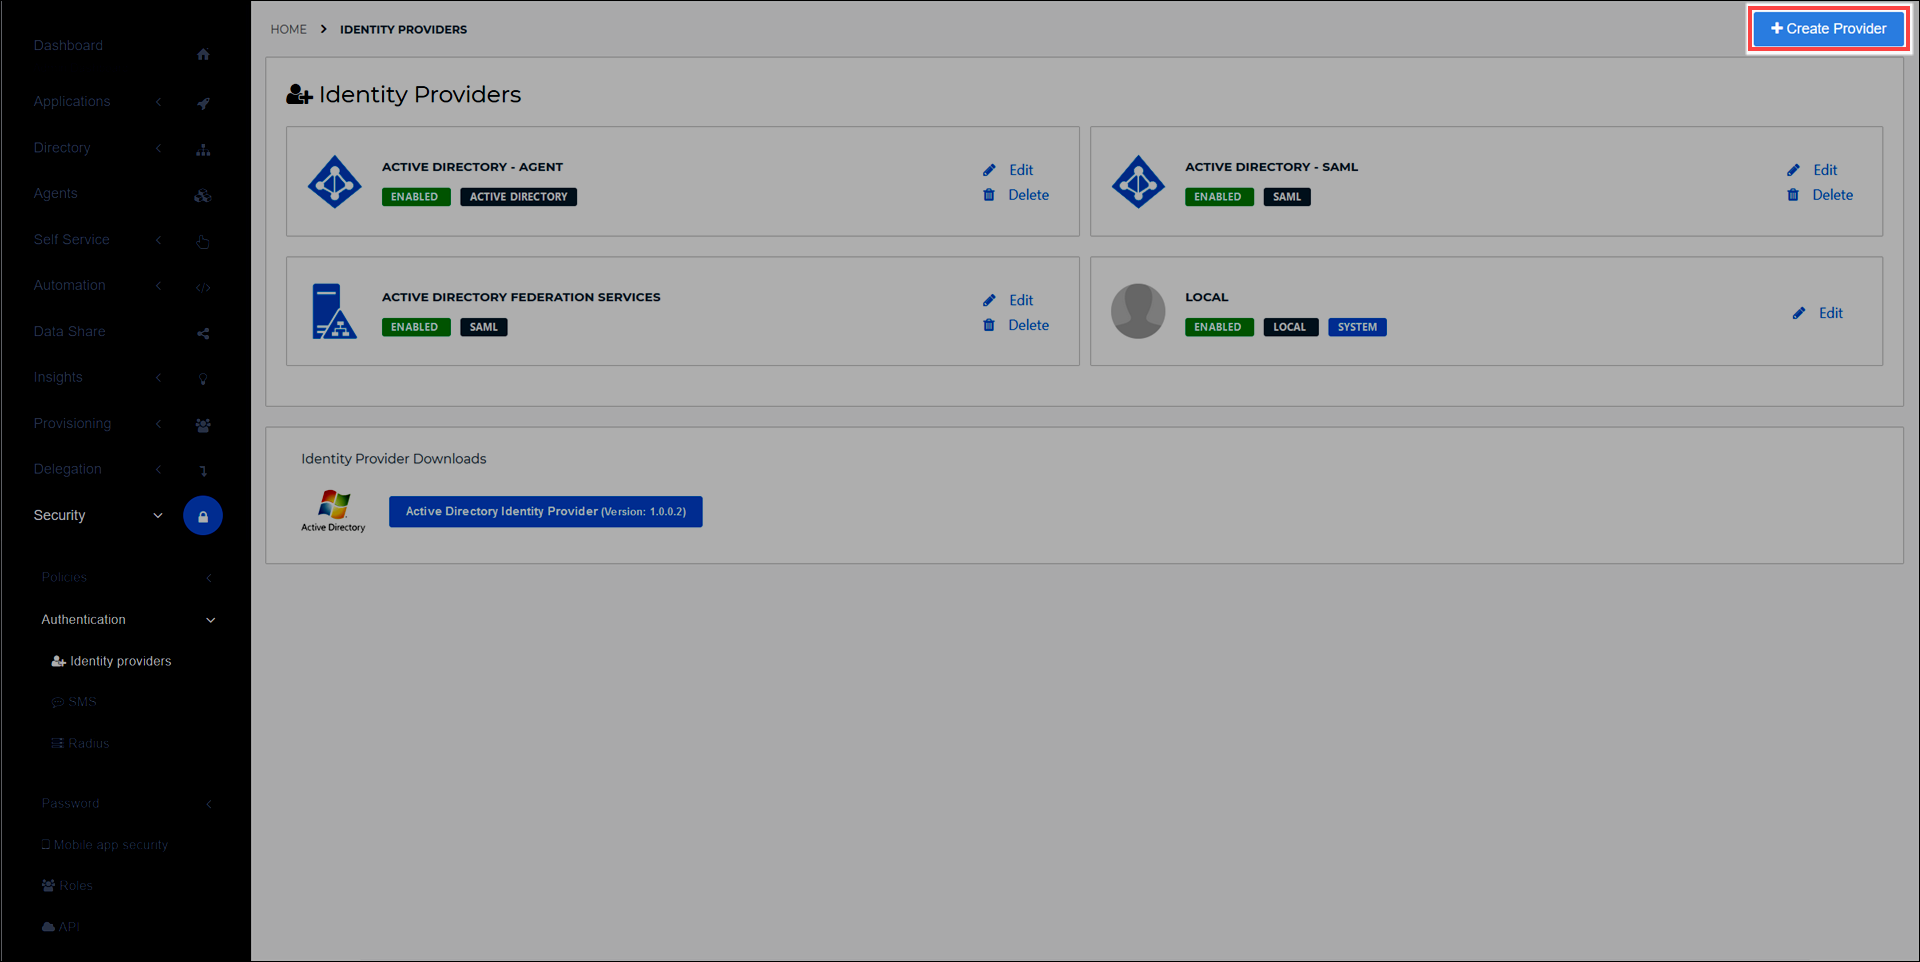
On the HelloID Administrator Dashboard, navigate to Security > Authentication > Identity Providers.
Click Create Provider.
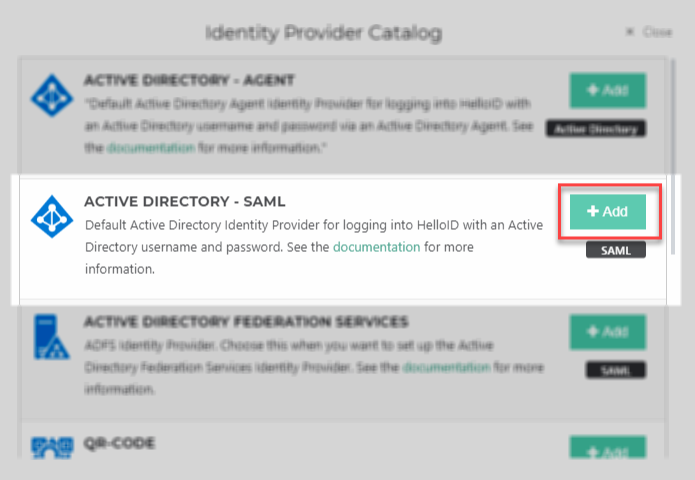
Find the Active Directory - SAML Identity Provider, and click the Add button next to it.
On the Portal Information tab, you have a handful of configuration options. View a complete configuration reference here.
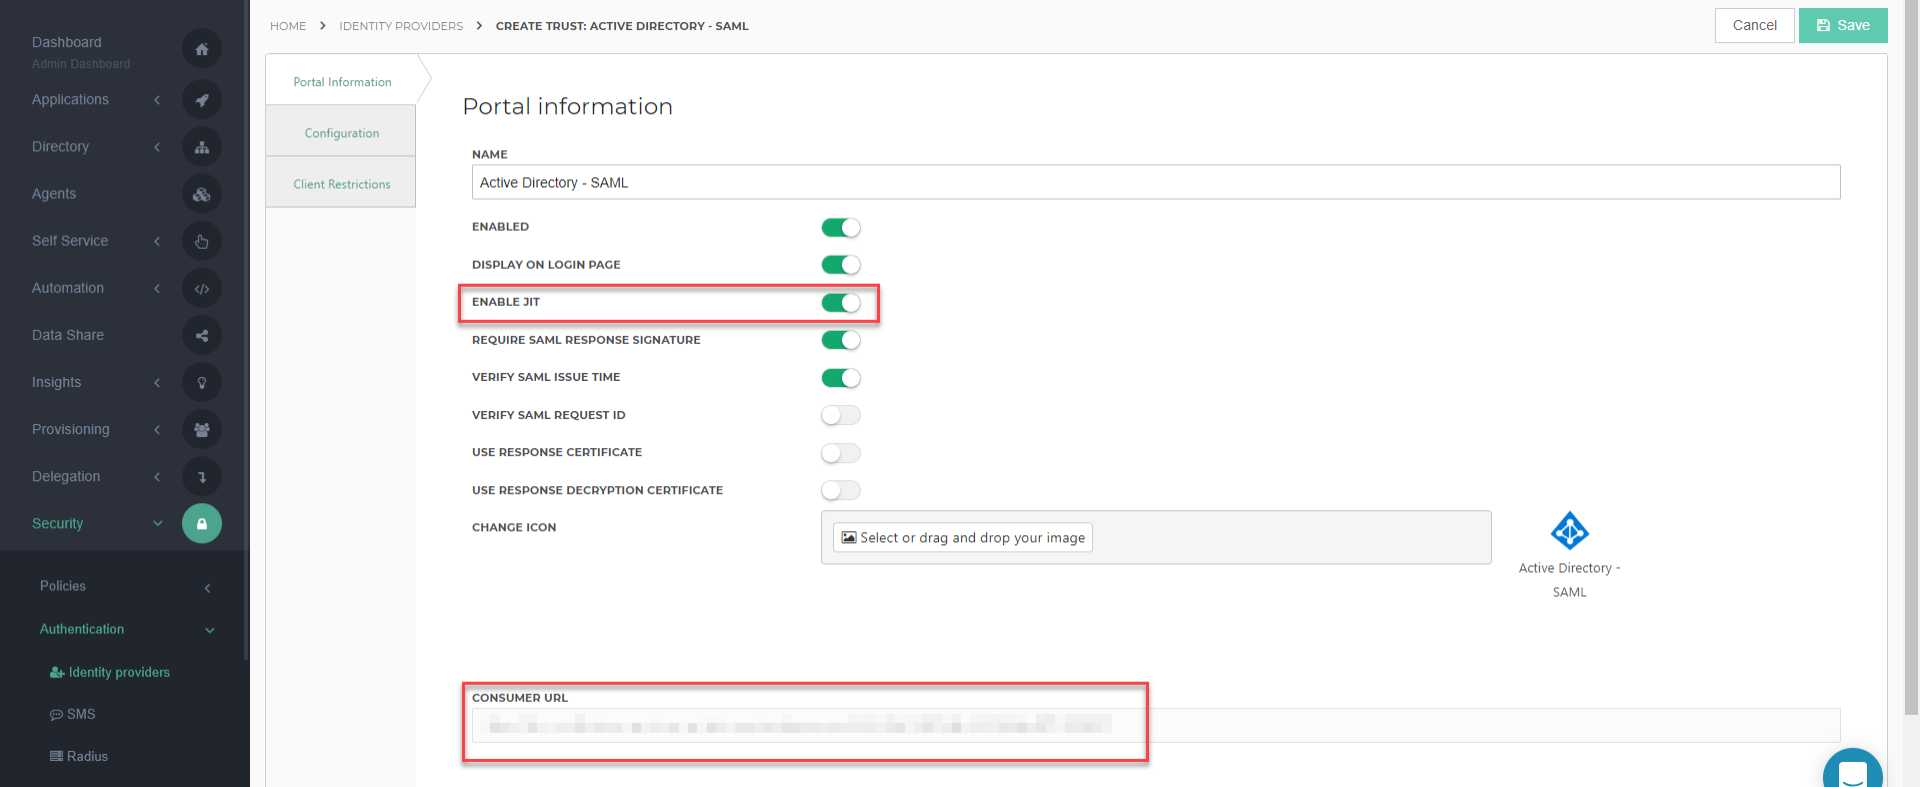
Make note of the Consumer URL value, as you will need it later. You may also enable Just-In-Time Provisioning (recommended).
Set the other options as desired.
Click Next to go to the Configuration tab.
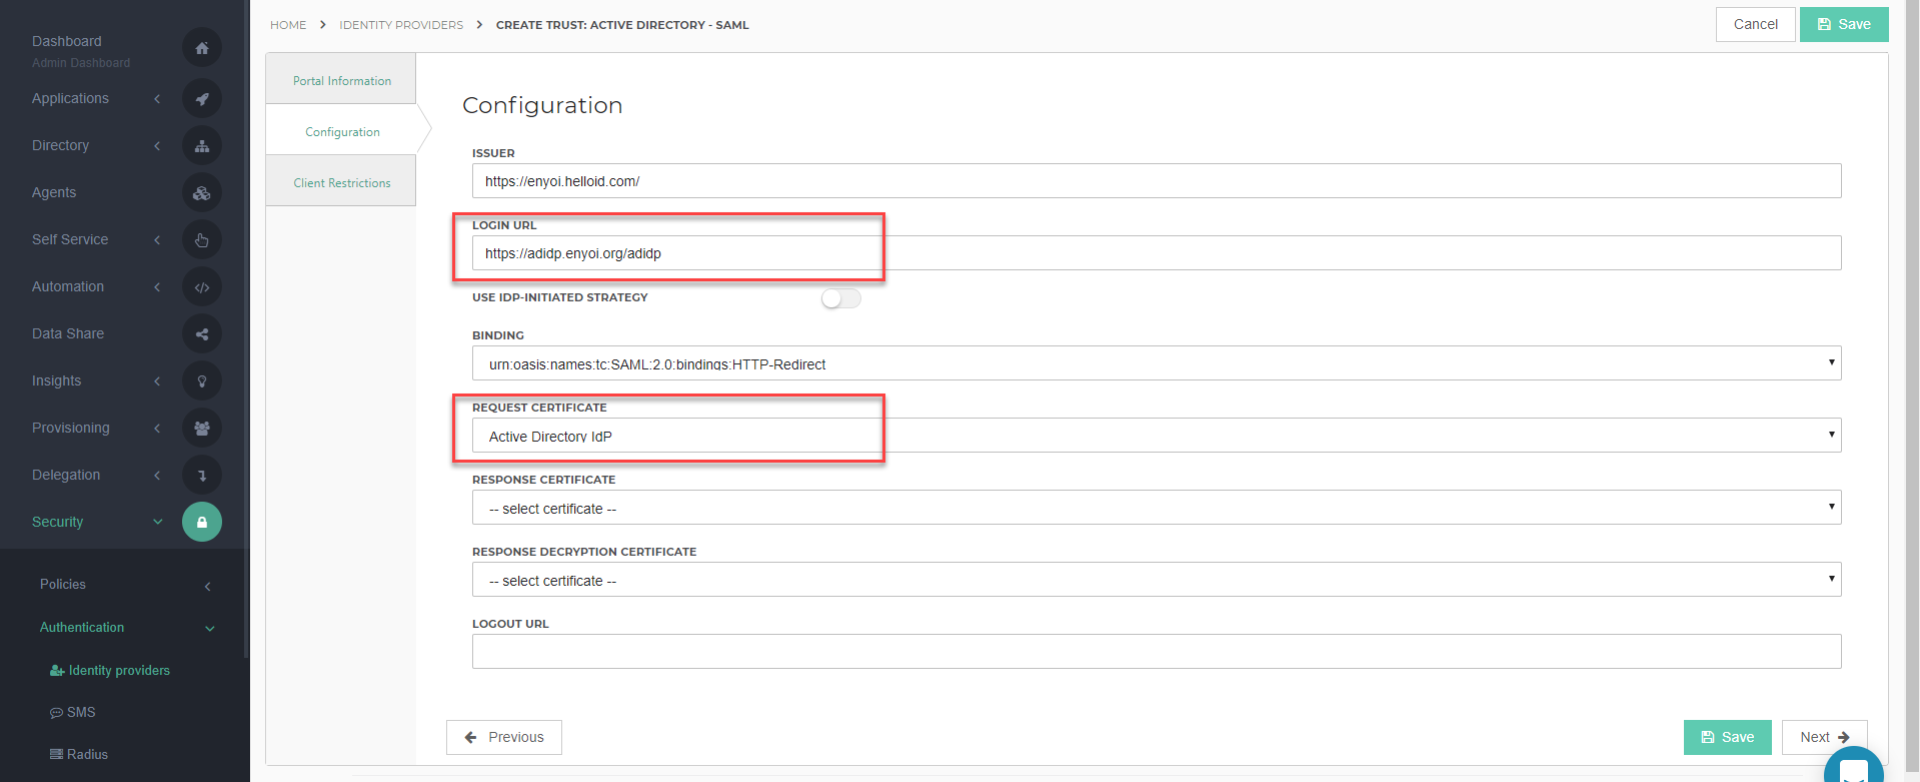
The Configuration tab lets you specify the details of your IIS IdP. Configure the following required settings and click Next. You may configure other optional settings as desired.
Issuer: This will be set in by the template.
IMPORTANT: Verify that the URL ends with a forward slash.
Login URL: Enter the URL of the IIS website's AD IdP application.
Request Certificate: Select the certificate that you created or imported in HelloID.
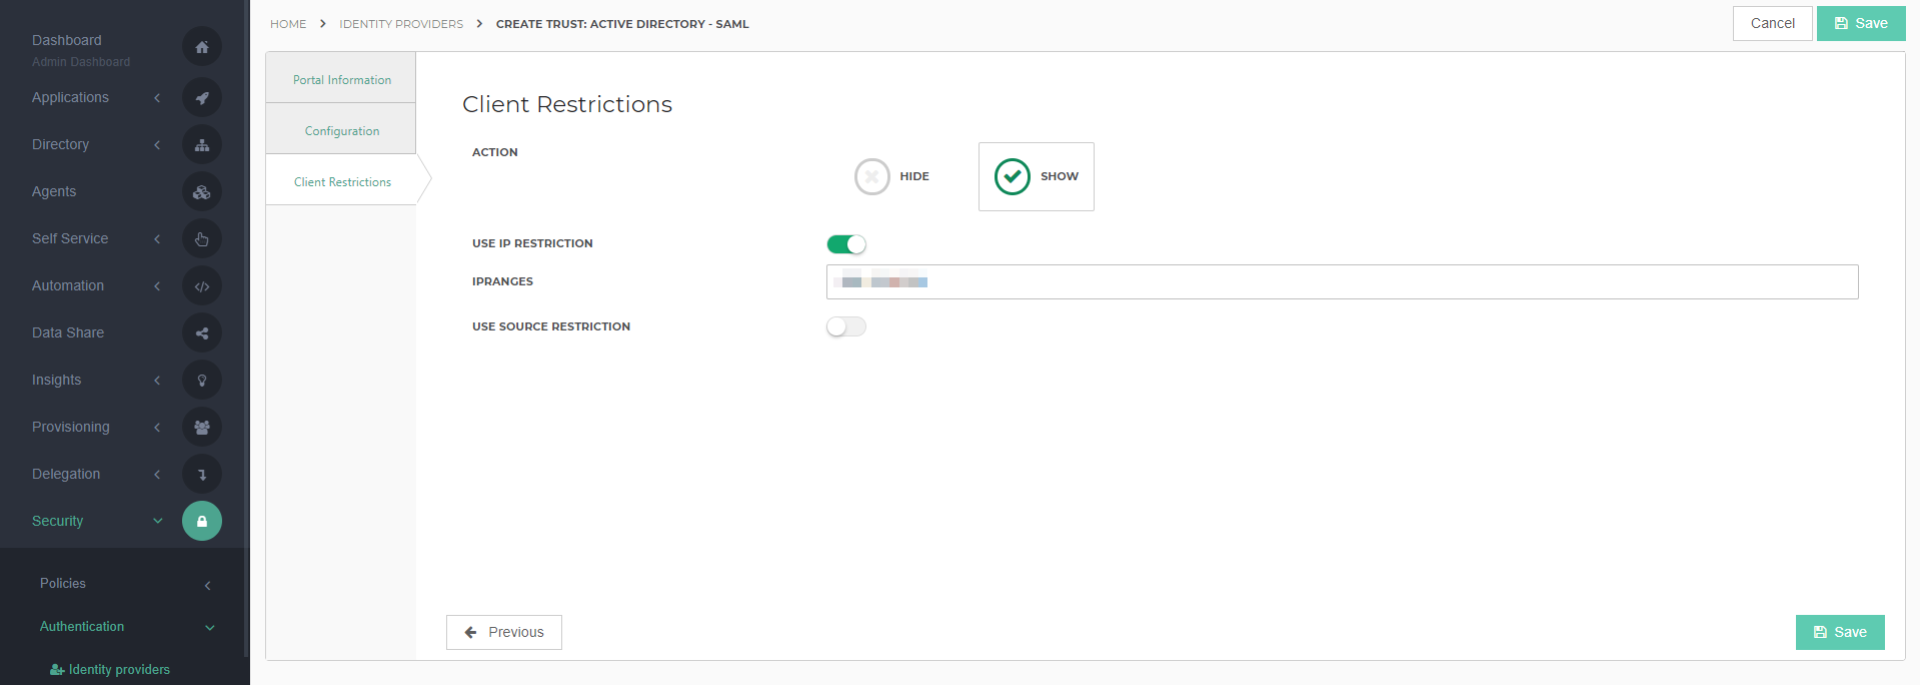
The Client Restrictions tab will allow you to show or hide this IdP from the login screen based on IP or source restrictions. For example, because the IIS web server must be accessible to client machines, you may only want to show this IdP if the clients are coming from your organization's own IP address. Configure this tab as you see fit and click Save. View more information about client restrictions here.
Configure the IIS Application
Open the IIS Manager console.
Select the AD IdP application, and then double click Application Settings.
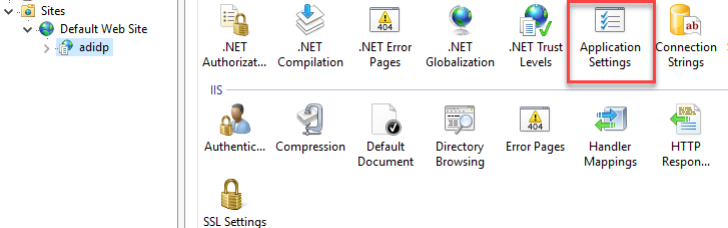
Fill in the following fields:
CertificatePath: The file path of the certificate on the IIS server.
CertificatePwd: The password that you create for the certificate.
ConsumerURL: The Consumer URL value from the IdP Portal Information page in HelloID.
TargetURL: The URL of your HelloID Portal.

Test the Configuration
The configuration is now finished and may be tested on a computer that has access to both the IIS server hosting the Active Directory IdP, as well as HelloID.
Launch a browser that supports integrated authentication (e.g., Internet Explorer or Chrome) and navigate to your HelloID portal's login page. You should now see a new login option for the Active Directory IdP, as shown below.
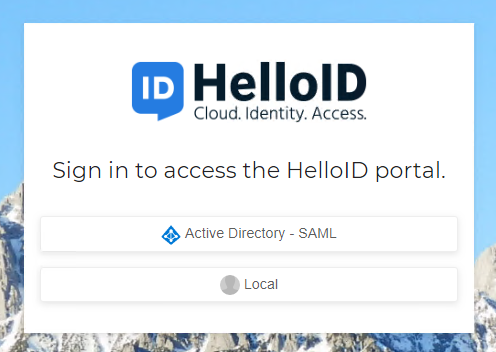
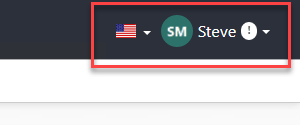
Click on the Active Directory - SAML login option. There will be a brief redirect, and you will be routed to the HelloID user dashboard, logged in as the Windows user. The name of the user will be displayed in the upper-right corner of the HelloID Dashboard.

Introduction
Active Directory Federation Services (AD FS) allows your organization's users to authenticate seamlessly with HelloID and their other applications. This guide will walk you through the steps of configuring AD FS as an Identity Provider (IdP) for HelloID.
Install Active Directory Federation Services
You must first install and configure Active Directory Federation Services before using it as an Identity Provider for HelloID. Please refer to this Microsoft AD FS Deployment Guide for instructions and best practices. If you have already done this, you may move on to the next section.
Configure HelloID
Create or Import a Certificate in HelloID
Communication between the Identity Provider and HelloID must be encrypted. To do this, we can either import a certificate into HelloID, or create a self-signed certificate. For this example, we will create a self-signed certificate.
On the HelloID Administrator Dashboard, navigate to Settings > Certificates.
Click Create Self-Signed Certificate.

Enter the fields for the new certificate and press Save to continue. Learn more about creating and using certificates here.

Click the Details link of the new certificate.

Click the Download button to download a copy of the certificate.
Copy the downloaded certificate to the AD FS server in a new folder (e.g., C:\HelloID Certificates).
Add the Identity Provider to HelloID
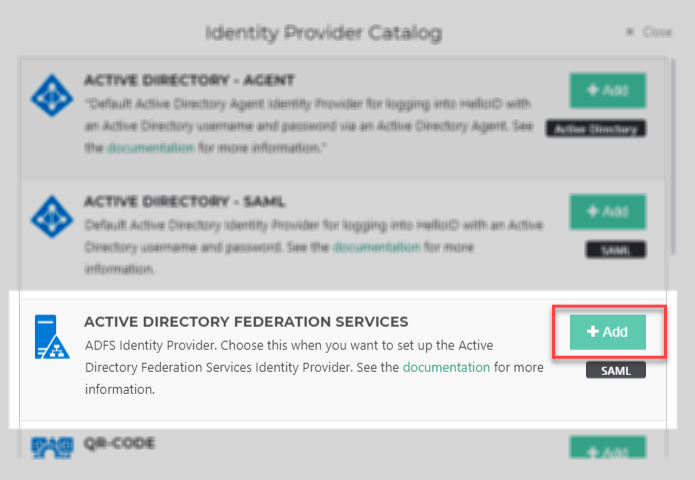
On the HelloID Administrator Dashboard, navigate to Security > Authentication > Identity Providers.
Click Create Provider.

Find the Active Directory Federation Services Identity Provider, and click the Add button next to it.
On the Portal Information tab, you have a handful of configuration options. View a complete configuration reference here.
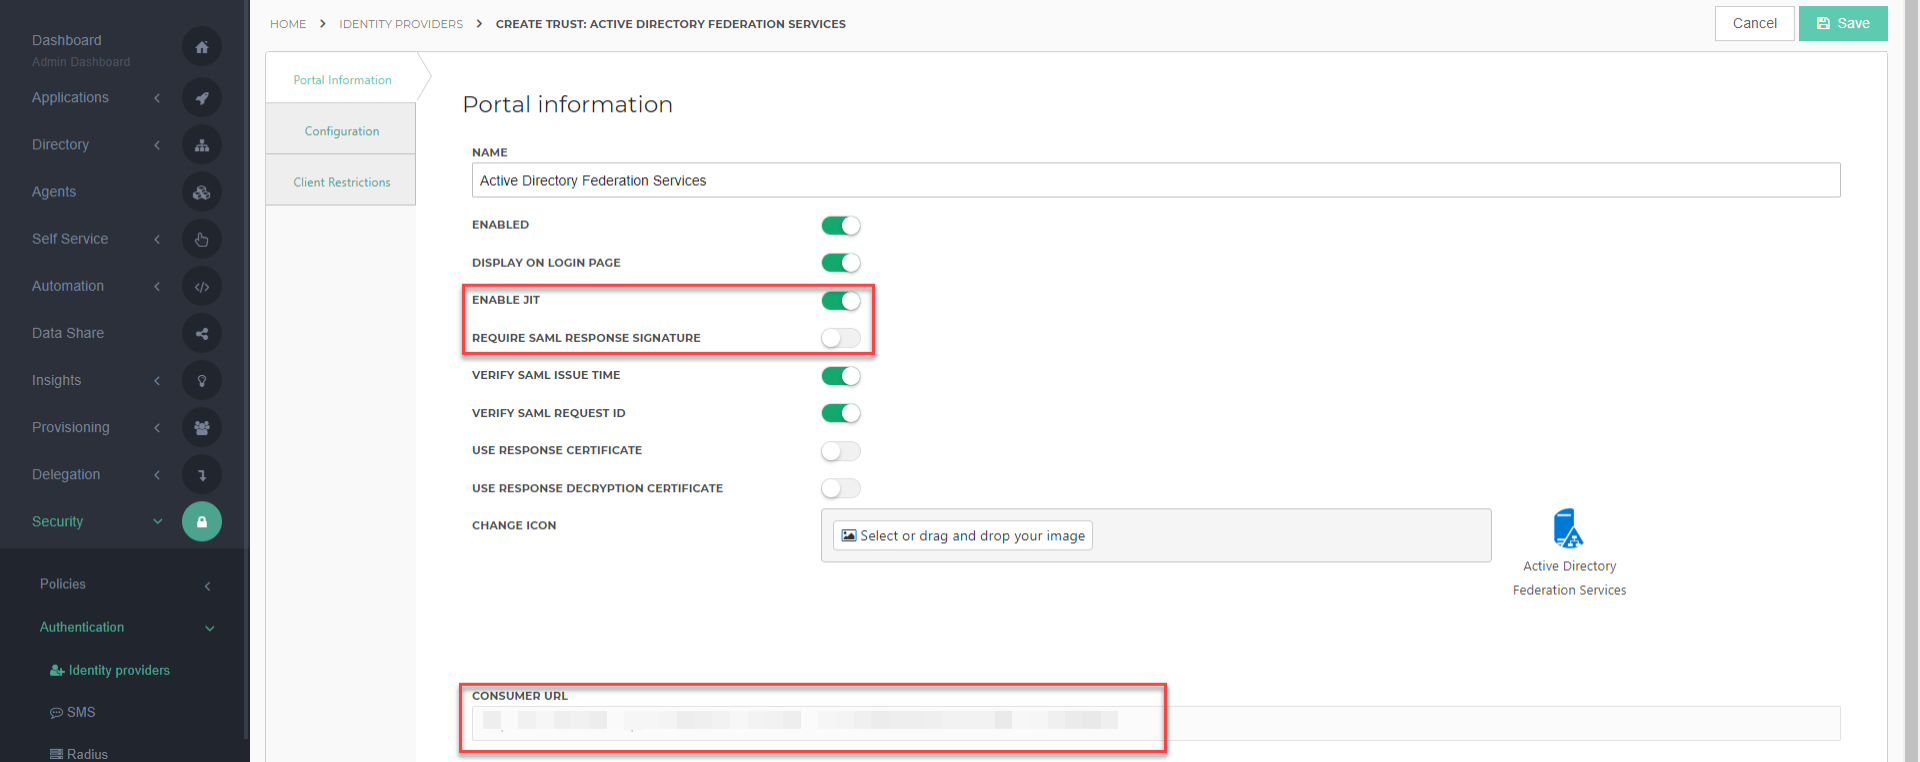
Make note of the Consumer URL value, as you will need it later.
Disable Require SAML response signature.
Enable JIT if you wish (recommended).
Set the other options as desired.
Click Next.
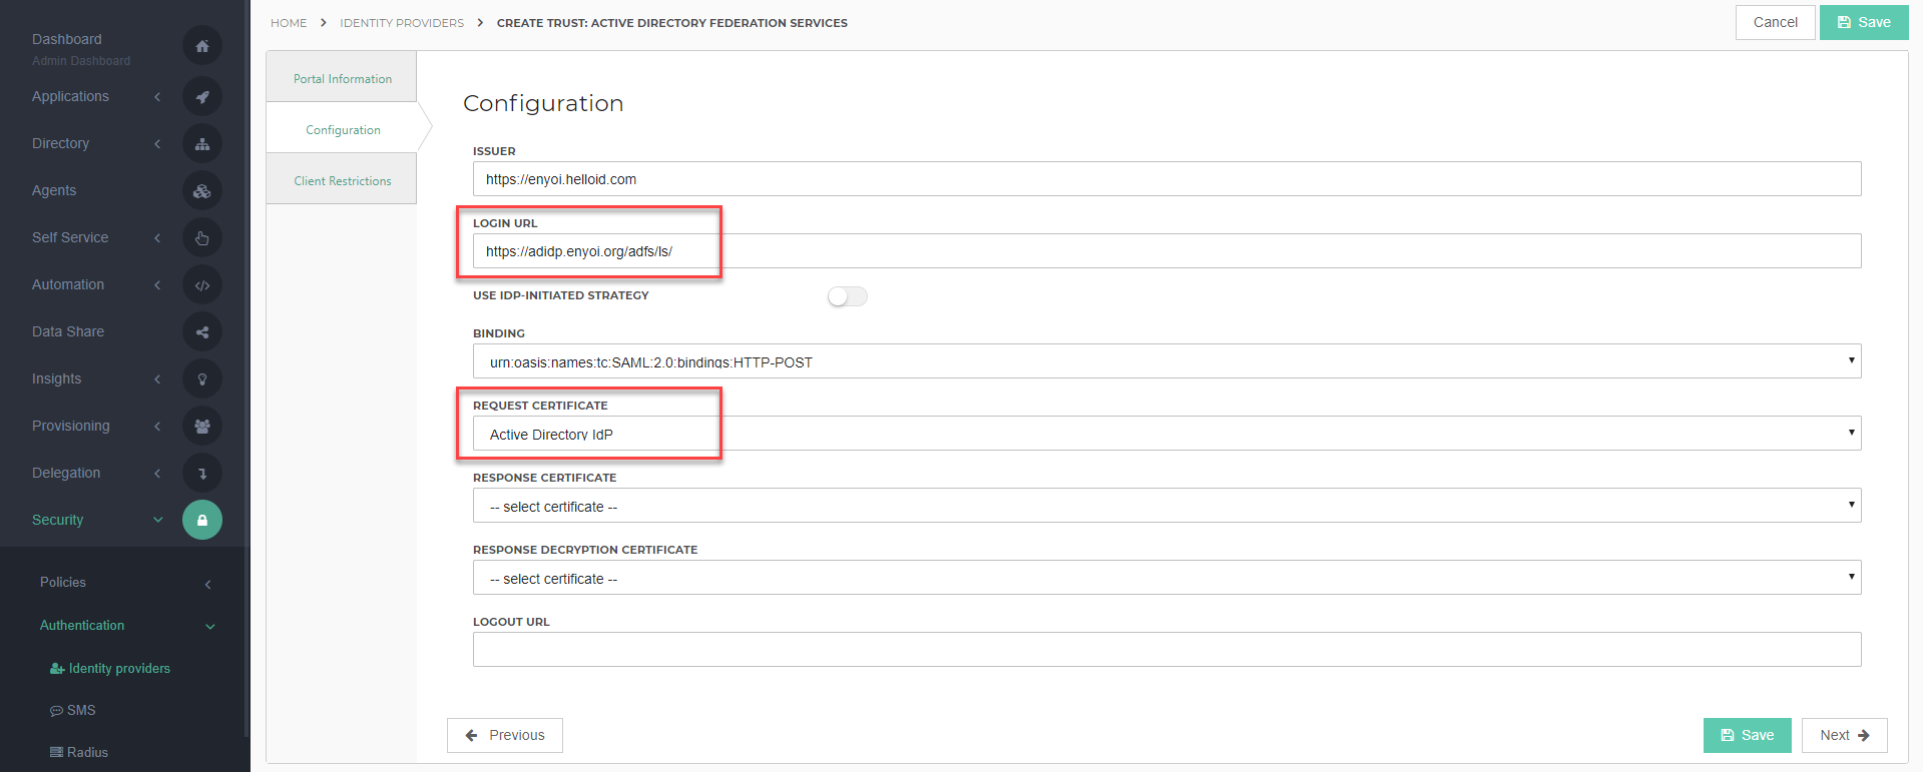
The Configuration tab lets you specify the details of your AD FS IdP. Configure the following required settings and click Next. You may configure other optional settings as desired.
Login URL: Enter the URL of the AD FS site's /adfs/ls/ endpoint.
IMPORTANT: Verify that the URL ends with a forward slash.
Request Certificate: Select the certificate that you created or imported in HelloID.
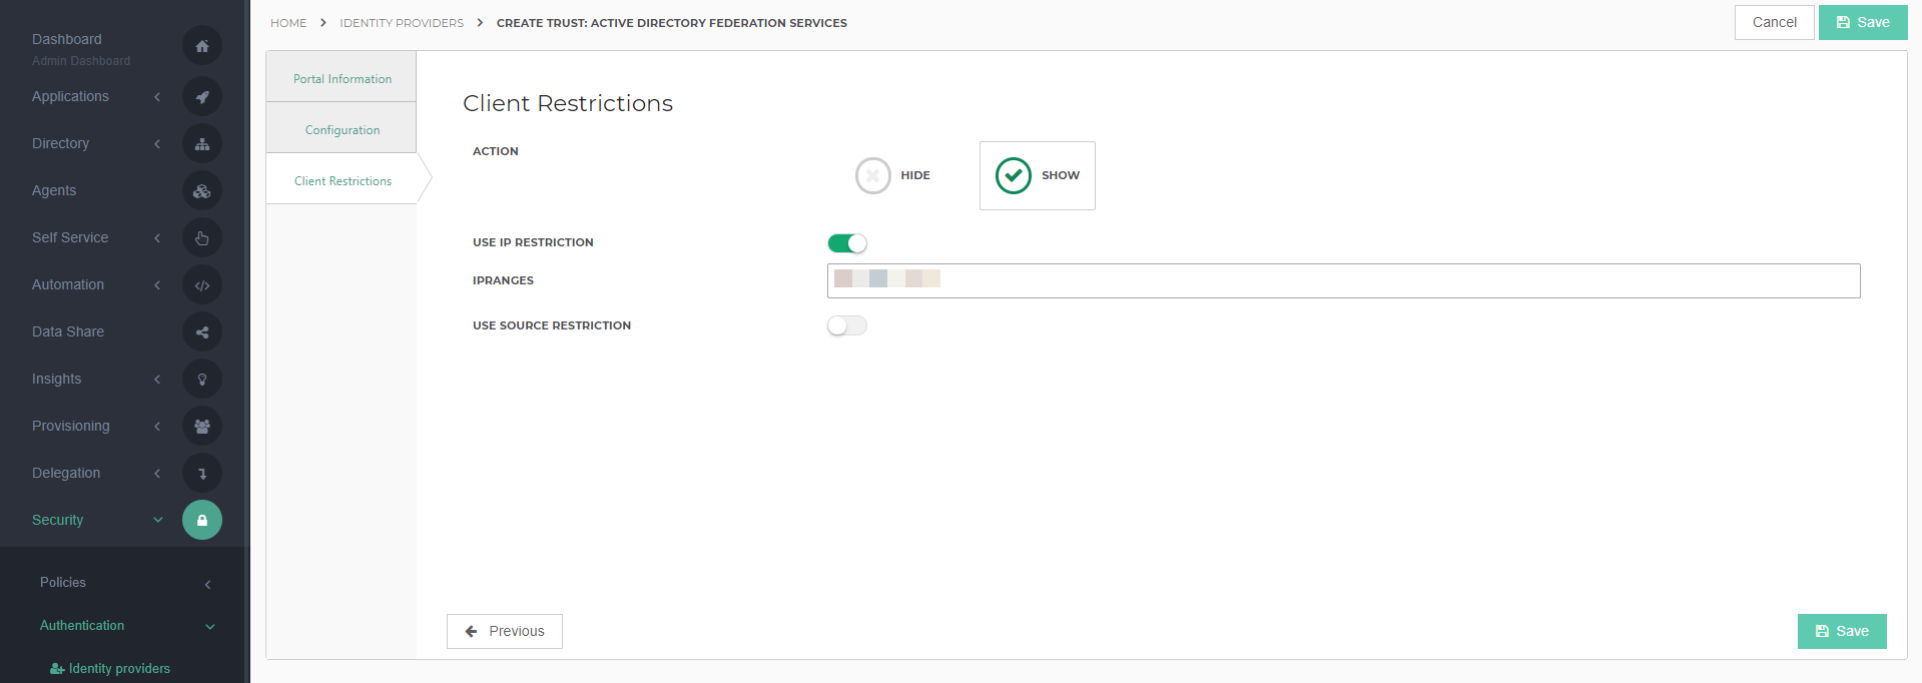
The Client Restrictions tab will allow you to show or hide this IdP from the login screen based on IP or source restrictions. For example, because the IIS web server must be accessible to client machines, you may only want to show this IdP if the clients are coming from your organization's own IP address. Configure this tab as you see fit and click Save. View more information about client restrictions here.
Configure Active Directory Federation Services
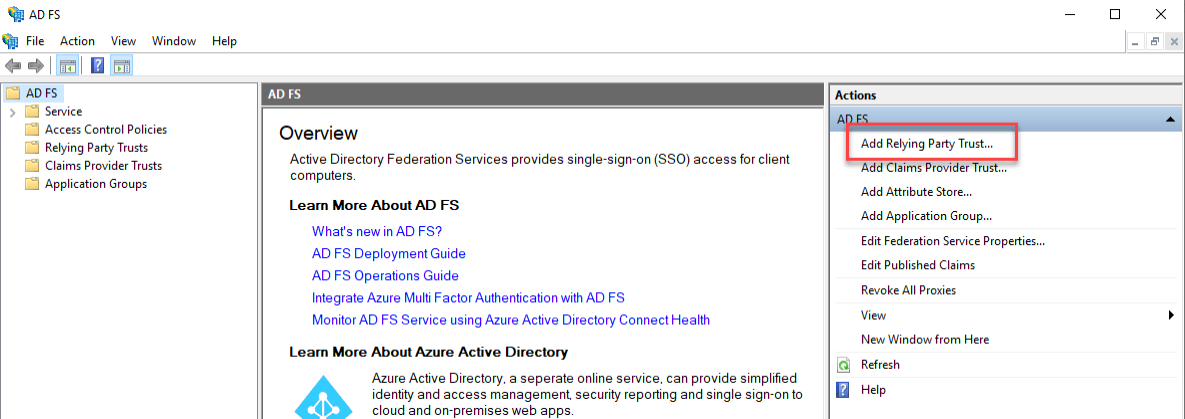
On the AD FS server, open the AD FS Management console.
Click Add Relying Party Trust...
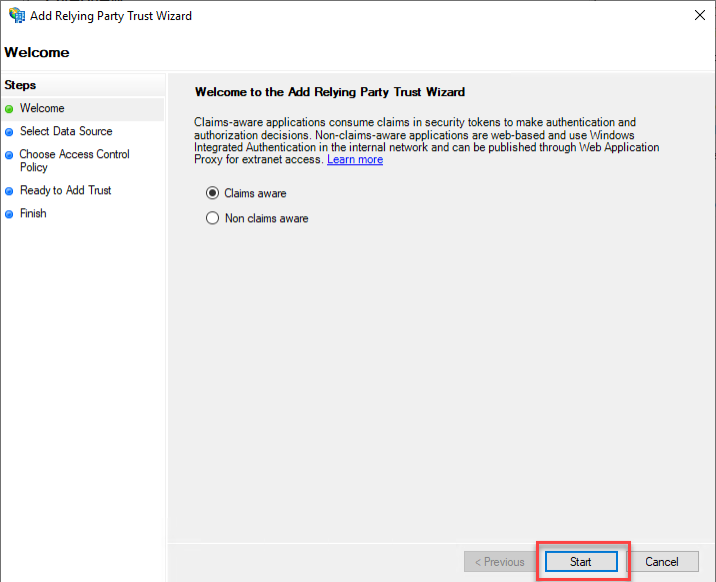
The Add Relying Party Trust Wizard will open. At Welcome page, click Start.
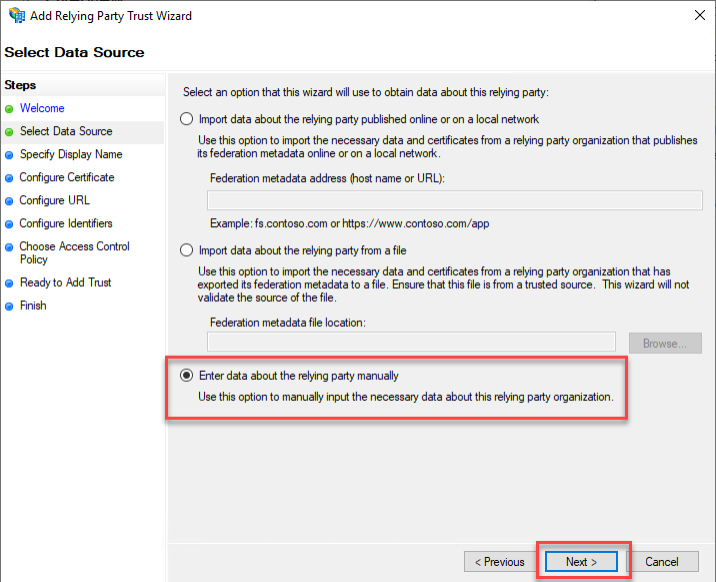
On the Select Data Source page, select Enter data about the relying party manually. Click Next to continue.
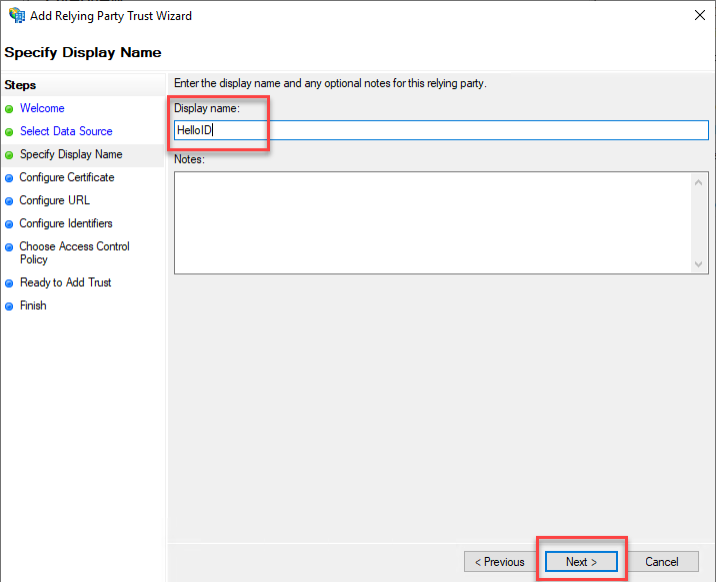
Specify Display Name page, enter a recognizable Display name and click Next.
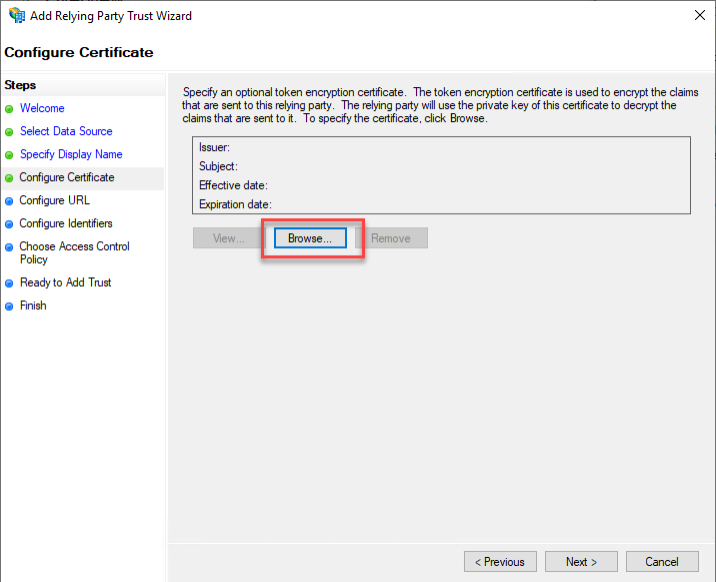
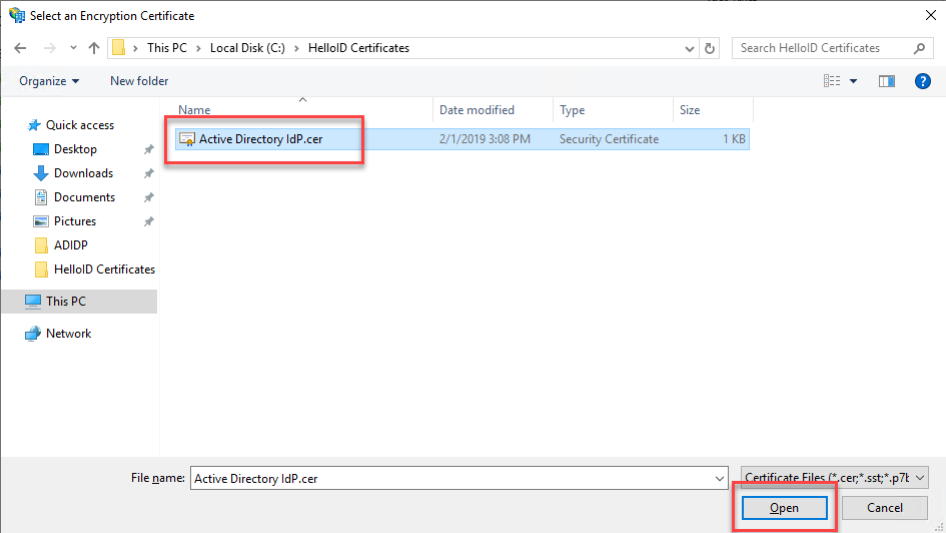
On the Configure Certificate page, click Browse.
In the file explorer that appears, find the certificate that you exported from HelloID. Select the certificate file and click Open.

Verify the certificate's details that appear and click Next.
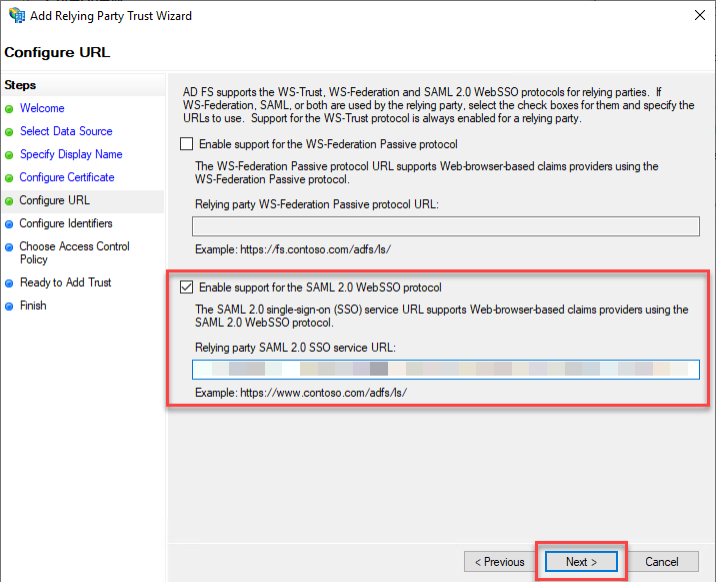
On the Configure URL page, select Enable support for the SAML 2.0 WebSSO Protocol. Then, paste the Consumer URL value from the IdP Portal Information page in HelloID. Click Next to continue.
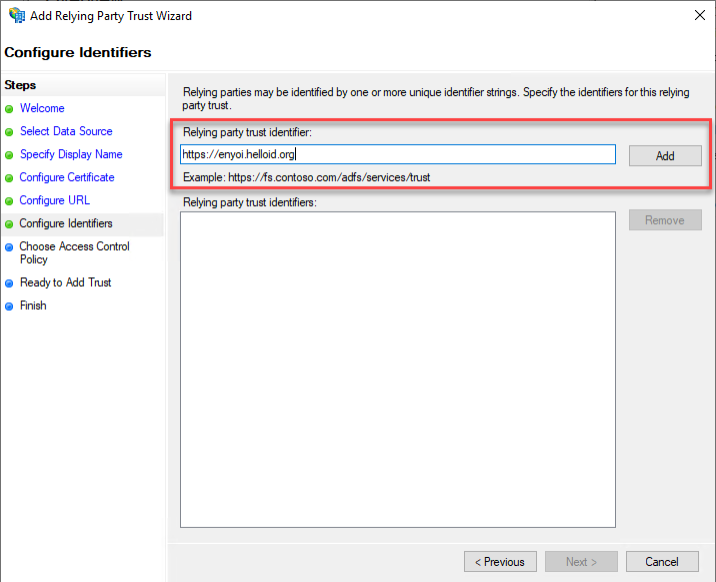
On the Configure Identifiers page, enter your HelloID portal URL into the Relying party trust identifier text box and click Add.
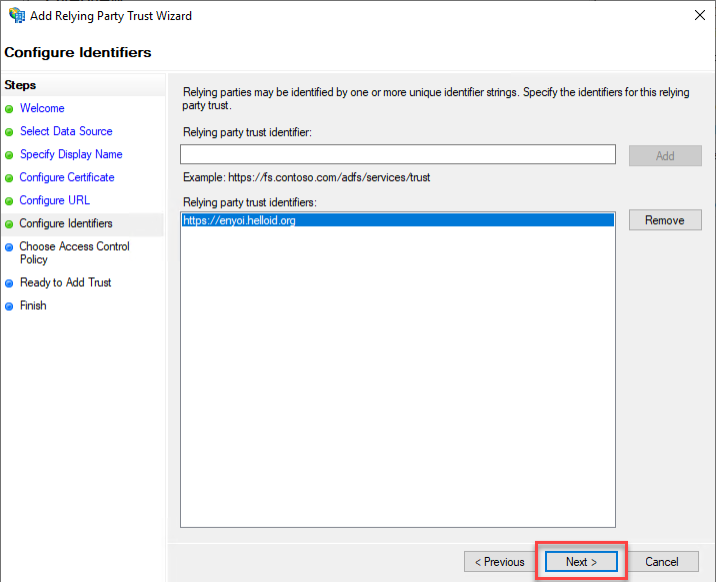
Once the relying party trust identifier has been added, click Next.
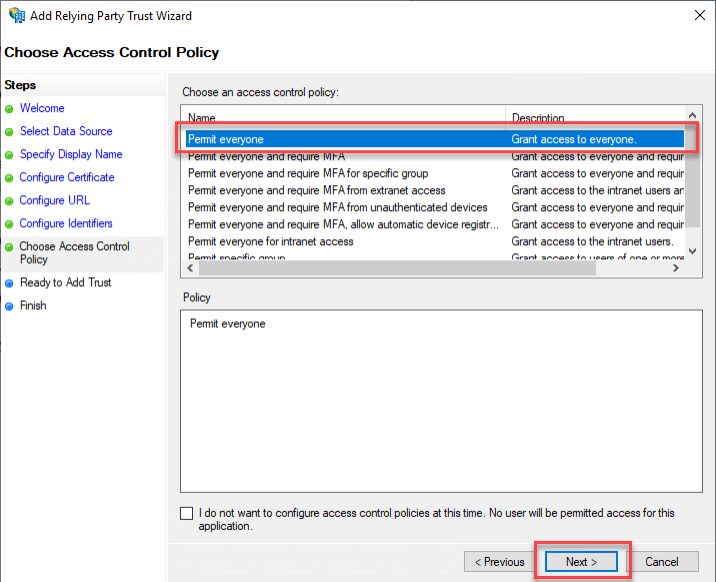
On the Choose Access Control Policy page, select Permit Everyone and click Next.
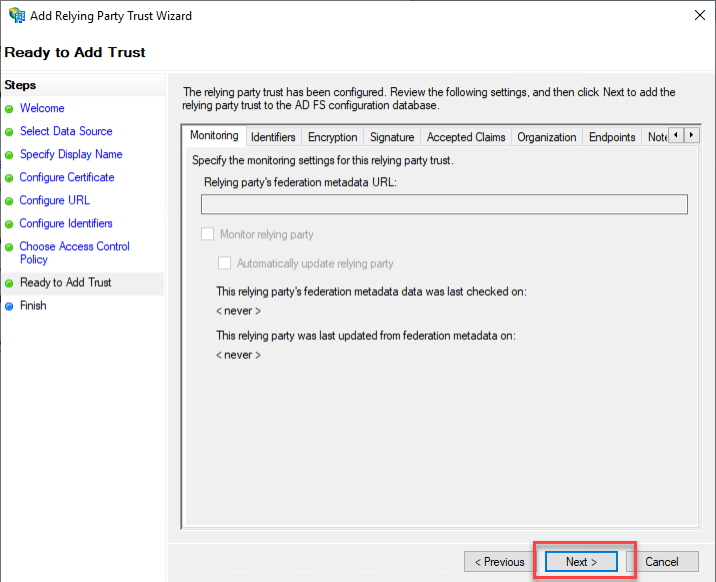
On the Ready to Add Trust page, verify that all settings are correct and click Next.
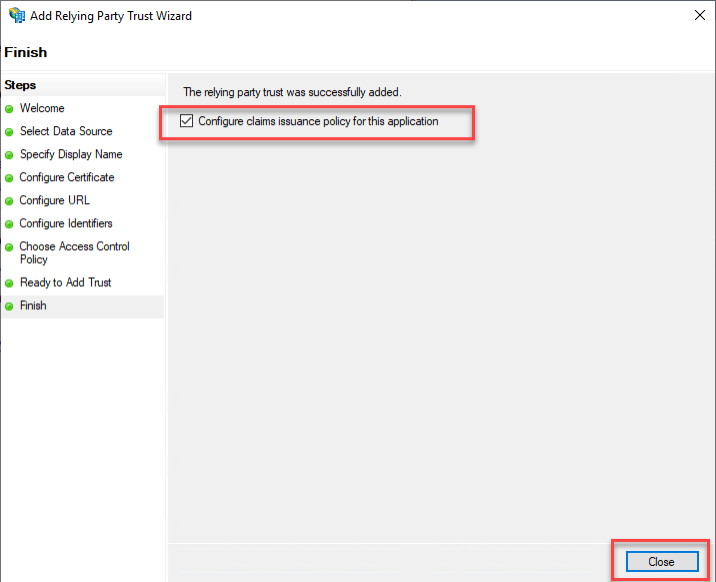
On the Finish page, ensure that Configure claims issuance policy for this application is selected, and click Close.
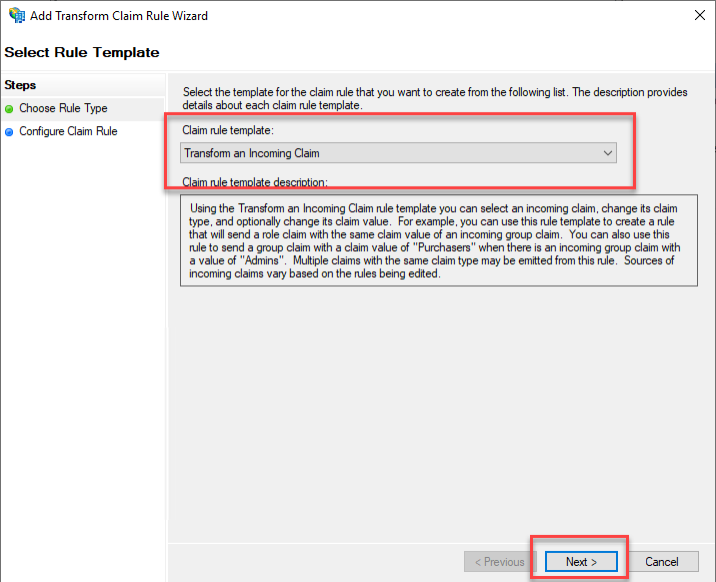
The Edit Claim Issuance Policy window will appear. Click Add Rule ... This will bring up the Add Transform Claim Rule Wizard.

On the Select Rule Template page, select Transform an Incoming Claim from the Claim rule template dropdown. Click Next to continue.
On the Configure Rule page, enter the following settings.
Claim rule name: Name ID
Incoming claim type: UPN
Outgoing claim type: Name ID
Outgoing name ID format: Unspecified
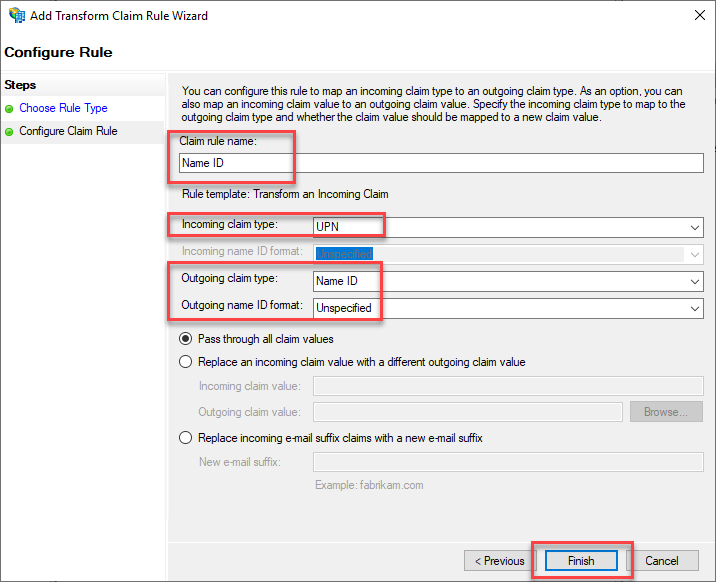
Note : In HelloID, the Windows account name is stored in "Name ID" attribute. In order to make a claim work from AD FS, a transformation must be applied to the claim.
Click Finish to add the rule.
Click Add Rule... to add another rule.
On the Select Rule Template page, select Send LDAP Attributes as Claims from the Claim rule template dropdown. Click Next to continue.
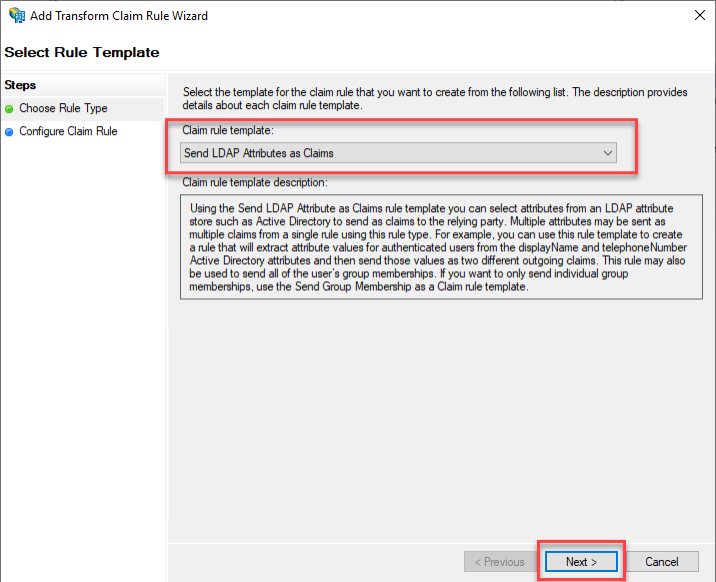
On the Configure Rule page, enter the following settings:
Claim rule name: Additional Attributes
Attribute store: Active Directory
Underneath Mapping of LDAP attributes to outgoing claim types, enter the following settings. Not all of these listed values are selectable, so you will need to enter them manually.
LDAP Attribute
Outgoing Claim Type
Given-Name
givenName
Surname
sn
E-Mail-Addresses
email
objectSid
objectSID
User-Principal-Name
userPrincipalName
manager
manager
SAM-Account-Name
sAMAccountName
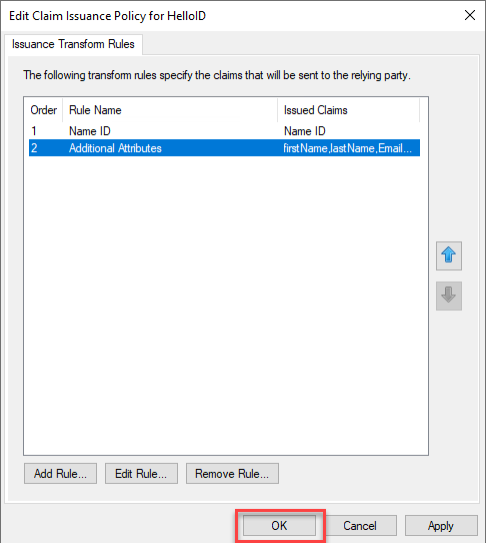
Click Finish to add the claim rule.
Click OK to close the Edit Claim Issuance Policy window.
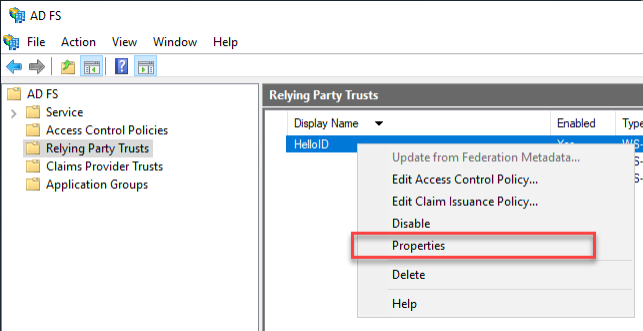
Right click on the newly created Relying Party Trust and select Properties.
Go to the Signature tab and click Add.
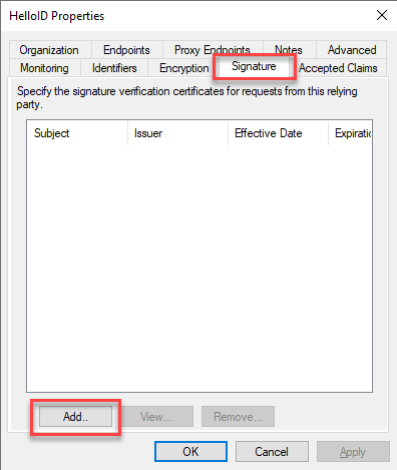
In the file explorer that appears, find the certificate that you exported from HelloID. Select the certificate file and click Open.
Click OK to close the window.
Test the Configuration
The configuration is now finished and may be tested on a computer that has access to both the AD FS as well as HelloID.
Launch a browser and navigate to your HelloID portal's login page. You should now see a new login option for the Active Directory Federation Services IdP, as shown below.
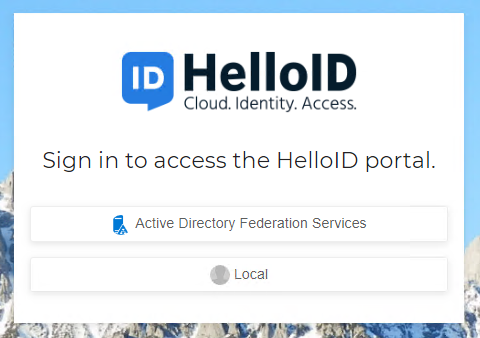
Click on the Active Directory Federation Services login, and you will be redirected to the AD FS login page. Enter your domain credentials. There will be a brief redirect, and you will be routed to the HelloID user dashboard, logged in as the Windows user. The name of the user will be displayed in the upper-right corner of the HelloID Dashboard.
Introduction
This article will walk you through configuring Azure AD as an OIDC identity provider (IdP) for HelloID.
Register HelloID with Azure AD
Log in to your Azure portal at https://portal.azure.com/.
Select the Azure Active Directory button.
Select the App registrations link under the Manage menu.
Select the New registration button.
Enter
HelloIDfor the Name.Select your desired option for Who can use this application or access this API.
Enter the following URL into the Redirect URI field:
https://customer.helloid.com/azureadoidcauthentication/consumeoidc. Replacecustomer.helloid.comwith your HelloID portal base URL.Select the Register button to save and open the new app.
Select the Authentication link under the Manage menu.
Enter the following URL into the Logout URL field:
https://customer.helloid.com/authentication/signoff. Replacecustomer.helloid.comwith your HelloID portal base URL.Select the ID tokens option under the Implicit grant section.
Select the Save button.
Select the Certificates & secrets link under the Manage menu.
Select the New client secret button. Enter an optional description and select your preferred expiration period.
Select the Add button.
The client secret appears under the Client secrets section. Copy its Value into a separate notepad app for later use. (Important, because you won't be able to view it again.)
Select the API permissions link.
Go to Add a permission > Microsoft Graph > Delegated permissions. Select the following permissions:
AccessReview.Read.AllDirectory.AccessAsUser.AllemailopenidprofileUser.Read
Select the Add permissions button to confirm your changes.
Select the Grant admin consent for Default Directory button to grant admin consent for all users.
Select the Yes button to confirm.
Configure the Azure AD OIDC IdP in HelloID
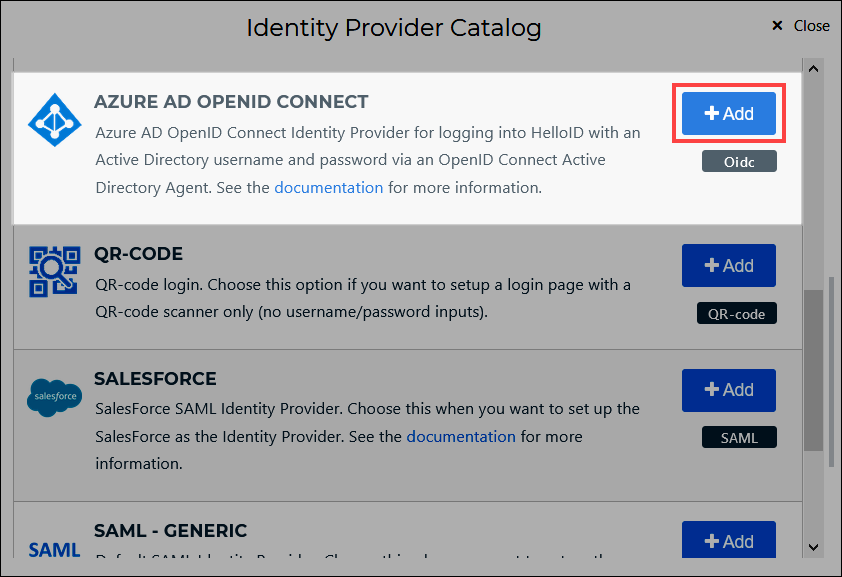
Go to Security > Authentication > Identity providers in your HelloID admin dashboard. Select the Create Provider button.
Select the Add button for Azure AD OpenID Connect.
Select the Configuration tab.
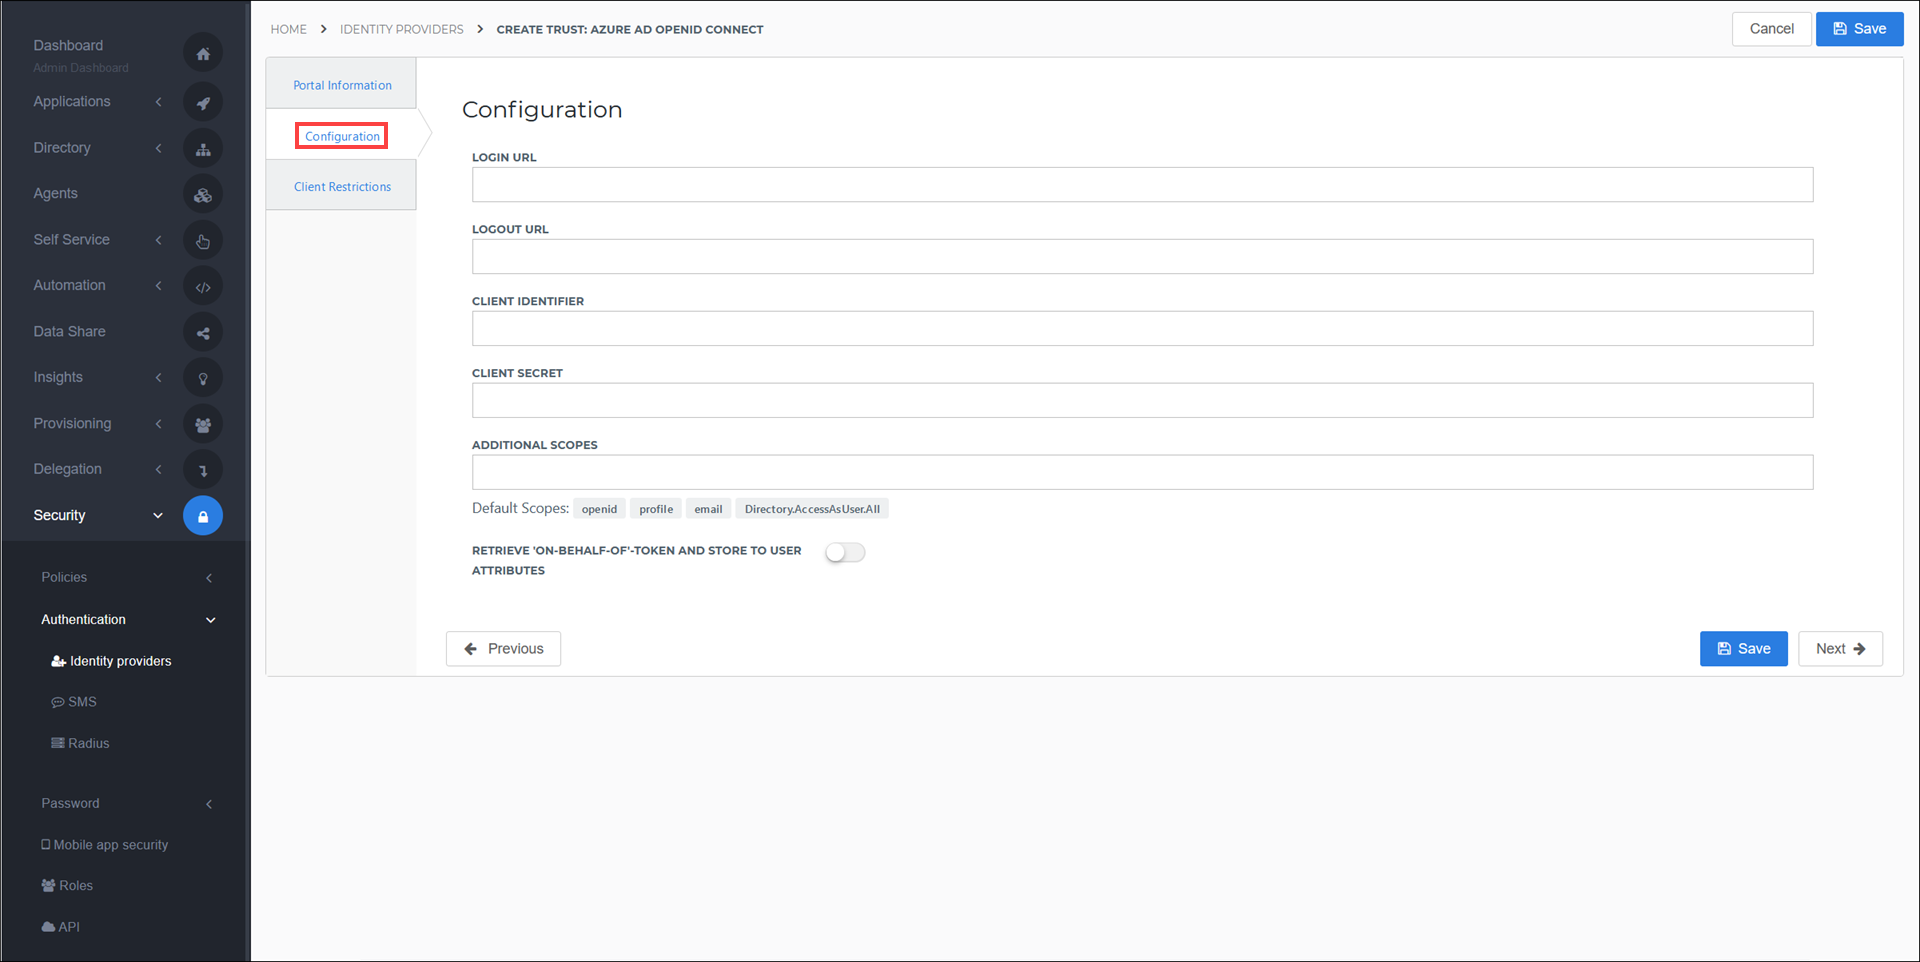
Enter the following information:
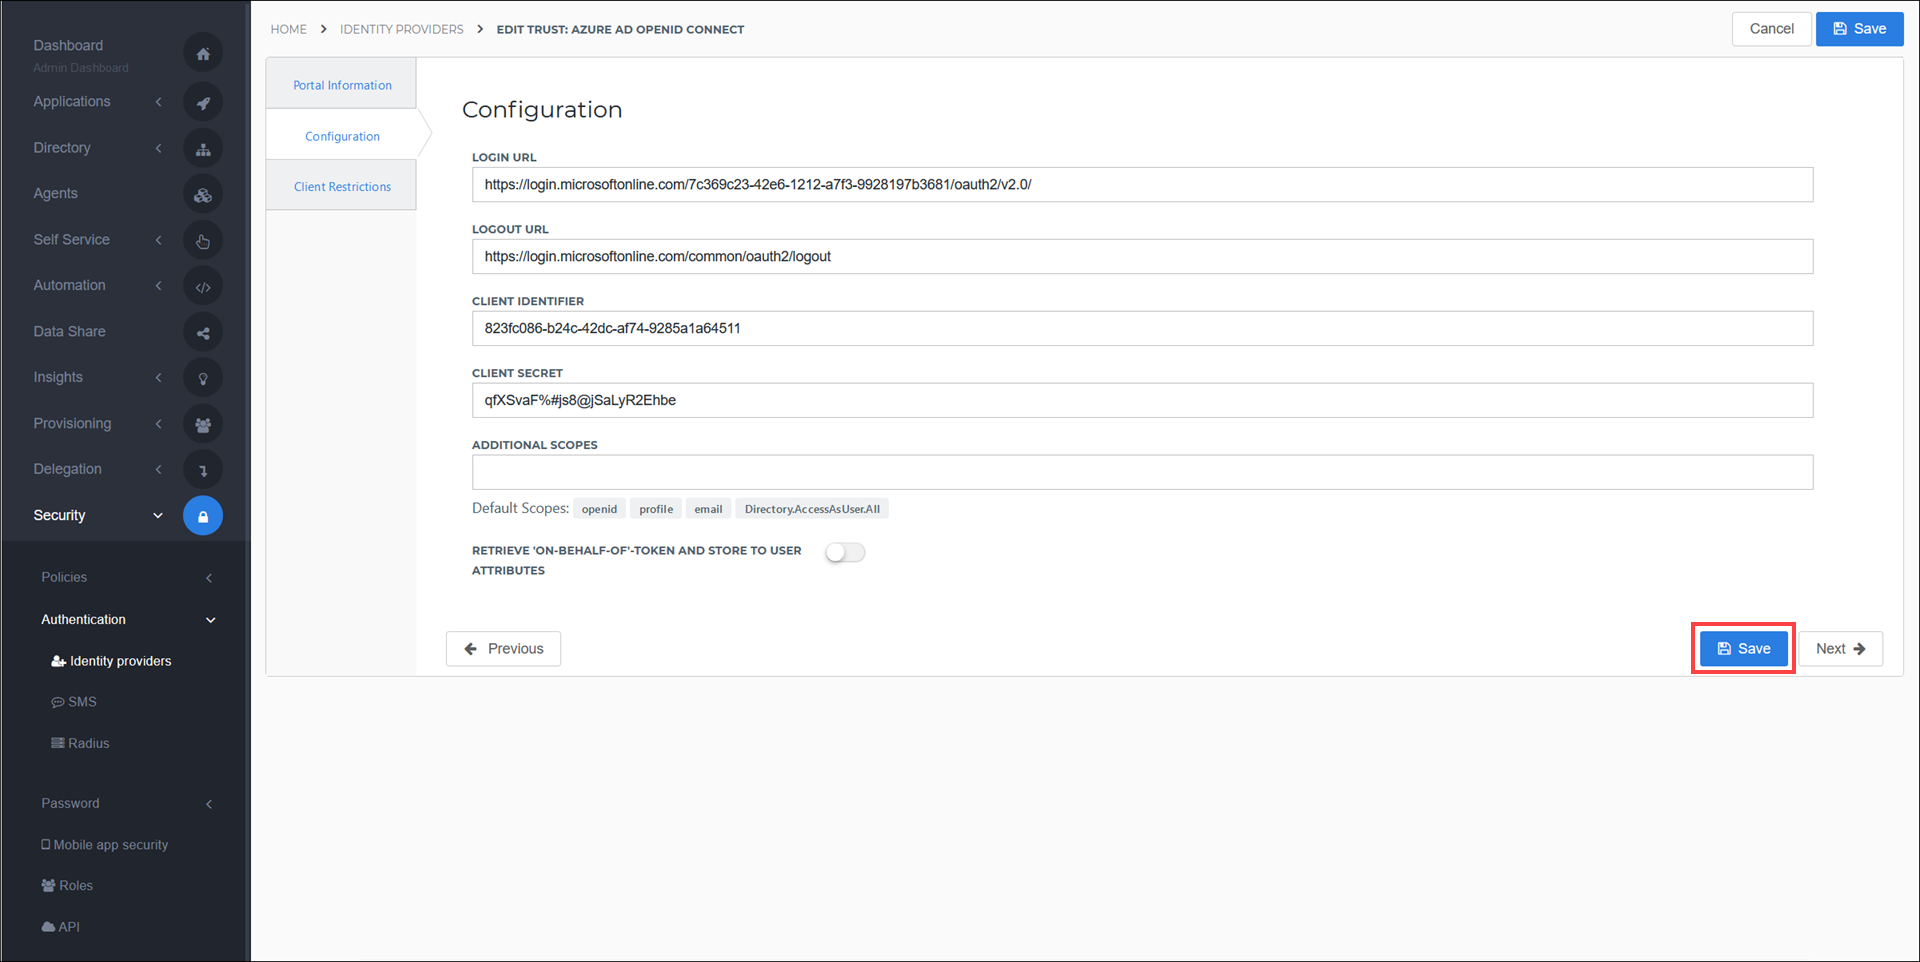
Login URLIn your Azure portal, go to Azure Active Directory > App registrations > HelloID and select the Endpoints button. Copy the OAuth 2.0 authorization endpoint (v2) value and paste it into this field. Remove the trailing
authorizeon this URL.Logout URLEnter
https://login.microsoftonline.com/common/oauth2/logout.Client IdentifierIn your Azure portal, go to Azure Active Directory > App registrations > HelloID . Copy the Application (client) ID value and paste it into this field.
Client SecretPaste the client secret value you copied into a separate notepad application in step 15 of the previous section.
The required scopes are already added as defaults under Additional Scopes. Add additional scopes if needed.
Configure additional options as needed. View a complete reference of IdP options here.
Select the Save button to confirm.
If integration with Azure Graph API is required, please follow these instructions in the section below, Retrieve the "on-behalf" token.
Modify default attribute mappings (if using Azure AD Connect)
You must modify the default Azure AD mapping set if:
You are already syncing an on-premises AD environment to HelloID, and;
You plan to use the Azure AD OIDC IdP as an alternate login method for these users, and;
Your Azure AD users are created from your on-premises AD environment via Azure AD Connect.
By default, Agent retrieves an on-premises AD user's objectSid value and writes it to the user.immutableId field in the synced HelloID user. It then uses this field its unique identifier. The Azure AD mapping set works similarly, using the Azure AD oid value (which was previously set by Azure AD Connect to a base64 transformation of the AD objectGUID).
This causes a conflict because the two systems each overwrite the HelloID user.immutableId field with different values, while also attempting to use user.immutableId as their unique identifier. This results in failure to correlate to the correct user accounts, and/or creation of duplicate accounts.
Resolve this by adjusting the mapping set as shown below. This solves the problem by using Azure AD's preferred_username (mapped to the HelloID user.userName field) as the Azure AD OIDC IdP's unique identifier. Your on-premises AD environment can then safely continue to use AD's objectSid mapped to the HelloID user.immutableId field as its unique identifier.
Both on-premises AD and Azure AD will now correlate to the correct HelloID user without any conflicts.
In HelloID, go to Directory > Mapping sets.
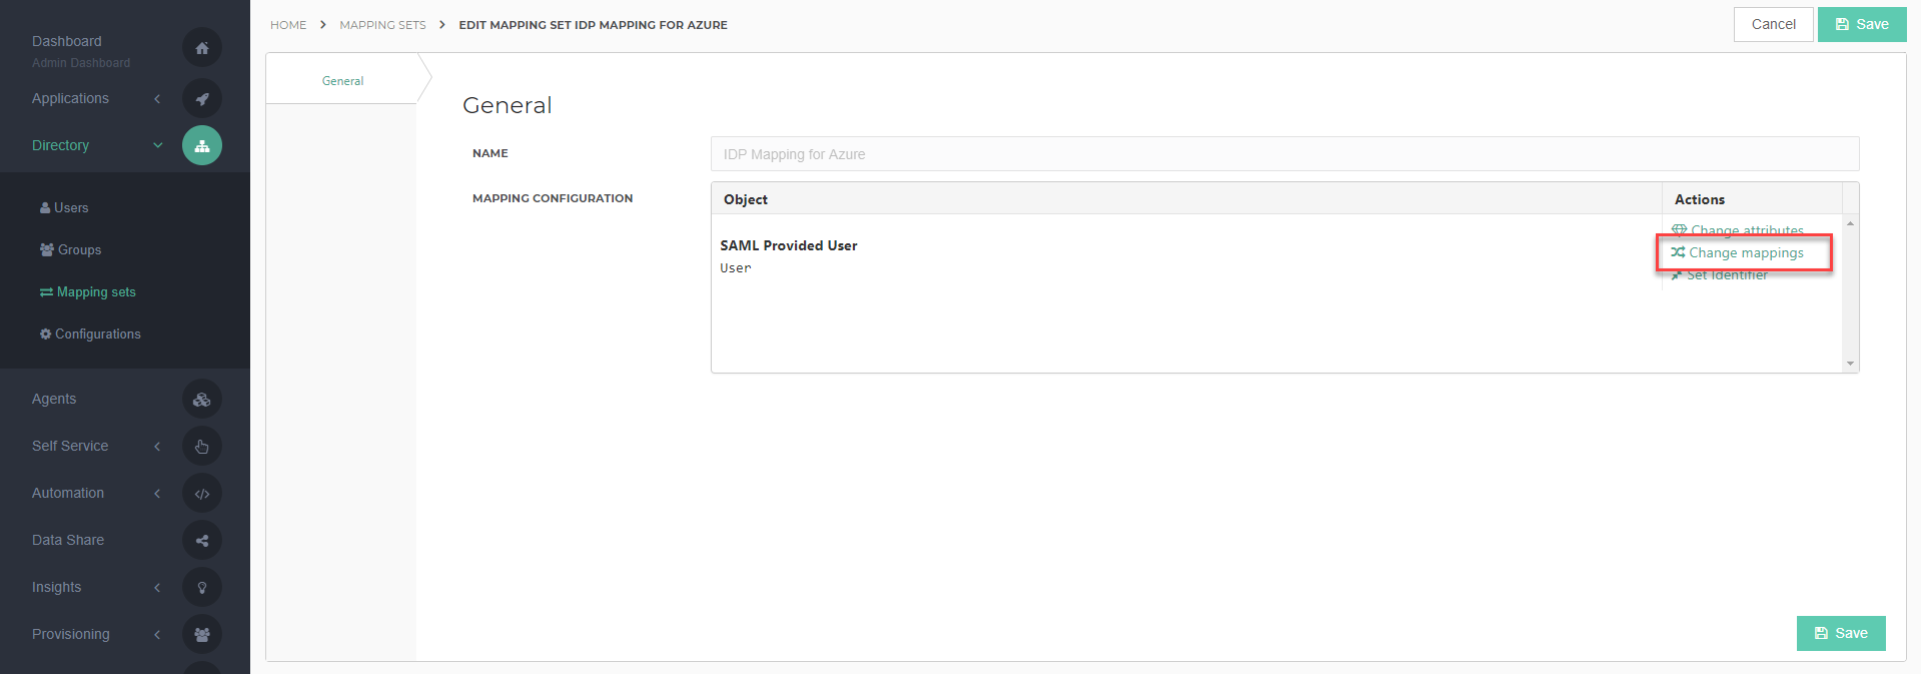
Select the Edit link for the IdP Mapping for Azure AD OpenID Connect.
Select the Change mappings link.
Select the X button to remove the following mapping:
User
HelloID User
{{user.oid}}user.immutableIdSelect the Close button.
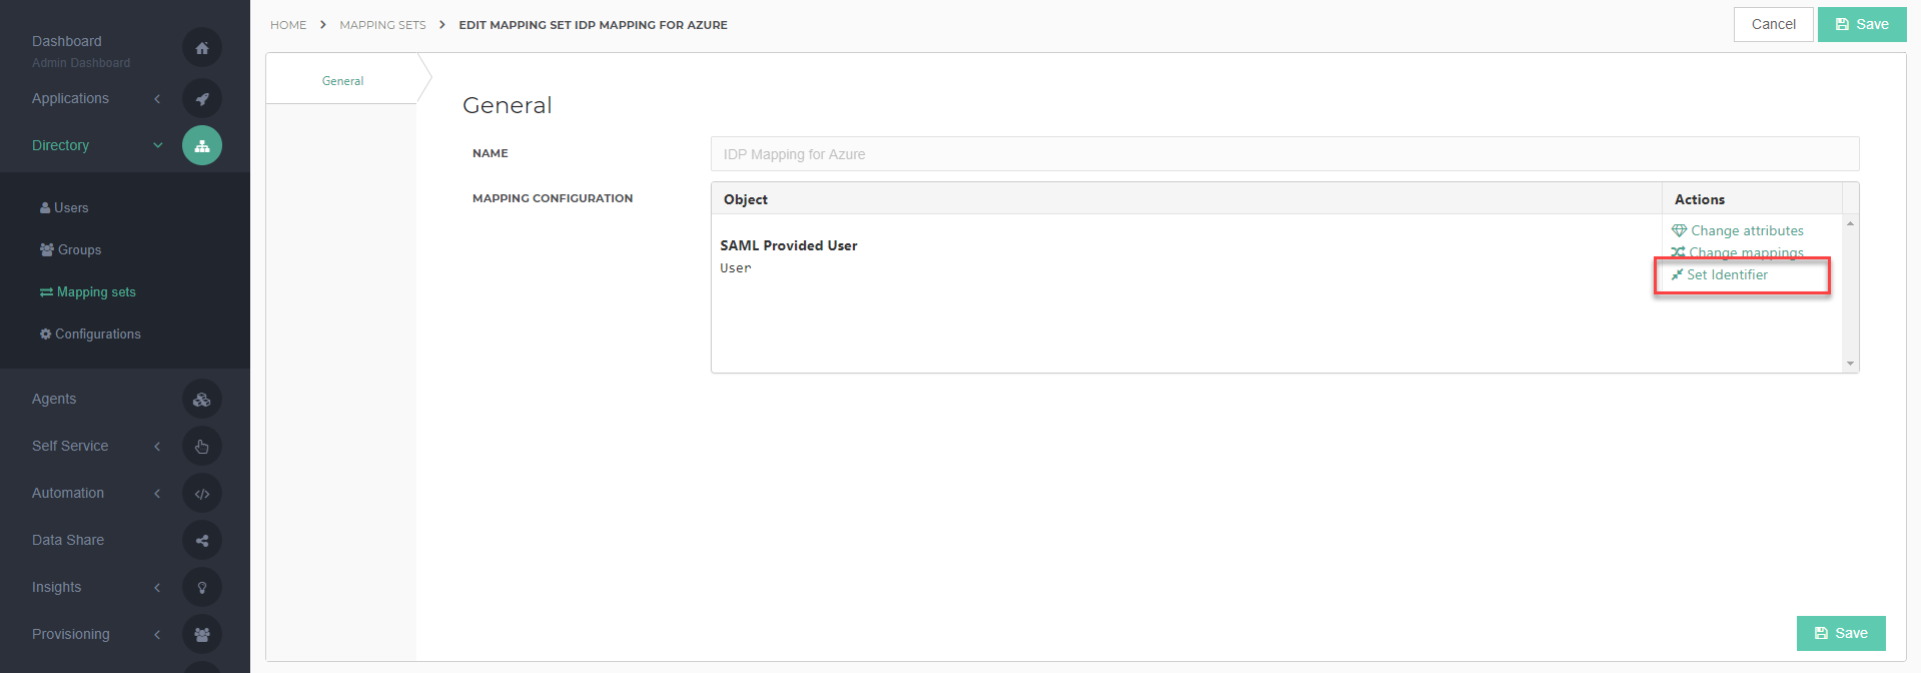
Select the Set Identifier link.
Set the unique identifier as follows:This configuration uses the UserPrincipalName from the Azure user to match to the Username of the HelloID user.
OIDC Provided User
HelloID User
{{user.preferred_username}}Username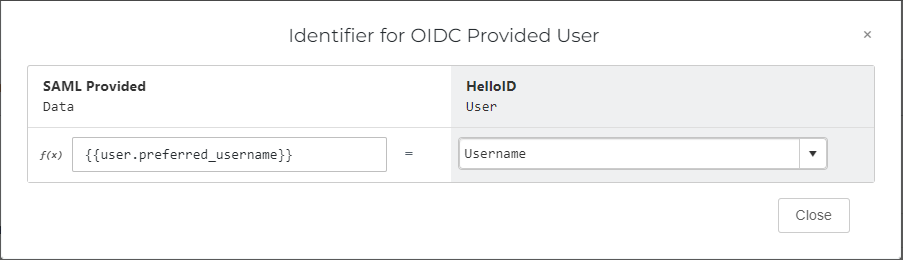
Select the Close button.
Select the Save button to confirm.
Retrieve the "on-behalf" token (optional)
You can store the on-behalf-of and on-behalf-of-refresh tokens from Azure AD inside HelloID user attributes. In this way, the tokens can be passed through to any SSO applications that users log into from HelloID. The applications can then use these tokens to directly access the Azure Graph API on behalf of the users, without requiring re-authentication.
As prerequisites, you must have already done the following:
Set up Azure AD as an OIDC IdP in HelloID, as per the above instructions
Added the target application(s) to which you want to pass the on-behalf-of tokens, to both HelloID (as SSO application(s)) and Azure AD (as registered apps)
It is recommended to use multiple browser tabs while following these instructions. You will be copying and pasting several values between Azure AD and HelloID.
In HelloID, go to Security > Authentication > Identity providers.
Select the Edit link for the Azure AD OIDC IdP.
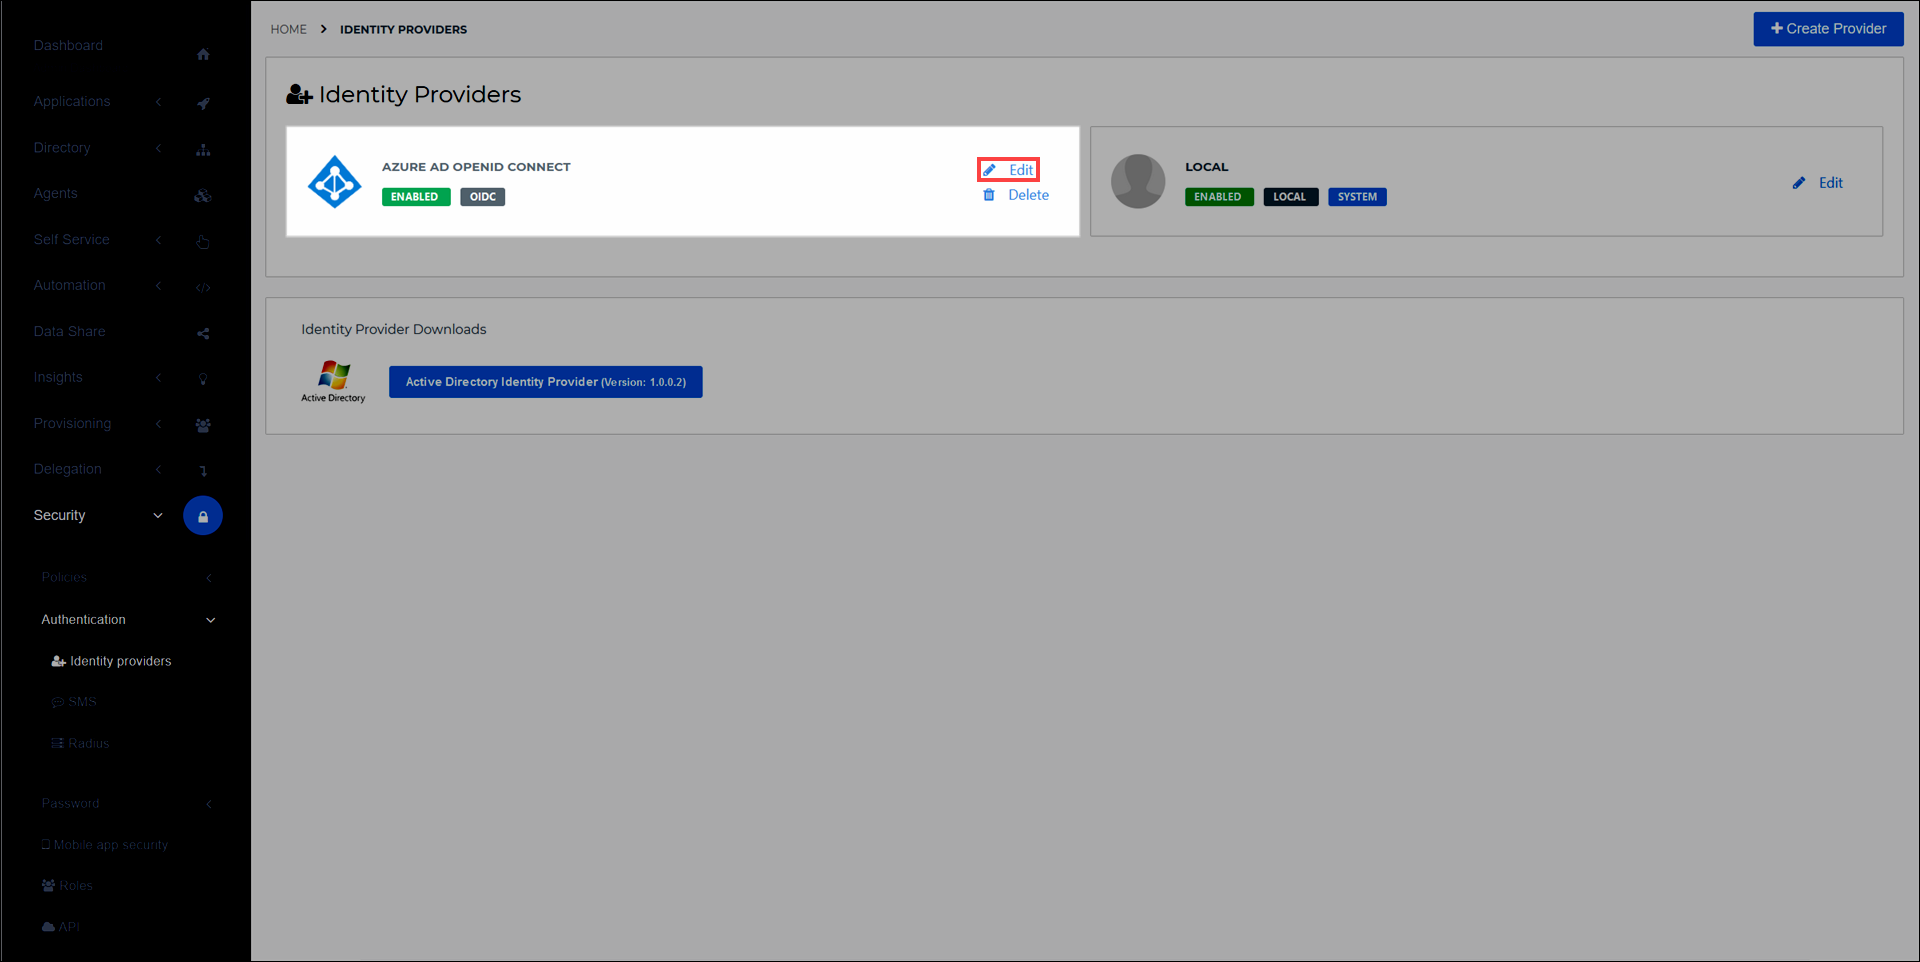
Select the Configuration tab.
Turn on the Retrieve 'On-behalf-of' token and store to user attributes toggle. This automatically adds and maps
onbehalfoftokenandonbehalfofrefreshtokenattributes to all users who log in via the Azure AD IdP, without requiring you to manually add these attributes to the Azure OIDC IdP's mapping set. Leave this browser tab open, without selecting the Save button yet.In a new browser tab, go to Azure Active Directory > App registrations in your Azure portal.
Select the
HelloIDapp that you registered earlier, in the section Register HelloID with Azure AD.Copy its Application (client) ID to a separate notepad app. You will need it shortly.
In Azure AD, go back to App registrations.
Select the target app which users will SSO into from HelloID (the app to which the on-behalf-of tokens will be passed).
Select the Expose an API link.
Select the Add a scope link.
Accept the default Application ID URI. Select the Save & continue button.
Enter your desired scopes.
Select the Add scope button to confirm.
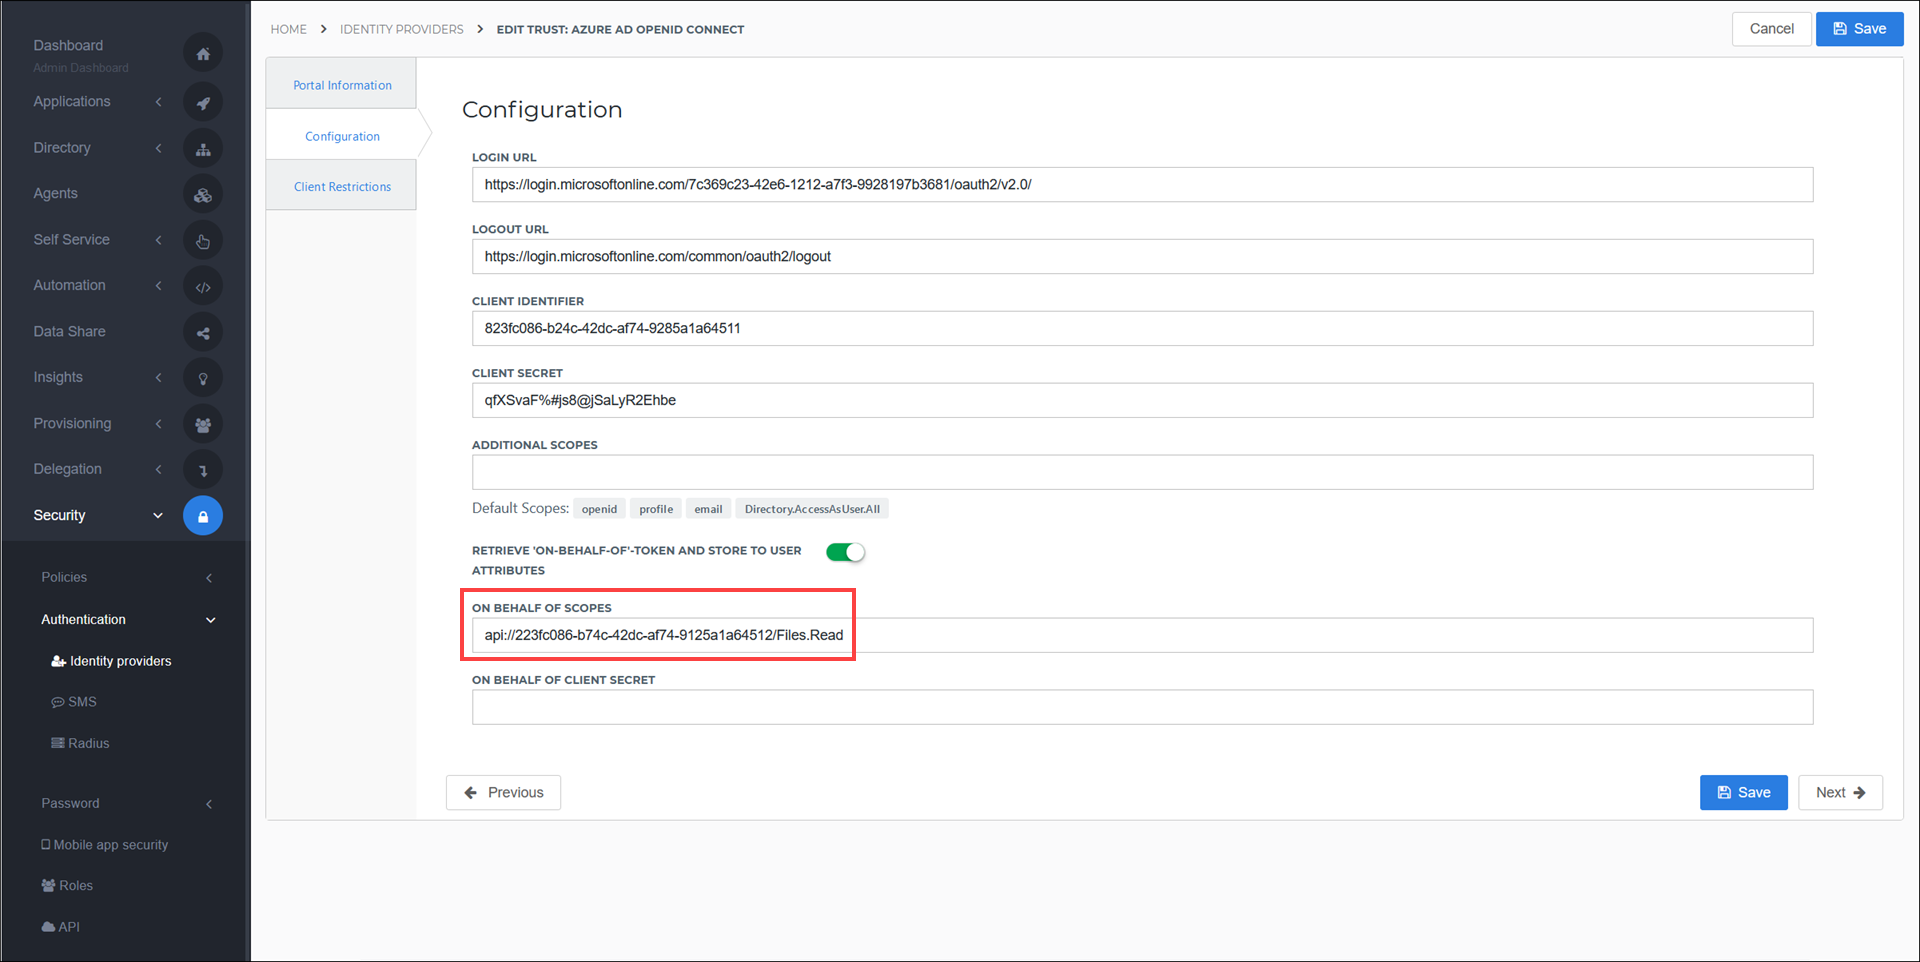
Copy the
api://value which appears under the Scopes column in the Azure AD Expose an API screen. (For example:api://37c086f5-bdc7-4f88-955c-49cb7c3d711d/Files.Read)In HelloID, paste it into the On Behalf of Scopes field of the Configuration tab.
Select the Save button.
In Azure AD, return to the Expose an API page for the target application.
Select the Add a client application button.
Paste the
HelloIDapp's Application (client) ID value you copied in step 7 into the Client ID field.Under Authorized scopes, select the check box for the scope you created in step 13.
Select the Add application button to confirm.
Select the Certificates & secrets link.
Select the New client secret link.
Enter a Description and an expiration period.
Select the Add button to confirm.
Copy the client secret that appears under the Value column.
In HelloID, paste it into the On Behalf of Client Secret field of the Configuration tab.
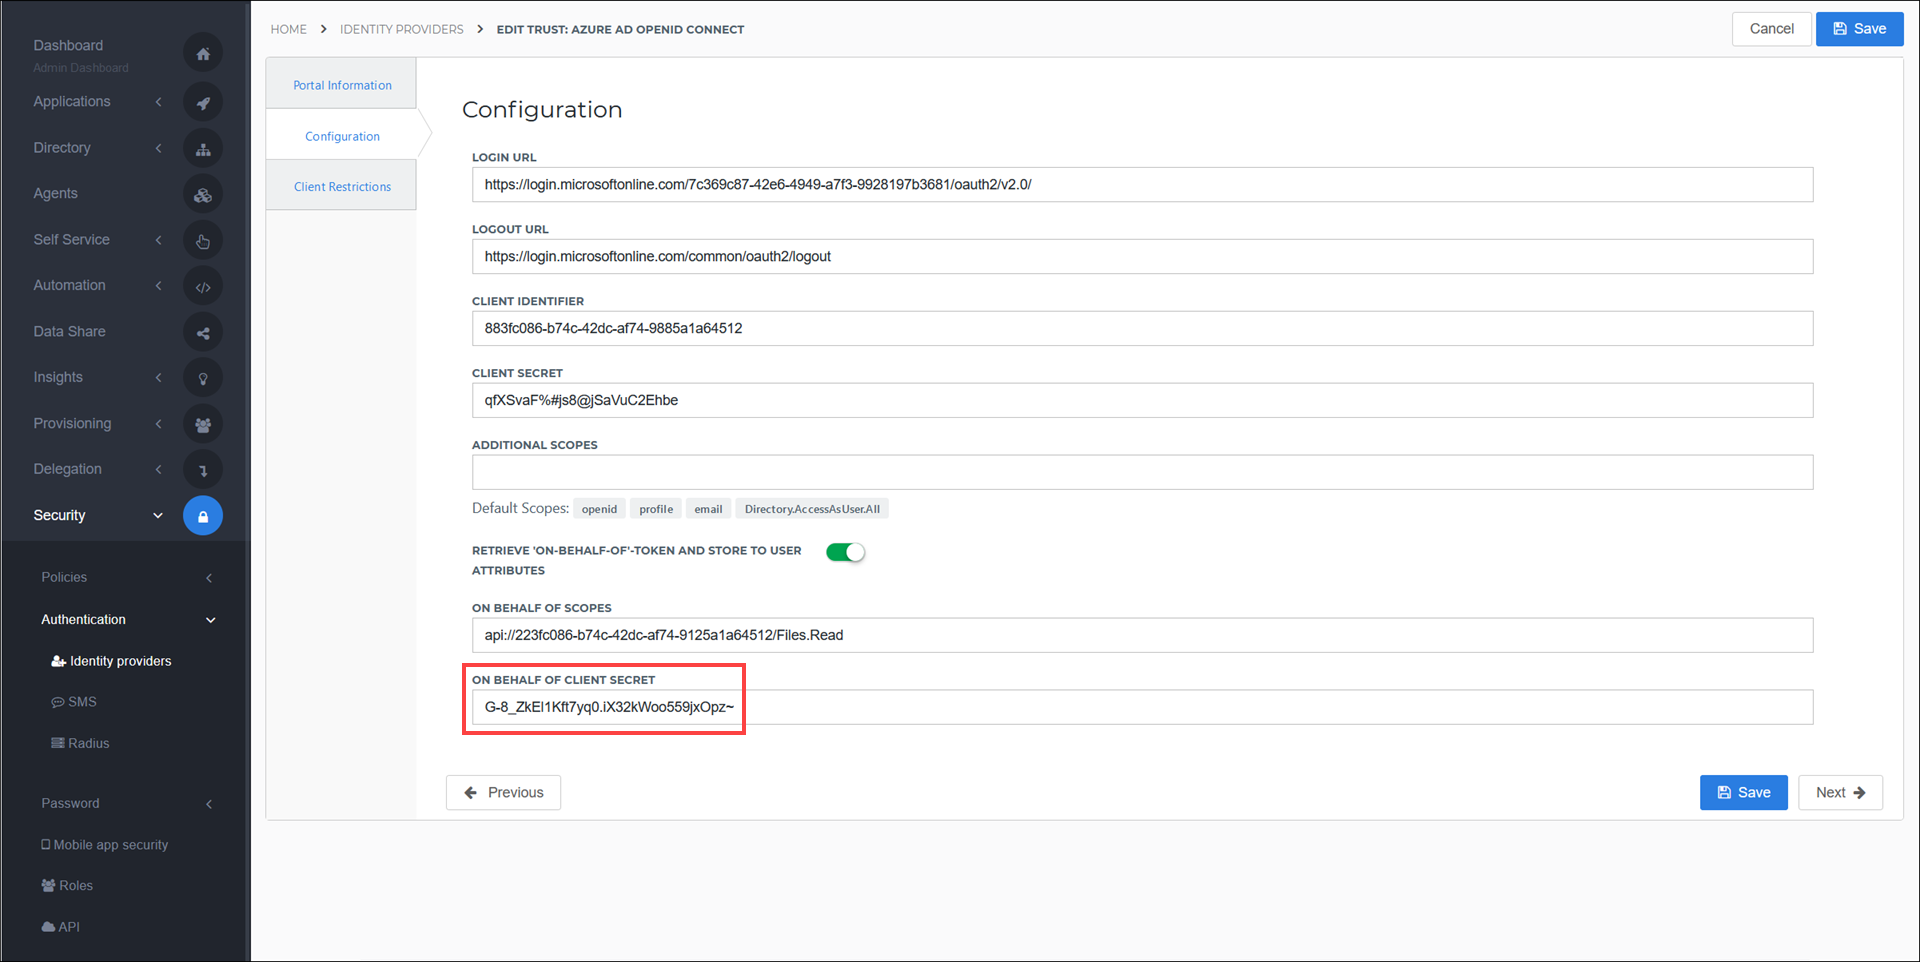
Select the Save button to confirm.
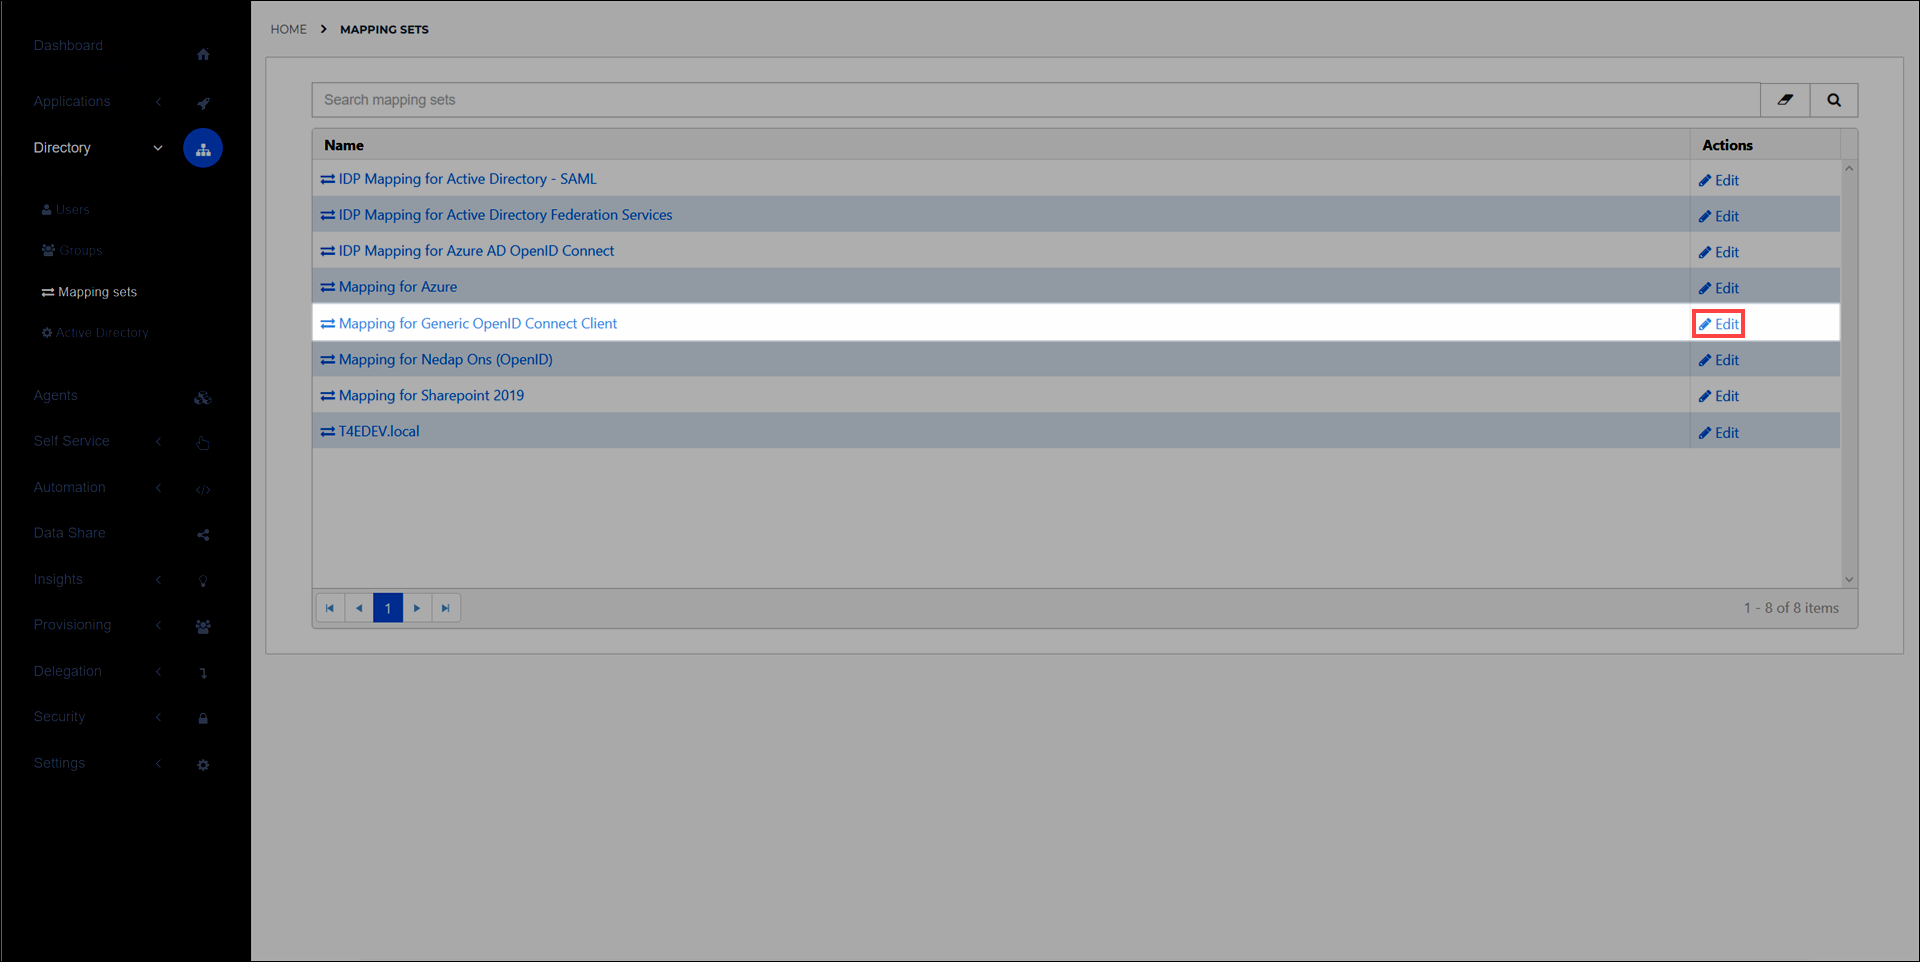
Go to Directory > Mapping sets and select the Edit link for the target application which will require these tokens. For example:
Select the Change attributes link to add
On behalf ofandOn behalf of Refreshattributes withonBehalfOfandonBehalfOfRefreshfor the External Field values, respectively. Learn more about mapping sets here.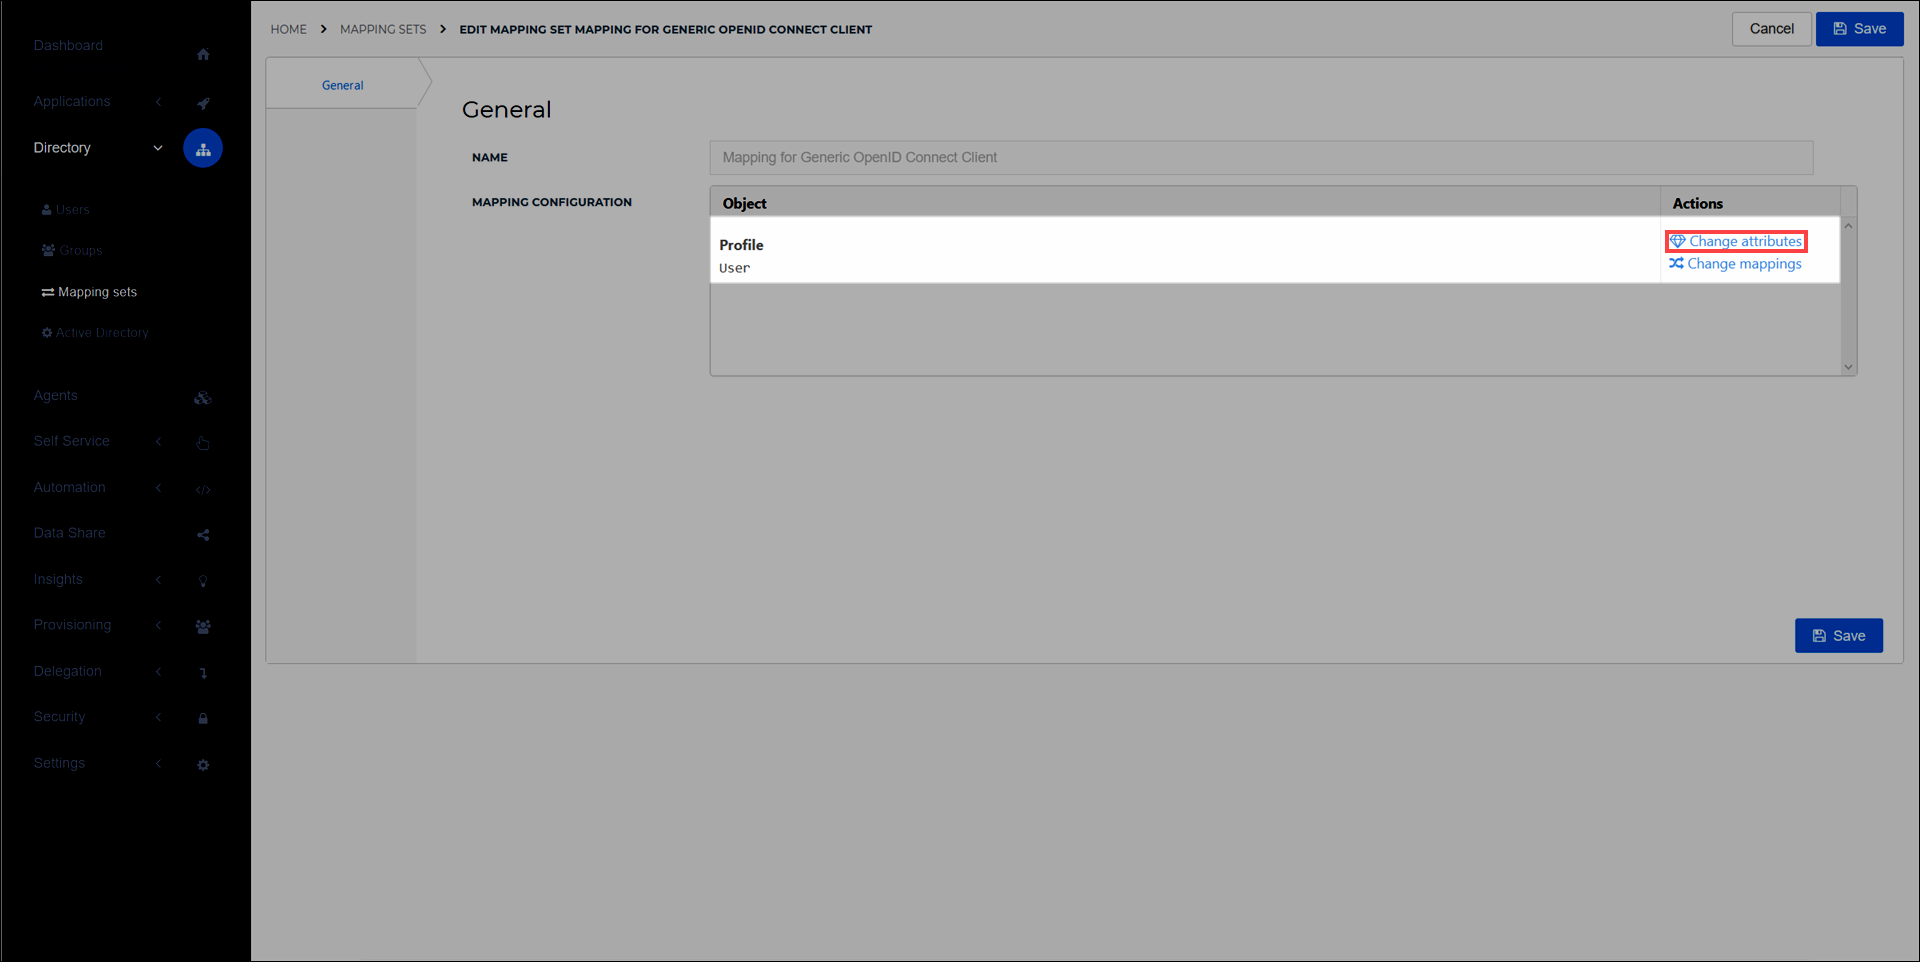
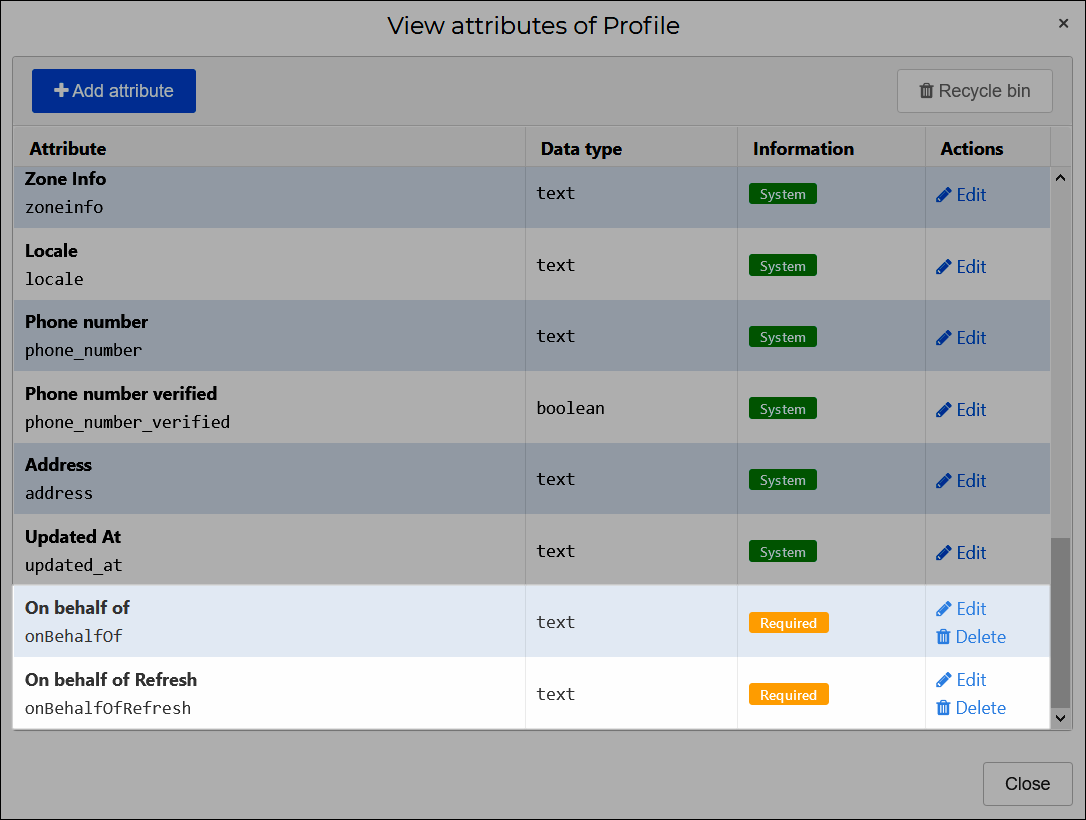
Select the Close button when done.
Select the Change mappings link to map the newly-created user attributes as follows:
User Attribute
HelloID Claim Set Variable
{{user.attributes.onbehalfoftoken}}On behalf of{{user.attributes.onbehalfofrefreshtoken}}On behalf of Refresh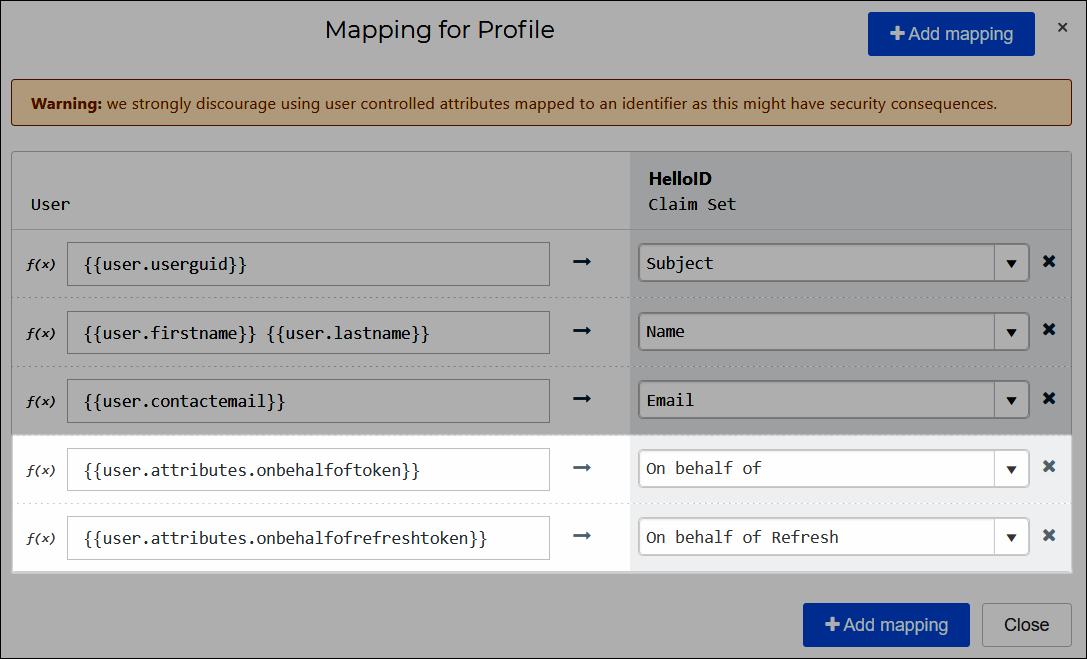
Select the Close button when done.
Select the Save button to confirm.
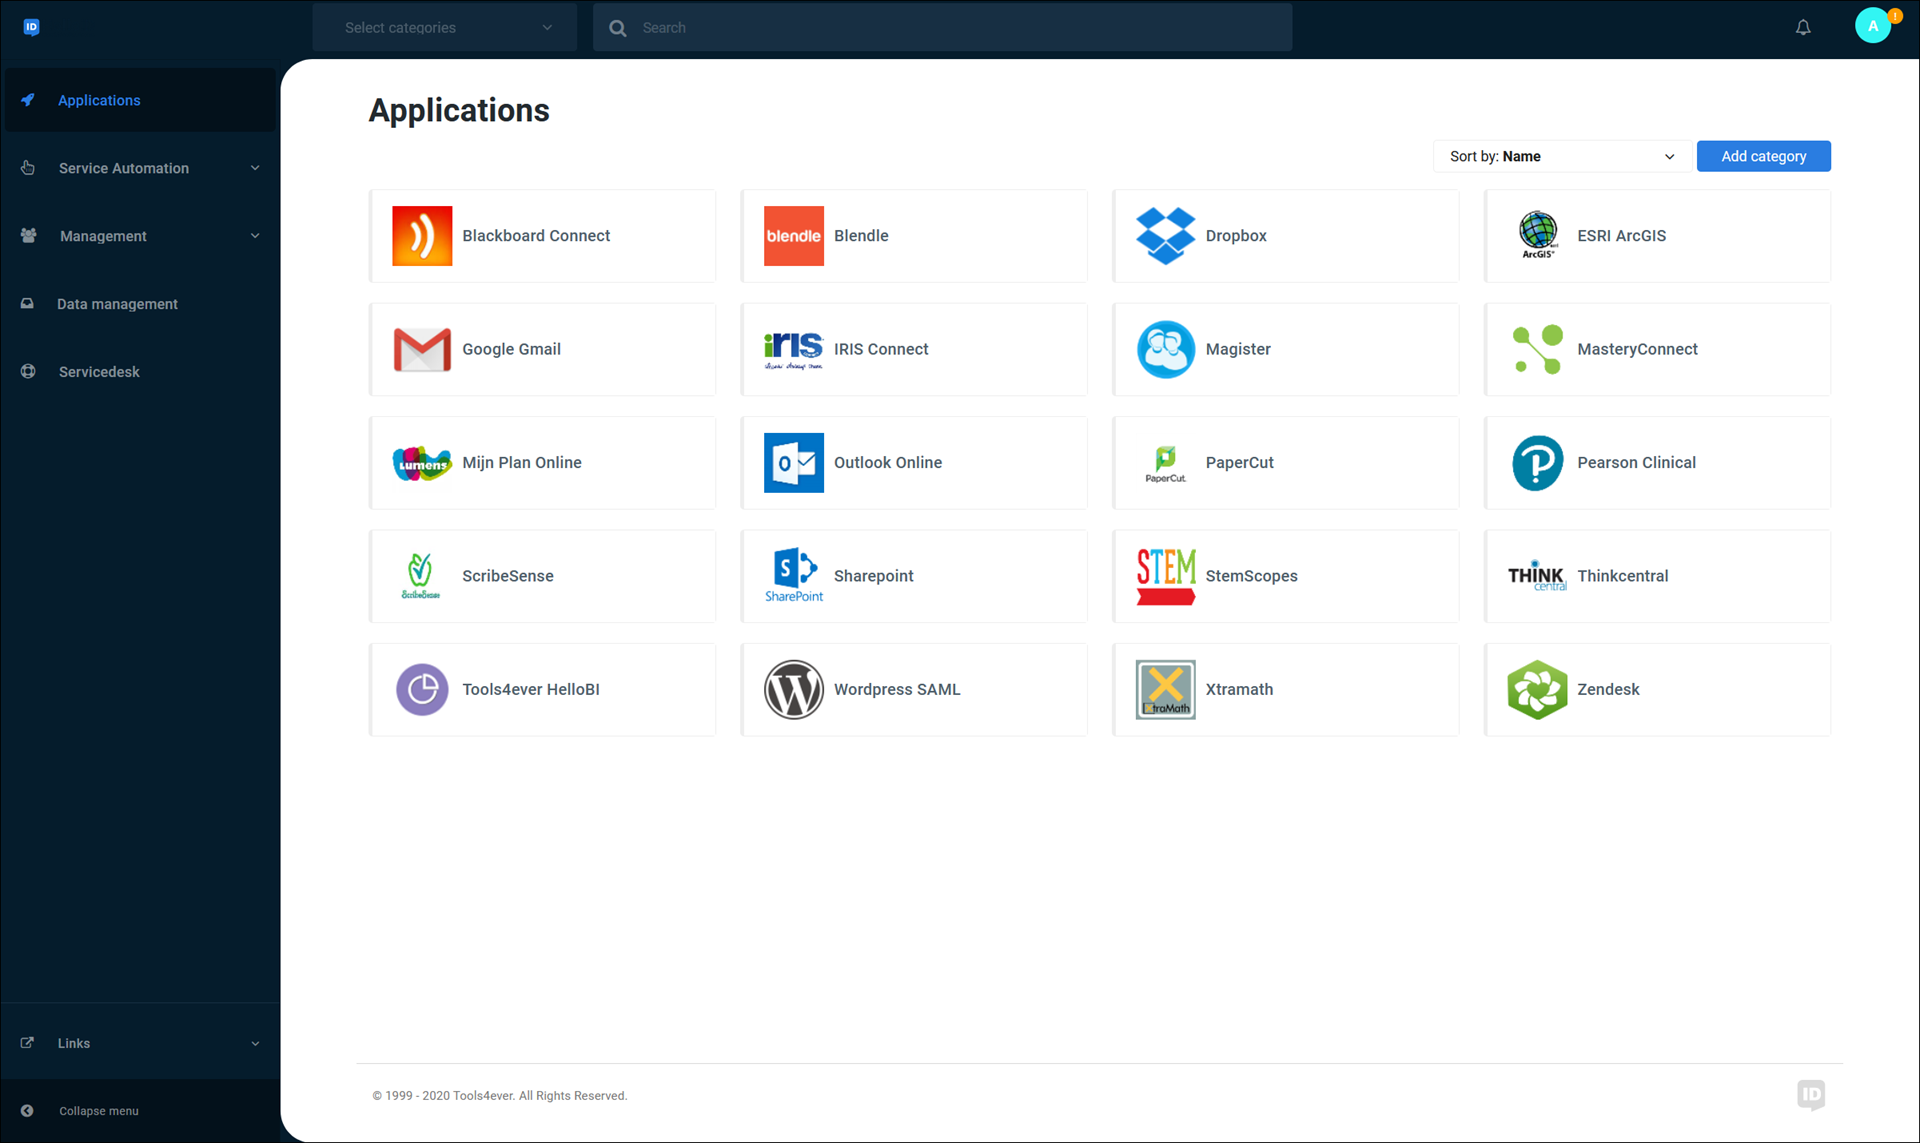
The on-behalf-of and on-behalf-of-refresh tokens will now be passed through to the configured application when an end user selects it in the Applications tab of the HelloID end user dashboard. The application will have access to the Azure Graph API without any additional authentication by the user.
Authentication Method Reference (AMR) Claims
If you have MFA enabled on the Azure side, you can additionally enable AMR claims to override Application Access Rule two-factor MFA challenges for users' HelloID applications. In other words, when AMR claims are enabled, users will only have to pass a single MFA challenge when initially logging into Azure. They will not receive additional MFA challenges for each application they launch. This configuration takes place entirely in Azure. Once enabled, the flow is handled transparently in HelloID.
Note: SAML is not recommended
We strongly suggest using the Azure AD (OIDC) IdP when possible. With OAuth, users who authenticate using multi-factor authentication (MFA) in Azure AD will have their MFA session information sent back to HelloID. This eliminates additional, unnecessary MFA challenges. SAML does not support this functionality.
Introduction
This article will walk you through configuring Azure Active Directory (AD) to be your SAML Identity Provider within HelloID. This is useful if your organization uses Azure AD as a primary source of authentication to access online services. This will allow your organization's users to log into HelloID and other cloud applications with their Azure AD username and password.
Configure the Azure IdP
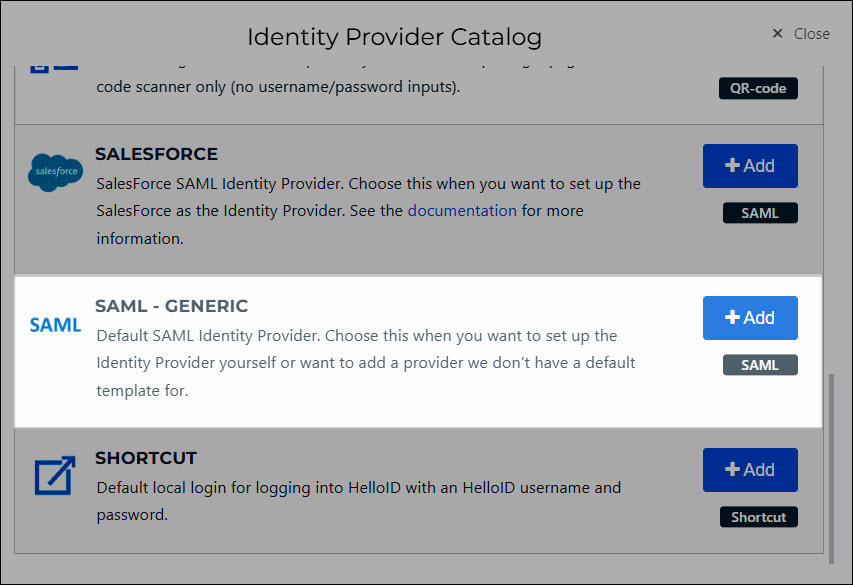
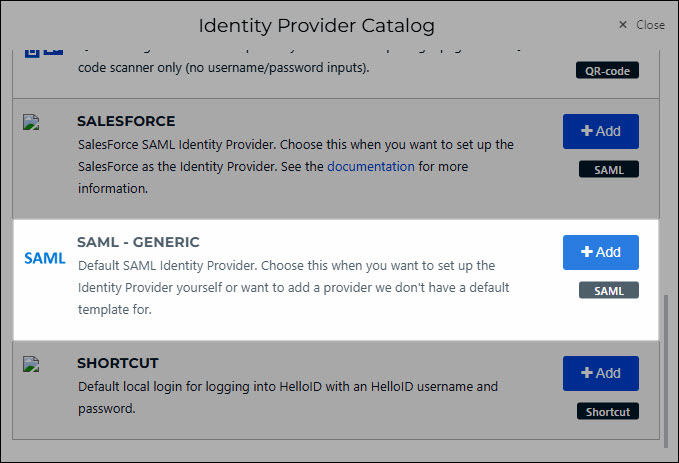
On the HelloID Administrator Dashboard, navigate to Security > Authentication > Identity Providers and click Create Provider. This will bring up the Identity Provider Catalog.
Find the SAML - Generic IDP and click the Add button next to it.
Enter the name and select an Icon (optional). Make note of the Consumer URL so that you can provide it to Azure in later steps. Enable JIT (just-in-time provisioning) if you so desire. Click Save to add the IdP to HelloID. We will come back to it later. View a complete configuration reference here.
Log on to https://manage.windowsazure.com. On the left-side menu bar, select Azure Active Directory.
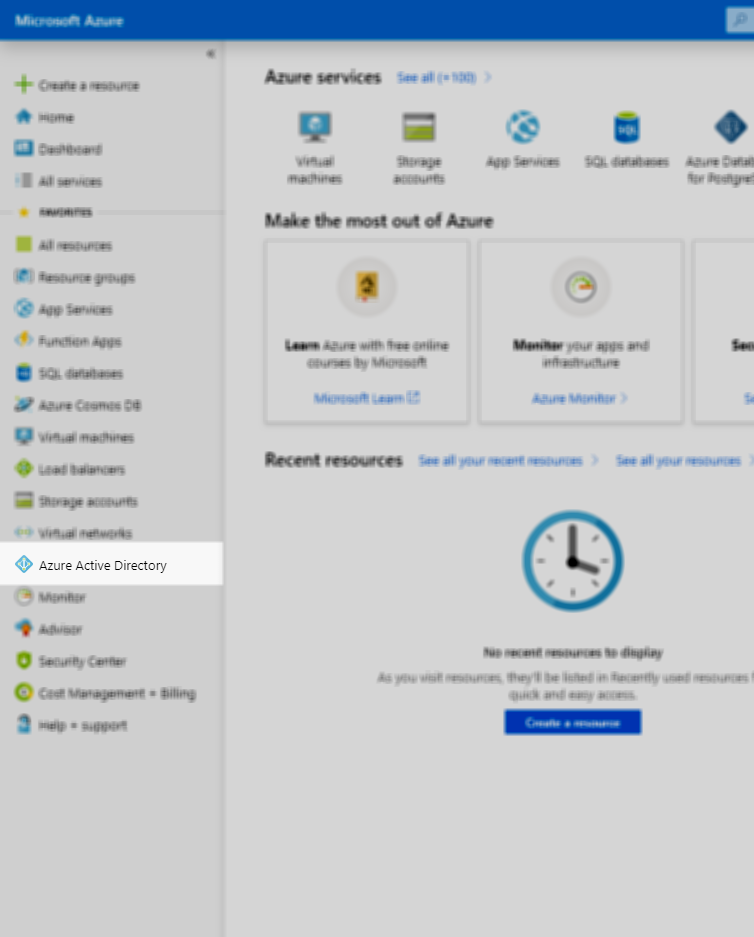
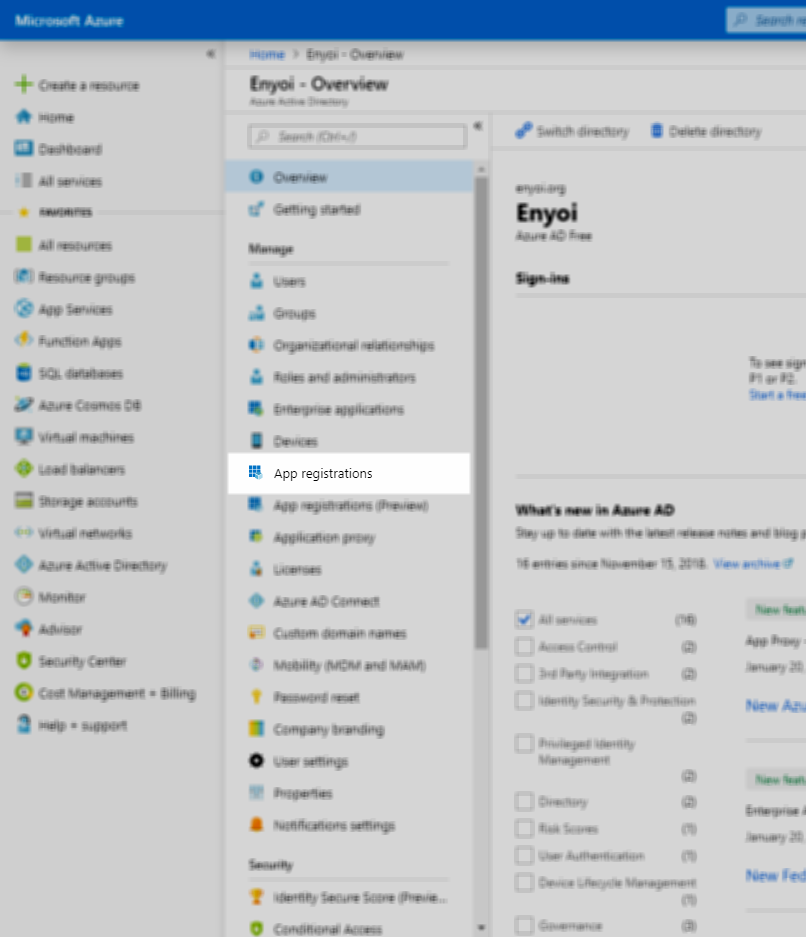
Select your desired domain and then click App registrations.
Click New application registration.

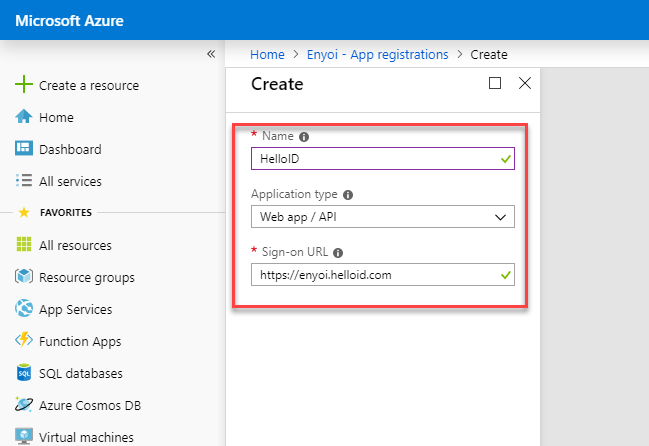
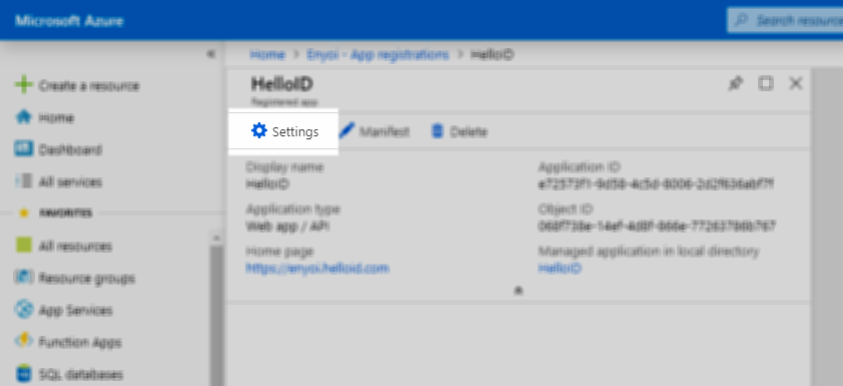
Specify the Name (HelloID), select Web app / API as Application type and specify the HelloID portal URL as Sign-on URL. Click Create when finished.
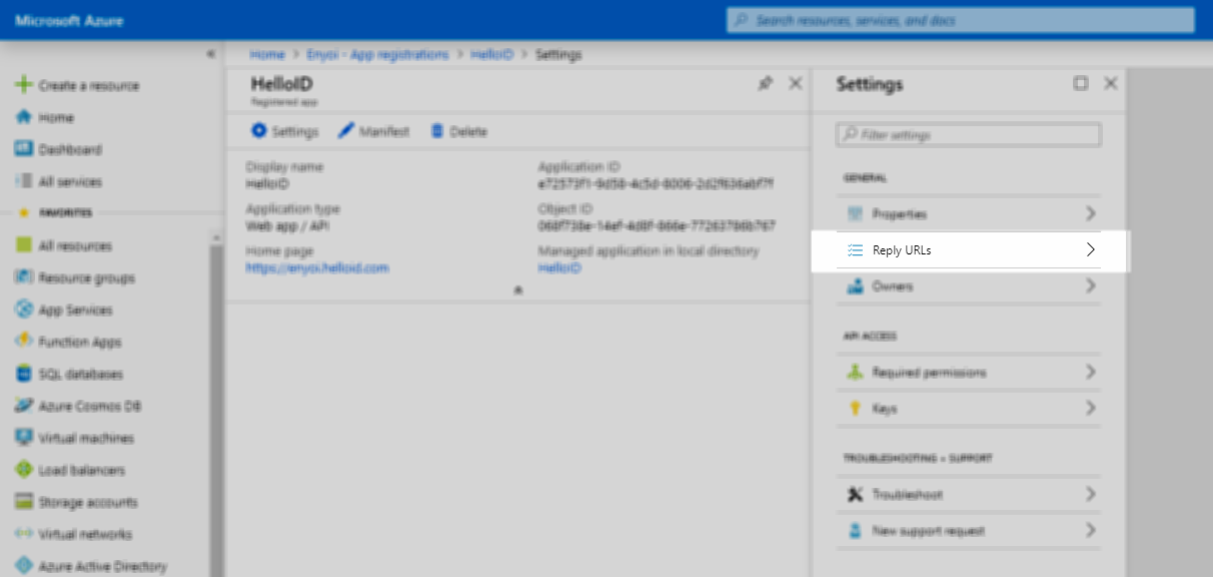
Once the application registration has been created, click Settings.
Select the Reply URLs section.
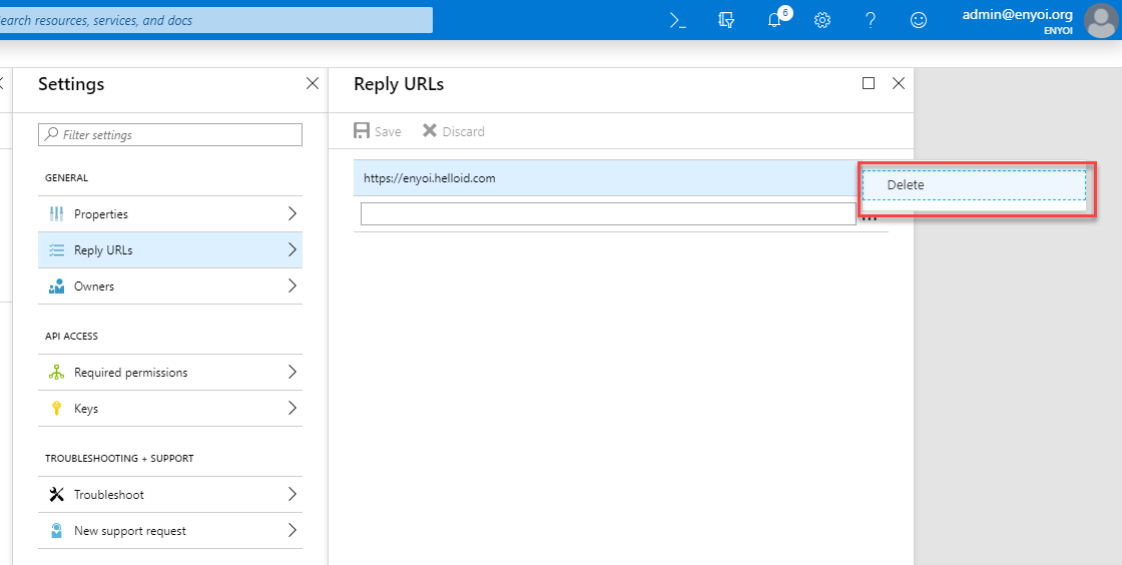
Delete the default reply URL.
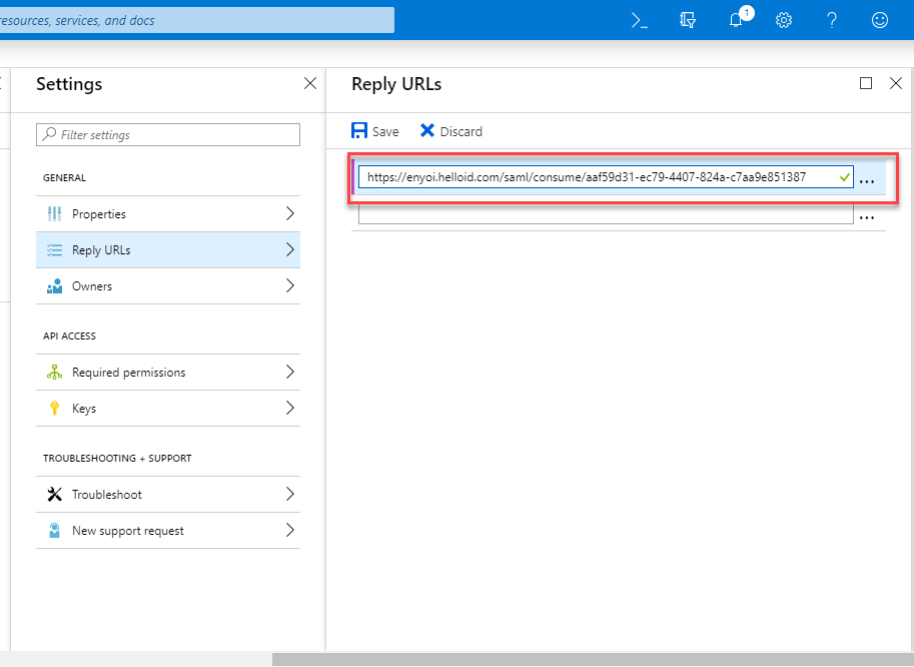
Add a new reply URL by pasting in the Consumer URL that you previously noted from HelloID. Click Save when you are finished.
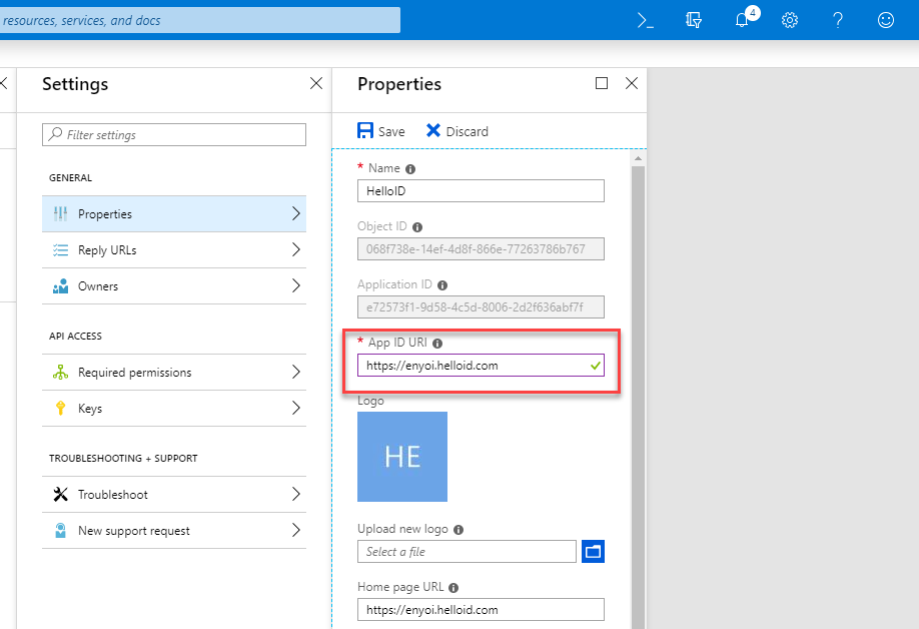
Select the Properties section.
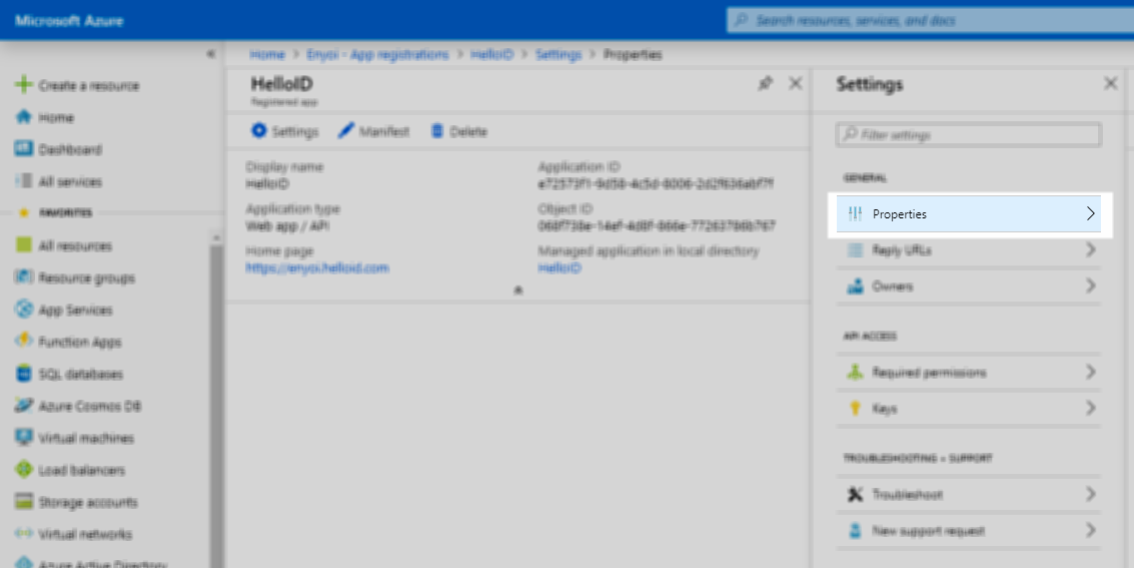
Change the App ID URI to the URL of your HelloID portal. Click Save when finished.
Select the Required permissions section.
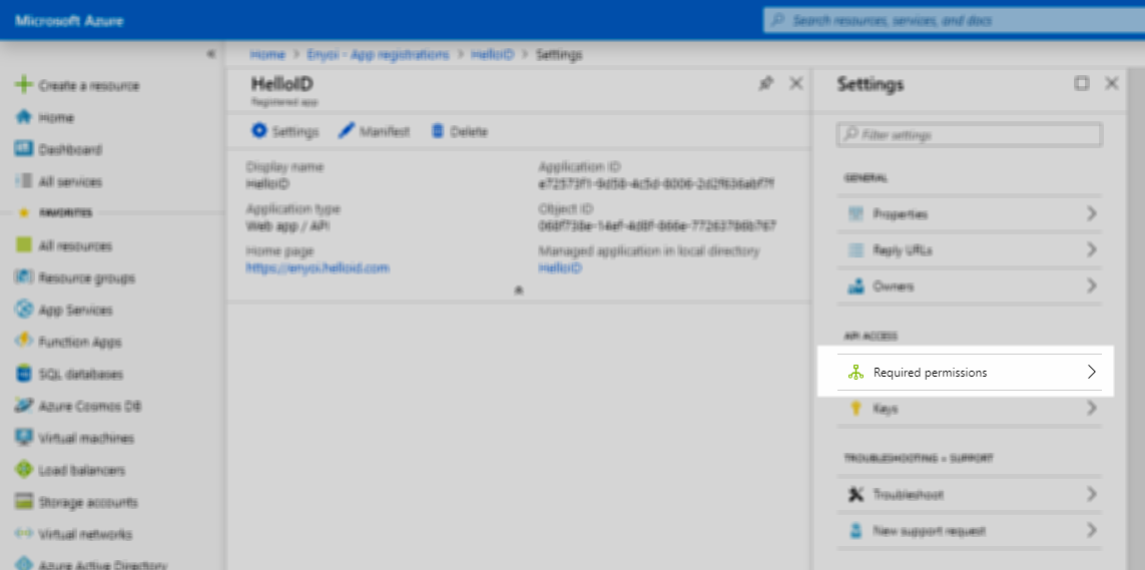
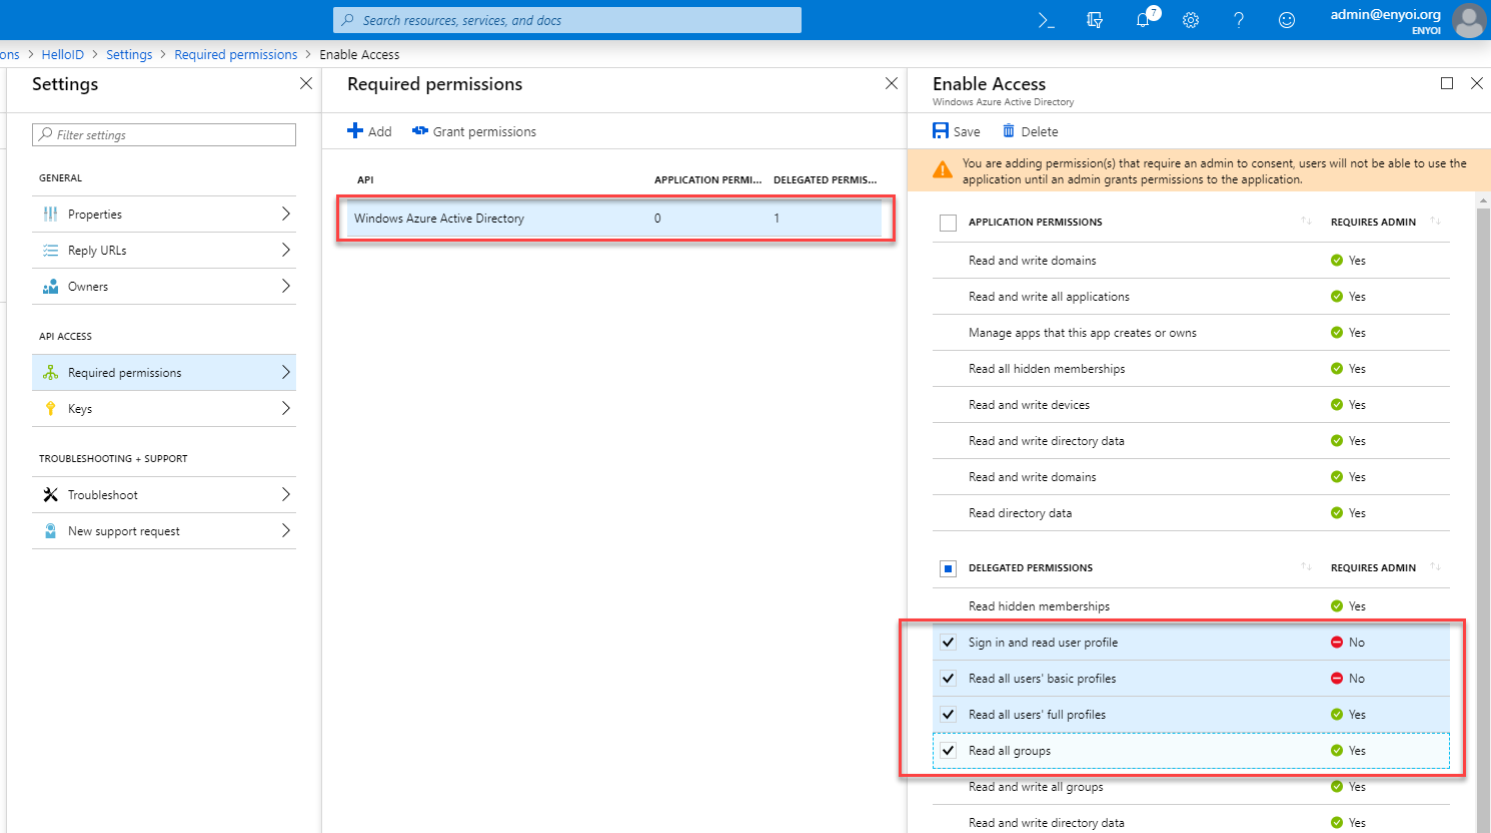
Click on Windows Azure Active Directory. Enable the following permissions, then click Save. Note that these permissions require you to grant end users permission to use this new application--we will take care of that later.
Sign in and read user profile
Read all users’ basic profiles
Read all users’ full profiles
Read all groups
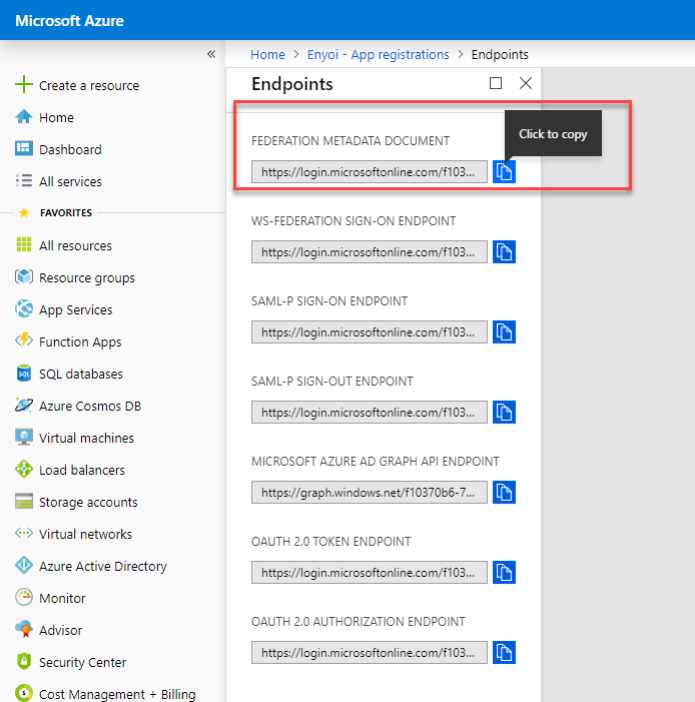
Go back to Azure Active Directory in the main portal screen, then go to App registrations and click on Endpoints.
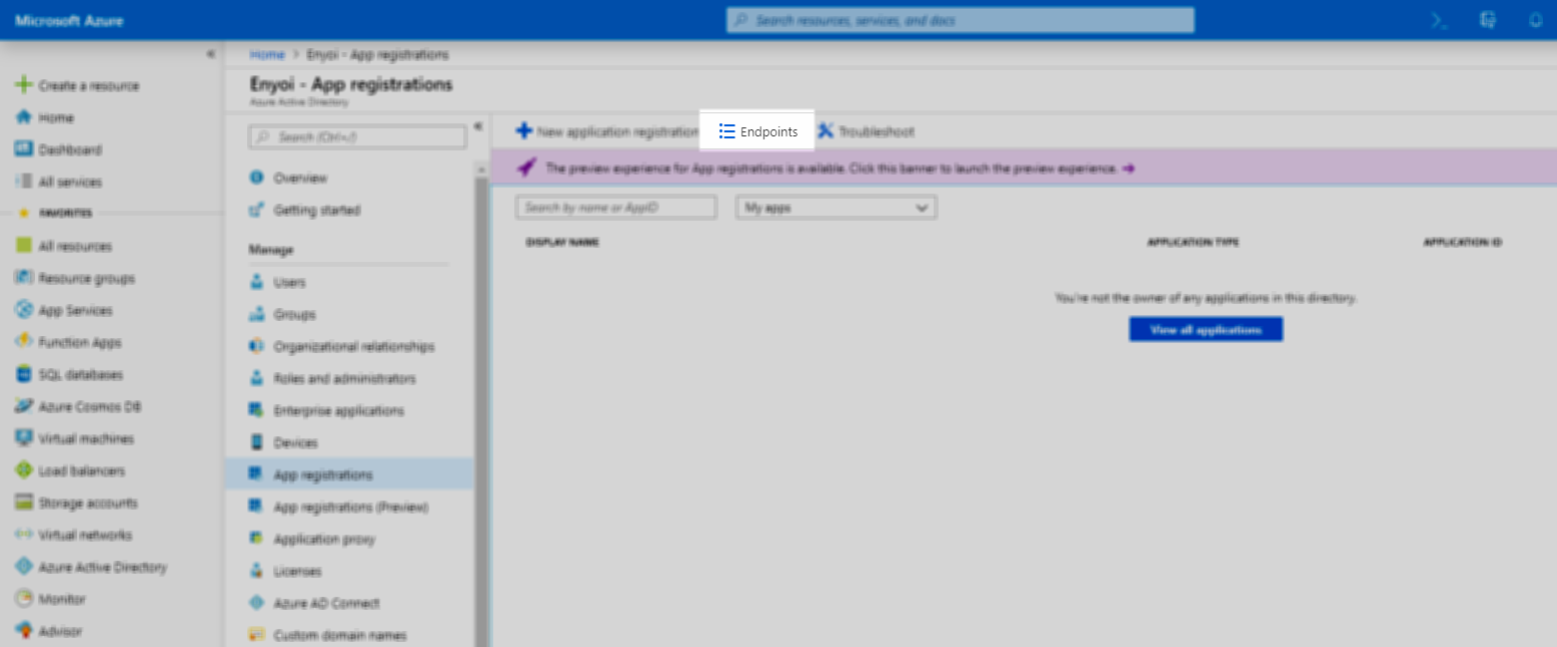
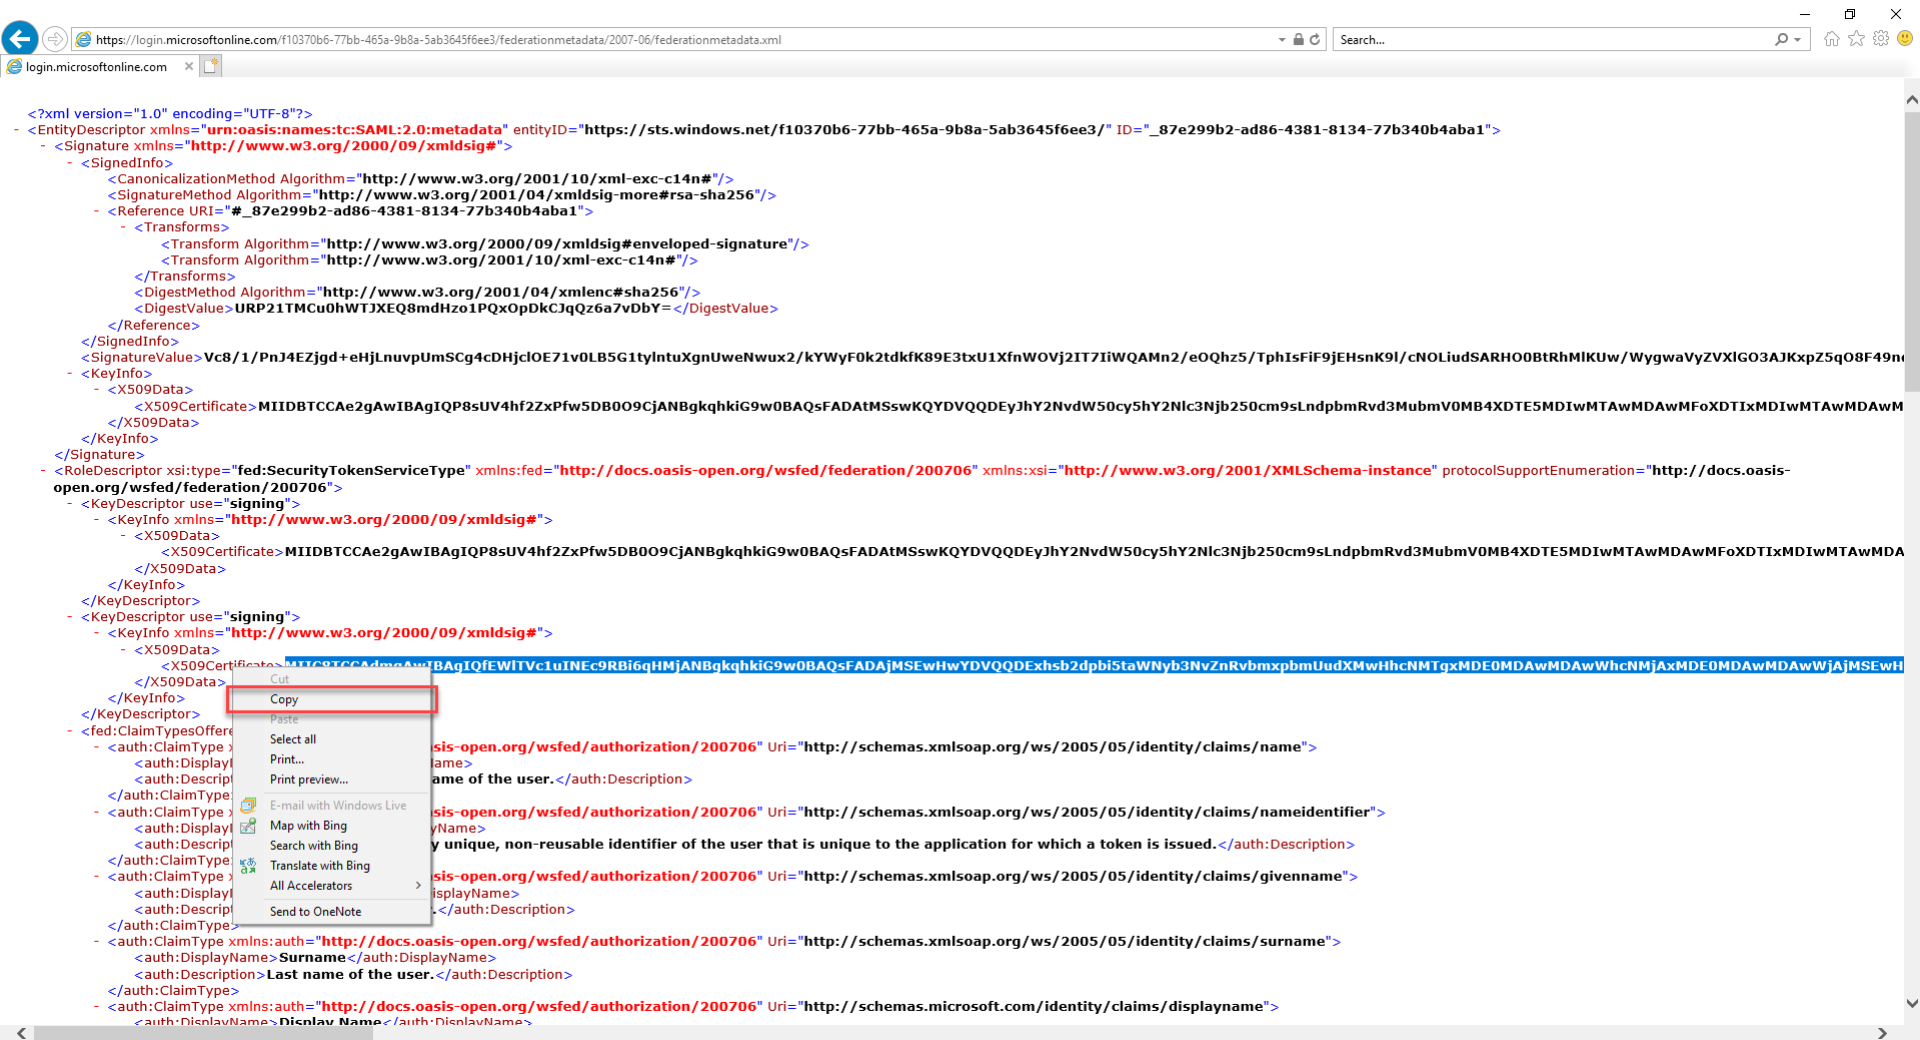
Copy the Federation Metadata Document URL into a new browser window. A page of XML will appear.
Highlight and copy the data within the X509Certificate tag.
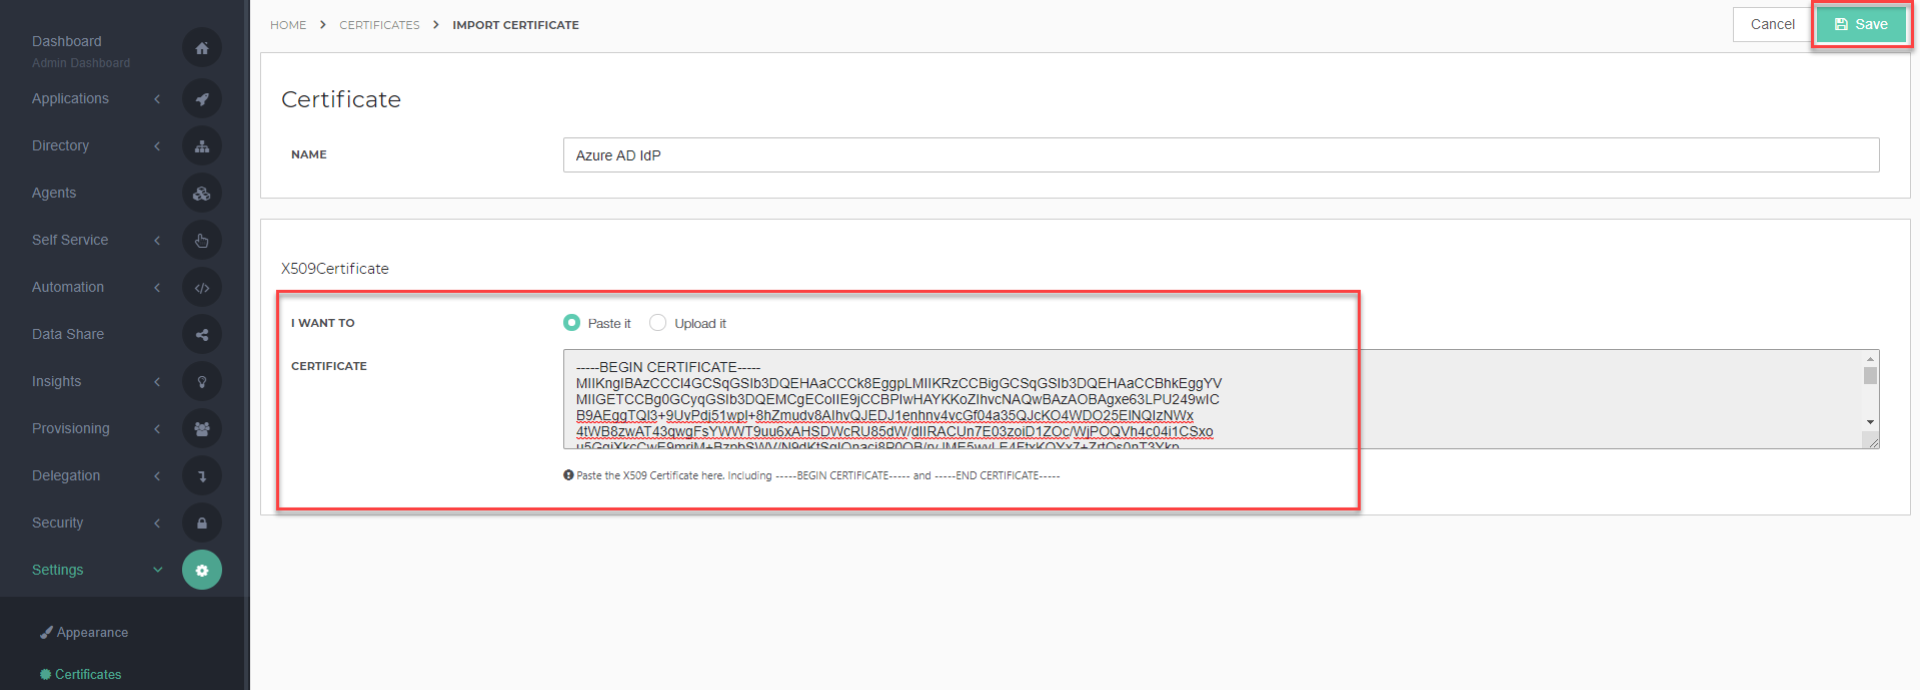
Go to the HelloID Administrator Dashboard and navigate to Settings > Certificates. Once there, click Import Certificate.
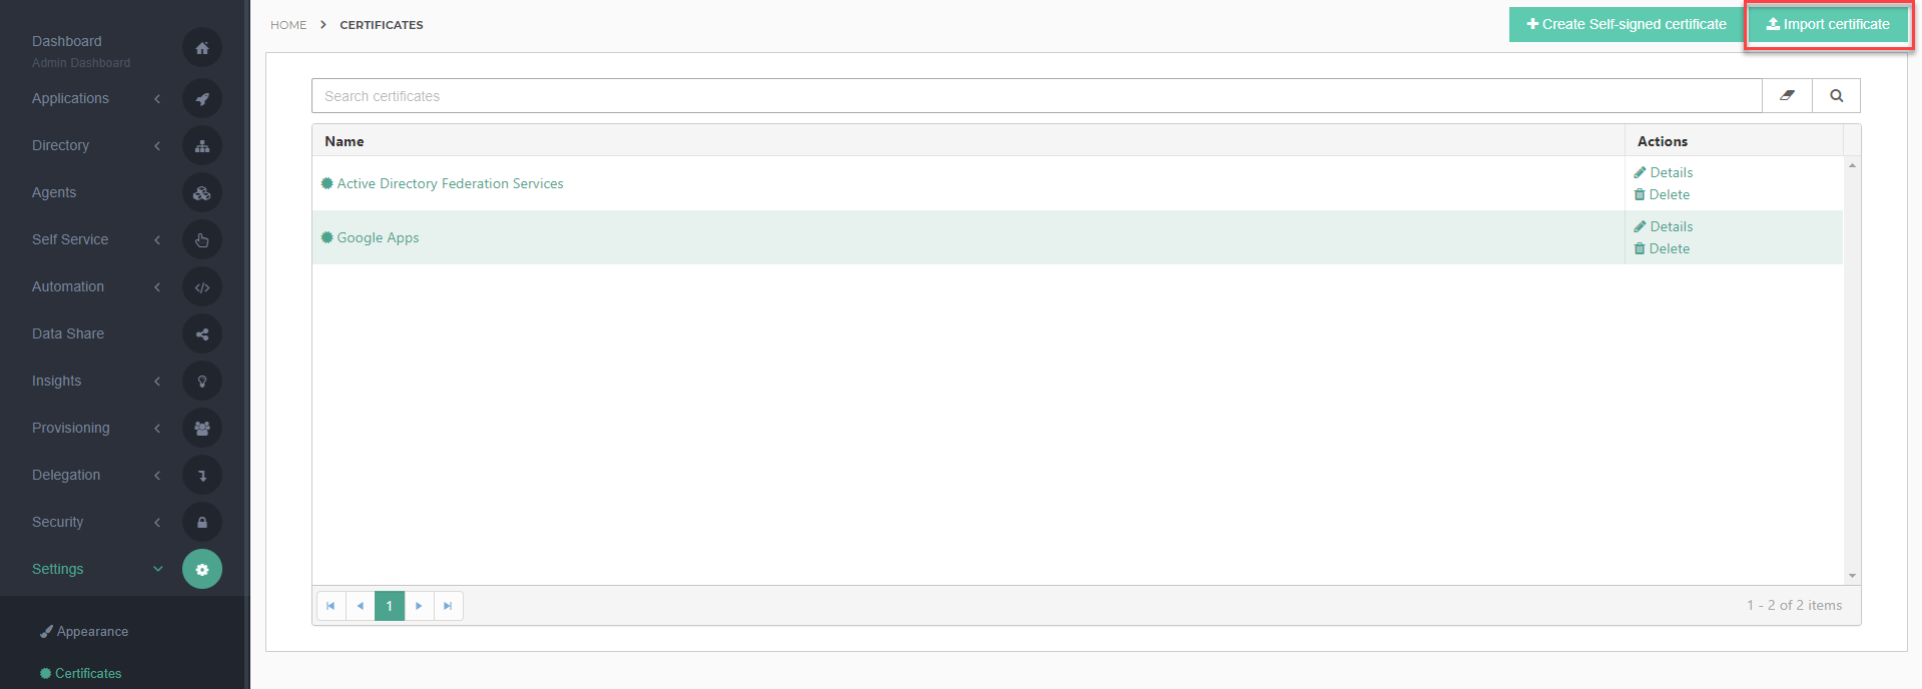
Paste the X509 into the Certificate area. Add -----BEGIN CERTIFICATE----- to the beginning of the key and -----END CERTIFICATE----- to the end of the key. Click Save to continue.
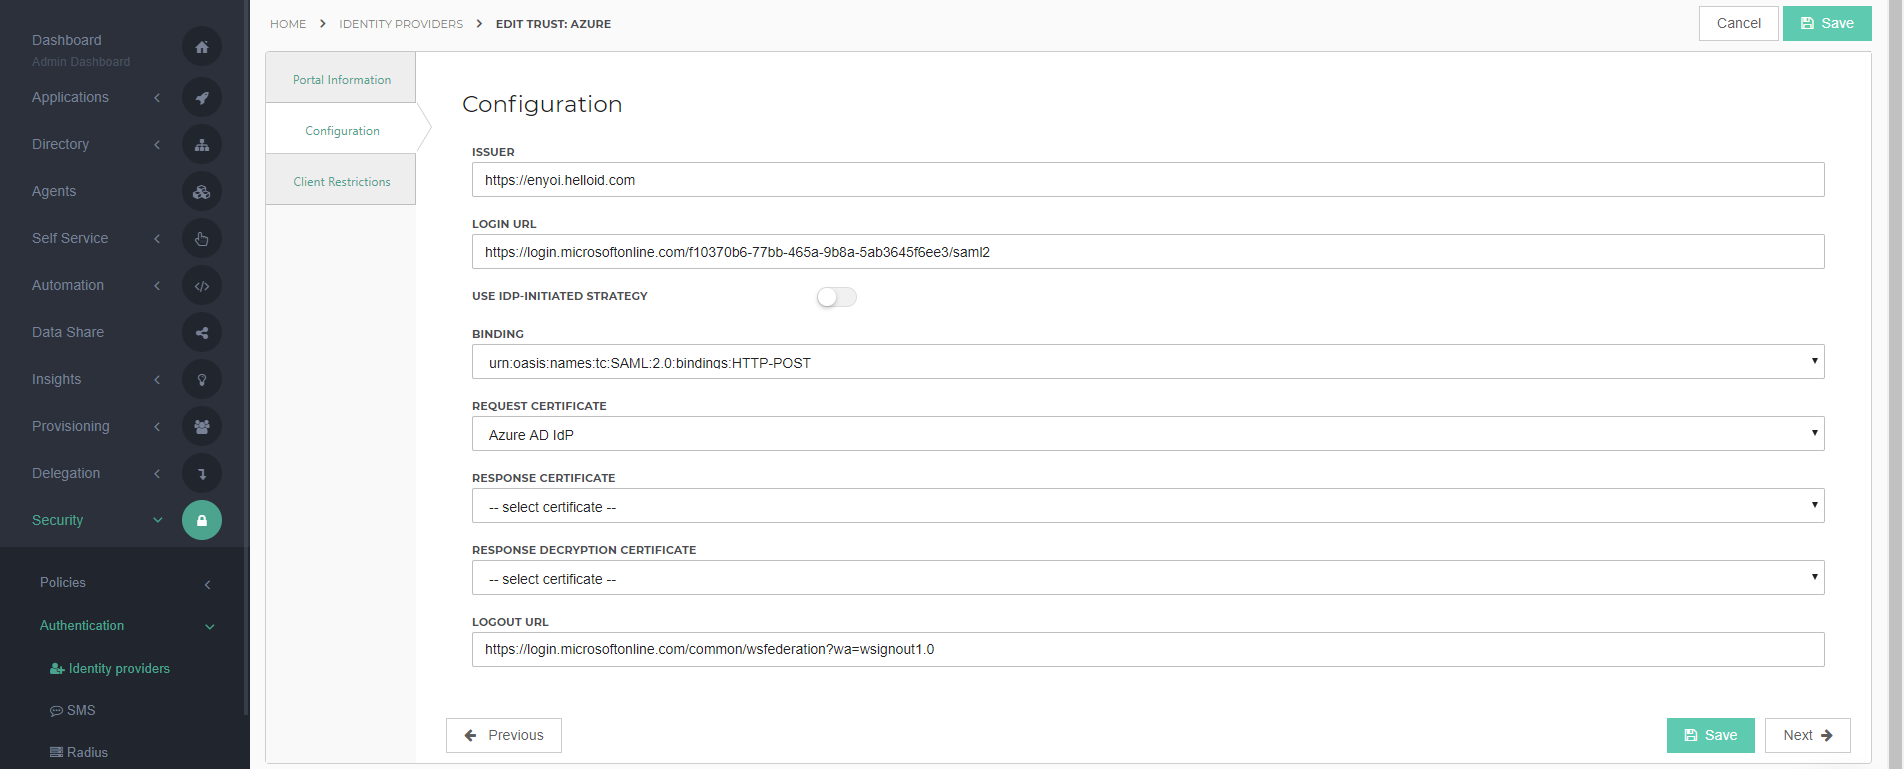
Navigate to Security > Authentication > Identity providers and edit the Azure Identity Provider that you created earlier. Click on its Configuration tab and fill out the following fields. You may configure other optional settings as desired.
Login URL: Paste the SAML-P sign-on endpoint from Azure.
Binding: Change this to HTTP-POST
Request Certificate: Select the certificate that you imported earlier.
Logout URL: https://login.microsoftonline.com/common/wsfederation?wa=wsignout1.0
Click Save to finish the configuration.
Add attribute mappings
By default, the attribute mapping for HelloID is set to only map the nameID attribute. However, since we are connecting to Azure AD, we want to map more attributes, such as first name, last name and user principal name (this is also the user's email address).
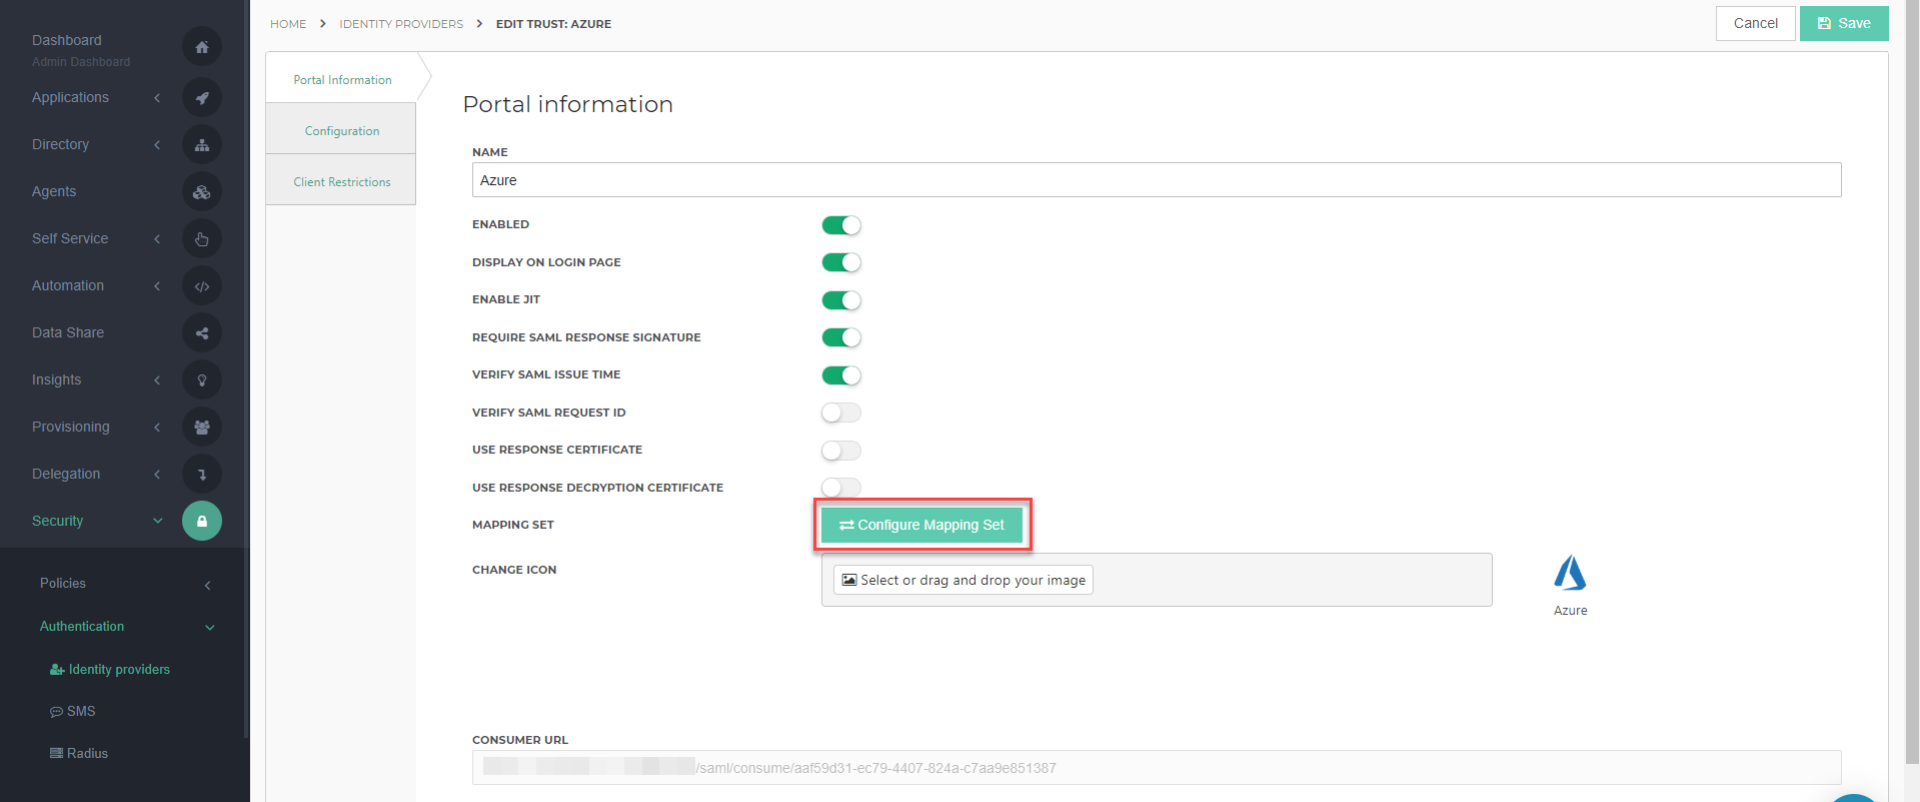
Navigate to Security > Authentication > Identity Providers. Edit the the Azure AD IDP and click on Configure Mapping Set. When prompted, click Proceed.
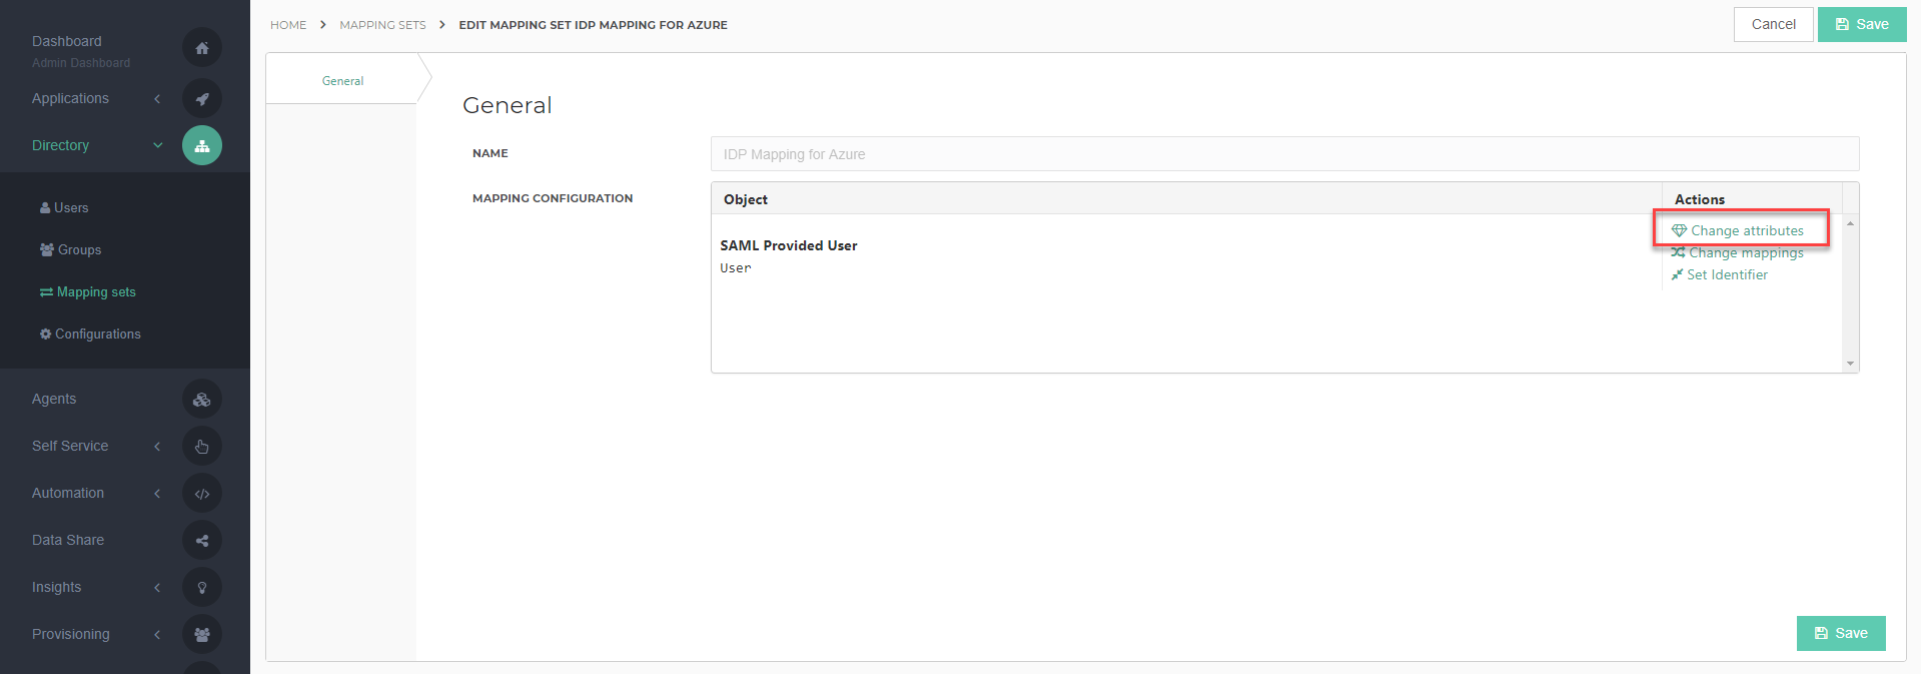
Click Change attributes.
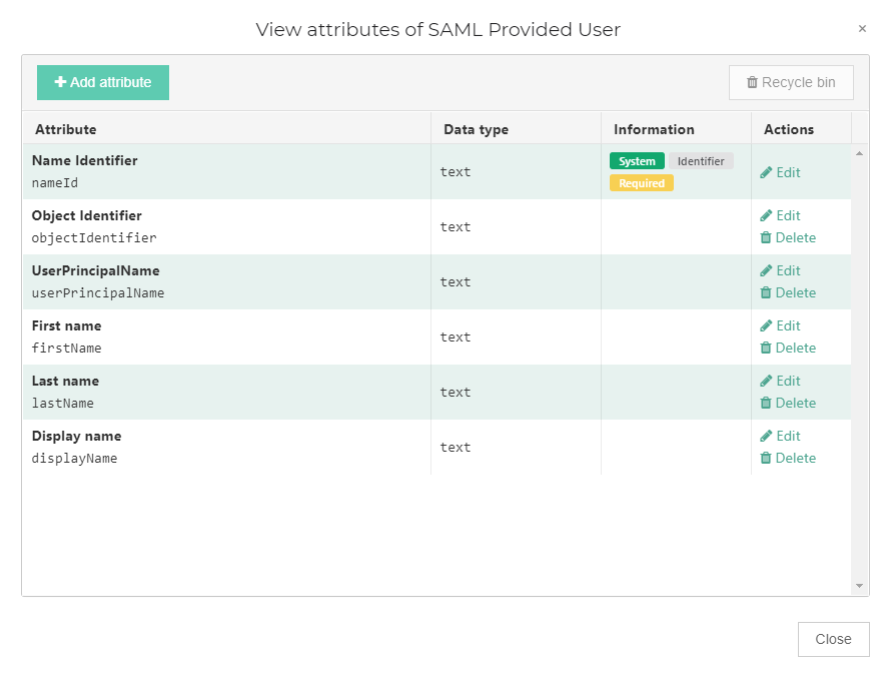
Add the following attributes and click Close when you are finished.
Display name
Variable name
Source field
Object Identifier
objectIdentifier
Attributes.http://schemas.microsoft.com/identity/claims/objectidentifier
UserPrincipalName
userPrincipalName
Attributes.http://schemas.xmlsoap.org/ws/2005/05/identity/claims/name
First name
firstName
Attributes.http://schemas.xmlsoap.org/ws/2005/05/identity/claims/givenname
Last name
lastName
Attributes.http://schemas.xmlsoap.org/ws/2005/05/identity/claims/surname
Display name
displayName
Attributes.http://schemas.microsoft.com/identity/claims/displayname
Click Change mappings.
How are your Azure AD users created?
The mappings and identifier that are set from this point forward depend on how users accounts are created in your Azure AD environment. Please choose from the following selections:
Users are created by Azure AD Connect
Users are created manually or by HelloID
Users are created by Azure AD Connect
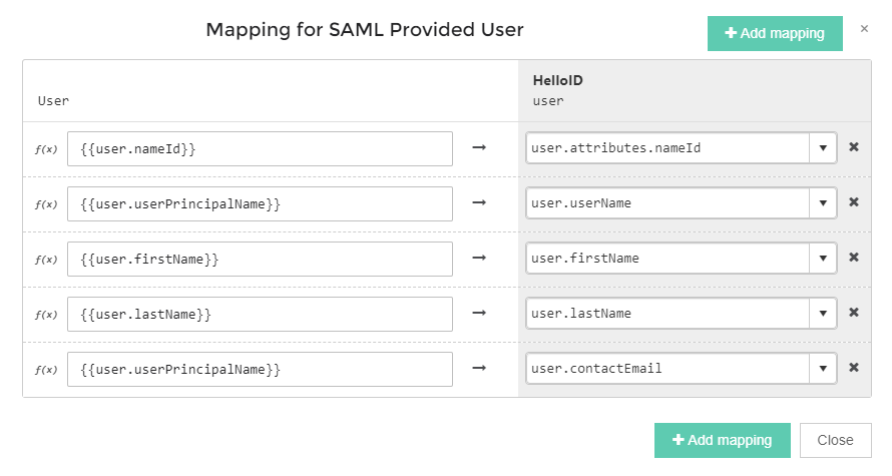
Add the following mappings and click Close when you are finished.
User
HelloID user
{{user.userPrincipalName}}
user.userName
{{user.firstName}}
user.firstName
{{user.lastName}}
user.lastName
{{user.userPrincipalName}}
user.contactEmail
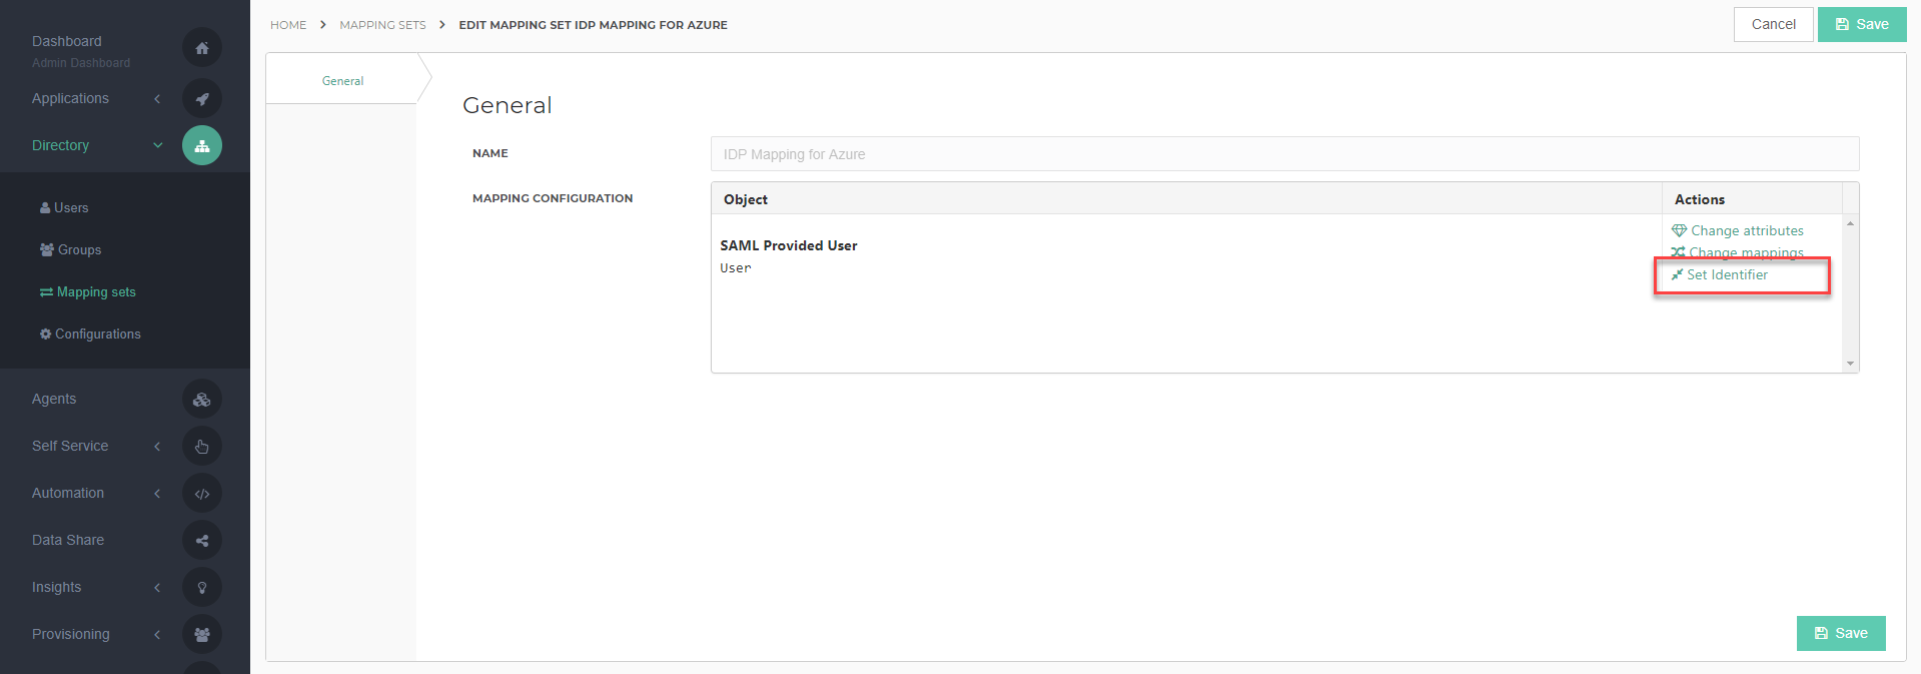
Click Set Identifier.
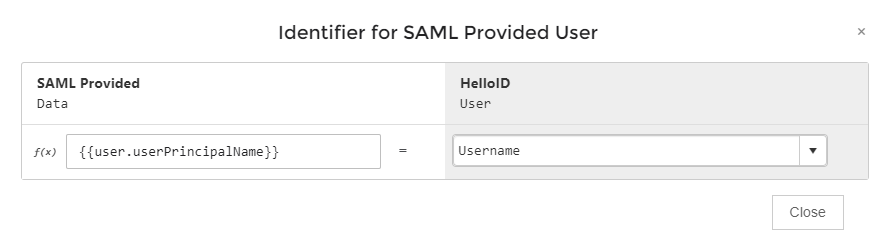
Modify the identifier as necessary to match the configuration shown below, and click Close.
SAML Provided Data
HelloID User
{{user.userPrincipalName}}
Username
Click the Save button to finish. The setup is complete.
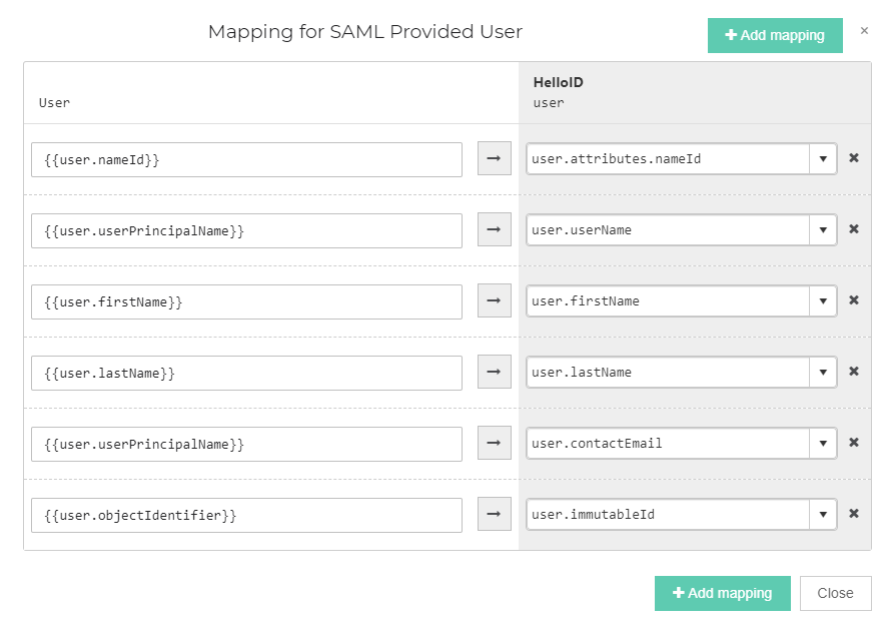
Users are created manually or by HelloID
Add the following mappings and click Close when you are finished.
User
HelloID user
{{user.userPrincipalName}}
user.userName
{{user.firstName}}
user.firstName
{{user.lastName}}
user.lastName
{{user.userPrincipalName}}
user.contactEmail
{{user.objectIdentifier}}
user.immutableId
Click Set Identifier.
Modify the identifier as necessary to match the configuration shown below, and click Close.
SAML Provided Data
HelloID User
{{user.objectIdentifier}}
Immutable ID
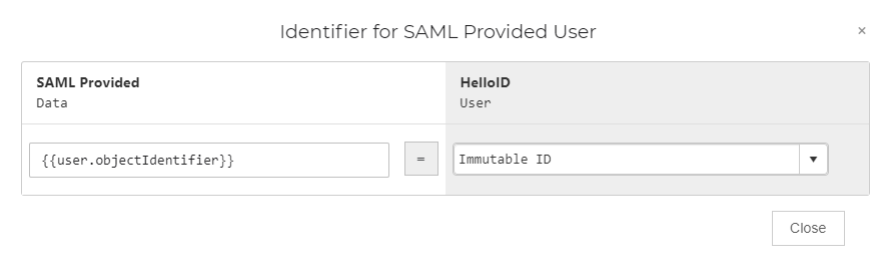
Click the Save button to finish.
This article will walk you through configuring Google Workspace to be your SAML Identity Provider within HelloID. This is useful if your organization uses Google Workspace as a primary source of authentication to access online services. This will allow your organization's users to log into HelloID and other cloud applications with their Google username and password.
Configure the Google IdP
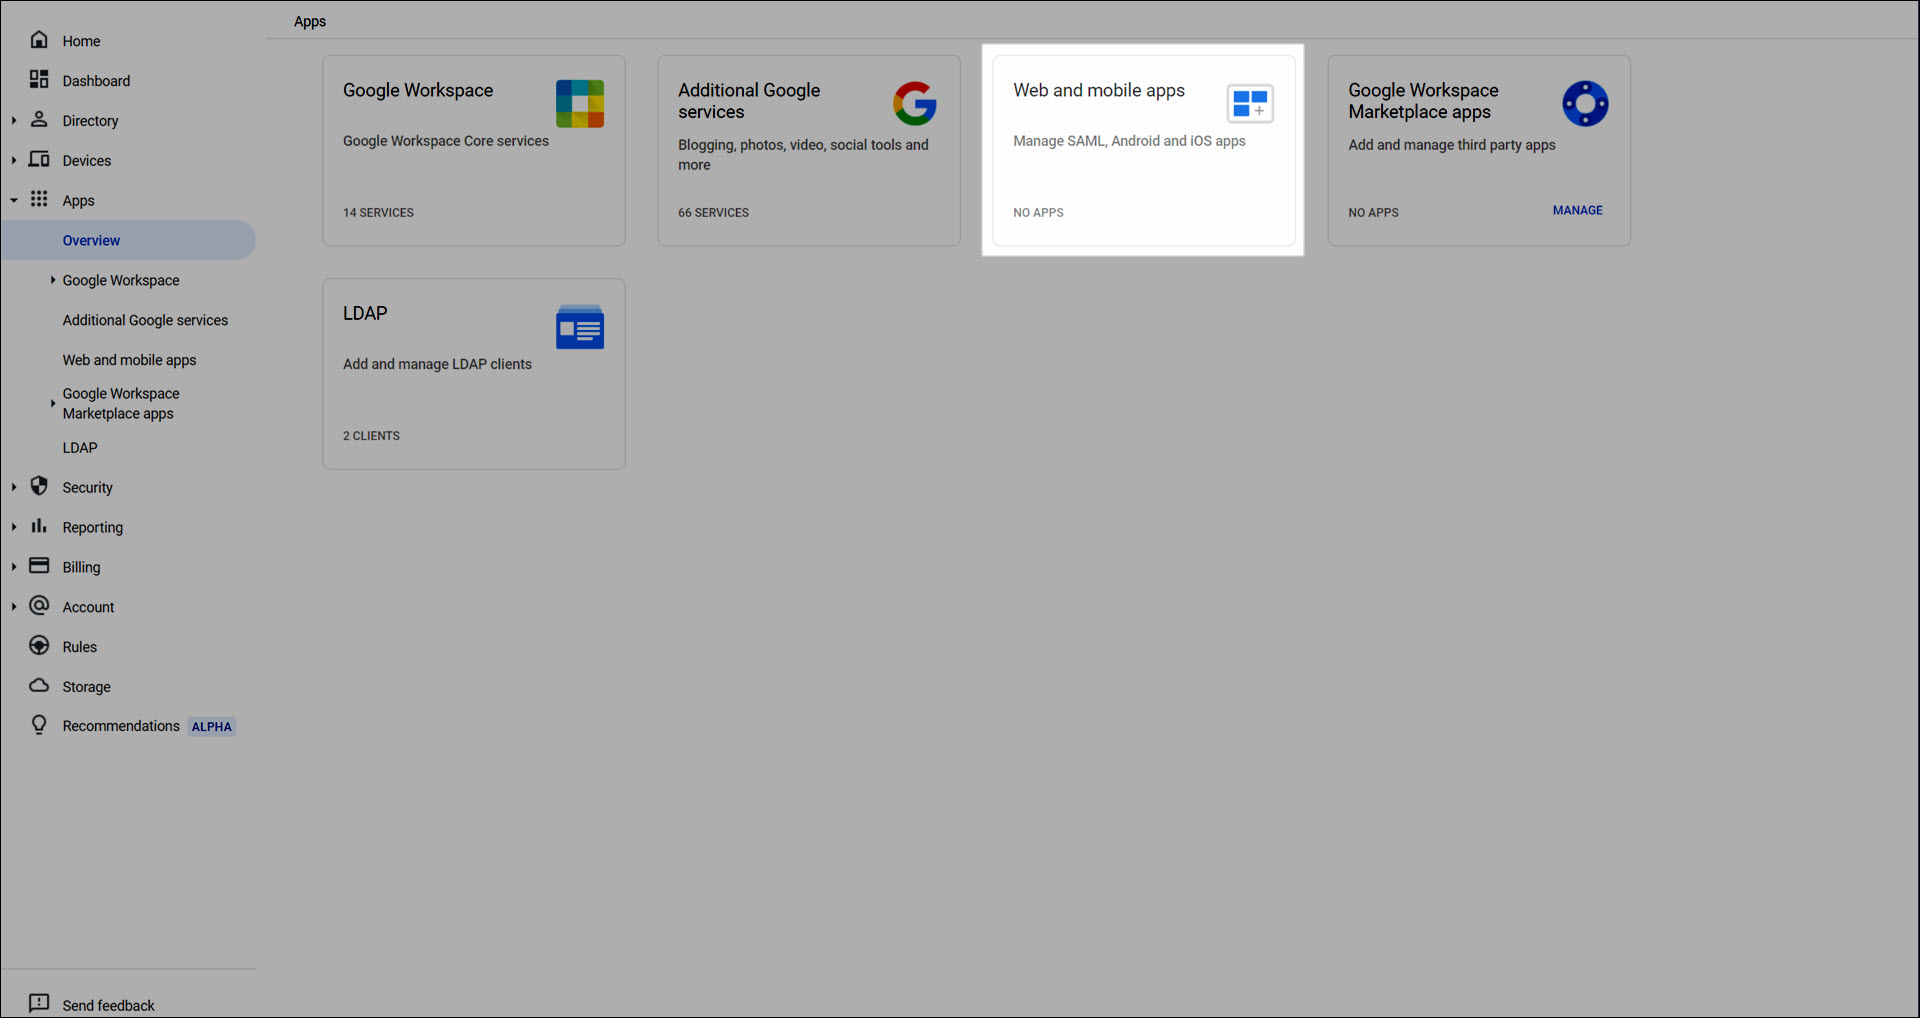
Log in to your Google Workspace admin console and select Apps.
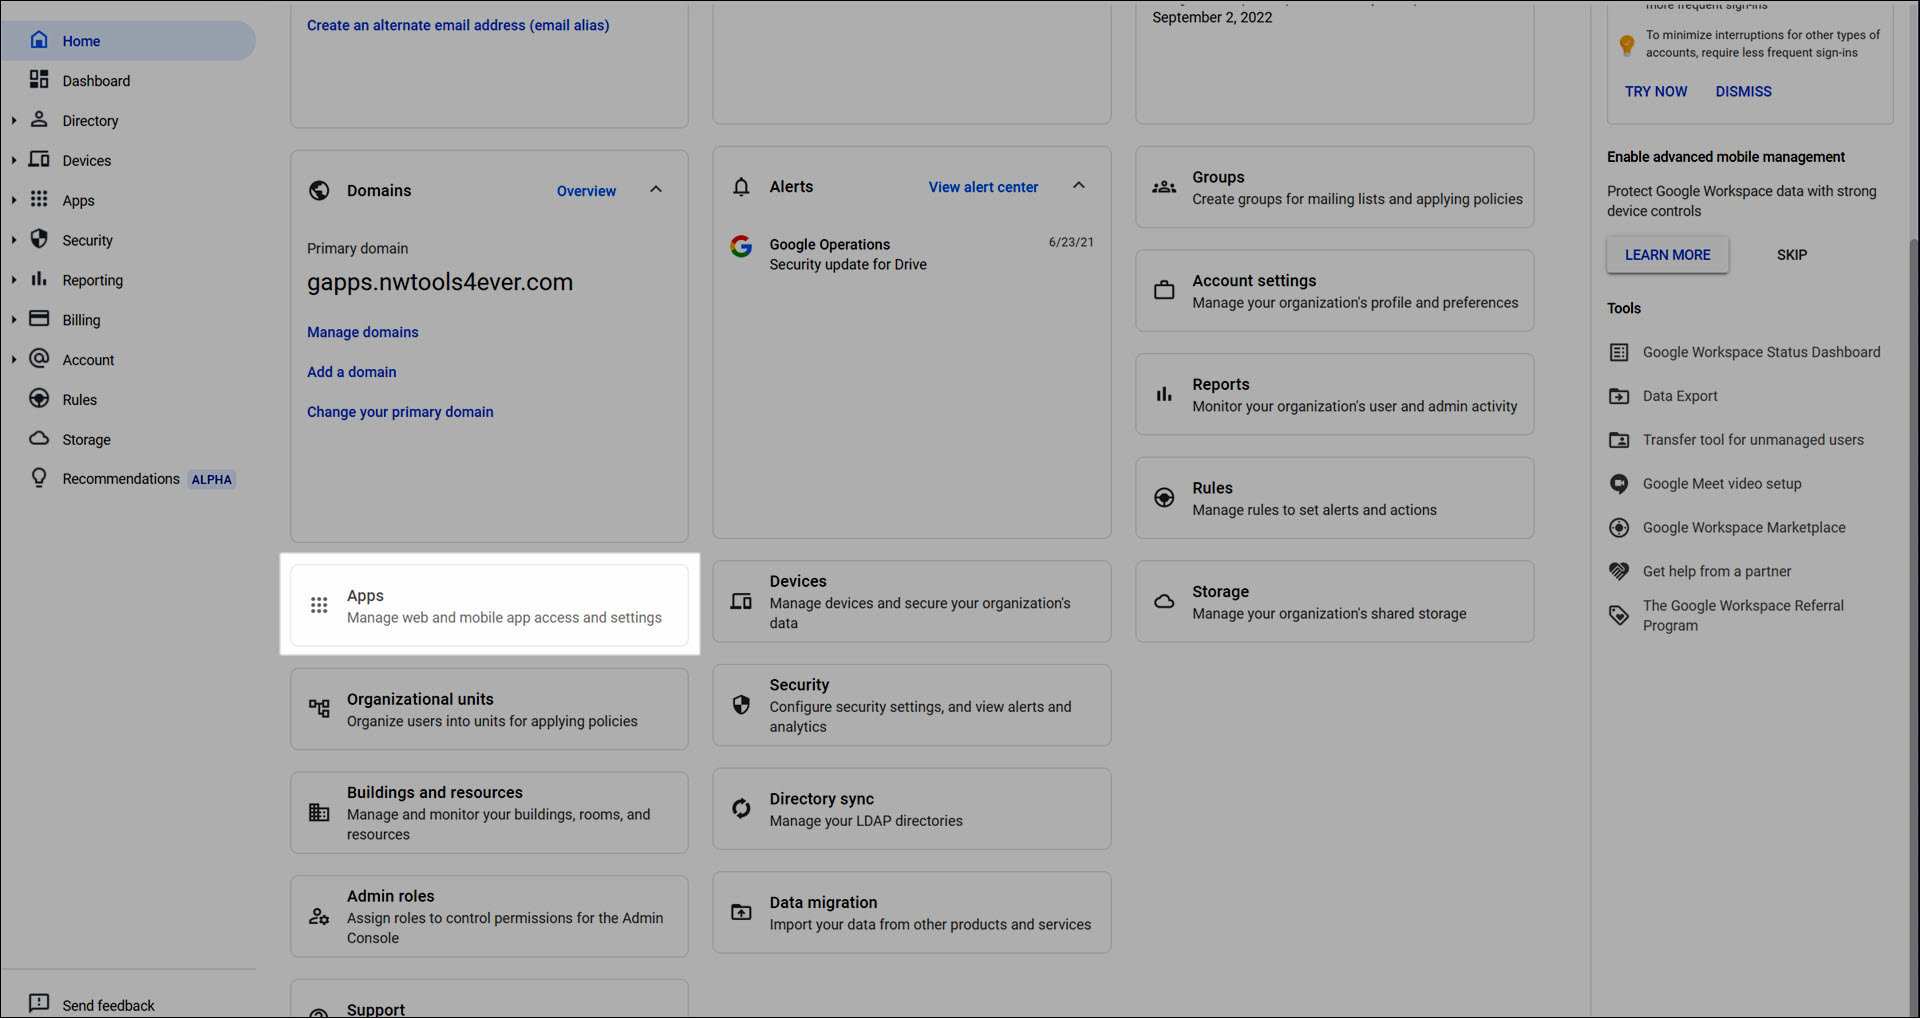
Select Web and mobile apps
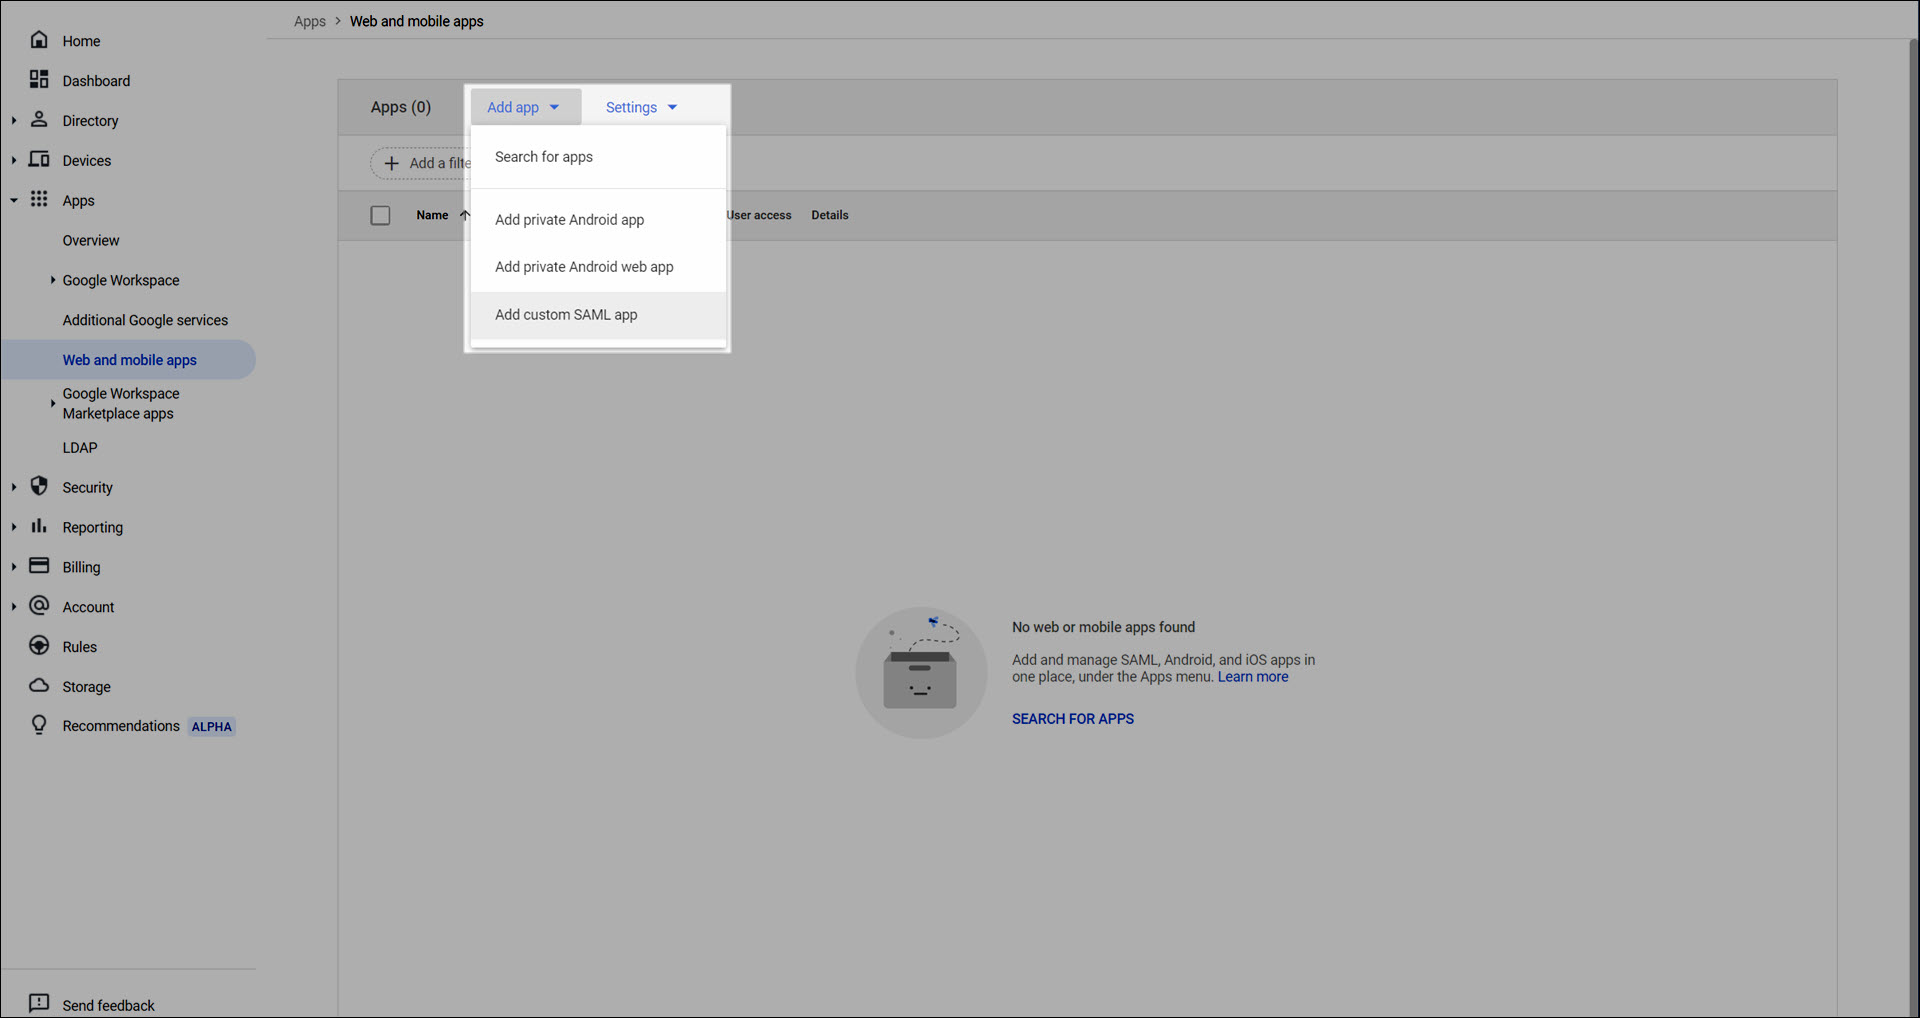
Go to Add app > Add custom SAML app
Enter an App Name (e.g., HelloID) and click Continue.
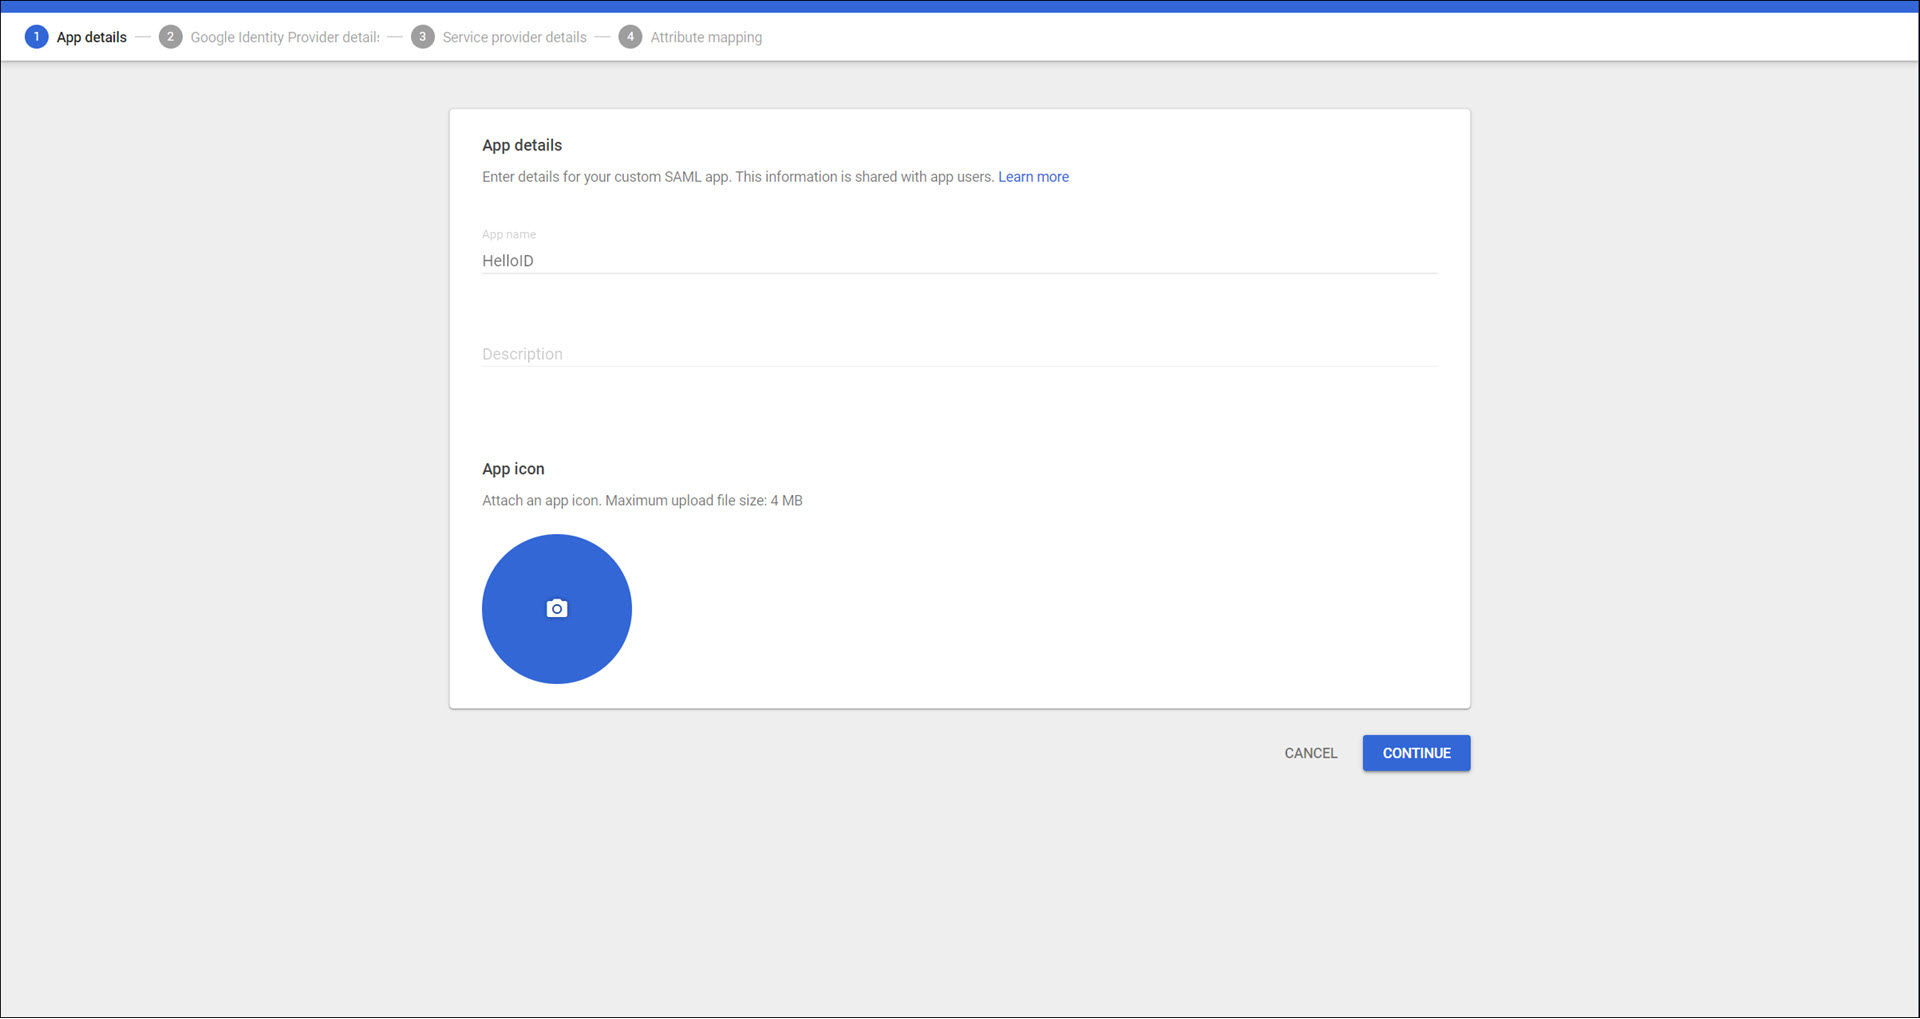
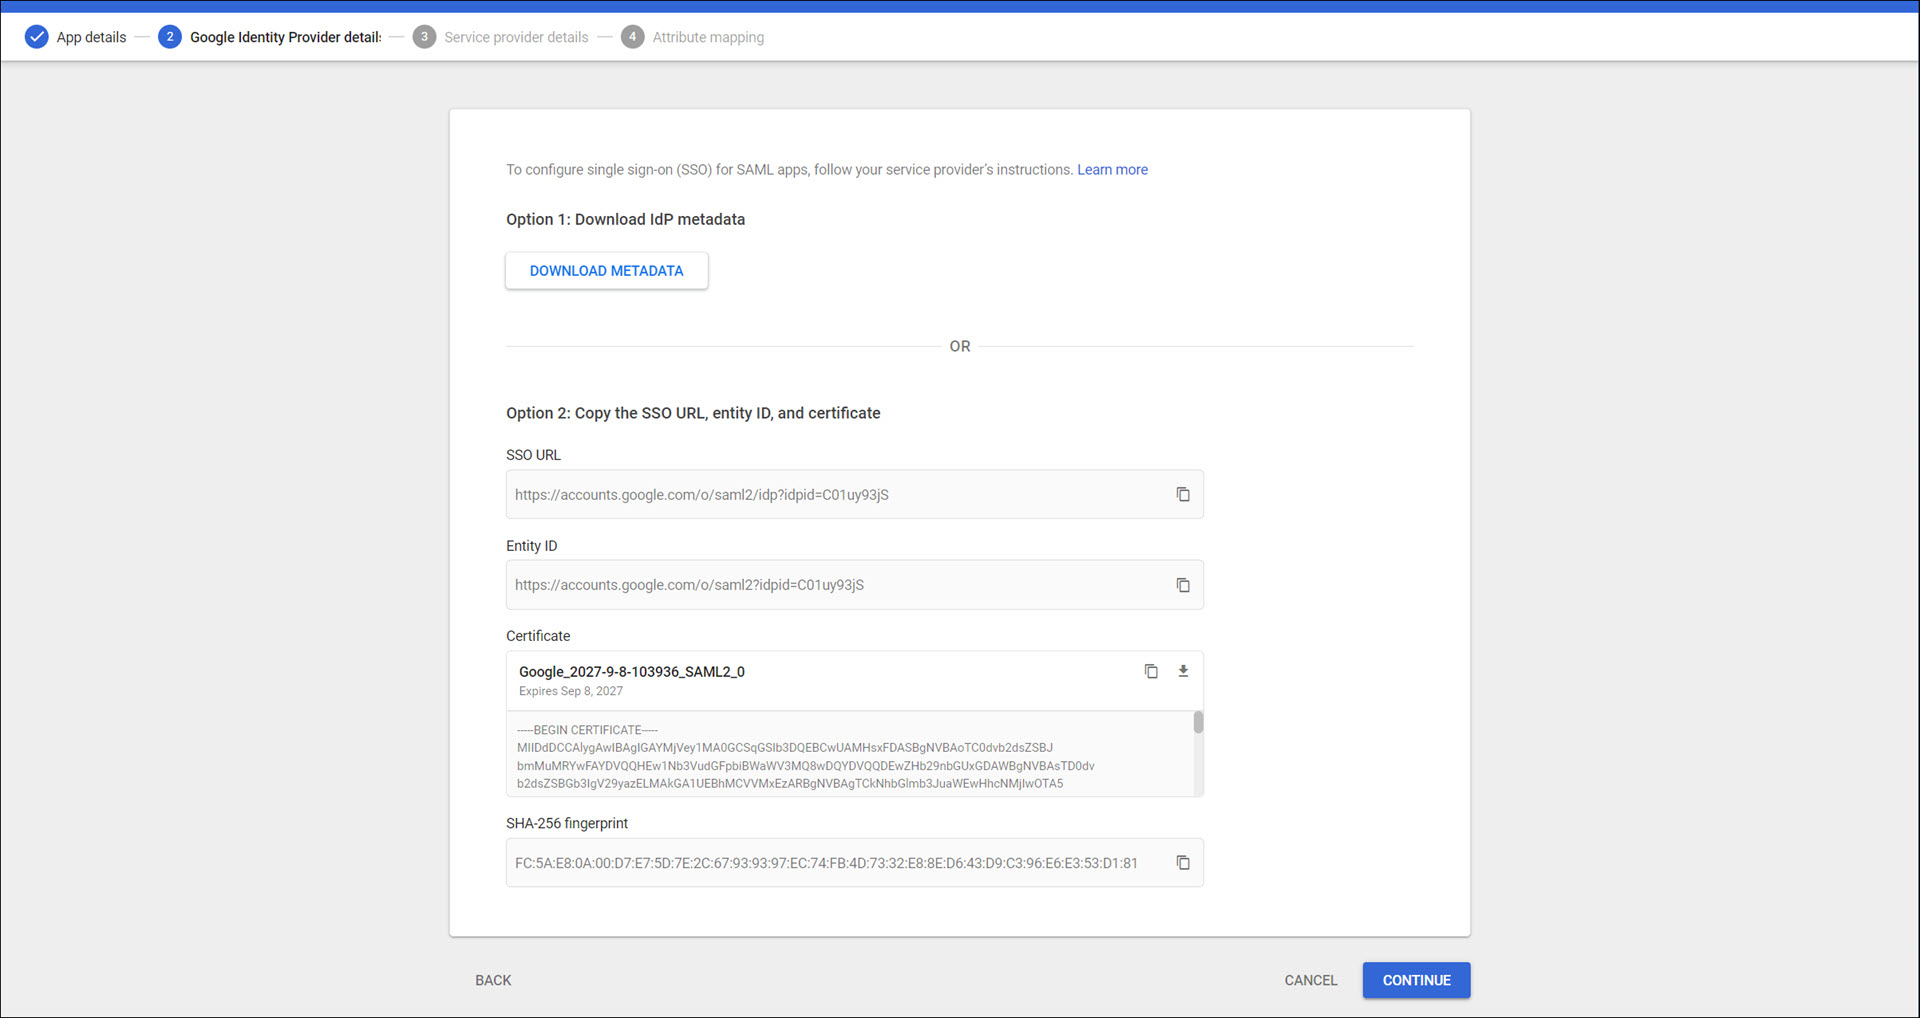
A screen will appear with the Google IdP information which is needed to set up the provider in HelloID. Minimize this browser tab.
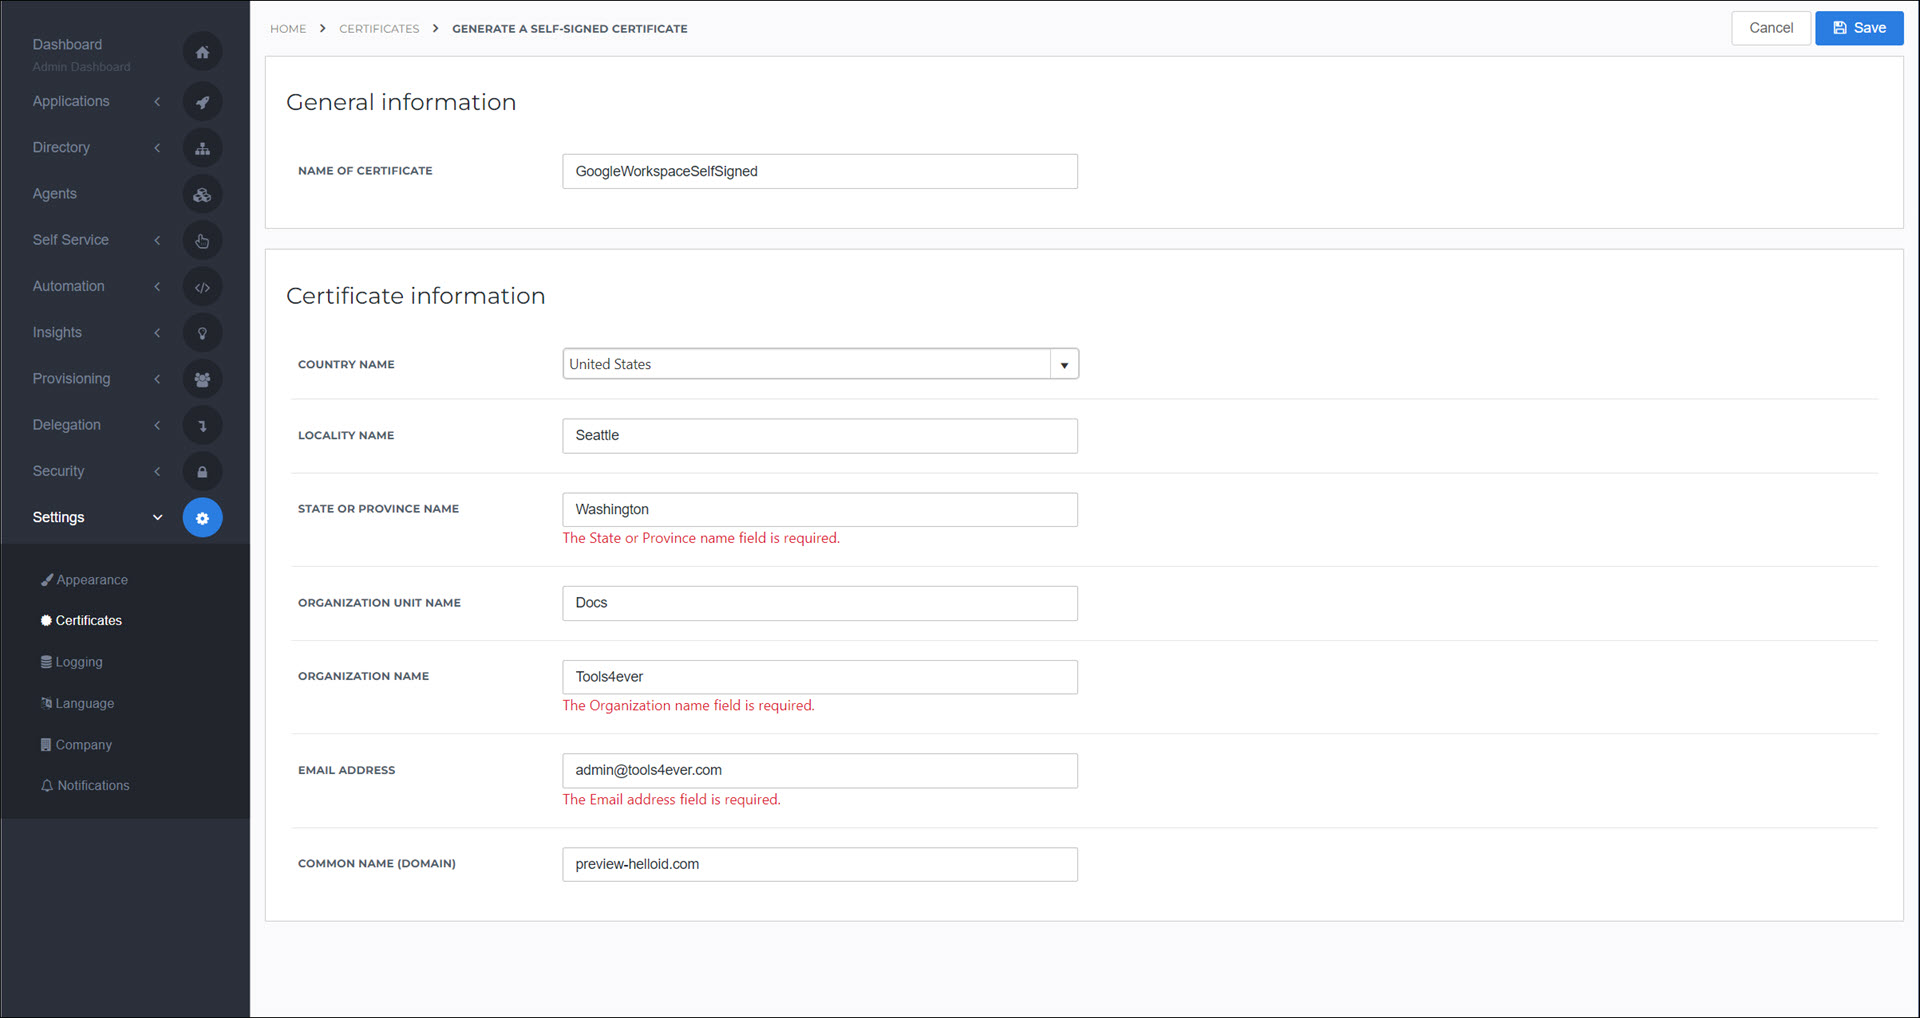
In the HelloID Administrator Dashboard, create a new certificate for the connection with Google Workspace.
Go to Security > Authentication > Identity Providers and click Create Provider. This will bring up the Identity Provider Catalog.
Find the SAML - Generic IdP and click the Add button next to it.
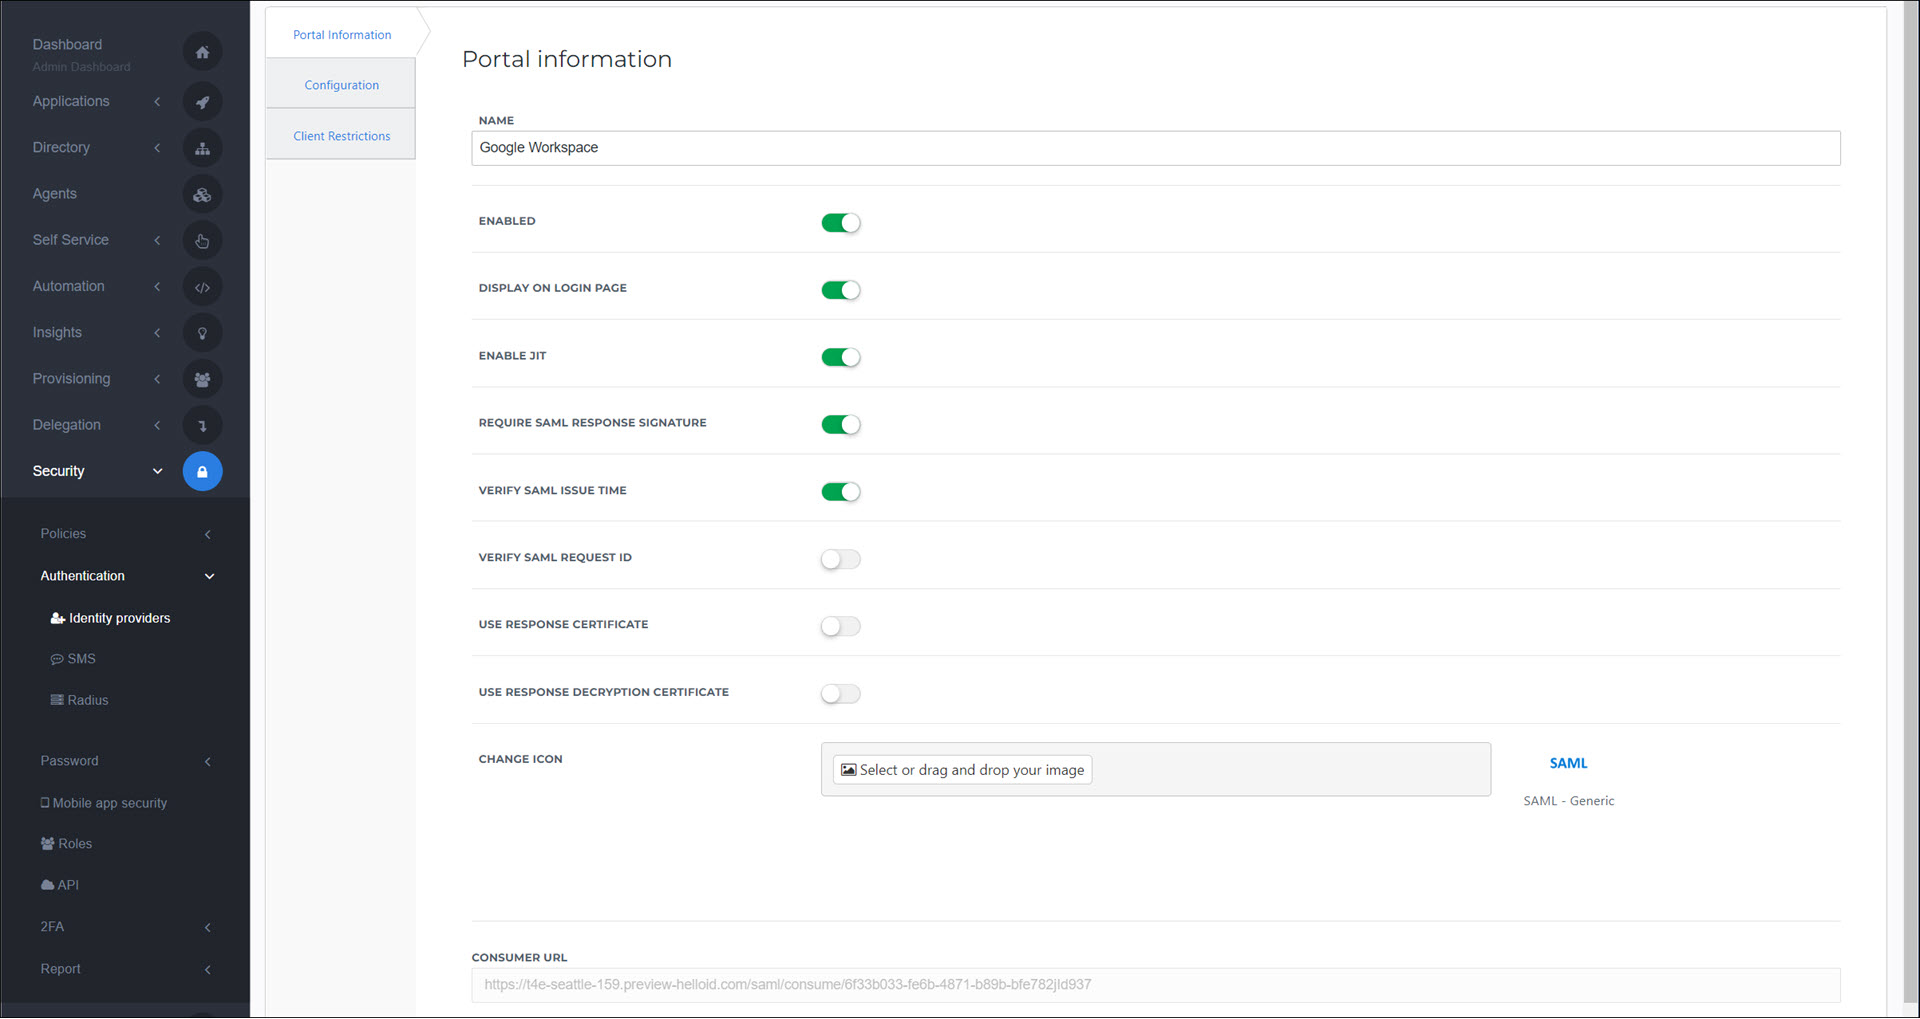
Enter a Name. Turn on the Enable JIT toggle (just-in-time provisioning) if you would like new HelloID accounts to be automatically created the first time users log in via Google Workspace. When JIT is on, you do not need to manually create HelloID accounts in advance. Click on the Configuration tab.
Enter the following values. All other fields may remain at their default value. View a complete configuration reference here.
Login URL: Copy SSO URL from the Google IdP configuration, which you minimized in step 5.
Request Certificate: Select the certificate that you created in step 6.
Logout URL: https://accounts.google.com/logout
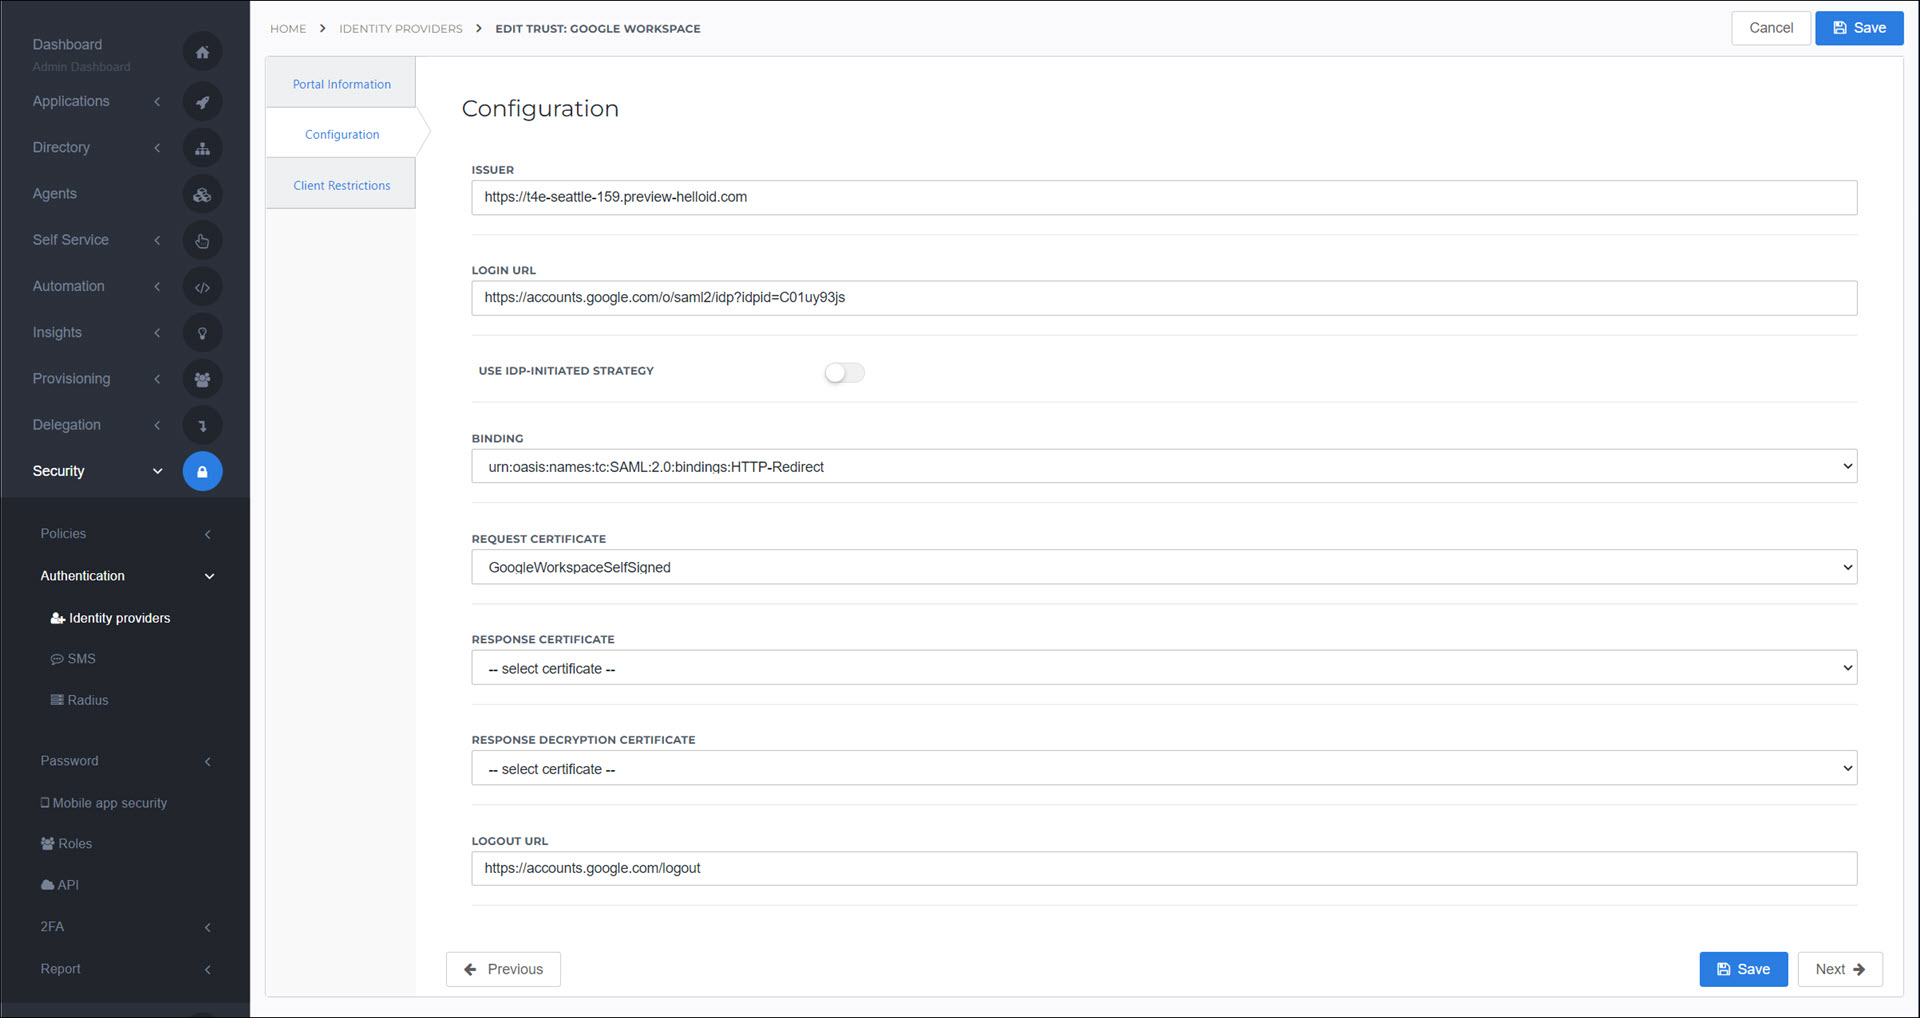
Click Save to save the IdP configuration in HelloID. You may configure other optional settings on the Configuration tab as desired.
Back in the browser tab with the Google SAML App, click Continue.
Enter the following values in the Service Provider Details screen.
ACS URL: the Consumer URL value from your newly-configured IdP object in HelloID
Entity ID: the Issuer value from your newly-configured IdP object in HelloID
Signed Response: Enable
Name ID Format: Email
Name ID: Basic Information > Primary email
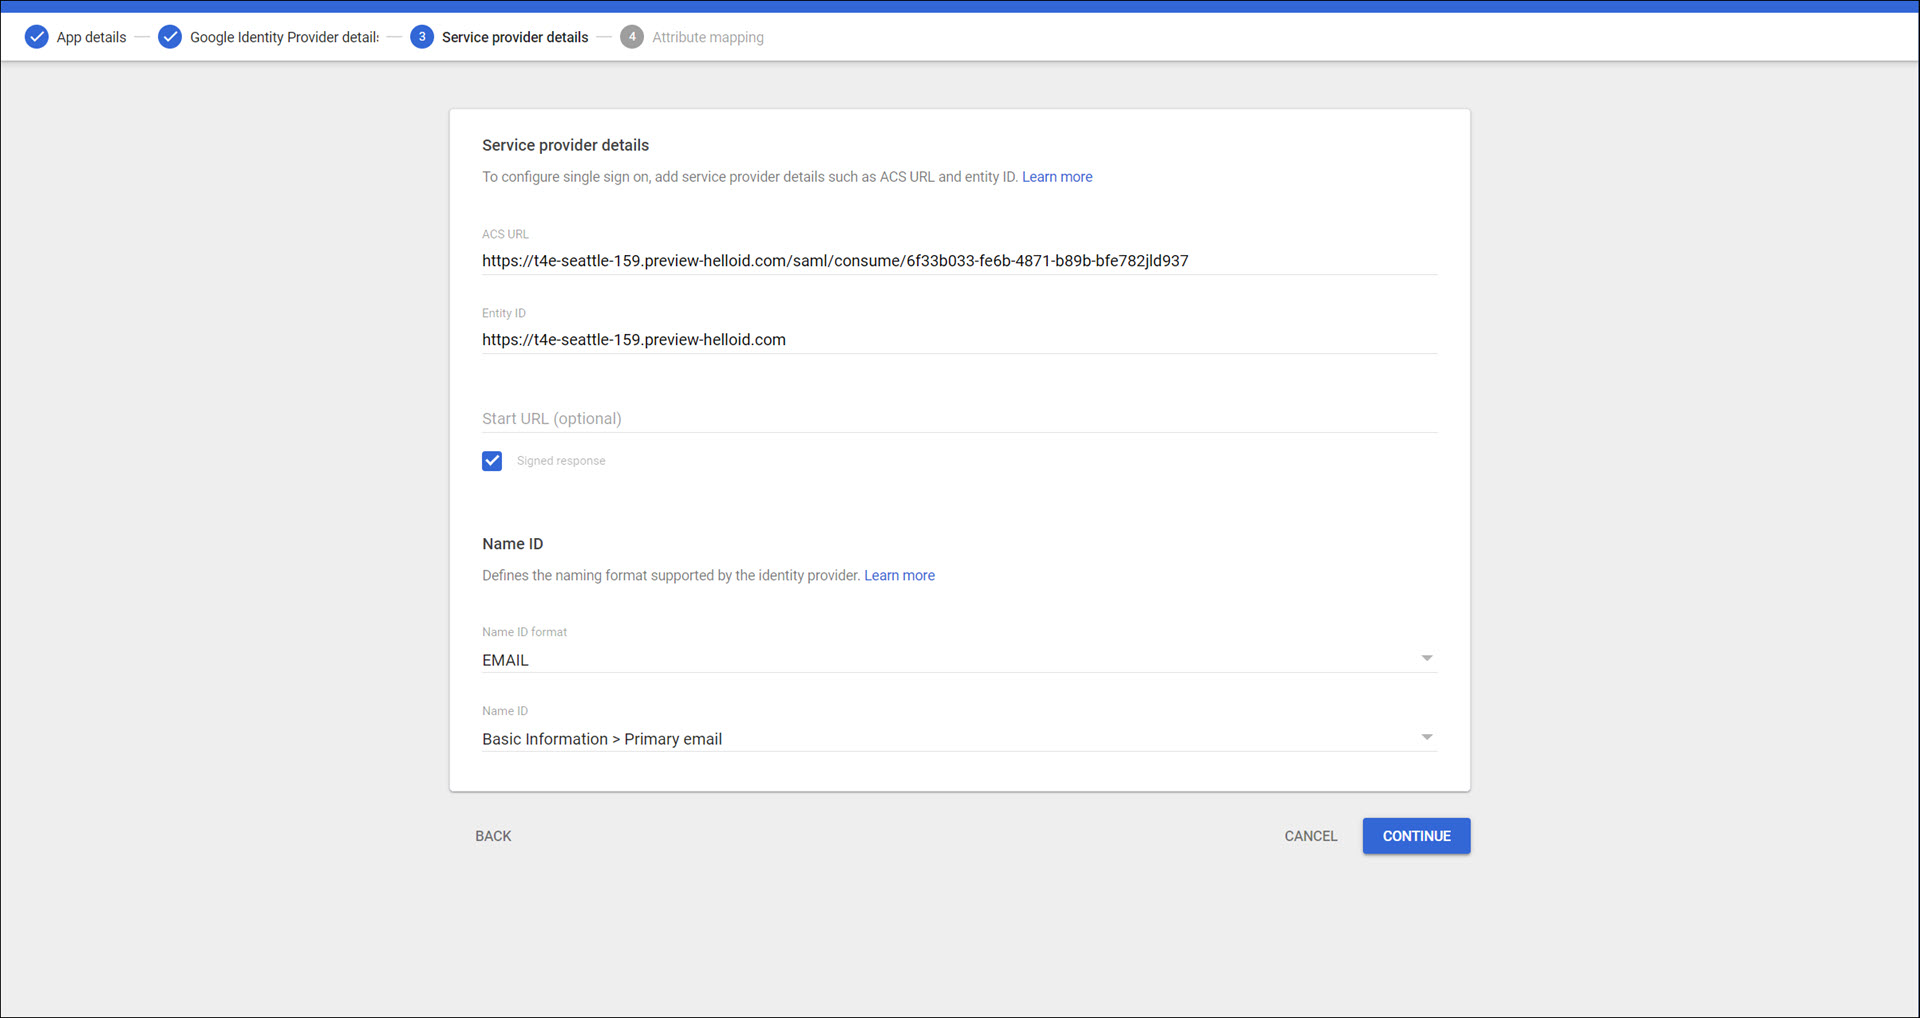
Click Continue.
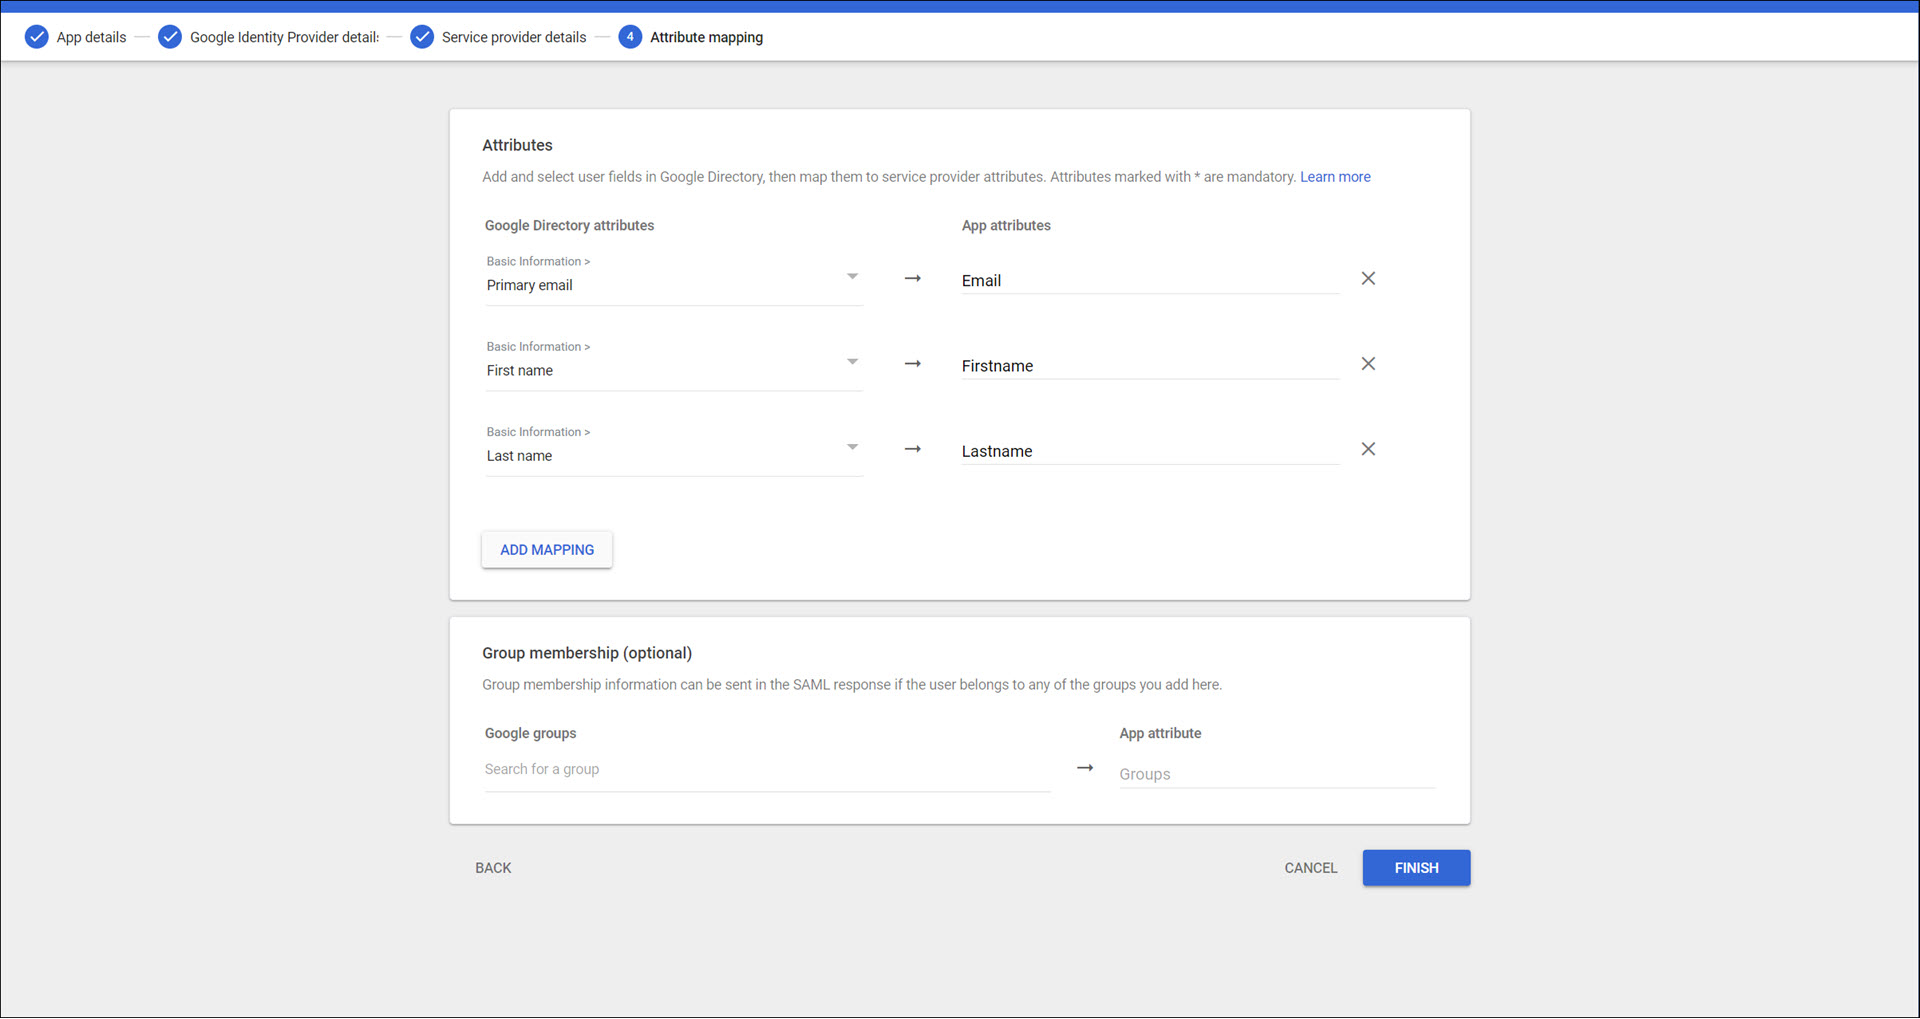
Click Add Mapping.
Add the following mappings and click Finish.
Basic Information > Primary email -> Email
Basic Information > First name -> Firstname
Basic information > Last name -> Lastname
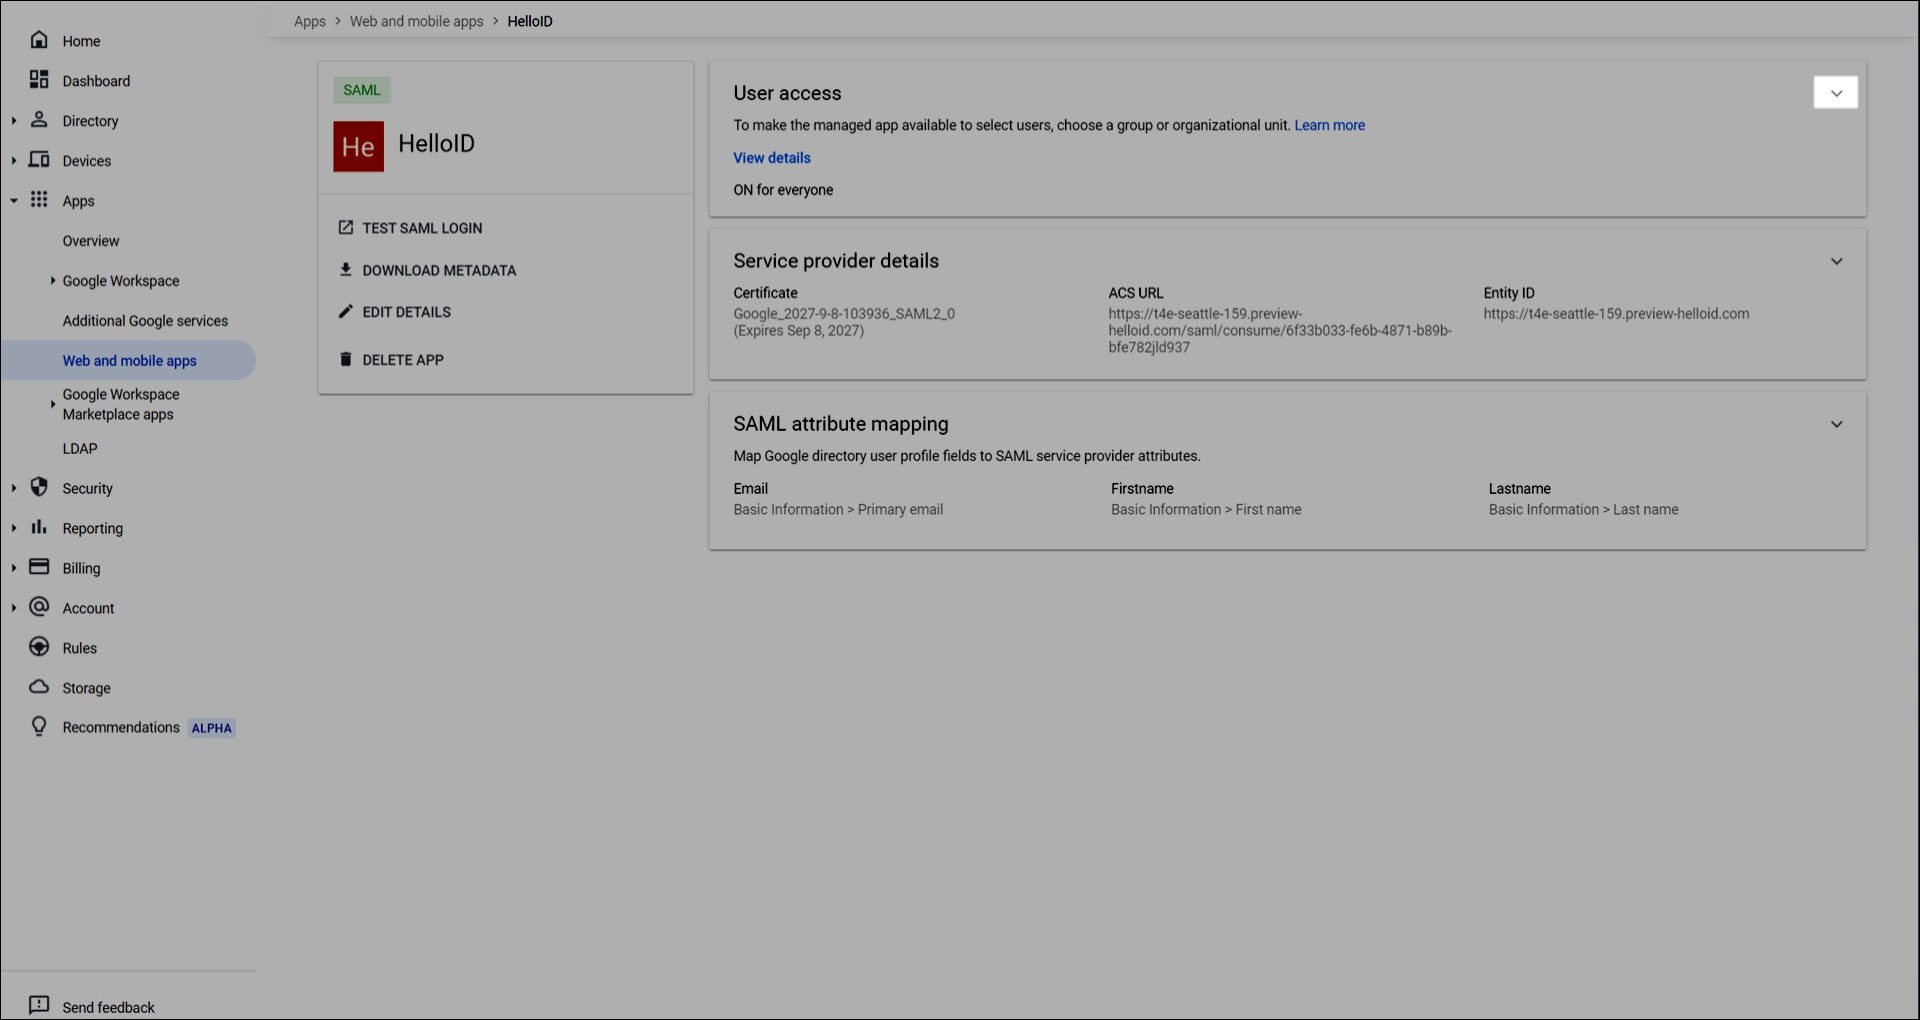
The SAML application for HelloID has been configured. Click Finish to continue.
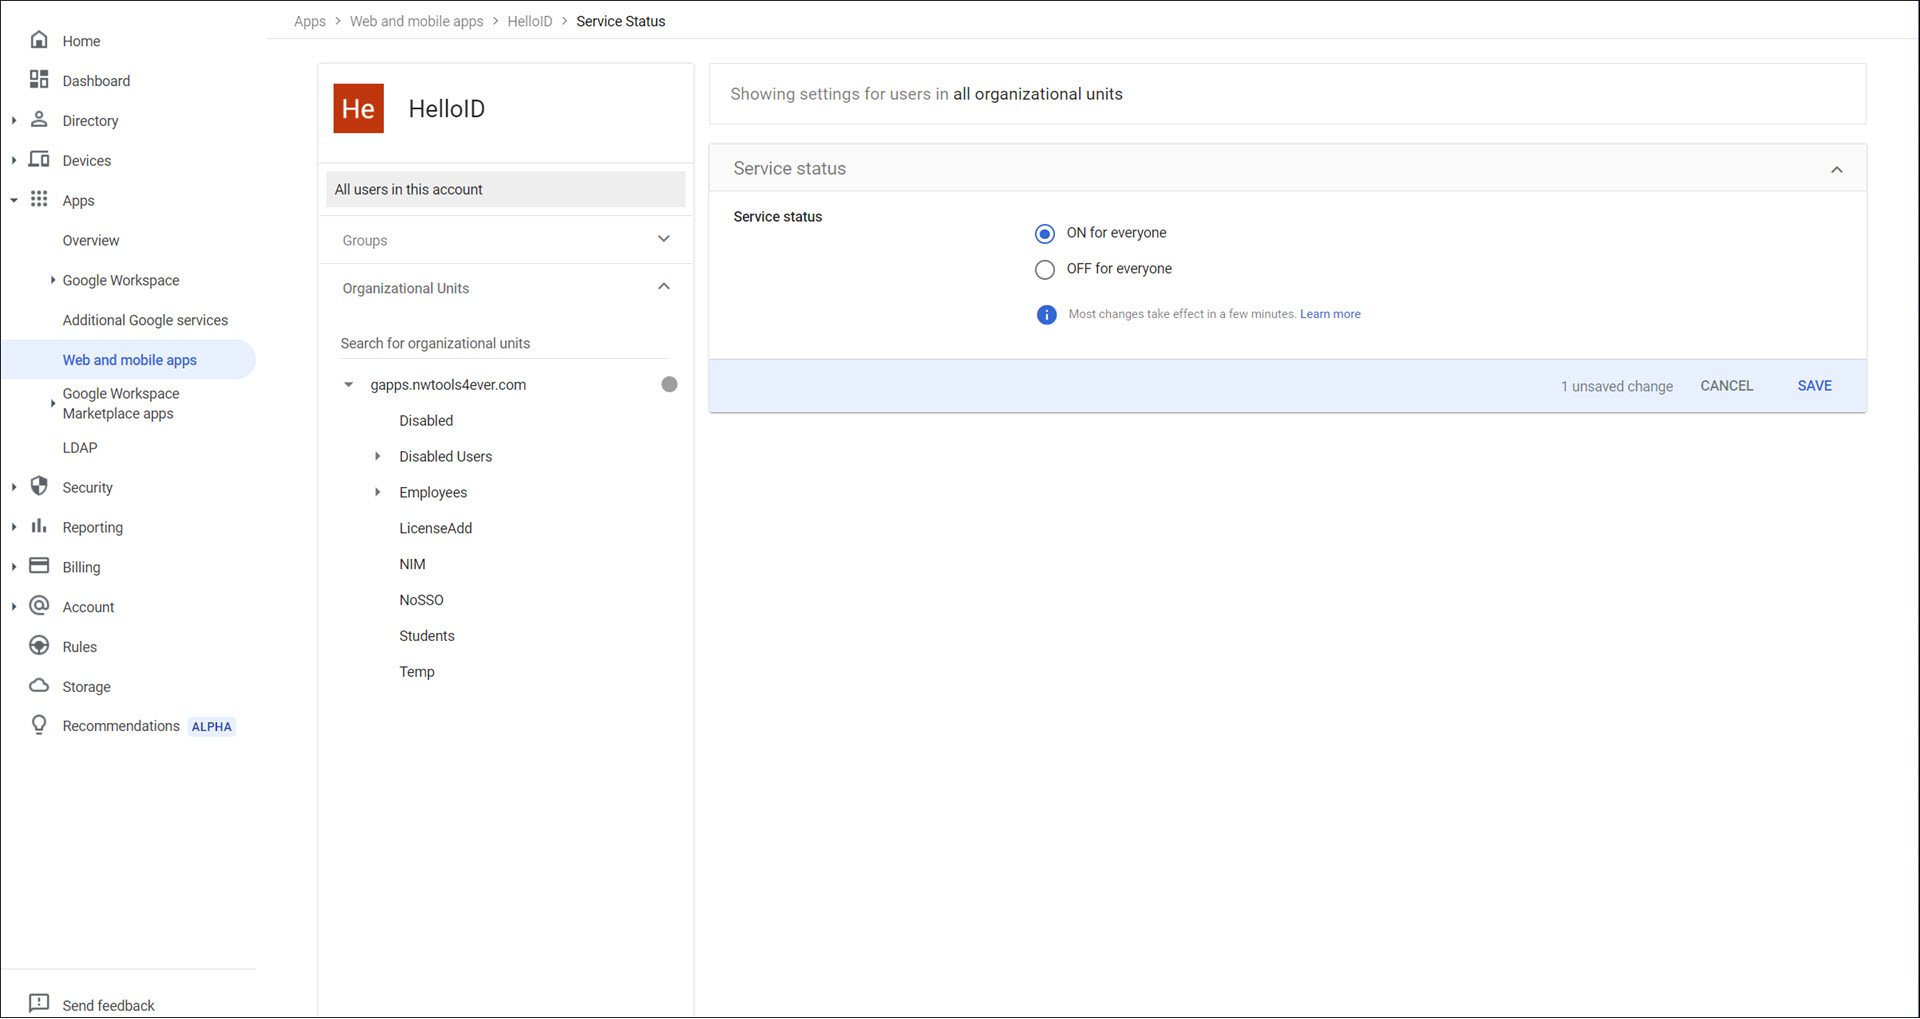
Expand the User Access pane.
Select On for everyone and click Save.
The configuration is finished. It can now be tested. Go to your HelloID portal and log in with the Google Workspace IdP. The login will be routed to Google.
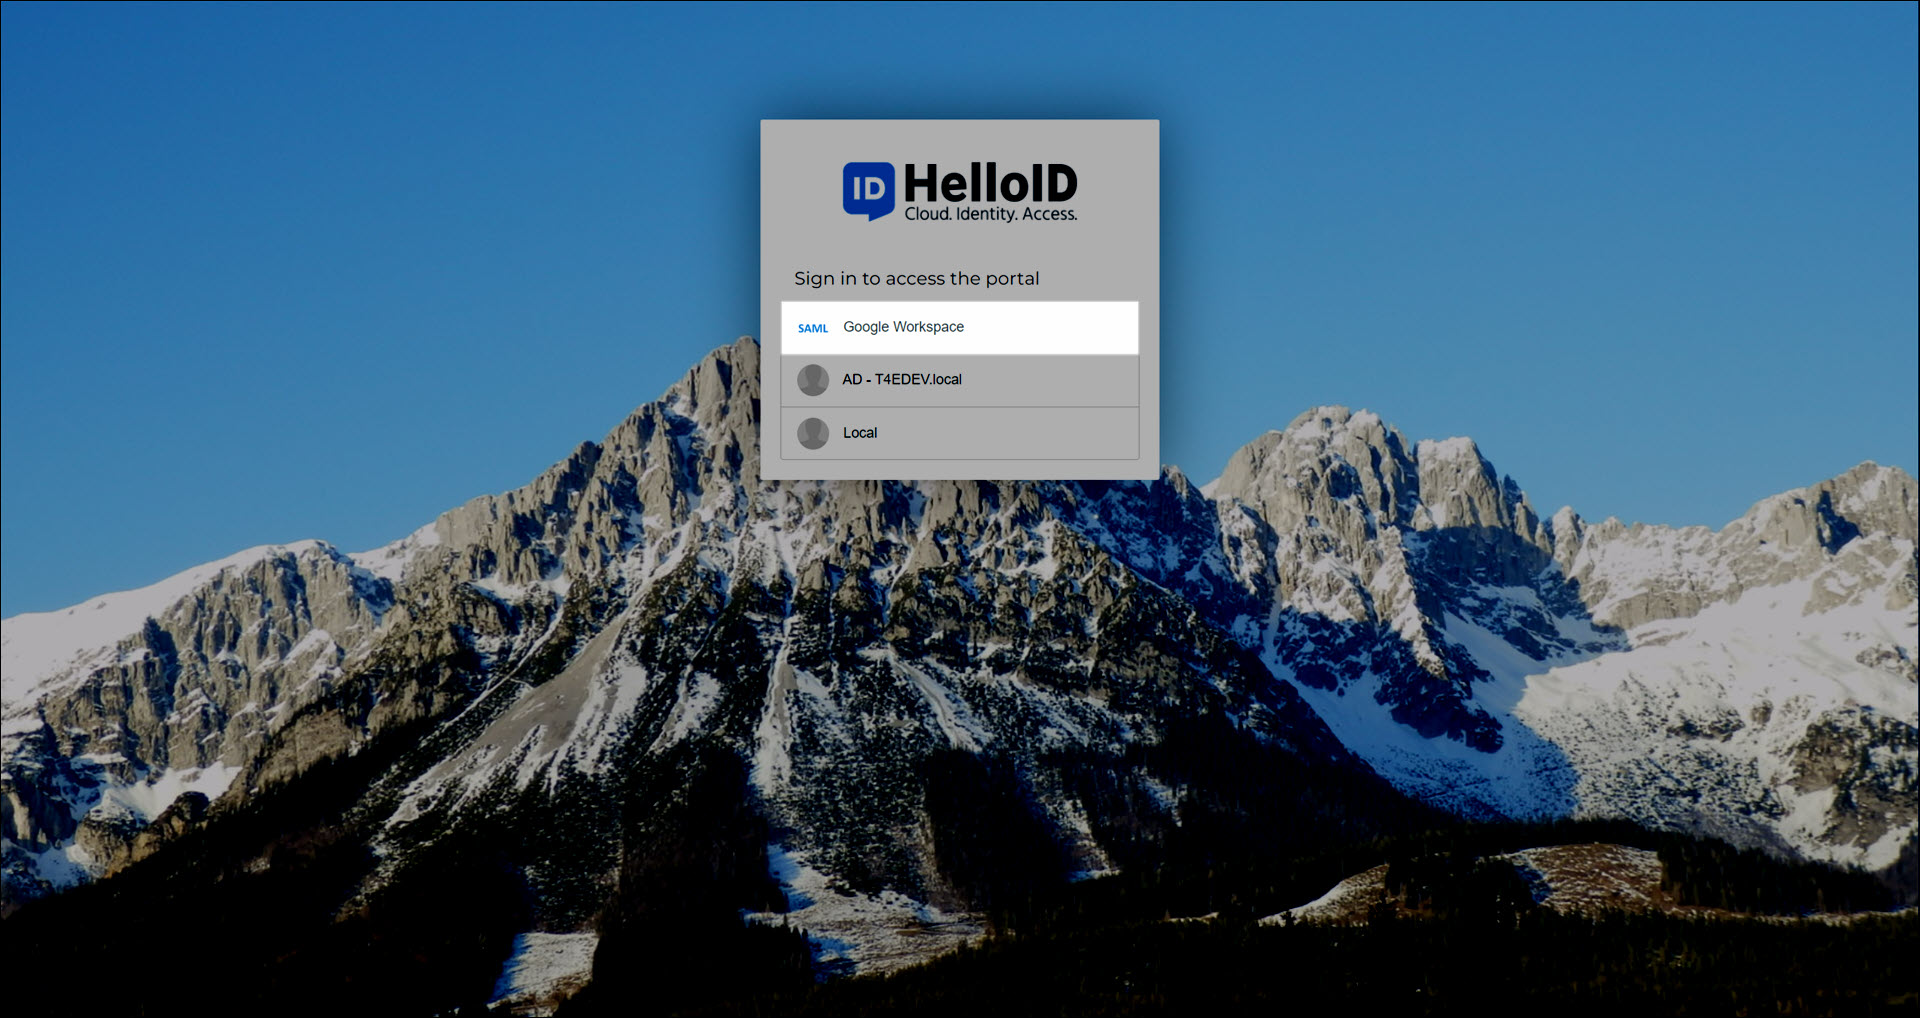
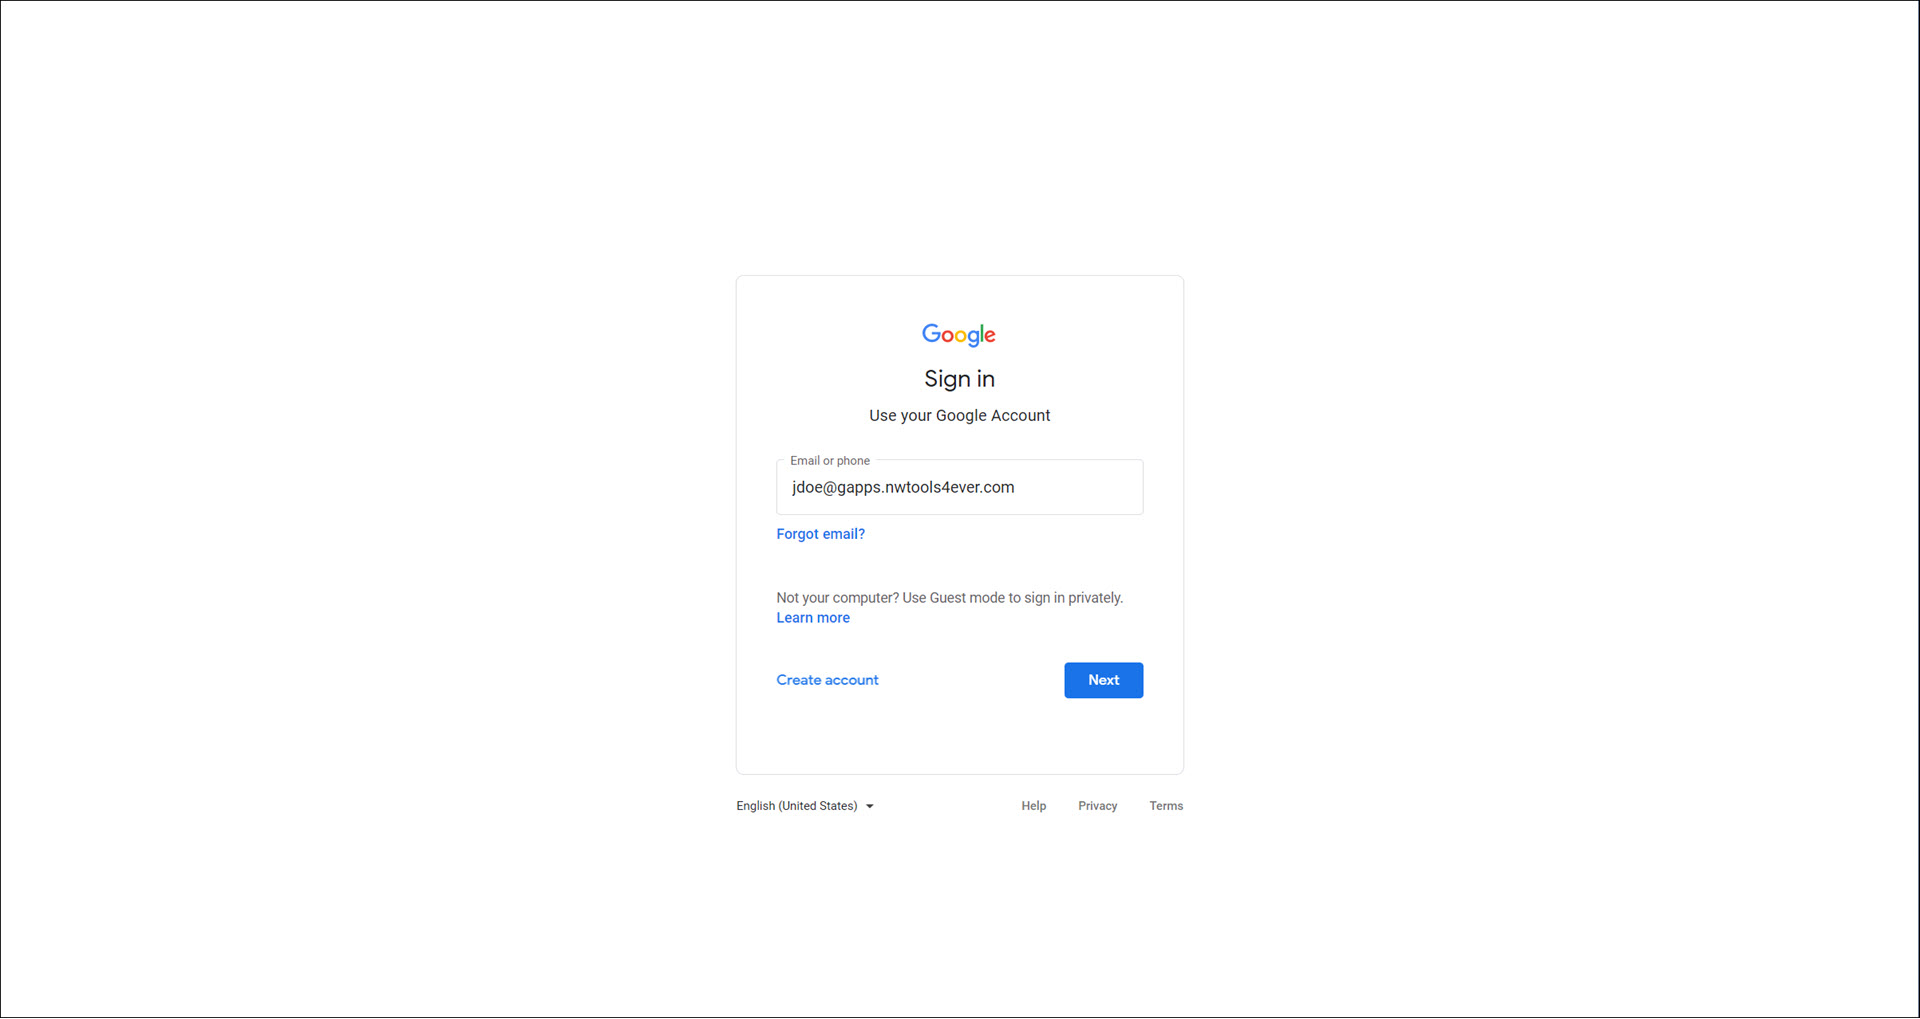
Once authenticated through Google, the user will be logged into HelloID with their Google account.
As a final step, you may want to edit HelloID's user attribute mapping configuration. See Mapping - Overview and Edit a mapping set.
This guide describes the whole process of configuring Salesforce and HelloID. If the domain has already been added to Salesforce you can skip ahead to step 13.
1. Go to Salesforce as the system admin and press Setup in the top right corner
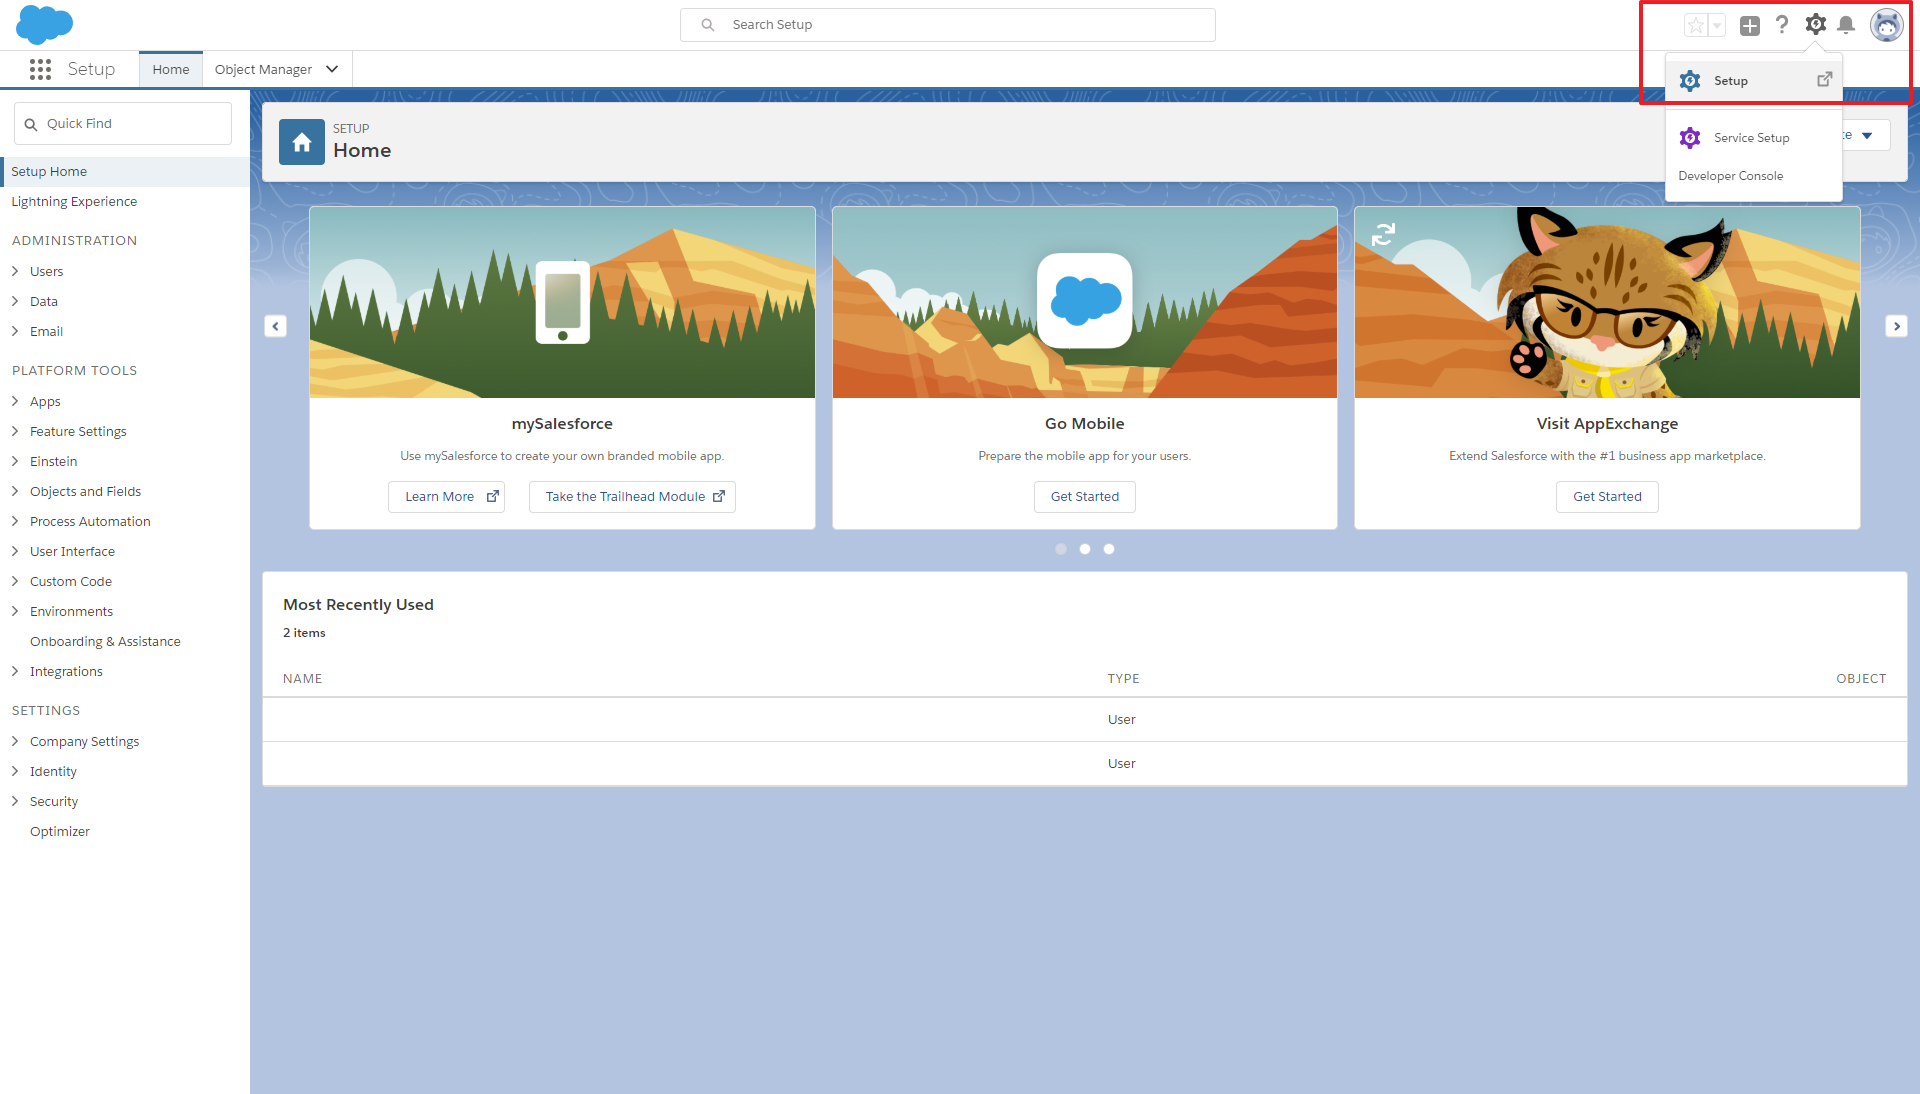
2. Enter Identity in the search window and select the Identity Provider in the results
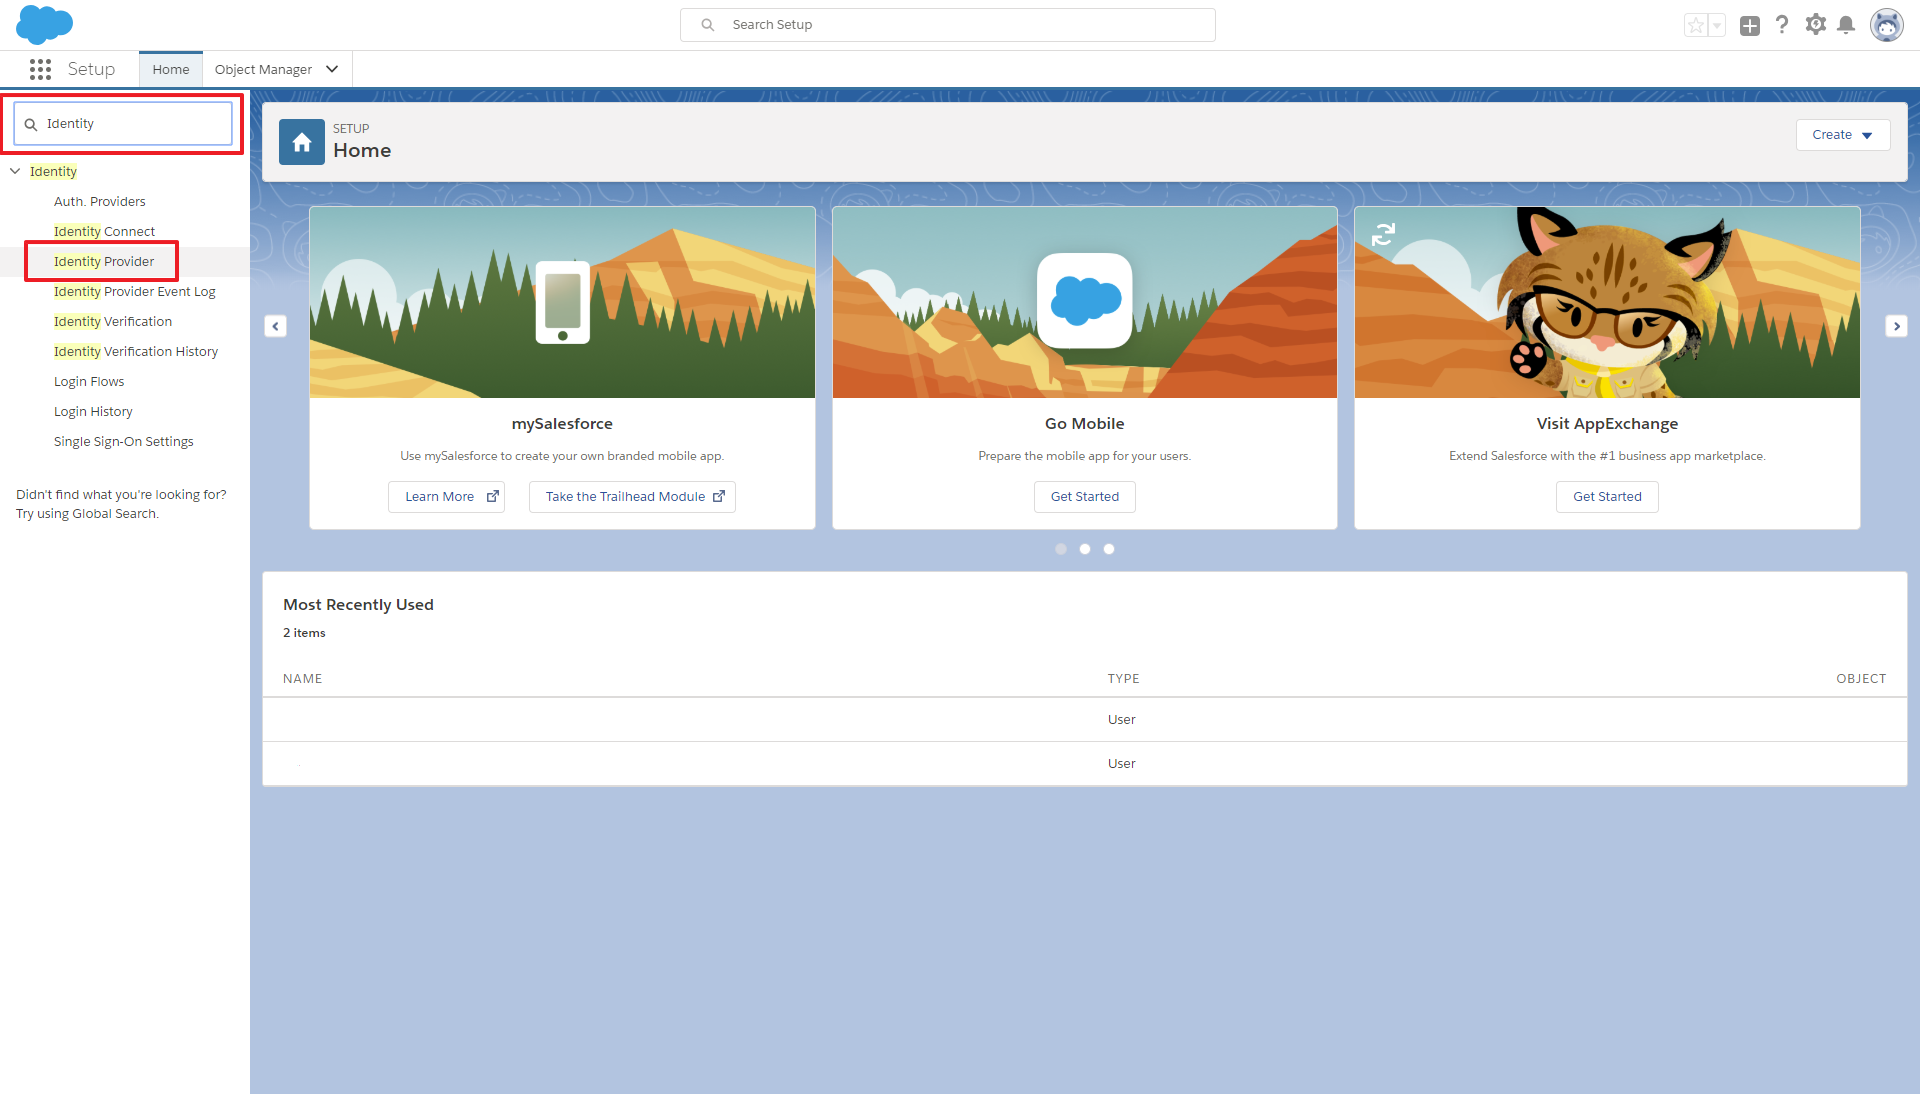
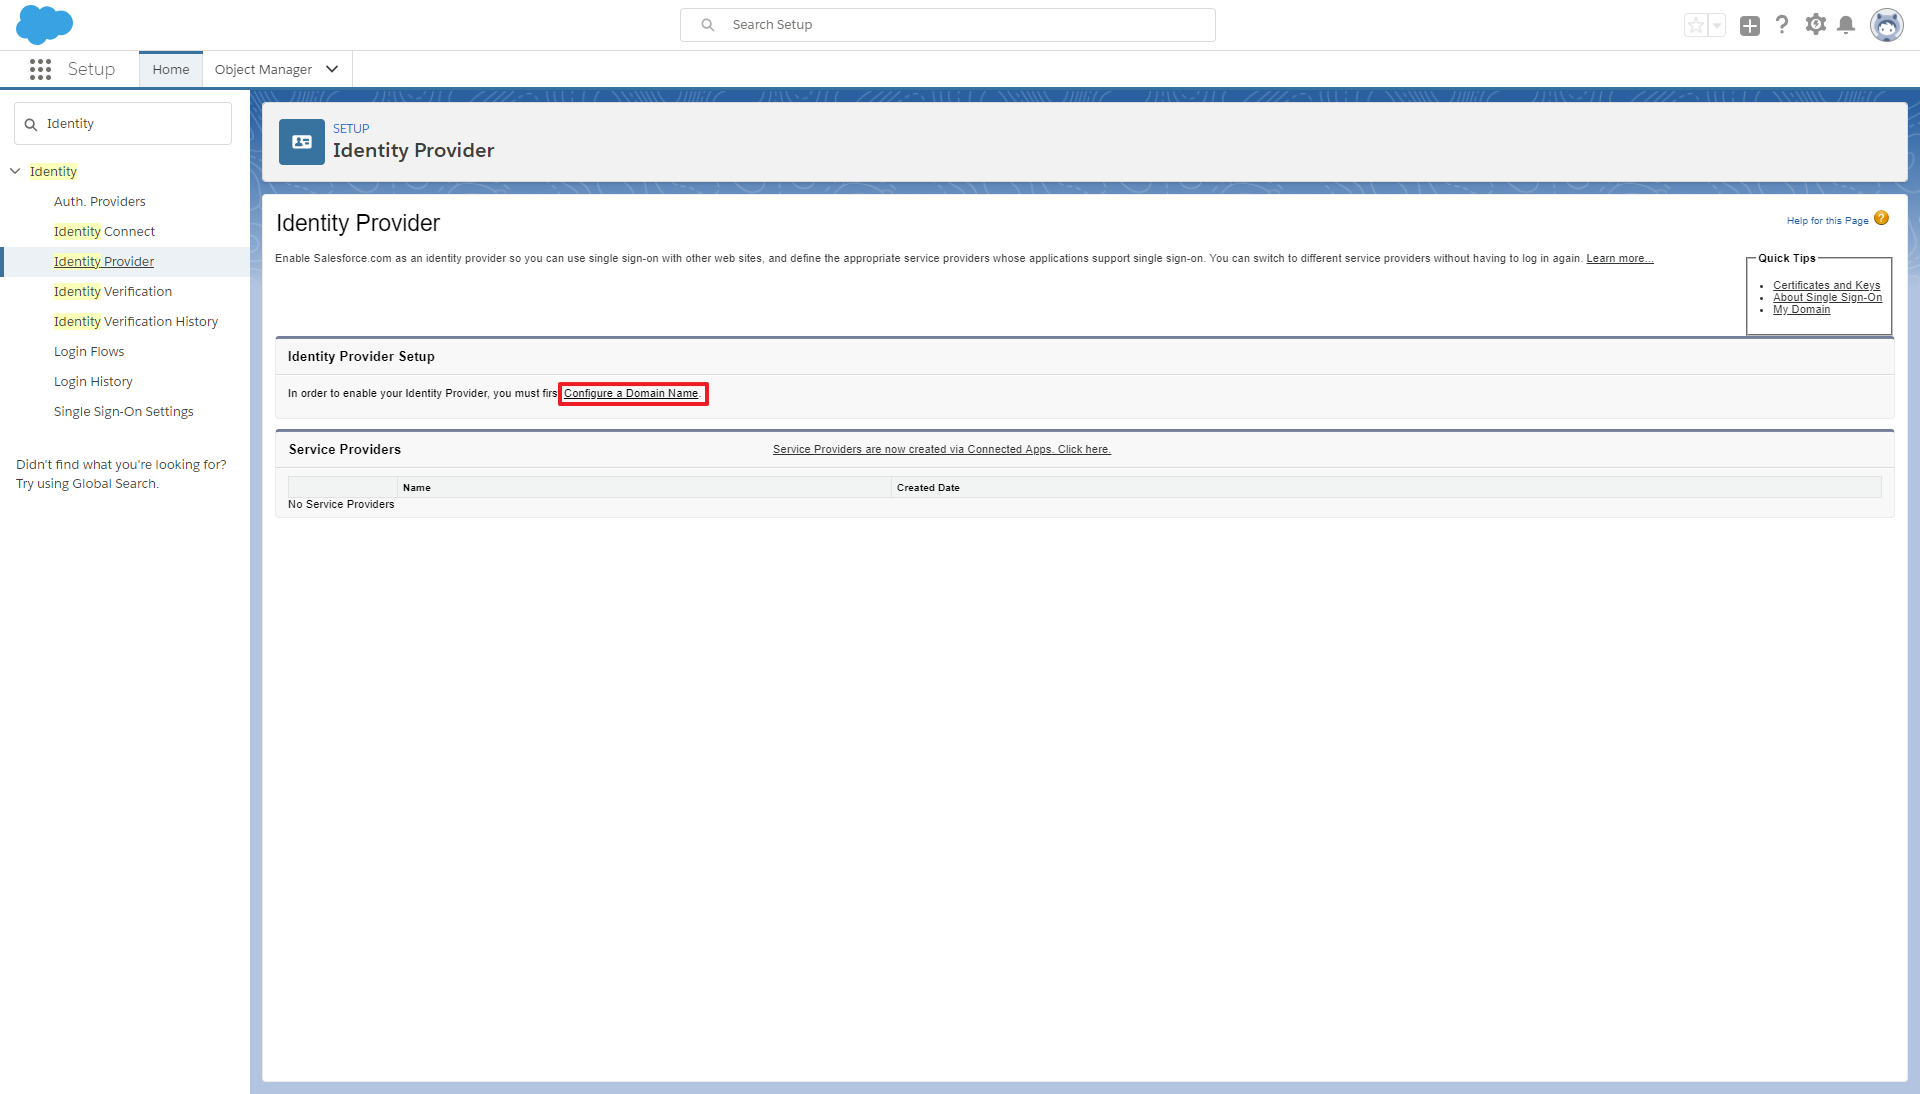
3. Press Configure a Domain Name
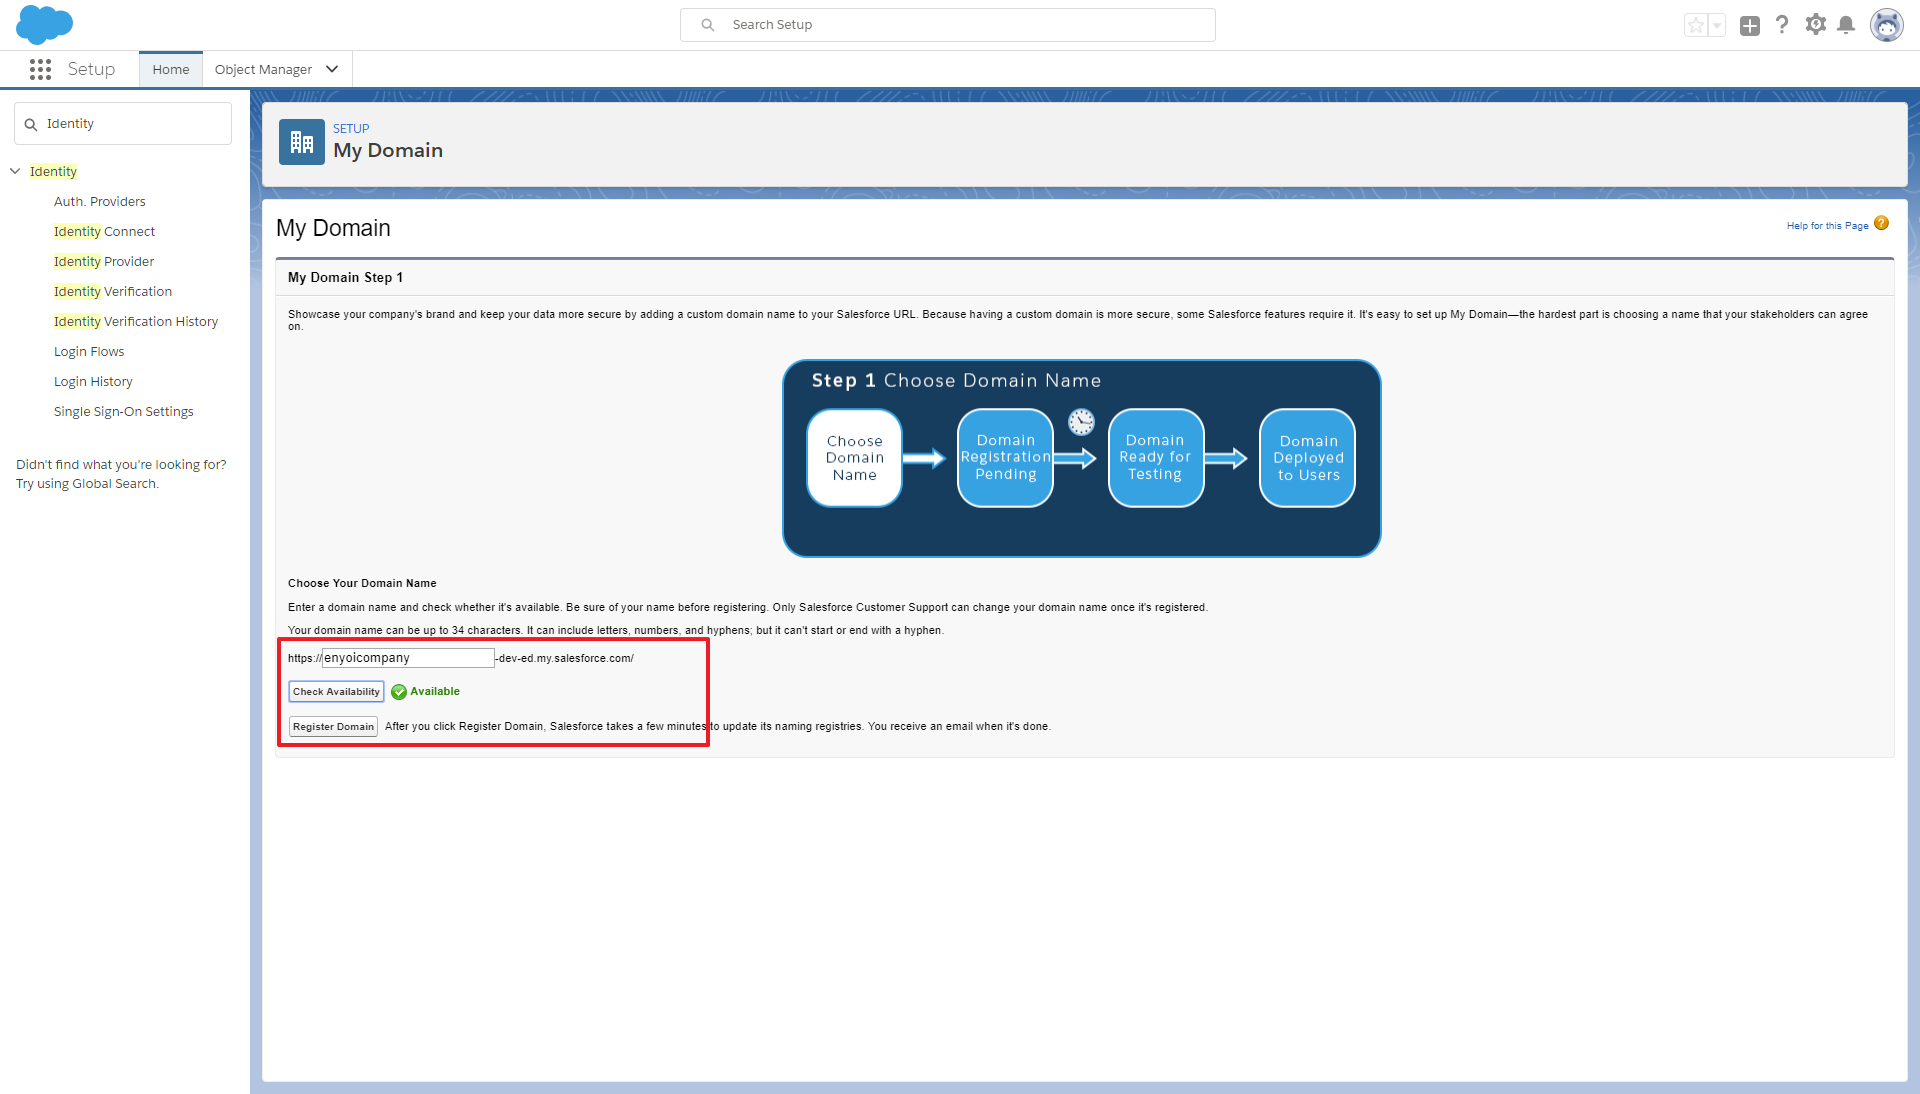
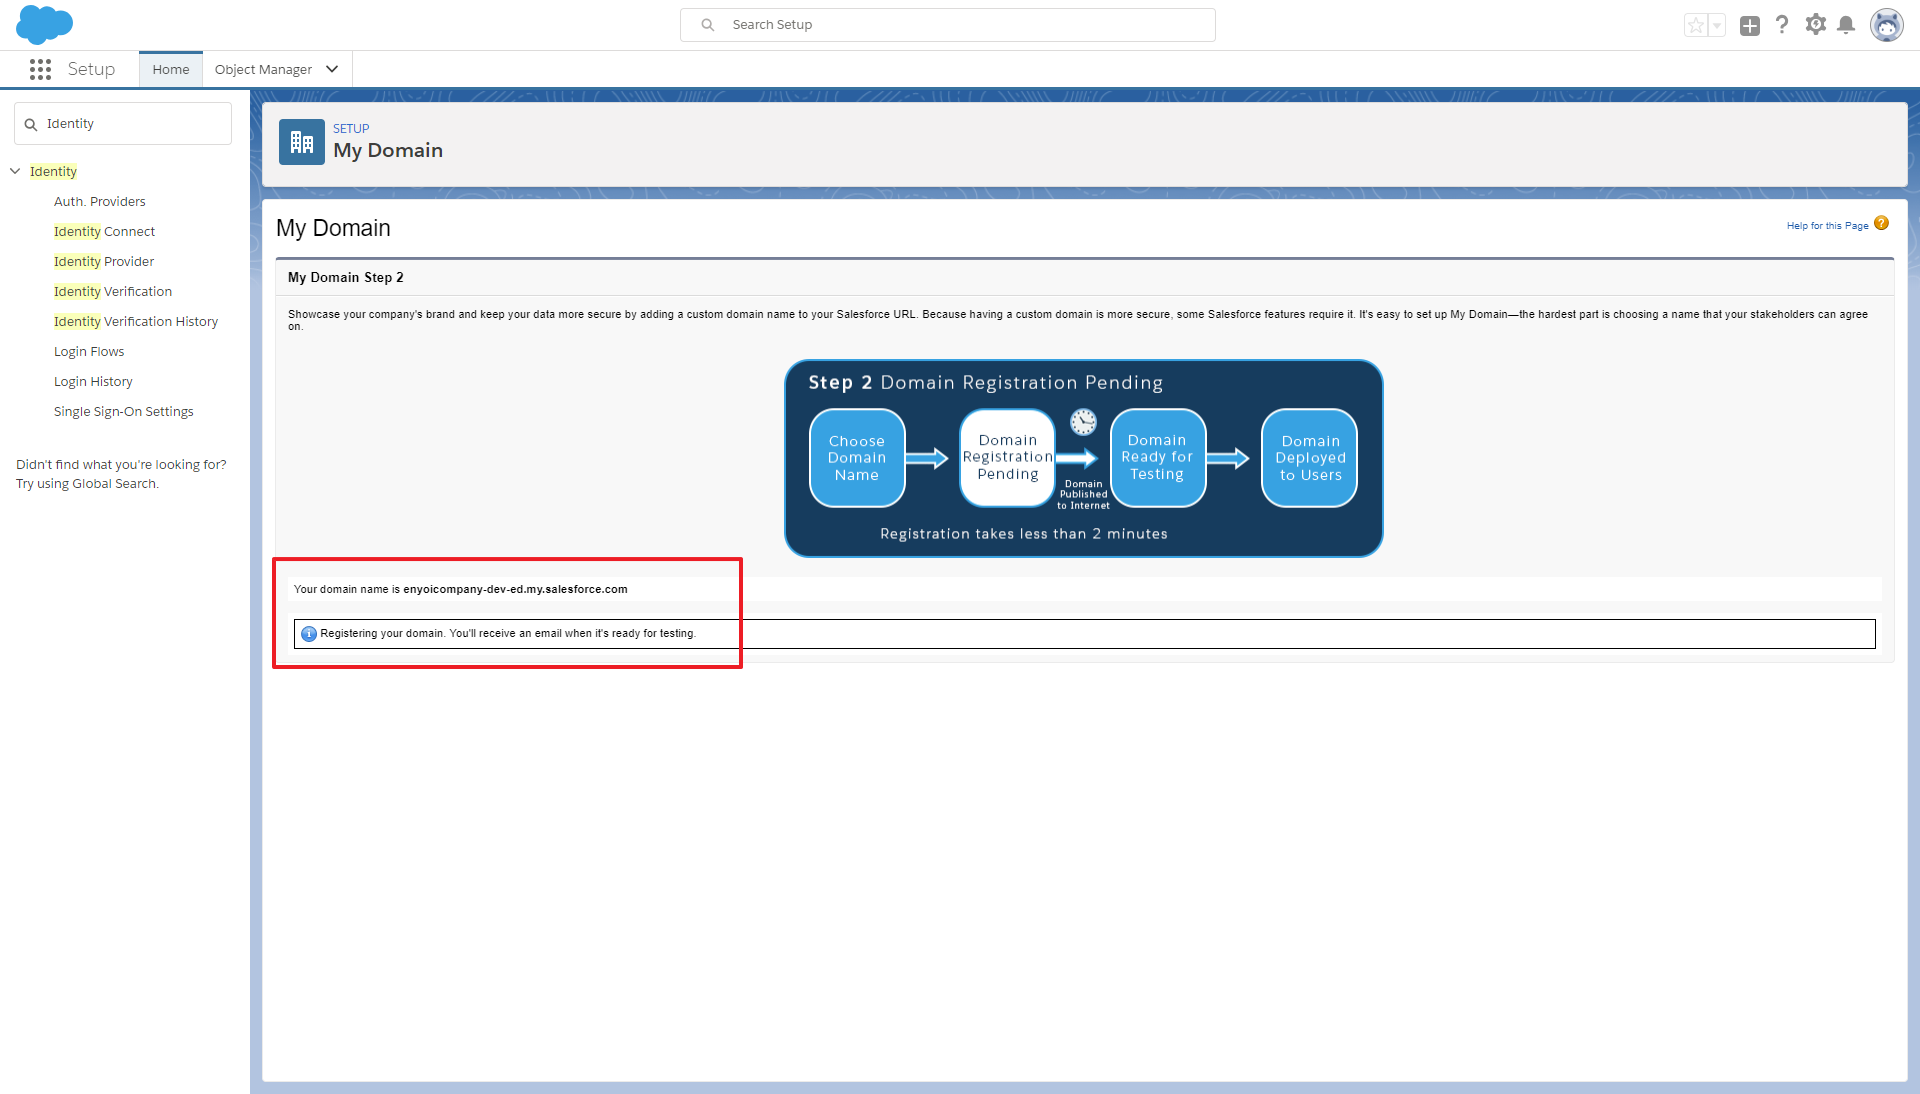
4. Enter the domain name and press Register domain
5. The registration will take some time, wait until this has finished
6. Press Login
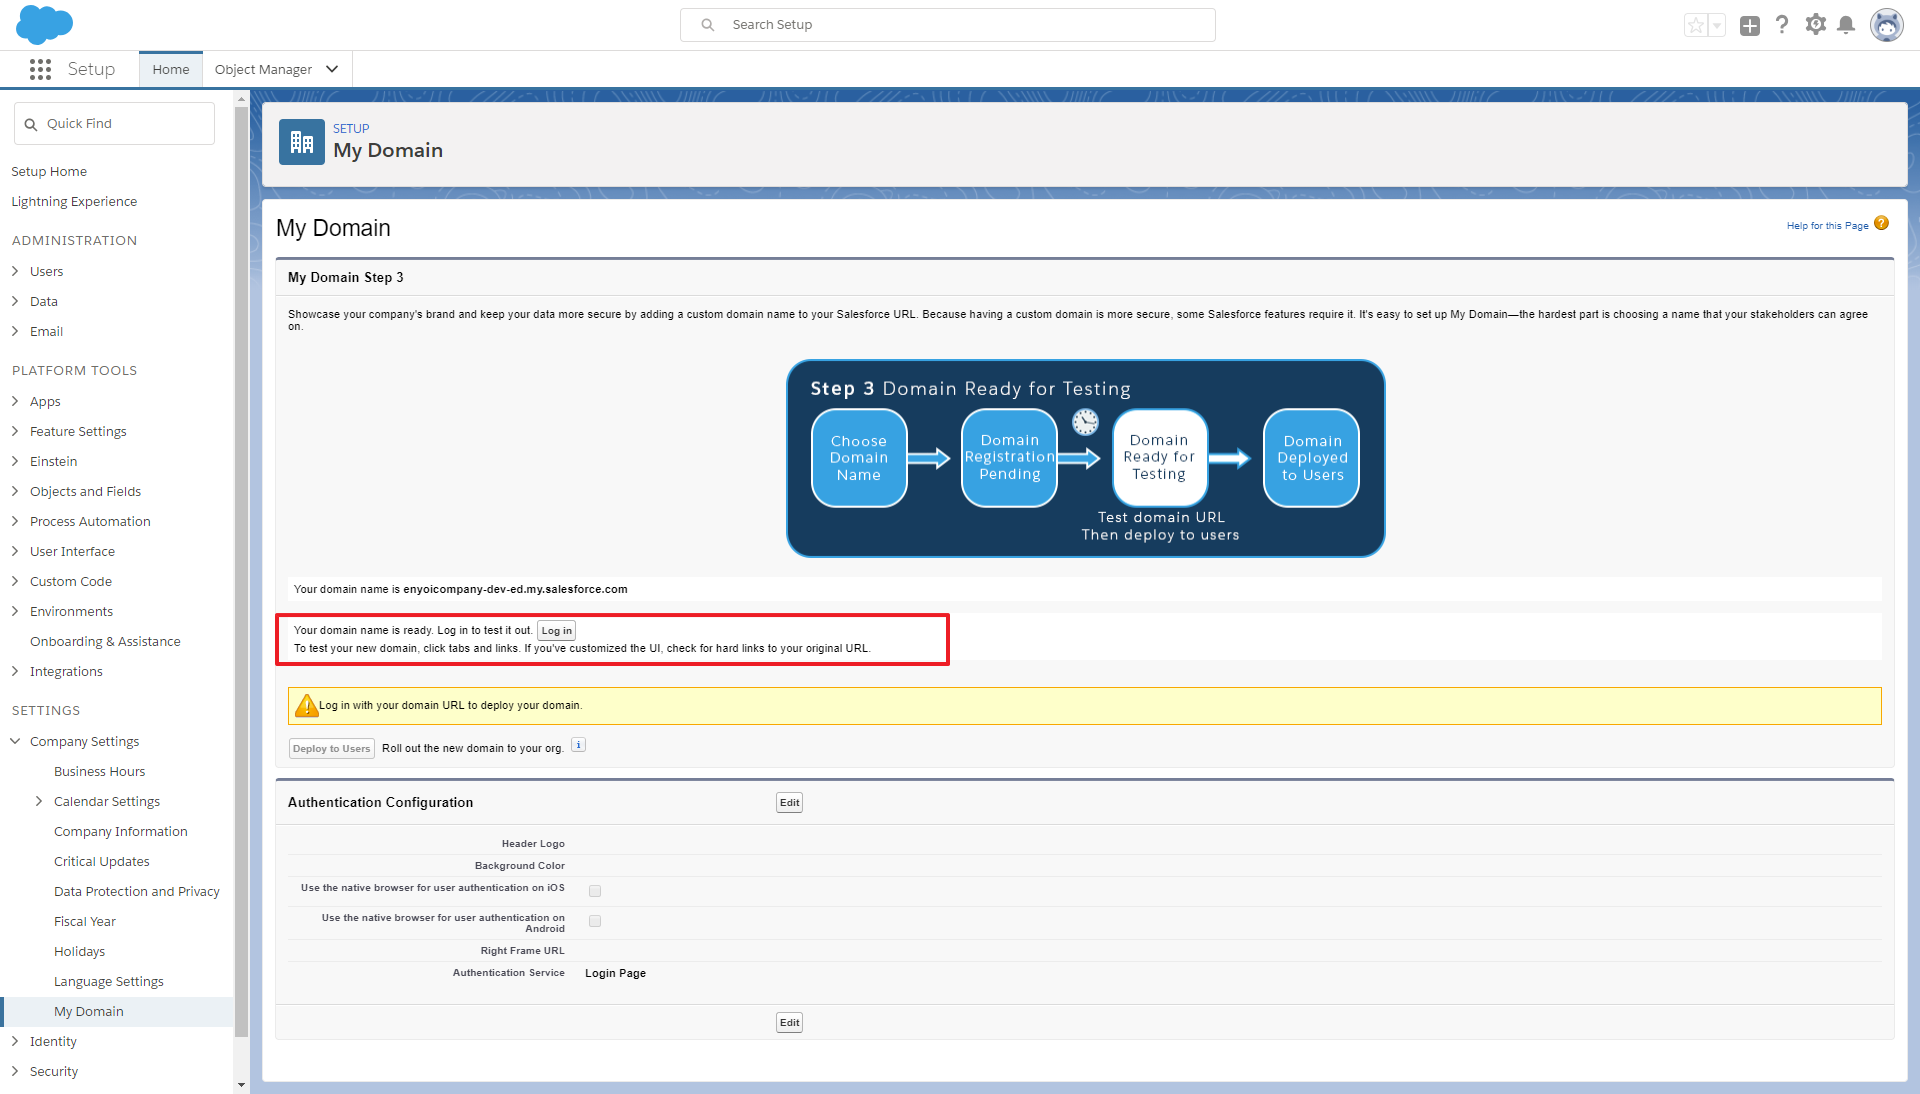
7. Deploy the new domain to the users
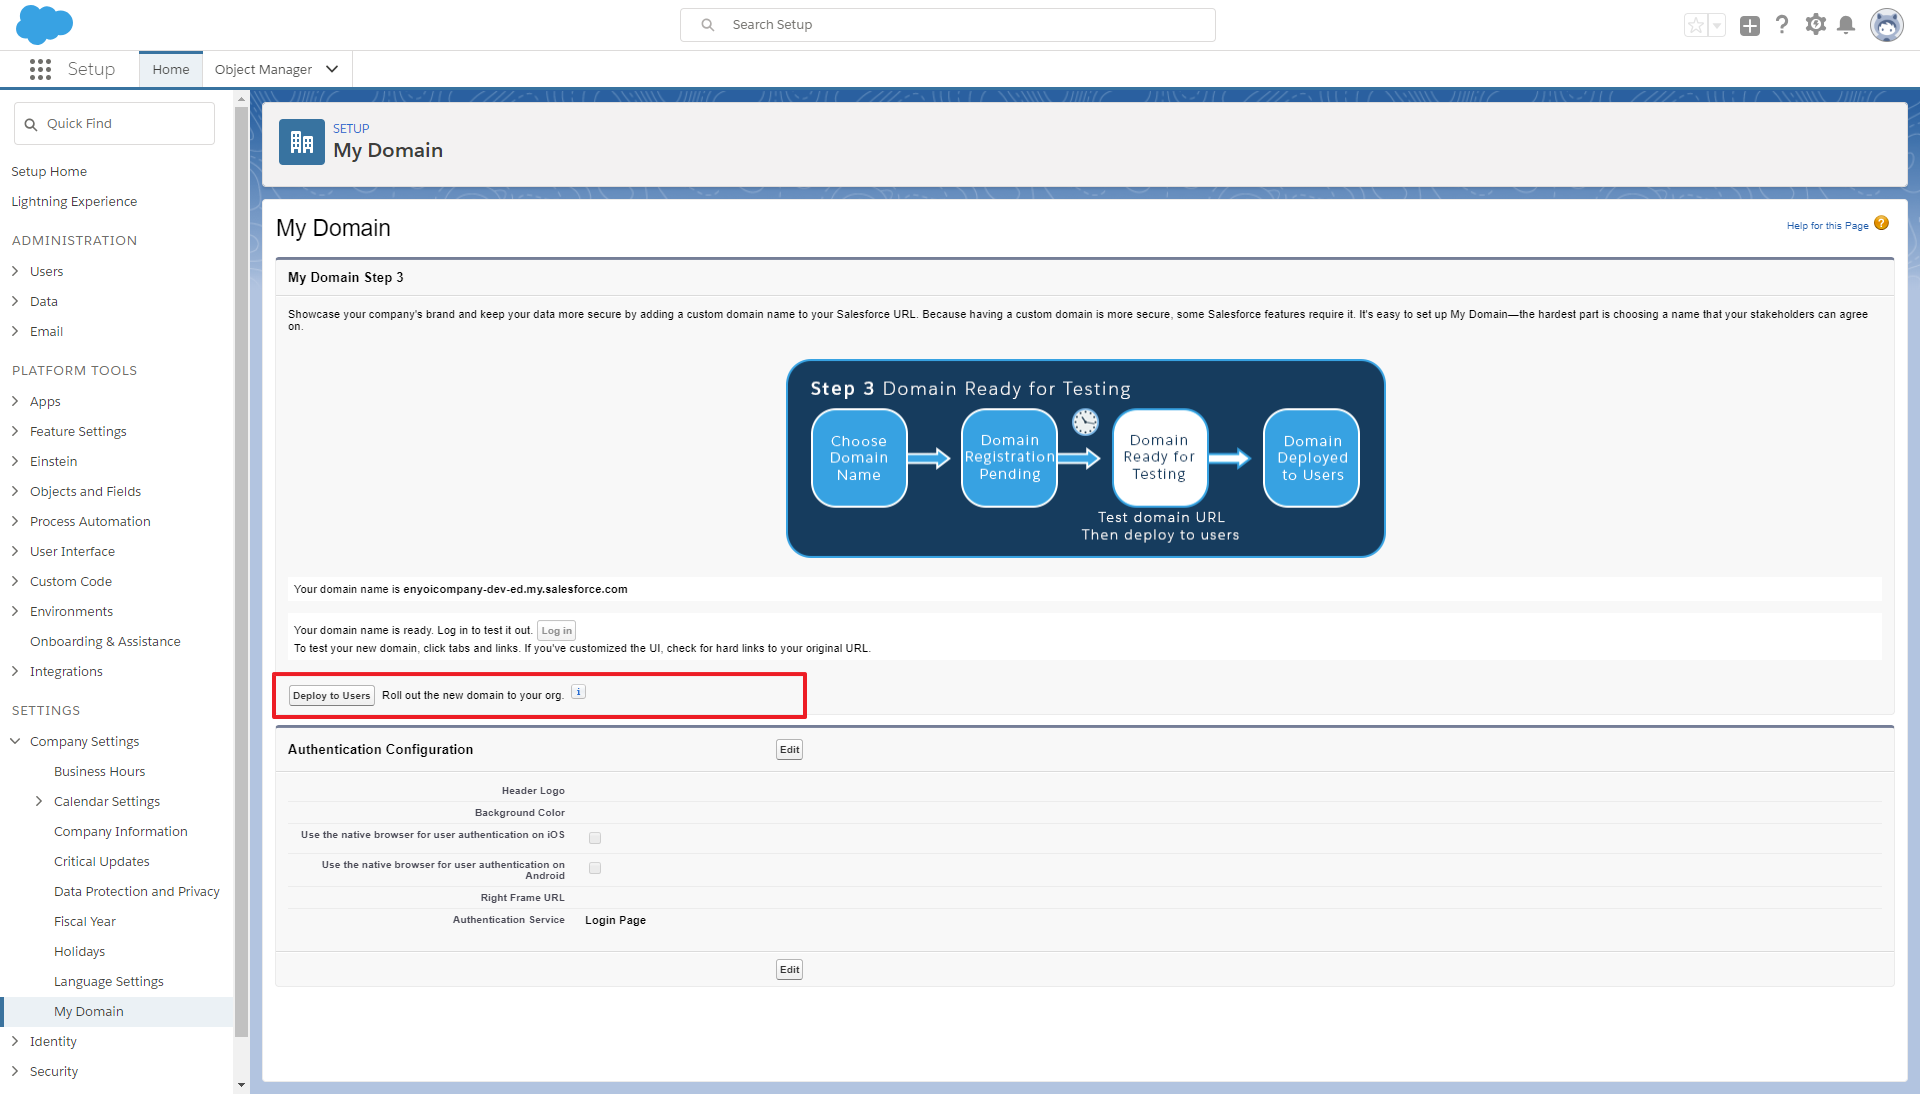
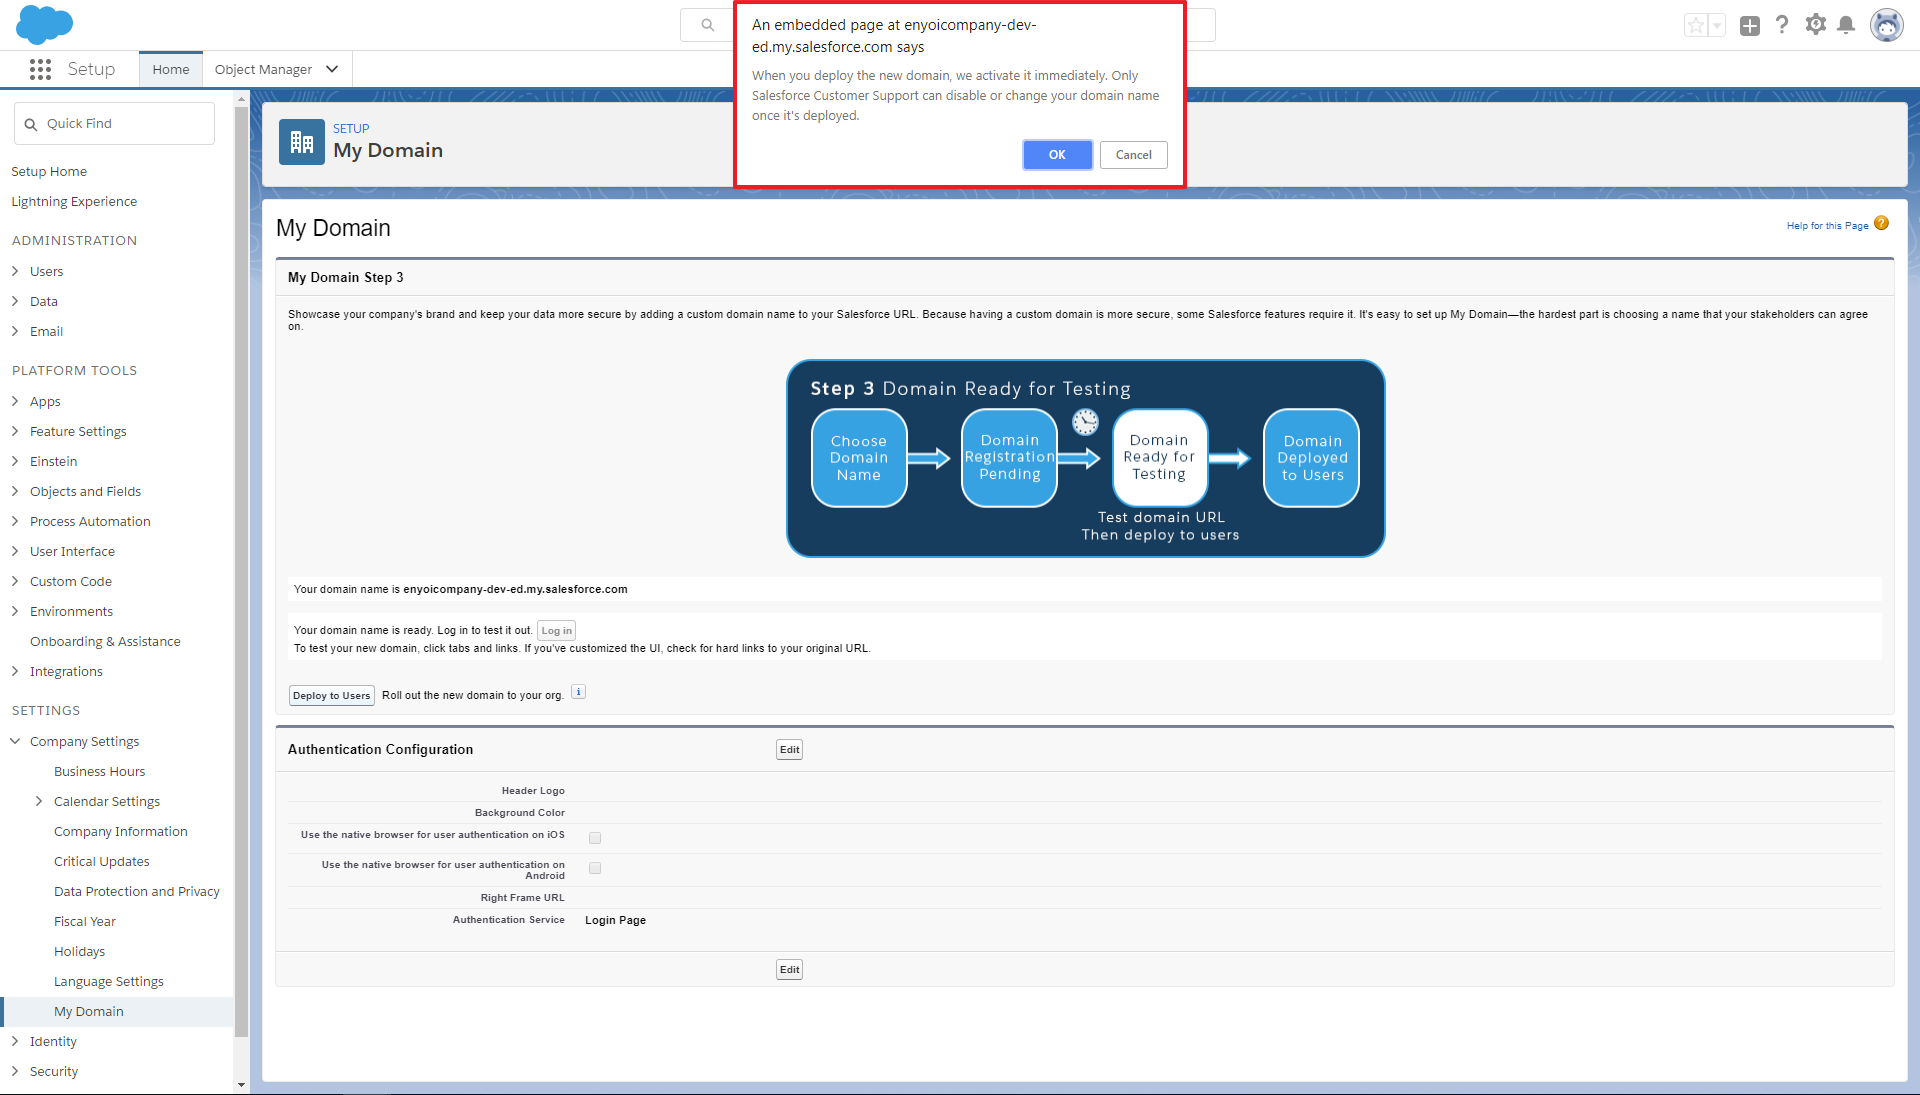
8. Press OK to proceed deployment of the new domain
If you have already enabled Salesforce as an identity provider, the steps 9 until 11 can be skipped
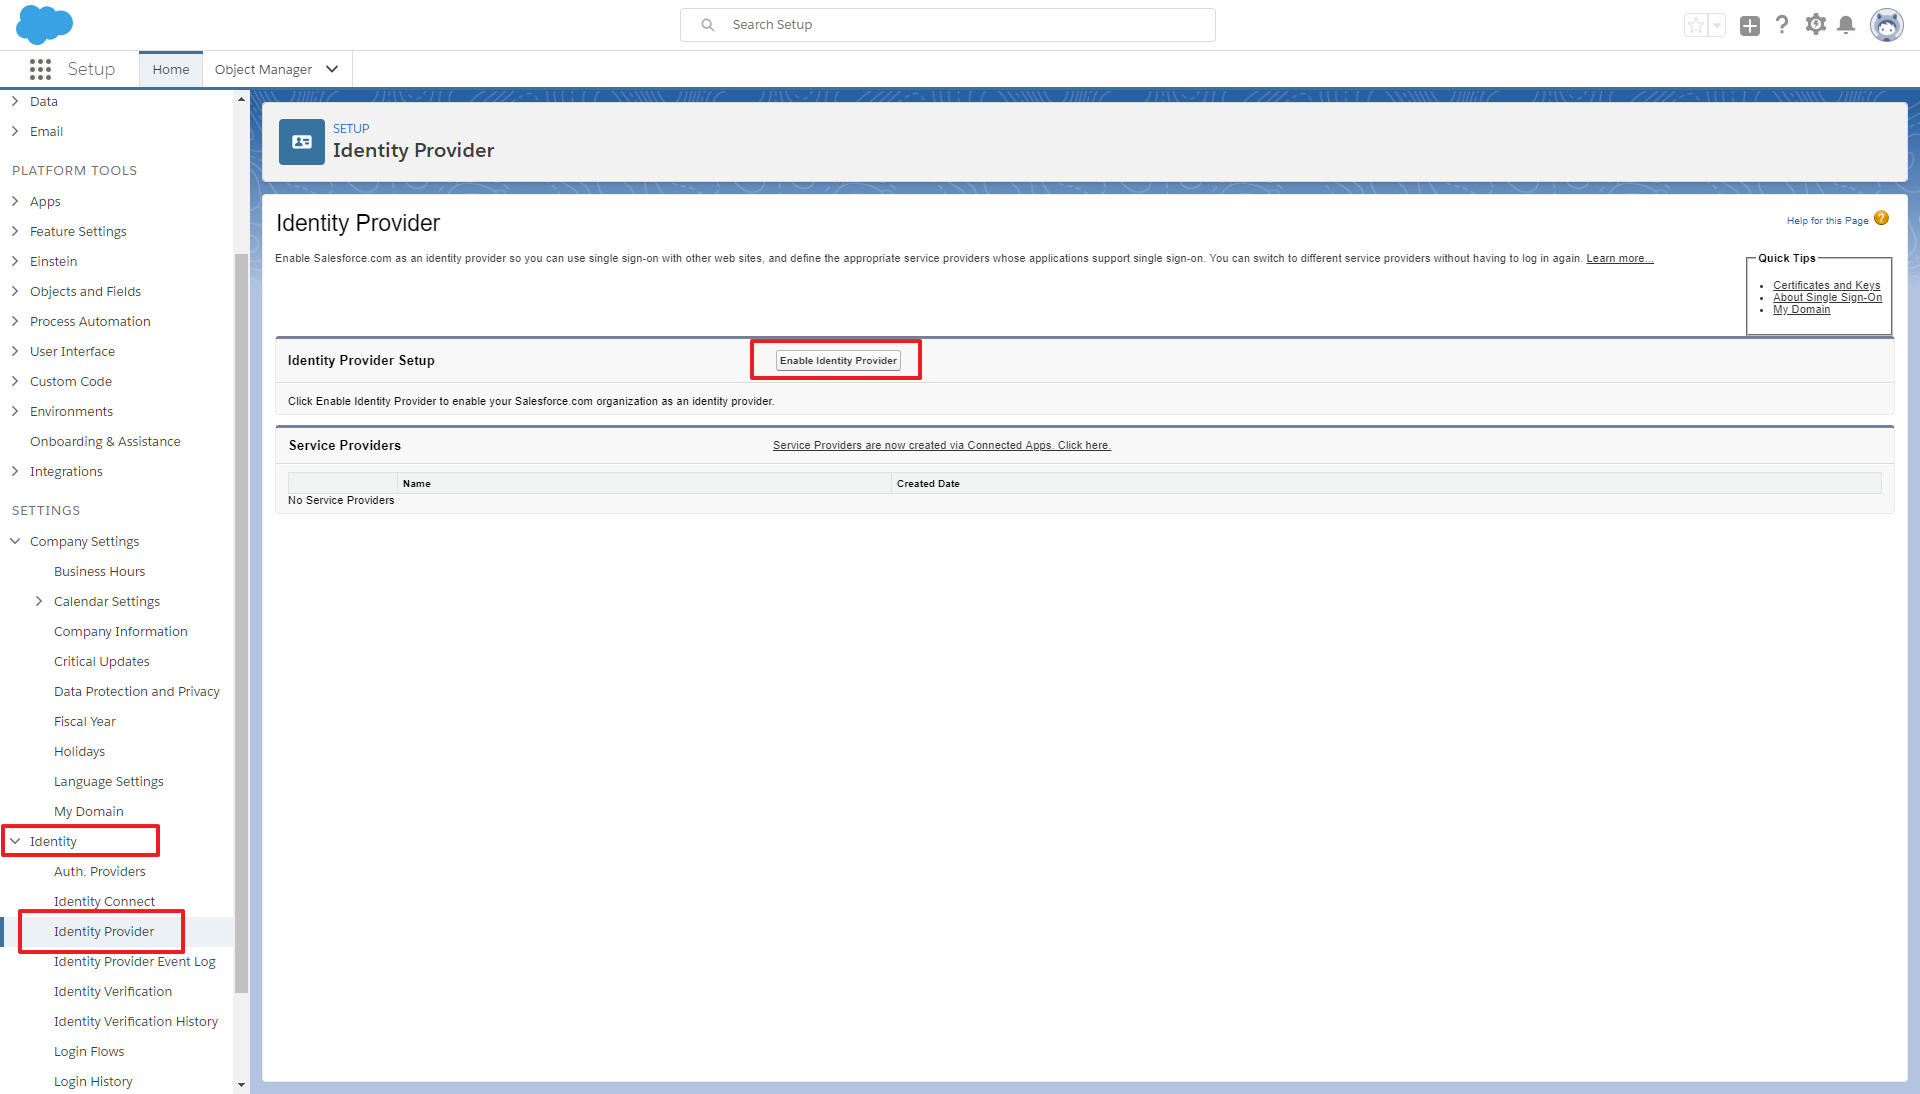
9. Go to Identity > Identity Provider and enable Salesforce as an identity provider
10. Choose the default certificate and press Save
11. Press OK to proceed enabling Salesforce as an identity provider
12. Go to Identity > Identity Provider and download the Metadata
13. Go to the HelloID portal, log on as an Administrator and go to the management portal. Go to Settings> Certificates and press Create Self-Signed Certificate to create or Import Certificate to import a Certificate. In this guide we will create a Certificate
14. Enter the fields for the new certificate and press Save to continue. See document “How to use certificates” for more information about creating and using certificates.
15. Go to Security > Authentication > Identity Providers and press Create Provider
16. The Identity Provider Catalog will open, Add the Salesforce SAML Identity Provider
17. Enable JIT . View a complete configuration reference here.
18. Press Configuration
18. Open the Metadata file (downloaded at step 12)
Enter the following required settings and press Save. You may configure other optional settings as desired.
Issuer: This will be set in by the template, check if it has a / at the end (<Portal URL>/)
Login URL: HTTP-Redirect URL from the Metadata
Binding: This will be set in by the template to Redirect
Request Certificate: select the created Salesforce certificate (see step 14 )
Logout URL: <Salesforce URL>/secur/logout.jsp
19. Now switch back to Salesforce and press Service Providers are now created via Connected Apps. Click here
20. Enter the following fields and press Save
Connected App Name: Use a recognizable name for the App
Api Name: Same as “Connected App Name”
Contact Email: Enter a contact Email for the App
Enable SAML: Enable this option
Entity URL: URL of the HelloID portal (There needs to be a / at the end of the URL)
ACS URL: Enter the Consumer ID, from Identity Provider - Portal Information (see step 17 )
21. Press Manage
22. Scroll down a bit and press Manage Profiles under Profiles to add profiles to the HelloID app
23. Select the profile which you want to grant access to be able to login to HelloID and press Save
24. The configuration has finished and can be tested by entering the portal URL. Instead of the showing the HelloID login you will be redirected to the Salesforce login page.
25. All users in the application profiles (configured at step 23) will be able to login.
This article will help you configure VMWare Workspace ONE as your HelloID SAML Identity Provider. This is useful if your organization uses VMWare Workspace ONE as a primary method of authenticating access to online services.
Get the VMWare Workspace ONE Metadata
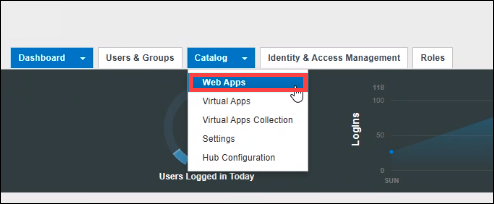
Log in to your VMWare Workspace ONE admin console and select Catalog > Web Apps.
Select Settings and go to SaaS Apps > SAML Metadata.
Select the Copy URL link for the Identity Provider (IdP) metadata. The URL resembles
https://{customer}.vmwareidentity.co.uk/SAAS/API/1.0/GET/metadata/idp.xml.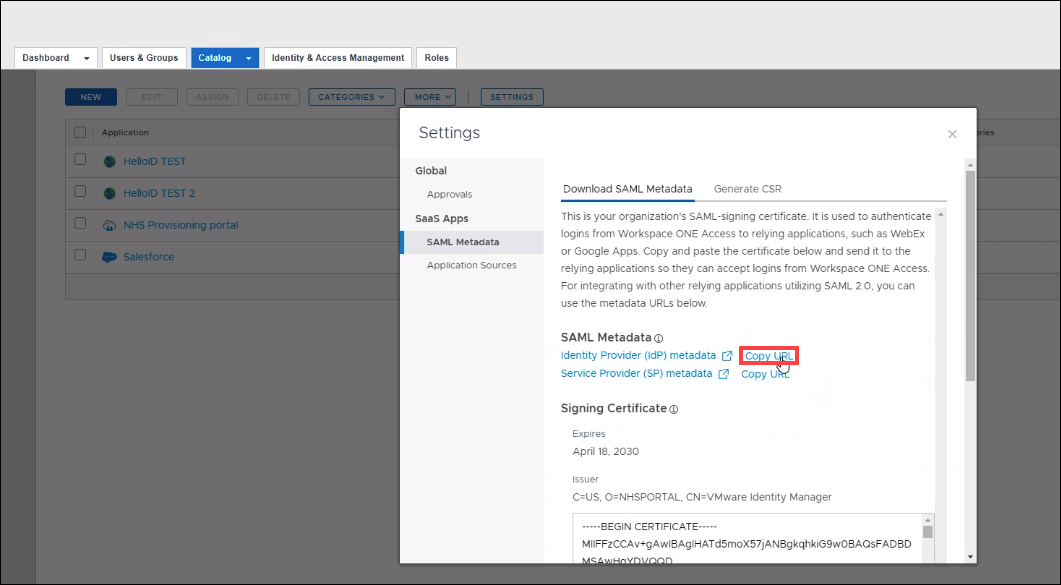
Open the URL in your browser, and copy the certificate string inside the
<ds:X509Certificate>element. Leave this tab open in your browser, as you will return to it later.
Configure the HelloID Identity Provider
Sign in into the HelloID Administrator Dashboard.
Import a new certificate for the connection with VMWare Workspace ONE. Use the previously copied string. Learn how to import a certificate.
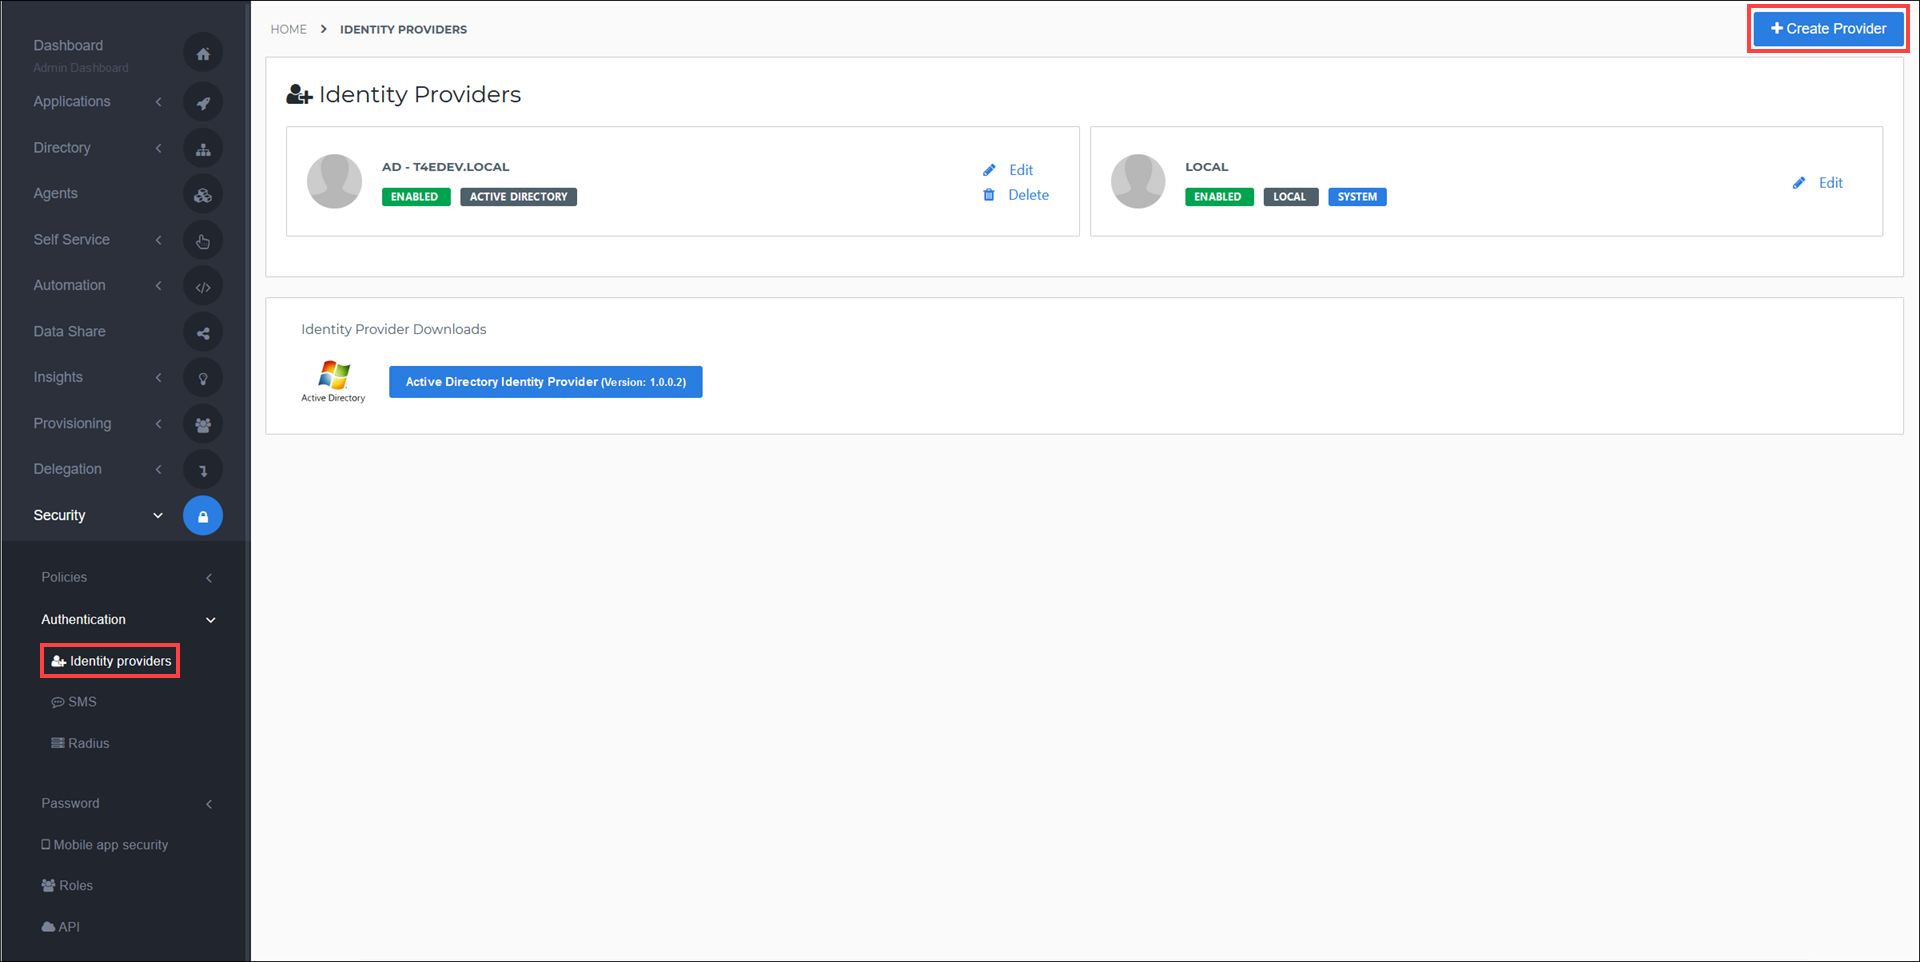
Go to Security > Authentication > Identity Providers and select the Create Provider button.
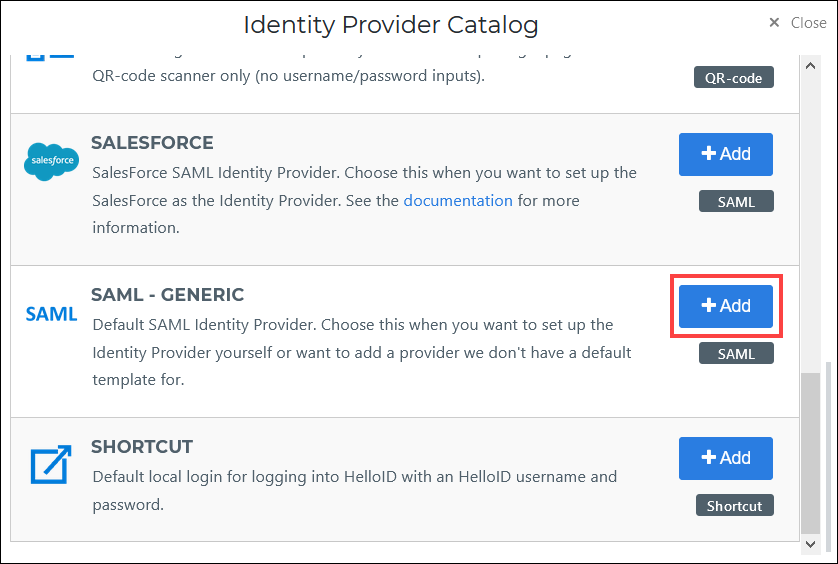
Find the SAML - Generic IdP and select the Add button.
Enter a Name and turn on the Use Response Certificate toggle. Copy the Consumer URL to a notepad app on your computer, as you will need it shortly. View a complete configuration reference here.
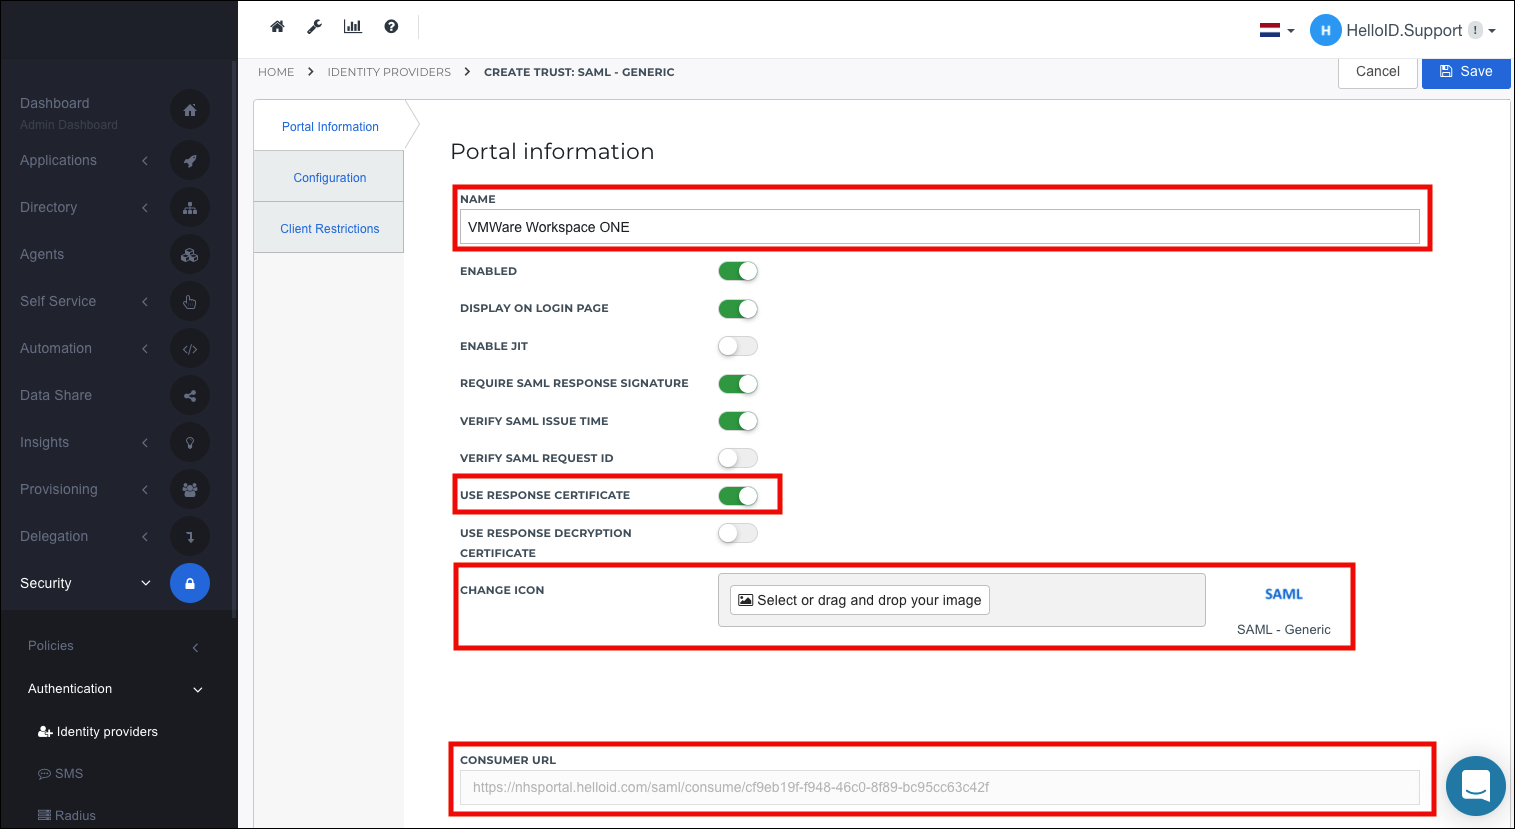
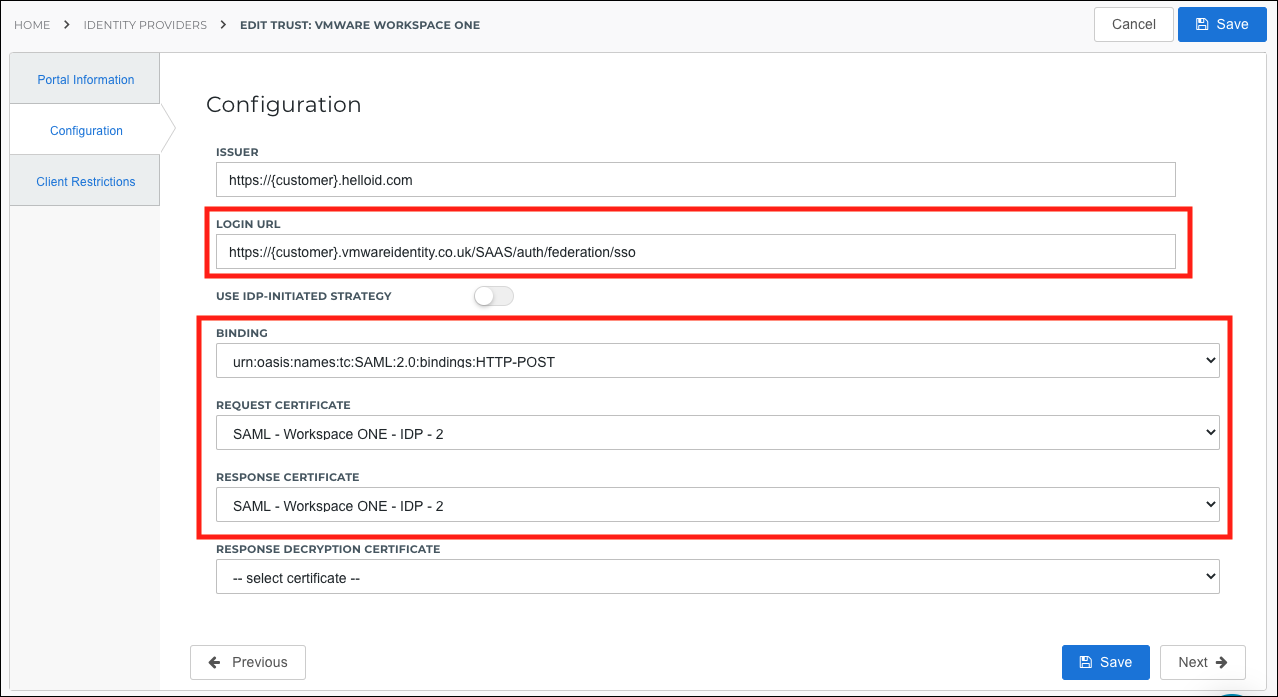
Select the Configuration tab. Enter the following required information. You may configure other optional settings as desired.
Login URL: Enter the SingleSignOnService URL from the metadata file you left open in your browser. This URL is found in the line with the HTTP-POST binding. For example:
<md:SingleSignOnService Binding="urn:oasis:names:tc:SAML:2.0:bindings:HTTP-POST" Location="https://{customer}.vmwareidentity.co.uk/SAAS/auth/federation/sso"/>Binding: Set to
urn:oasis:names:tc:SAML:2.0:bindings:HTTP-POSTRequest Certificate: Select the certificate you previously created.
Response Certificate: Select the certificate you previously created.
Select the Save button to confirm the IdP configuration.
Configure the VMWare Workspace ONE SaaS App
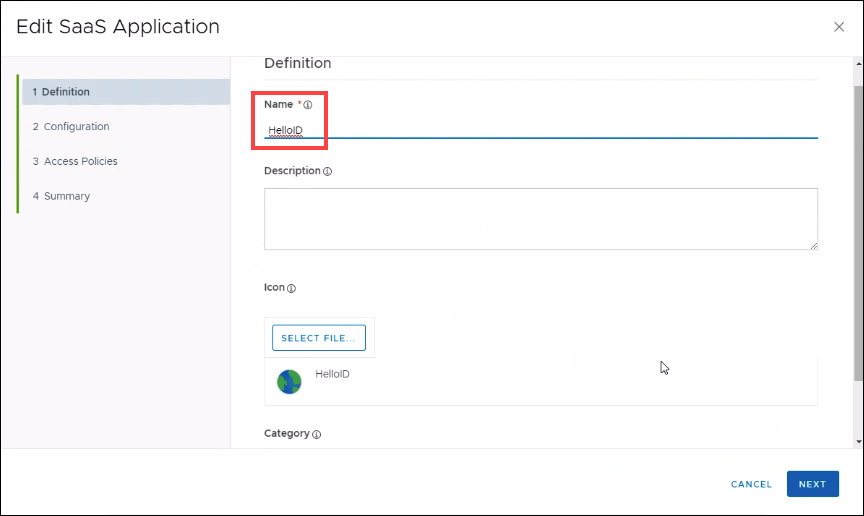
In the VMWare Workspace ONE console, select the New button to create a new SaaS application.
Enter a name for the new SaaS app and select the Next button.
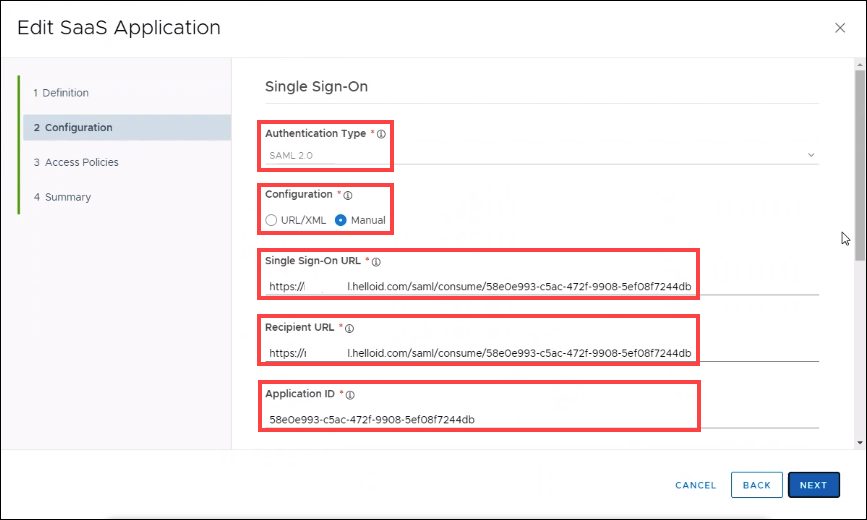
Enter the following information:
Authentication TypeSAML 2.0
ConfigurationManual
Single Sign-On URLThe Consumer URL you previously copied.
Recipient URLThe Consumer URL you previously copied.
Application IDThe last part of the Consumer URL, after the final
/.Signed ResponseEnable
Name ID FormatEmail
Scroll down and select the Advanced Properties link.
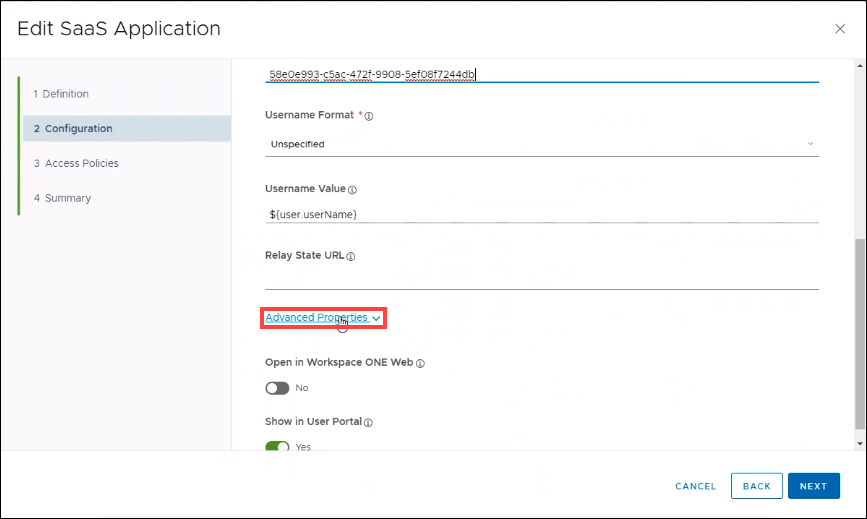
Enter the following information:
Signature AlgorithmSHA256 with RSA
Digest AlgorithmSHA256
Assertion Time200
Request SignaturePaste the same certificate string you previously used to create the certificate.
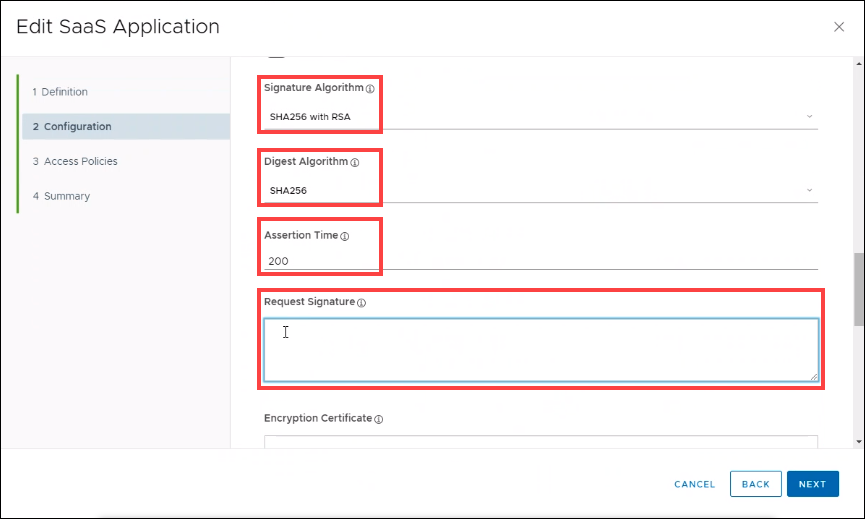
Select the Next button.
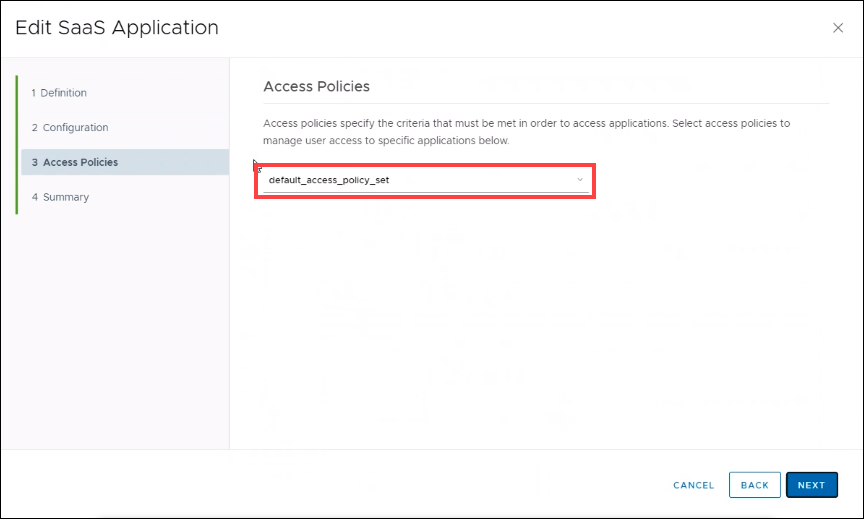
Select your preferred Access Policy. Select the Next button.
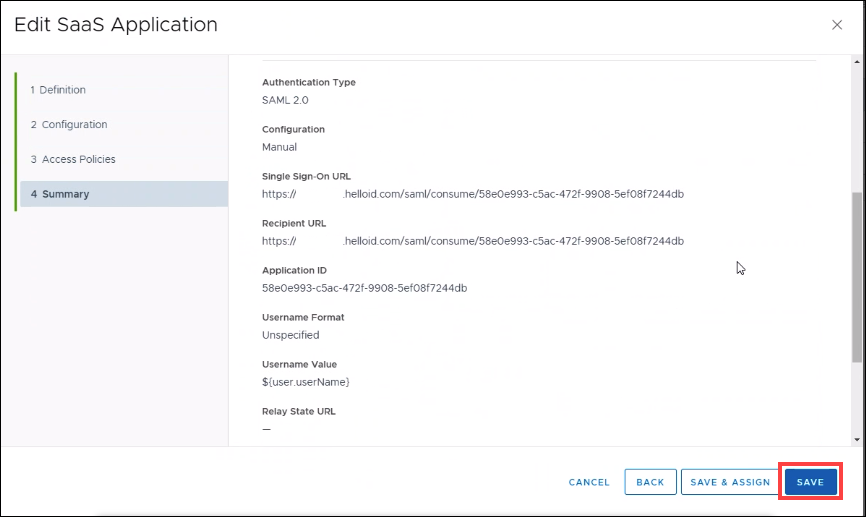
In the configuration overview, select the Save (or Save & Assign) button.
Users can now log in to HelloID via the new SAML connection, after being authenticated in VMWare Workspace ONE.
To get started:
Add your own unlisted proprietary/generic SAML IdP by going to Security > Identity Providers > Create Provider > SAML - Generic.
Refer to the IdP settings reference to help you configure a generic SAML IdP.
The QR code IdP is deprecated. Instead, see Enable QR code login.
Go to Security > Authentication > Identity Providers.
For the relevant IdP, click Edit.
Continue by following the relevant tutorial in Add an IdP.
Go to Security > Authentication > Identity Providers.
For the relevant IdP, click Delete.
To confirm, click Delete.