Add, edit, or remove a schedule
For more information, see Schedules.
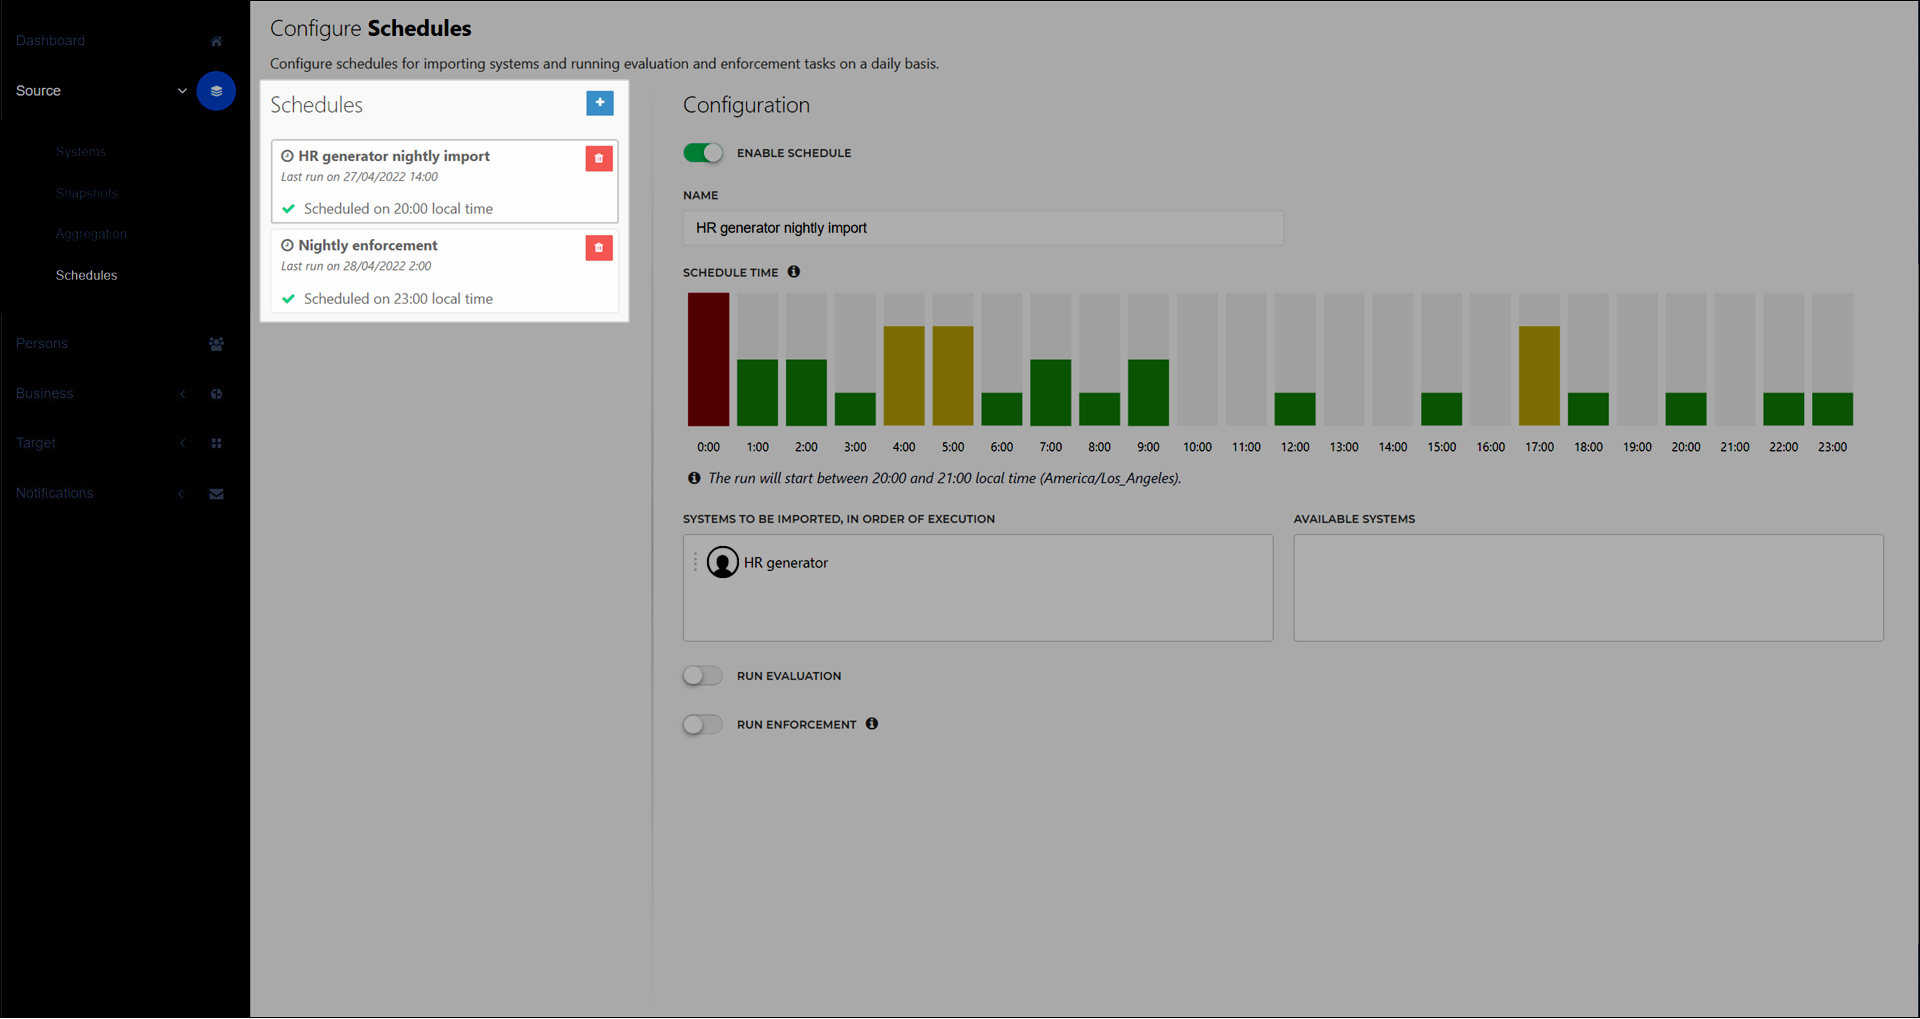
Add a schedule
Go to Source > Schedules.
Click
 Add.
Add.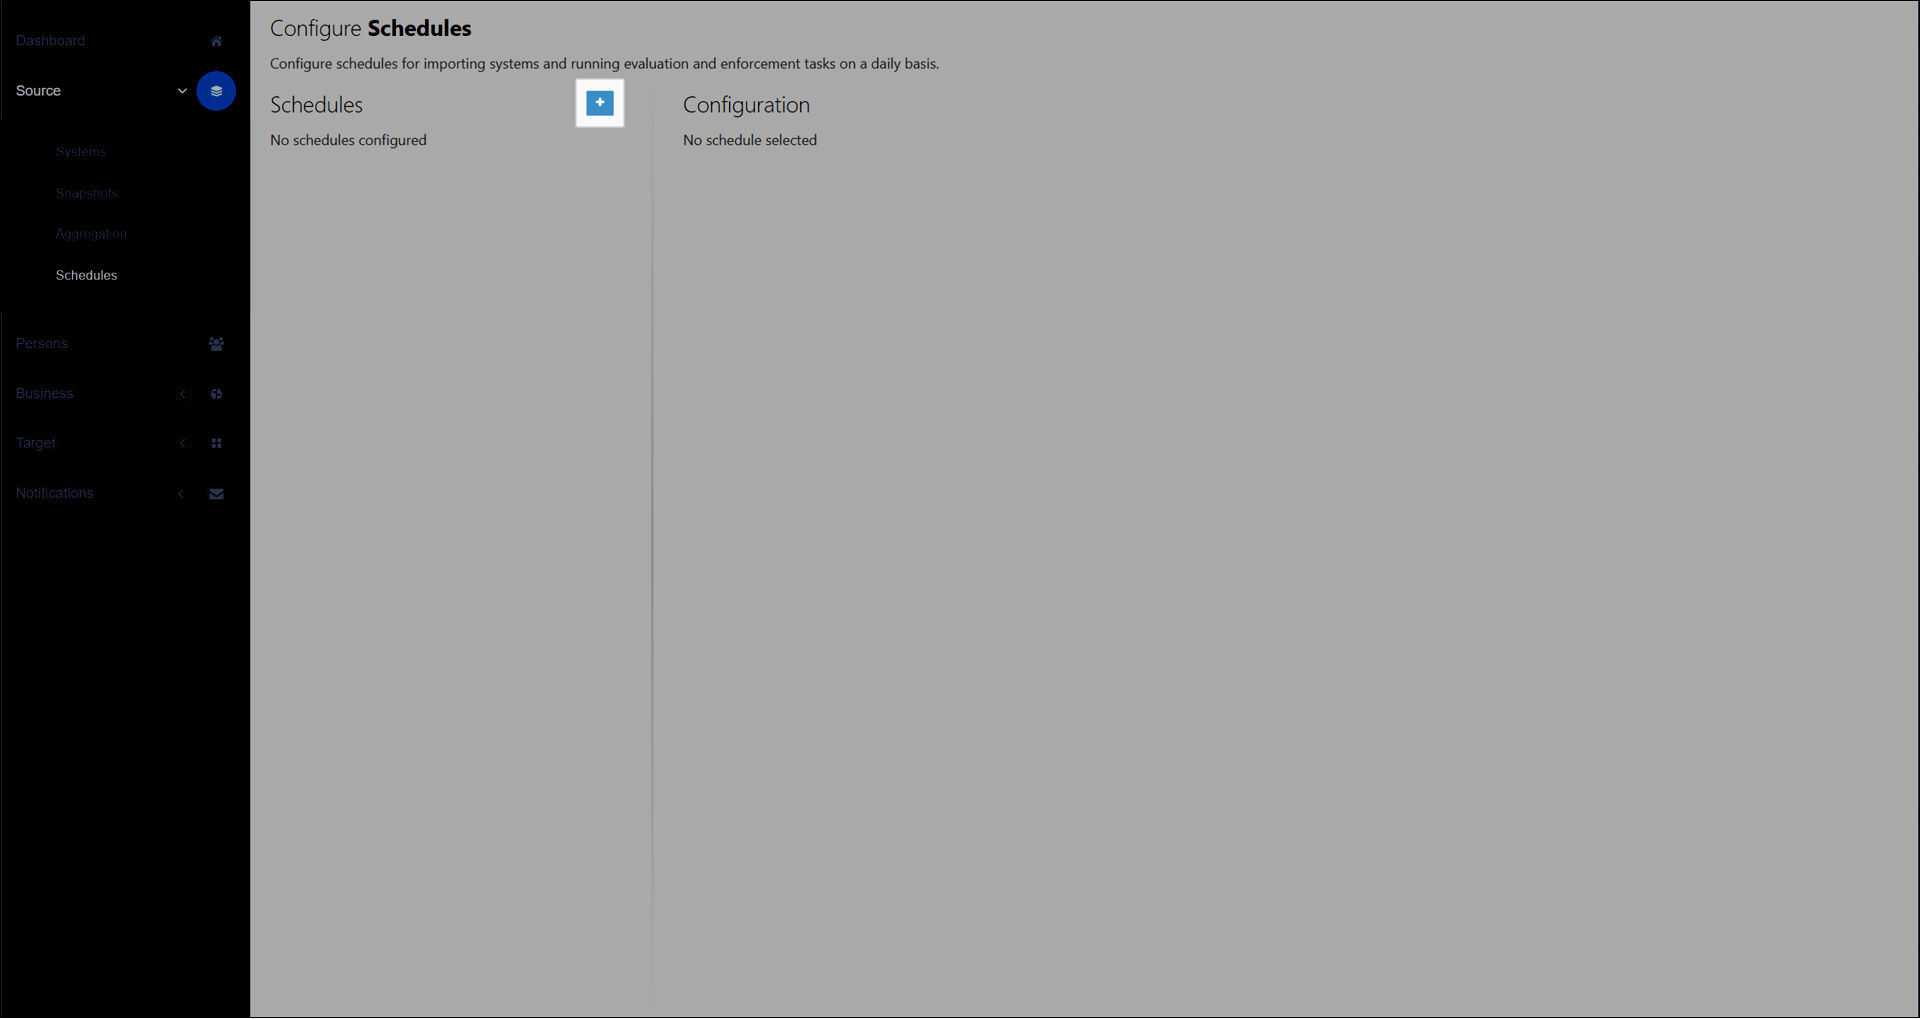
Enter a Name.
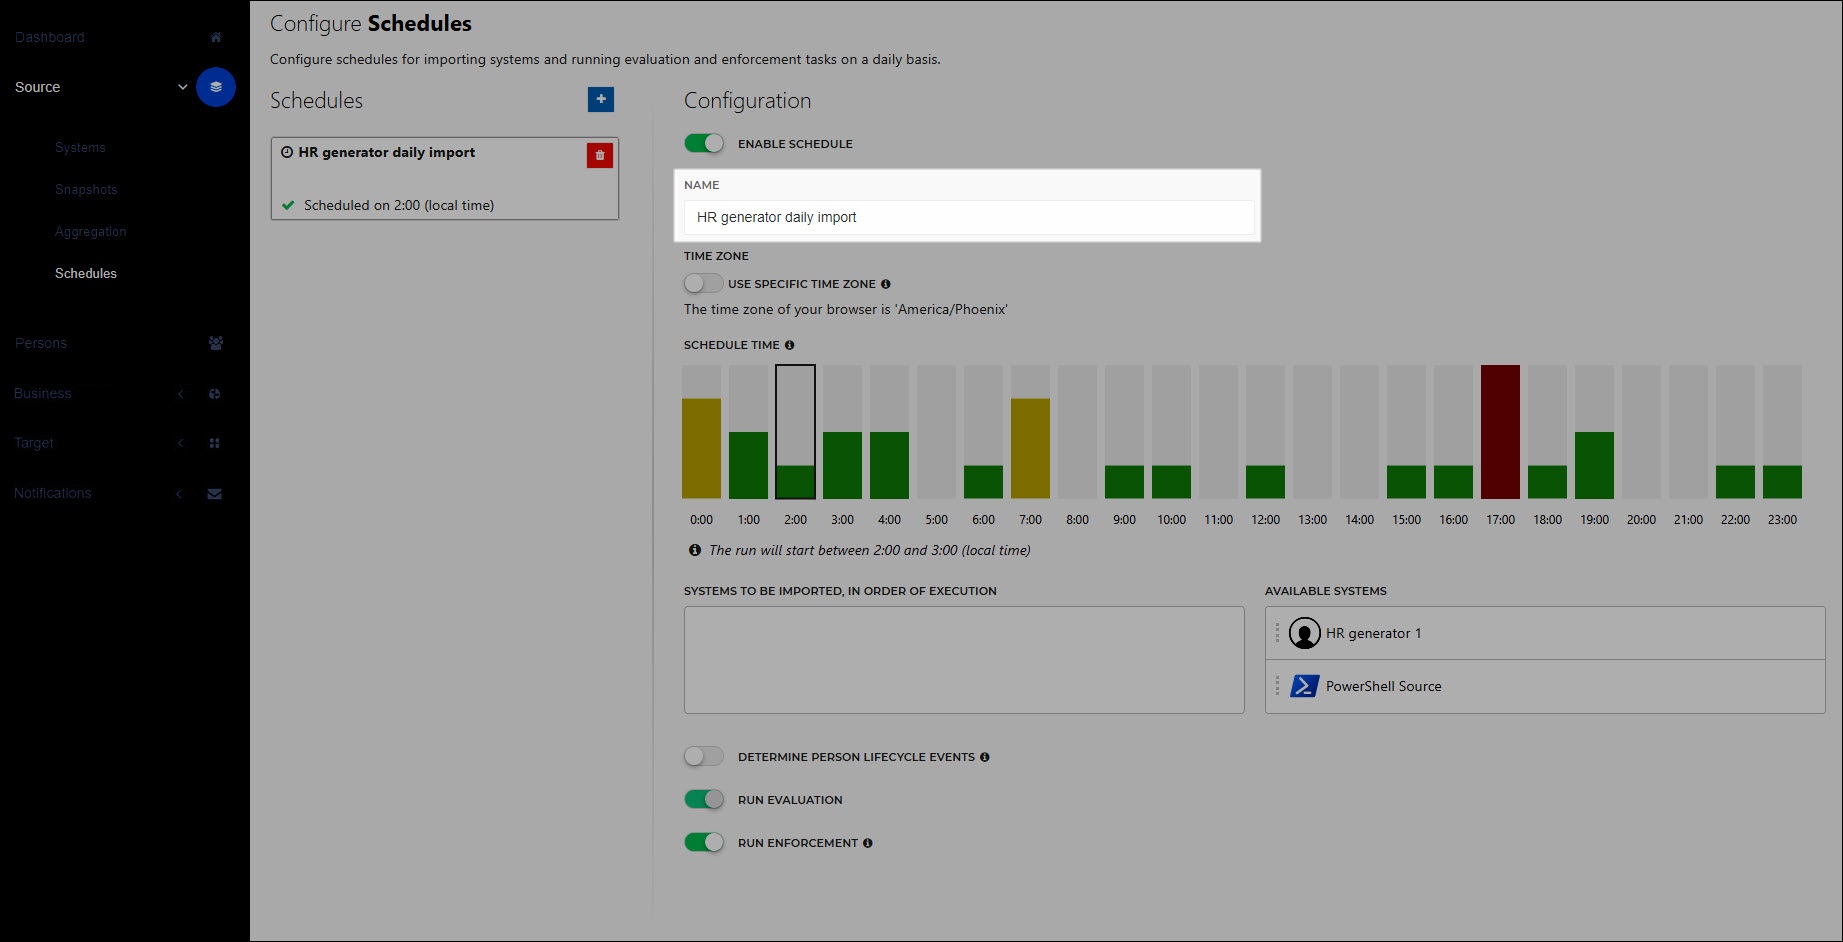
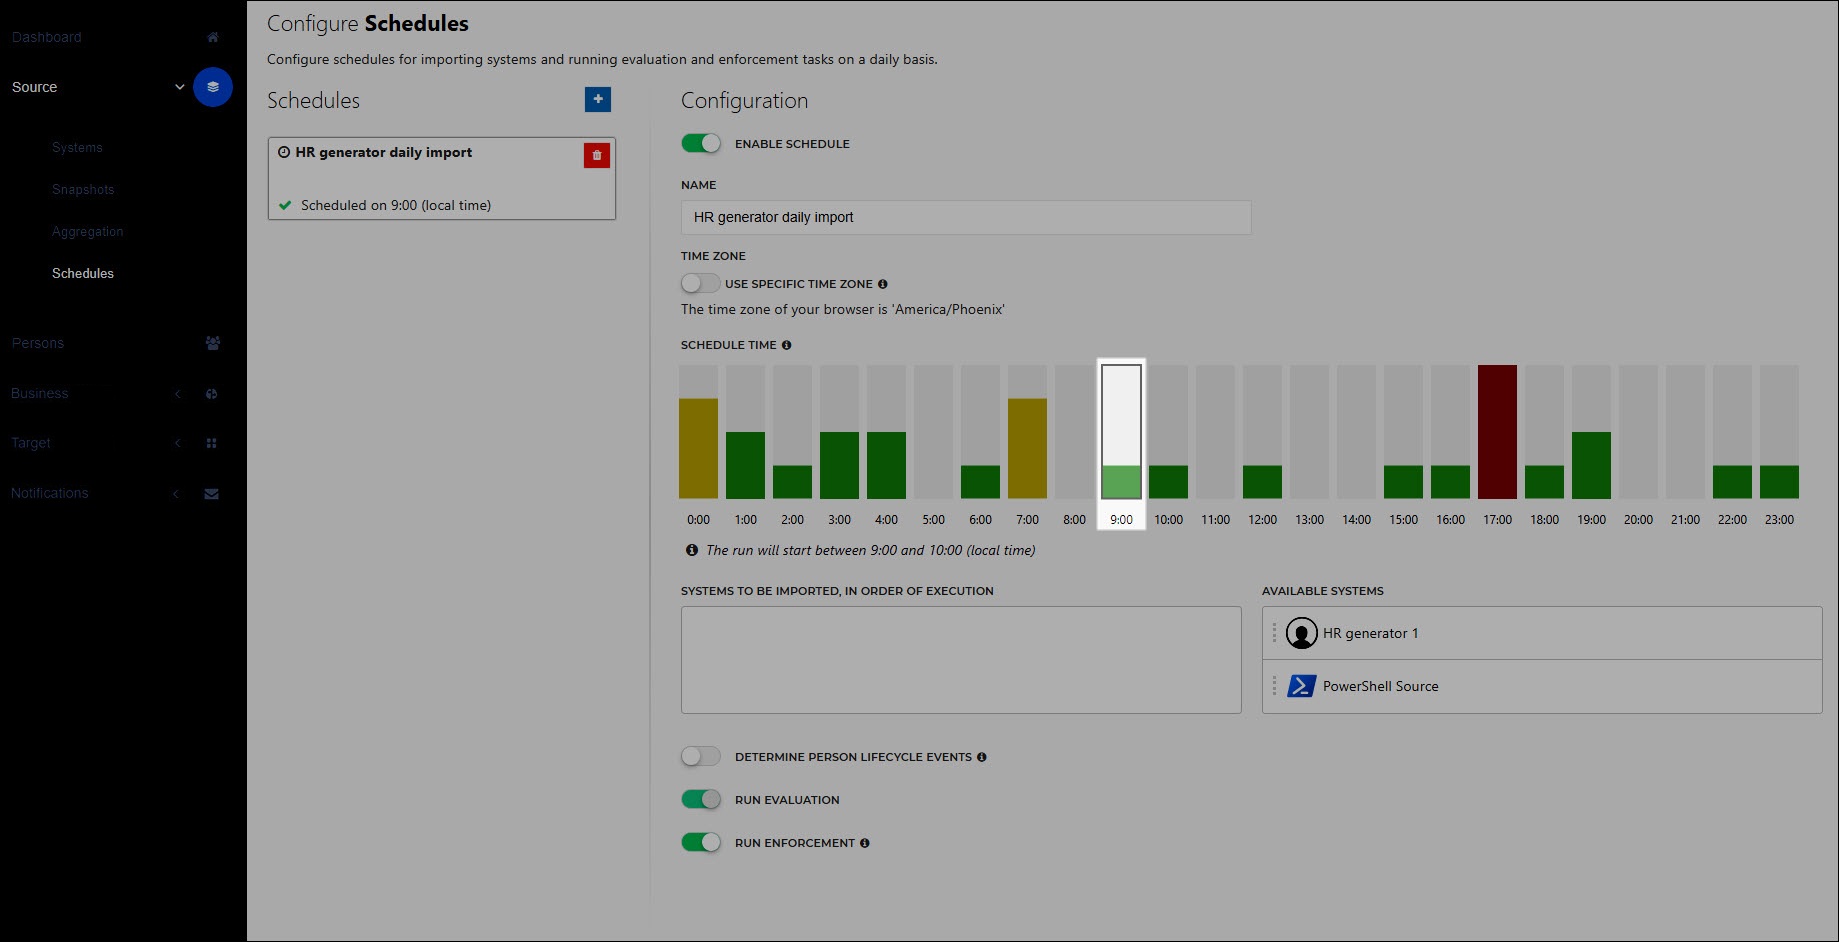
Select an hourly time slot (local time) under Schedule Time for the schedule to run each day.
Tip
The colors in the Schedule Time pane indicate the average server load by time slot. Selecting a green or yellow time slot means your schedule is more likely to run at the beginning of the hour, and thus to finish within the hour. However, your schedule is guaranteed to at least start during the selected time slot, even if the server load is high (red).
Optional: Enable the Use Specific Time Zone toggle and choose a time zone in the dropdown to tie the selected time slot to a specific time zone. If you leave this toggle disabled, the selected time slot will be tied to the current time zone setting of your browser.
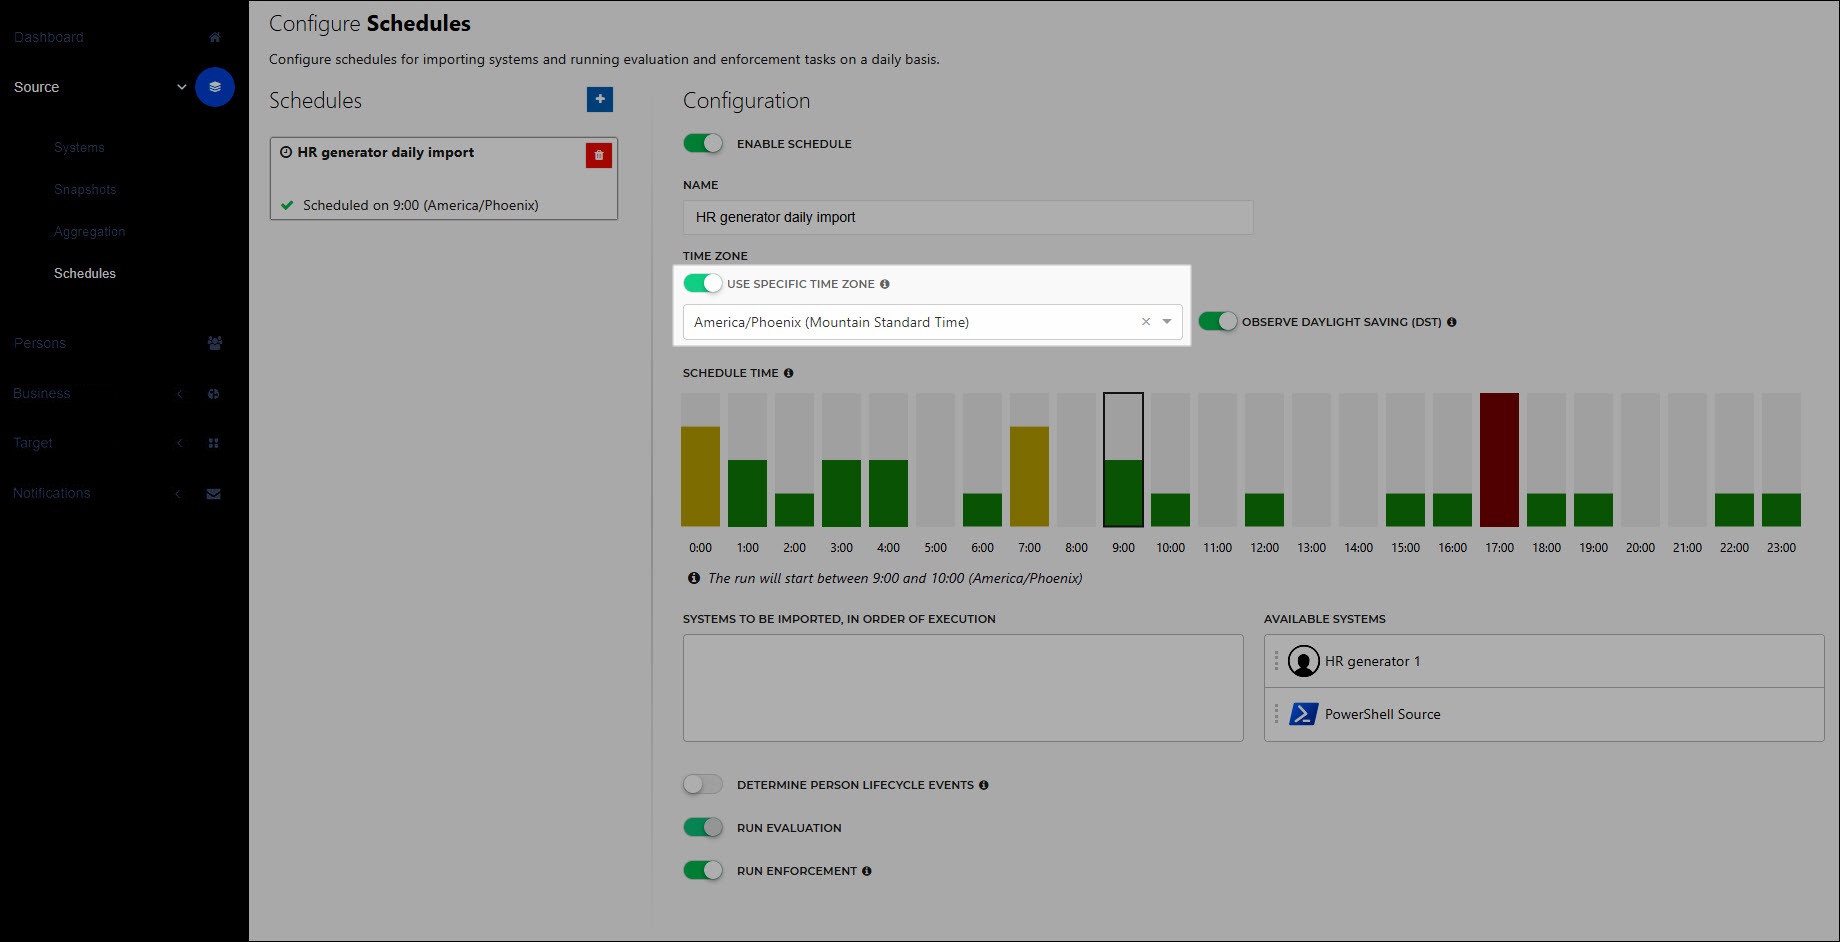
Optional: Set the Observe Daylight Saving (DST) toggle. When enabled, the schedule will use the DST variant of the chosen time zone during daylight savings (i.e., the schedule will automatically be adjusted +/- 1 hour to continue running at the same clock time).
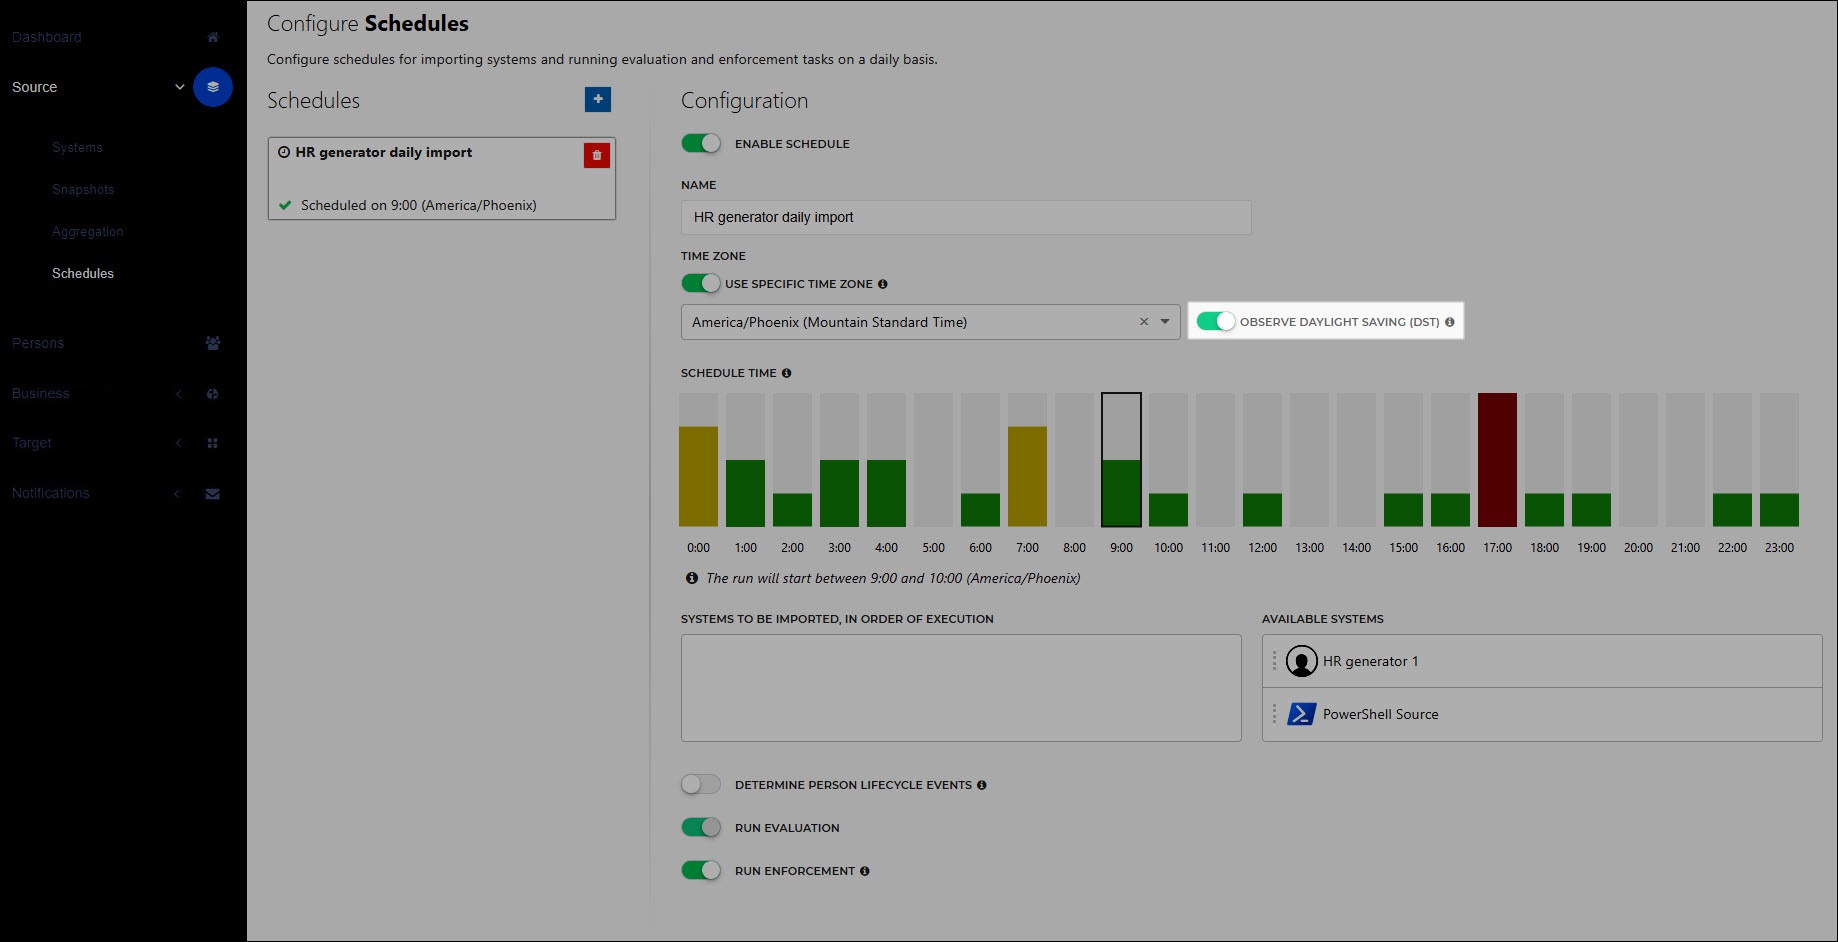
Drag and drop Source systems from the Available Systems pane to the Systems To Be Imported pane (see Source imports). Place them in the order they should be imported (descending).

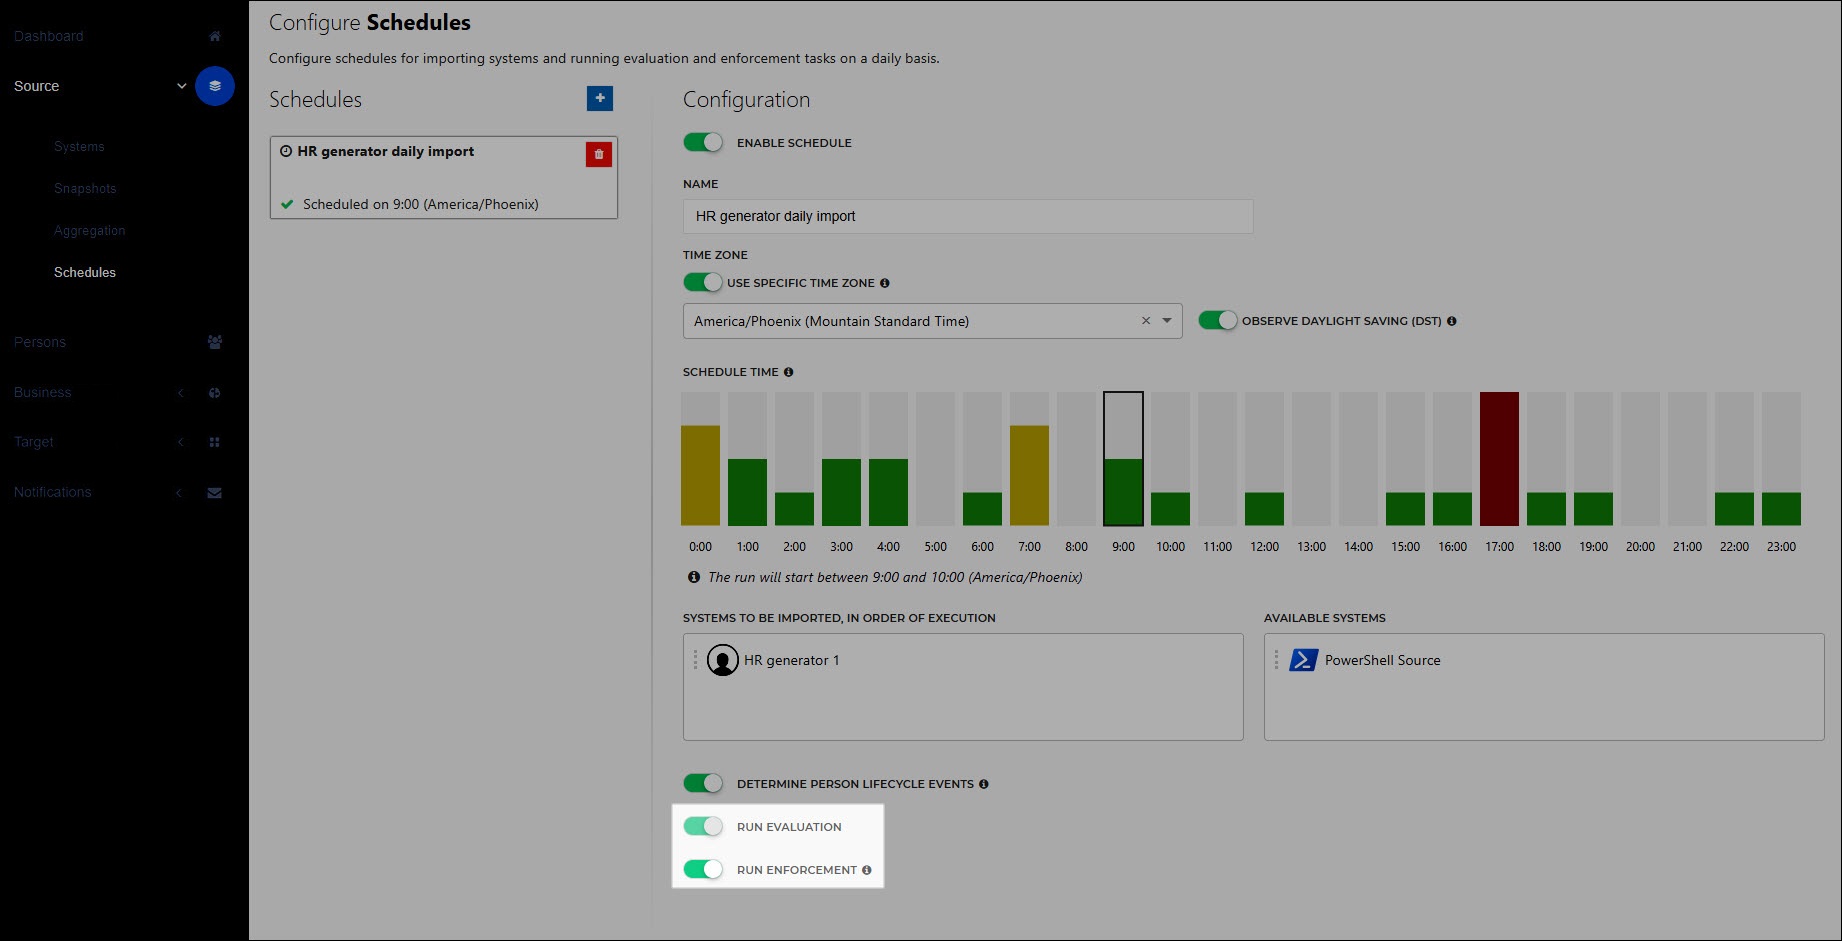
Optional: Enable the Determine Person Lifecycle Events toggle to enable Person lifecycle.
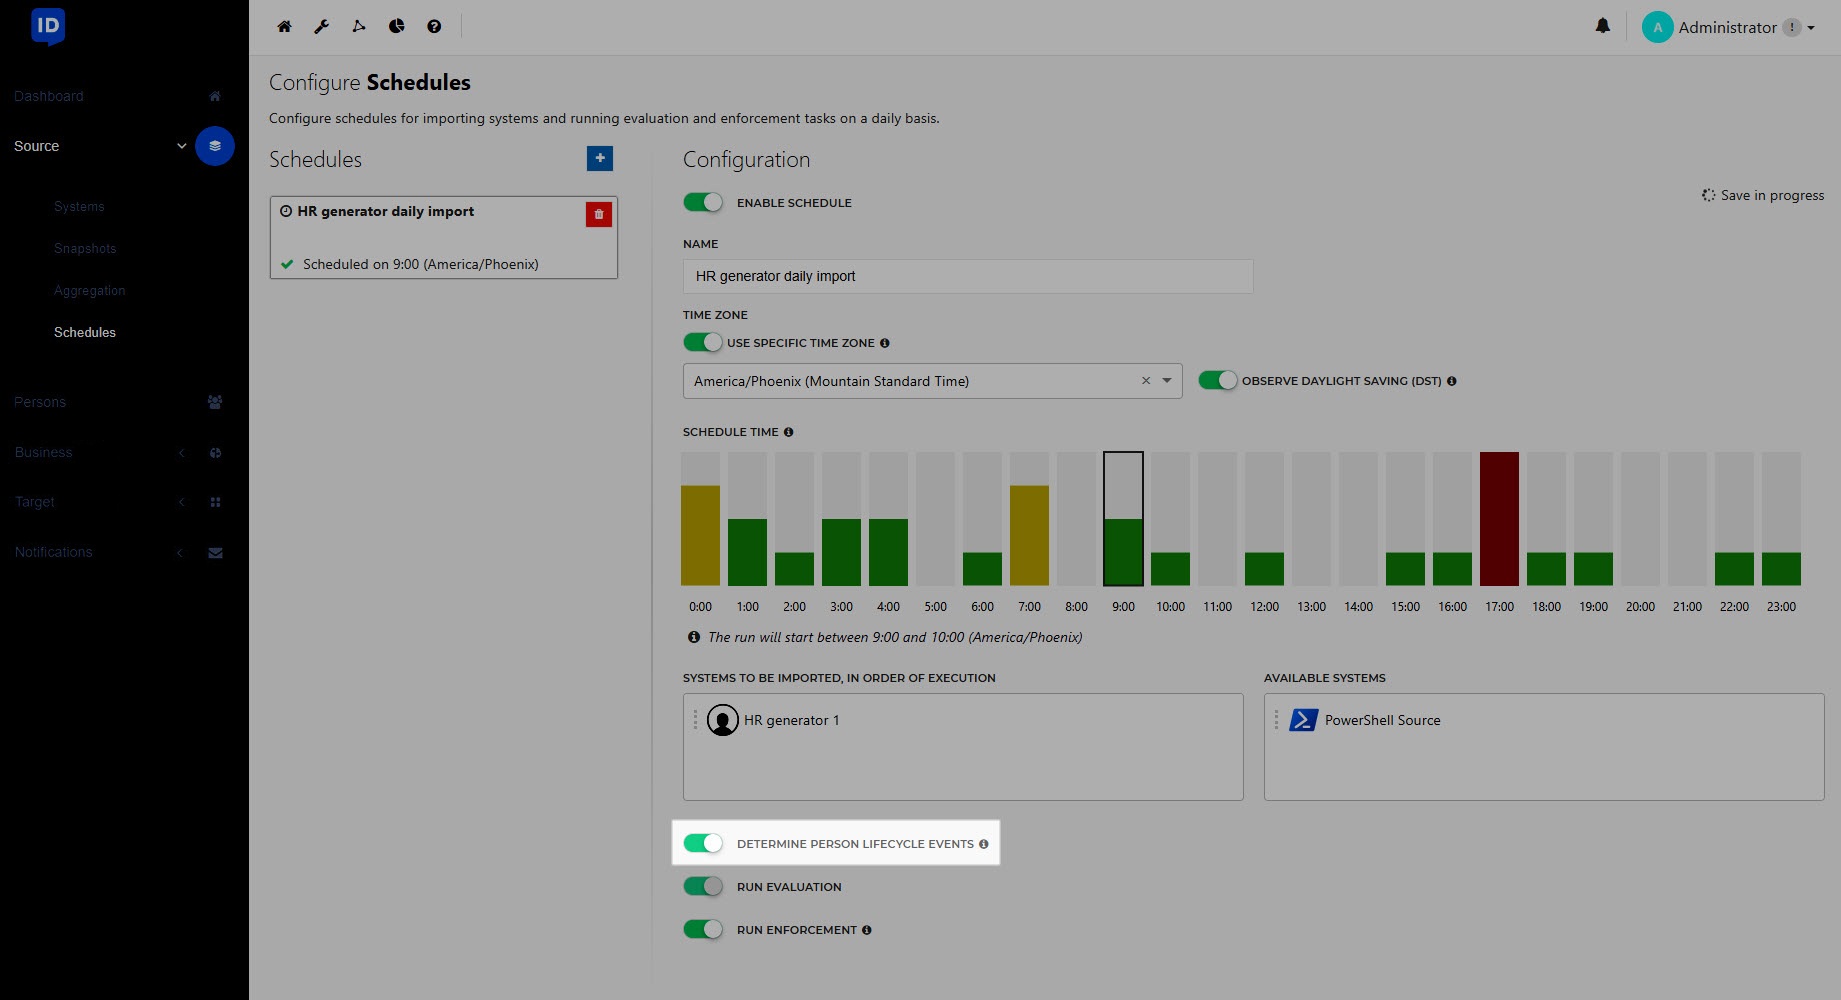
Enable or disable the Run Evaluation and Run Enforcement toggles to determine whether the schedule will perform an Evaluation, an Enforcement, or both.
Optional: Repeat steps (2) - (8) to add up to two additional schedules. Additional schedules must be at least 2 hours apart from one another.
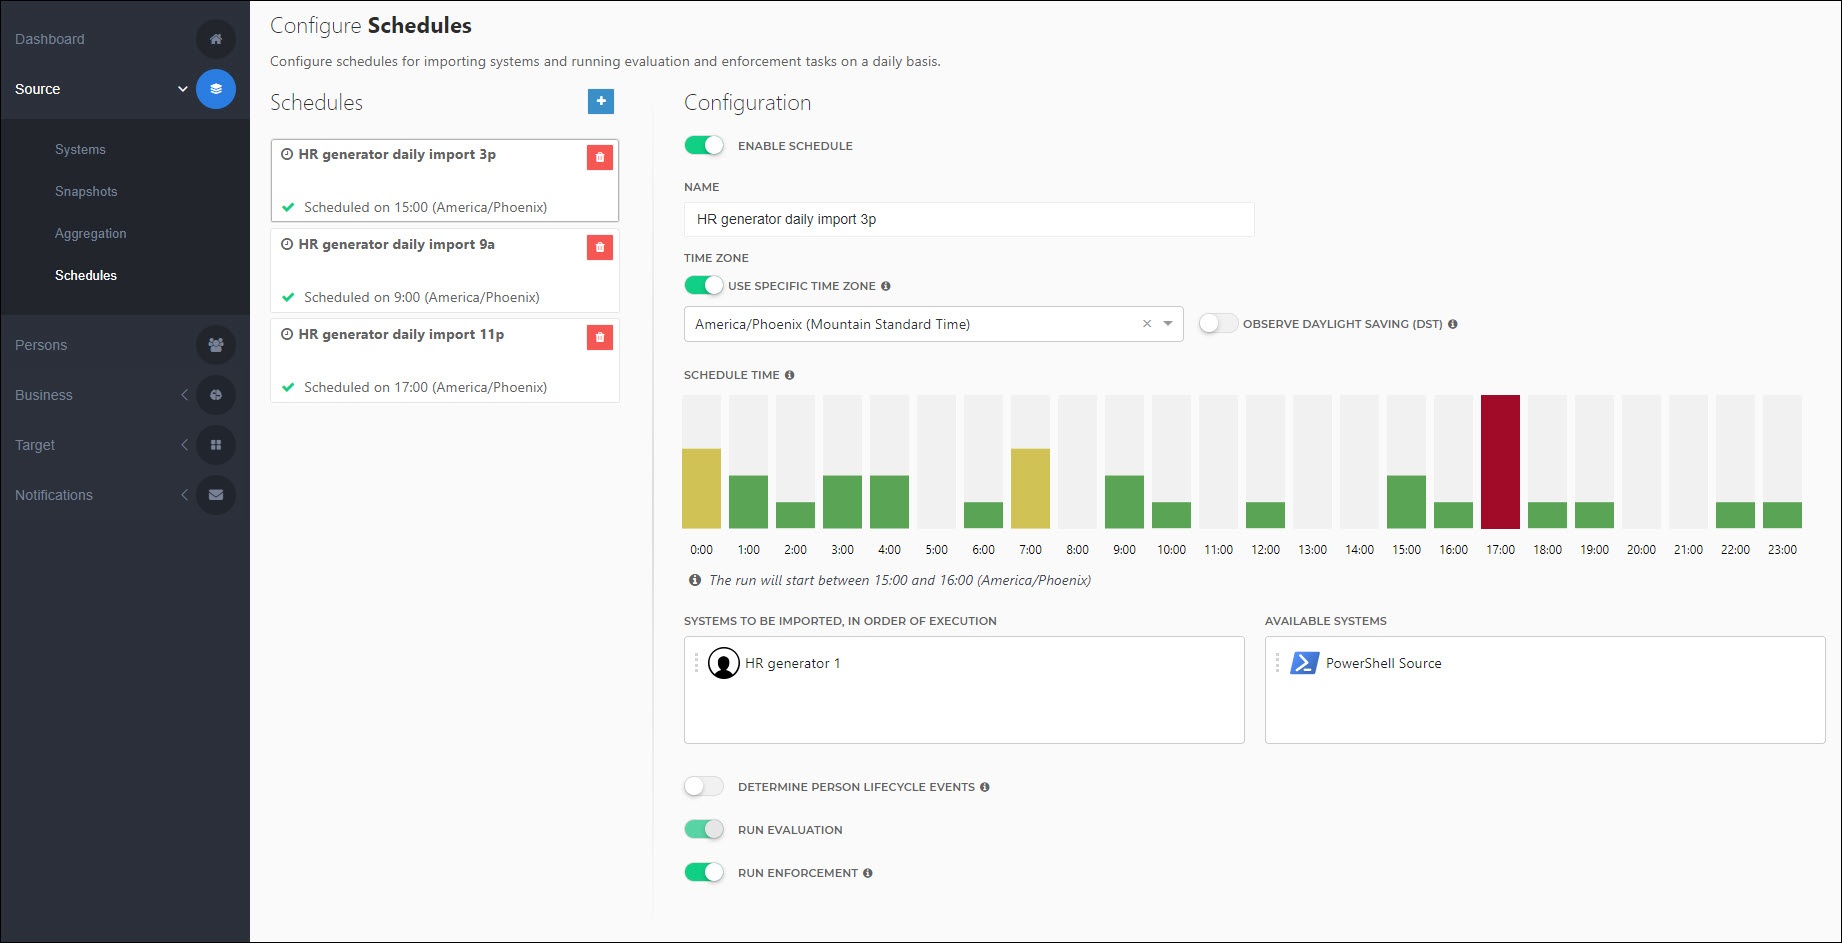
The schedule(s) will run at variable times during the selected one-hour window, depending on server load. You will receive corresponding Alerts.
Go to Source > Schedules.
In the Schedules pane, click the tile for the relevant schedule.
Continue by following the instructions in Add a schedule.
Go to Source > Schedules.
In the Schedules pane, click
 Delete for the relevant schedule.
In the dialog box, click Delete to confirm.
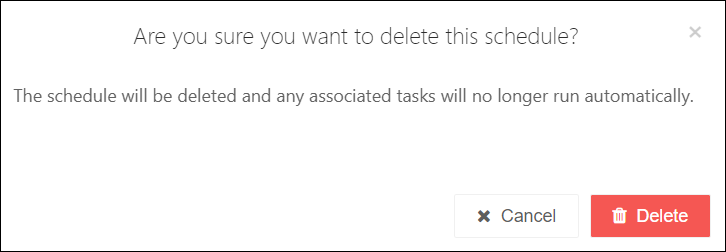
The schedule is removed and no longer runs.