Add, edit, or remove a condition
For more information, see Conditions.
Add a condition
For more information, see Person conditions.
For the relevant business rule, Edit a business rule.
Go to the Conditions tab.
In the Options pane, click
 Add for Person Attribute.
Click the newly-added condition to expand it.
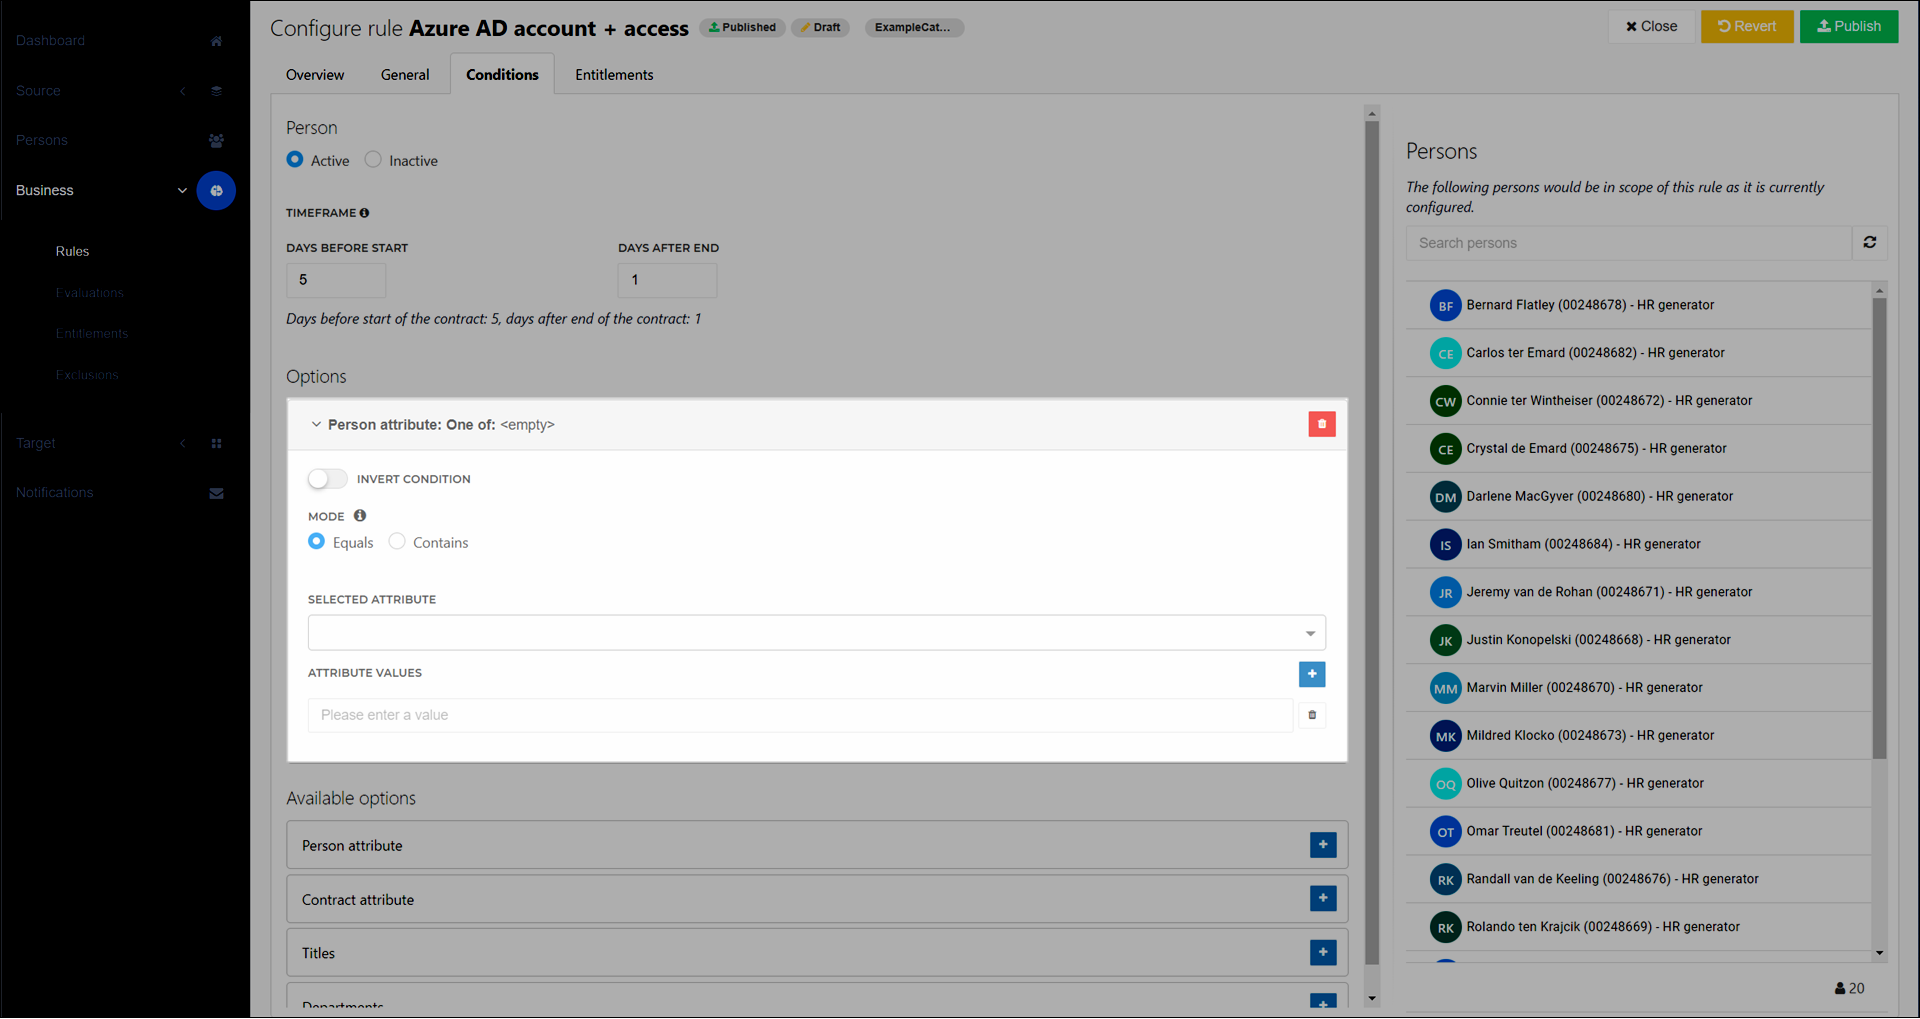
Set the Invert Condition and Mode Condition options.
Expand the Selected Attribute dropdown and select a field from the Person schema. (The selected field must be mapped on the Person tab of your Source mappings.)
Enter an Attribute Value for the selected person field.
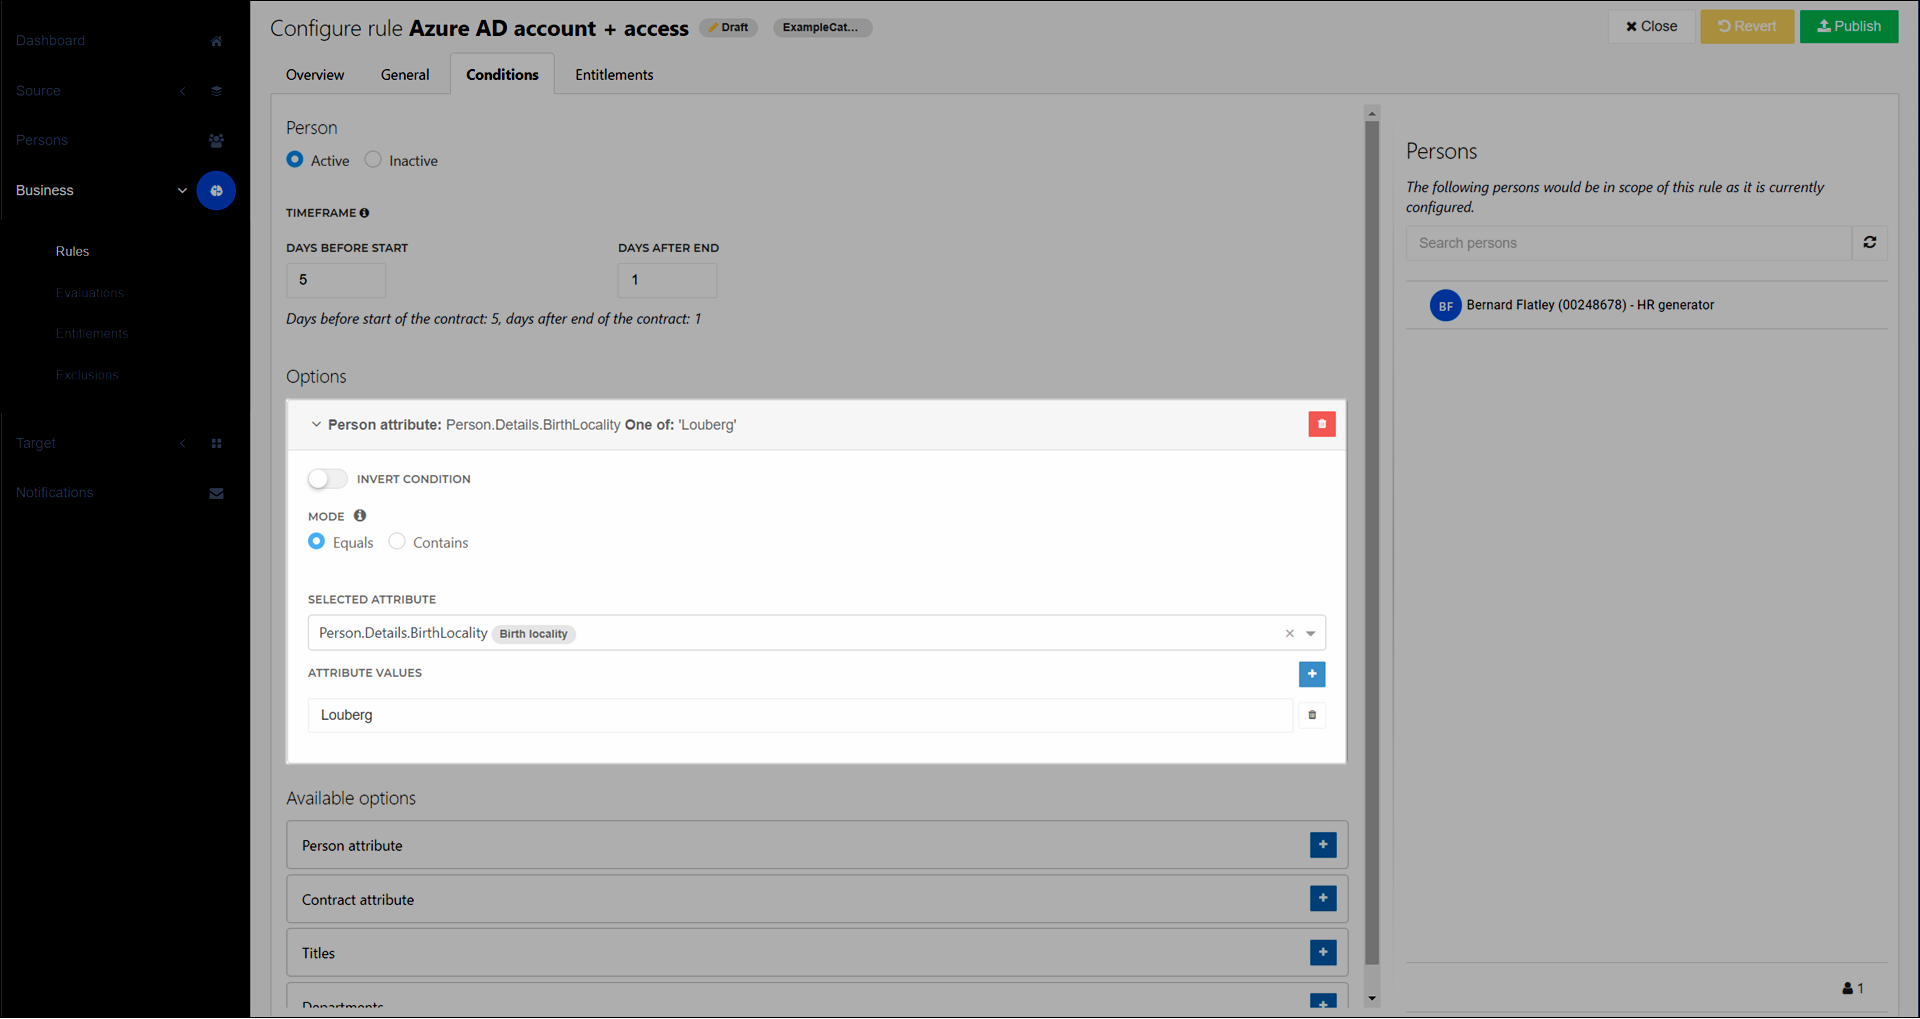
Optional: Click
 Add to add additional person attribute values. Then, repeat step (6) as needed.
Preview the in-scope persons in the Persons pane.
Your changes are automatically saved, and the business rule is put into a Draft state. Optionally, Publish a rule.
For more information, see Contract conditions.
For the relevant business rule, Edit a business rule.
Go to the Conditions tab.
In the Options pane, click
 Add for Contract Attribute.
Click the newly-added condition to expand it.
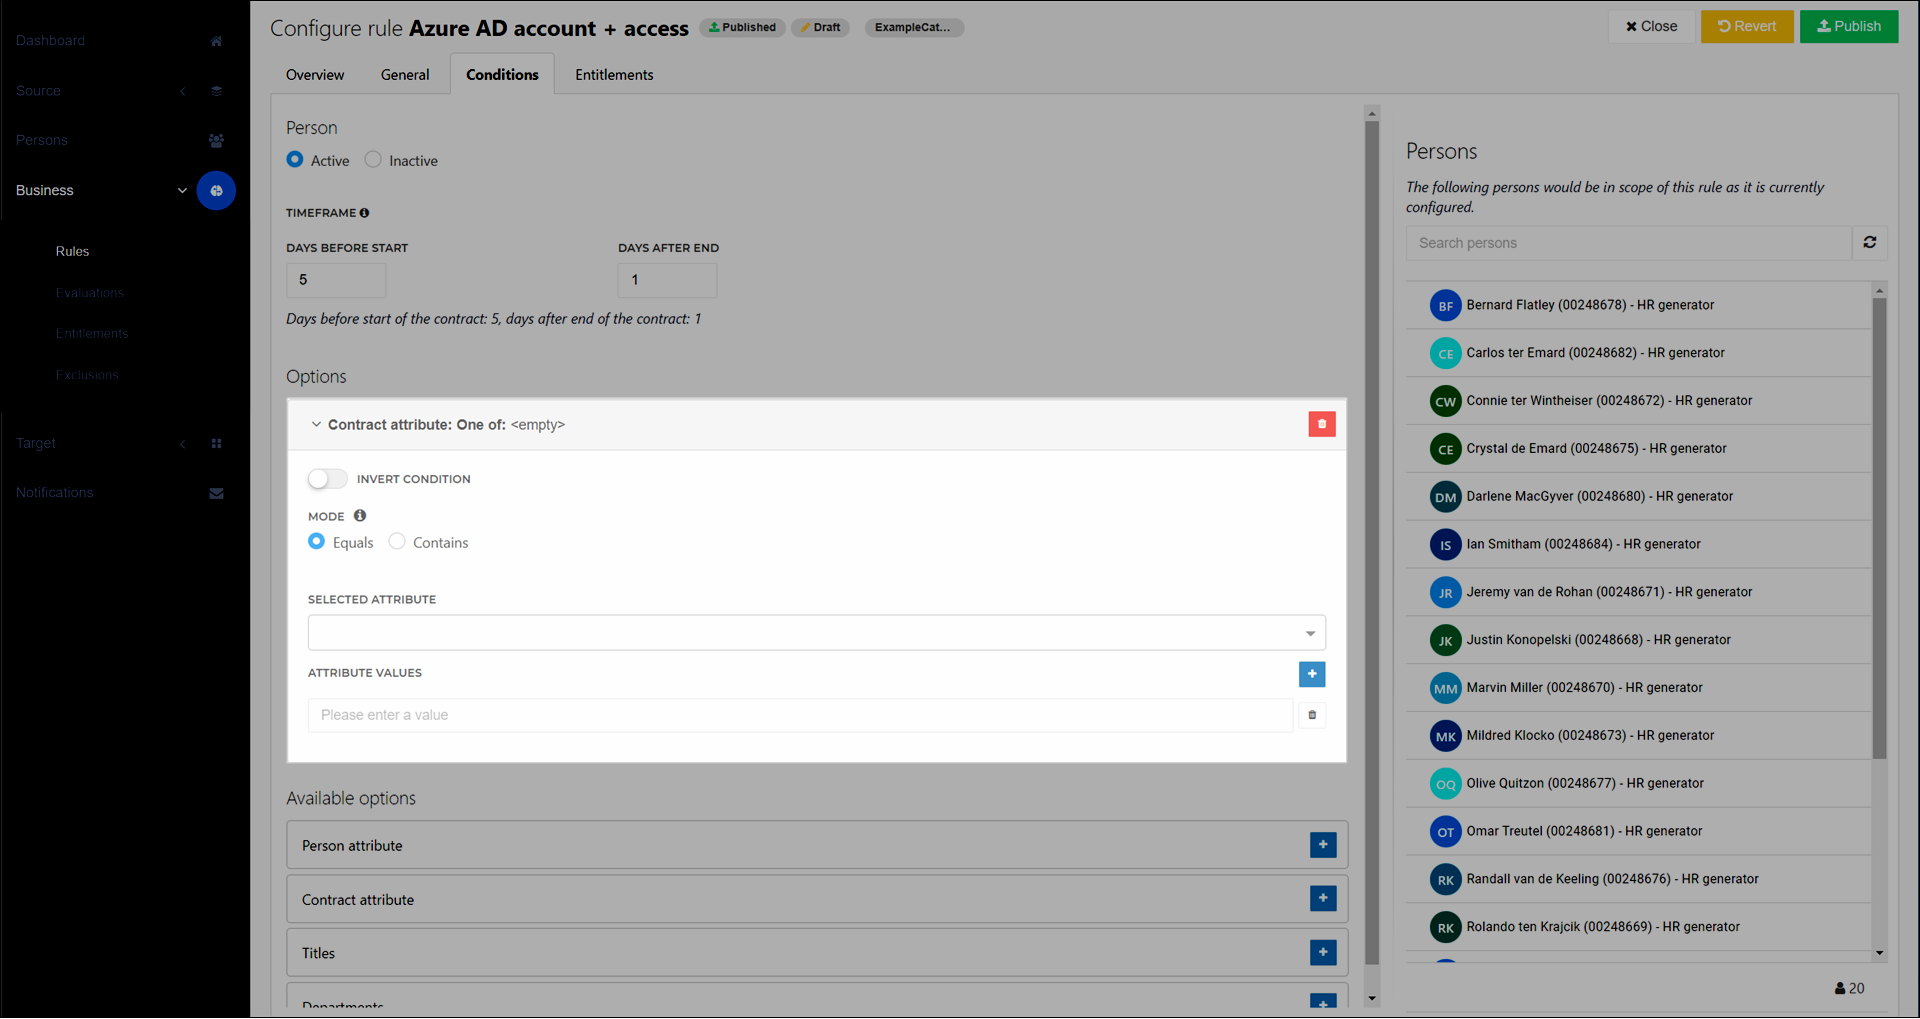
Set the Invert Condition and Mode Condition options.
Expand the Selected Attribute dropdown and select a field from the Contract schema. (The selected field must be mapped in your contract Source mappings.)
Enter an Attribute Value for the selected contract field.
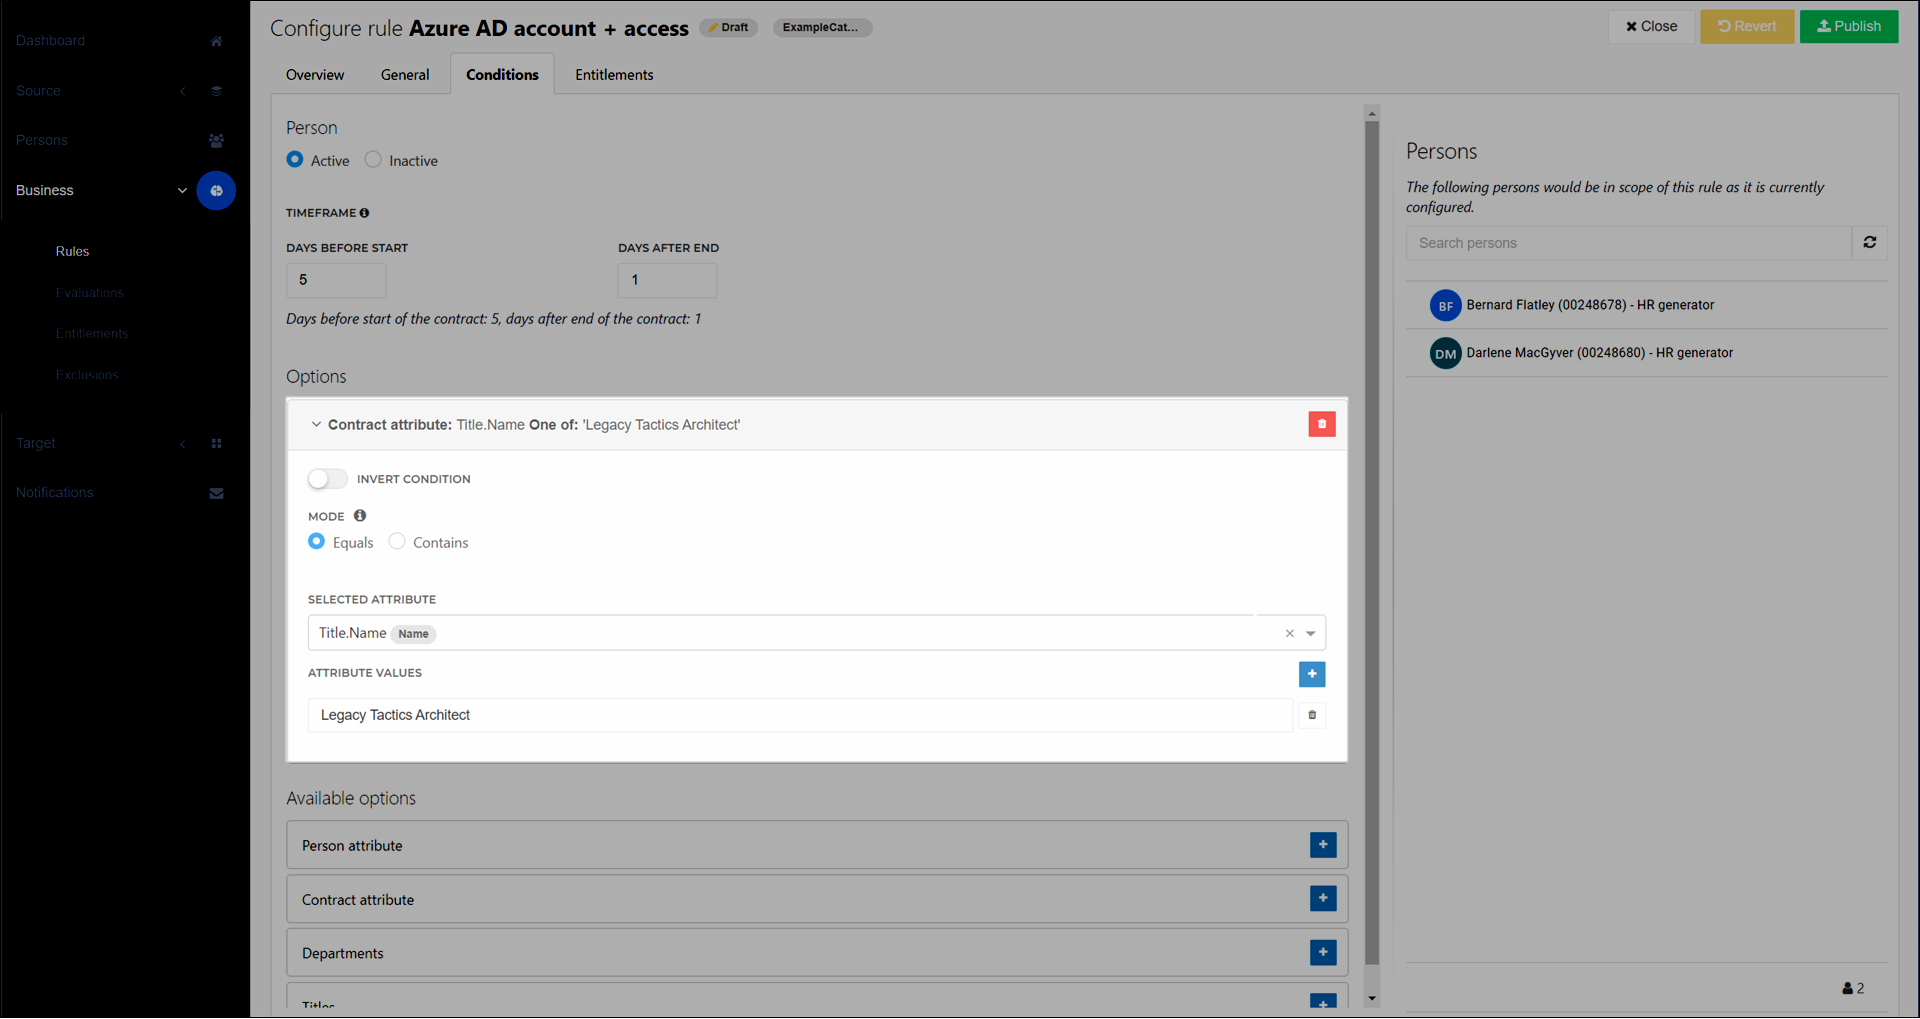
Optional: Click
 Add to add additional contract attribute values. Then, repeat step (6) as needed.
Preview the in-scope persons in the Persons pane.
Your changes are automatically saved, and the business rule is put into a Draft state. Optionally, Publish a rule.
For more information, see Department conditions.
For the relevant business rule, Edit a business rule.
Go to the Conditions tab.
In the Options pane, click
 Add for Departments.
Click the newly-added condition to expand it.
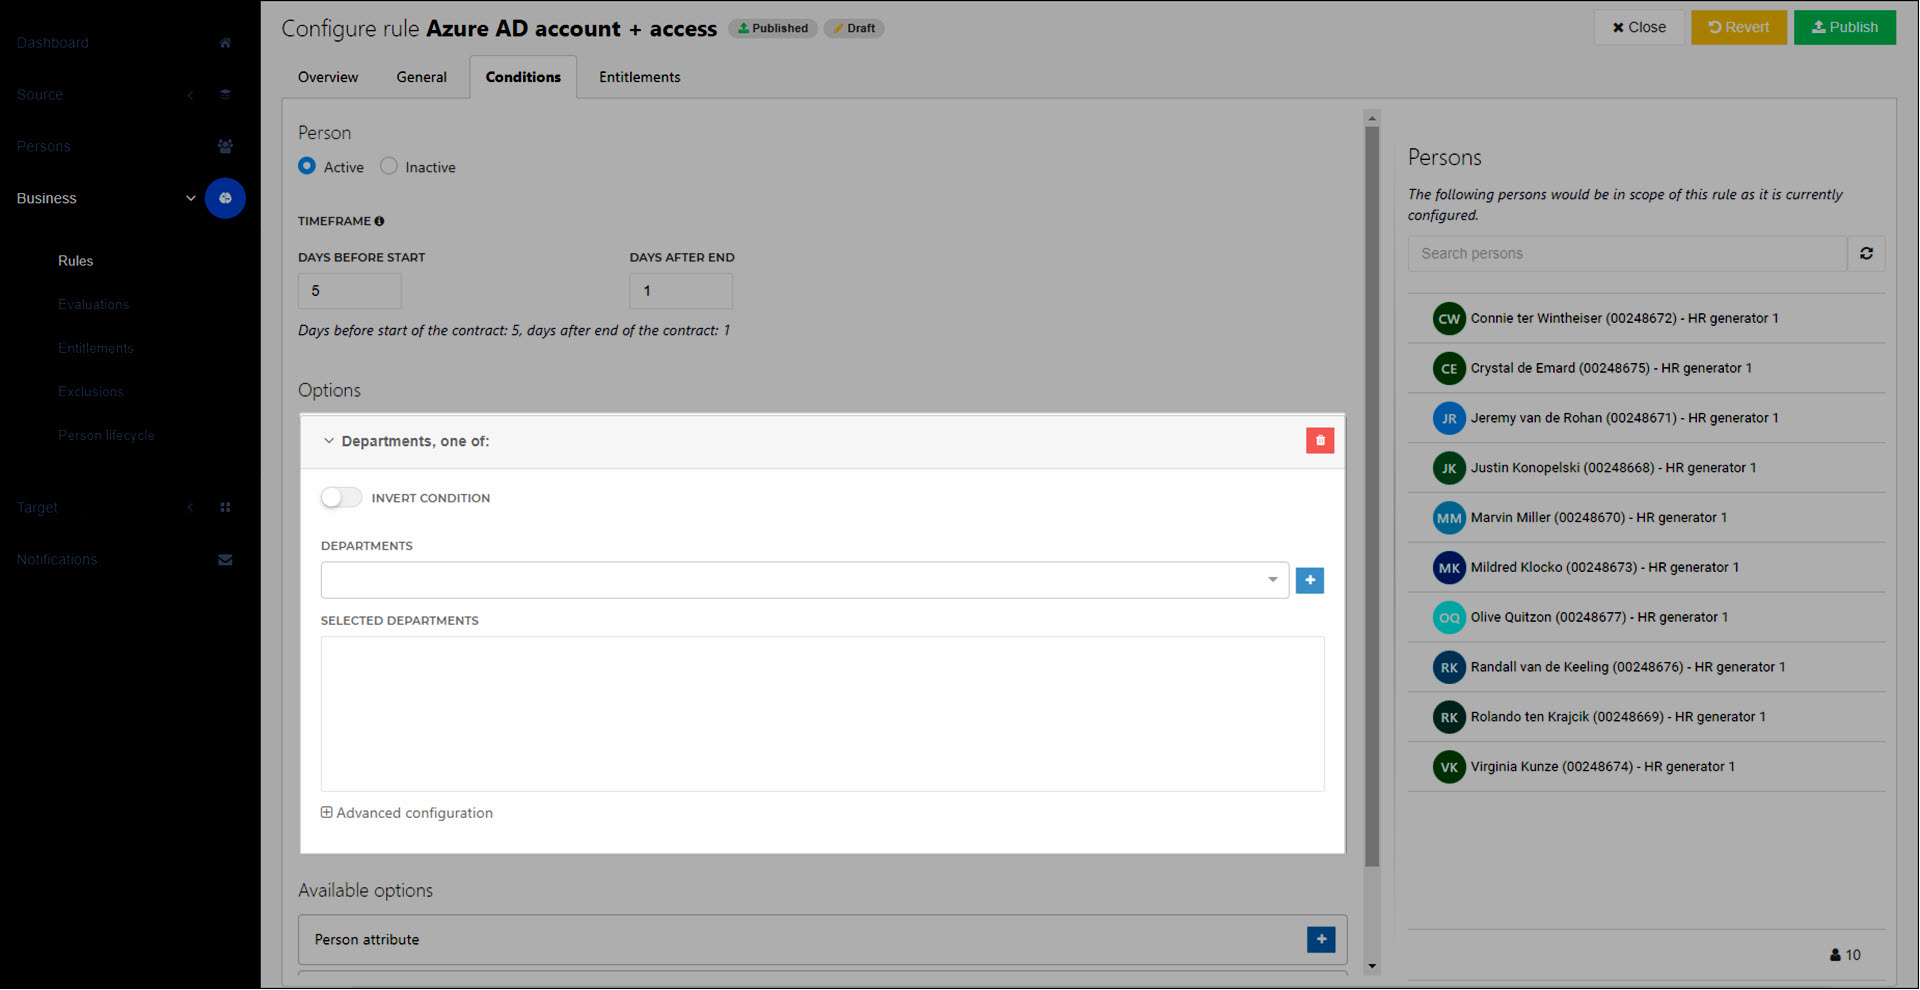
Set the Invert Condition and Mode Condition options.
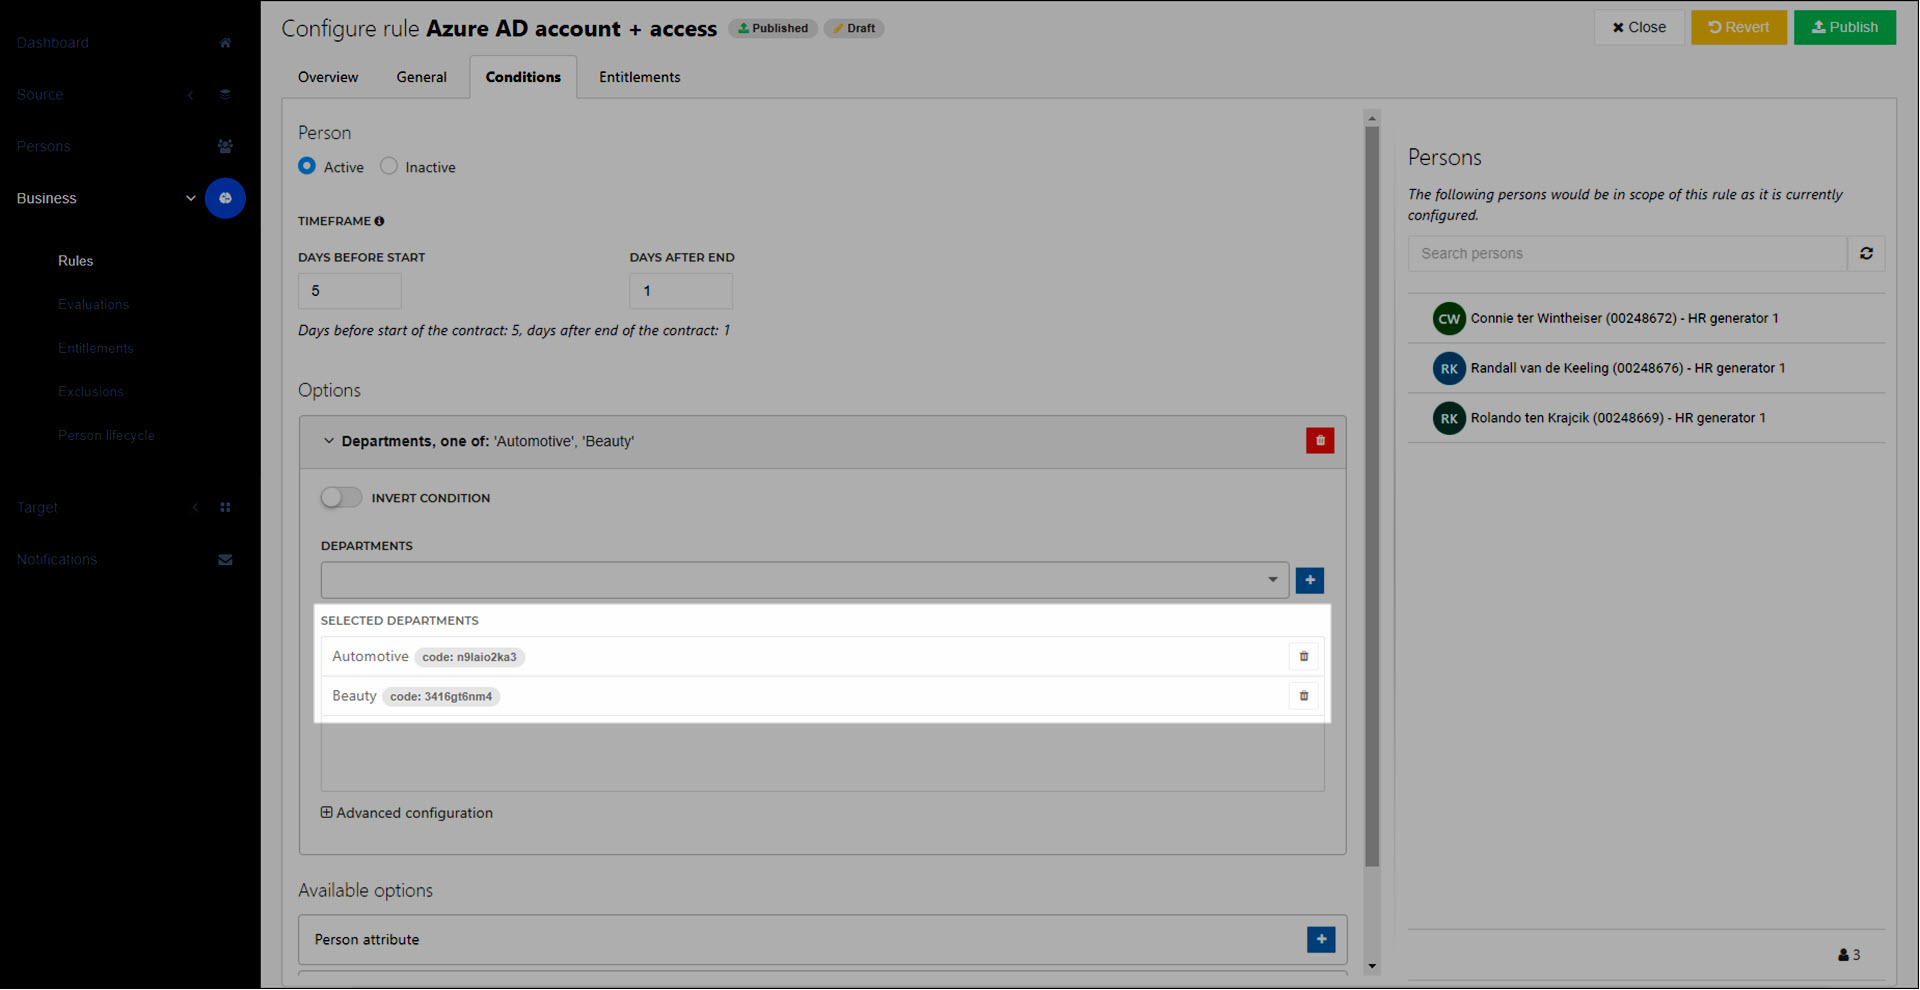
Expand the Departments dropdown and select a department name. Click
 Add to add it to the Selected Departments pane.
Tip
Departments are defined in your Departments import script, and the
ExternalIdmust be mapped onto Department.ExternalId in your contract Source mappings.Optional: Repeat step (6) to add additional departments to the Selected Departments pane.
Optional: Expand the Advanced Configuration section to manually add departments using their
ExternalId.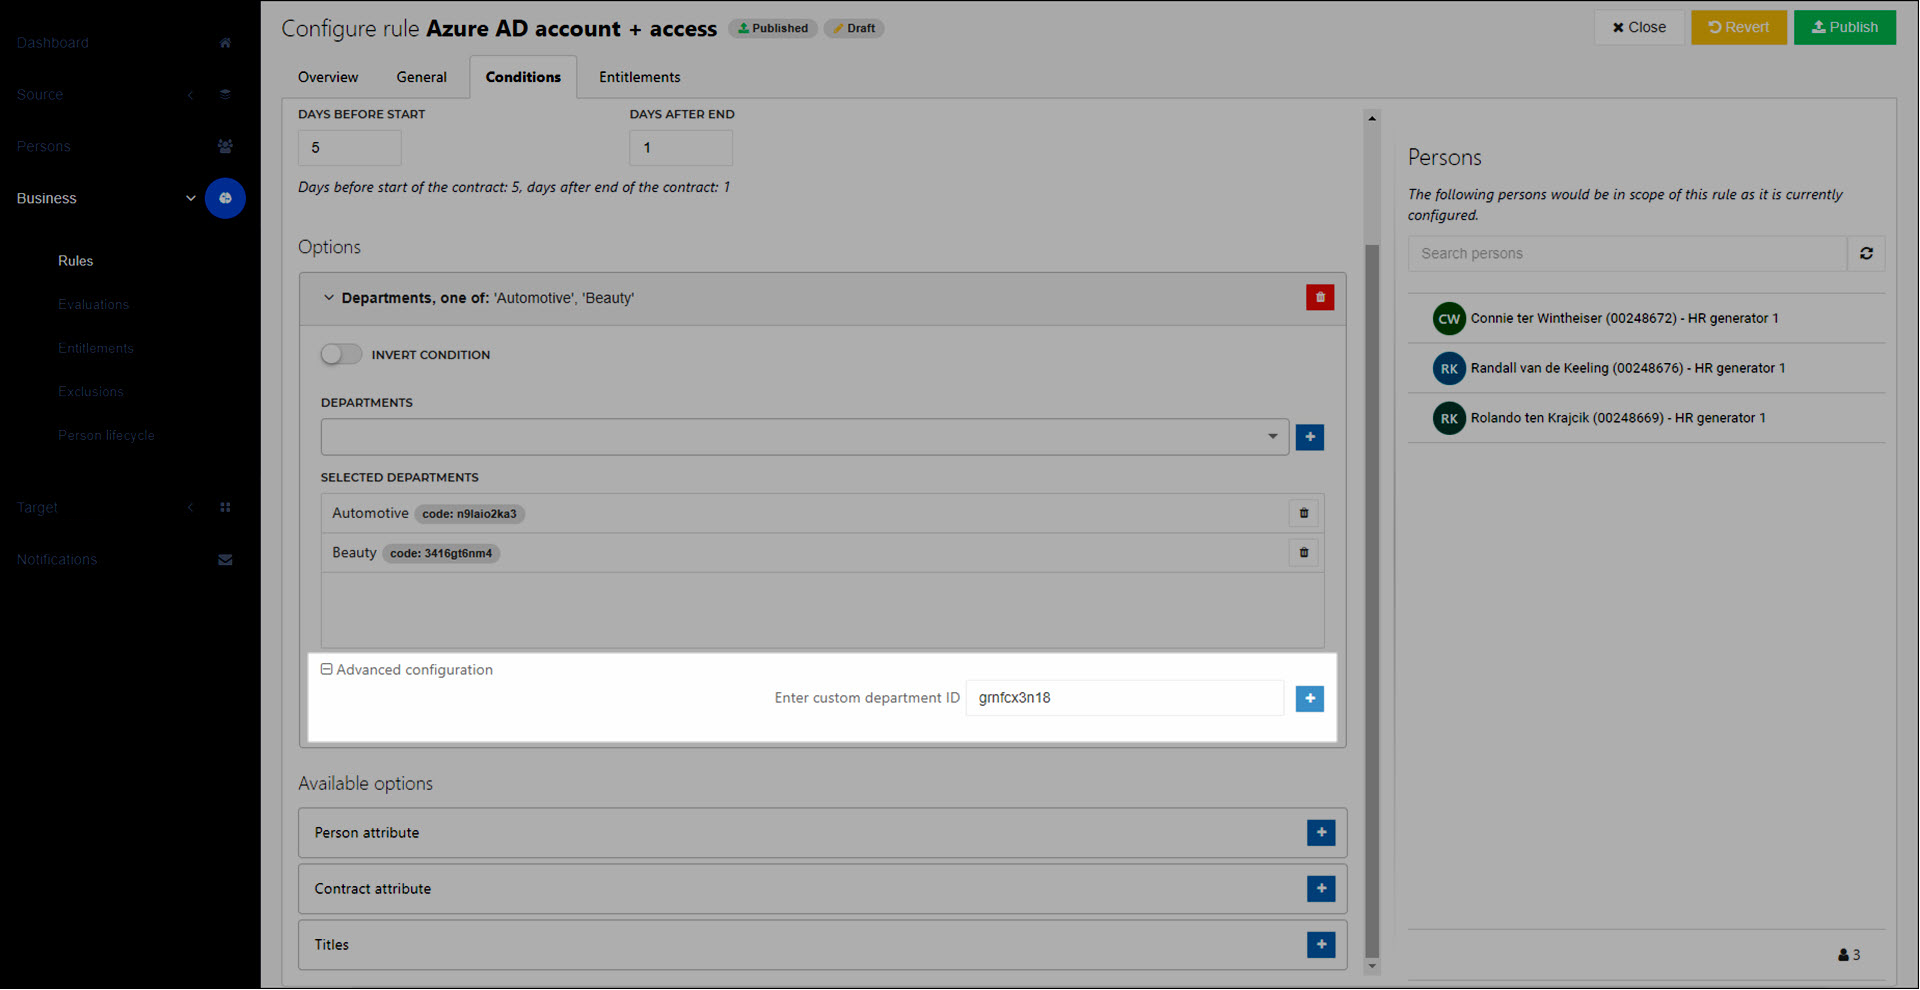
Preview the in-scope persons in the Persons pane.
Your changes are automatically saved, and the business rule is put into a Draft state. Optionally, Publish a rule.
For more information, see Title conditions.
For the relevant business rule, Edit a business rule.
Go to the Conditions tab.
In the Options pane, click
 Add for Titles.
Click the newly-added condition to expand it.
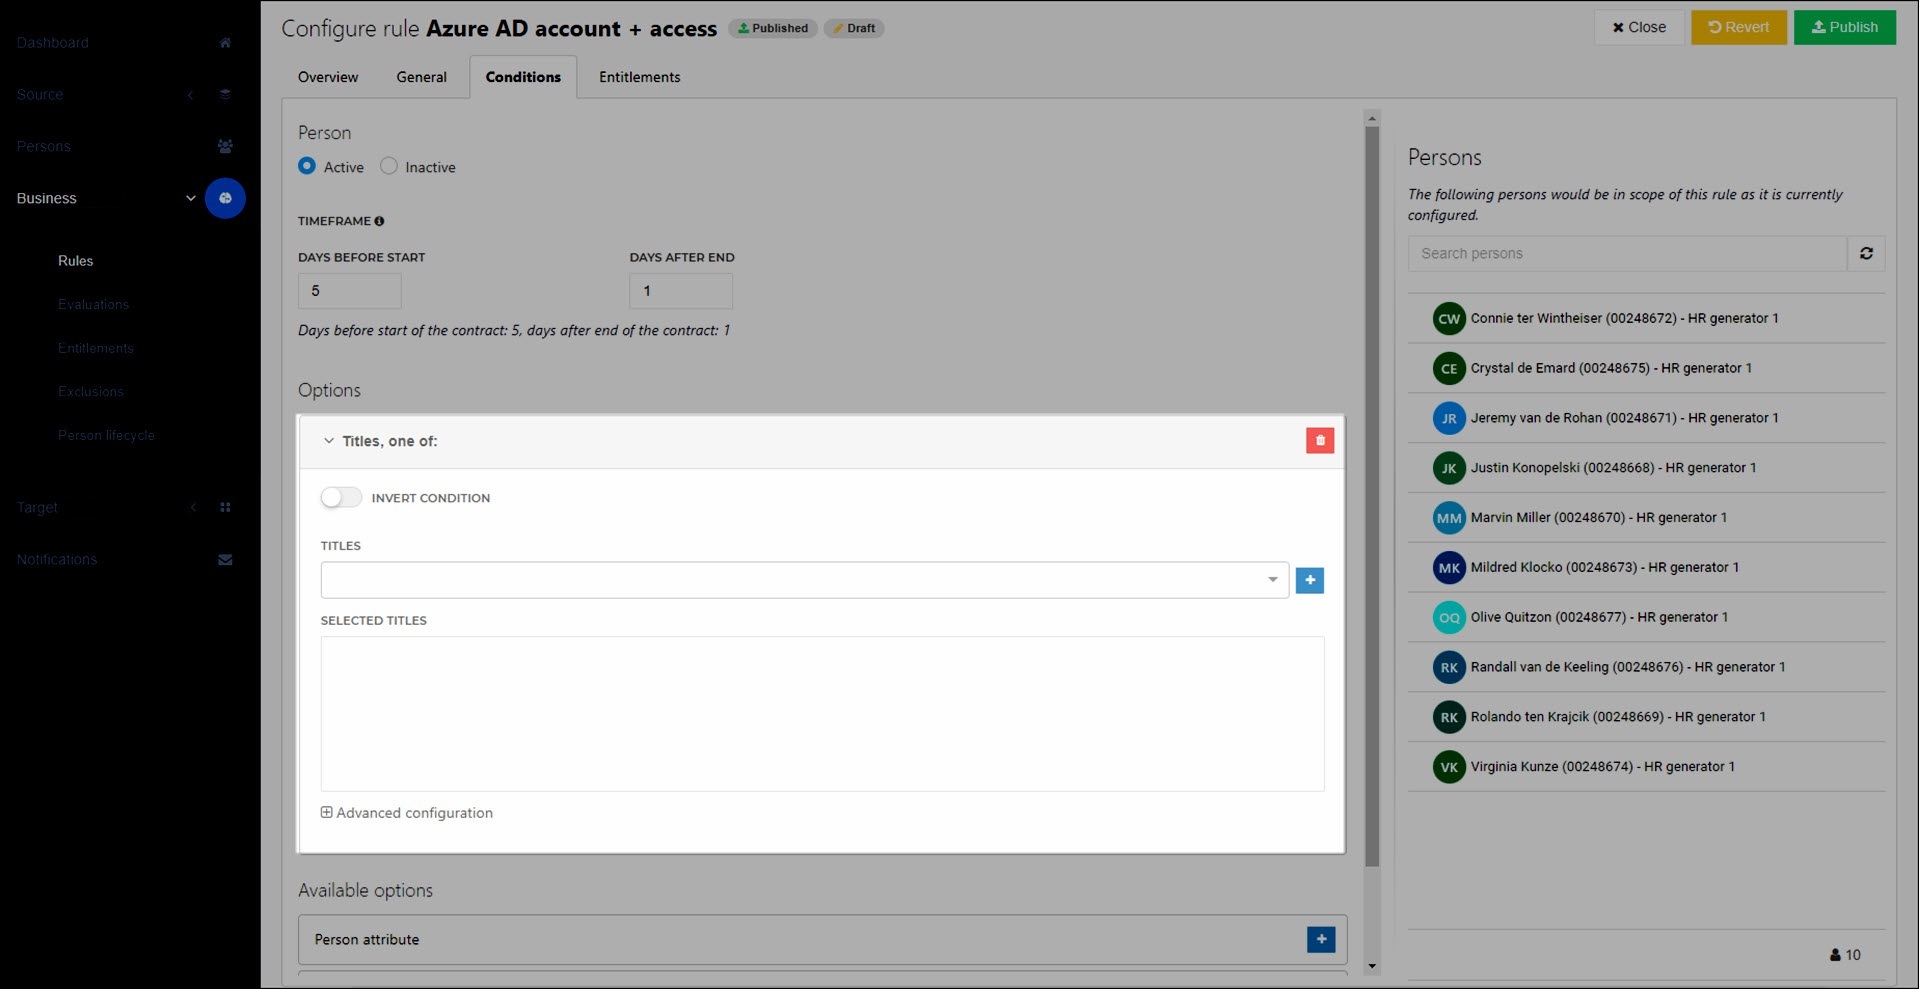
Set the Invert Condition and Mode Condition options.
Expand the Titles dropdown and select a title name. Click
 Add to add it to the Selected Titles pane. (Departments are defined in your Departments import script and must be mapped in your contract Source mappings.)
Optional: Repeat step (6) to add additional titles to the Selected Titles pane.
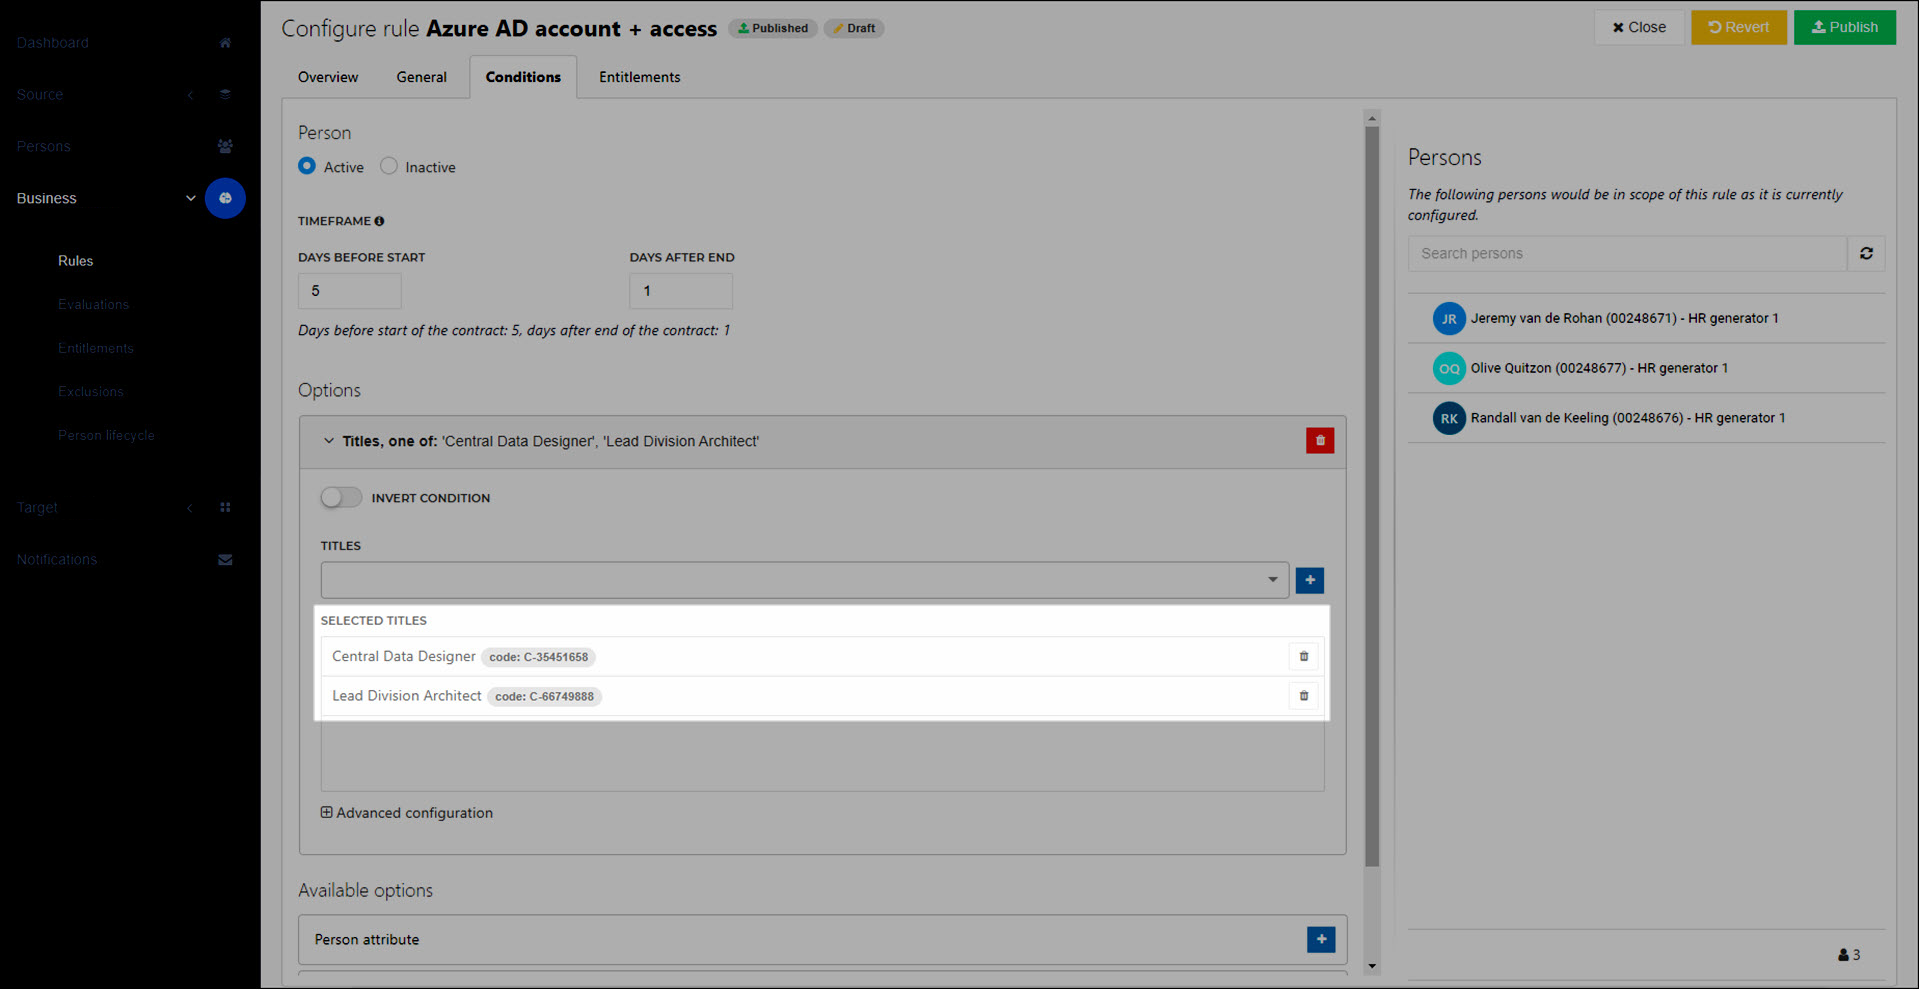
Optional: Expand the Advanced Configuration section to manually add titles using the Title.ExternalId field. (This field must be mapped on the Contract tab of your Source mappings.)
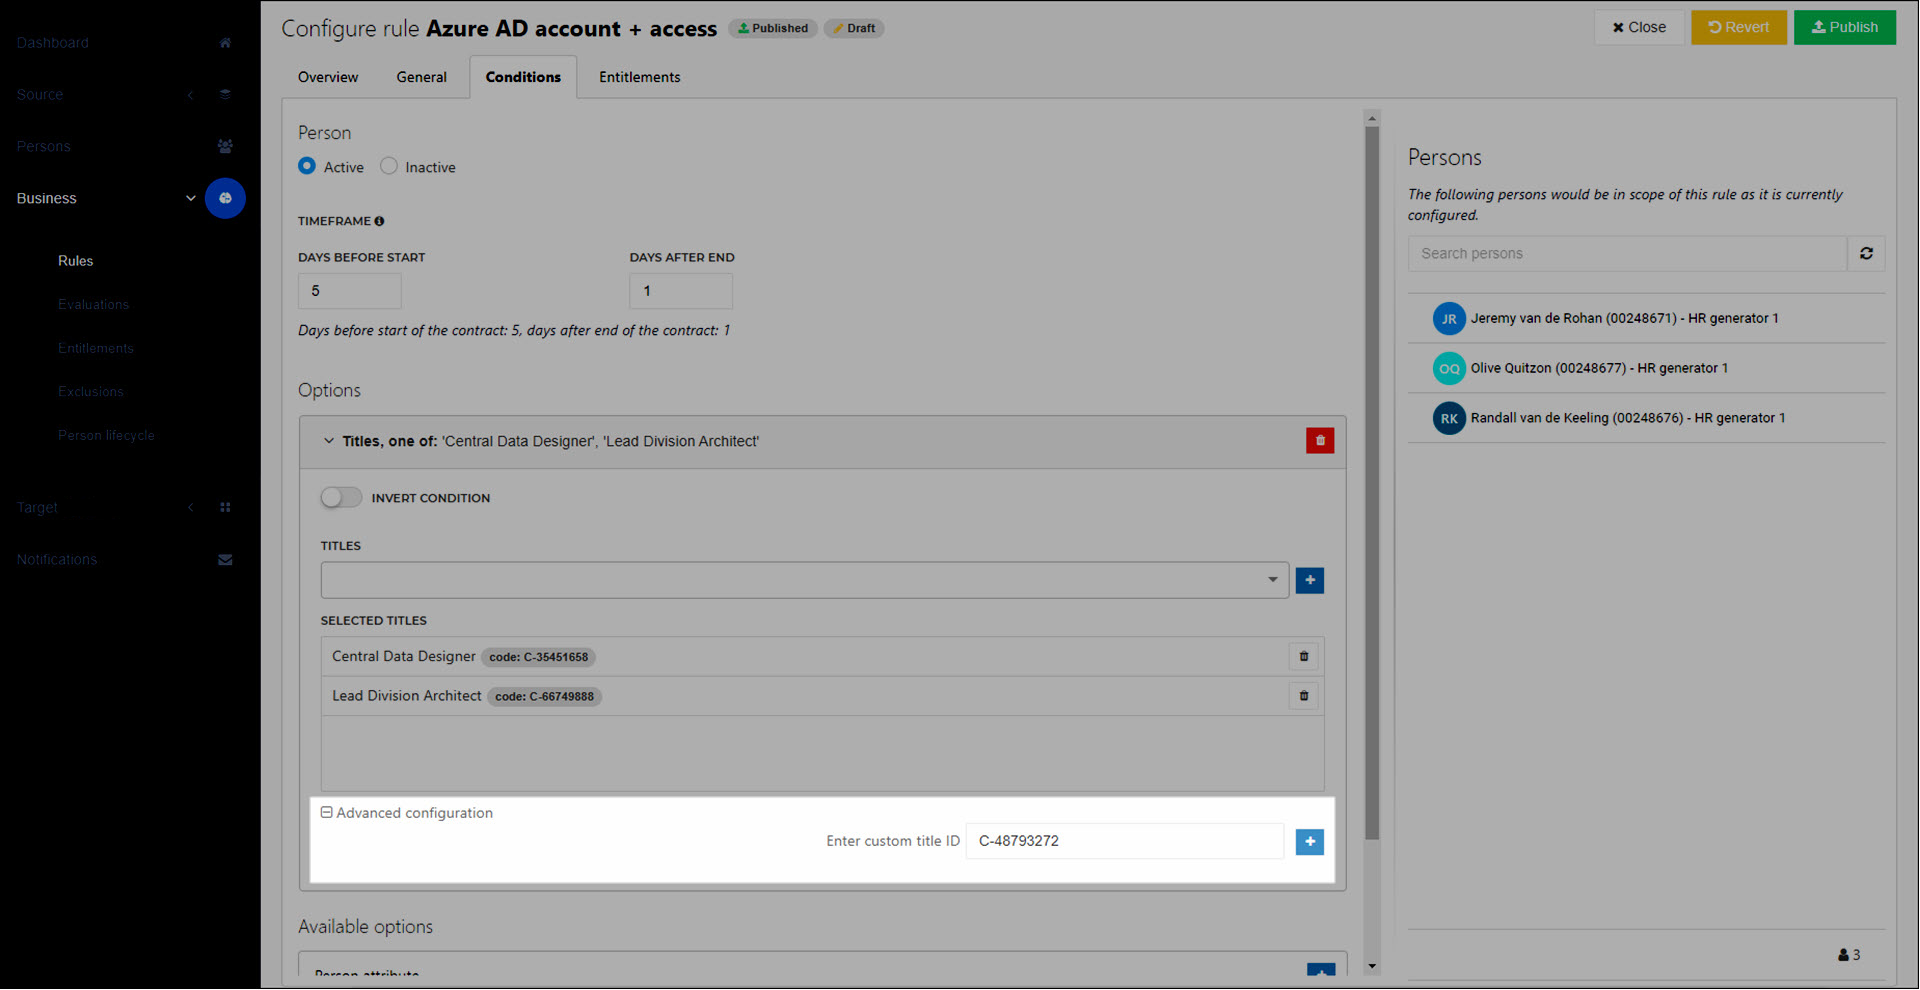
Preview the in-scope persons in the Persons pane.
Your changes are automatically saved, and the business rule is put into a Draft state. Optionally, Publish a rule.
For the relevant business rule, Edit a business rule.
Go to the Conditions tab.
Continue by following the steps in Add a condition.
For the relevant business rule, Edit a business rule.
Go to the Conditions tab.
For an existing person, contract, department, or title condition, click
 Delete.
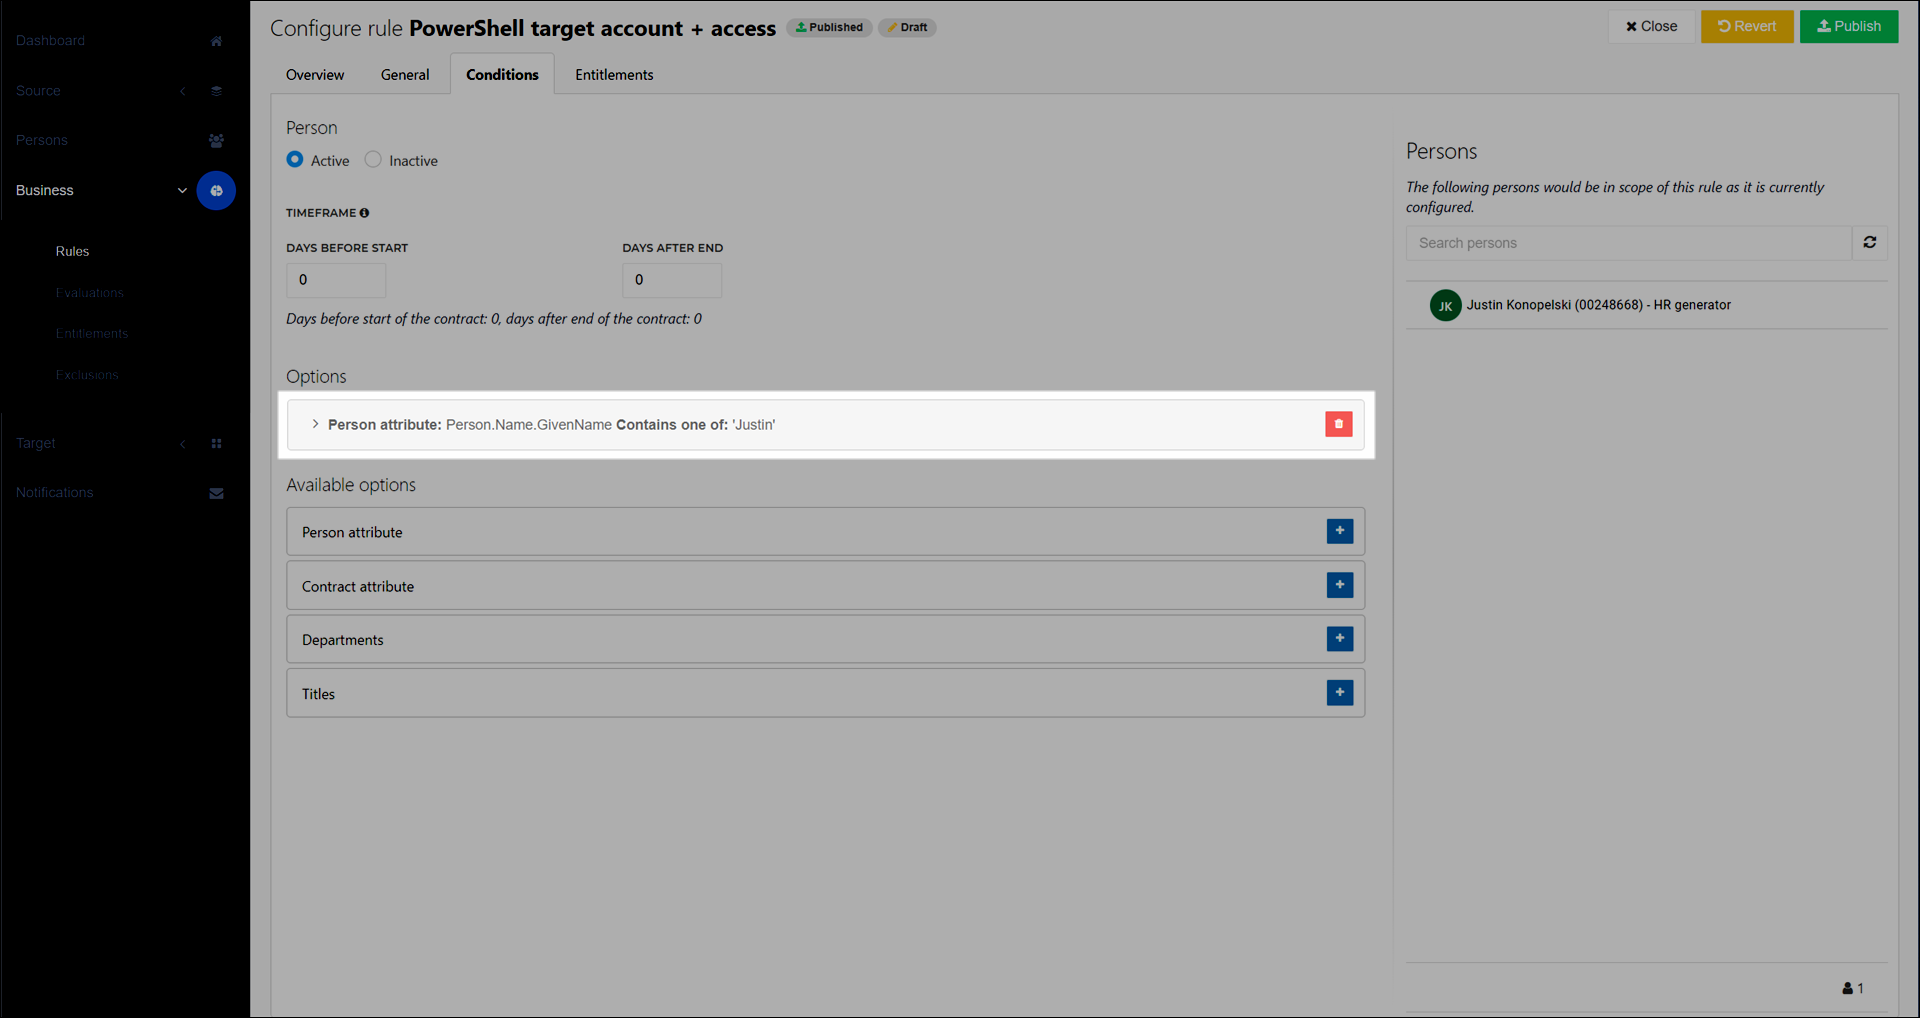
Your changes are automatically saved, and the business rule is put into a Draft state. Optionally, Publish a rule.