Add, edit, or remove a scheduled task
Add a scheduled task
Go to Automation > Tasks.
Click Create Task.
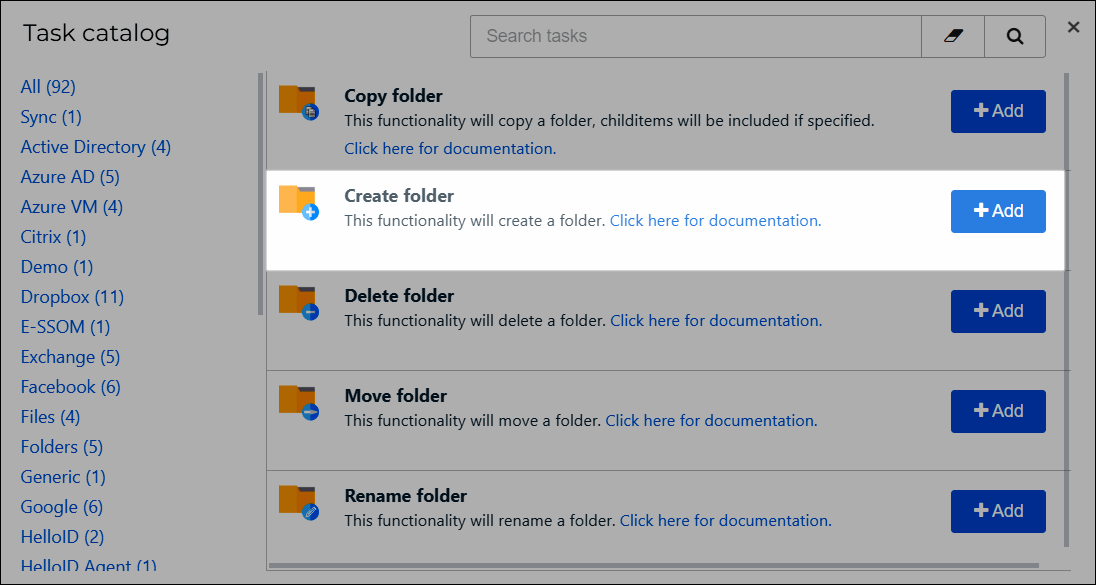
In the Task catalog dialog box, search for the pre-defined task that you want to create.
For this example, we'll add the Create folder task.
Optional: Change the task's default Name.
For this example, we'll use
Scheduled task: Create folder.Optional: Specify the Agent Pool which will run the scheduled task. See Agent pools.

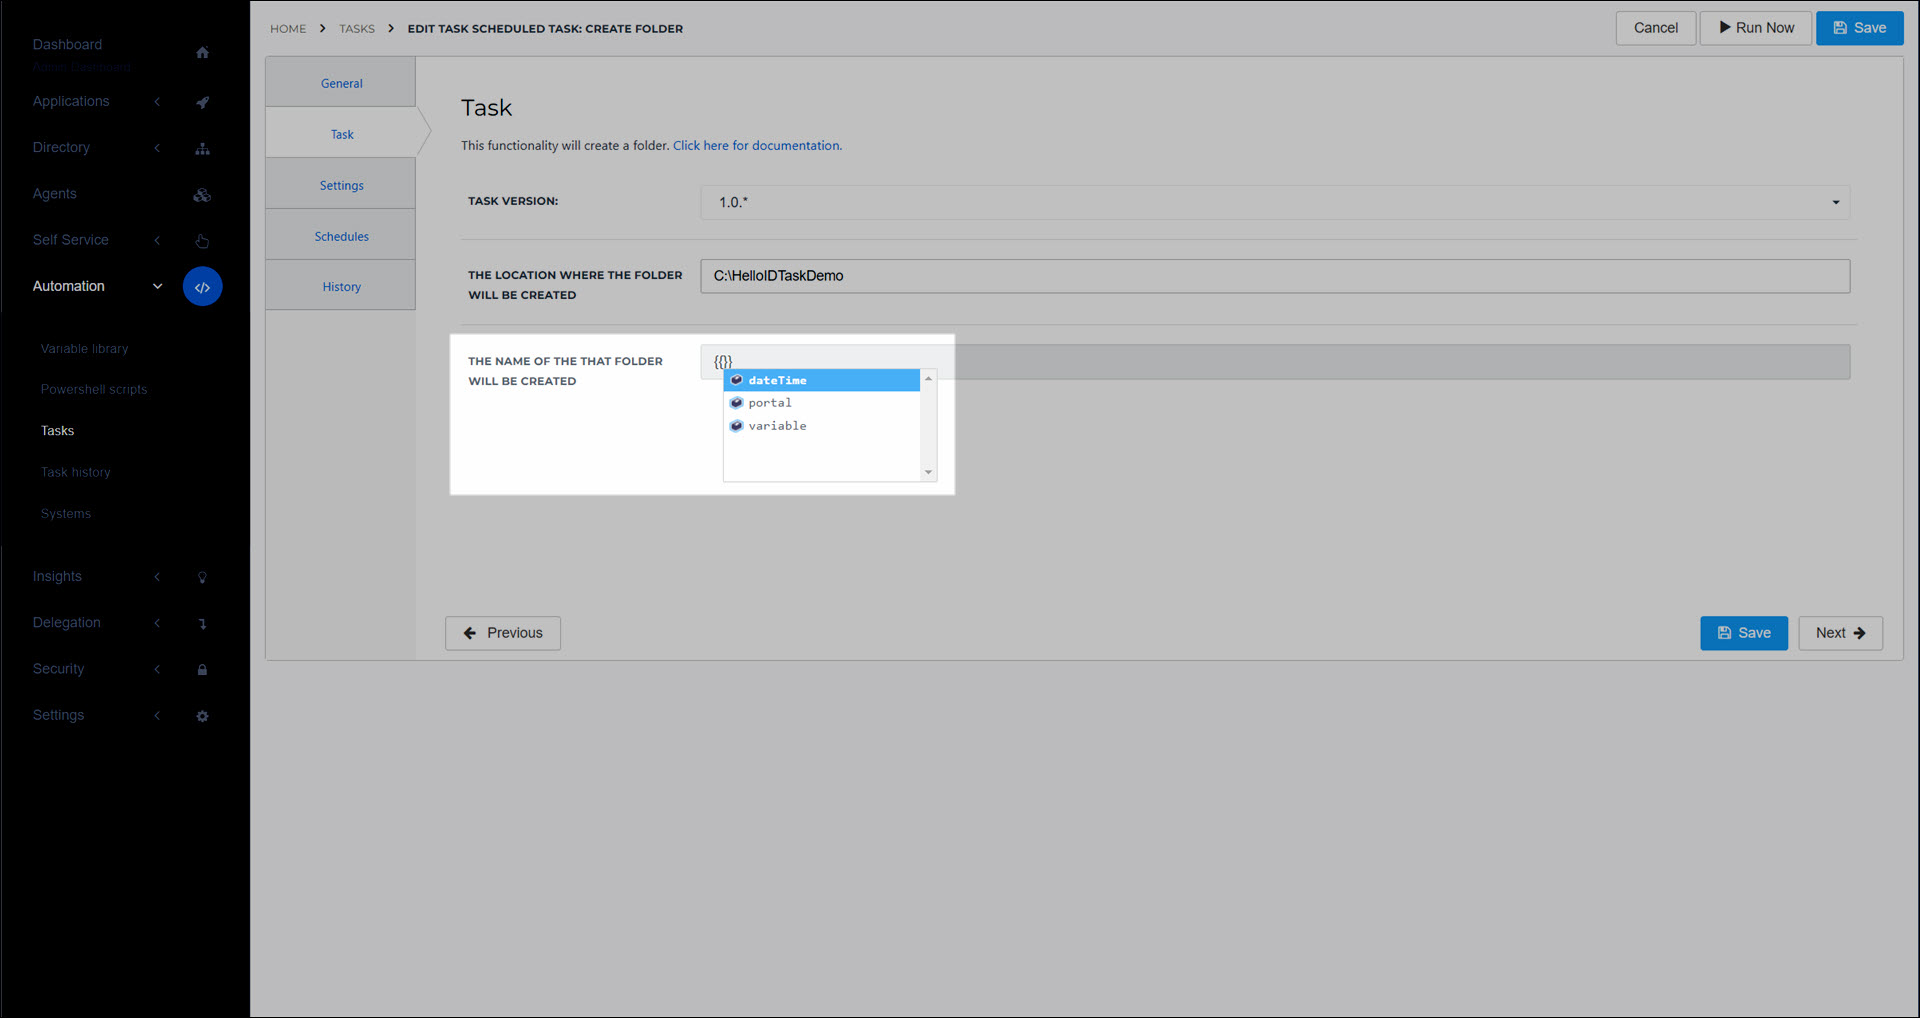
Go to the Task tab.
Enter the required input values for the task.

Tip
Type
{{in a text field to activate autocomplete.You have access to System variables (under {{portal.}}) and Custom variables (under {{variable.}}).
Go to the Settings tab.
Optional: Configure email notifications.
Go to the Schedules tab.
Click Add Schedule.
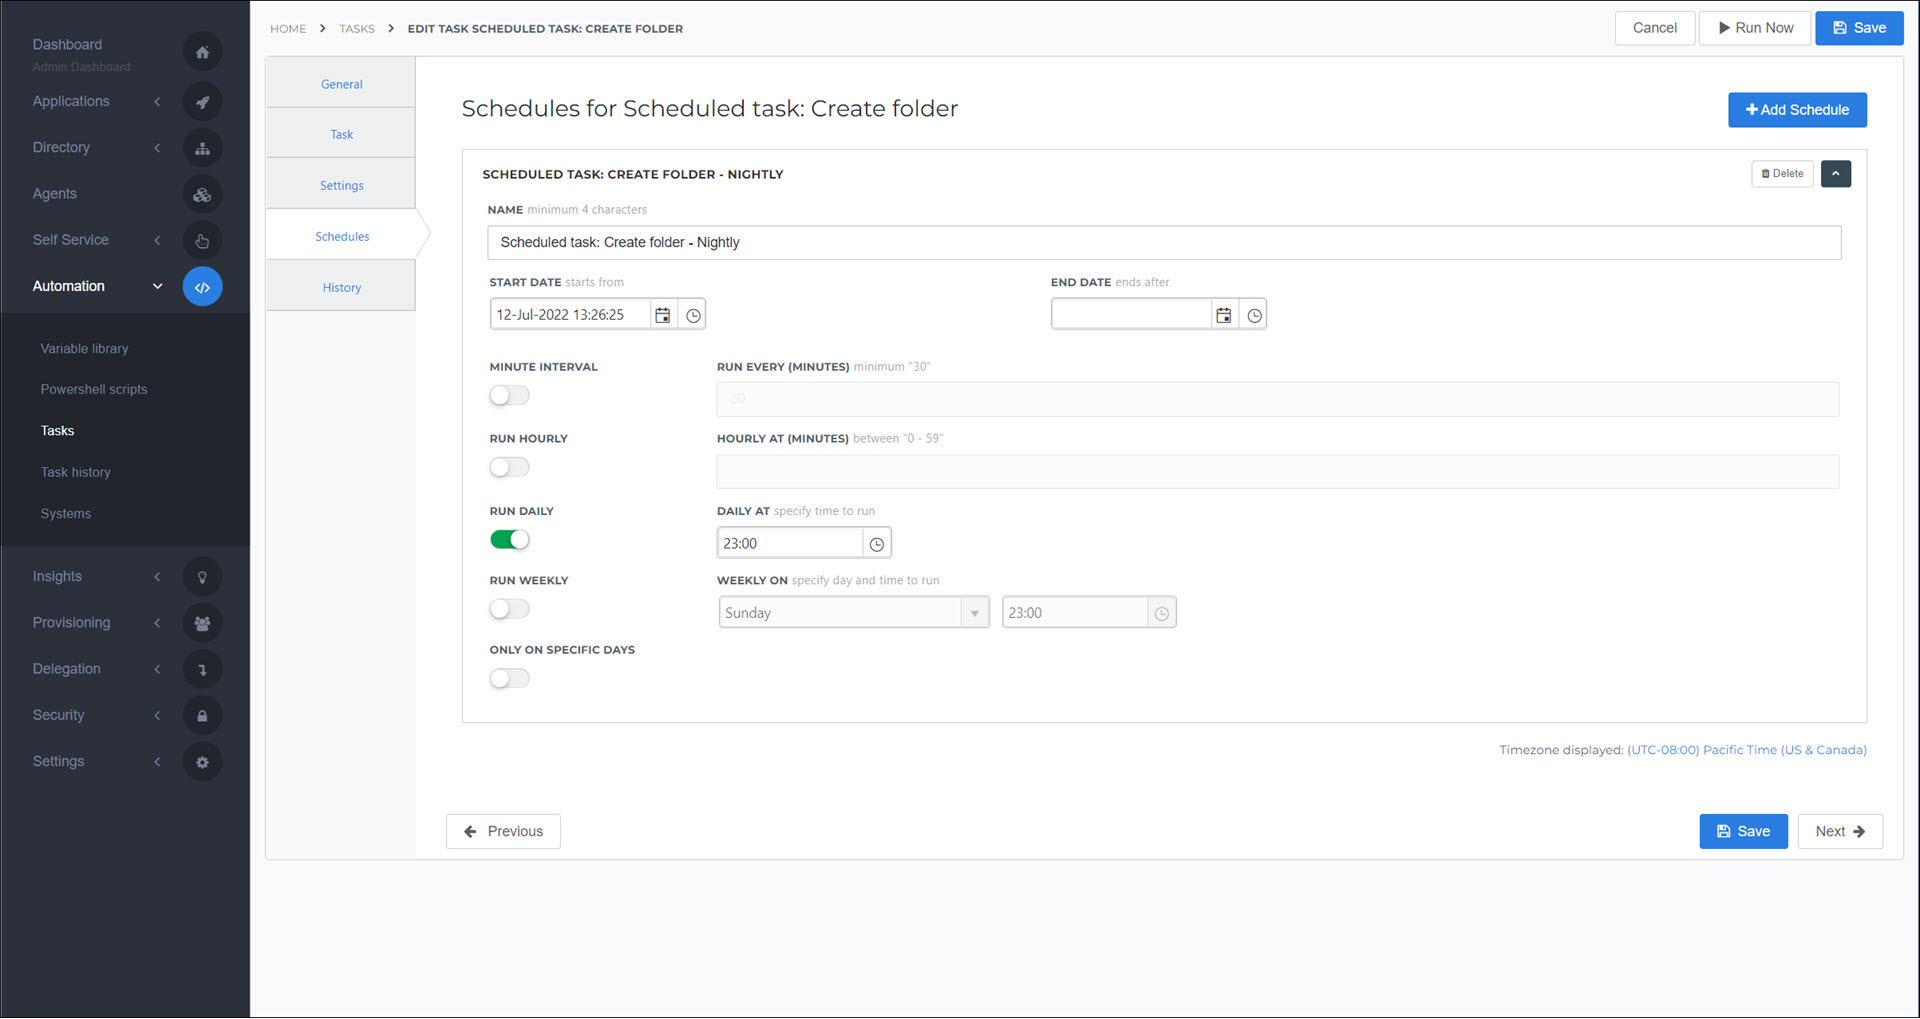
Enter a Name for the schedule.
For this example,
Scheduled task: Create folder - Nightly.Configure the schedule as desired.
Click Save.
The scheduled task has been added, and is now listed in Automation > Tasks.
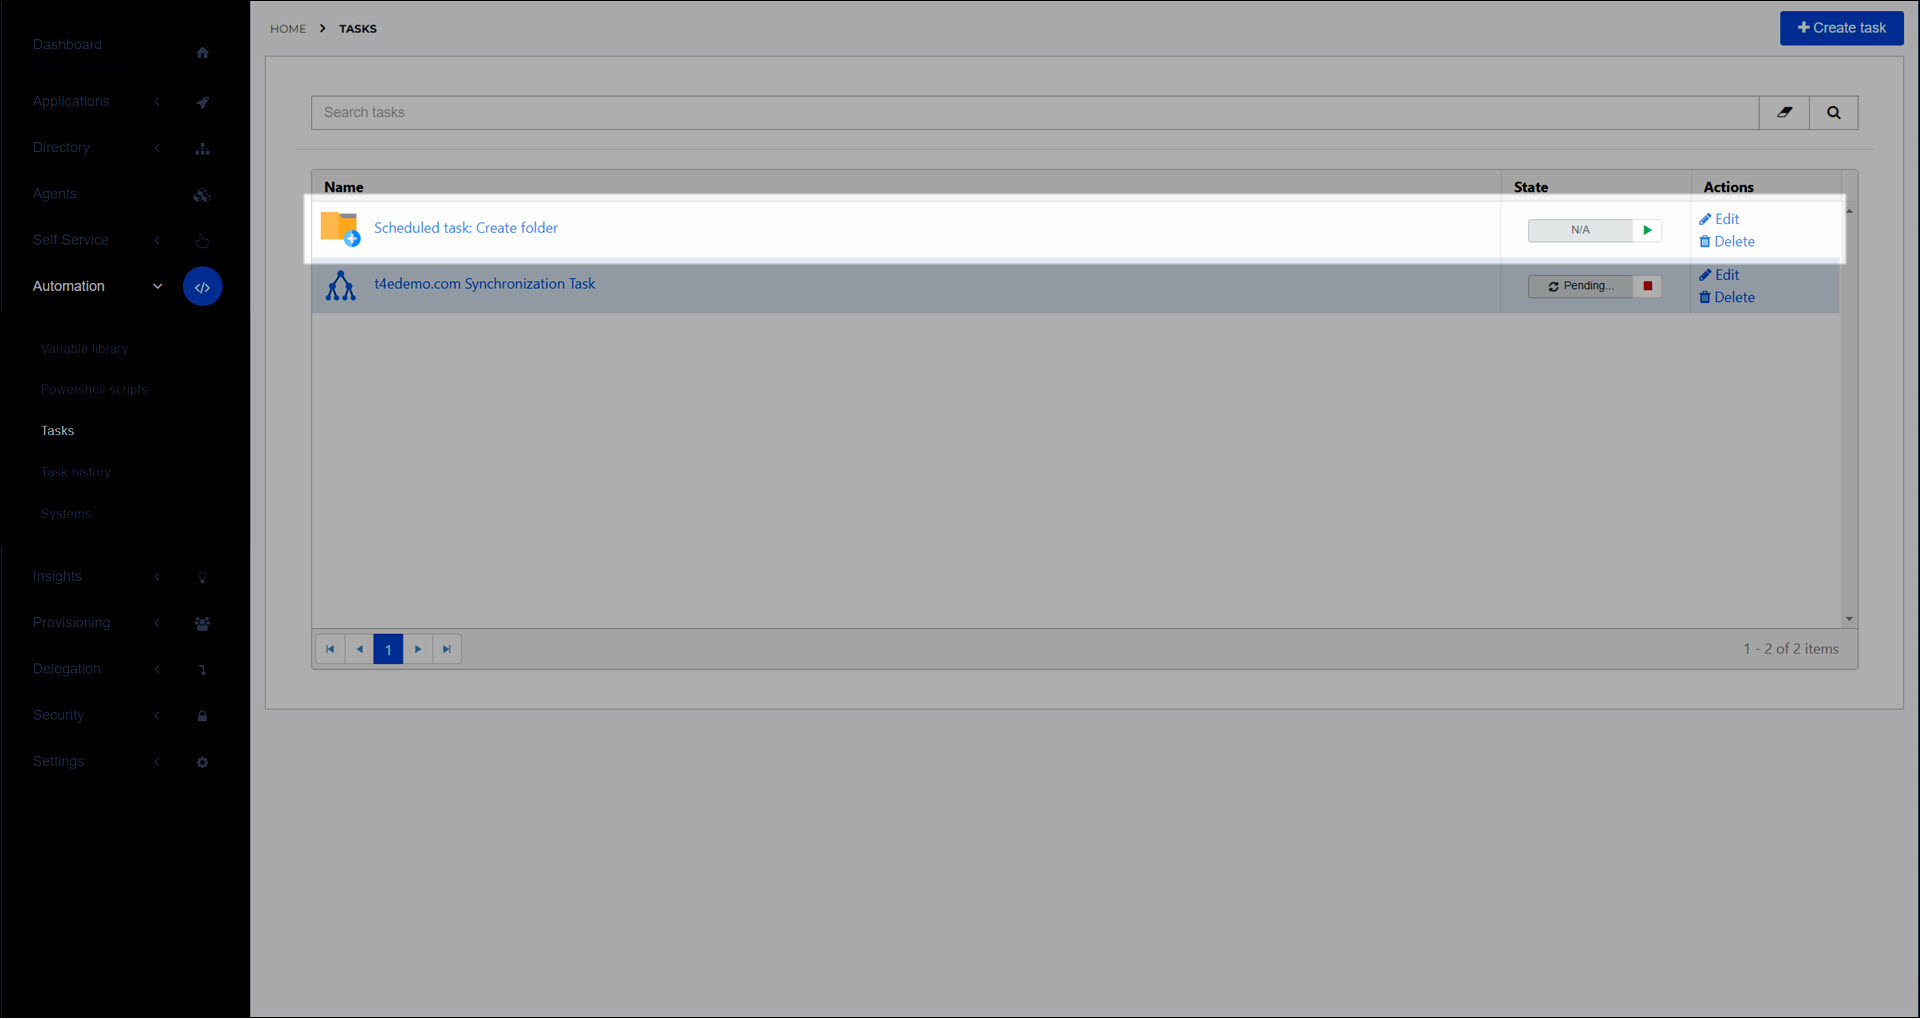
It will automatically run on the specific schedule. To manually run it, Manually run a scheduled task. To view its run history, View task run history.
Tip
The Tools4ever GitHub account contains a variety of PowerShell scheduled tasks that you can import into your HelloID environment. See Service Automation GitHub resources.
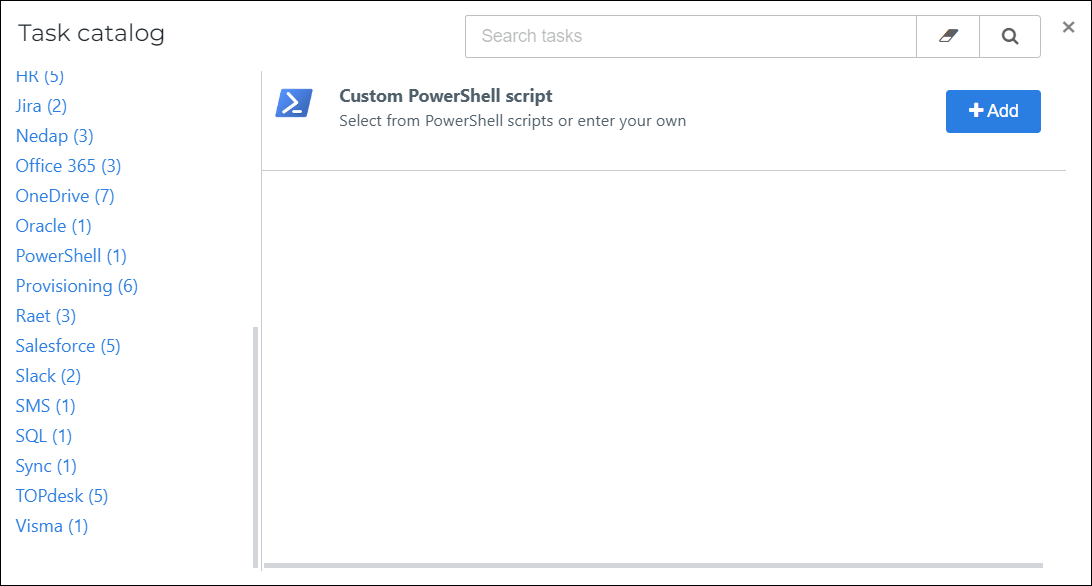
Go to Automation > Tasks.
Click Create Task.
In the Task catalog dialog box, click PowerShell in the left-hand column, and then click Add for Custom PowerShell Script.
Optional: Change the task's default Name.
For this example, we'll use
Scheduled task: Weather report.Optional: Specify the Agent Pool which will run the scheduled task. See Agent pools.
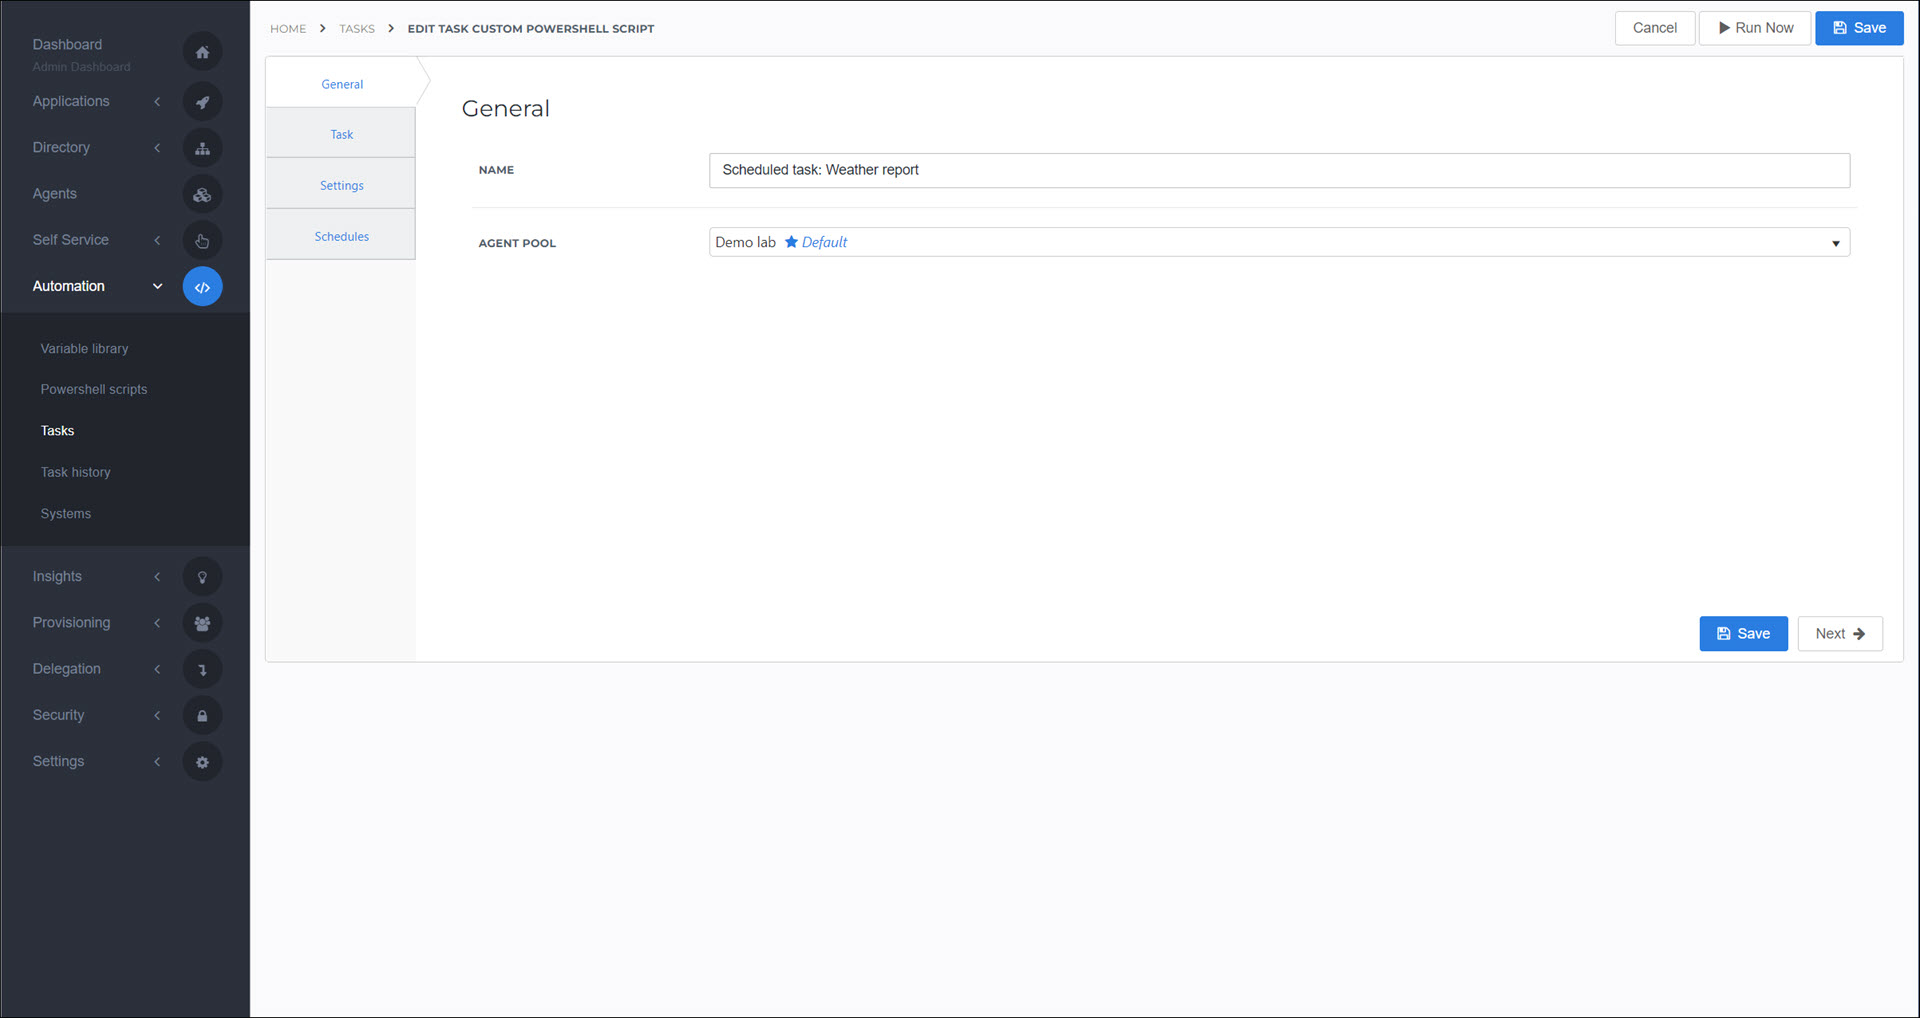
Go to the Task tab.
Disable the Use Template toggle.
Enter your code in the PowerShell Script field.
For this example:
$temperatureUnit = "fahrenheit"
$locationEndpoint = "https://api.open-meteo.com/v1/forecast?latitude=40.71&longitude=-74.01&hourly=temperature_2m&temperature_unit=$temperatureUnit&windspeed_unit=mph&precipitation_unit=inch"
Hid-Write-Summary -Message "Looking up New York weather" -Event Information
$response = Invoke-RestMethod -uri $locationEndpoint
Hid-Write-Summary -Message "Response: $response" -Event Information
$result = @{weather = "Current time: $($response.hourly.time[0]); current temperature: $($response.hourly.temperature_2m[0]) degrees $temperatureUnit"}
Hid-Write-Summary -Message "Result: $($result.weather)" -Event Information
Hid-Add-TaskResult -ResultValue $result
Tip
In your script, you have direct access to System variables and Custom variables.
The Variables tab is deprecated and does not offer any functionality not already available directly in PowerShell.
Note
Scheduled tasks that run frequently and log a lot of lines can quickly fill up your system's database. Limit the amount of logging to avoid running out of database space and hitting the Performance limits.
Go to the Settings tab.
Optional: Configure email notifications.
Go to the Schedules tab.
Click Add Schedule.
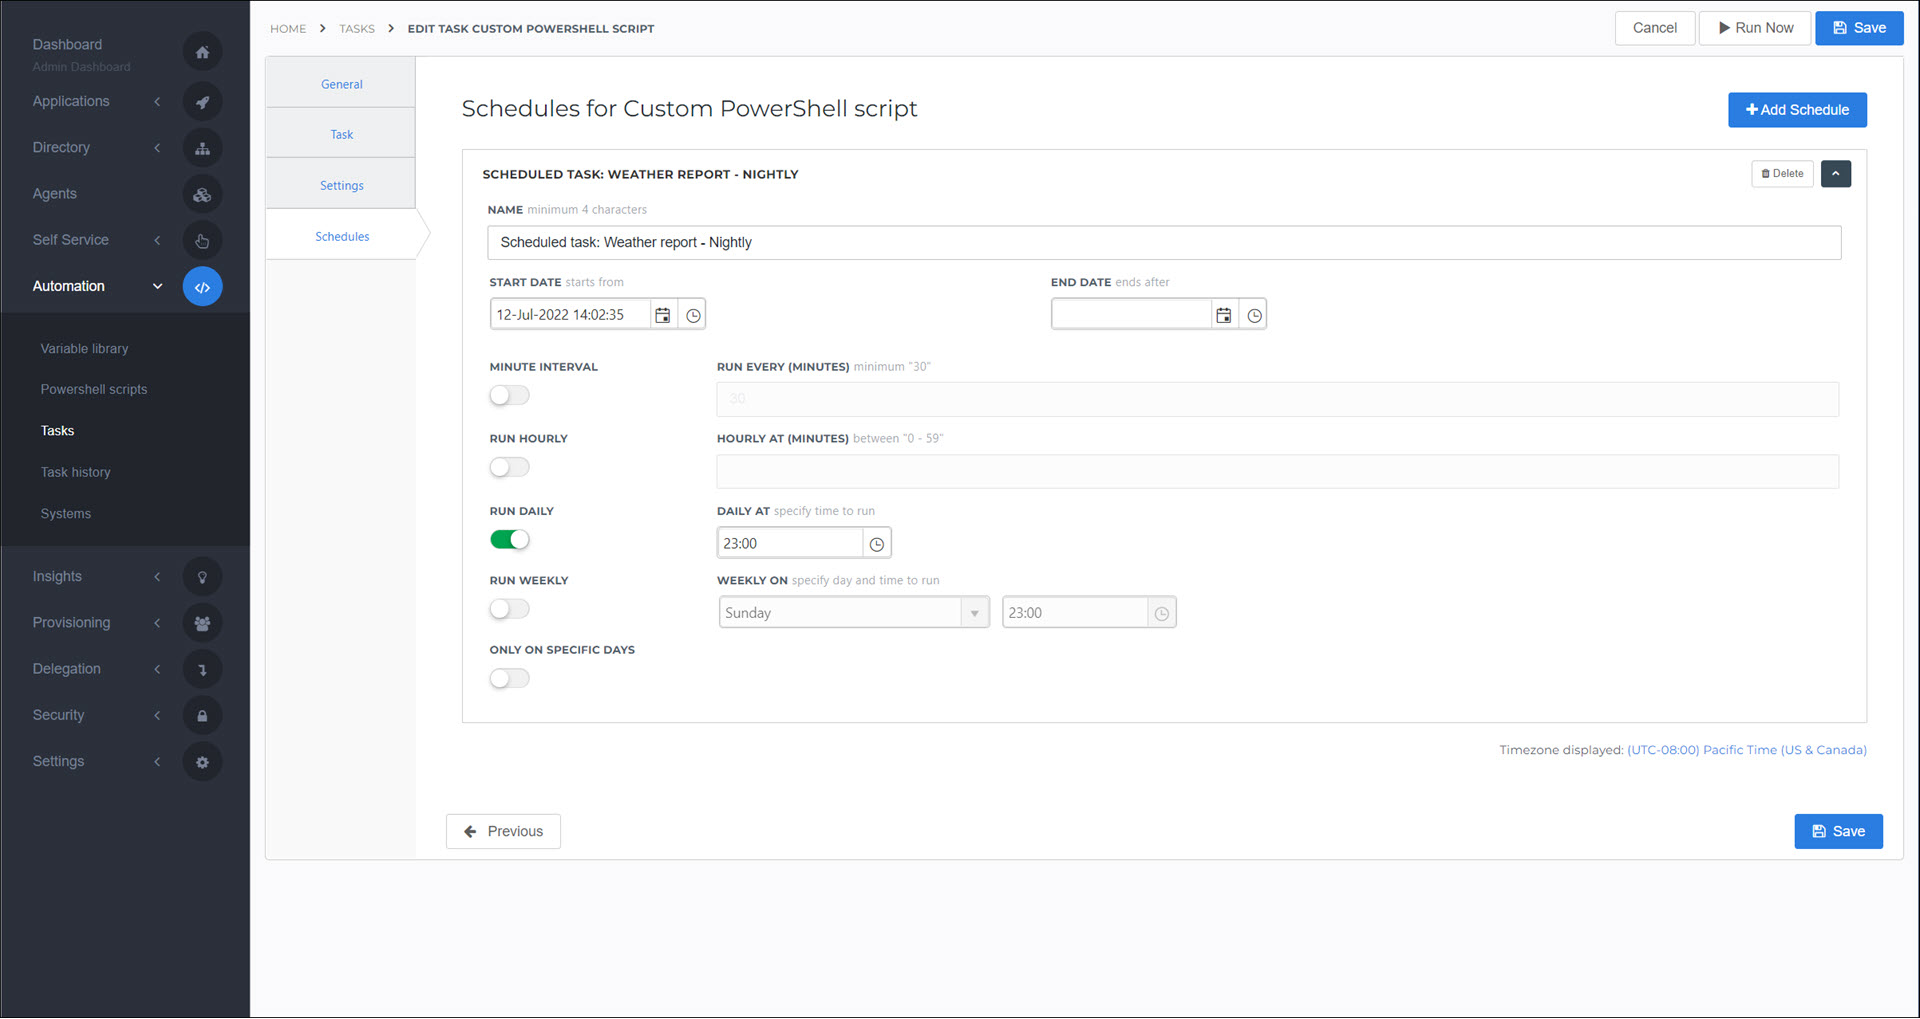
Enter a Name for the schedule.
For this example,
Scheduled task: Weather report - Nightly.Configure the schedule as desired.
Click Save.
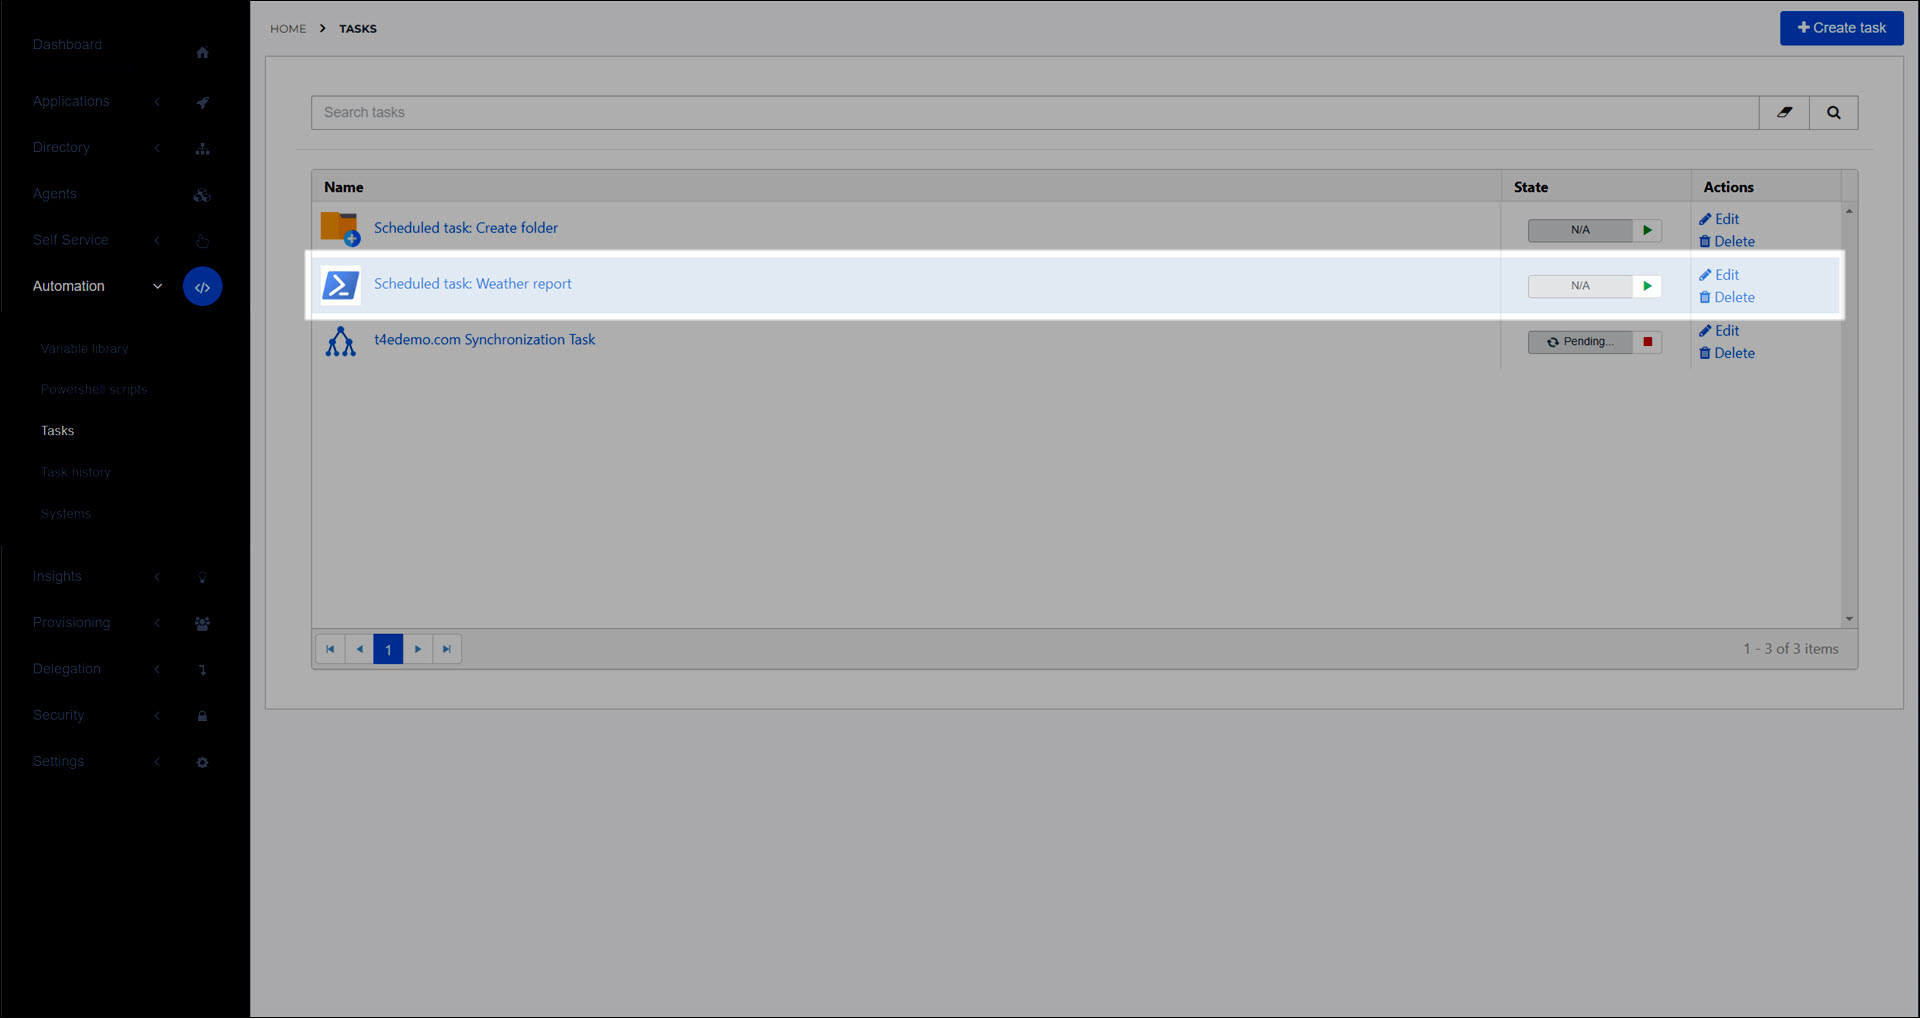
The scheduled task has been added, and is now listed in Automation > Tasks.
It will automatically run on the specific schedule. To manually run it, Manually run a scheduled task. To view its run history, View task run history.
Go to Automation > Tasks.
For the relevant scheduled task, click Edit.
Continue by following the instructions in Add a pre-defined scheduled task or Add a PowerShell scheduled task.
Go to Automation > Tasks.
For the relevant scheduled task, click Delete.
Click Delete to confirm.